Edgebrook K-5414 - Water dispenser KOHLER - Free user manual and instructions
Find the device manual for free Edgebrook K-5414 KOHLER in PDF.

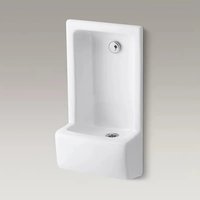
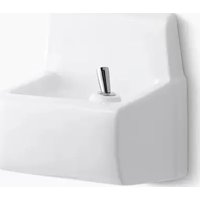
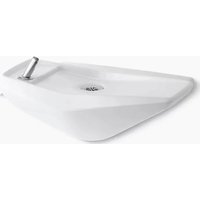
| Product Type | Drinking Water Dispenser (Fountain) |
| Brand | Kohler |
| Model | Edgebrook K-5414 |
| Dimensions (rim height) | 30" (76.2 cm) for schools, 36" to 44" (91.4 to 111.8 cm) for other buildings |
| Dimensions (width x depth) | 12" x 12" (30.5 x 30.5 cm) approximately |
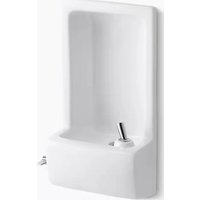
| Supply | Connection to water supply (city pressure) |
| Material | Vitreous china (flange and fountain) |
| ADA Compliance | Yes, when the rim is at a maximum of 36" (91.4 cm) from finished floor |
| Main Functions | Drinking water distribution, flow regulation |
| Required Installation Tools | Plumber's putty, sealing tape, tube cutter, strap wrench, screwdriver, adjustable wrench, drill, square |
| Parts Provided | Wall bracket, fountain head, strainer, connection parts, gaskets, nuts |
| Maintenance and Cleaning | Clean the surface with a soft cloth and soapy water. Check gaskets and flow regularly. |
| Safety | Caution: porcelain may break if subjected to impact or overtightening. |
| Flow Adjustment | Via adjustment screw under the regulator cover |
| Supply Connection | 3/8" IPS thread with coupling nut |
| Approximate Weight | Approximately 10 kg (porcelain parts) |
Frequently Asked Questions - Edgebrook K-5414 KOHLER
User questions about Edgebrook K-5414 KOHLER
0 question about this device. Answer the ones you know or ask your own.
Ask a new question about this device
Download the instructions for your Water dispenser in PDF format for free! Find your manual Edgebrook K-5414 - KOHLER and take your electronic device back in hand. On this page are published all the documents necessary for the use of your device. Edgebrook K-5414 by KOHLER.
USER MANUAL Edgebrook K-5414 KOHLER
natural_image
Line drawing of a rectangular container with a handle and two feet inserted (no text or symbols)Mproduct numbers are for Mexico (i.e. K-12345M)
Assorted Screwdrivers
Adjustable Wrench
Drill and Bits
Framing Square
Pipe Wrench
Plus:
- Various Carpentry Tools - Suitable Fasteners
Before You Begin

CAUTION: Riskofpersonalinjuryorproductdamage.
Handle with care. Vitreous china can break or chip if the product is handled carelessly.
□ Observe all local plumbing and building codes.
☐ Kohler Co. reserves the right to make revisions in the design of products without notice, as specified in the Price Book.
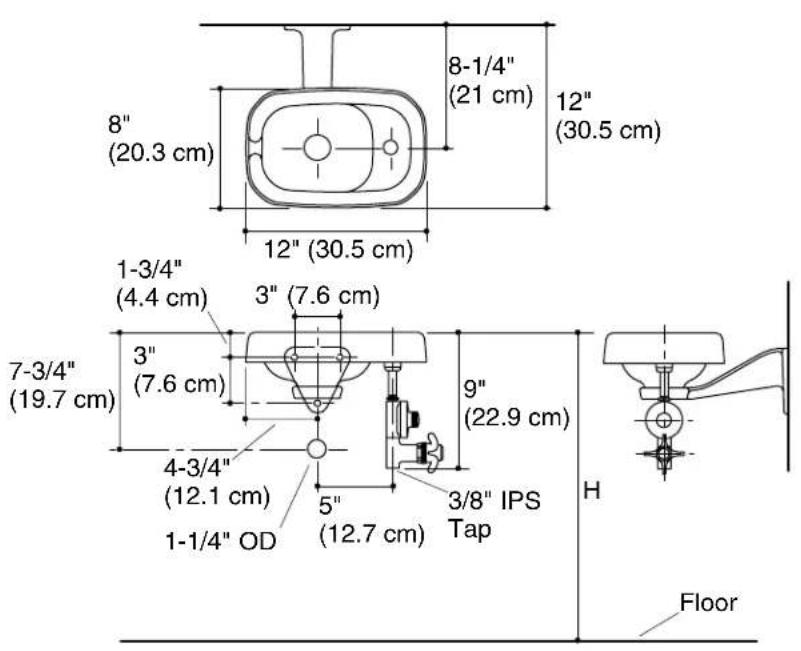
Roughing-In
- The drinking fountain complies with ADA requirements when the rim is mounted no higher than 36" (91.4 cm) from the finished floor (dimension H).
- The distance between the rim and the floor (dimension H) is 30" (76.2 cm) for grade schools and 36" (91.4 cm) to 44" (111.8 cm) for other buildings.
1. Prepare the Site
☐ Rough-in the supply and drain piping according to the roughing-in.
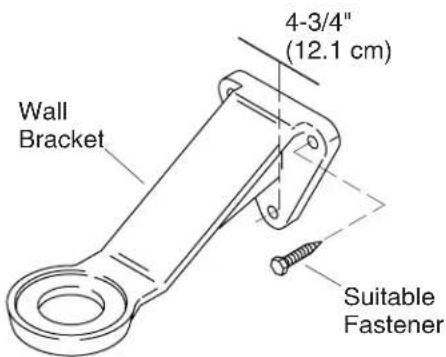
☐ Use suitable fasteners (not provided) to install the wall bracket to a reinforced area of the wall. Refer to the "Roughing-In" section to determine the correct height for your installation.
☐ Place the fastener hole in the bottom of the wall bracket exactly 4-3/4" (12.1 cm) down from the desired drinking fountain height.
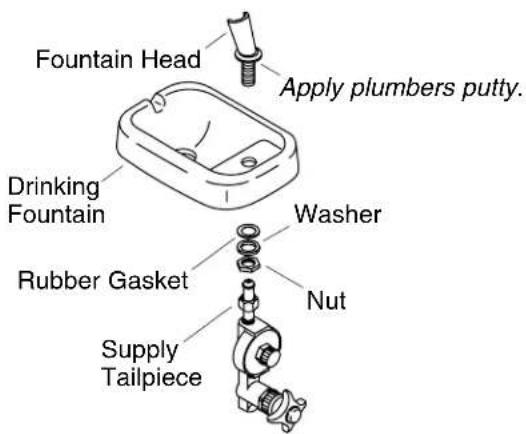
2. Install the Drinking Fountain
CAUTION: Riskofpersonalinjuryorproductdamage.
Overtightening can cause vitreous china to break or chip.
□ Loosen the supply tailpiece and remove the fountain head assembly.
□ Remove the nut, washer, and rubber gasket from the fountain head shank.
□ Apply a bead of plumbers putty or other sealant to the fountain head flange according to the manufacturer's instructions.
☐ Insert the fountain head into the drinking fountain hole.
□ Install the rubber gasket, washer, and nut to the fountain head shank.
□ Position the fountain head as desired, and securely tighten the nut.
□ Remove any excess putty.
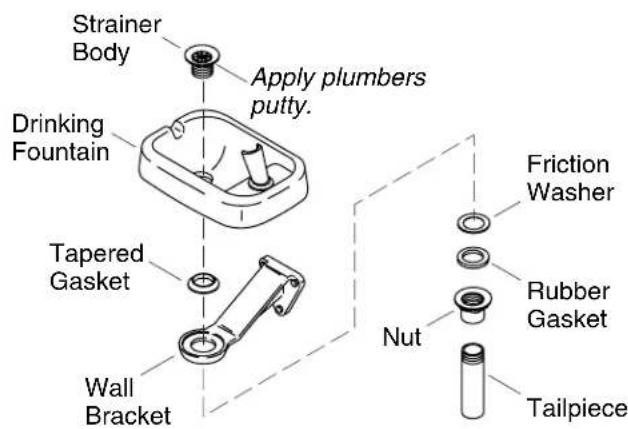
3. Install the Strainer
□ Apply a bead of plumbers putty or other sealant around the underside of the strainer body flange according to the manufacturer's instructions.
☐ Insert the strainer body into the fountain drain hole.
☐ From the underside of the drinking fountain, slide the tapered gasket onto the strainer body, making sure that the tapered side is facing up.
☐ Position the drinking fountain onto the wall bracket, and assemble the friction washer, rubber gasket, and nut onto the strainer body.
☐ Tighten the nut securely. Remove any excess putty.
□ Apply thread sealant to the tailpiece threads, and install the tailpiece to the nut. Tighten with a clean strap wrench.
□ Make your drain connections.
4. Complete the Installation
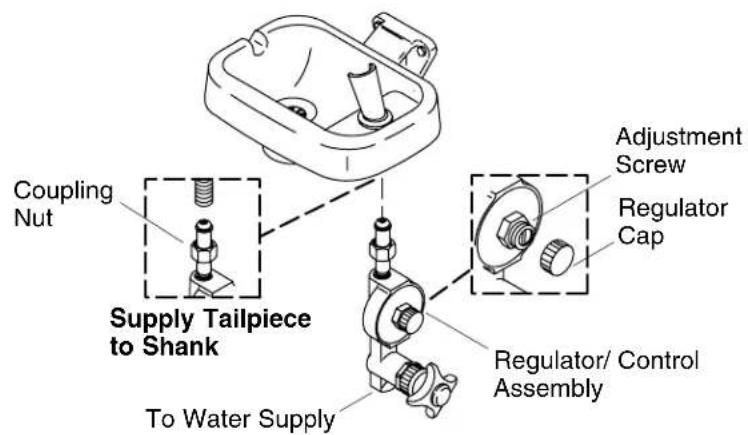
□ Connect the regulator and control assembly to the water supply.
□ Connect the supply tailpiece to the fountain head shank with the coupling nut. Tighten securely.
□ Turn on the water supply, and check for leaks.
☐ Turn the control handle to open. Adjust the water volume, if necessary, by first removing the regulator cap. Then use a slotted screwdriver to turn the adjustment screw clockwise to decrease the water volume, or counterclockwise to increase the volume.
□ Reinstall the regulator cap.