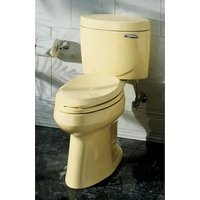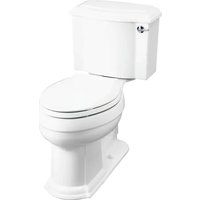
Branham K-4920 - Toilet KOHLER - Free user manual and instructions
Find the device manual for free Branham K-4920 KOHLER in PDF.


User questions about Branham K-4920 KOHLER
0 question about this device. Answer the ones you know or ask your own.
Ask a new question about this device
Download the instructions for your Toilet in PDF format for free! Find your manual Branham K-4920 - KOHLER and take your electronic device back in hand. On this page are published all the documents necessary for the use of your device. Branham K-4920 by KOHLER.
USER MANUAL Branham K-4920 KOHLER
Mproduct numbers are for Mexico (i.e. K-12345M)
• Hole Cutting Equipment
- Trap
- Sand
• Waterproof Compound Sealant Tape
Before You Begin

CAUTION: Riskofpersonalinjury. Handle this product with care. Vitreous china can break or chip if the product is handled carelessly.
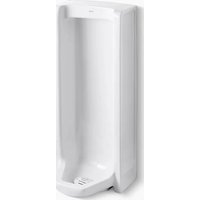
IMPORTANT: This urinal requires a .5 gpf (1.9 lpf) to 1.0 gpf (3.8 lpf) flush valve.
□ Observe all local plumbing and building codes.
□ Refer to local codes and manufacturer's instructions for flush valve requirements.
□ Carefully inspect the new urinal for damage.
☐ Fixture dimensions are nominal and conform to tolerances by ASME Standard A112.19.2/CSA B45.1.
□ Site preparation may require additional tools and hardware.
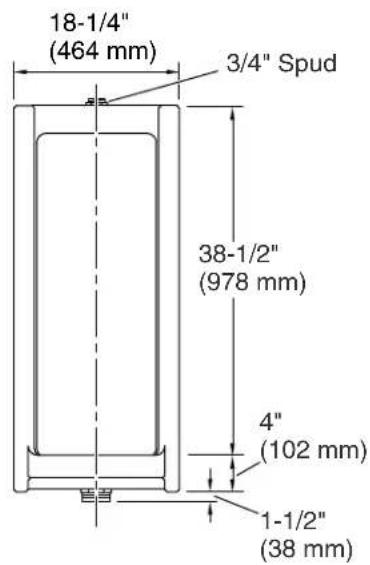
text_image
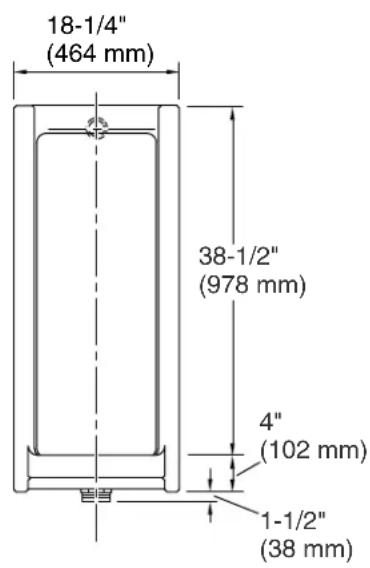
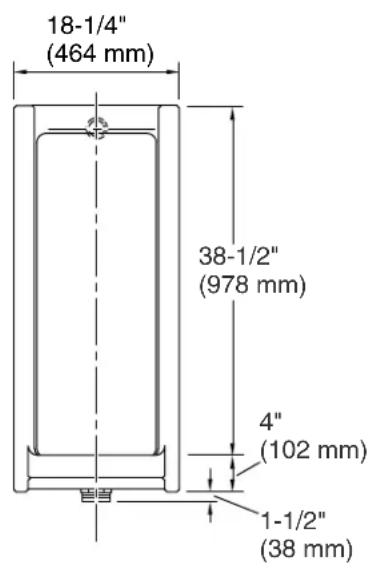
18-1/4" (464 mm) 3/4" Spud 38-1/2" (978 mm) 4" (102 mm) 1-1/2" (38 mm)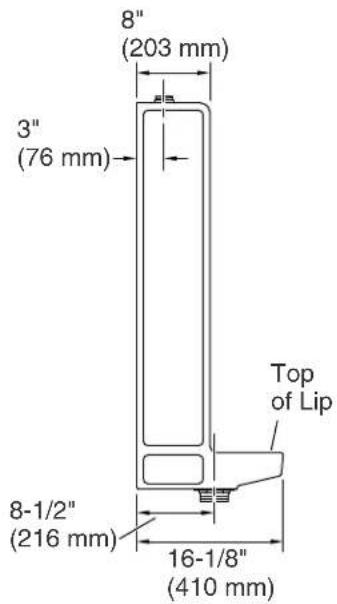
text_image
8" (203 mm) 3" (76 mm) Top of Lip 8-1/2" (216 mm) 16-1/8" (410 mm)Roughing-In (Top Spud)
Kohler Co. 3 1013946-2-C
text_image
18-1/4" (464 mm) 38-1/2" (978 mm) 4" (102 mm) 1-1/2" (38 mm)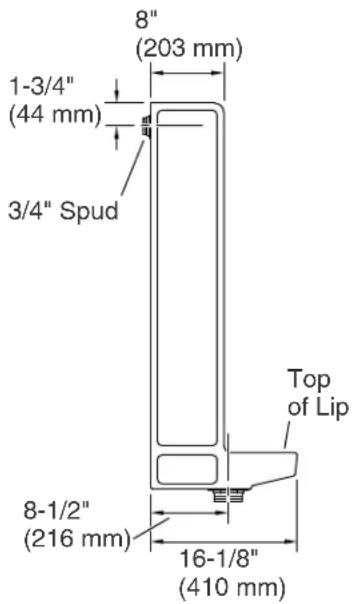
text_image
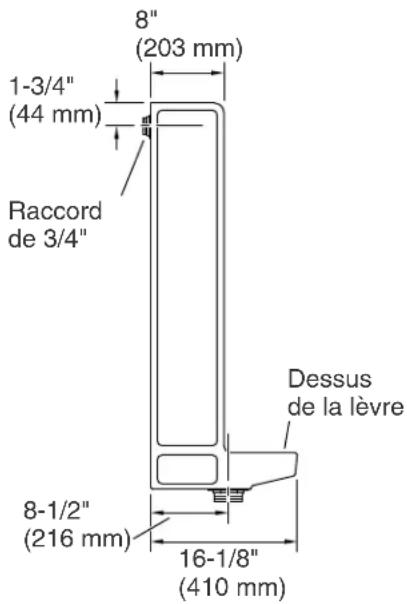
8" (203 mm) 1-3/4" (44 mm) 3/4" Spud Top of Lip 8-1/2" (216 mm) 16-1/8" (410 mm)Roughing-In (Rear Spud)
1. Preparation
□ Turn the water supply off.
□ Install or relocate the waste pipe as necessary to conform to the roughing-in dimensions.
□ Install the shut-off valve.
□ Install adequate support framing as needed.
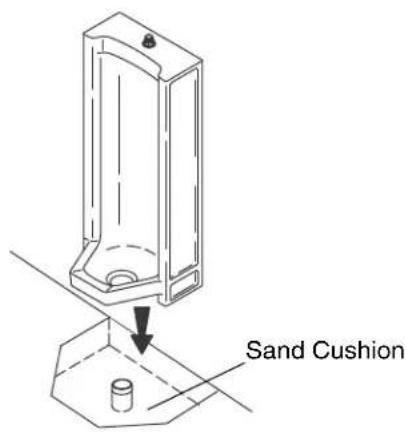
☐ Provide a pit in the rough floor to allow for at least a 1" (25 mm) sand cushion under the stall.
text_image
Sand Cushion2. Install the Urinal
☐ The sides should have at least 1/2"(13 mm) of sand cushion.
☐ For proper drainage, the lip of the urinal should be installed below the floor level.
☐ The finished floor should slope toward the urinal lip.
CAUTION: Riskofpersonalinjury. Handle with care. Vitreous china can break or chip if the product is handled carelessly.
□ Carefully position the urinal in the sand cushion.
□ Use a level to adjust the urinal in the sand cushion.
□ Install the finished floor.

NOTE: Do not rigidly secure the urinal to the floor or walls.
☐ Fill the gap between the urinal and the finished floor with waterproof compound.
3. Complete the Installation
IMPORTANT: This urinal requires a .5 gpf (1.9 lpf) to 1 gpf (3.8 lpf) flush valve.
□ Install the flush valve according to the manufacturer's instructions.
□ Connect the water supply and complete the waste pipe connections.
Complete the Installation (cont.)
□ Turn on the water supply.
☐ Flush and check the entire installation for leaks.
1013946-2-C 6 Kohler Co.
text_image
18-1/4" (464 mm) Raccord de 3/4" 38-1/2" (978 mm) 4" (102 mm) 1-1/2" (38 mm)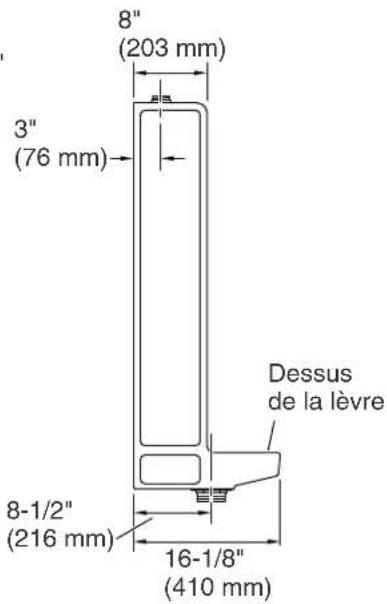
text_image
8" (203 mm) 3" (76 mm) Dessus de la lèvre 8-1/2" (216 mm) 16-1/8" (410 mm)Raccordement (raccord supérieur)
1013946-2-C Français-2 Kohler Co.
text_image
18-1/4" (464 mm) 38-1/2" (978 mm) 4" (102 mm) 1-1/2" (38 mm)