USER MANUAL PUMPGRINDER M1 VALBERG
07/2025-01
INSTRUCTIONS FOR USE 02
CONSIGNES D'UTILISATION ....16
OEBRUKSAANWUZINGEN 32
INSTRUCCIONES DE USO .....46
ELECTRO DEPOT
route de Vendezville
3755 FACHES-THUMESNIL - FRANCE
What's in the box / Contenu de l'emballage /
Wat zit er in de verpakking / Contenido de la caja
Fill the water tank / Remplissage du réservoir d'eau / Het waterreservoir vullen / Llenar el depósito de agua
Grind coffee beans / Broyage des grains de café / Kofflebonen malen / Moler granos de café


Preheat / Préchauffage / Voorverwarmen / Precalentar
natural_image
Illustration of a hand inserting a plug into an electrical outlet with an upward arrow (no text or symbols)

natural_image
Line drawing of a coffee machine with a cup and tray, no text or symbols present

natural_image
Hand touching a circular target with concentric rings and a power button icon (no text or symbols)
natural_image
Three circular icons with concentric rings and symbols, each containing a cup and a coffee cup, arranged horizontally (no text or labels)

natural_image
Line drawing of a coffee machine with control panel and side indicators (no text or symbols)
natural_image
Illustration of a hand pointing at concentric circles with a coffee cup icon below (no text or symbols)
natural_image
Line drawing of a coffee machine with a cup and spool, no text or symbols present
natural_image
Line drawing of a kitchen sink and bucket pouring liquid into a container (no text or symbols)

natural_image
Technical line drawing of a mechanical assembly with a curved pipe and bracket (no text or symbols)

natural_image
Line drawing of a hand using a tool to clean or adjust a mechanical component (no text or symbols)
Make coffee / Préparation du café / Koffie zetten / Preparar café

natural_image
Illustration of a hand pouring dark granular material into a container using a tool (no text or symbols)

natural_image
Line drawing of a coffee machine with a cup and lever (no text or symbols)
natural_image
Diagram of a robotic arm gripping a cylindrical object, with a hand adjusting the handle (no text or symbols present)
natural_image
Illustration of a hand pouring black granular material into a trash bin (no text or symbols)
Set the coffee cup size / Réglage de la taille de la tasse de café / Formaat van koffiekopje instellen / Ajustar el tamaño de la taza de café
natural_image
Line drawing of a coffee maker with a cup and stand, no text or symbols present

Make hot water / Préparation d'eau chaude / Heet water maken / Preparar agua caliente

natural_image
Hand touching a circular target with concentric rings, next to a power button icon (no text or symbols on the target or button)
natural_image
Line drawing of a coffee machine with control panel and side view indicators (no text or symbols on the device itself)

natural_image
Illustration of a hand pouring liquid into a cup using a pipette (no text or symbols)

natural_image
Illustration of a hand touching concentric circles with a small lightning bolt symbol below (no text or labels)
natural_image
Circular diagram with concentric rings and arrows pointing downward, no text or symbols present
natural_image
Line drawing of a coffee machine with side indicators (hourlight, hourglass) and label '60' (no text or symbols on the device itself)

natural_image
Illustration of a medical or laboratory device with a bulb, smoke, and a 10-second mark (no text or symbols on the device itself)

natural_image
Diagram of a mechanical component with a tool and directional arrow, no text or symbols present
natural_image
Line drawing of a hand pouring liquid into a cup using a pipette (no text or symbols)

natural_image
Illustration of a laboratory procedure showing a beaker with liquid being stirred by a pipette, with an arrow indicating the process (no text or symbols present)
natural_image
Illustration of a mixing bowl with a brush and bubbles, showing a rotating arrow (no text or symbols)
natural_image
Illustration of a hand pouring liquid into a cup using a pipette (no text or symbols)
natural_image
Line drawing of a hand cleaning a device with a cloth (no text or symbols)
natural_image
Illustration of a cup pouring liquid from a container into a bag (no text or symbols)
Cleaning / Nettoyage / Reiniging / Limpieza

natural_image
Line drawing of a coffee machine with a thermometer and downward arrow indicating temperature (no text or symbols on the device itself)
natural_image
Line drawing of a coffee maker with labeled components including tray, base, and control panel (no text or symbols)
natural_image
Line drawing of a coffee machine with a hand operating the lid (no text or symbols)

natural_image
Illustration of a laboratory setup with a water dispenser pouring liquid into a container, using a stand mixer and measuring cup (no text or symbols present)
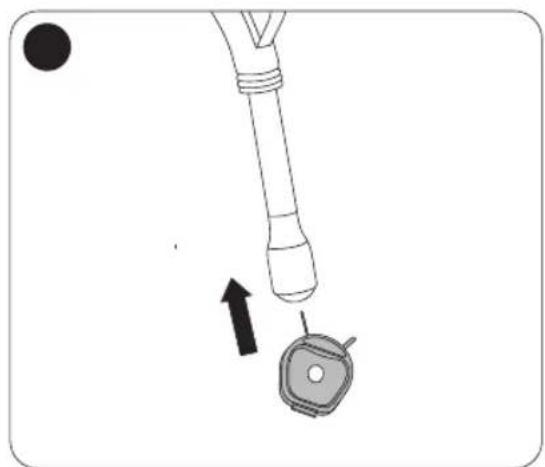
Clean the grinding outlet / Nettoyage de la sortie de broyage / Koffiemolenuitloop reinigen / Limpiar la salida de molienda /
natural_image
Technical line drawing of a mechanical assembly with a spring-loaded component and a numbered label (84), no readable text or symbols present.
Clean the grinding wheel / Nettoyage du broyeur / Maalschijf reinigen / Limpiar la rueda de molienda
natural_image
Diagram showing a kitchen appliance with a bucket and directional arrows indicating motion (no text or symbols)
natural_image
Line drawing of a bucket with a handle and spout, no text or symbols present
natural_image
Line drawing of a car dashboard with a brush and control panel (no text or symbols)
Descaling / Détartrage / Ontkalken / Descalcificación
natural_image
Diagram of a mechanical component with a tool and directional arrow, no readable text or symbols present
natural_image
Illustration of a hand pouring liquid into a cup using a pipette (no text or symbols)

Storage / Rangement / Opslag / Almacenamiento
natural_image
Diagram of a vehicle fuel pump assembly showing a container with internal components and an arrow indicating direction (no text or symbols)
natural_image
Line drawing of a kitchen appliance with a grater and sink (no text or symbols)
natural_image
Diagram of a medical or laboratory procedure showing a tool interacting with a device (no text or symbols present)
Single/Double coffee cup / 1 tasse/2 tasses / Enkel/Dubbel koffiekopje / Taza de café individual/doble


Thank you!
Thank you for choosing this VALBERG product. VALBERG products are chosen, tested, and recommended by ELECTRO DEPOT, so you can be sure you are getting a top-quality, easy-to-use product that won't let you down.
We're confident your new device will be a pleasure to use every day!
Welcome to ELECTRO DEPOT.
Table of Contents

Product overview
Parts
Product usage
Specifications

Product usage
Before first use
Auto power off
Filling the water tank
Grinding coffee beans
Making espresso
Making hot water
Heating/frothing milk

Cleaning and maintenance
Cleaning and maintenance
Descaling the coffee maker
Reset coffee maker
Indicator lights
Troubleshooting
Storage
A
Product overview
Before using the unit, carefully read both the Manual and Regulatory Warnings booklet. Keep these instructions for future reference and pass them onto any new owners of the unit.
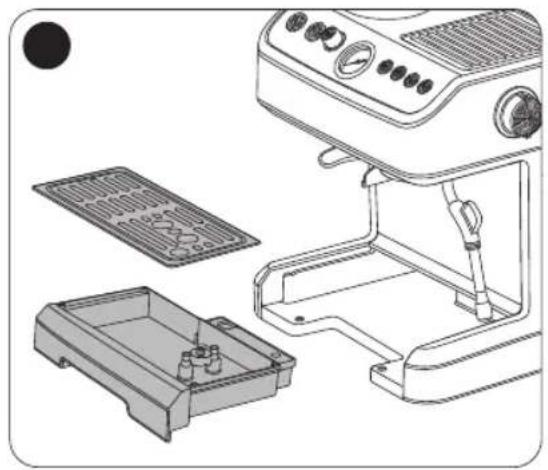
Parts
A Coffee powder hammer
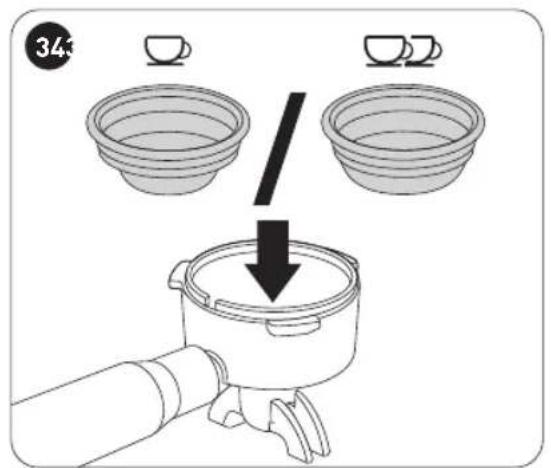
B Portafilter basket (1 cup)
c Portafilter basket (2 cups)
D Portafilter
E Drip plate
F Drip tray
G Control panel
① On/Off button with indicator light
② Grind button with indicator light
③ Grind adjustment knob
4 Pressure gauge
⑤ 1-cup brew button with indicator light
6 2-cup brew button with indicator light
⑦ Manual brew button with indicator light
⑧ Steam button with indicator light
A
Product overview
H Ground coffee basket
I Bean container cover
J Bean container with lock/unlock knob
K Steam nozzle through-hole needle
L Cleaning brush
M Round brush
N Water tank cover
0 Water tank
P Cup warming area
Steam control knob
R Frothing pipe handle
s Frothing pipe
T Storage box
U Measuring spoon
v Stainless steel milk jug
Product usage
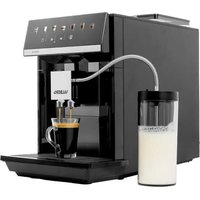
- This product is designed for grinding coffee beans, brewing coffee and boiling water. It must not be used for any other purposes. It is intended for household use only and should not be used for commercial purposes. Any other use may damage the product or cause injury.
Specifications
Model: 10009378 - PUMPGRINDER M1
Supply voltage: 220-240V\~, 50-60Hz
Power consumption: Heating: 1350W, Motor: 110W
Off mode power consumption: 0.3W
The period after which the equipment reaches automatically off mode: 30 minutes
Tank capacity: 2.8L
Protection class: Class I
Before first use
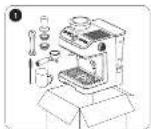
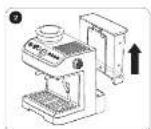
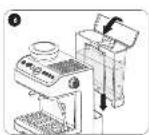
Remove all packaging before use (Fig. 1).
- Place the unit on a stable, level, non-slip, heat-resistant surface.
- Do not position the unit near the edge of a countertop where it could accidentally fall off.
- Do not place the unit on a hot surface such as a stove.
- Unwind the power cord fully.
- Clean the unit to remove any residues from the manufacturing process. The appliance may give off a slight odour when you start using it. This is normal due to its newness and does not indicate a manufacturing defect or danger.
- To ensure the first cup of coffee tastes excellent, we recommend that you rinse the coffee maker 2 to 3 times by using the brew function before making your first cup of coffee (Fig. 2 to Fig. 6 and Fig. 17 to Fig. 33).

NOTE: When using for the first time, the unit may not produce water, resulting in the product entering a water-deficient protection state. In case the unit does not produce water when first use, continue to press the brew button until the unit produces water. This may takes up to 3 cycles of brewing, and if the unit still does not produce water, we recommend you contact the after-sales service centre.
Notes on illustrations:
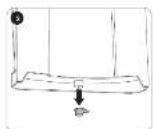
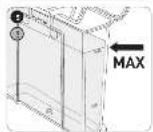
- Do not fill the water tank with water exceeding the MAX mark on the water tank (Fig. 5).
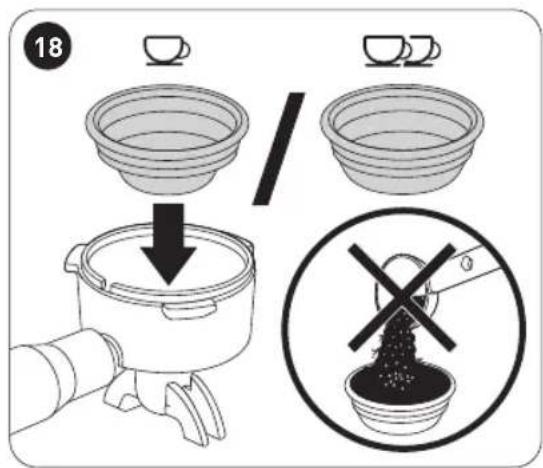
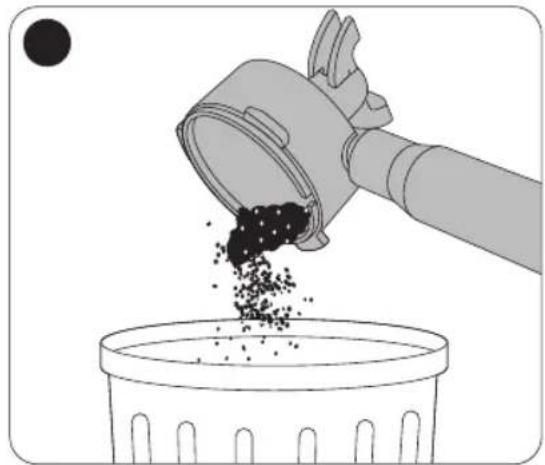
- Do not put coffee into the portafilter basket when rinsing before first use (Fig. 18).
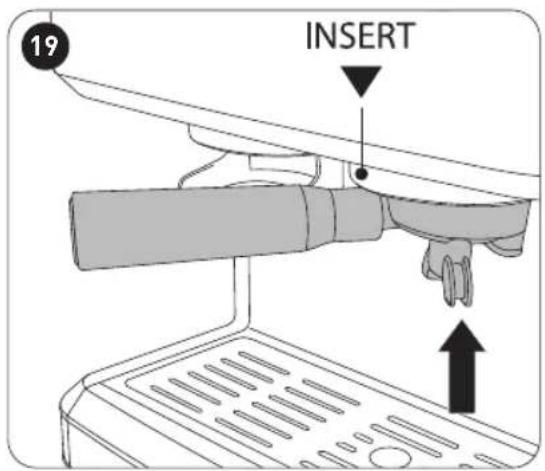
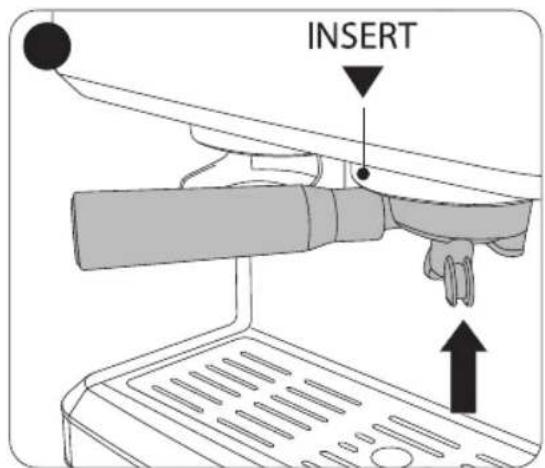
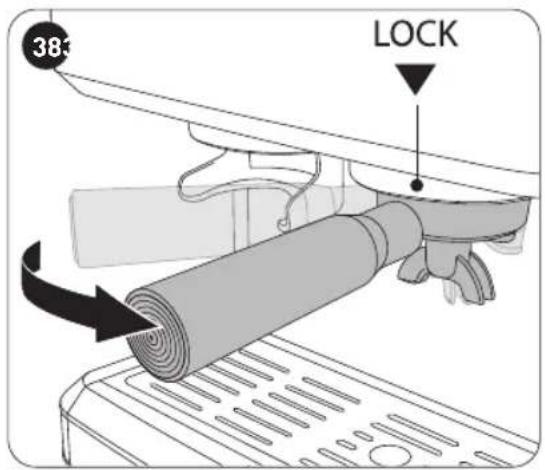
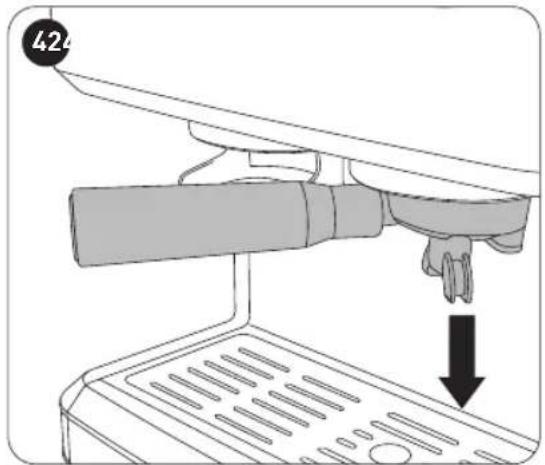
- Make sure the portafilter is securely fixed in the locked ( ) position (Fig. 20).
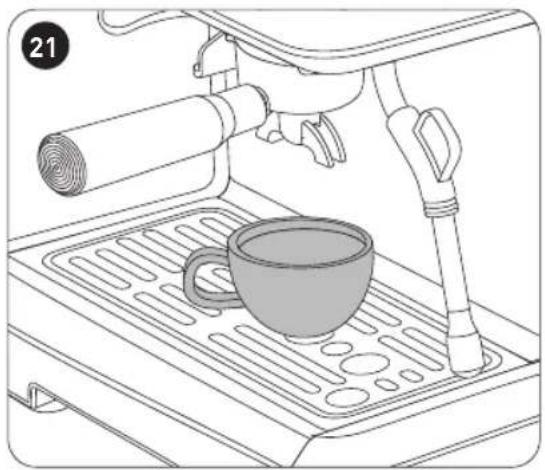
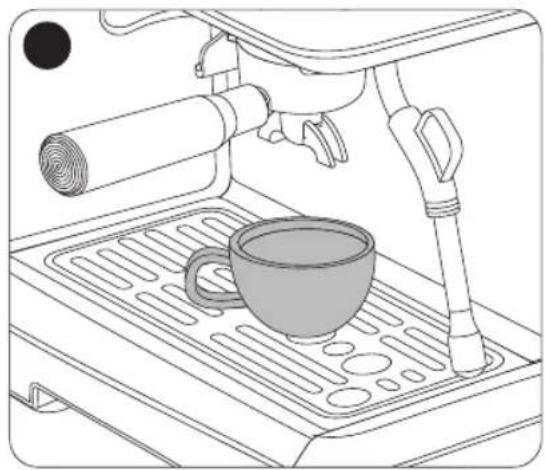
- Place a coffee cup (not provided) on the drip plate, making sure it is placed under the spout of the portafilter (Fig. 21).
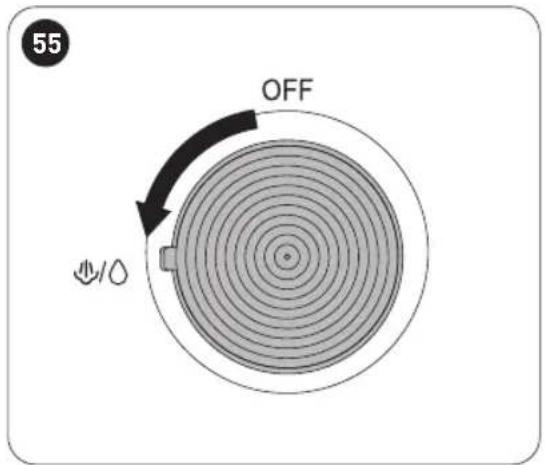
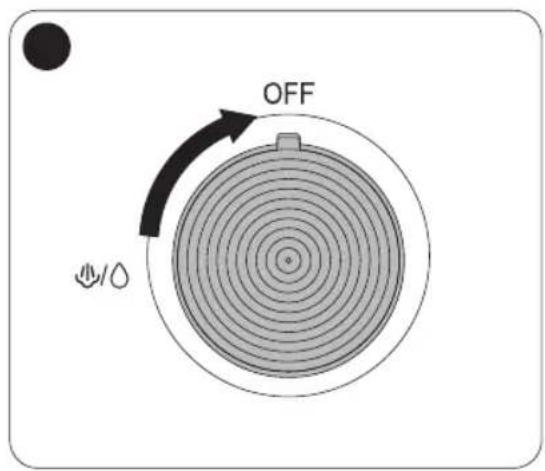
- Make sure the steam control knob is in the OFF position before powering on the coffee maker (Fig. 22).
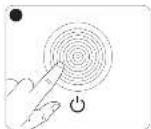
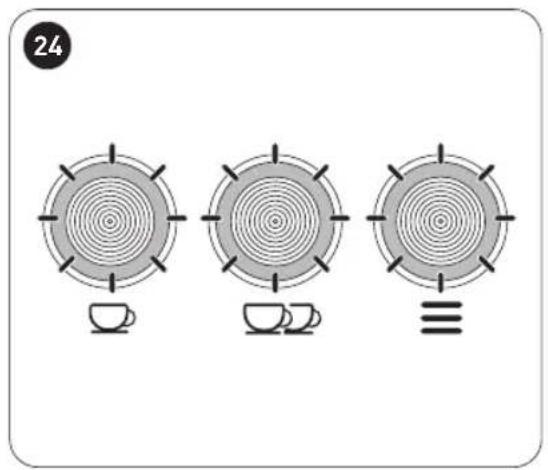
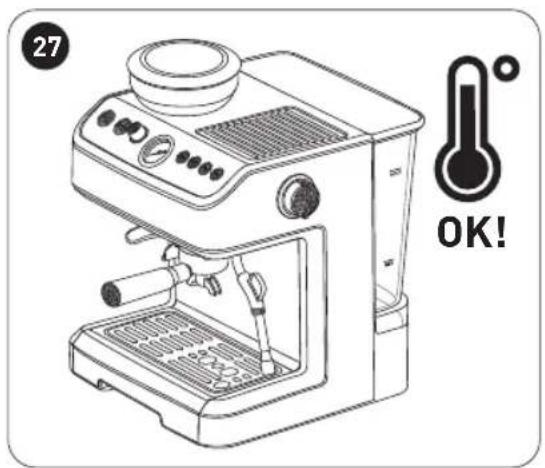
- After the coffee maker is plugged into a mains outlet, press the On/Off button on the control panel (Fig. 23), all the indicator lights on the control panel flashes (Fig. 24). The coffee maker starts to preheat. When all indicator lights stop flashing, the preheating is done (Fig. 26).

NOTE: On initial use or when there is air in the unit, a noise may be heard for about 20 seconds as the water pumps through the coffee maker.
Auto power off
If there is no operation within 30 minutes, the coffee maker will power off automatically.
Filling the water tank

WARNING: Do not operate the coffee maker when there is no water in the tank. Add water timely when the water level is below the MIN level marked on the tank.
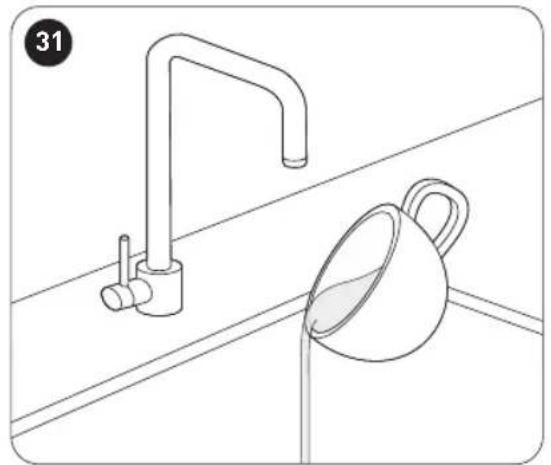
- Fill the water tank with fresh water and take care not to exceed the MAX level marked on the tank (Fig. 2 to Fig. 6). Alternatively, fill the tank without removing it by pouring fresh water into the tank directly from a jug.

NOTE: It is normal for there to be water in the space under the tank. Dry it regularly with a clean sponge.
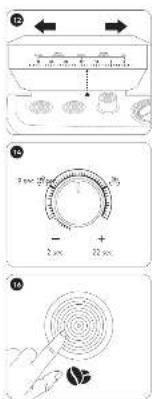
Grinding coffee beans

WARNING: The grinding system can only be used for grinding coffee beans.
We recommend you use moderately roasted coffee beans and make sure the beans are clean. Unused beans need to be sealed to protect them from moisture.
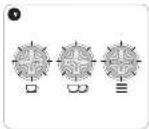
- After the coffee maker is plugged into a mains outlet (Fig. 7), press the On/Off button on the control panel (Fig. 8), the 3 indicator lights (☐, ☐ and ≡) on the control panel flash (Fig. 9). When the 3 indicator lights stop flashing, the coffee maker is ready for grinding.
• To start grinding coffee bean, follow the steps in Fig. 10 to Fig. 16.

NOTE:
- Default gear: Single-cup gear at 13-15 gear, and double-cup gear at 11-13 gear (Fig. 12).
• Minimum grinding time is 2 seconds, with single cup for 9 seconds and double cup for 13 seconds, and the maximum grinding time is 22 seconds (Fig. 14).
Making espresso
Preheating
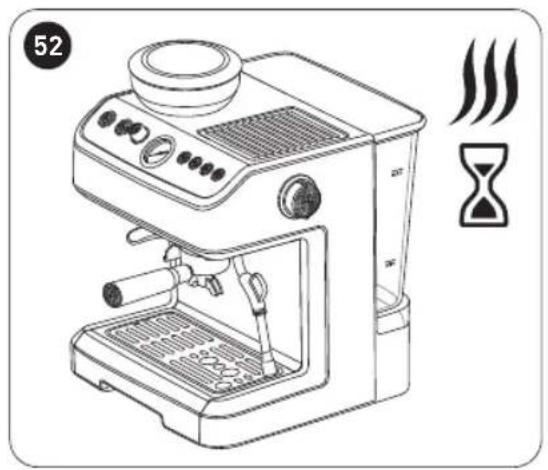
Each time before making a cup of good hot espresso coffee, we recommend you warm the coffee maker, including the portafilter, portafilter basket and cup, for example, rinse them with hot water, so that your coffee will not be affected by the parts that are cold. Then, follow the steps in Fig. 2 to Fig. 6 and Fig. 17 to Fig. 33 for preheating.
B
Product usage

NOTE:
- After preheating, you can check and make sure the water is preheated by pressing the brew button, and when the water comes out from the spout, the coffee maker is ready to start brewing your coffee.
- On initial use or when there is air in the unit, a noise may be heard for about 20 seconds as the water pumps through the coffee maker.
Making espresso
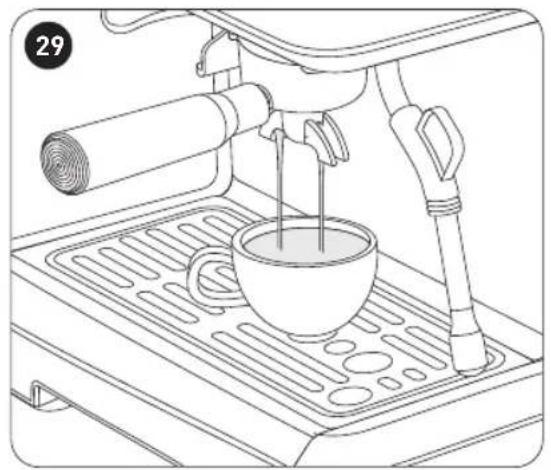
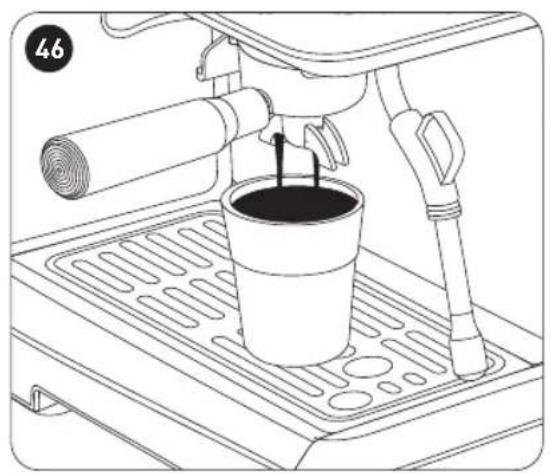
For best results, always preheat the water as shown in Fig. 2 to Fig. 6, and Fig. 17 to Fig. 33. To start brewing your espresso, follow the steps in Fig. 34 to Fig. 43.

NOTE:
- Do not leave the coffee maker unattended whilst brewing coffee, as you may need to reposition the cup to catch the coffee being dispensed or to prevent the coffee from spilling out of the cup.
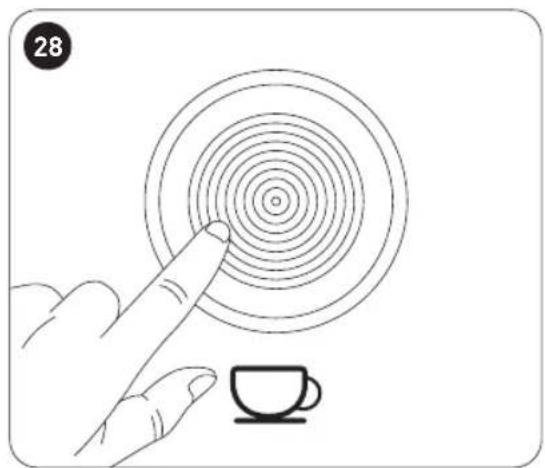
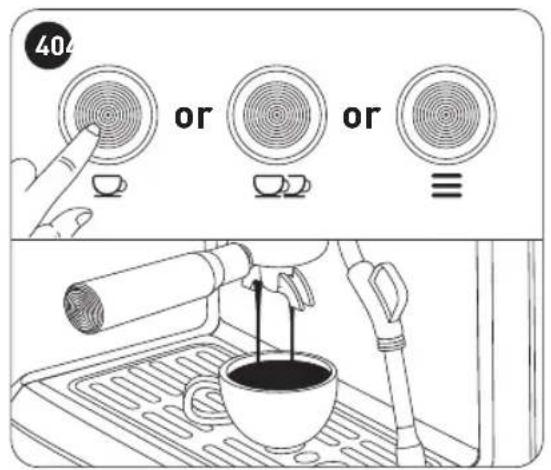
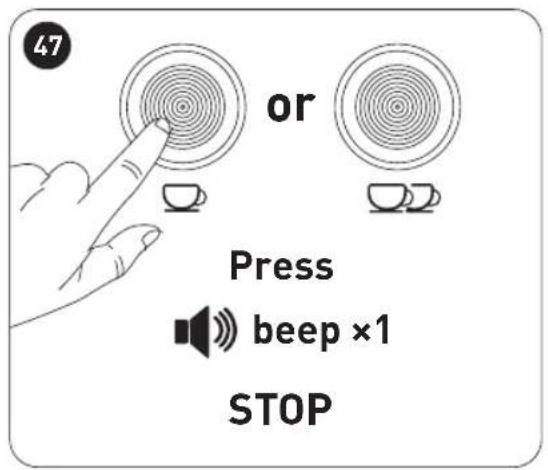
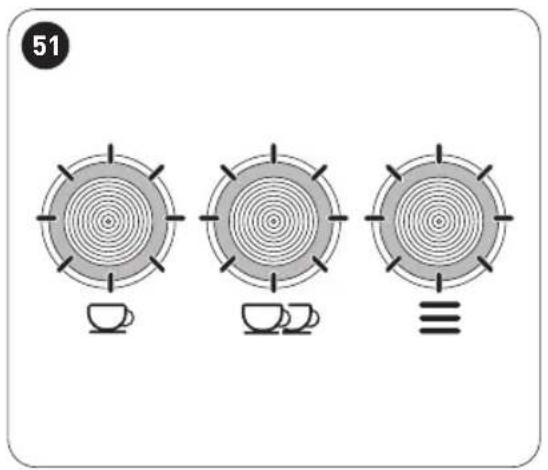
- You can select 1-cup ( ), 2-cup ( ) or manual brewing ( ) by pressing the button. If manual brewing button is pressed, the coffee maker will continue brewing until you press the manual brewing button again to stop.
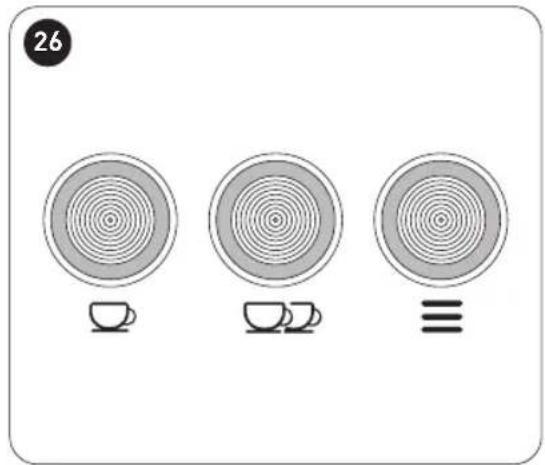
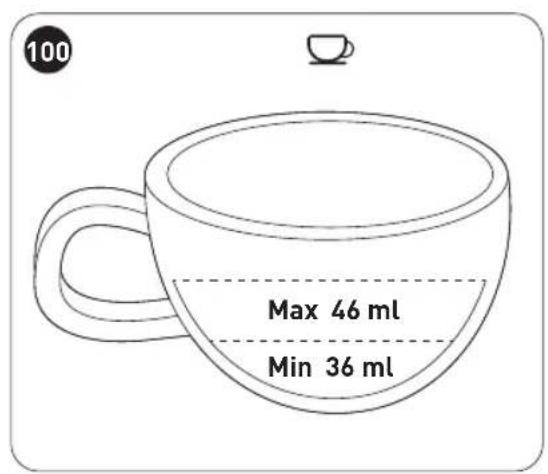
- Recommended single coffee cup is approximately 36-46ml, and double coffee cup approximately 75-85ml (Fig. 100 and Fig. 101). The maximum operating time for brewing is 60 seconds. The coffee maker will stop automatically when the operating time exceeds 60 seconds.
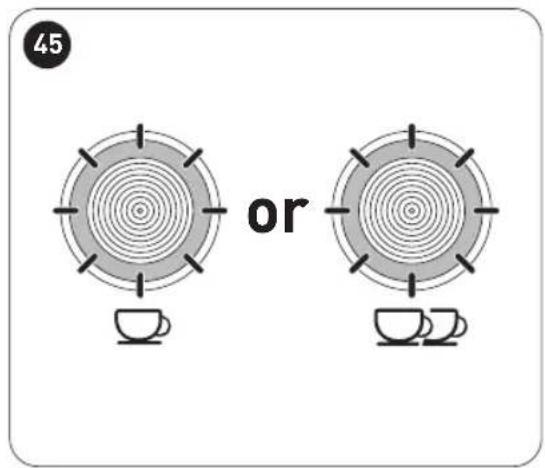
Setting the coffee cup size
The factory default coffee cup volume is the standard cup volume. You can follow the steps in Fig. 44 to Fig. 48 to change it.
Making hot water
You can use the coffee maker to make hot water for warming coffee cup or making tea, or for cooling down the appliance. Follow the steps in Fig. 2 to Fig. 6 and Fig. 49 to Fig. 57.
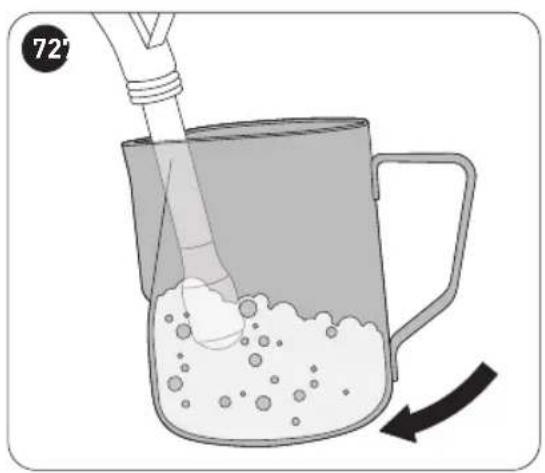
Heating/frothing milk
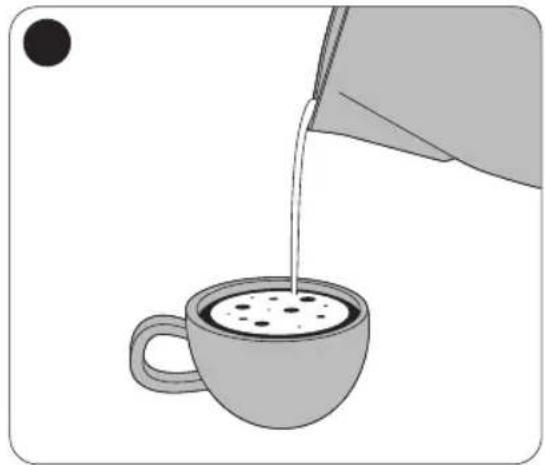
You will get a cup of latte or cappuccino when you top up the espresso with frothed milk. You will need a milk jug for frothing. Do not overfill the milk jug as the milk volume increases when you add steam to heat and froth it. Use a large cup that is big enough for the espresso with the frothed milk.
- After preparing your espresso, follow the steps in Fig. 2 to Fig. 6 and Fig. 17 to Fig. 33 to preheat the coffee maker.
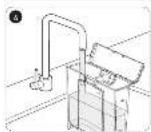
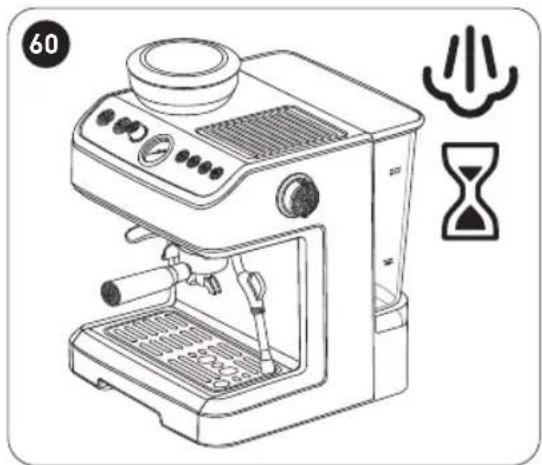
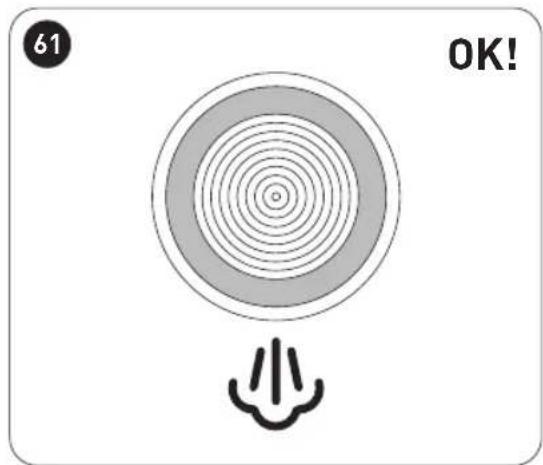
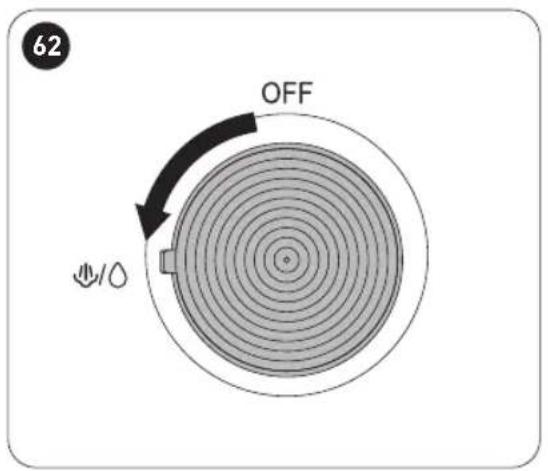
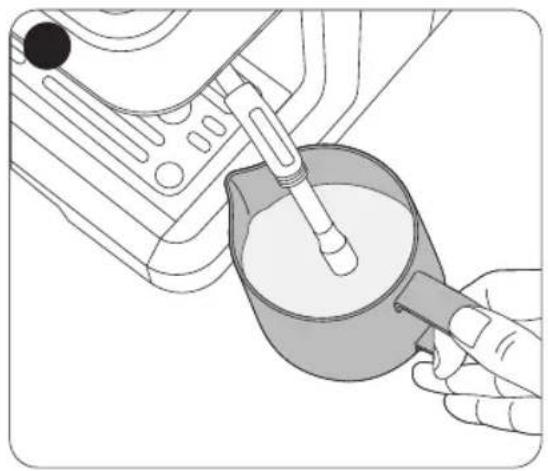
- Follow the steps in Fig. 58 to Fig. 64 to heat up and build up steam pressure.
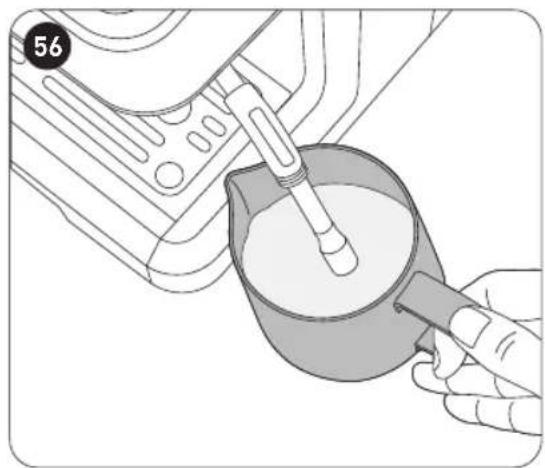
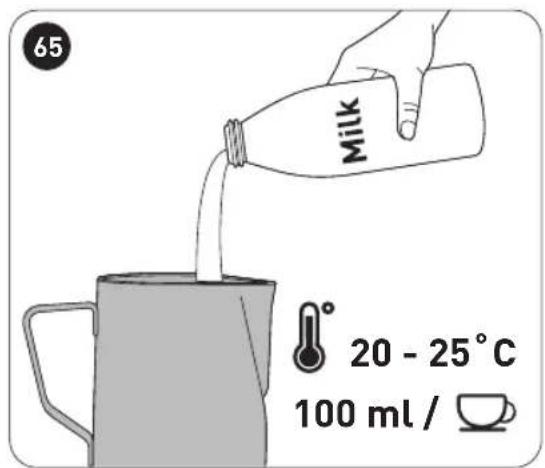
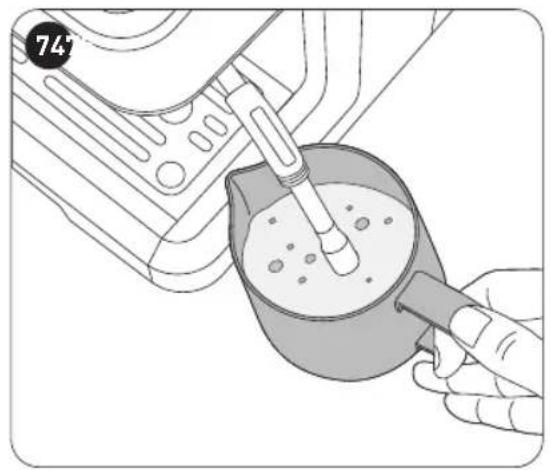
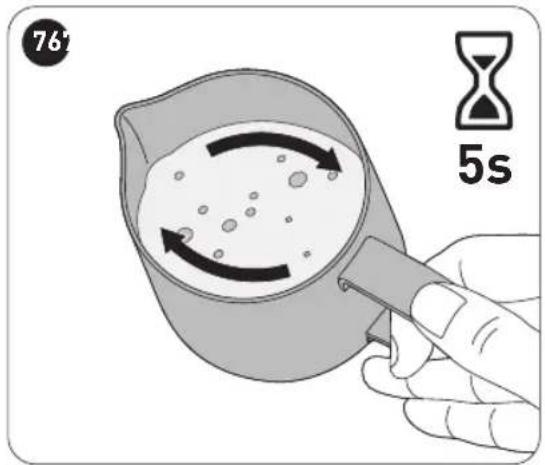
- Follow the steps in Fig. 65 to Fig. 77 to start frothing milk.
B
Product usage

WARNING!
- Never turn the steam control knob rapidly, as the steam will accumulate rapidly in a short time. This may increase the potential of the risk of explosion (Fig. 62).
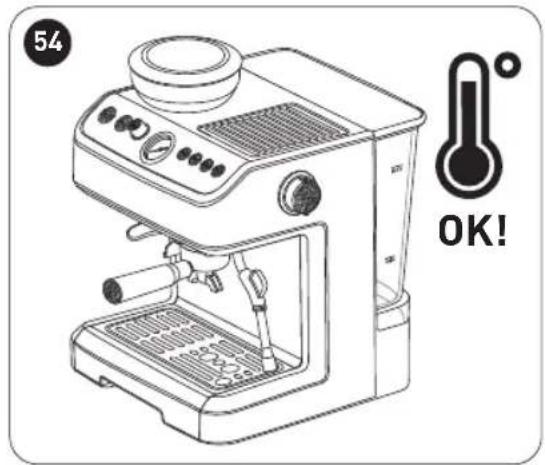
- Test if the temperature is too high in the coffee maker: After using the “Steam” function for frothing milk, press the brew button and if the brew button (☐) indicator light and the steam button (☐) indicator light blink fast together, it means the temperature of the appliance is too high and the appliance needs to be turned off. Allow it to rest for at least 5 minutes or use the “Making hot water” function (Fig. 49 to Fig. 57) to cool down the appliance.

CAUTION: Hot steam can cause burns! Keep your hands and face away from the end of the frothing pipe where the nozzle releases steam.

NOTE:
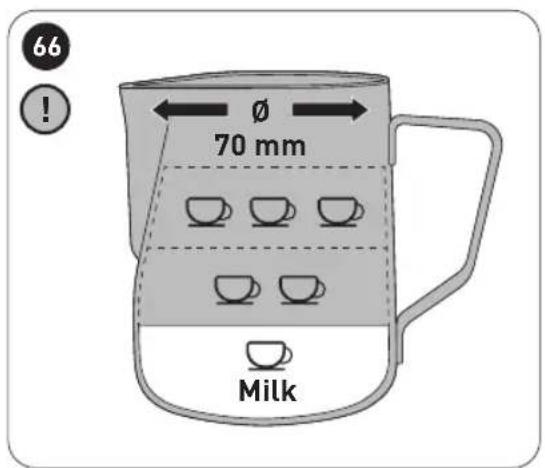
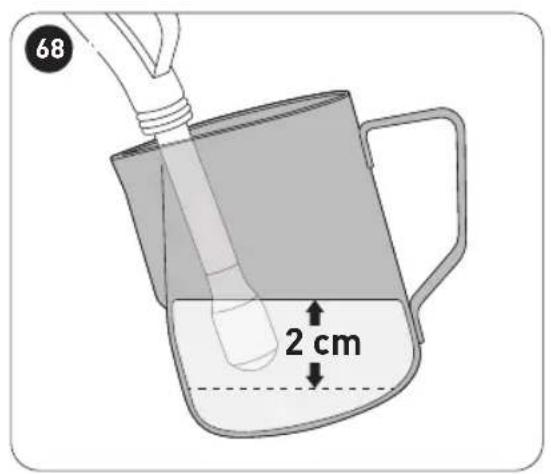
- Fill the milk jug with about 100 ml of milk for one cup of cappuccino. We recommend you use whole milk at refrigerated temperature (Fig. 65). When choosing the size of the milk jug, we recommend that the diameter of the jug should not be less than 70mm (±5mm), and bear in mind that the milk increases in volume by 2 times. Make sure the height of the jug is enough.
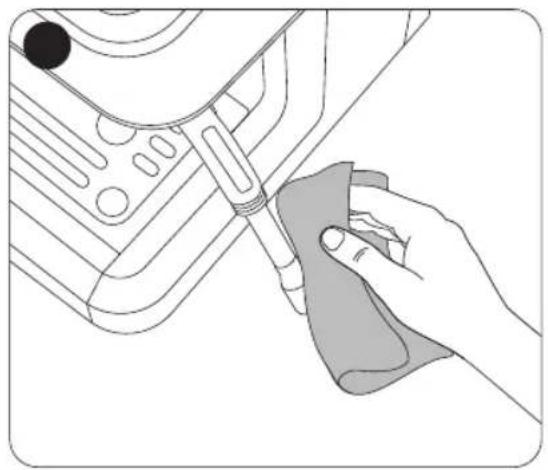
- Clean the frothing pipe with a wet sponge or cloth immediately after the steam stops generating. Be careful of the remaining hot steam (Fig. 75).
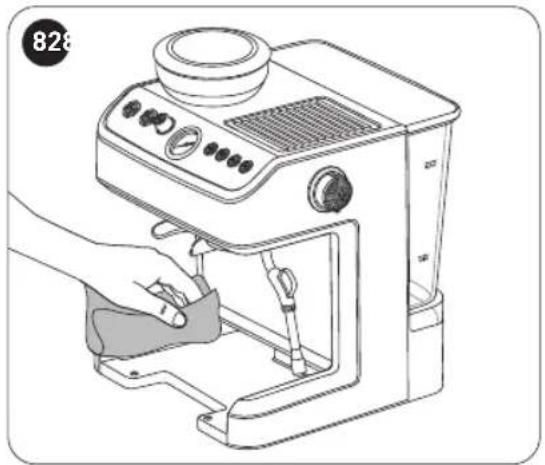
Cleaning and maintenance
Follow the steps in Fig. 78 to Fig. 83 to clean the appliance.

WARNING!
- To prevent the risk of electrocution, unplug the appliance from the mains supply before cleaning.
- Allow the appliance to cool down completely before cleaning.
- Do not immerse the appliance, power cable or plug in water or any other liquids as they contain electrical components.
- Never use solvents, chemical or abrasive cleaning agents, wire brushes, sharp objects or scouring pads to clean the appliance.
- Dry all parts thoroughly and reassemble before using the appliance.
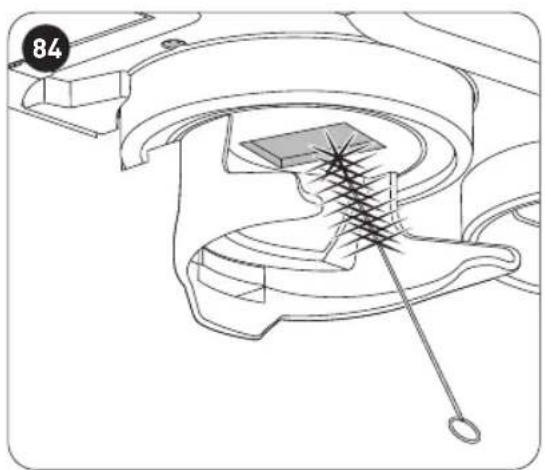
Cleaning the grinding outlet
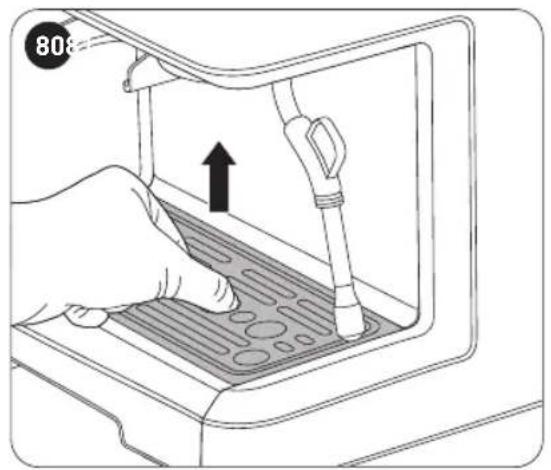
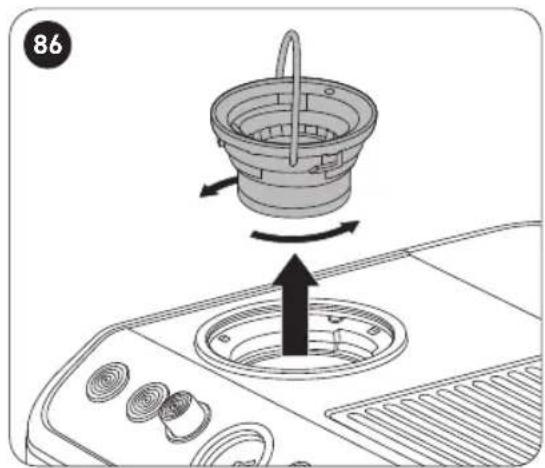
Use the round brush to clean the coffee bean grinding outlet (Fig. 84).
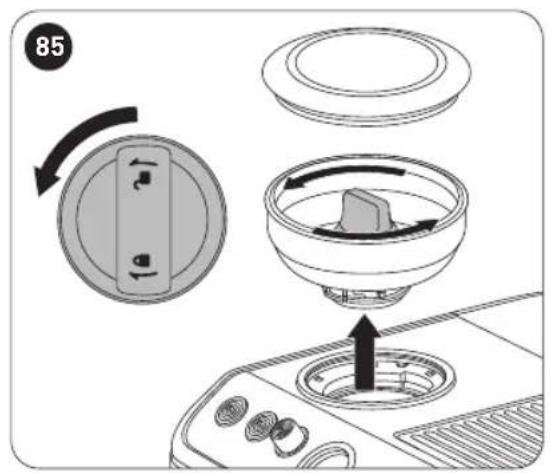
Cleaning the grinding wheel
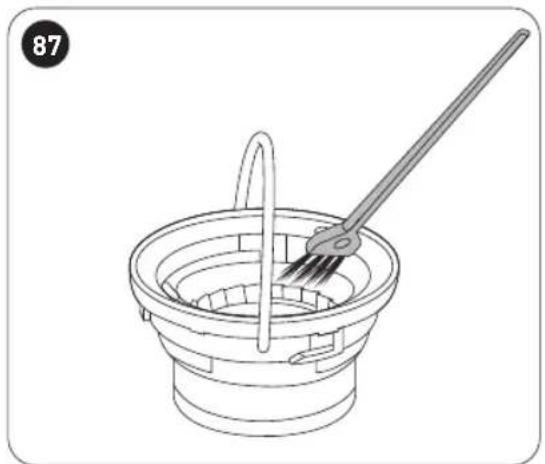
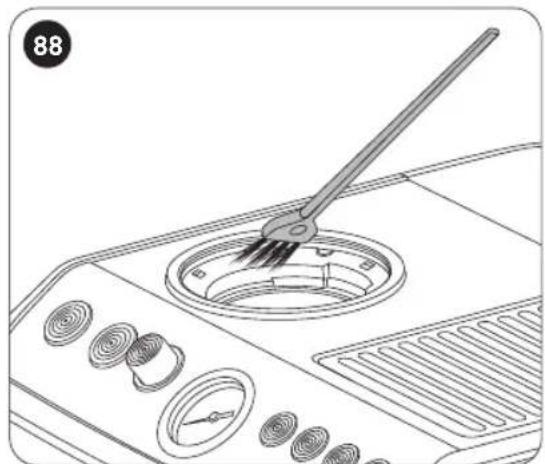
Use the cleaning brush to clean the coffee bean grinding wheel (Fig. 85 to Fig. 88).
Descaling the coffee maker

NOTE:
- Regular descaling can avoid the shortening of the coffee maker's expected life span.
- The frequency required for descaling will vary depending on the hardness of the water and how often you use the coffee maker.
- Only use descalers that are made for this specific purpose and follow the manufacturer's instructions carefully.
- Using filtered water will reduce the amount of scale accumulating in the coffee maker.
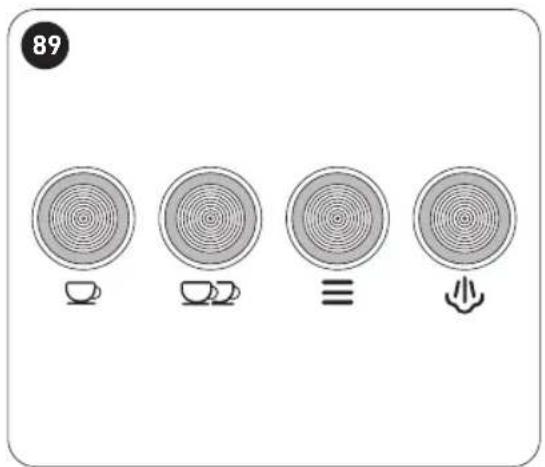
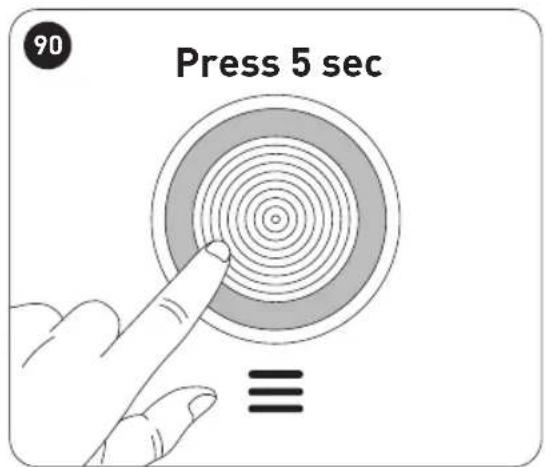
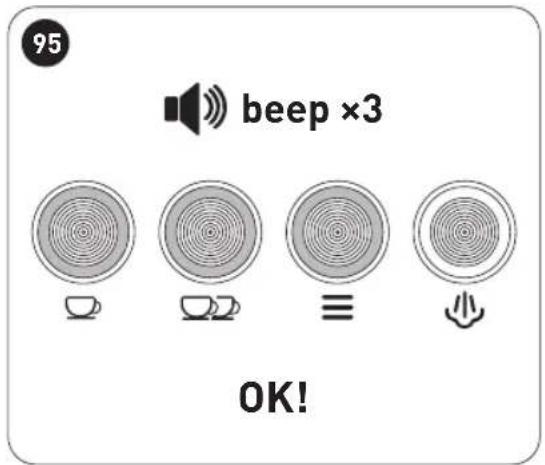
We recommend you descale the coffee maker every 2 to 3 months. When the coffee maker needs descaling, all four indicator lights will light up to alert you (Fig. 89). After descaling is done, the steam button will go off (Fig. 95) indicating the coffee maker is in normal operating condition.
- Fill the water tank up to the MAX mark on the water tank (Fig. 2 to Fig. 6), and then add the descaler as per manufacturer's instructions.
- Follow the steps in Fig. 17 to Fig. 33 to preheat the coffee maker.
- Follow the steps in Fig. 89 to Fig. 95 to perform descaling.

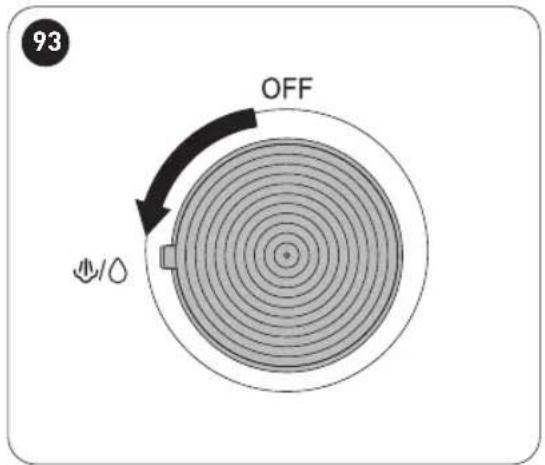
WARNING: While descaling is in progress, the water will release from the frothing pipe. If you want the water to release from the coffee outlet instead of from the frothing pipe, turn the steam control knob to OFF position.

NOTE: Avoid pouring the water/descaler solution into an enamelled water basin. Do not reuse the same solution. In case of unsatisfactory results, repeat the steps above.
C
Cleaning and maintenance
- Alternatively, you can follow the steps above and clean the coffee maker with a vinegar solution comprising 3 cups of white vinegar and then water up to the MAX mark (Fig. 5).
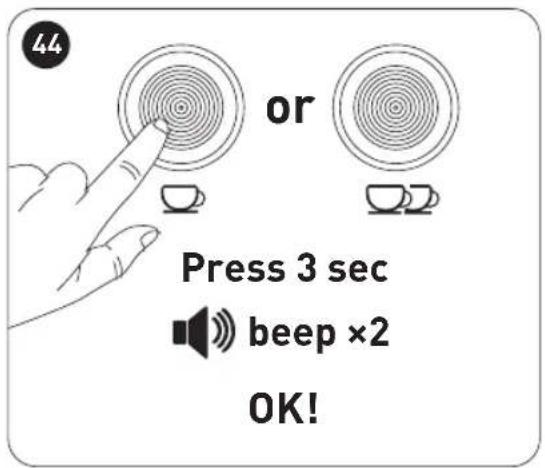
Reset coffee maker
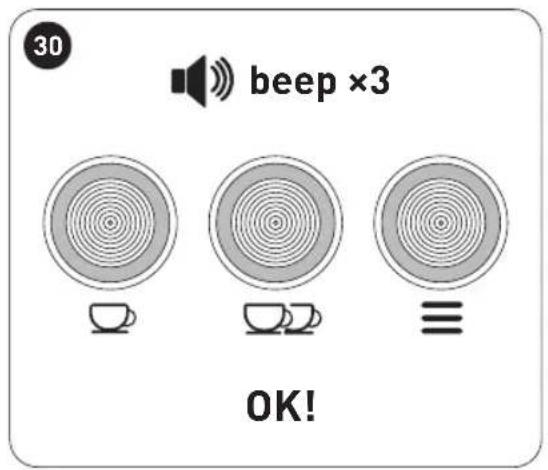
If you want to reset all functions of the coffee maker to its default settings, press and hold □ and together for 3 seconds, the 3 indicator lights (▽ and □) flash and your hear three beeps.
When all indicator lights turn off, the coffee maker is reset to its default settings.
Indicator lights
Indicator lights On/Flashing Indication
| ☐, ☐☐ ≡ | Flash slowly • The coffee maker is preheating. |
| ☐, ☐☐ ≡ | Flash quickly • The coffee maker requires descaling. | • The coffee maker is preheating and the steam knob is turned on. Turn the steam knob to OFF position and let the coffee maker cool down. |
| ☐, ☐☐ ≡ | Flash quickly Steady on | • Contact the after-sales service centre. |
| ☐, ☐☐ ≡ | Flash quickly for 3 times • The coffee maker enters water-deficient protection state. Perform the brewing function and continue to press the brew button until the unit produces water. This may takes up to 3 cycles of brewing, and if the unit still does not produce water, we recommend you contact the after-sales service centre. |
Troubleshooting
Problem Possible Cause Solution
| Water leaks from the bottom of the coffee maker. | There is too much water in the drip tray. | Empty and clean the drip tray. If this does not resolve the issue, contact your nearest service centre. |
| Water leaks out of the side of the metal filter or filter holder. | Coffee grounds on the portafilter rim are preventing a tight seal around the portafilter. | Remove excess coffee grounds. |
| The coffee tastes vinegary. | Incorrect cleaning.The coffee is stored in a hot or wet environment or for too long and has gone off. | Clean the coffee maker as shown in the “Before first use” section.Store coffee powder in an air tight jars in a cool, dry place, such as in the fridge. |
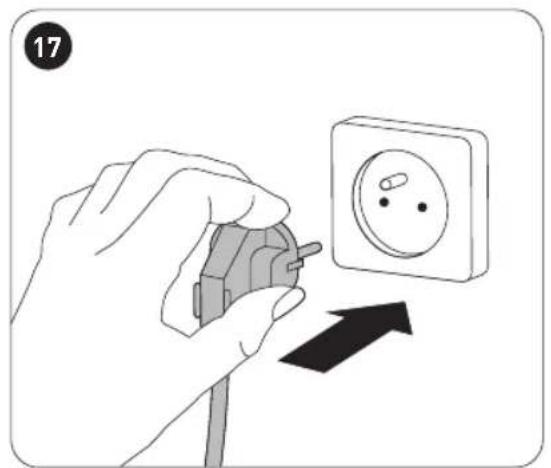
| The coffee maker is not turning on. | The power is incorrectly connected. | Plug the power plug into a mains socket, making sure that the plug is firmly inserted. |
| The frothing pipe is not frothing the milk. | The coffee maker has not been preheated.The container is too large and not the correct shape.The wrong type of milk is used.The frothing pipe is blocked | Press the steam button to activate the frothing pipe. Wait until the indicator light of the steam button to stop flashing and lights up steadily on the control panel.Use a tall, narrow jug.Use whole or semi-skimmed milk.Use the steam nozzle through-hole needle to unblock it. |
Storage

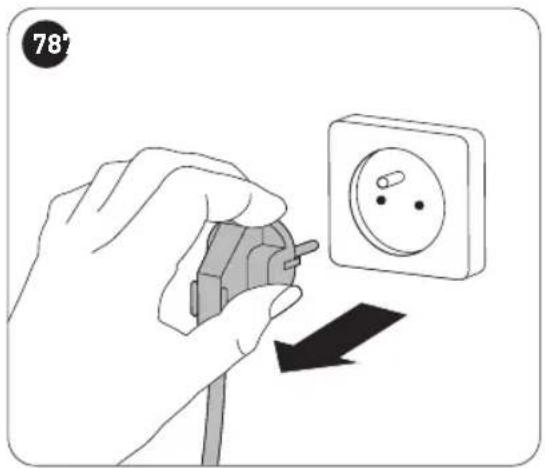
WARNING: Before storing the appliance, unplug it from the mains socket and allow it to cool completely.
- If you do not plan to use the appliance for a long time, we recommend that you clean it and then store it in its original packaging in a cool, dry place, away from direct sunlight, excessive dirt and dust, and out of the reach of children or pets.
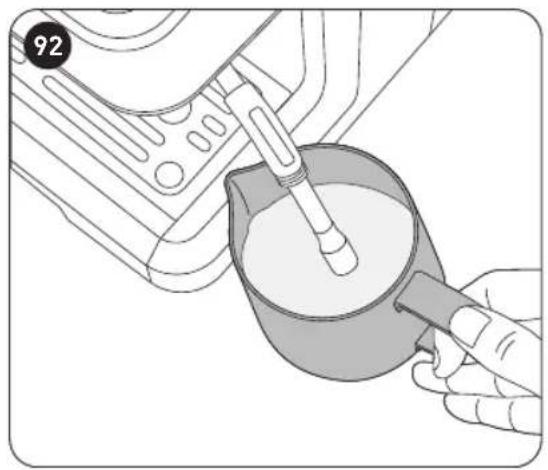
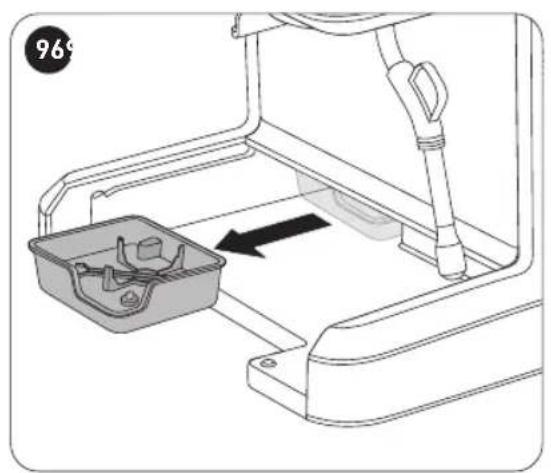
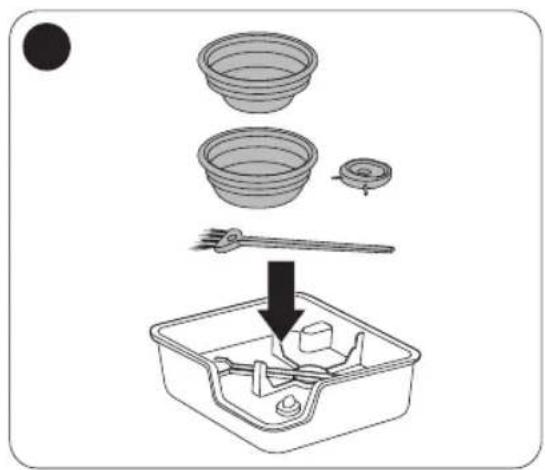
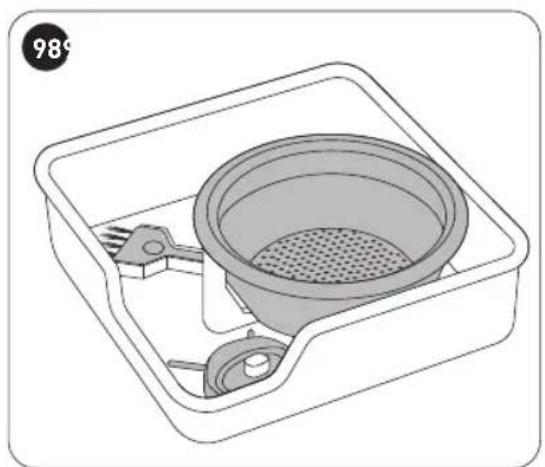
- There is a storage box for you to store the accessories, for example, the cleaning brush and the steam nozzle through-hole needle (Fig. 96 to Fig. 98).
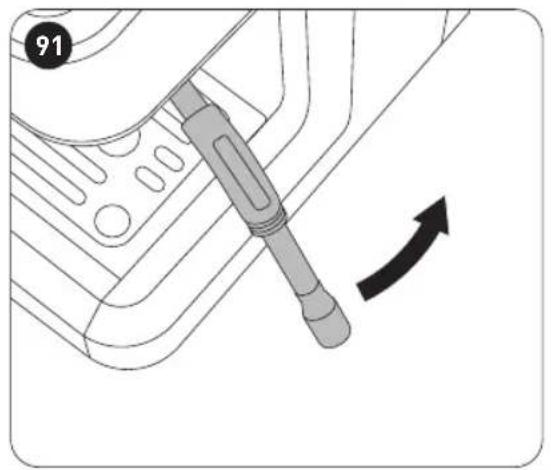
- In case the steam pipe is blocked, use the steam nozzle through-hole needle to unblock it (Fig. 99).
Merci !
natural_image
Solid gray rounded rectangle shape with no text or symbols
Bedankt!
OPMERKING:
NOTA:
natural_image
Solid gray rounded rectangle shape with no text or symbols