MisterCook Duo - Cooker Klarstein - Free user manual and instructions
Find the device manual for free MisterCook Duo Klarstein in PDF.


User questions about MisterCook Duo Klarstein
0 question about this device. Answer the ones you know or ask your own.
Ask a new question about this device
Download the instructions for your Cooker in PDF format for free! Find your manual MisterCook Duo - Klarstein and take your electronic device back in hand. On this page are published all the documents necessary for the use of your device. MisterCook Duo by Klarstein.
USER MANUAL MisterCook Duo Klarstein
text_image
QR code image containing encoded data, no visible human-readable textINHALTSVERZEICHNIS
natural_image
Symbol of a trash bin crossed with a diagonal line, no text or numbers presentBerlin Brands Group UK Limited
PO Box 42
272 Kensington High Street
London, W8 6ND
United Kingdom
Dear Customer,
Congratulations on purchasing this device. Please read the following instructions carefully and follow them to prevent possible damages. We assume no liability for damage caused by disregard of the instructions and improper use. Scan the QR code to get access to the latest user manual and more product information.

text_image
QR code image containing encoded data, no visible human-readable textCONTENTS
Safety Instructions 18
Device Overview 19
Operation 20
Control Panels and Buttons 21
Menu Settings 22
Cleaning and Care 24
Troubleshooting 25
Product Data Sheet 27
Disposal Considerations 28
Manufacturer & Importer (UK) 28
TECHNICAL DATA
| Item number 10033283 | |
| Power supply 220-240 V ~ 50/60 Hz | |
| Rated power (Watt) 3000 W |
SAFETY INSTRUCTIONS
- Read all instructions in this manual carefully. Only use the appliance as described in this manual. Do not use the appliance except as intended.
- When using electrical appliances, basic safety precautions should always be followed to reduce the risk of fire, electric hazard and injury to persons, including the following.
- Do not touch hot surfaces.
- To protect against electrical shock, do not place this appliance in water or other liquid. See the instructions for cleaning in the section "Cleaning and care".
- Only use the appliance under supervision. Place the hotplate out of the reach of children.
• Children should be supervised to ensure that they do not play with the appliance.
- This appliance can be used by children aged from 8 years and above and persons with reduced physical, sensory or mental capabilities or lack of experience and knowledge if they have been given supervision or instruction concerning use of the appliance by a person responsible for their safety.
- The appliance is not intended to be operated by means of an external timer or separate remote-control system.
- Place the appliance on a flat, stable surface.
- Do not use the appliance in narrow, poorly ventilated rooms.
- Unplug the main power from the wall socket when not in use and before cleaning. Switch off the appliance before unplugging it from the mains. Allow to cool before cleaning the appliance.
- Do not operate any appliance with a damaged cord or plug or after the appliance malfunctions, or has been damaged in any manner. Return appliance to the nearest authorized service facility for examination, repair or adjustment.
- The surface of the hotplate is made of crystal glass and covers live parts of the appliance: If the glass surface of the hotplate is damaged or has cracks, switch off the appliance immediately and disconnect the mains plug to avoid the possibility of an electric shock.
- To reduce the risk of injury, use accessory attachments only if recommended by the appliance manufacturer.
- Do not use the appliance outdoors, while standing in a damp area or near an open fire.
- Do not let the power cord hang over the edge of a table or counter, or touch hot surfaces. Do not bend the power cord as this may cause damage.
- Do not place on or near a hot gas or electric burner, or in a heated oven.
- Do not use the hotplate without a pot.
- Extreme caution must be used when moving any pot or pan containing hot oil or liquids from this appliance.
- When heating the hotplate, do not place any plastic containers or paper on the hotplate and make sure that there are no fabric or plastic products near the hotplate.
- Do not handle the power cord or plug with wet hands.
- Do not place metallic objects such as knives, forks, spoons and lids on the hotplate as they can become hot.
- Do not block or cover the air inlet and outlet openings.
- Avoid something falling on the hotplate.
- Do not open or modify any parts of the appliance and do not repair the hotplate yourself to avoid electric shocks, short circuits or fires.
- If the supply cord is damaged, it must be replaced by the manufacturer or its service agent or a similarly qualified person in order to avoid a hazard.
- Keep the manual in a safe place for future reference.
- The appliance is not intended for commercial use, but only for household use and in similar environments, such as kitchens in offices, farms, hotels, motels and facilities offering bed & breakfasts.

WARNING:
Risk of fire! Do not store other items on the cooking surfaces, except pans and pots.
DEVICE OVERVIEW
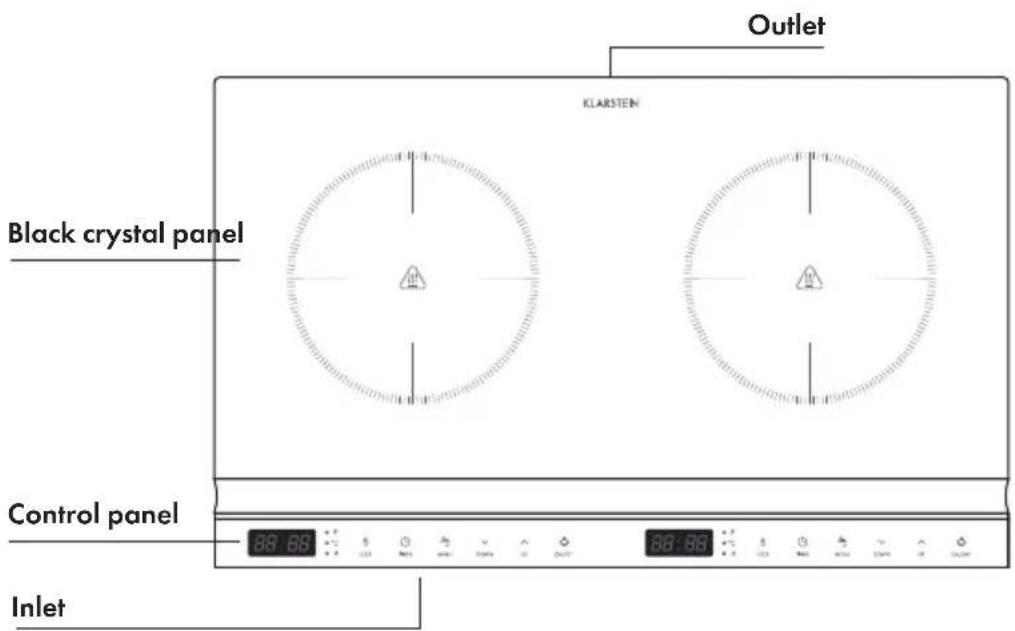
text_image
Outlet KLAERSTEN Black crystal panel Control panel InletOPERATION
Before first Use
- Check the voltage on the rating plate before use. Connect the equipment only to sockets that match the voltage of the equipment. If you are not sure whether your connections meet the requirements, consult an electrician or your power supplier.
- Place the appliance on a level, heat-resistant surface. Do not place it on surfaces that are unstable and from which it can easily tip over.
Initial use
Insert the mains plug into the wall socket. To start the unit, press and hold the Menu button for 2 seconds.
Usage
- Put the food to be heated in a pot and place it in the middle of the hotplate. Before placing the cookware on the hotplate, clean the bottom of the pot to prevent burns.
- Set the desired cooking time, output and temperature as described in the following sections.
- The surface of the hotplate will quickly become hot during operation. Do not touch it.
- After cooking, switch off the appliance by pressing the ON/OFF button. The hotplate still has a high temperature, the display remains illuminated and the fan continues to run. Do not touch the hotplate by hand until the appliance has cooled down and then unplug the appliance from the wall outlet.
- If you are not going to use the appliance for a long time, remove the plug from the socket so that the plate does not accidentally come on.
CAUTION
Risk of burns! During use, accessible parts of this appliance will become hot enough to cause burns. Do not let your body, clothing or any item other than suitable cookware contact the hotplate until the surface is cool.
CONTROL PANELS AND BUTTONS
Left control panel

text_image
88:88 ● P ● ℃ ● ⏱ LOCK TIMER MENU DOWN UP ON/OFFRight control panel

text_image
88:88 ● P ● °C ● ⏱ LOCK TIMER MENU DOWN UP ON/OFF| Button functions | |
| ON/OFF | Press the ON/OFF button to turn on the hotplate. A beep will sound and the display will show "ON". You can now make further settings. If no entries are made, a beep sounds after 1 minute and the hotplate automatically switches to standby mode.If you want to switch the hotplate on again, press the ON/OFF button. The display shows "ON".To switch to standby mode during operation, press the ON/OFF button. A beep sounds, the heating element is switched off, the display shows "HOT" and the infrared hob switches to standby mode. (Ventilation will continue for some time while the hotplate cools down.)Note:The hotplate does not have a power switch. The power supply can only be interrupted by pulling the mains plug. |
| TIMER | Use this button to set the cooking time. |
| LOCK | During operation, press and hold the LOCK button for 2 seconds to activate the child lock. When the child lock is on, all buttons other than the LOCK button and the ON/OFF button are locked.To turn off, press the ON/OFF button or press the LOCK button for 2 seconds to unlock the child lock. |
| MENU | Use this button to select the power and temperature level. |
| UP + DOWN | Use these buttons to set the power, temperature and timer. |
Notes on working power
Working power is 2000 W for each hob, total power is not exceeding 3000 W when 2 hobs are working.
1 The power of each hob is influenced by the power of the other. If one hob is set to 2000 W, the second hob can only be set to 1000 W. The maximum total displayed power of 2 hobs is 3000 W. In heating mode, the power of one hob increases while that of the other decreases, and the displayed power changes accordingly.
2 In share power status, when each burner losses connection, the power of each hob is automatically reduced to 1400 W with a corresponding change in the power level display if the power of one hob exceeds 1400 W.
3 The power is regulated according to the last set power level of a hob, the power of the second hob is set relative to it.
MENU SETTINGS
Note: If you press the MENU button to set the desired temperature and power level, the hotplate will immediately heat up to the default temperature and power level (2000 W/600 °C). Use the UP/DOWN buttons to change the settings.
P Power (Watt):
- Press the MENU button to set the power.
- The "P" (POWER) indicator will light up. The default setting is "2000 W" and the power level is shown in the display.
- Use the UP and DOWN buttons to select the desired power level (200-2000 W).
°C Temperature:
-
Press the MENU button to set the temperature.
The “°C” indicator lights up. The default setting is “600 °C” and the temperature level is shown in the display.
Use the UP/DOWN buttons to set the desired temperature level (90-650 °C).
Press the TIMER button to set the cooking time. You can select "0:01-3:00" (1 min to 3 h). -
Press the MENU button to select additional functions.
Correspondence of the variable power and temperature levels
| Level 1 2 3 4 5 6 7 | 8 9 10 | |||||||||
| Power (W) | 200 | 400 | 600 | 800 | 1000 | 1200 | 1400 | 1600 | 1800 | 2000 |
| Temperature (°C) | 90 | 150 | 300 | 350 | 400 | 450 | 500 | 550 | 600 | 650 |

Timer:
- In the setting state of power or temperature, press the TIMER button to set the cooking time. The TIMER indicator lights up and the display flashes. The default setting is "0:10" (10 min).
- Use the UP button to increase the cooking time by 10 minutes each time the button is pressed, or use the DOWN button to reduce the cooking time by 1 minute each time the button is pressed. You can set "0:01" to "3:00" (1 min to 3 h). A long press on the UP/DOWN buttons allows you to set the cooking time more quickly. If you do not press another button after setting the cooking time, the countdown is activated after 5 seconds and ":" flashes in the display.
- While the timer countdown is running, the display alternately shows the timer time and the power or temperature every 5 seconds.
- During countdown, press the TIMER button twice to reset the timer or press the MENU button to select another temperature or power level. Use the UP/DOWN buttons to change the settings.
- The hotplate will automatically turn off when the countdown time has elapsed.

Child Lock (LOCK):
- During operation, press and hold the LOCK button for 2 seconds to activate the child lock. The display will show „LOC” and after 5 seconds the set time will be confirmed automatically. When the child lock is on, all other buttons are disabled except the LOCK button and the ON/OFF button.
- Press the ON/OFF button to turn off the hotplate or press the LOCK button for 2 seconds to unlock the child lock.
CLEANING AND CARE
Note: Turn off the appliance and unplug it from the wall outlet before maintenance or cleaning to avoid electric shock. Make sure that the hotplate has already cooled down.
- Never immerse the appliance in water or other liquids.
- Clean the cooking plate, the appliance surface and the control panel from dirt. Use a damp cloth or sponge and a small amount of detergent. Make sure that no water leaks into the hotplate. Never use abrasives, steel wool pads or abrasive sponges for cleaning, as they can damage the surface.
- Keep the panel and housing clean and protect all openings to avoid short circuits.
- Stains may form on the surface after prolonged use of the hotplate. This is a normal procedure and will not affect the use of the appliance.
- If possible, do not use an extension cord. If you do use one, make sure that the amperage of the connected appliance does not exceed the maximum amperage of the power cord.
• Make sure that no liquid drips onto the hotplate during cooking to prolong its life. - Only use pots and pans with a flat bottom so that the bottom is completely on the hotplate.
Choose pot
- Pots made of all materials can be used for cooking. Cookware with a base diameter of approx. 18-26 cm (round) or approx. 12-20 cm (square) is well suited. Cookware with an uneven base or a base diameter of less than 12 cm is not well suited.
Friendly cookware
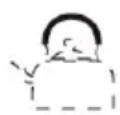
Stainless-Steel kettle
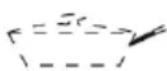
Iron pot Magnetic
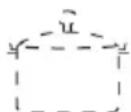
stainless steel pot
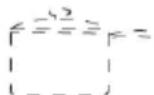
Colored iron pot
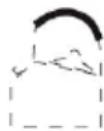
Magnetic iron kettle

Iron pan Aluminium Heat-resistant

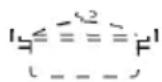
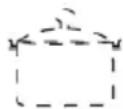
Ceramic pot
pot
Non-friendly cookware
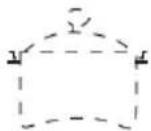
Uneven
pot bottom
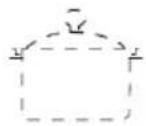
Pot bottom with feet
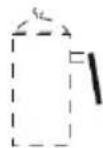
Pot bottom with small diameter
System protection functions
1 Plate overheating protection: When the hotplate heats up to 650 °C, it is automatically cooled down.
2 Inner overheating protection: When the inner temperature of the machine reaches 100 °C , heating is stopped.
3 Overvoltage protection: If the voltage exceeds 275 V, the hotplate will not be heated any further.
4 Low voltage protection: If the voltage is below 120 V, the hotplate will not be heated any further.
TROUBLESHOOTING
| Problem Possible Solution | |
| Plug the mains plug into the wall socket. Press the ON/OFF button, the display does not light. | Check that the mains plug is plugged into the wall socket correctly and that the wall socket is in good condition. |
| The On/Off indicator does not light. Check | if the display or the main board are in good condition. |
| During operation, the heating process is suddenly stopped. | Check whether the following causes have occurred: the surrounding temperature is high or the set timer time has been reached. If the overheating protection has been started, do not put the hotplate back into operation until after 10 minutes. The hotplate switches off automatically during operation after 2 hours of non-use. |
| The power cord is damaged. Have the defective power cord replaced by an authorized electrician with a power cord of the same model. | |
| Error code Cause/Solution | |
| E1 Short | or open circuit detection of the temperature sensor. |
| E2 Short | or open circuit detection of silicon controlled. |
| E3 | High voltage protection:A beep sounds every second and the LED display shows a flashing “E3”: The voltage is ≥ 275 V. If the voltage is < 265 V, press the ON/OFF button, the infrared cooker will work or turn off. |
| E4 | Low voltage protection:A beep sounds every second and the LED display shows a flashing “E4”: The voltage is ≤ 120 V. If the voltage is > 130 V, press the ON/OFF button, the infrared cooker will work or turn off. |
| E5 | Fan open circuit:The working current of the fan is too low. |
| E6 Overheat protection of silicon controlled (internal) | |
PRODUCT DATA SHEET
| Symbol Value Unit | |||
| Model identification | 10033283 | ||
| Type of hob | Freestanding | ||
| Number of cooking zones and/or areas | 2 | ||
| Heating technology (induction cooking zones and cooking areas, radiant cooking zones, solid plates) | Infrared hob | ||
| For circular cooking zones or area: diameter of useful surface area per electric heated cooking zone, rounded to the nearest 5 mm | ∅ 19,0 / | 19,0 cm | |
| For non-circular cooking zones or areas: length and width of useful surface area per electric heated cooking zone or area, rounded to the nearest 5 mm | LW | — | cm |
| Energy consumption per cooking zone or area calculated per kg | EC Electric Cooking Hob | 190,5 / 187,0 Wh/kg | |
| Energy consumption for the hob calculated per kg | EC Electric Cooking Hob | 188,7 Wh/kg | |
DISPOSAL CONSIDERATIONS
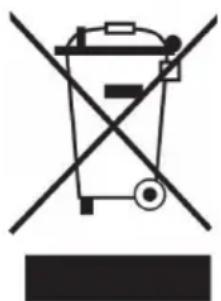
natural_image
Symbol of a trash bin crossed with a diagonal line, no text or numbers presentIf there is a legal regulation for the disposal of electrical and electronic devices in your country, this symbol on the product or on the packaging indicates that this product must not be disposed of with household waste. Instead, it must be taken to a collection point for the recycling of electrical and electronic equipment. By disposing of it in accordance with the rules, you are protecting the environment and the health of your fellow human beings from negative consequences. For information about the recycling and disposal of this product, please contact your local authority or your household waste disposal service.
MANUFACTURER & IMPORTER (UK)
Manufacturer:
Chal-Tec GmbH, Wallstrasse 16, 10179 Berlin, Germany.
Importer for Great Britain:
Berlin Brands Group UK Limited
PO Box 42
272 Kensington High Street
London, W8 6ND
United Kingdom
Estimado cliente:
text_image
QR code image containing encoded data, no visible human-readable textÍNDICE
natural_image
Symbol of a trash bin crossed with a diagonal line, no text or numbers presentBerlin Brands Group UK Limited
PO Box 42
272 Kensington High Street
London, W8 6ND
United Kingdom
Chère cliente, cher client,
text_image
QR code image containing encoded data, no visible human-readable textSOMMAIRE
FICHE DE DONNÉES PRODUIT
natural_image
Symbol of a trash bin crossed with a diagonal line, no text or numbers presentBerlin Brands Group UK Limited
PO Box 42
272 Kensington High Street
London, W8 6ND
United Kingdom
Gentile Cliente,
text_image
QR code image containing encoded data, no visible human-readable textINDICE
natural_image
Symbol of a trash bin crossed with a diagonal line, no text or numbers presentPRODUTTORE E IMPORTATORE (UK)
Produttore:
Chal-Tec GmbH, Wallstraße 16, 10179 Berlino, Germania.
Berlin Brands Group UK Limited
PO Box 42
272 Kensington High Street
London, W8 6ND
United Kingdom

area
| Category | Value | |---|---| | 1 | 100 | | 2 | 100 | | 3 | 100 | | 4 | 100 | | 5 | 100 | | 6 | 100 | | 7 | 100 | | 8 | 100 | | 9 | 100 | | 10 | 100 | | 11 | 100 | | 12 | 100 | | 13 | 100 | | 14 | 100 | | 15 | 100 | | 16 | 100 | | 17 | 100 | | 18 | 100 | | 19 | 100 | | 20 | 100 | | 21 | 100 | | 22 | 100 | | 23 | 100 | | 24 | 100 | | 25 | 100 | | 26 | 100 | | 27 | 100 | | 28 | 100 | | 29 | 100 | | 30 | 100 | | 31 | 100 | | 32 | 100 | | 33 | 100 | | 34 | 100 | | 35 | 100 | | 36 | 100 | | 37 | 100 | | 38 | 100 | | 39 | 100 | | 40 | 100 | | 41 | 100 | | 42 | 100 | | 43 | 100 | | 44 | 100 | | 45 | 100 | | 46 | 100 | | 47 | 100 | | 48 | 100 | | 49 | 100 | | 50 | 100 | | 51 | 100 | | 52 | 100 | | 53 | 100 | | 54 | 100 | | 55 | 100 | | 56 | 100 | | 57 | 100 | | 58 | 100 | | 59 | 100 | | 60 | 100 | | 61 | 100 | | 62 | 100 | | 63 | 100 | | 64 | 100 | | 65 | 100 | | 66 | 100 | | 67 | 100 | | 68 | 100 | | 69 | 100 | | 70 | 100 | | 71 | 100 | | 72 | 100 | | 73 | 100 | | 74 | 100 | | 75 | 100 | | 76 | 100 | | 77 | 100 | | 78 | 100 | | 79 | 100 | | 80 | 100 | | 81 | 100 | | 82 | 100 | | 83 | 100 | | 84 | 100 | | 85 | 100 | | 86 | 100 | | 87 | 100 | | 88 | 100 | | 89 | 100 | | 90 | 100 | | 91 | 100 | | 92 | 100 | | 93 | 100 | | 94 | 100 | | 95 | 100 | | 96 | 100 | | 97 | 100 | | 98 | 100 | | 99 | 100 | | Note: The actual values in the 'Value' column are not provided in the code. I have used the label 'The Region' to represent the 'Region'. The values are estimated based on the provided code.