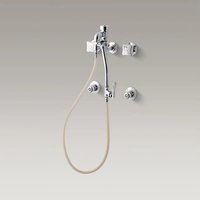
Triton K-13938-2A - Faucet KOHLER - Free user manual and instructions
Find the device manual for free Triton K-13938-2A KOHLER in PDF.


| Product Type | Bidet cleaning faucet |
| Brand | Kohler |
| Model | Triton K-13938-2A |
| Category | Faucet |
| Use | Toilet bowl cleaning |
| Number of Handles | 2 (two-handle model) |
| Water Supply | Hot and cold water |
| Connection | 1/2" N.P.T. pipe or tube, or copper |
| Valve Spacing | 8" (20.3 cm) |
| Hole Diameter | 2-1/2" (6.4 cm) |
| Materials | Brass, plastic |
| Installation | Wall-mount, requires reinforcement |
| Required Tools | Adjustable wrench, screwdriver, strap wrench |
| Functions | Adjustable sprayer, flow and temperature control |
| Maintenance | Regular cleaning, leak check |
| Safety | Turn off water before installation, follow local codes |
| Spare Parts | Valves, handles, hose, vacuum breaker (available from Kohler) |
| Repairability | Repairable with common tools |
| Manual Content | 28 pages, available for download |
| Warranty | Not specified |
Frequently Asked Questions - Triton K-13938-2A KOHLER
User questions about Triton K-13938-2A KOHLER
0 question about this device. Answer the ones you know or ask your own.
Ask a new question about this device
Download the instructions for your Faucet in PDF format for free! Find your manual Triton K-13938-2A - KOHLER and take your electronic device back in hand. On this page are published all the documents necessary for the use of your device. Triton K-13938-2A by KOHLER.
USER MANUAL Triton K-13938-2A KOHLER
natural_image
Technical line drawing of a mechanical assembly with hoses and connectors (no text or symbols)M product numbers are for Mexico (i.e. K-12345M)
Thank You For Choosing Kohler Company
We appreciate your commitment to Kohler quality. Please take a few minutes to review this manual before you start installation. If you encounter any installation or performance problems please don't hesitate to contact us. Our phone numbers and web site are listed on the back cover. Thanks again for choosing Kohler Company.
Tools and Materials
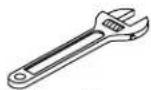
Adjustable Wrench
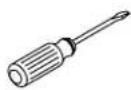
Blade
Screwdriver
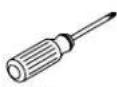
Phillips
Screwdriver
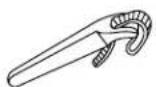
Strap Wrench

Thread Sealant
Plus:
- 9/16" or larger drill bit for wall material
- Piping support brackets
• Rags
text_image
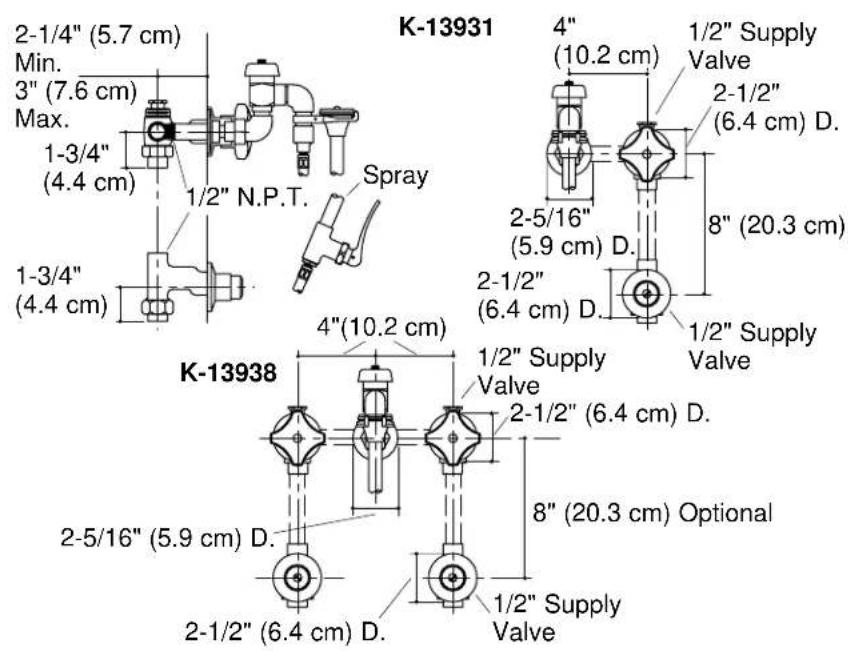
2-1/4" (5.7 cm) Min. 3" (7.6 cm) Max. 1-3/4" (4.4 cm) 1/2" N.P.T. Spray 1-3/4" (4.4 cm) K-13931 4" (10.2 cm) 1/2" Supply Valve 2-1/2" (6.4 cm) D. 2-5/16" (5.9 cm) D. 8" (20.3 cm) 2-1/2" (6.4 cm) D. 1/2" Supply Valve K-13938 4"(10.2 cm) 1/2" Supply Valve 2-1/2" (6.4 cm) D. 8" (20.3 cm) Optional 2-5/16" (5.9 cm) D. 2-1/2" (6.4 cm) D. 1/2" Supply ValveBefore You Begin

CAUTION: Risk of property damage. To support the bedpan washer and piping, provide sufficient reinforcement or mounting brackets as required inside the wall.
NOTE: Refer to the roughing-in diagram for dimensional information.
□ Shut off the main valve and water supply.
□ Observe all local plumbing codes and building codes.
☐ Plumb using 1/2" NPT pipe or 1/2" copper tubing, elbows, and adapters. Secure the piping to reinforcements in the wall.
☐ Do not remove plastic thread protectors until instructed.
☐ Kohler Co. reserves the right to make revisions in the design of bedpan washers without notice, as specified in the Price Book.
text_image
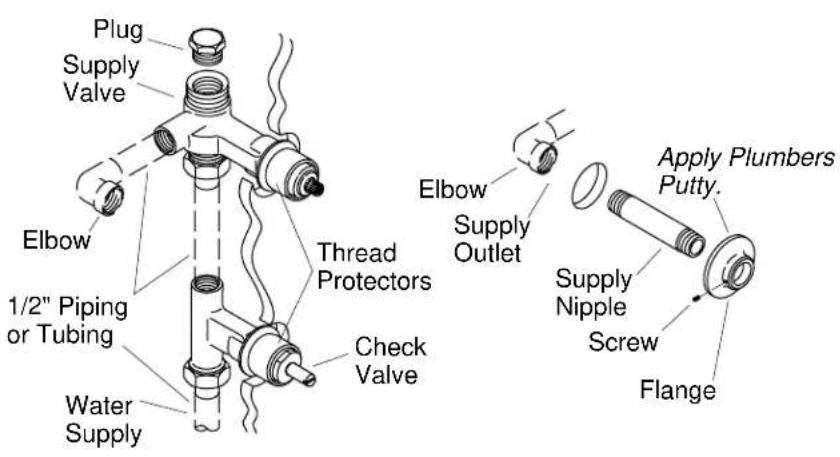
Plug Supply Valve Elbow 1/2" Piping or Tubing Water Supply Thread Protectors Check Valve Elbow Supply Outlet Apply Plumbers Putty. Supply Nipple Screw Flange1. Install the Valve Body
NOTE: Apply a thread sealant where applicable.
NOTE: Do not remove thread protectors at this time.
☐ Thread the plug button into the top of the supply valve.
☐ Install both the supply valve and the check valve according to the roughing-in diagram. Install two supply valves and two check valves for a two handle bedpan washer.
☐ Thread one supply nipple into the supply elbow outlet in the wall. Repeat for a two handle bedpan washer.
□ Apply a bead of plumbers putty or other sealant to backside of the flange according to the putty manufacturer's instructions.
☐ Slide one flange onto and over the supply nipple until it is snug against the finished wall. Secure with the flange setscrew. Repeat for a two handle bedpan washer.
□ Remove any excess putty or sealant.
text_image
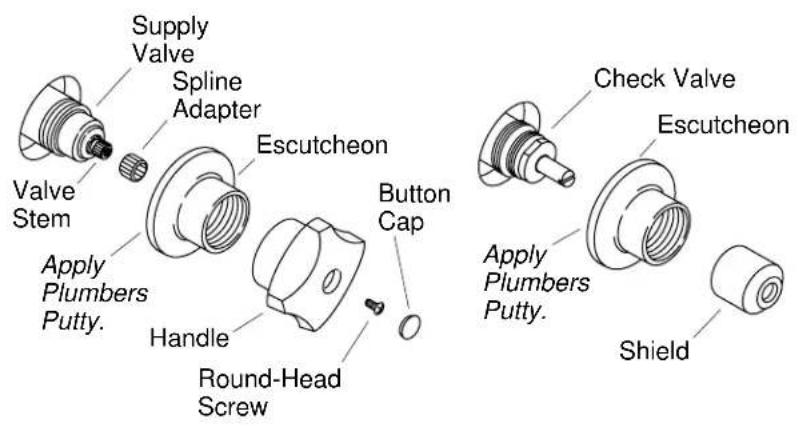
Supply Valve Spline Adapter Escutcheon Valve Stem Apply Plumbers Putty. Handle Round-Head Screw Button Cap Check Valve Escutcheon Apply Plumbers Putty. Shield2. Install the Handles and Check Valves
NOTE: Handles that are marked "Cold" with a blue tape must always be installed onto the right valve as viewed from the front of the bedpan washer.
One Handle Installation
☐ To install one handle, remove the thread protector from the valve. Turn the valve to the closed position.
□ Apply a bead of plumbers putty or other sealant to backside of the escutcheon according to the putty manufacturer's instructions.
☐ Thread the escutcheon onto the valve body until it is snug against the finished wall.
□ Remove any excess putty or sealant.
□ Press the spline adapter into the valve stem.
☐ Press the handle onto the escutcheon and spline adapter. Secure with a screw.
☐ Insert one button cap into the top and over the screw.
Install the Handles and Check Valves (cont.)
☐ Repeat for a two handle bedpan washer.
Check Valve Installation
☐ To install one check valve, remove the thread protector.
□ Apply a bead of plumbers putty or other sealant to backside of the escutcheon according to the putty manufacturer's instructions.
☐ Thread the escutcheon onto the check valve until it is snug against the finished wall.
□ Remove any excess putty or sealant.
☐ Thread the shield onto the check valve until tight.
☐ Repeat for a two handle bedpan washer.
text_image
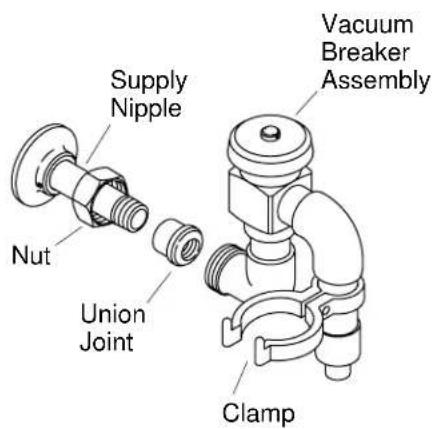
Supply Nipple Nutm Union Joint Clamp Vacuum Breaker Assembly3. Install the Vacuum Breaker
NOTE: Apply a thread sealant where applicable.
☐ Rotate the nut and union joint counterclockwise until they are removed from the vacuum breaker assembly.
☐ Slide the nut with threads facing out, half way down the supply nipple.
☐ Thread the union joint onto the supply nipple.
☐ Thread the vacuum breaker assembly onto the union joint until tight. Ensure that the vacuum breaker assembly is vertically aligned.
☐ Slide the nut onto the vacuum breaker assembly and thread until tight.
☐ Rotate the vacuum breaker clamp to point straight out from the left side of the vacuum breaker assembly. Secure with a screw.
text_image
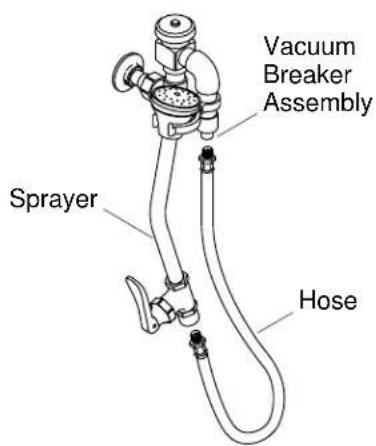
Sprayer Vacuum Breaker Assembly Hose4. Install the Hose Assembly
☐ Thread one end of the flexible hose into the vacuum breaker assembly outlet. Securely tighten.
☐ Thread the other end of the flexible hose into the sprayer outlet. Securely tighten.
☐ Hang the spray nozzle from the rotated valve assembly clamp.
text_image
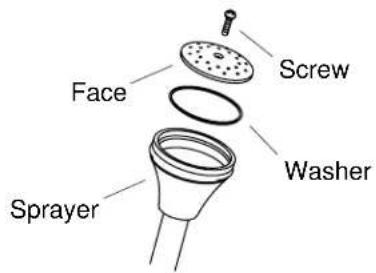
Face Screw Washer Sprayer5. Installation Checkout
NOTE: The water flow from the sprayer can be limited by adjusting the angle valve.
NOTE: The water temperature can be reset by adjusting the angle valve.
One Handle Bedpan Washer
☐ For a one handle bedpan washer, turn on the main water supply.
□ Open both the check valve and the supply valve.
□ Check for leaks. Repair as needed.
□ Remove the screw, face, and washer from the sprayer.
□ Run water through the hose for approximately one minute to remove debris.
□ Test and verify that the sprayer operates normally.
Two Handle Bedpan Washer
☐ For a two handle bedpan washer, repeat with the other check valve and supply valve.
□ Turn the water off.
□ Remove any debris from the sprayer and reinstall.
□ Test and verify that the sprayer operates normally.




