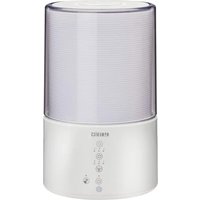
UHE-PL125 - Humidifier HOMEDICS - Free user manual and instructions
Find the device manual for free UHE-PL125 HOMEDICS in PDF.

User questions about UHE-PL125 HOMEDICS
0 question about this device. Answer the ones you know or ask your own.
Ask a new question about this device
Download the instructions for your Humidifier in PDF format for free! Find your manual UHE-PL125 - HOMEDICS and take your electronic device back in hand. On this page are published all the documents necessary for the use of your device. UHE-PL125 by HOMEDICS.
USER MANUAL UHE-PL125 HOMEDICS
activate your warranty and meet your product
Scan the QR code within 7 days of receiving your product to activate your warranty and experience all the humidifier benefits!

text_image
QR code image containing encoded data, no visible human-readable text
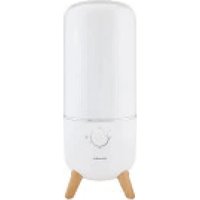
ultrasonic warm & cool mist humidifier with built-in planter
INSTRUCTION MANUAL AND WARRANTY INFORMATION
UHE-PL125 | L-04667, Rev. 2
IMPORTANT SAFETY INSTRUCTIONS
WHEN USING ELECTRICAL PRODUCTS, BASIC SAFETY PRECAUTIONS SHOULD ALWAYS BE FOLLOWED, INCLUDING THE FOLLOWING:
READ AND SAVE THESE INSTRUCTIONS.
DANGER – TO REDUCE THE RISK OF ELECTRIC SHOCK:
- Always place humidifier on a firm, flat surface. A waterproof mat or pad is recommended for use under the humidifier. Never place it on a rug or carpet, or on a finished floor that may be damaged by exposure to water or moisture.
- This appliance has a polarized plug (one blade is wider than the other). To reduce the risk of electric shock, this plug is intended to fit in a polarized outlet only one way. If the plug does not fit fully in the outlet, reverse the plug. If it still does not fit, contact a qualified electrician. Do not attempt to defeat this safety feature.
- Always unplug the unit from the electrical outlet immediately after using and before cleaning.
- DO NOT reach for a unit that has fallen into water. Unplug it immediately.
- DO NOT place or store the unit where it can fall or be pulled into a tub or sink.
- DO NOT place or drop into water or other liquids.
• DO NOT use water above 86°F.
WARNING – TO REDUCE THE RISK OF BURNS, FIRE, ELECTRIC SHOCK, OR INJURY TO PERSONS:
- Use this unit only for its intended use as described in this manual. Do not use attachments not recommended by Homedics; specifically, any attachments not provided with this unit.
- DO NOT use replacement parts that have not been recommended by the manufacturer (e.g. parts made using a 3D printer).
- NEVER drop or insert any object into any opening.
- NEVER operate the appliance if it has a damaged cord or plug, if it is not working properly, if it has been dropped or damaged, or dropped into water. Return the appliance to a Homedics Service Center for examination and repair.
• Always unplug the unit when filling or moving the unit. - Ensure that your hands are dry when operating the controls or removing the plug.
- NEVER use the humidifier in an environment where explosive gases are present.
- DO NOT place the humidifier near heat sources, such as a stove, and do not expose the humidifier to direct sunlight.
- DO NOT carry this unit by the power cord or use the power cord as a handle.
- To disconnect, turn all controls to the off position, then remove the plug from the outlet.
SAVE THESE INSTRUCTIONS
CAUTION
- PLEASE READ ALL INSTRUCTIONS CAREFULLY BEFORE
OPERATING.
- This product is intended for household use only.
- NEVER cover the unit while it is operating.
• Always keep the cord away from high temperatures and fire.
- Perform regular maintenance on the ultrasonic membrane.
- NEVER use detergent to clean the ultrasonic membrane.
- NEVER clean the ultrasonic membrane by scraping with a hard object.
- DO NOT attempt to adjust or repair the unit. Servicing must be performed by professional or qualified personnel.
- Stop using this unit if there is an unusual noise or smell.
- Unplug this unit when not in use for a long period of time.
- DO NOT touch the water or any parts of the unit that are covered by water while the unit is on or plugged in.
- NEVER operate without water in the tank.
- Only use water in the tank.
- NEVER use any additive in the water including essential oils.
- DO NOT wash, adjust, or move this unit without first unplugging it from the electrical outlet.
- Keep this unit out of reach of children. Do not allow children to use this unit without supervision.
- DO NOT use outdoors. For indoor use only.
- All servicing of this humidifier must be performed by authorized Homedics service personnel only.
- DO NOT place a humidifier on furniture.
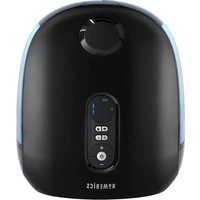
GET TO KNOW YOUR ULTRASONIC
HUMIDIFIER WITH SMALL PLANTER

text_image
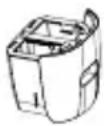
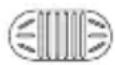
Lid Planter Pot Mist Nozzle Outer Pot Accent Light Water Reservoir Control Panel Digital Display Tank Light Water Tank Demineralization Cartridge (1 pc.) Essential Oil Pads (3 pcs.) Screen Water Reservoir Cover Essential Oil TrayCONTROL PANEL
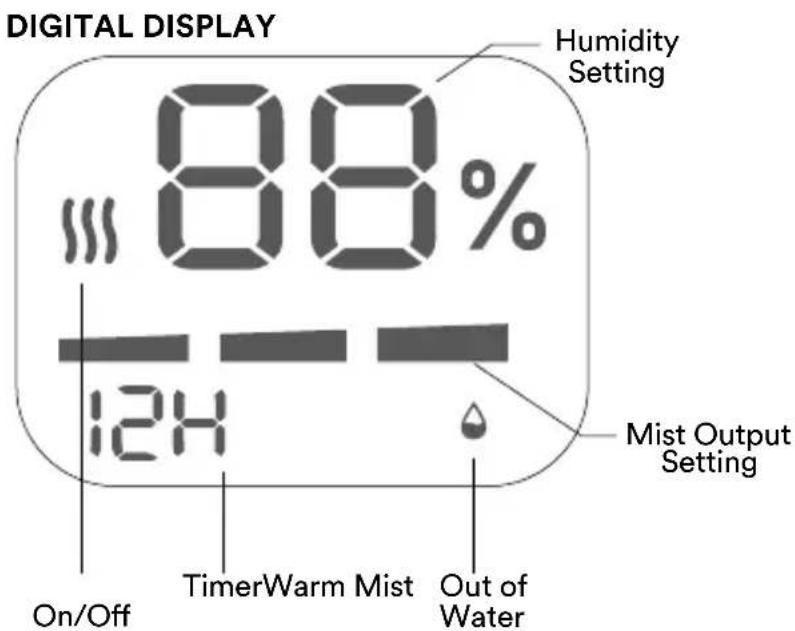
text_image
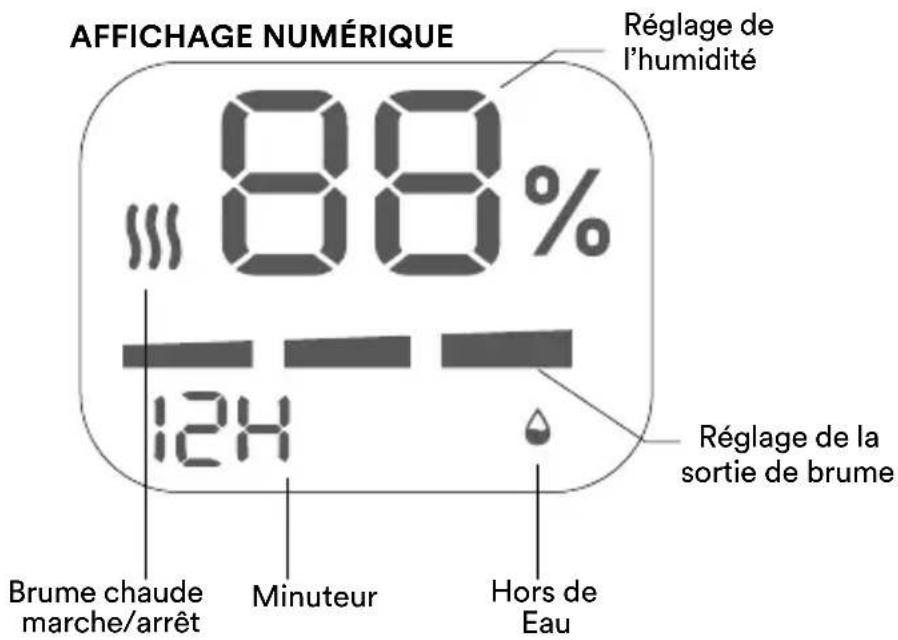
DIGITAL DISPLAY 88% Humidity Setting 124 On/Off TimerWarm Mist Out of Water Mist Output Setting
Power on/off

Mist level

Auto mode

Humidity control

Warm mist on/off

Timer Light on/off

ABOUT WHITE DUST
Use of high mineral content hard water may cause a white mineral residue to accumulate on surfaces in the room near the humidifier. The mineral residue is commonly called “white dust.” The higher the mineral content (or, the harder your water is), the greater the potential for white dust. The white dust is not caused by a defect in the humidifier. It is caused only by minerals suspended in the water.
HOW TO FILL
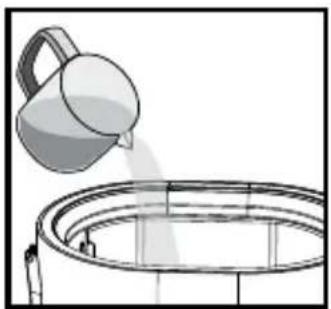
CAUTION: Before filling the tank with water, turn the power off and unplug the humidifier from the outlet. NOTE: Always use 2 hands to carry the water tank. The convenient top-fill tank can be filled with a pitcher or at the faucet. For best results, use distilled water.
HOW AND WHY TO USE DEMINERALIZATION CARTRIDGES
The Homedics demineralization cartridge will help reduce the potential for white dust, a deposit of minerals left behind from using hard water in your humidifier. The cartridge should be replaced every 30–40 fillings. The cartridge may need to be replaced more often if you are using very hard water.
TO FILL WITH A PITCHER TO FILL AT THE FAUCET
natural_image
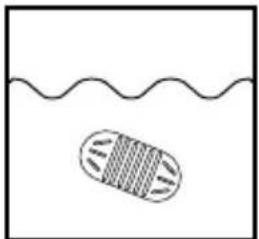
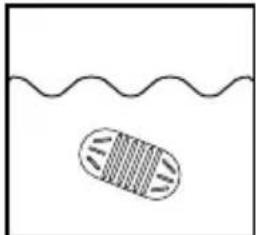
Simple line drawing of a cell with internal bands, partially submerged in a wavy liquid (no text or symbols)- Remove 1 demineralization cartridge from packaging and soak in water for 10 minutes.
natural_image
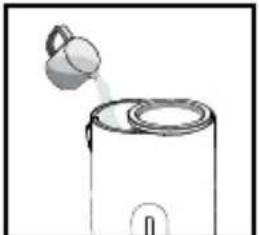
Simple line drawing of a container with a lid emitting powder (no text or symbols)- Fill carefully with clean, cool water or distilled water (if in area with hard water) until the water level reaches the MAX fill line. DO NOT fill with warm or hot water. CAUTION: Never add essential oils or other additives to the water tank or water reservoir.
natural_image
Simple line drawing of a cell with internal bands submerged in a wavy liquid (no text or symbols)- Remove 1 demineralization cartridge from packaging and soak in water for 10 minutes.
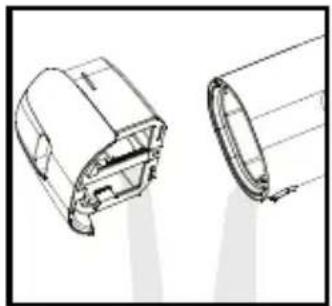
natural_image
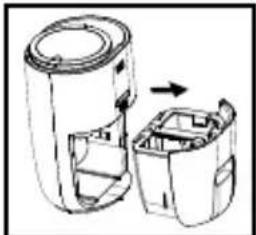
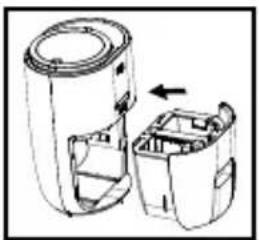
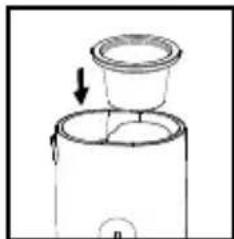
Diagram of a device with two views showing internal components, one being rotated (no text or symbols)- Remove water tank from the unit.
natural_image
Line drawing of a hand holding an open cylindrical device with internal components (no text or symbols)- Use 2 hands to carry the water tank. Fill with clean, cool water or distilled water (if in area with hard water) until the water level reaches the MAX fill line. DO NOT fill with warm or hot water. CAUTION: Never add essential oils or other additives to the water tank or water reservoir.
natural_image
Technical line drawing of a mechanical assembly with pipes and a central component (no text or symbols)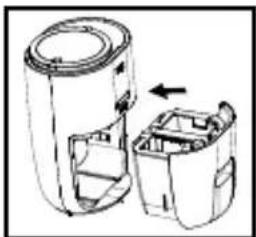
natural_image
Diagram of a device with two internal compartments and an arrow indicating rotation (no text or symbols)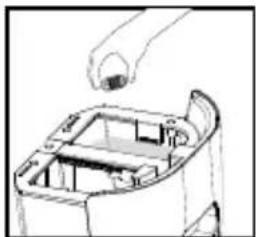
natural_image
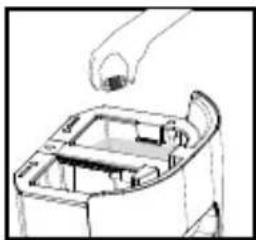
Line drawing of a mechanical component with a hand holding a tool above it (no text or symbols)- Add the soaked demineralization cartridge to the water tank.
natural_image
Diagram of a hand inserting a component into a device housing (no text or symbols visible)- Add the soaked demineralization cartridge to the water tank.
natural_image
Technical line drawing of a device with two views showing internal components (no text or symbols)- Replace water tank.
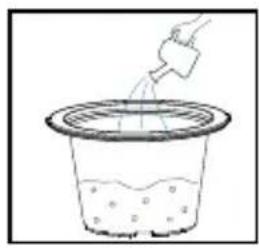
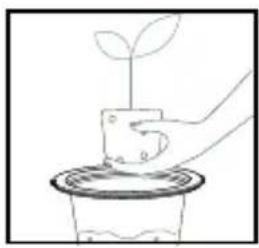
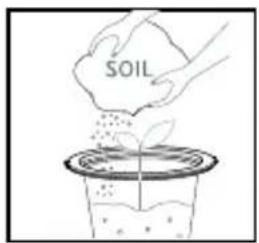
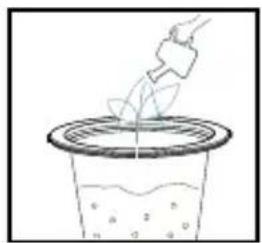
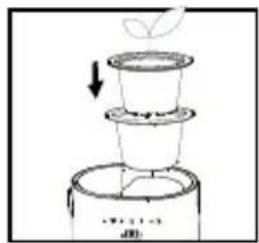
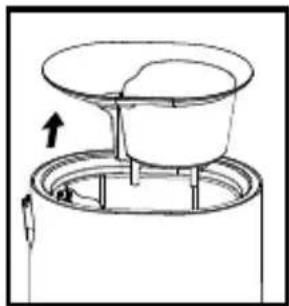
ADD A PLANT
For safety, transplanting, adding soil, watering, or any other plant manipulations must be done with the unit turned OFF, unplugged, and the planter pot removed from the humidifier and set on a flat, steady surface.
natural_image
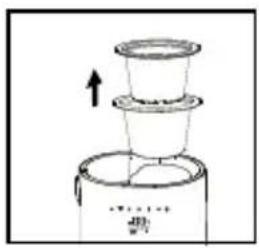
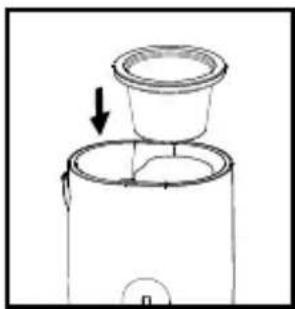
Simple line drawing of a multi-tiered container with an upward arrow, no text or symbols present.- Remove planter pot and the outer pot from the humidifier.
text_image
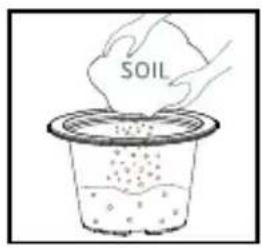
SOIL- Add soil in the planter pot.
natural_image
Simple line drawing of a container with liquid and a hand pouring liquid from a container (no text or symbols)- Dampen soil with a little water.
natural_image
Simple line drawing of a hand placing a small plant into a pot (no text or symbols)- Insert a plant from a 4" - 6" container into the pot.
text_image
SOIL- Add more soil, do not over fill.
natural_image
Simple line drawing of a container with liquid and a hand pouring liquid from a container (no text or symbols)- Water as needed.
natural_image
Simple line drawing of a plant growing from a multi-tiered container (no text or symbols)- Inset planter pot back into the outer pot and place back into the ultrasonic humidifier.
To ensure the stability of your humidifier and the safety of the user, your pot must not be more than 6" in diameter. This unit can hold a plant of a maximum height of 15" above the soil, 15" leaf span, and 2.4 lbs (1.1kg) weight of plant and soil total.
PRUNING YOUR PLANT

text_image
15 in / 0.38 m max 15 in / 0.38 m maxPruning is the practice of trimming parts of the plant to refresh its look and allow for new, healthy growth. Pruning needs will differ depending on the plant species.

Keep the plant height under 15 in/0.38 meter to ensure the stability of the unit and the safety of the users.
CAUTION: Ensure that plant foliage is not blocking air intake vents or mist output.
HOW TO OPERATE

POWER BUTTON
Turns humidifier on/off.
NOTE: When the reservoir is empty, the display will flash for a few seconds and you may hear the pump running while it is filling.

WARM MIST
Press to turn warm mist on/off. The warm mist icon will illuminate on the display. Once warm mist is selected, it will take 20-30 minutes to warm the mist.

MIST OUTPUT
Mist adjusts from the lowest output (1) to the highest output (3). To increase the mist output, press the mist output button. The corresponding mist level will be lit on the display. Use the 45-degree rotating mist nozzle to adjust the mist output direction. Do not point the mist nozzle toward walls or furniture.

NIGHT LIGHT/DISPLAY LIGHTS
Press the night light button once to turn on the night light. The light in the water tank of the humidifier will turn on. Press the button a second time to turn on the top rim accent light. Press the button a third time to turn off the display light. Press the button again and the top rim accent light dims. Press again and the top rim accent light turns off, press again and all lights will be off. Press again and the display lights are back on.

PROGRAMMING THE HUMIDITY LEVEL
The default humidistat setting is CO (continuous on). The programmable humidistat can be set in 5% increments, from 35% to 55% humidity or continuous on. The humidity level will increase by 5% each time the button is pressed and will be displayed on screen.
NOTE: Humidifier will turn off when the set humidity level is reached. Humidifier will turn on when the humidity level drops 5% below the set humidity level.
NOTE: To eliminate any programmed humidistat setting, continue to press the programmable humidistat button until you reach CO, one level after 55%.

AUTO MODE
Automatically adjusts mist output based on room humidity. Press to turn auto mode on/off. When on, AU will show on the digital display.
- Less than 35% RH, the humidifier will operate at mist level 3. The color code will glow red.
- Between 35%-55% RH the humidifier will operate at mist level 2. The color code will glow green.
- Over 55% RH the humidifier will cycle off until the humidity level drops below 55% RH. The color code will glow green.

TIMER
Press the timer button until the desired auto-shutoff timer setting is displayed.
The timer button will cycle through the following settings: 4, 8, 12, and 0 hours. To cancel the timer at any time, press the timer button until 0 hours is displayed.
NOTE: Always be sure the humidifier has a full tank of water prior to using the timer setting.
HOW TO USE OIL TRAY
CAUTION: Putting oil anywhere but the oil tray will damage the humidifier.
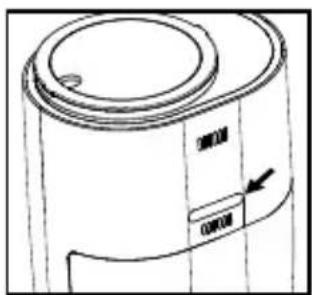
text_image
20000 20000- The oil tray is located on the back side of the humidifier.
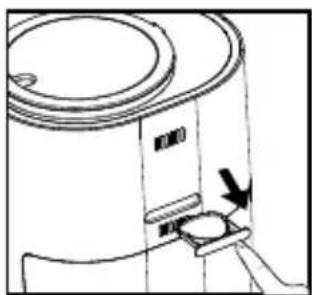
natural_image
Line drawing of a cylindrical device with a curved top and side connectors, showing an arrow pointing to a button (no text or symbols present)- Push to open and remove the tray. Use the 1 pre-installed essential oil pad in the oil tray (3 total included).
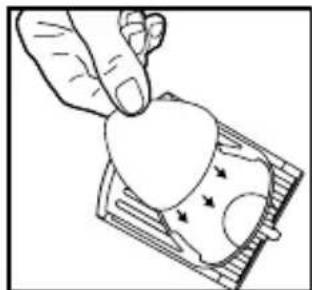
natural_image
Hand placing a heart-shaped object into a card slot (no text or symbols visible)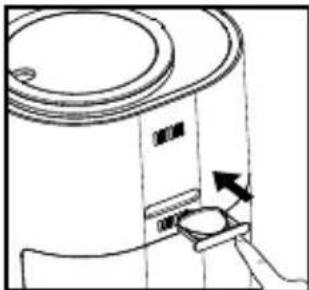
natural_image
Line drawing of a cylindrical device with a lid and a base, showing an arrow indicating direction (no text or symbols)- Place the oil tray back in its compartment and push to close. The scent will start automatically when the mist is turned on.
natural_image
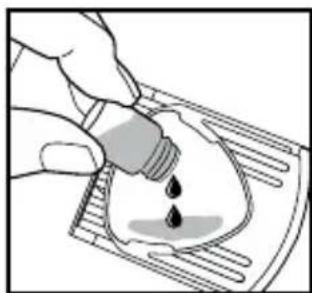
Illustration of a hand pouring liquid into a container with a droplet (no text or symbols)- Add 5–7 drops of essential oil to the pad. You may use more or less depending on personal preference. CAUTION: Only place essential oil on the pad and NOT directly into the tray.
NOTE: For use with the included Homedics essential oil pads only.
NOTE: Do not leave a used essential oil pad in the oil tray if it will be out of use for a long period of time.
ARE ESSENTIAL OILS SAFE TO USE AROUND PETS?
We should always exercise caution when using essential oils around pets. Keep all essential oil and aromatherapy products (like diffusers) out of the reach of pets. Keep open bottles away from pets to avoid internal consumption. We do not recommend the topical use of essential oils on pets, as they have a strong sense of smell and cannot get rid of the oil if they don't like it or it is disturbing them. When diffusing essential oils around pets, always diffuse in a well-ventilated area and leave an option for them to remove themselves from the space, such as leaving a door open. Every animal is different, so carefully observe how each animal responds when introducing an essential oil for the first time. If irritation occurs, discontinue the use of the essential oil. We recommend seeking medical attention if ingestion of essential oil occurs.
HOW TO CLEAN AND CARE
CAUTION: Before cleaning, turn off and unplug the humidifier. Clean over a waterproof surface near a faucet. DO NOT place any parts of the humidifier in the dishwasher. DO NOT submerge the humidifier base in water or any other liquid. Doing so will damage the humidifier. DO NOT use abrasive pads or brushes, harsh chemicals, detergents, or liquid soaps to clean the humidifier. Clean with a soft cloth, cotton swab, or soft brush.
WEEKLY CLEANING
natural_image
Diagram of a mechanical device with a top component and internal structure, showing an upward arrow (no text or symbols)- Remove reservoir cover and screen from the unit.
natural_image
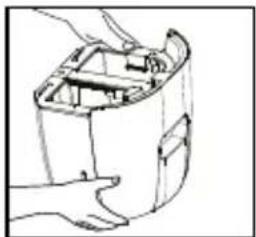
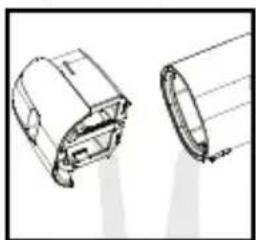
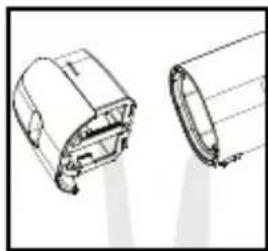
Technical line drawing of a mechanical component with two views (top and side), no visible text or symbols- Remove the water tank and pour out any water from the tank and water reservoir.

natural_image
Technical line drawing of a cylindrical mechanical component with an upward arrow indicating motion or assembly (no text or symbols present)- Remove the mist chimney and the nozzle.
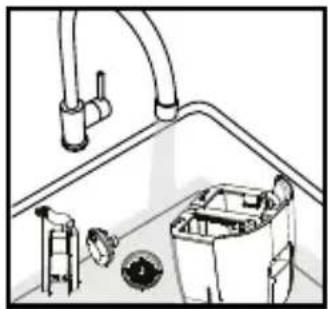
natural_image
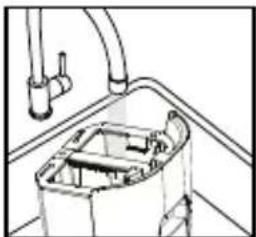
Line drawing of a kitchen sink with pipes, fixtures, and a bowl (no text or symbols)- Rinse the mist chimney, screen, mist nozzle, and water tank with room temperature water.
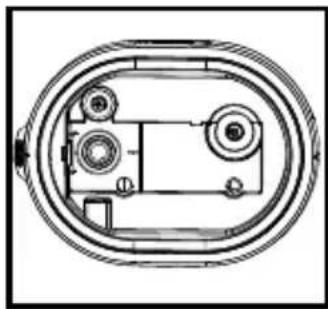
natural_image
Technical line drawing of a mechanical component with two circular parts and internal features (no text or symbols)- Wipe inside the reservoir with a damp soft cloth or soft brush.

natural_image
Technical line drawing of a cylindrical mechanical component with an inset showing a vertical ladder and a separate view of the end (no text or symbols)- Reinstall the mist chimney and nozzle. CAUTION: Never add water to the reservoir without the mist chimney installed.
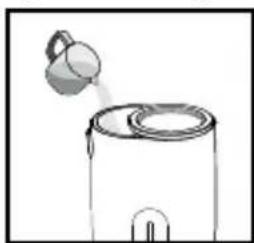
natural_image
Simple line drawing of a bucket pouring liquid into a container (no text or symbols)- Fill the water reservoir halfway with water, swish, and pour out. CAUTION: Never submerge the base in water on any other liquid.
natural_image
Line drawing of a coffee maker with a lid and base, showing no text or symbols- Thoroughly dry all parts with a soft cloth and reassemble.
SCALE REMOVAL
Perform when the Clean Reminder glows red, before storage, or as needed. Failure to do so may cause reduced or no mist output.
Prepare 4 cups/ 950 mL of a cleaning solution using a 50/50 mix of white vinegar and water.
natural_image
Technical line drawing of two mechanical components (no text or symbols)- Remove the tank cover and pour out any water from the tank and water reservoir. Then place tank back into unit.
natural_image
Simple line drawing of a container with a lid and a spout pouring liquid (no text or symbols)- Fill the tank carefully with 4-cups/950 mL of 50/50 white vinegar and water. Swish the solution around the water tank. Do not pour out the solution.
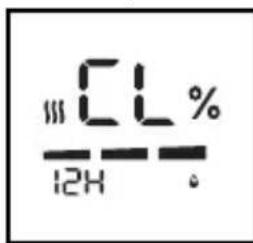
text_image
||CL% — 12H .- Plug in the power cord. Press and hold the power button and the mist button for 5 seconds. The pump will run for 45 seconds and the digital display will show "CL". Repeat step once more if needed.
natural_image
Technical line drawing of two mechanical components (no text or symbols)- Pour out the solution from the water tank and water reservoir. Rinse the water tank with clean water until the vinegar smell is gone and wipe dry with a soft cloth.
natural_image
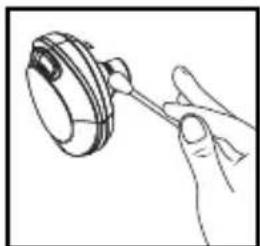
Line drawing of a hand holding a mechanical component (no text or symbols)- Remove the mist chimney and mist nozzle. Clean using the solution on a cotton swab. Rinse with water to remove the vinegar smell, dry and set aside.
natural_image
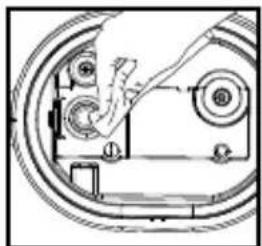
Technical line drawing of a mechanical assembly with no visible text or symbols- Wipe the transducer/ultrasonic membrane with a cotton swab to remove loosened scale. Never touch the transducer/ultrasonic membrane with your fingers; the natural oils in the skin can damage the surface.
natural_image
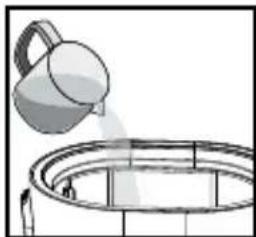
Illustration of a bucket pouring liquid into a circular tank (no text or symbols)- Reinstall the mist chimney and mist nozzle. Pour a small amount of water in the water reservoir, swish, and pour out. Repeat until the vinegar smell is gone. CAUTION: Never submerge the base in water on any other liquid.
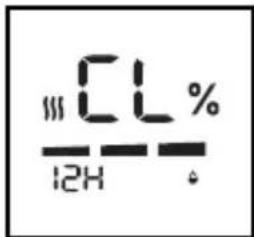
text_image
CL% 12H- If needed, repeat steps 3 and 4 with a tank full of clean water to flush the cleaning solution from the tubing.
natural_image
Simple line drawing of a coffee maker with a cup and lid, no text or symbols present- Completely dry all parts with a soft cloth before reassembling or storage.
CLEANING THE OIL TRAY
- Open the oil tray and remove the pad.
- Rinse the oil tray with water and wipe dry with a soft cloth. DO NOT clean with detergent or liquid cleaners.
NOTE: If continuing to use the same scent, set the oil pad aside for reuse.
DO NOT leave a used pad in the oil tray when storing.
STORAGE
Store in a cool, dry location.
Before storing
- Descale the humidifier following the Scale Removal instructions.
- Clean the oil tray following the Cleaning The Oil Tray instructions. DO NOT leave a used pad in the oil tray when storing.
After storing
- Rinse the tank with water prior to operating.
SPECIFICATIONS
ULTRASONIC TECHNOLOGY
This humidifier use ultrasonic, high frequency technology to convert water into a fine mist that is dispersed evenly into the air.
ELECTRICAL RATING
120VAC 60Hz, 70W
AUTO-SHUTOFF PROTECTION
When the tank is empty, the humidifier will shut off automatically. The out of water indicator will glow red.
CAPACITY
1.3 gallons
RUNTIME
Up to 60 hours. Runtime is based on setting the mist level on the low setting. Based on the natural humidity level in your home, the temperature of water you use, and the mist-level setting, you may experience longer or shorter runtimes.
ROOM SIZE
402 sq. feet / 37.3 sq. meters. Based on AHAM HU-1-2016 measurement as shown by independent laboratory testing.
QUIET OPERATION
21.5-25.0 dBA
REPLACEMENT PARTS
To purchase genuine Homedics Replacement parts, go to the retailer where you purchased your Homedics Ultrasonic Humidifier, or visit www.homedics.com (US), www.homedics.ca (CAN).
WATER TANK
Model #: PP-UHEPL125TANK
DEMINERALIZATION CARTRIDGE
Model #: UHE-HDC4

AROMA PADS
Model #: UHE-PAD1
TROUBLESHOOTING
| PROBLEM POSSIBLE CAUSE SOLUTION | ||
| No power • Unit is not plugged in• Unit is not turned on• No power at unit | • Plug in unit• Press the power button to turn humidifier on• Check circuits and fuses or try a different outlet | |
| Reduced or no mist • Humidifier has not warmed up• Low mist setting• Too much water in the water reservoir• Moving the humidifier with water in the tank• Scale build-up• Out of water• Water tank or water reservoir washed with detergent• Plant foliage is covering the air intake vents or mist nozzle• Not enough water in reservoir | • Allow humidifier to run 20 minutes to warm up• Turn to a higher mist setting• Remove the water tank and pour out all water in the water reservoir. Replace the water tank. The water reservoir will refill automatically.• Too much water in the water reservoir. See solution above.• Clean following the Scale Removal instructions.• Fill the water tank• Rinse thoroughly with clean water until there is no foam or smell from detergent• Move or prune plant foliage that is blocking air intake vents or mist nozzle.• When the reservoir is empty, the display will flash for a few seconds and you may hear the pump running while it is filling. | |
| Humidifier does not turn on or turns off during operation | • Out of water• Room humidity higher than programmable humidistat setting• Auto mode | • Fill the water tank• The humidifier has cycled off. Set the humidistat to a higher setting or to CO (continuous on).• Room humidity is higher than 56% RH. The humidifier will cycle on when the humidity drops below 55%RH. |
| Water overflows from water reservoir | Damaged water tankWater tank outlet valveMoving the humidifier with water in the tank causing too much water to enter the water reservoirTank not seated securely on the base | Check tank for cracks or damageDebris prevents a watertight seal. Use your finger to open the valve and rinse with water.Remove the water tank and pour out all water in the water reservoir. Replace the water tank. The water reservoir will refill automatically.Empty all water from the water reservoir and place the water tank properly on the base. The water reservoir will refill automatically. |
| Water overflows when top-filling | Water is poured too quickly.Screen is blocked.Water tank is not installed securely. | Slow your rate of pour so the unit does not overflow.Check the screen under the plant pot.If dirty, remove the screen to rinse any debris from the screen.Install water tank at the back of the unit and push in all the way. If the water tank is not securely installed, water cannot flow into the tank from the top fill area. |
| Peculiar odor Unit is newIf unit is in use, the odor may be a dirty tank or old water in the tank and water reservoir.Mold or fungus is growing in plant growth media. | Open the tank cover and let the tank air out in a cool, dry place for 12 hoursClean following the Weekly Cleaning instructions. If odor persists, clean following the Scale Removal instructionsCheck your plant and growth media to ensure no excessive mold or fungus growth. Repot your plant if necessary | |
| Excessive noise Unit is not levelLow water level | Place unit on a flat, even surface.Check the water level; refill the tank if the water is low | |
| White dust accumulation | Hard water usedDemineralization cartridge needs to be replaced | Use distilled water and a demineralization cartridgeReplace demineralization cartridge |
| Clean Reminder illuminates on the digital display | Transducer/Ultrasonic Membrane needs cleaningClean reminder needs to be reset | Follow Scale Removal instructions in the How to Clean and Care Section.After filling the tank with water, press and hold the Night-Light button until the red out of water symbol turns off. |
SUPPLIER'S DECLARATION OF CONFORMITY
Product Description: ultrasonic warm & cool mist humidifier with built-in planter Model Number: UHE-PL125
Trade Name: Homedics
FCC Compliance Statement
This device complies with Part 18 of the FCC Rules. Operation is subject to the following two conditions: (1) This device may not cause harmful interference, and (2) This device must accept any interference received, including interference that may cause undesired operation.
U.S. Contact Information
Company: Homedics, LLC.
Address: 3000 N Pontiac Trail, Commerce Township, MI 48390
8:30am-7:00pm EST Monday-Friday 1-800-466-3342
Homedics is not responsible for any radio or TV interference caused by unauthorized modifications to this equipment. Such modifications could void the user authority to operate the equipment.
This equipment has been tested and found to comply with the limits for a Class B digital device, pursuant to Part 18 of the FCC Rules. These limits are designed to provide reasonable protection against harmful interference in a residential installation. This equipment generates, uses, and can radiate radio frequency energy and, if not installed and used in accordance with the instructions, may cause harmful interference to radio communications. However, there is no guarantee that interference will not occur in a particular installation. If this equipment does cause harmful interference to radio or television reception, which can be determined by turning the equipment off and on, the user is encouraged to try to correct the interference by one or more of the following measures:
- Reorient or relocate the receiving antenna.
- Increase the separation between the equipment and receiver.
- Connect the equipment to an outlet on a circuit different from that to which the receiver is connected.
- Consult the dealer or an experienced radio/TV technician for help.
This product has been tested and compiles with the requirements for Federal Communication Commission, Part 18. Although this product is tested and compiles with FCC, it may interfere with other devices. If this product is found to interfere with another device, separate the other device and this product. Conduct only the user maintenance found in this instruction manual. Other maintenance and servicing may cause harmful interference and can void the required FCC compliance.
CAN ICES-001(B)/NMB-001(B)
Homedics
2-YEAR LIMITED WARRANTY
Homedics sells its products with the intent that they are free of defects in manufacture and workmanship for a period of 2 years from the date of original purchase, except as noted below. Homedics warrants that its products will be free of defects in material and workmanship under normal use and service. This warranty extends only to consumers and does not extend to Retailers.
To obtain warranty service on your Homedics product, contact a Consumer Relations representative for assistance. Please make sure to have the model number of the product available.
Homedics does not authorize anyone, including, but not limited to, Retailers, the subsequent consumer purchaser of the product from a Retailer or remote purchasers, to obligate Homedics in any way beyond the terms set forth herein. This warranty does not cover damage caused by misuse or abuse; accident; the attachment of any unauthorized accessory; alteration to the product; improper installation; unauthorized repairs or modifications; improper use of electrical/power supply; loss of power; dropped product; malfunction or damage of an operating part from failure to provide manufacturer's recommended maintenance; transportation damage; theft; neglect; vandalism; or environmental conditions; loss of use during the period the product is at a repair facility or otherwise awaiting parts or repair; or any other conditions whatsoever that are beyond the control of Homedics.
This warranty is effective only if the product is purchased and operated in the country in which the product is purchased. A product that requires modifications or adoption to enable it to operate in any other country than the country for which it was designed, manufactured, approved and/or authorized, or repair of products damaged by these modifications is not covered under this warranty.
THE WARRANTY PROVIDED HEREIN SHALL BE THE SOLE AND EXCLUSIVE WARRANTY. THERE SHALL BE NO OTHER WARRANTIES EXPRESS OR IMPLIED INCLUDING ANY IMPLIED WARRANTY OF MERCHANTABILITY OR FITNESS OR ANY OTHER OBLIGATION ON THE PART OF THE COMPANY WITH RESPECT TO PRODUCTS COVERED BY THIS WARRANTY. HOMEDICS SHALL HAVE NO LIABILITY FOR ANY INCIDENTAL, CONSEQUENTIAL, OR SPECIAL DAMAGES. IN NO EVENT SHALL THIS WARRANTY REQUIRE MORE THAN THE REPAIR OR REPLACEMENT OF ANY PART OR PARTS WHICH ARE FOUND TO BE DEFECTIVE WITHIN THE EFFECTIVE PERIOD OF THE WARRANTY. NO REFUNDS WILL BE GIVEN. IF REPLACEMENT PARTS FOR DEFECTIVE MATERIALS ARE NOT AVAILABLE, HOMEDICS RESERVES THE RIGHT TO MAKE PRODUCT SUBSTITUTIONS IN LIEU OF REPAIR OR REPLACEMENT.
This warranty does not extend to the purchase of opened, used, repaired, repackaged and/or resealed products, including but not limited to sale of such products on internet auction sites and/or sales of such products by surplus or bulk resellers. Any and all warranties or guarantees shall immediately cease and terminate as to any products or parts thereof which are repaired, replaced, altered, or modified, without the prior express and written consent of Homedics.
This warranty provides you with specific legal rights. You may have additional rights which may vary from state to state and country to country. Because of individual state and country regulations, some of the above limitations and exclusions may not apply to you.
For more information regarding our product line in the USA, please visit www.homedics.com. For Canada, please visit www.homedics.ca.
FOR SERVICE IN THE USA
cservice@homedics.com
8:30am-7:00pm EST Monday-Friday
1-800-466-3342
FOR SERVICE IN CANADA
cservice@homedics.ca
8:30am-5:00pm EST Monday-Friday
1-888-225-7378
Homedics
text_image
QR code with a white arrow pointing to it, indicating a decrease or direction in the data.MANUEL D'INSTRUCTIONS ET INFORMATIONS SUR LA GARANTIE
UHE-PL125 | L-04667, Rev. 2
INSTRUCTIONS DE SÉCURITÉ IMPORTANTES
LORS DE L'UTILISATION D'APPAREILS ÉLECTRIQUES, DES PRÉCAUTIONS DE SÉCURITÉ DE BASE DOIVENT TOUJOURS ÊTRE RESPECTÉES, NOTAMMENT LES SUIVANTES :
LISEZ ET CONSERVEZ CES INSTRUCTIONS.
DANGER - POUR RÉDUIRE LE RISQUE DE CHOC ÉLECTRIQUE :
natural_image
Line drawing of a kitchen appliance with a handle and side panel (no text or symbols)PANNEAU DE CONTRÔLE
natural_image
Simple line drawing of a cell partially submerged in a liquid with wavy lines above (no text or symbols)natural_image
Simple line drawing of a container with a lid and a spout (no text or symbols)natural_image
Diagram of a mechanical component with a handle and internal structure (no text or symbols)natural_image
Technical line drawing of a mechanical device with two views showing internal components (no text or symbols)natural_image
Simple line drawing of a cell partially submerged in water (no text or symbols)natural_image
Line drawing of a cylindrical device with internal components and an arrow indicating rotation (no text or symbols)natural_image
Line drawing of a hand holding a small object, possibly a device or container (no text or symbols visible)natural_image
Line drawing of a kitchen sink with pipes and a container (no text or symbols)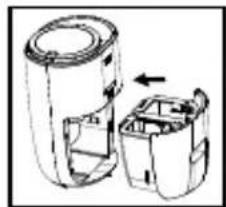
natural_image
Diagram of a device with two open compartments and an arrow indicating direction (no text or symbols)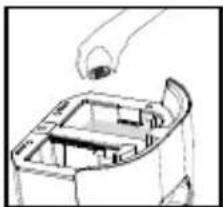
natural_image
Line drawing of a mechanical component with a handle and internal structure (no text or symbols)natural_image
Simple line drawing of a multi-tiered container with an upward arrow, no text or symbols present.natural_image
Simple line drawing of a container with liquid and a hand pouring liquid from a container (no text or symbols)natural_image
Simple line drawing of a hand placing a small plant into a pot (no text or symbols)natural_image
Simple line drawing of a hand pouring liquid into a container with bubbles (no text or symbols)natural_image
Simple line drawing of a plant growth setup with a leaf on top, showing a downward arrow and base (no text or symbols)natural_image
Line drawing of a kitchen appliance with a handle and arrow indicating a component (no text or symbols)natural_image
Illustration of a hand placing a heart-shaped object into a card with decorative patterns (no text or symbols)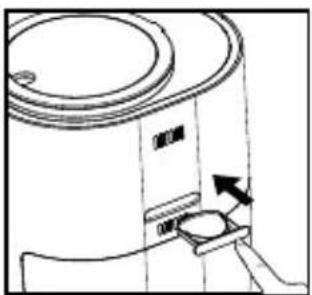
natural_image
Diagram of a cylindrical container with a side panel and an arrow indicating direction (no text or symbols)
natural_image
Illustration of a hand pouring liquid into a container with droplets (no text or symbols)natural_image
Diagram of a mechanical device with a rotating top and base, showing directional arrows (no text or symbols)natural_image
Technical line drawing of a mechanical component with two views (top and side), no visible text or symbolsnatural_image
Technical line drawing of a cylindrical mechanical component with an inset showing a small structure and directional arrows (no text or symbols)natural_image
Line drawing of a kitchen sink with pipes and a bowl, no text or symbols presentnatural_image
Technical line drawing of an oval-shaped mechanical component with internal components (no text or symbols)natural_image
Technical line drawing showing a mechanical assembly with a ladder, cylindrical housing, and a separate view of a curved component (no text or symbols)natural_image
Simple line drawing of a container with liquid being poured into it (no text or symbols)natural_image
Line drawing of a coffee maker with a lid and base, showing no text or symbolsnatural_image
Technical line drawing of two cylindrical mechanical components (no text or symbols)natural_image
Simple line drawing of a container with a lid and a spool pouring liquid from it (no text or symbols)natural_image
Technical line drawing of a mechanical component with two views (top and side), no text or symbols present.natural_image
Line drawing of a hand holding a mechanical component (no text or symbols)natural_image
Mechanical assembly diagram showing a hand operating a circular component with internal gears and mounting brackets (no text or symbols)natural_image
Simple line drawing of a bucket pouring liquid into a circular tank (no text or symbols)natural_image
Simple line drawing of a two-tiered cylindrical container with a lid and an arrow indicating direction (no text or symbols)Adresse : 3000 N Pontiac Trail, Commerce Township, MI 48390
POUR OBTENIR DU SERVICE AU CANADA
cservice@homedics.ca
text_image
Image containing a stylized logo or symbol with a curved arrow, possibly indicating rotation or direction.
text_image
QR code image containing encoded data, no visible human-readable textUHE-PL125 | L-04667, Rev. 2
natural_image
Simple line drawing of a cell partially submerged in water (no text or symbols)natural_image
Simple line drawing of a container with a lid and a spout, no text or symbols presentnatural_image
Simple line drawing of a cell partially submerged in water (no text or symbols)natural_image
Diagram of two electronic devices with one showing a transformation arrow (no text or symbols)natural_image
Line drawing of hands assembling or holding a mechanical component (no text or symbols visible)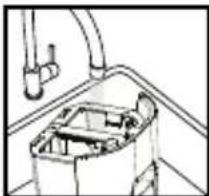
natural_image
Technical line drawing of a mechanical component with pipes and housing (no text or symbols)natural_image
Line drawing of a mechanical component with a handle and internal structure (no text or symbols)natural_image
Diagram of a cylindrical device with internal components and an arrow indicating rotation (no text or symbols)natural_image
Line drawing of a hand opening a mechanical component (no text or symbols)natural_image
Technical line drawing of a mechanical component with an arrow indicating rotation (no text or symbols)natural_image
Simple line drawing of a three-tiered cylindrical container with an upward arrow indicating flow or movement (no text or symbols)natural_image
Simple line drawing of a hand pouring liquid into a container with bubbles (no text or symbols)natural_image
Simple line drawing of a hand placing a small plant into a potted plant (no text or symbols)natural_image
Simple line drawing of a hand pouring liquid into a beaker with bubbles (no text or symbols)natural_image
Simple line drawing of a plant growing from a container with a leaf, showing a downward arrow (no text or symbols)natural_image
Technical line drawing of a cylindrical mechanical component with internal features and an arrow indicating direction (no text or symbols)natural_image
Line drawing of a cylindrical device with a handle and arrow indicating direction (no text or symbols)natural_image
Illustration of a hand placing a heart-shaped object into a tray with arrows indicating motion (no text or symbols)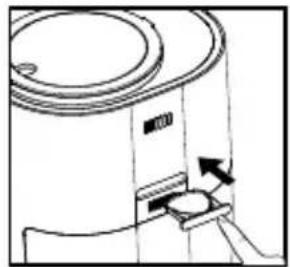
natural_image
Line drawing of a cylindrical device with a handle and arrow indicating direction (no text or symbols)natural_image
Illustration of a hand pouring liquid into a container with droplets (no text or symbols)CÓMO LIMPIAR Y CUIDAR
natural_image
Diagram of a mechanical device with a top component and internal structure, showing an arrow indicating direction (no text or symbols)natural_image
Technical line drawing of a mechanical component with two views (top and side), no visible text or symbolsnatural_image
Technical line drawing of a cylindrical mechanical component with an upward arrow indicating assembly or adjustment (no text or symbols present)natural_image
Line drawing of a kitchen sink with pipes, fixtures, and a bowl (no text or symbols)natural_image
Technical line drawing of a mechanical component with two circular features and internal components (no text or symbols)natural_image
Technical line drawing of a cylindrical mechanical component with an inset showing a vertical ladder and a separate view of its internal structure (no text or symbols)natural_image
Simple line drawing of a bucket pouring liquid into a container (no text or symbols)natural_image
Line drawing of a coffee maker with a lid and base, showing no text or symbolsnatural_image
Technical line drawing of two mechanical components (no text or symbols)natural_image
Simple line drawing of a container with a lid and a spout (no text or symbols)natural_image
Technical line drawing of two mechanical components with no visible text or symbolsnatural_image
Line drawing of a hand holding a small mechanical component (no text or symbols)natural_image
Technical line drawing of a mechanical assembly with gears and shafts (no text or symbols)natural_image
Illustration of a kettle pouring liquid into a circular tank (no text or symbols)natural_image
Simple line drawing of a container with a lid and an arrow indicating downward motion (no text or symbols)Empresa: Homedics, LLC.
Dirección: 3000 N Pontiac Trail, Commerce Township, MI 48390