
PPAKF 12 A1 - Rechargeable battery with charger PARKSIDE - Free user manual and instructions
Find the device manual for free PPAKF 12 A1 PARKSIDE in PDF.

| Product type | Rechargeable Li-ion battery with charger |
| Brand | Parkside |
| Model | PPAKF 12 A1 |
| Battery reference | PAPK 12 2.5 B1 |
| Charger reference | PLGK 12 6.0 B1 |
| Battery nominal voltage | 12 V --- |
| Battery capacity | 2.5 Ah |
| Battery energy | 30 Wh |
| Battery type | Lithium-ion, 3 cells |
| Recommended charging temperature | +4 °C to +40 °C |
| Operating temperature | +4 °C to +50 °C |
| Storage temperature | 0 °C to +45 °C |
| Maximum temperature | +50 °C |
| Charger - Input voltage | 220–240 V~, 50–60 Hz |
| Charger - Input power | 100 W |
| Charger - Output voltage | 12 V --- |
| Charger - Output current | 6 A |
| Charger - Protection class | II (double insulation) |
| Charging time (2.5 Ah battery) | 55 min |
| Compatibility | Devices from the X 12 V TEAM series |
| Package contents | 1 battery, 1 charger, 1 instruction manual |
| Warranty (charger) | 5 years |
| Warranty (battery) | 3 years |
| Repairability index | Spare parts available (see manual) |
| Usage | Household use only, in dry indoor areas |
Frequently Asked Questions - PPAKF 12 A1 PARKSIDE
User questions about PPAKF 12 A1 PARKSIDE
0 question about this device. Answer the ones you know or ask your own.
Ask a new question about this device
Download the instructions for your Rechargeable battery with charger in PDF format for free! Find your manual PPAKF 12 A1 - PARKSIDE and take your electronic device back in hand. On this page are published all the documents necessary for the use of your device. PPAKF 12 A1 by PARKSIDE.
USER MANUAL PPAKF 12 A1 PARKSIDE
Translation of the original instructions
FR BE
12 V BATTERIE 2,5 Ah + CHARGEUR 6 A
Mode d'emploi
GB/IE User manual Page 48

natural_image
Silhouette of a person disposing of trash into a bin (no text or symbols)natural_image
Simple line drawing of a trash bin with crossed lines indicating no waste or discharge (no text or symbols)Gerät entsorgen
natural_image
Symbol of a trash bin crossed with the lines, representing waste or discharge (no text or numbers present)List of pictograms used.....Page49
Introduction..... Page51
Intended use ...... Page52
Scope of delivery .... Page53
Parts list ...... Page53
Technical data ...... Page54
General safety notes ...... Page57
First set-up of the product. . . . . . . . Page64
Unpacking the product and basic cleaning .... Page64
Operation.... Page65
Charging the battery ..... Page65
Inserting the battery into the battery device .... Page69
Checking the battery charge level on the battery device.....Page69
Removing the battery from the battery device .... Page70
Wall mounted charger (optional) . . . Page71
Cleaning and maintenance ..... Page72
Cleaning.....Page72
Maintenance.....Page73
Storage Page73
Disposal..... Page74
Warranty Page77
Warranty claim procedure ..... Page79
Service....Page81
| List of pictograms used | |
 | Read the instruction manual. |
 | |
 | DANGER! – Designating a hazard with high risk, which will result in death or severe injury if not avoided (e.g. risk of suffocation) |
 | WARNING! – Designating a hazard with moderate risk, which can result in death or severe injury if not avoided (e.g. risk of electric shock) |
 | CAUTION! – Designating a hazard with low risk, which could result in minor or moderate injury if not avoided (e.g. risk of scalding) |
 | Direct current/voltage |
 | Alternating current/voltage |
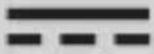
 | Protection class II (double insulation) |
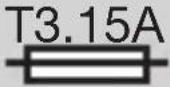 | Fuse |
 | Use the product in dry indoor spaces only. |
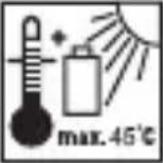 | Protect the battery against heat and continuous intense sunlight. |
 | Protect the battery against water and moisture. |
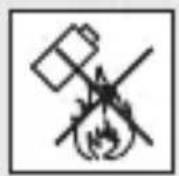
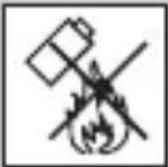 | Protect the battery from fire. |
| Safety informationInstructions for use | |
| CE mark indicates conformity with relevant EU directives applicable for this product. | |
| Lithium-ion battery | |
12V 2.5Ah BATTERY + 6A CHARGER
Introduction
We congratulate you on the purchase of your new product. You have chosen a high quality product. The instructions for use are part of the product. They contain important information concerning safety, use and disposal. Before using the product, please familiarise yourself with all of the safety information and instructions for use.
Only use the product as described and for the specified applications. If you pass the product on to anyone else, please ensure that you also pass on all the documentation with it.
Intended use
The rechargeable battery and the charger are to be used in conjunction with a device from the X 12 V TEAM series. The rechargeable battery is compatible with all devices in the X 12 V TEAM series. The rechargeable battery may only be charged using chargers from the X 12 V TEAM series.
The product is not intended for commercial use. Any other usage or modification of the product is deemed to be improper and carries a significant risk of accidents. The manufacturer accepts no responsibility for damage(s) attributable to misuse.
- Scope of delivery
1× Rechargeable battery
1× Charger
1× User manual
Parts list
Before reading, unfold the page containing the illustrations and familiarise yourself with all the functions of the product.
1 Rechargeable battery
2 Release button
3 Charger
4 Charging control LED – Red
5 Charging control LED – Green
6 Mains cord with mains plug

Technical data
| Rechargeable battery (Li-Ion): PAPK 12 2.5 B1 | |
| Number of cells: 3 | |
| Rated voltage: 12 V | --- |
| Capacity: 2.5 Ah | |
| Energy: 30 Wh | |
Recommended ambient temperature:
| Maximum temperature: max. | +50 °C |
| While charging: +4 to +40 °C | |
| During operation: +4 to +50 °C | |
| During storage: 0 to +45 °C | |
| Charger: PLGK 12 6.0 B1 | |
| Input: | |
| Rated voltage: 220-240 V~ | |
| Rated frequency: 50-60 Hz | |
| Rated power consumption: 100 W | |
| Output: | |
| Rated voltage: 12 V --- | |
| Rated current: 6 A | |
| Fuse (internal): | 3.15 AT3.15A |
| Protection class: | II/□ (double insulation) |
Charging time:
The following batteries are suitable for charging with the charger:
PAPK 12 A4 /B4
PAPK 12 C1/D1
PAPK 12 2.5 A1/B1
PAPK 12 5.0 A1/B1
We recommend you to charge these batteries with the following chargers:
PLGK 12 A3
PLGK 12 6.0 B1
| Charging time PLGK 12 6.0 B1 | |
| PAPK 12 A4 45 min | |
| PAPK 12 2.5 A1 / PAPK 12 2.5 B1 | 55 min |
| PAPK 12 B4 60 min | |
| PAPK 12 D1 / PAPK 12 5.0 A1/B1 | 80 min |
Customers can order compatible replacement batteries and chargers from Lidl online shops for the following countries:
Germany (lidl.de), France (lidl.fr), Belgium (lidl.be), Czech Republic (lidl.cz), Netherlands (lidl.nl), Poland (lidl.pl), Slovakia (lidl.sk), Spain (lidl.es)
Customers from all other countries can order from www.optimex shop.com.

General safety notes
This product can be used by children aged from 8 years and above and persons with reduced physical, sensory or mental capabilities or lack of experience and knowledge if they have been given supervision or instruction concerning use of the product in a safe way and understand the hazards involved.
Children shall not play with the product.
Cleaning and user maintenance shall not be made by children without supervision.

WARNING!
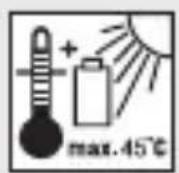

Do not dispose of batteries in household waste, fire or water. Do not subject the battery to strong sunlight over long periods and do not leave it on a heater (max. 45 °C).
Careful handling and use of battery devices
Charge the batteries only in chargers that are part of the X 12 V TEAM series. Risk of fire if a charger that is suitable for a specific type of battery is used with other batteries.
In the power tools, use only the batteries designed for the purpose. The use of other batteries may result in injuries and risk of fire.
- Keep the unused battery away from paper clips, coins, keys, nails, screws and other small metal objects, which could cause bridging of the contacts. A short circuit between the battery contacts may cause burns or fire.
If used incorrectly, liquid may leak from the battery. Avoid contact with this. In the event of accidental contact, rinse off with water.
If the liquid gets into eyes, seek medical assistance. Leaking battery fluid may cause skin irritations or burns.
- Do not use damaged or altered batteries. Damaged or altered batteries can be unpredictable and lead to fire, explosion or risk of injury.
Do not expose batteries to fire or elevated temperatures. Fire or temperatures over +130 °C can cause an explosion.
■ Follow all instructions for charging and never charge the battery or the battery-powered tool outside the temperature range stated in the operating instructions. Incorrect charging or charging outside the permitted temperature range may destroy the battery and increase the risk of fire.
Service
■ Never repair damaged batteries.
All battery repairs should be carried out by the manufacturer or authorised customer service centres only.
Special safety directions for battery-operated tools
■ Ensure that the device is switched off before inserting the battery.
Inserting a battery into a power tool that is switched on may result in accidents.
■ Recharge the batteries indoors only because the battery charger is designed for indoor use only.
To reduce the electric shock hazard, unplug the battery charger from the mains before cleaning the charger.
- Do not subject the battery to strong sunlight over long periods and do not leave it on a heater.
Heat damages the battery and there is a risk of explosion.
- Allow a hot battery to cool before charging.
Do not open up the battery and avoid mechanical damage to the battery. Risk of short circuit and fumes may be emitted that irritate the respiratory tract. Ensure fresh air and seek medical assistance in the event of discomfort.
- Do not use non-rechargeable batteries. The product could be damaged.
Correct handling of the battery charger
■ Children must be supervised to ensure that they do not play with the device.
Before each use, check the charger, cable and plug and have them repaired by qualified professionals and only with original parts. Do not use a defective charger and do not open it up yourself. This ensures that the safety of the device is maintained.
■ Ensure that the mains voltage matches the specifications on the charger rating plate. Risk of electric shock.
- Keep the charger clean and away from wet and rain. Do not use the charger outdoors. Dirt and the entry of water increase the risk of electric shock.
■ Operate the charger only with the appropriate original batteries.
Charging other batteries may result in injuries and risk of fire.
- Avoid mechanical damage to the charger. This can result in internal short circuits.
The charger must not be operated on or in the immediate vicinity of flammable surfaces (e.g. paper, textiles). Risk of fire due to heating caused by charging.
If the connection cable of this device is damaged, it must be replaced by the manufacturer or their customer service or by a similarly qualified person in order to avoid hazards.
The battery of your device is only partially precharged upon delivery and must be fully charged before being used for the first time. Insert the battery into the base and connect the charger to the mains.
■ Remove the mains plug when the battery is fully charged and disconnect the battery from the charger.
- Do not attempt to charge non rechargeable batteries in the charger.
- Do not use any accessories that are not recommended by the manufacturer. This can result in electric shock or fire.
- First set-up of the product
● Unpacking the product and basic cleaning
- Take the product out of the packaging and remove all packaging materials and plastic wrappings.
-
Check to make sure that all listed parts are included (see “Scope of delivery”).
-
Check whether the product and all parts are in good condition, if any damage or defect is detected, do not use the product, but follow the procedure described in chapter "Warranty".
- Before first use, clean all parts of the product as described in the chapter "Cleaning and maintenance".
Operation
● Charging the battery
WARNING!
Charge the batt ^1 in a dry room only. Prior to inserting the battery into the charger ^3 , check that the outer surface of the battery is clean and dry. There is a risk of injury due to electric shock.

CAUTION!
Do not expose the batt(1) to extreme conditions such as heat or impact. Risk of injury from escaping electrolytic solution! After eye/skin contact, rinse the affected areas with water or a neutraliser and consult a doctor.
NOTES
The rechargeable batt ^1 only reaches its full capacity once it has been charged several times.
- Charge the battery before using it for the first time.
■ Only use chargers from the X 12 V TEAM series to recharge the battery.
NOTES
If a fully recharged battery lasts for considerably shorter operating times, the battery is used up and needs to be replaced. Only use an original replacement battery from the X 12 V TEAM series.
- Let the battery cool down before charging.
The battery may be charged at any time without reducing the lifetime of the battery.
- Interrupting the charging process does not damage the battery.
☐ Charge the battery 1 before use when it is at medium or low charging level.
☐ The charging control LEDs (green 5 and red 4) indicate the status of the charger 3 and the battery:
| LED Status | |
| Green LED lights up without battery inserted | Charger ready for use |
| Green LED lights up | Battery fully charged |
| Red LED lights up | Battery charging |
- Remove the battery 1 from the battery device.
- Insert the battery into the charger 3.
- Connect the mains plug 6 to a socket outlet.
- When the battery is fully charged: Remove the battery from the charger. Disconnect the mains plug from the socket outlet.
- Inserting the battery into the battery device
NOTE
■ Only insert the rechargeable battery 1 once the battery device is ready for use.
☐ Push the battery along the guide rail into the device. You will hear it click into place.
- Checking the battery charge level on the battery device
NOTES
The batt ^1 must be inserted in the battery device to check the charge level.
The charge level of the battery is indicated by the charge level indicator on the battery device.
☐ Press and hold the power button during operation of the battery device.
☐ The charge level of the battery 1 is indicated by illumination of the corresponding LED lights:
| LED Status | |
| red – yellow – green | Battery fully charged |
| red – yellow Battery | half charged |
| red Battery needs | to be charged |
- Removing the battery from the battery device
NOTE
■ Switch off the battery device before removing the battery 1 from the battery device.
☐ Press both release buttons 2 on the battery. Pull the battery out of the battery device.
● Wall mounted charger (optional)

WARNING!
When drilling, be careful not to damage any supply lines. Use suitable search devices to find these or consult an installation plan for guidance. Contact with electrical cables can lead to electric shock and fire. Contact with a gas pipe can result in an explosion. Damage to a water pipe can lead to property damage and electric shock.
NOTE
You can also mount the charger 3 on the wall.
-
Attach 2 screws 100 mm apart to the desired position on a wall using dowels. The screw head can have a diameter of 7 to 9 mm. Leave the screw heads protruding at a distance of approx. 10 mm from the wall.
-
Attach the charger 3 with the openings of the wall bracket to the two screws. Pull the charger down until it stops.
● Cleaning and maintenance
Cleaning
NOTE
Do not use chemical, alkaline, abrasive or other aggressive detergents or disinfectants to clean this product as they might be harmful to its surfaces.
■ Never allow fluids to get into the product.
NOTE
The product must always be kept clean, dry and free from oil or grease. Remove debris from it after each use and before storage.
■ Regular and proper cleaning will help ensure safe use and prolong the life of the product.
□ Clean the battery with a dry cloth. Use a soft brush for areas that are hard to reach.
Maintenance
☐ The product is maintenance free.
Storage
☐ Remove the battery 1 from the battery device before storing it for longer periods of time.
☐ During a longer storage period, check the state of charge of the battery roughly every 3 months and recharge if necessary.
☐ The storage temperature for the battery is between 0 °C and +45 °C.
☐ Avoid extreme cold or heat during storage to ensure the battery output is not adversely affected.
☐ Only store the battery in a partially-charged state. During prolonged storage, 2 to 3 LEDs should be illuminated. The battery charge level indicator of the battery device signalises the charge level of the battery.
● Disposal
The packaging is made entirely of recyclable materials, which you may dispose of at local recycling facilities.
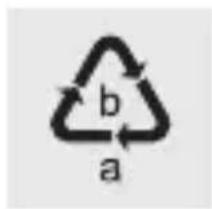
Observe the marking of the packaging materials for waste separation, which are marked with abbreviations (a) and numbers (b) with following meaning: 1–7: plastics/20–22: paper and fibreboard/80–98: composite materials.
Product:
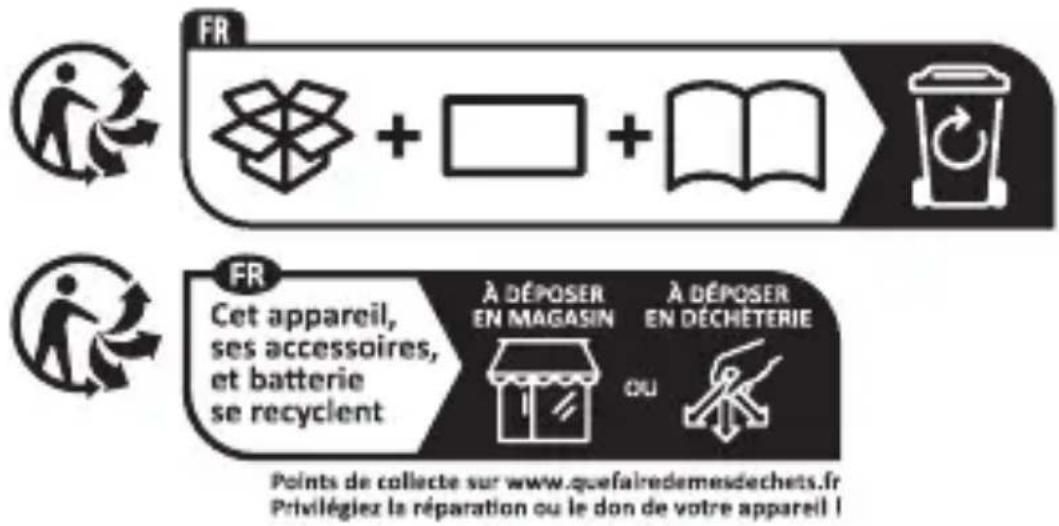
The product incl. accessories and packaging materials are recyclable and are subject to extended producer responsibility.
Dispose them separately, following the illustrated Info tri (sorting information), for better waste treatment.
The Triman logo is valid in France only.
natural_image
Silhouette of a person disposing of trash into a bin (no text or symbols)Contact your local refuse disposal authority for more details of how to dispose of your worn-out product.

to protect the environment, please dispose of the product properly when it has reached the end of its useful life and not in the household waste. Information on collection points and their opening hours can be obtained from your local authority.
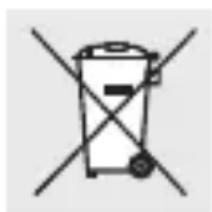
Faulty or used batteries/rechargeable batteries must be recycled. Please return the batteries/rechargeable batteries and/or the product to the available collection points.
natural_image
Simple line drawing of a trash bin with two crossed lines indicating no text or symbols (no text or numbers present)Environmental damage through incorrect disposal of the batteries/rechargeable batteries!
Remove the batteries/battery pack from the product before disposal.
Batteries/rechargeable batteries may not be disposed of with the usual domestic waste. They may contain toxic heavy metals and are subject to hazardous waste treatment rules and regulations. The chemical symbols for heavy metals are as follows:
Cd = cadmium, Hg = mercury, Pb = lead. That is why you should dispose of used batteries/rechargeable batteries at a local collection point.
Warranty
The product has been manufactured to strict quality guidelines and meticulously examined before delivery. In the event of material or manufacturing defects you have legal rights against the retailer of this product. Your legal rights are not limited in any way by our warranty detailed below.
The warranty for this product is 5 years (for Charger) / 3 years (for Battery) from the date of purchase. The warranty period begins on the date of purchase. Keep the original sales receipt in a safe location as this document is required as proof of purchase.
Any damage or defects already present at the time of purchase must be reported without delay after unpacking the product.
Should the product show any fault in 5 years (for Charger) / 3 years (for Battery) from the date of purchase, we will repair or replace it – at our choice – free of charge to you.
The warranty period is not extended as a result of a claim being granted. This also applies to replaced and repaired parts.
The warranty covers material or manufacturing defects. This warranty does not cover product parts subject to normal wear and tear, thus considered consumables (e.g. batteries, tubes, cartridges), nor damage to fragile parts, e.g. switches or glass parts.
● Warranty claim procedure
So that your request can be processed quickly, please observe the following instructions:
For all inquiries, please have the receipt and item number (IAN 480899_2410) ready as proof of purchase.
The article number can be taken from the identification label on the product, engraving on the product, the front cover of your manual (at the bottom left), or the sticker on the back or bottom of the product.
If malfunctions or other defects arise, first contact the service department indicated below by phone or email.
You can then send a product recorded as defective to the communicated service address postage free, making sure to enclose proof of purchase (receipt) and information on the details of the defect and when it occurred.
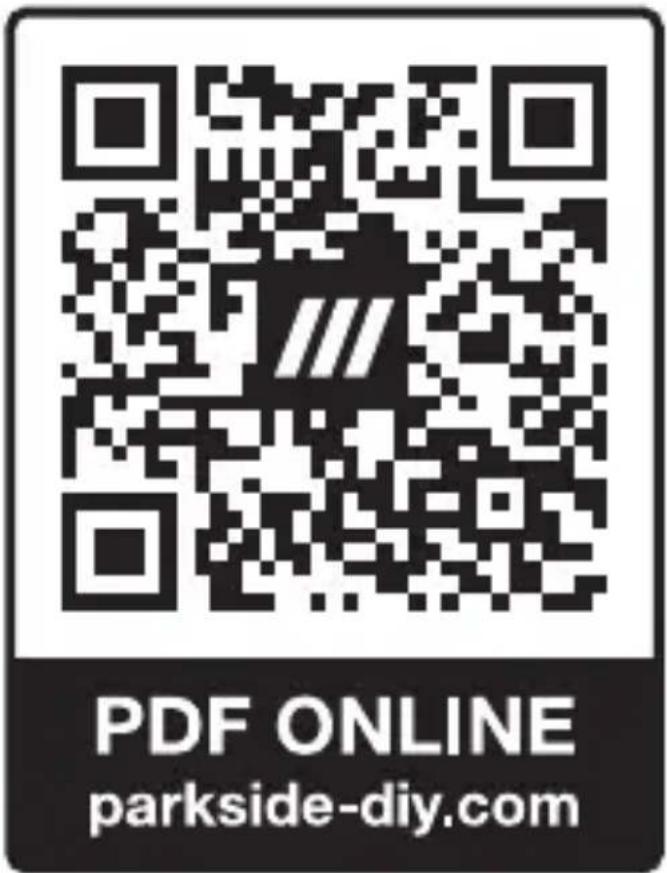
You can download and view this and numerous other manuals at parkside-diy.com. This QR code takes you directly to parkside-diy.com. Choose your country and use the search screen to search for the operating instructions. Entering the item number (IAN) 480899_2410 takes you to the operating instructions for your item.

Service

Service Great Britain
Tel.:08000569216
E Mail:owim@lidl.co.uk

Service Ireland
Tel.:1800200736
E Mail:owim@lidl.ie

Nettoyage.....Page110
Entretien..... Page111
Rangement Page111
Mise au rebut .... Page112
Garantie....Page116
Faire valoir sa garantie ..... Page121
Service après-vente .... Page124
natural_image
Silhouette of a person sorting trash into a bin (no text or symbols)natural_image
Symbol of a trash bin crossed with no text or labelsInleiding....Pagina129