
SDBK 2400 E1 - Iron SILVERCREST - Free user manual and instructions
Find the device manual for free SDBK 2400 E1 SILVERCREST in PDF.

| Product type | Cordless steam iron |
| Brand | SilverCrest |
| Model | SDBK 2400 E1 |
| Input voltage | 220-240 V~, 50-60 Hz |
| Power | 2000-2400 W |
| Protection class | I |
| Water tank capacity | Approx. 320 ml |
| Soleplate | Soleplate designed for optimal glide |
| Thermostat | 3 temperature settings (synthetic, silk/wool, cotton/linen) |
| Steam functions | Spray, burst of steam, continuous steam (3 positions: off, medium, max) |
| Anti-drip system | Yes (prevents water leakage at low temperature) |
| Anti-scale filter | Yes (permanent, maintenance-free) |
| Self-cleaning function | Yes (removes dirt and limescale) |
| Cordless ironing | Yes (iron rests on base to heat up) |
| Base locking | Yes (align arrows) |
| Power cord | With anti-kink protection |
| Cleaning | Damp cloth, no harsh products |
| Warranty | 3 years |
| Package contents | Iron, base, measuring cup, quick start guide |
Frequently Asked Questions - SDBK 2400 E1 SILVERCREST
User questions about SDBK 2400 E1 SILVERCREST
0 question about this device. Answer the ones you know or ask your own.
Ask a new question about this device
Download the instructions for your Iron in PDF format for free! Find your manual SDBK 2400 E1 - SILVERCREST and take your electronic device back in hand. On this page are published all the documents necessary for the use of your device. SDBK 2400 E1 by SILVERCREST.
USER MANUAL SDBK 2400 E1 SILVERCREST
natural_image
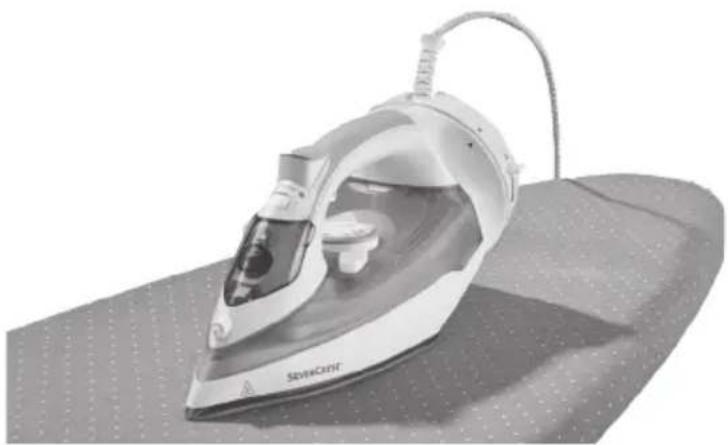
Exterior view of a steam iron on a flat surface (no text or symbols visible)KABELLOSES DAMPFBÜGELEISEN/ CORDLESS STEAM IRON/
FER À REPASSER VAPEUR SANS FIL SDBK 2400 E1
DE AT CH
KABELLOSES DAMPFBÜGELEISEN
Operation and safety notes
FR BE
FER À REPASSER VAPEUR SANS FIL
GB/IE Operation and safety notes Page 17
Warnings and symbols used Page 18
Introduction Page 18
Intended use....Page 18
Scope of delivery.... Page 19
Description of parts Page 19
Technical data Page 19
Safety instructions....Page 19
Burn hazards Page 22
Before first use Page 22
Operation Page 22
Setting the temperature Page 22
Ironing Page 22
Filling the water tank Page 23
Ending ironing Page 24
Additional product features....Page 24
Anti-drip system Anti Drip Page 24
Anti-lime filter Anti Calc Page 24
Cleaning and care Page 24
Self-cleaning function....Page 24
Storage Page 25
Disposal Page 25
Warranty Page 25
Warranty claim procedure....Page 26
Service Page 26
| Warnings and symbols usedThe following warnings are used in the user manual, short manual and on the packaging: | |||
 | DANGER! This symbol in combination with “Danger” marks a high-risk hazard that if not prevented could result in death or serious injury. |  | Alternating current/voltage |
 | Hertz (supply frequency) | ||
 | Watts | ||
 | WARNING! This symbol in combination with “Warning” marks a medium-risk hazard that if not prevented could result in death or serious injury. |  | NOTE: This symbol in combination with “Note” provides additional useful information. |
 | Use the product in dry indoor spaces only. | ||
 | CAUTION! This symbol in combination with the signal word “Caution” marks a low-risk hazard that if not prevented could result in minor or moderate injury. | 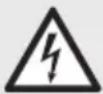 | Danger - Risk of electric shock! |
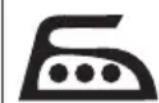
 | ATTENTION! This symbol with the signal word “Attention” indicates a possible property damage. |  | CAUTIONHot surface!This symbol indicates a hot surface. |
| [T20H] | Safety informationInstructions for use | [SHTX] | CE mark indicates conformity with relevant EU directives applicable for this product. |
CORDLESS STEAM IRON
Introduction
We congratulate you on the purchase of your new product. You have chosen a high quality product. The instructions for use are part of the product. They contain important information concerning safety, use and disposal. Before using the product, please familiarise yourself with all of the safety information and instructions for use.
Only use the product as described and for the specified applications. If you pass the product on to anyone else, please ensure that you also pass on all the documentation with it.
Intended use
This product is designed for ironing clothing. Do not use it for any other purpose.
This product is only intended for private household use, not for commercial purposes.
The manufacturer accepts no liability for damages caused by improper use.
- Scope of delivery
After unpacking the product, check if the delivery is complete and if all parts are in good condition. Remove all packaging materials before use.
1× Cordless steam iron
1× Stand base
1× Measuring cup
1× Short manual
• Description of parts
1 Water nozzle
2 Fill opening (water tank)
3 Steam control
4 Spray button
5 Steam burst button
6 Temperature control lamp (heating)
7 Base
8 Power cord (with anti-kink protection and cable clip) and power plug
9 Stand base lock
10 Stand base
11 Temperature control
12 Self-cleaning button
13 max mark (max. water fill level 320 ml)
14 Soleplate
15 Measuring cup (max. water fill level 320 ml)
- Technical data
| Input voltage: 220-240 V~,50-60 Hz | |
| Power consumption: 2000-2400 W | |
| Protection class: I | |

Safety instructions
BEFORE USING THE PRODUCT, FAMILIARISE YOURSELF WITH ALL OF THE SAFETY INFORMATION AND INSTRUCTIONS FOR
USE! WHEN PASSING THIS PRODUCT ON TO OTHERS, ALSO INCLUDE ALL THE DOCUMENTS!
In the case of damage resulting from non-compliance with these operating instructions the warranty claim becomes invalid! No liability is accepted for consequential damage! In the case of material damage or personal injury caused by incorrect handling or non-compliance with the safety instructions, no liability is accepted!
⚠ WARNING! RISK OF LOSS OF LIFE OR ACCIDENT TO INFANTS AND CHILDREN!
Never leave children unsupervised with the packaging material. The packaging material represents a danger of suffocation.
Children frequently underestimate the dangers. Always keep children away from the packaging material.
⚠️ DANGER! Risk of electric shock! Never attempt to repair the product yourself.
In case of malfunction, repairs are to be conducted by qualified personnel only.
⚠ WARNING! Risk of electric shock! Do not immerse the product's electrical components in water or other liquids. Never hold the product under running water.
⚠️ CAUTION! Risk of electric shock! Never use a damaged product. Disconnect the product from the power supply and contact your retailer if it is damaged.
⚠ WARNING! Risk of injury! Switch the product off and disconnect it from the power supply before cleaning work and when not in use.
⚠ WARNING! Misuse may lead to injury. Use this product solely in accordance with these instructions. Do not attempt to modify the product in any way.
This product can be used by children aged from 8 years and above and persons with reduced physical, sensory or mental capabilities, or lack of experience and knowledge if they have been given
supervision or instruction concerning use of the product in a safe way and understand the hazards involved.
■ Children shall not play with the product.
■ Cleaning and user maintenance shall not be made by children without supervision.
■ The product must not be left unattended while it is connected to the supply mains.
■ The plug must be removed from the socket-outlet before the water reservoir is filled with water.
■ The product must be used and rested on a flat, stable surface.
■ When placing the product on its stand, ensure that the surface on which the stand is placed is stable.
The product is not to be used if it has been dropped, if there are visible signs of damage or if it is leaking.
■ The product must only be used with the stand provided.
■ Ensure the rated voltage shown on the rating label corresponds with the voltage of the power supply.
■ The product demands increased energy consumption. Do not connect any other devices (e.g. heaters, air conditioners, etc.) to the same circuit.
The use of extension cords is not recommended. If the use of an extension cord is necessary, it must be designed for a current flow of at least 10 A. Lay cords in such a way that they may not be tripped over or otherwise damaged.
- Do not operate any product with a damaged power cord or plug, when the product malfunctions or has been damaged in any manner.
■ Only use the product in dry indoor rooms.
- Do not operate the product with wet hands or while standing on a wet floor. Do not touch the power plug with wet hands.
■ Protect the product against heat. Do not place the product close to open flames or heat sources such as stoves or heating appliances.
■ Regularly check the power plug and the supply cord for damages. If the supply cord is damaged, it must be replaced
by the manufacturer, its service agent or similarly qualified persons in order to avoid a hazard.
■ Protect the power cord against damages. Do not let it hang over sharp edges, do not squeeze or bend it. Keep the power cord away from hot surfaces and open flames and ensure that nobody can pull on or trip over it unintentionally.
■ Stop using the product if the anti-kink protection on the power cord is damaged!
- Do not pull the power plug out of the electrical outlet by the power cord. Do not wrap the power cord around the product.
■ Protect the product, its power cord and power plug against dust, direct sunlight, dripping and splashing water.
■ Always turn off the product before disconnecting it from the power supply.
- Keep the product at least 50 cm away from any objects (curtains, walls, etc.).
■ Refer to the “Cleaning and care” chapter for instructions on how to clean the product.
■ Store the product in a cool, dry place, protected from moisture and out of the reach of children.
Burn hazards
■ Only touch the product on the handle when it is heated up.
■ Steam is very hot. Never put your hands in front of the steam jet.
■ Never touch the soleplate in operation or while heated up (e.g. to test the temperature).
- Keep the iron and its cord out of reach of children less than 8 years of age when it is energized or cooling down.
Before first use
☐ Remove the packaging. Check if all parts are complete.
☐ To remove any production or transport residue, iron a simple scrap of fabric (e.g. a cloth or rag) before first use.
NOTE: The product may give off some vapours or odours during first use. These are production or transport residue that will quickly subside. There may also be quiet noises such as clicking or crackling. These will also quickly subside once the plastic parts have finally adjusted to the operating conditions.
Operation
Setting the temperature
☐ The pointer behind the temperature control 11 shows the current temperature setting.
☐ Turn the temperature control 11 clockwise from the lowest setting MIN to the desired temperature level.
☐ The temperature control 11 is divided into 3 ranges. They are general recommendations for different types of fabric:
eSymbol Setting
 | Low temperatureFor synthetic fabrics (e.g. nylon) |
 | Medium temperatureFor sensitive fabrics (e.g. silk or wool) |
 | High temperatureFor tough fabrics (e.g. cotton or linen) |
 | Highest temperatureFor steam ironing |
- Ironing
⚠️ ATTENTION! Before ironing, check the ironing instructions on the fabric or article of clothing. They are usually included on a sewn-on tag.
⚠️ ATTENTION! Operate the product on an even and solid surface.
i NOTES:
☐ The product can be operated cordless. This makes the product a little lighter. The power cord 8 is no longer in the way during ironing.
☐ As soon as the product is placed on the stand base 10, the soleplate 14 is heating up. The temperature control lamp 6 lights up until the set temperature is reached.
- Turn the temperature control 11 counterclockwise all the way to MIN.
- Connect the power plug 8 with an appropriate power outlet.
-
Make sure the power cord 8 is laid out safely.
-
Set the temperature control 11 to the desired temperature.
| Temperature control lamp 6 | |
| On Product has not yet reached the set temperature and is still heating up. | |
| Off The set temperature has been reached. |
- Once the set temperature has been reached, you can begin ironing.
Cordless ironing
NOTE: The arrows on the product ▼ and on the stand base ▲10 must be aligned.
- Place the product on the stand base 10.
- Wait until the temperature control lamp 6 goes out.
- The arrows and are aligned when the product is closed (Fig. C). Slide the stand base lock 9 to 8 and lift the product upwards.
- Start ironing.
- To heat up the product again, place it on the stand base 10.
NOTE: The product is only firmly locked to the stand base 10 when the arrows on the product ▼ and on the stand base ▲ are aligned.
Ironing with power cord
- Place the product on the stand base 10 . Make sure ▼ and ▲ are aligned (Fig. C).
- Wait until the temperature control lamp 6 goes out.
- Once the set temperature has been reached, you can start ironing.
NOTE: If you want to iron with many steam bursts in quick succession, ironing with the power cord 8 is recommended. Otherwise the temperature of the soleplate 14 may fall below the set temperature faster than normal as a result of too many steam bursts.
- Filling the water tank
⚠️ DANGER! Risk of electric shock!
Always disconnect the power plug 8 from the power outlet before filling the water tank.
⚠️ ATTENTION! Fill the water tank with tap water or distilled water without any additives. If your tap water is hard, use distilled water. Where the water is moderately hard, mix distilled water and tap water at a ratio of 1:1.
⚠️ ATTENTION! Use the measuring cup 15 to fill water into the water tank.
NOTE: The water tank has a filling capacity of approximately 320 ml.
NOTE: The max mark 13 that marks the maximum filling capacity applies when the product is set up vertically on the stand base 10.
-
Tip the product forward at approximately 45^ .
-
Open the lid of the fill opening 2.
-
Carefully pour water into the water tank. Do not exceed the max mark 13.
-
Close the lid of the fill opening 2.
Spray function

☐ You can spray the fabric in front of the soleplate 14 with water as required. To do so, press the spray button 4.
Steam burst

☐ You can steam the fabric through the soleplate 14 as required. To do so, press the steam burst button 5.
i NOTES:
☐ Vertical Steam You can also use the steam burst in a vertical position.
☐ The higher the set temperature, the stronger the steam burst.
Steam ironing
☐ You can also set the iron to continuously give off steam.
☐ The temperature control 11 should be at the highest level to produce enough steam.
☐ The steam control 3 has 3 positions:
 | ||
| No steam | Medium steam | Maximum steam |
NOTE: Continuous steam ironing is only possible when the iron is held horizontally. If you hold the iron vertically or set it down, this interrupts steam operation.
Ending ironing
- Turn the temperature control 11 counterclockwise all the way to MIN.
- Set down the product with the stand base 10 on an even, stable surface.
- Disconnect the power plug 8 from the power outlet.
- Let the product cool (this takes approximately 15 minutes). Do not leave the product unattended while it is still hot.
- To prevent limescale build-up, empty the water tank after each use. To do so, open the lid of the fill opening 2 . Empty the water tank via the fill opening by holding the iron upside down over a sink.
● Additional product features
Anti-drip system
☐ The product features an anti-drip system.
This prevents water from exiting from the soleplate 14 as long as the temperature is too low to produce steam. This feature prevents water stains on your clothing.
Anti-lime filter
☐ The product features an anti-lime filter. This is a permanent water filter. It is not in need of replacement or maintenance.
To maintain the filter's functionality, only fill the water tank with tap water or distilled water.
☐ Do not use any additives. They may damage the water filter.
● Cleaning and care
⚠️ DANGER! Risk of electric shock!
Always disconnect the plug 8 from the power outlet before cleaning the product.
⚠ WARNING! Do not immerse the product's electrical components in water or other liquids. Never hold the product under running water.
☐ Wipe down the product with a slightly damp cloth.
☐ Do not let any water or other liquids enter the product interior.
☐ Do not use any abrasive, aggressive cleaners or hard brushes to clean the product.
□ Clean the soleplate 14 using a damp cloth and a mild, non-scouring detergent.
☐ Let all parts dry completely after cleaning.
Self-cleaning function
☐ The product features a self-cleaning function to remove filth and limescale build-up in the steam channels.
☐ Use the self-cleaning function at least twice per month.
☐ If you use tap water: Use the self-cleaning function after every use.
NOTE: Check the hardness of your household's water with your local water supplier.
⚠️ DANGER! Risk of electric shock!
Always unplug the power plug 8 before filling the water tank.
- Never fill the water tank past the max mark 13 . To do so, open the lid of the fill opening 2 .
- Place the product on the stand base 10. Make sure ▼ and ▲ are aligned (Fig. C).
- Turn the temperature control 11 counterclockwise all the way to MIN.
-
Plug the power plug 8 into an appropriate power outlet.
-
Set the temperature control 11 to the highest temperature (turn clockwise all the way).
-
Set the steam control 3 to maximum steam power.
-
Wait for the product to heat up and the temperature control lamp 6 to go off.
-
Hold the product horizontally over a sink.
-
Press and hold the self-cleaning button 12 until no more steam or boiling, soiled water exits the product.
-
Empty the water tank of any residual water via the fill opening 2.
Storage
Place the product on the stand base 10. Make sure ▼ and ▲ are aligned (Fig. C)
☐ Store the product in the original packaging when it is not in use.
□ Store the product at a dry location out of the reach of children.
□ Store the product with the water tank empty only.
☐ Make sure the power cord 8 is rolled up evenly and without kinks around the base 7 (Fig. D).
Disposal
The packaging is made entirely of recyclable materials, which you may dispose of at local recycling facilities.
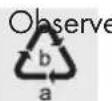
the marking of the packaging materials for waste separation, which are marked with abbreviations (a) and numbers (b) with following meaning: 1–7: plastics/20–22: paper and fibreboard/80–98: composite materials.
Product:
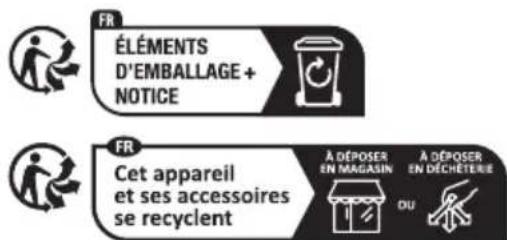
The product and packaging materials are recyclable and are subject to extended producer responsibility.
Dispose them separately, following the illustrated Info-tri (sorting information), for better waste treatment.
The Triman logo is valid in France only.

Contact your local refuse disposal authority for more details of how to dispose of your worn-out product.

protect the environment, please dispose of the product properly when it has reached the end of its useful life and not in the household waste. Information on collection points and their opening hours can be obtained from your local authority.
Warranty
The product has been manufactured to strict quality guidelines and meticulously examined before delivery. In the event of material or manufacturing defects you have legal rights against the retailer of this product. Your legal rights are not limited in any way by our warranty detailed below.
The warranty for this product is 3 years from the date of purchase. The warranty period begins on the date of purchase. Keep the original sales receipt in a safe location as this document is required as proof of purchase.
Any damage or defects already present at the time of purchase must be reported without delay after unpacking the product.
Should the product show any fault in materials or manufacture within 3 years from the date of purchase, we will repair or replace it – at our choice – free of charge to you. The warranty period is not extended as a result of a claim being granted. This also applies to replaced and repaired parts.
This warranty becomes void if the product has been damaged, or used or maintained improperly.
The warranty covers material or manufacturing defects. This warranty does not cover product parts subject to normal wear and tear, thus considered consumables (e.g. batteries, rechargeable batteries, tubes, cartridges), nor damage to fragile parts, e.g. switches or glass parts.
● Warranty claim procedure
To ensure quick processing of your claim, observe the following instructions:
Make sure to have the original sales receipt and the item number (IAN 467411_2404) available as proof of purchase.
You can find the item number on the rating plate, an engraving on the product, on the front page of the instruction manual (bottom left), or as a sticker on the rear or bottom of the product.
If functional or other defects occur, contact the service department listed below either by telephone or by e-mail.
Once the product has been recorded as defective you can return it free of charge to the service address that will be provided to you. Ensure to enclose the proof of purchase (sales receipt) and a short, written description outlining the details of the defect and when it occurred.
Service

Service Great Britain
Tel.:0800 0569216
E-Mail: owim@lidl.co.uk

Service Ireland
Tel.:1800 200736
E-Mail: owim@lidl.ie

