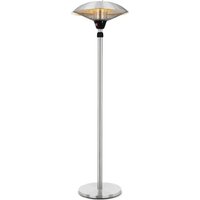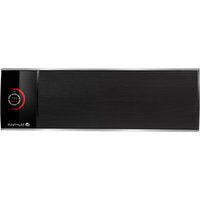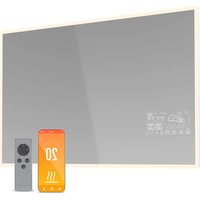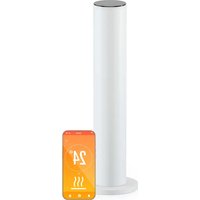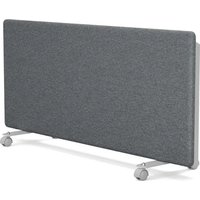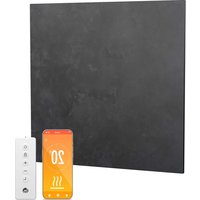
HeatSquare Smart - Heating Blumfeldt - Free user manual and instructions
Find the device manual for free HeatSquare Smart Blumfeldt in PDF.


User questions about HeatSquare Smart Blumfeldt
0 question about this device. Answer the ones you know or ask your own.
Ask a new question about this device
Download the instructions for your Heating in PDF format for free! Find your manual HeatSquare Smart - Blumfeldt and take your electronic device back in hand. On this page are published all the documents necessary for the use of your device. HeatSquare Smart by Blumfeldt.
USER MANUAL HeatSquare Smart Blumfeldt
natural_image
Green abstract circular logo with three curved segments (no text or symbols)
natural_image
Abstract green circular logo with two leaf-like shapes (no text or symbols)
natural_image
Abstract green circular logo with three leaf-like shapes forming a Y-shape (no text or symbols)text_image
QR code image containing encoded data, no visible human-readable textINHALT
Technische Daten 3
text_image
1 2 3 888 ←4Fernbedienung
Tasten
text_image
QR code with a green logo in the center, likely linking to a digital service or website.
text_image
QR code with a green logo in the center, likely linking to a digital service or website.PRODUKTINFORMATIONEN
natural_image
Symbol of a trash bin crossed with a diagonal line, no text or numbers presentBerlin Brands Group UK Limited PO Box 42 272 Kensington High Street London, W8 6ND United Kingdom
Congratulations on purchasing this equipment. Please read this manual carefully and take care of the following hints to avoid damages. Any failure caused by ignoring the items and cautions mentioned in the instruction manual are not covered by our warranty and any liability. Scan the QR code to get access to the latest user manual and other information about the product.
text_image
QR code image containing encoded data, no visible human-readable textCONTENTS
Technical Specifications 19
Safety Instructions 20
Assembly and Mounting 21
Control Panel 23
Operation 24
Device Control by Smartphone 27
Product Information 29
Disposal Considerations 31
Declaration of Conformity 31
TECHNICAL SPECIFICATIONS
| Article number 10046 | 394, 10046396 10046395 | 10046397 |
| Power supply 230V~ / | 50 Hz | |
| Power 350 W 700 W | ||
| Measurements | 60×60 cm 60×120 cm | |
| Mounting wall | ||
| WLANFrequencyMax. radio-frequencypower | 2.400–2.4835 GHz<20 dBm | |
SAFETY INSTRUCTIONS
- Check that the voltage indicates on the data plate corresponds with that of the local network before connecting the appliance to the mains power supply.
- If the supply cord is damaged, it must be replaced by a qualified engineer in order to avoid a hazard.
- The heater must not be positioned directly under the power socket.
- Keep furniture, curtains and other flammable material at least 1 meter away from the appliance.
- Keep out of reach of children and do not allow them to operate this appliance.
- This appliance is intended for household use only and should not be used for industrial purposes.
- Do not operate this appliance after a malfunction or after being damaged in any way.
- Repairs to electrical appliances should only be performed by a qualified electrician.
- Improper repairs may place user at serious risk.
- Do not run the mains cable under carpets, rugs, etc.
- Do not allow the mains cable to hang over sharp edges or come in contact with hot surfaces.
- In order to avoid overheating, do not cover the heater.
- Do not use this heater with a programmer, timer, separate remote control system or any other device that switches the heater on automatically, since a fire risk exists if the heater is covered or positioned incorrectly.
- Never immerse the product in water or any other liquid for any reasons.
- Do not use this heater in the immediate surroundings of a bath, a shower or a swimming pool.
- Do not use the appliance outdoors.
- Do not use if you have wet hands.
- Never use the appliance on or near hot surfaces.
- Do not operate with a damaged cord.
- Before cleaning the appliance, make sure it is unplugged from the power and that it is completely cooled.
- Do not clean the appliance with abrasive chemicals.
- Never use accessories that are not recommended or supplied by the manufacturer. It could cause danger to the user or damage to the appliance.
- This device may be only used by children 8 years old or older and persons with limited physical, sensory and mental capabilities and / or lack of experience and knowledge, provided that they have been instructed in use of the device by a responsible person who understands the associated risks.
- Children of less than 3 years should be kept away unless continuously supervised.
• Children aged from 3 years and less than 8 years shall only switch on/off
the appliance provided that it has been placed or installed in its intended normal operating position and they have been given supervision or instruction concerning use of the appliance in a safe way and understand the hazards involved. Children aged from 3 years and less than 8 years shall not plug in, regulate and clean the appliance or perform user maintenance.
- Children should be supervised to ensure that they do not play with the appliance.

CAUTION
Risk of burns! Some parts of this product can become very hot and cause burns. Particular attention has to be given where children and vulnerable people are present.
- Do NOT operate the heater in small rooms when occupied by people not capable of leaving the room by themselves. The surface of the heater can reach a surface temperature of up to 95°C, keep out of reach of children and disabled persons.
- Keep away babies and children from all packaging material such as plastic bags to avoid danger of suffocation.
ASSEMBLY AND MOUNTING
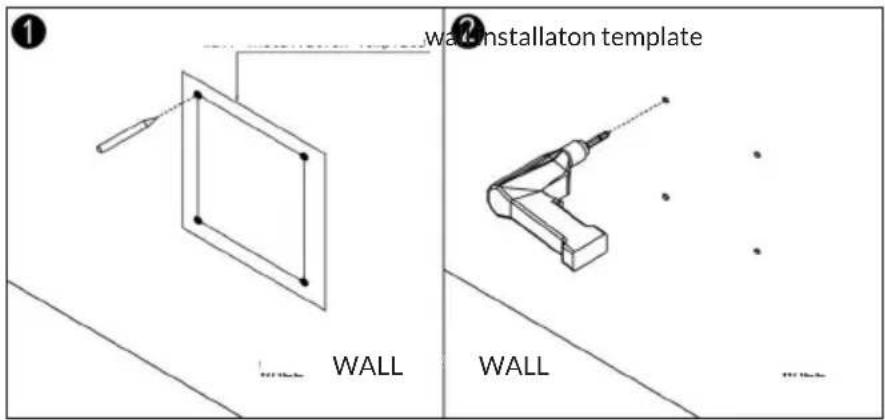
Note: The kit supplied in the package is designed for mounting on a solid wall. If mounted onto other types of walls, you will need appropriate fixings (not supplied). Please make sure the wall is safe to mount. We highly recommend to have the panel installed by a qualified electrician or installer. The heater must be at least 20 cm removed from all objects, walls, etc. The distance to the floor must be at least 20 cm.
text_image
wall installation template WALL WALLUse the supplied template to mark the position of the holes on the wall.
Drill holes using a 8-mm drill.
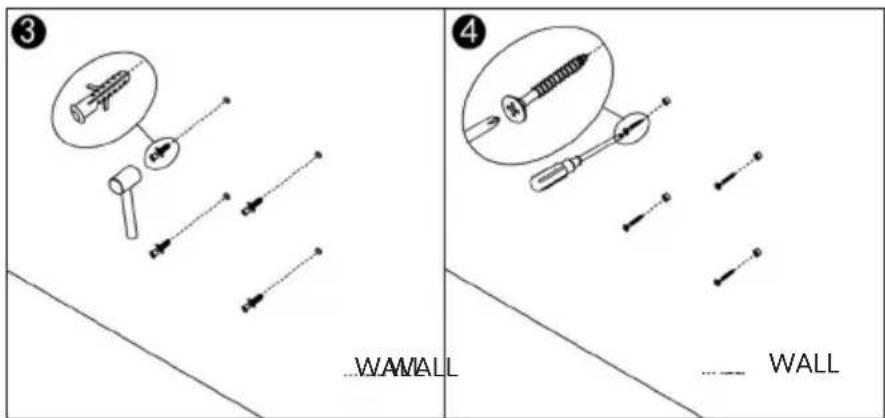
text_image
③ WAMALL WALLInsert the dowels into the holes.
Screw in the supplied screws to the wall.
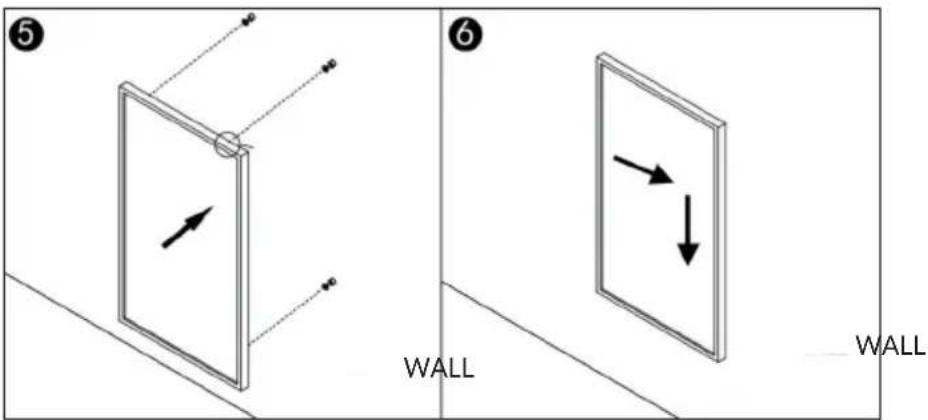
text_image
⑤ WALL ⑥ WALLMount the panel on the screws.
Move the panel to the left and then down:until it's secured..
CONTROL PANEL
General introduction to the control system
The Blumfeldt HeatSquare has an integrated WIFI control box, meaning there is no other additional thermostat needed to control the heater. Once the heater has been connected to the APP, the smartphone will take control and communicate with the control box. If your home internet is not working, it is still possible to operate the heater via the control box manually, once the heater is reconnected to the WIFI, the smart phone will take control again.
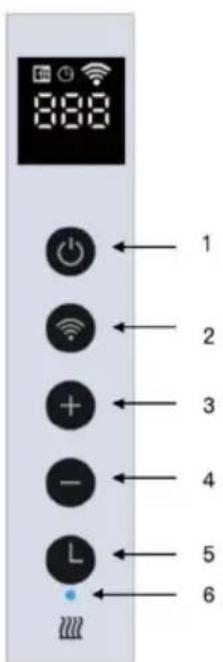
Control panel
1 Power button
2 WIFI button
3 "+" button
4 "-" button
5 Timer button
6 Heating status indicator
text_image
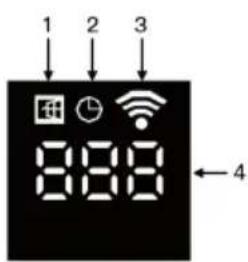
888 1 2 3 4 5 6Screen display
1 Open window Sign
2 Timer Sign
3 WIFI Sign
4 Temperature
text_image
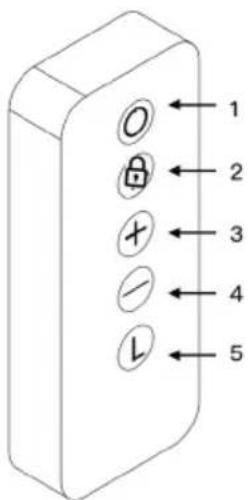
1 2 3 4 8 8 8Remote control
Buttons
1 Power
2 Child lock
3 Raise temperature
4 Lower temperature
5 Timer
text_image
1 2 3 4 5OPERATION
Manual Operation
Adjust desired temperature
Activate the power switch, press power button to power on the heater, adjust your desired temperature by pressing “-” or “+” button.
Countdown timer
Press timer button and "00H" will appear on the screen and you can set the desired countdown timer by pressing "-" and "+" button.
Child lock
Press and hold the "Power" button for 3 seconds, the screen will show "CL" to activate the child lock function, press and hold the "Power" button again to deactivate.
Open window detection
This heater is equipped with an open window detection function. If our control system detects that the room temperature decreases dramatically in short period when the heater is in the heating status, it will recognise that a window is open. The window sign on the screen will start to flash and the heater will power off for 30 minutes and get back to the previous setting automatically
after 30 minutes. You can deactivate and activate this function by long pressing for 5 seconds the “-” button on the heater, and the open window sign on the screen will disappear and appear accordingly.
Remote Controller Operation
This heater also equipped with the remote controller, which you can use to operate:
- Set the desire room temperature
- Countdown timer
- Child lock (screen shows CL when child lock was activated)
Temperature calibration
Power on the heater, Press and hold “+” button for 5 seconds to enter the temperature calibration, adjust the number by pressing “-” or “+” button, the calibration ranges from -5 °C to +5 °C.
WIFI reset
Power on the heater, press and hold "WIFI" button for 5 seconds until the WIFI indicator starts to flash to reset the Wifi connection.
WIFI function ON/OFF
Power on the heater, press and hold “Timer” button for 10 seconds to deactivate the WIFI function of this heater and the WIFI sign on the screen will disappear, long press “Timer” button for 10 seconds to activate it on again.
Mute the Beep sound
If you would like to mute the "Beep" sound when operating the heater, please press the "Power" button until screen shows "OFF", press and hold the "-"button for 3 seconds to mute the "Beep" Sound, long press the "-" button to activate it again.
Remote controller operation
This heater also equipped with the remote controller, which you can use to operate:
- Set the desire room temperature
- Countdown timer
- Child lock (screen shows CL when child lock was activated)
Explore more with the APP
After connecting this device to the APP, you can have the easy operation:
- Set up the schedules for heating
- Turn on countdown timer
- Calibrate the temperature sensor
- Mute the "beep" sound
• Using smart scenarios
• Voice control your heater
Connect to WIFI
- Activate the Power switch, press the "Power" button, the WIFI sign will start to flash rapidly, open the APP on your smart phone and add your device. Choose "Add Device", then "Add Manually", "Home Appliances (Small)" and then choose "Heater" to add the device.
- Enter the WIFI password of your home network. Please make sure your home WIFI is working as well as keep the heater and smartphone as close as possible to the WIFI router.
Please notice that this heater is only working with 2.4GHz WIFI networks, it doesn't support 5GHz networks currently. Also, make sure your internet router has enough capacity to add a new device. - Wait till the connecting status shows 100% to finish the settings and the WIFI signal on the control box will stop flashing.
If you still fail to establish a connection, please power off the heater and power it back on again after a few seconds. Long press the "Timer" button on the touch screen for 5 seconds until the Wifi indicator is flashing slowly and repeat the connection process under the AP mode.
If above procedure is not working, please try to reset to the factory mode and try the connection again.
If all the above is not working and the Wifi single light is flashing as expected, please try to disconnect an already connected smart device from your current Wifi router and try to connect thisheater to the Wifi router.
DEVICE CONTROL BY SMARTPHONE
If you integrate the device into your home WiFi, you can conveniently operate it via the associated Blumfeldt app. The app not only allows you to remotely control the device via your smartphone, but also gives you access to recipes and additional information.
Follow these steps to connect your smartphone to your Blumfeldt device:
- Download the Blumfeldt app first by scanning the QR code with your smartphone (see below), or download it directly from App Store or Google Play.
- Make sure your smartphone is connected to the same WiFi network that your Blumfeldt device is to be connected to.
- Open the Blumfeldt app.
- Sign in to your account. If you do not have an account, sign up in the Blumfeldt app.
- Follow the instructions from the app.
App Download
Use the scan function of your smartphone to scan the QR code and save the app on your smartphone.
Note: The app provides further information on how to use the app and help on how to connect to your device as soon as you open it for the first time.
iOS Android

text_image
QR code with a green logo in the center, likely linking to a digital service or website.
text_image
QR code with green logo in center, likely linking to a digital service or websiteTroubleshooting connection problems
If your Blumfeldt device cannot be found in the WLAN, check the following:
- The device is not plugged in. Make sure that your device is plugged into an electric socket.
- The device is not in pairing mode. Make sure that the WiFi indicator (LED) on the smart device control panel is blinking as described in the 'Reset WiFi settings' instruction of your smart device (instructions are usually available on device connection process).
- The WiFi access point does not operate on 2.4 GHz. Make sure that your access point operates on 2.4 GHz band and you have a separate SSID on 2.4 GHz band. If you are not sure about the operating band of your access point, please contact your internet provider company.
Important: please note that if your WiFi router is dual band - operating on both 2.4 GHz and 5 GHz band - you need to separate the SSIDs for each band and use the 2.4 GHz SSID for connection.
- Firewall settings of your WiFi network; the firewall setting of your WiFi network may not allow the Blumfeldt app to configure the WiFi settings on your smart device. Please make sure that you are not using a public WiFi network, e.g. airports, dormitories, companies, etc.
- Different credentials used in smartphone and the app. Make sure that the WiFi credentials entered in the Blumfeldt app are the same as the ones that your smartphone is connected to.
Following the above mentioned points, if your smart device still fails to connect to the app, please contact us via email for support: appsupport@go-bbg.com
PRODUCT INFORMATION
| Model identifier: 100463 | 94, 10046396 | |||||||
| Item Symbol Value Unit Item Symbol | Value Unit | |||||||
| Heat output | ||||||||
| Nominal heat output P | nom | 0.35 kW | ||||||
| Minimum heat output (indicative) | Pmin | N/A kW | ||||||
| Auxiliary electricity consumption Type of heat output/room temperature control | ||||||||
| At nominal heat output el | max | 0.35 kW single stage | heat output and no room temperature control | no | ||||
| At minimum heat output | elmin | - | kW two | or | more manual stages, no room temperature control | no | ||
| In standby mode | elSB | 0.001 kW with mechanic thermostat room temperature control no | ||||||
| with electronic room temperature control | no | |||||||
| electronic room temperature control plus day timer | no | |||||||
| electronic room temperature control plus week timer | yes | |||||||
| Other control options (multiple selections possible) | ||||||||
| room temperature control, with presence detection | no | |||||||
| room temperature control, with open window detection | yes | |||||||
| with distance control option | yes | |||||||
| with adaptive start control | no | |||||||
| with working time limitation | no | |||||||
| with black bulb sensor | no | |||||||
| Contact details | Chal-Tec GmbH, Wallstraße 16, 10179, Berlin, Germany | |||||||
| Model identifier: 10046395, 10046397 | ||||||||
| Item Symbol Value Unit Item Symbol | Value Unit | |||||||
| Heat output Useful efficiency (NCV) | ||||||||
| Nominal heat output P | nom | 0.7 kW | ||||||
| Minimum heat output (indicative) | Pmin | N/A kW | ||||||
| Auxiliary electricity consumption Type of heat output/room temperature control | ||||||||
| At nominal heat output el | max | 0.7 kW | single stage | heat output and no room temperature control | no | |||
| At minimum heat output el | min | - kW | two or more | manual stages, no room temperature control | no | |||
| In standby mode | elsB | 0.001 kW | with mechanic thermostat room temperature control no | |||||
| with electronic room temperature control | no | |||||||
| electronic room temperature control plus day timer | no | |||||||
| electronic room temperature control plus week timer | yes | |||||||
| Other control options (multiple selections possible) | ||||||||
| room temperature control, with presence detection | no | |||||||
| room temperature control, with open window detection | yes | |||||||
| with distance control option | yes | |||||||
| with adaptive start control | no | |||||||
| with working time limitation | no | |||||||
| with black bulb sensor | no | |||||||
| Contact details | Chal-Tec GmbH, Wallstraße 16, 10179, Berlin, Germany | |||||||
DISPOSAL CONSIDERATIONS
natural_image
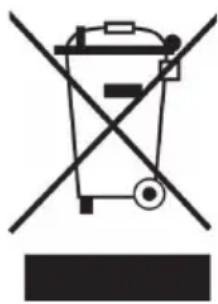
Symbol of a trash bin crossed with a diagonal line, no text or numbers presentIf there is a legal regulation for the disposal of electrical and electronic devices in your country, this symbol on the product or on the packaging indicates that this product must not be disposed of with household waste. Instead, it must be taken to a collection point for the recycling of electrical and electronic equipment. By disposing of it in accordance with the rules, you are protecting the environment and the health of your fellow human beings from negative consequences. For information about the recycling and disposal of this product, please contact your local authority or your household waste disposal service.
DECLARATION OF CONFORMITY

Manufacturer:
Chal-Tec GmbH, Wallstrasse 16, 10179 Berlin, Germany.
Importer for Great Britain:
Berlin Brands Group UK Limited PO Box 42 272 Kensington High Street London, W8 6ND United Kingdom
Hereby, Chal-Tec GmbH declares that the radio equipment type HeatSquare is in compliance with Directive 2014/53/EU. The full text of the EU declaration of conformity is available at the following internet address: use. berlin/10046394
For Great Britain: Hereby, Chal-Tec GmbH declares that the radio equipment type HeatSquare is in compliance with the relevant statutory requirements. The full text of the declaration of conformity is available at the following internet address: use.berlin/10046394
Chère cliente, cher client,
text_image
QR code image containing encoded data, no visible human-readable textCONTENU
text_image
1 2 3 8:88 ←4Contrôle à distance
Boutons
text_image
QR code with a green logo in the center, likely linking to a digital service or website.
text_image
QR code with a green logo in the center, likely linking to a digital service or website.INFORMATIONS SUR LE PRODUIT
natural_image
Symbol of a trash bin crossed with a diagonal line, no text or numbers presentDÉCLARATION DE CONFORMITÉ

Fabricant :
Chal-Tec GmbH, Wallstrasse 16, 10179 Berlin, Allemagne.
Berlin Brands Group UK Limited
Boîte postale 42
272 Kensington High Street
Londres, W8 6ND
Royaume-Uni
text_image
QR code image containing encoded data, no visible human-readable textINDICE
text_image
3 PARETE 4 PARETEtext_image
⑤ PARETE ⑥ PARETEtext_image
1 2 3 8:88 ←4Telecomando
Tasti
text_image
QR code with a green logo in the center, likely linking to a digital service or website.
text_image
QR code with a green logo in the center, likely linking to a digital service or website.natural_image
Symbol of a trash bin crossed with a diagonal line, no text or numbers presentBerlin Brands Group UK Limited PO Box 42
272 Kensington High Street
London, W8 6ND
United Kingdom
text_image
QR code image containing encoded data, no visible human-readable textÍNDICE
Datos técnicos 61
text_image
1 2 3 8:88 4Mando a distancia
Botones
text_image
QR code with a green logo in the center, likely linking to a digital service or website.