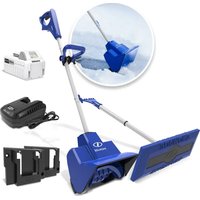
24V-SS11-ULT - Electric snow shovel Snow Joe - Free user manual and instructions
Find the device manual for free 24V-SS11-ULT Snow Joe in PDF.


User questions about 24V-SS11-ULT Snow Joe
0 question about this device. Answer the ones you know or ask your own.
Ask a new question about this device
Download the instructions for your Electric snow shovel in PDF format for free! Find your manual 24V-SS11-ULT - Snow Joe and take your electronic device back in hand. On this page are published all the documents necessary for the use of your device. 24V-SS11-ULT by Snow Joe.
USER MANUAL 24V-SS11-ULT Snow Joe
Form No. ASP-24V-SS11-ULT-880E-M (S)
natural_image
Technical line drawing of a snow anti-lock push-button tool with two internal components and a base plate (no text or symbols)THANK YOU FOR YOUR PURCHASE!
SCAN
REGISTER
ONLINE TODAY

Place UPC sticker here
ACTIVATE YOUR 2 YEAR WARRANTY
RECEIVE 90 DAYS BONUS COVERAGE
VISIT SHOPJOE.COM/REGISTER

text_image
+EXTENDED WARRANTYUPGRADE YOUR COVERAGE AT SHOPJOE.COM/REGISTER
FOR UP TO 3, 4, OR 5 YEARS OF TOTAL TOOL COVERAGE
When we say we stand behind our product, we mean it! Now you can blow, mow, cut, saw or tend to any other yard task with confidence, knowing that if there is a problem with your tool within the warranty period, we will gladly solve it.
We love to hear your feedback! Share your experience by writing comments and reviews on shopjoe.com, or connect with us on social media!

© SNOWJOECO
GOWITHJOE
OR HAS SOMETHING LEFT YOU LESS THAN SATISFIED?
WE'RE SORRY ABOUT THAT!
Our friendly customer service team is ready to help you with any issues you may have.
CALL US 1-866-225-9723
For fastest response CHAT WITH US SHOPJOE.COM/CHAT
Model 24V-SS11
Form No. ASP-24V-SS11-ULT-880E-M (S)
IMPORTANT!
Safety Instructions
All Operators Must Read These Instructions Before Use
Read all instructions before using this cordless snow shovel. Basic safety precautions should always be followed to reduce the risk of fire, electric shock and personal injury.
General Safety WARNINGS!
You and any other operator of this snow shovel must read, understand and follow these instructions in their entirety, and should reread them at the start of each snow season. Failure to follow these instructions may result in ELECTRIC SHOCK, FIRE and/or serious PERSONAL INJURY.
Notice the personal safety alert symbol △ used in this manual to draw your attention to a WARNING given along with the particular operating instruction. This means that the operation requires special ATTENTION, CAUTION and AWARENESS.
- Keep work area clean and well lit – Cluttered, dark areas invite accidents.
- Use the right product – Do not use this machine for any job except that for which it is intended.
- Replacement parts – When servicing this unit, use only identical replacement parts. Replace or repair damaged cord immediately on the charger.
Do not use on gravel surfaces unless the snow shovel is adjusted for such surfaces in accordance with the operator's manual.
- Keep children, bystanders and pets away – All spectators, including pets, should be kept a safe distance away from the work area.
- Dress properly – Do not wear loose articles of clothing or jewelry. They can become caught in moving parts. Wear rubber boots.
- Avoid accidental starting – Make sure the safety switch and the trigger switch are in the off position before inserting the battery in the unit. Do not carry the cordless snow shovel with the safety switch and the trigger switch engaged.
-
Moving parts - Keep hands and feet away from moving parts. Keep guards in place and in proper working order.
-
⚠CAUTION! Exercise caution to avoid slipping or falling. Wear protective footwear that will protect your feet and improve your footing on slippery surfaces.
- Use safety glasses – Also use safety footwear, snug-fitting clothing, protective gloves, hearing and head protection.
- Stay alert – Watch what you are doing. Use common sense. Do not operate the cordless snow shovel when you are tired or under the influence of alcohol or drugs.
- Do not force the tool - It will perform better with less likelihood of personal or mechanical injury if it is used at the rate for which it was designed.
- Do not overreach – Keep proper footing and balance at all times.
-
If the cordless snow shovel strikes a foreign object, follow these steps:
-
Stop the cordless snow shovel. Remove the battery.
- Inspect for damage.
-
Repair any damage before restarting and operating the snow shovel.
-
Disconnect the tool – Turn off the power switch and remove the battery when it is not in use, before servicing it, when changing accessories and when performing any other maintenance task.
- Store idle tool indoors – When not in use, the cordless snow shovel should be stored indoors in a dry, locked place out of the reach of children.
- Maintain the cordless snow shovel with care – Follow the applicable maintenance instructions for replacing parts and changing accessories. Lubrication is not required.
This is the safety alert symbol. It is used to alert you to potential personal injury hazards. Obey all safety messages that follow this symbol to avoid possible injury or death.
Improperly using or maintaining this cordless snow shovel could result in injury or death. To reduce this potential, comply with the following safety instructions.
This cordless snow shovel can amputate hands and feet if used incorrectly. It can also pick up foreign objects, which can become dangerous projectiles when thrown into the air. Failure to observe the following safety instructions could result in serious personal injury.
Training
- Read, understand and follow all instructions on the machine and in the manual before operating this unit. Thoroughly familiarize yourself with the controls and the proper use of the equipment. Know how to stop the unit and disengage the controls quickly.
- Children should never be allowed access to the equipment. Adults should never operate the equipment without carefully reading and understanding these instructions.
- Keep the area of operation clear of all persons, particularly small children and pets.
• Exercise caution to avoid slipping or falling.
Preparation
- Thoroughly inspect the area where the equipment is to be used and remove all doormats, sleds, boards, wires and other foreign objects.
- Do not operate the equipment without wearing adequate winter garments. Avoid loose fitting articles of clothing that can become caught in moving parts. Wear footwear that will improve footing on slippery surfaces.
- Do not attempt to clear snow from a gravel or crushed rock surface. This product is intended for use only on paved surfaces.
- Never attempt to make any adjustments while the motor is running (except when specifically recommended by the manufacturer).
- Always wear safety glasses or eye shields during operation or while performing an adjustment or repair to protect your eyes from foreign objects that may be thrown from the machine.
Operation
- Do not put hands or feet near or under rotating parts. Keep clear of the discharge opening at all times.
- Exercise extreme caution when operating on or crossing gravel drives, walks or roads. Stay alert for hidden hazards or traffic.
- After striking a foreign object, stop the motor. Thoroughly inspect the cordless snow shovel for any damage, and repair the damage before restarting and operating the cordless snow shovel.
- If the unit should start to vibrate abnormally, stop the motor and check the unit immediately to ascertain the cause. Vibration is generally a sign of trouble.
- Stop the motor and remove the battery whenever you leave the operating position, when transporting the unit, before unclogging the rotor blade housing and when making any repairs, adjustments or inspections to the unit.
- When cleaning, repairing or inspecting the cordless snow shovel, make sure that all moving parts have come to a complete stop before beginning work.
• Exercise extreme caution when operating on slopes. -
Never operate the cordless snow shovel without proper guards and other safety devices in place and in proper working order.
-
Never direct the discharge toward people or areas where property damage can occur. Keep children, pets and other bystanders away from the work area.
- Do not overload the machine capacity by attempting to clear snow at too fast a rate.
- Look behind and use care when backing up with the cordless snow shovel.
- Never operate the cordless snow shovel without good visibility or light. Always be sure of your footing, and keep a firm hold on the handles. Walk, never run, with the unit.
Clearing a Clogged Rotor Housing
Hand contact with the rotating rotor blades inside the rotor housing is the most common cause of injury associated with cordless snow shovels. Never use your hands to clear a clogged rotor housing.
To clear the rotor housing:
- Shut the motor off and remove the battery.
- Wait 10 seconds to be sure the rotor blades have come to a complete stop.
- Always use a clean-out tool, not your hands, to free the rotating blades.
Maintenance and Storage
- Check all fasteners at frequent intervals for proper tightness to ensure that the equipment is in safe working condition.
- Always refer to the operator's manual for important details, such as how to properly store your cordless snow shovel for an extended period of time.
- Maintain or replace safety and instruction labels as needed.
- Run the machine a few minutes after throwing snow to prevent the rotor blades from freezing.
Battery + Charger Safety Instructions
We pay a great deal of attention to the design of every battery pack to ensure that we supply you with batteries that are safe, durable and have a high energy density. The battery cells have a wide range of safety devices. Each individual cell is initially formatted and its electrical characteristic curves are recorded. This data is then used exclusively to be able to assemble the best possible battery packs.
Despite all the safety precautions, caution must always be exercised when handling batteries. The following points must be obeyed at all times to ensure safe use. Safe use can only be guaranteed if undamaged cells are used. Incorrect handling of the battery pack can cause cell damage.
IMPORTANT! Analyses confirm that incorrect use and poor care of high-performance batteries are the main factors responsible for personal and/or product damage.
⚠ WARNING! Use only approved replacement batteries; other batteries may damage the cordless snow shovel and cause it to malfunction, which can lead to serious personal injury.
⚠ WARNING! Do not use a battery pack or appliance that is damaged or modified. Damaged or modified batteries may exhibit unpredictable behavior resulting in fire, explosion or risk of injury.
Do not modify or attempt to repair the appliance or the battery pack except as indicated in the instructions for use and care.
Have your battery pack serviced by a qualified repair person using only identical replacement parts. This will ensure that the safety of the battery pack is maintained.
⚠️CAUTION! To reduce the risk of injury, charge the IONMAX 24V lithium-ion battery pack only in its designated IONMAX 24V lithium-ion lithium-ion charger. Other types of chargers present risk of fire, personal injury and damage. Do not wire a battery pack to a power supply plug or car cigarette lighter. Such misuse will permanently disable or damage the battery pack.
- Avoid dangerous environments – Do not charge the battery pack in rain, snow or in damp or wet locations. Do not use the battery pack or charger in the presence of explosive atmospheres (gaseous fumes, dust or flammable materials) because sparks may be generated when inserting or removing the battery pack, which could lead to a fire.
- Charge in a well-ventilated area – Do not block the charger vents. Keep them clear to allow for proper ventilation. Do not allow smoking or open flames near a charging battery pack. Vented gases may explode.
NOTE: The safe temperature range for the battery is 41^ F – 105^ F ( 5^ C – 40.5^ C). Do not charge the battery outside in freezing weather; charge it at room temperature.
- Maintain charger cord – When unplugging the charger, pull the plug, not the cord, from the receptacle to reduce the risk of damage to the electrical plug and cord. Never carry the charger by its cord or yank it by the cord to disconnect it from the receptacle. Keep the cord away from heat, oil and sharp edges. Make sure the cord will not be stepped on, tripped over or subjected to damage or stress when the charger is in use. Do not use the charger with a damaged cord or plug. Replace a damaged charger immediately.
- Do not use an extension cord unless it is absolutely necessary – Using the wrong, damaged or improperly wired extension cord poses a risk of fire and electric shock. If an extension cord must be used, plug the charger into a properly wired 16 gauge or larger extension cord with the female plug matching the male plug on the charger. Make sure that the extension cord is in good electrical condition.
- Charger 24VCHRG-QC is rated for 120 volt AC only – The charger must be plugged into an appropriate receptacle.
- Use only recommended attachments – Use of an attachment not recommended or sold by the battery charger
or battery pack manufacturer may result in risk of fire, electric shock or personal injury.
- Unplug charger when not in use – Make sure to remove battery packs from unplugged chargers.
⚠ WARNING! To reduce the risk of electric shock, always unplug the charger before performing any cleaning or maintenance. Do not allow water to flow into the charger. Use a Ground Fault Circuit Interrupter (GFCI) to reduce shock hazards.
- Do not burn or incinerate battery packs – Battery packs may explode, causing personal injury or damage. Toxic fumes and materials are created when battery packs are burned.
- Do not crush, drop or damage battery packs – Do not use the battery pack or charger if they have sustained a sharp blow, been dropped, run over or have been damaged in any way (i.e. pierced with a nail, hit with a hammer, stepped on, etc.).
- Do not disassemble – Incorrect reassembly may pose a serious risk of electric shock, fire or exposure to toxic battery chemicals. If the battery or charger are damaged, contact an authorized All Season Power Customer Service center at 1-866-225-9723 for assistance.
- Battery chemicals cause serious burns – Never let a damaged battery pack contact the skin, eyes or mouth. If a damaged battery pack leaks battery chemicals, use rubber or neoprene gloves to safely dispose of it. If skin is exposed to battery fluids, wash the affected area with soap and water and rinse with vinegar. If eyes are exposed to battery chemicals, immediately flush with water for 20 minutes and seek medical attention. Remove and dispose of contaminated clothing.
- Do not short circuit – A battery pack will short circuit if a metal object makes a connection between the positive and negative contacts on the battery pack. Do not place a battery pack near anything that may cause a short circuit, such as paper clips, coins, keys, screws, nails and other metallic objects. A short-circuited battery pack poses a risk of fire and severe personal injury.
- Store your battery pack and charger in a cool, dry place – Do not store the battery pack or charger where temperatures may exceed 105°F (40.5°C), such as in direct sunlight or inside a vehicle or metal building during the summer.
Information about the battery
- The battery pack supplied with your cordless snow shovel is only partially charged. The battery pack has to be charged completely before you use the tool for the first time.
- For optimum battery performance, avoid low discharge cycles by charging the battery pack frequently.
- Store the battery pack in a cool place, ideally at 77°F (25°C) and charged to at least 40%.
- Lithium-ion batteries are subject to a natural aging process. The battery pack must be replaced at the latest when its capacity falls to just 80% of its capacity when new. Weakened cells in an aged battery pack are no longer
capable of meeting the high power requirements needed for the proper operation of your snow shovel, and therefore pose a safety risk.
- Do not throw battery packs into an open fire as this poses a risk of explosion.
- Do not ignite the battery pack or expose it to fire.
- Do not exhaustively discharge batteries. Exhaustive discharge will damage the battery cells. The most common cause of exhaustive discharge is lengthy storage or non-use of partially discharged batteries. Stop working as soon as the performance of the battery falls noticeably or the electronic protection system triggers. Place the battery pack in storage only after it has been fully charged.
- Protect batteries and the tool from overloads. Overloads will quickly result in overheating and cell damage inside the battery housing even if this overheating is not apparent externally.
- Avoid damage and shocks. Immediately replace batteries that have been dropped from a height of more than one meter or those that have been exposed to violent shocks, even if the housing of the battery pack appears to be undamaged. The battery cells inside the battery may have suffered serious damage. In such instances, please read the waste disposal information for proper battery disposal.
- If the battery pack suffers overloading and overheating, the integrated protective cutoff will switch off the equipment for safety reasons.
IMPORTANT! Do not press the ON/OFF switch any more if the protective cut-off has been activated. This may damage the battery pack.
- Use only original battery packs. The use of other batteries poses a fire risk and may result in injuries or an explosion.
Information about the charger and the charging process
- Please check the data marked on the rating plate of the battery charger. Be sure to connect the battery charger to a power supply with the voltage marked on the rating plate. Never connect it to a different mains voltage.
- Protect the battery charger and its cord from damage. Keep the charger and its cord away from heat, oil and sharp edges. Have damaged cords repaired without delay by a qualified technician at an authorized All Season Power Customer Service center at 1-866-225-9723.
- Electrical plugs must match the outlet. Never modify the plug in any way. Do not use any adapter plugs with grounded appliances. Unmodified plugs and matching outlets will reduce the risk of electric shock.
- Keep the battery charger, battery pack(s) and the cordless tool out of the reach of children.
- Do not use the supplied battery charger to charge other cordless tools.
- During periods of heavy use, the battery pack will become warm. Allow the battery pack to cool to room temperature
before inserting it into the charger to recharge.
- Do not overcharge batteries. Do not exceed the maximum charging times. These charging times only apply to discharged batteries. Frequent insertion of a charged or partially charged battery pack will result in overcharging and cell damage. Do not leave batteries in the charger for days on end.
- Never use or charge batteries if you suspect that it has been more than 12 months since the last time they were charged. There is a high probability that the battery pack has already suffered dangerous damage (exhaustive discharge).
- Charging batteries at a temperature below 41^ F ( 5^ C) will cause chemical damage to the cells and may cause a fire.
- Do not use batteries that have been exposed to heat during the charging process, as the battery cells may have suffered dangerous damage.
- Do not use batteries that have suffered curvature or deformation during the charging process or those that exhibit other atypical symptoms (gassing, hissing, cracking, etc.).
- Never fully discharge the battery pack (maximum recommended depth of discharge is 80%). A complete discharge of the battery pack will lead to premature aging of the battery cells.
Protection from environmental influences
- Wear suitable work clothes. Wear safety goggles.
- Protect your cordless tool and the battery charger from moisture and rain. Moisture and rain can cause dangerous cell damage.
- Do not use the cordless tool or the battery charger near vapors and flammable liquids.
- Use the battery charger and cordless tools only in dry conditions and at an ambient temperature of 41^ F – 105^ F ( 5^ C – 40.5^ C).
- Do not keep the battery charger in places where the temperature is liable to reach over 105^ F ( 40.5^ C). In particular, do not leave the battery charger in a car that is parked in the sunshine.
- Protect batteries from overheating. Overloads, overcharging and exposure to direct sunlight will result in overheating and cell damage. Never charge or work with batteries that have been overheated – replace them immediately, if possible.
- Store the charger and your cordless tool only in dry locations with an ambient temperature of 41^ F – 105^ F ( 5^ C – 40.5^ C). Store your lithium-ion battery pack in a cool, dry place at a temperature of 77^ F ( 25^ C). Protect the battery pack, charger and cordless tool from humidity and direct sunlight. Only place fully charged batteries in storage (charged to at least 40%).
- Prevent the lithium-ion battery pack from freezing. Battery packs that were stored below 32^ F ( 0^ C) for more than 60 minutes must be discarded.
- When handling batteries, be wary of electrostatic charge. Electrostatic discharges can damage the electronic protection system and the battery cells. Avoid electrostatic charging and never touch the battery poles.
Safety Symbols
The following table depicts and describes safety symbols that may appear on this product. Read, understand and follow all instructions on the machine before attempting to assemble and operate.
| Symbols SymbolsDescriptions Descriptions | |||
 | READ THE OPERATOR'S MANUAL(S) - Read, understand and follow all instructions in the user manual(s) before attempting to assemble and operate. |  | WARNING! Do not expose the unit to rain or wet conditions. Keep dry. |
 | SAFETY ALERT - Indicates a precaution, a warning or a danger. |  | DANGER! Cutting/dismemberment hazard - Keep feet away from the rotating auger. |
 | Wear hearing protection.Wear eye protection.Wear breathing protection. | 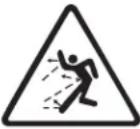 | CAUTION! Beware of stones and other foreign objects that could be thrown from the appliance. |
 | Wear safety gloves during use to protect hands. |  | Wear safety footwear at all times to provide protection against objects that may accidentally fall on feet. |
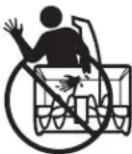 | Do not use hands to unclog chute. | 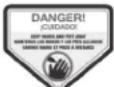 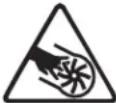 | DANGER! Cutting/dismemberment hazard - Keep hands away from the rotating auger. Do not use hands to unclog rotor housing. Stop motor before removing debris. |
 | Keep hands, feet and clothing away from the rotating auger to avoid injury. | 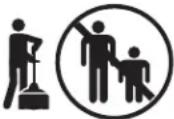 | Keep bystanders and children a safe distance (at least 11 yd/10 m) away from the work area. |
 | The rotating part will continuously run for several seconds after you turn off the machine. |  | Indoor use only. Only use battery charger indoors. |
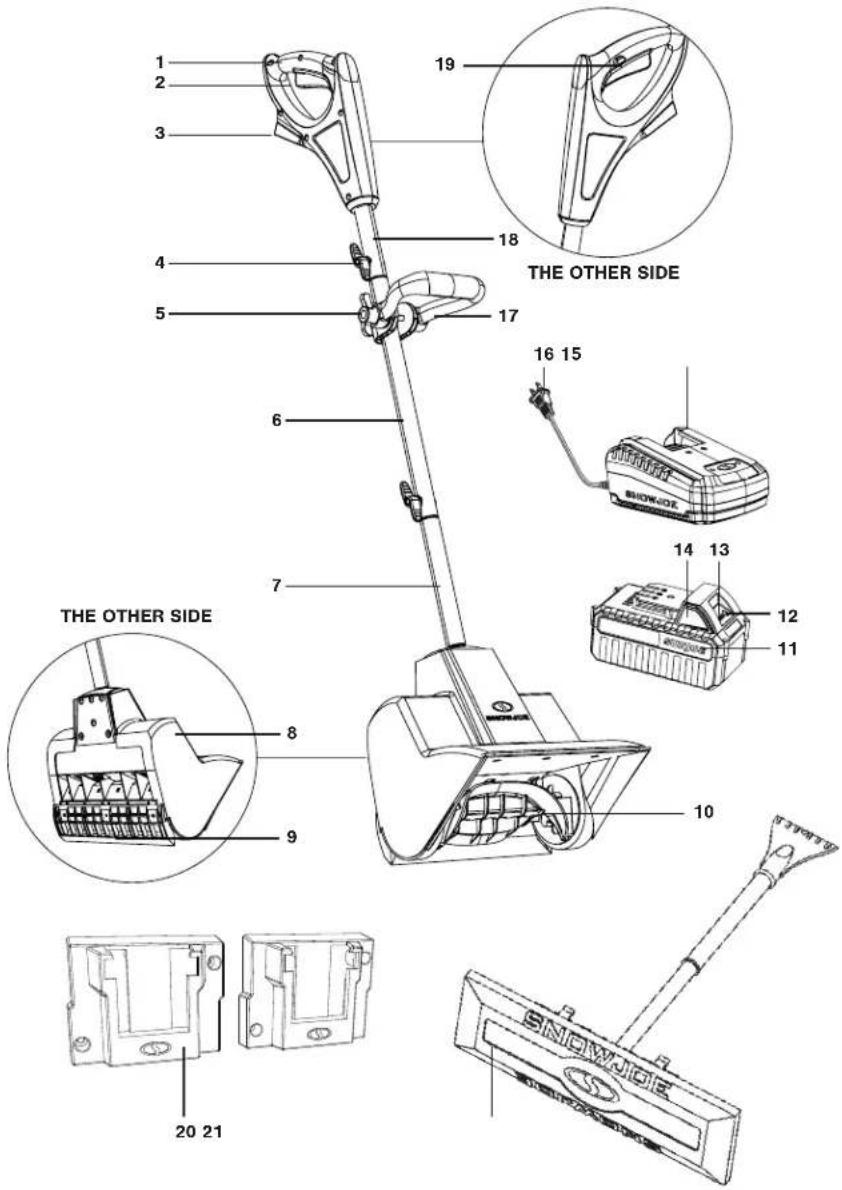
Know Your Cordless Snow Shovel
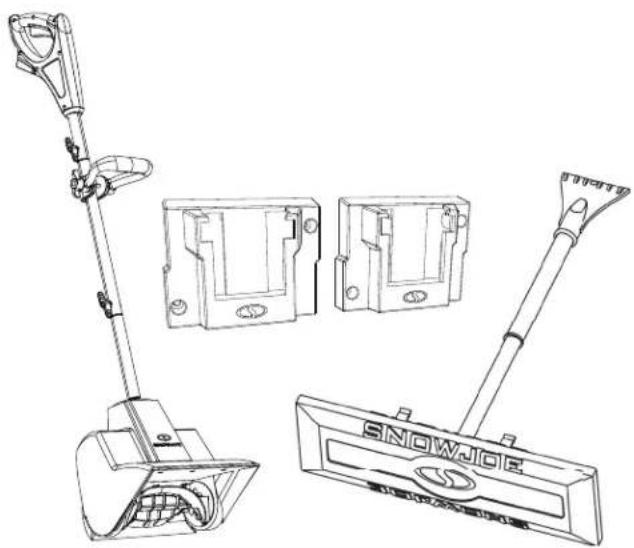
Read the owner's manual and safety rules carefully before operating your cordless snow shovel. Compare the illustration below to the actual unit in order to familiarize yourself with the location of the various controls and adjustments. Save this manual for future reference.
- Upper handle
- ON/OFF trigger switch
- Battery compartment
- Joint-fixing knob and bolt (2)
- Handle knob
- Middle pole
- Lower pole
- Motor housing
-
Scraper blade
-
Shovel blade
-
IONMAX 24V lithium-ion battery (24VBAT) featuring exclusive EcoSharp® technology
-
Push button for battery indicator
-
Battery indicator
-
Push lock button
-
IONMAX 24V lithium-ion battery charger (24VCHRG-QC)
-
Charger plug
-
Auxiliary handle
-
Upper pole
-
Safety switch
-
IONMAX mounted battery storage
-
2-in-1 telescoping snow broom
text_image
1 2 3 4 5 6 7 8 9 10 11 12 13 14 15 16 17 18 19 THE OTHER SIDE THE OTHER SIDE SNOWIDETechnical Data
Motor 400 W brush
Battery Voltage Max ^* .....24V D.C.
Battery Capacity 4.0 Ah
Charger Input 120V \~ 60 Hz 75 W
Charger Output 26V D.C. 2.2A
Rotor....2-blade paddle auger
Clearing Width....11 in. (28 cm)
Depth of Snow Cut....7 in. (17.8 cm)
Throw Distance Max 20 ft (6 m)
Plowing Capacity Max 74 lbs/min (33 kg/min)
Net Weight....11 lbs (5 kg)
Unpacking
Carton Contents
- Cordless snow shovel upper pole assembly
- Cordless snow shovel lower pole assembly
• Middle pole with auxiliary handle
• Joint-fixing knob and bolt (2 sets)
• IONMAX 24V lithium-ion battery
• IONMAX 24V lithium-ion battery charger
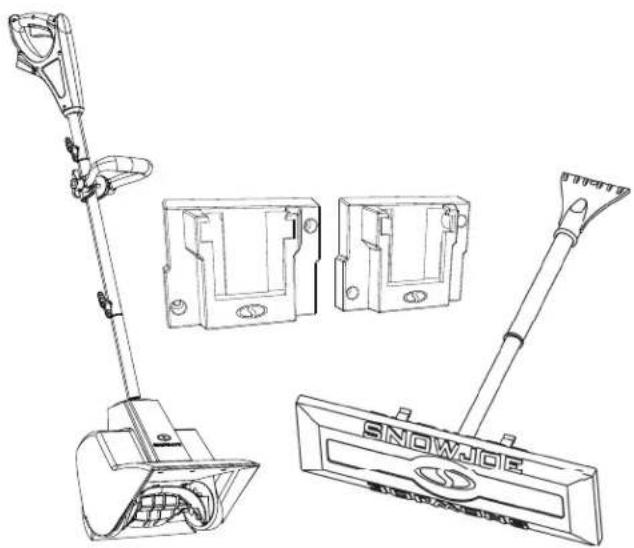
• IONMAX mounted battery storage (x2)
• 2-in-1 telescoping snow broom -
Manuals
-
Carefully remove the cordless snow shovel and check to see that all of the above items are supplied.
- Inspect the product carefully to make sure no breakage or damage occurred during shipping. If you find damaged or missing parts, DO NOT return the unit to the store. All Season Power Customer Service center at 1-866-225-9723.
NOTE: Do not discard the shipping carton and packaging material until you are ready to use your new cordless snow shovel. The packaging is made of recyclable materials. Properly dispose of these materials in accordance with local regulations.
IMPORTANT! The equipment and packaging material are not toys. Do not let children play with plastic bags, foils or small parts. These items can be swallowed and pose a suffocation risk!
Battery Pack Operation
The equipment is powered by a lithium-ion battery. The battery pack is completely sealed and maintenance free.
⚠ WARNING! Before first use, the battery requires at least 1 hr and 50 mins charge time to be fully charged. When the battery is at low capacity, recharge for 1 hr and 50 mins again before resuming operation.
Battery Charge Level Indicator
The battery pack is equipped with a push button for checking the charge level. Simply press the push button to read off the battery charge level from the LEDs of the battery indicator:
- All 3 level monitoring LEDs are lit: Battery charge level is high.
- 2 level monitoring LEDs are lit: Battery charge level is decreasing. Stop work as soon as possible.
- 1 level monitoring LED is lit: Battery is flat. Stop work IMMEDIATELY and charge the battery. Otherwise the battery's service life will be greatly shortened.
| Light IndicatorsLights | |
| Charge level button | |
| The battery is at 30% capacity and requires charging | |
| The battery is at 60% capacity and requires charging soon | |
| The battery is at full capacity |
NOTE: If the charge level button does not appear to be working, insert the battery into the charger and charge as needed.
NOTE: Immediately after using the battery pack, the charge level button may display a lower charge than it will if checked a few minutes later. The battery cells "recover" some of their charge after resting.
Charger Operation
⚠ WARNING! Charge only IONMAX 24V lithium-ion battery packs with its compatible IONMAX 24V lithium-ion charger. Other types of batteries may cause personal injury and damage.
To reduce the risk of electric shock, do not allow water to flow into the charger's AC/DC plug.
When to Charge the IONMAX 24VBAT Lithium-Ion Battery
NOTE: The IONMAX 24VBAT lithium-ion battery packs do not develop a "memory" when charged after only a partial discharge. Therefore, it is not necessary to run down the battery pack before placing it into the charger.
- Use the battery charge indicator lights to determine when to charge your IONMAX 24VBAT lithium-ion battery pack.
- You can "top-off" your battery pack's charge before starting a big job or after a long day of use.
Charging the Battery
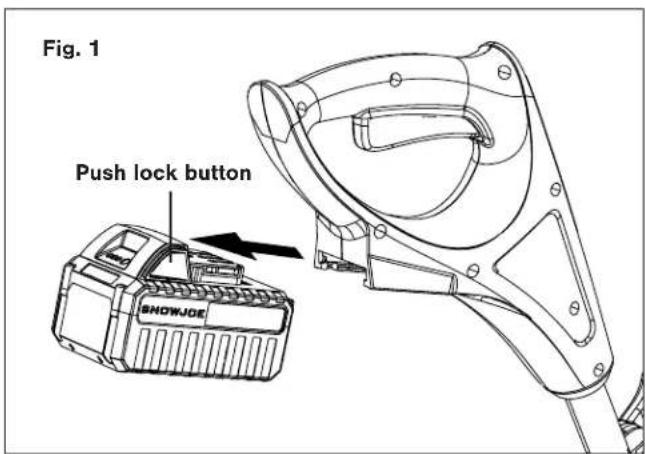
- Press the push lock buttons on the battery to pull the battery pack out of the equipment (Fig. 1).
text_image
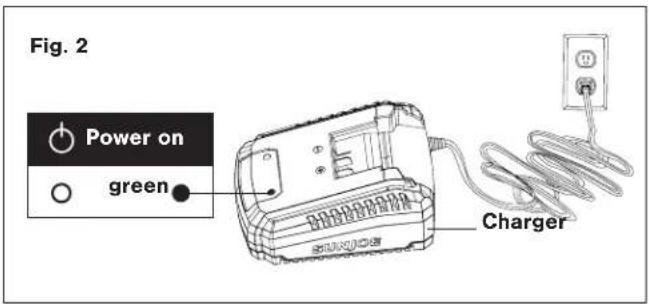
Fig. 1 Push lock button SHOWJOE- Check that the mains voltage is the same as that marked on the rating plate of the battery charger. Then, insert the charger's plug into the electrical wall outlet. When you plug in the charger, the top right green light will illuminate and stay green (Fig. 2).
text_image
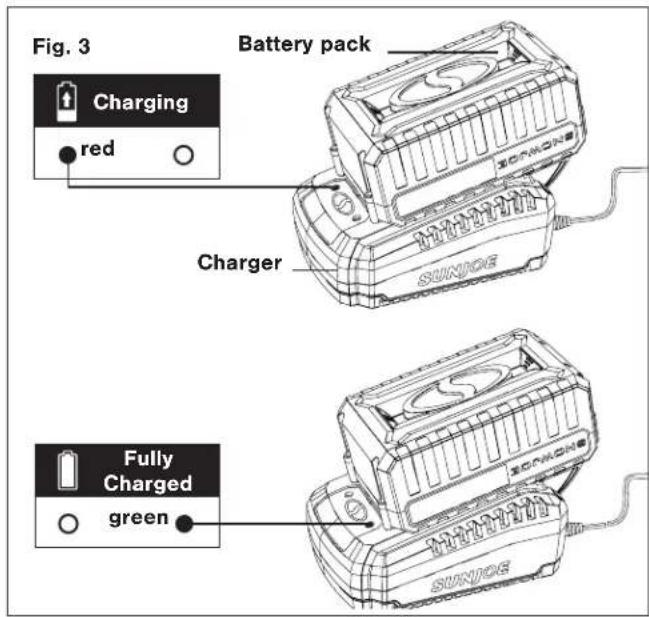
Fig. 2 Power on green Charger- Place the battery pack into the charger by sliding the pack to lock it into position. When you insert the battery into the charger, the top right green light will go off, and the top left red light will illuminate to indicate that the battery is charging (Fig. 3).
text_image
Fig. 3 Battery pack Charging red Charger Fully Charged green- When the charger light turns green, the battery is fully charged (Fig. 3).
NOTE: A fully discharged pack with an internal temperature in the normal range will fully charge in 1 hr and 50 mins (between 32°F/0°C and 113°F/45°C). - If the light indicators do not come on at all, check that the battery pack is fully seated into the bay. Remove the battery pack and reinsert. If the problem persists, contact an authorized All Season Power Customer Service center at 1-866-225-9723 for assistance.
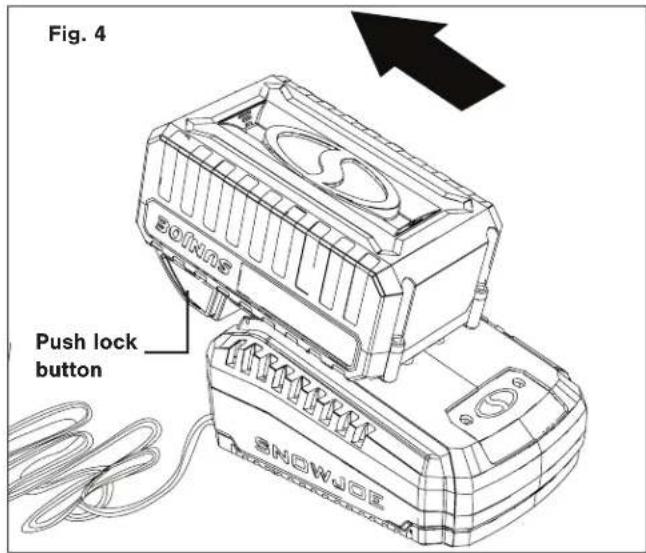
- When charging is complete, remove the battery from the charger by pressing the push lock button and sliding the battery backward to unlock it from the charger (Fig. 4).
text_image
Fig. 4 BODENS Push lock button S SNOWIDE- Timely recharging of the battery will help prolong the battery's life. You must recharge the battery pack when you notice a drop in the equipment's power.
IMPORTANT! Never allow the battery pack to become fully discharged as this will cause irreversible damage to the battery.
Charging a Hot or Cold Battery Pack
The green indicator light on the charger base indicates that the battery pack temperature is outside the charging range. Once the pack is within the acceptable range, normal charging will take place and the red light will be continuous. Hot or cold battery packs may take longer to charge.
| Lithium-Ion Charging Status | |||
| Battery Pack Temperature | Charger Base Indicator Light | Battery Pack Indicator Light | Charging Status |
| Too hot Green | Flashing together | Not charging | |
| Normal range Red | Flashing one by one | Normal charging | |
| Too cold Green | Flashing together | Not charging | |
Assembly
Connecting the Poles
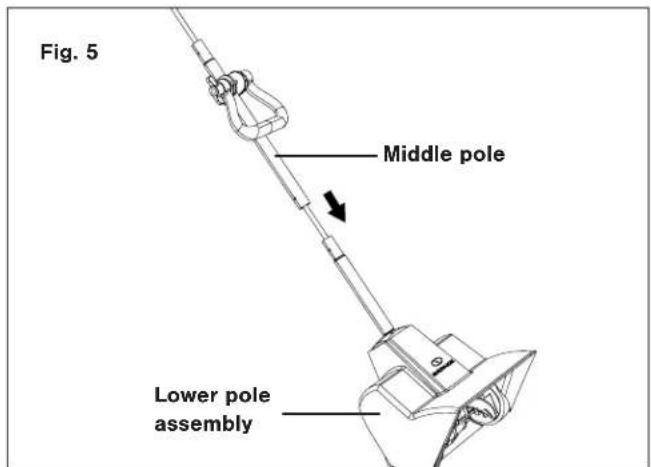
- Slide the middle pole into the lower pole assembly. Align the screw holes (Fig. 5).
text_image
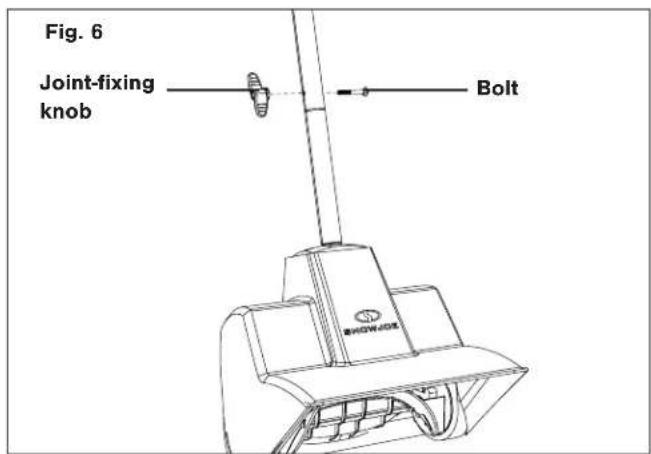
Fig. 5 Middle pole Lower pole assembly- Insert the bolt through the square hole in the pole and secure the other end with the joint-fixing knob (Fig. 6). Twist until tight.
NOTE: You may have to carefully move the wiring inside the tube to one side if it blocks the path of the bolt.
text_image
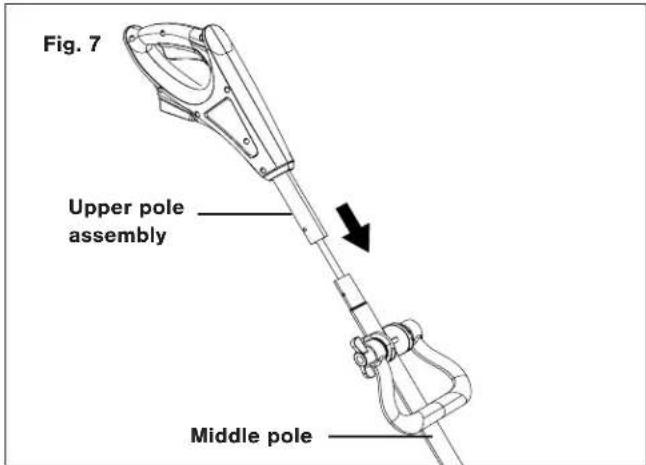
Fig. 6 Joint-fixing knob Bolt- Slide the upper pole assembly onto the middle pole. Align the screw holes (Fig. 7).
text_image
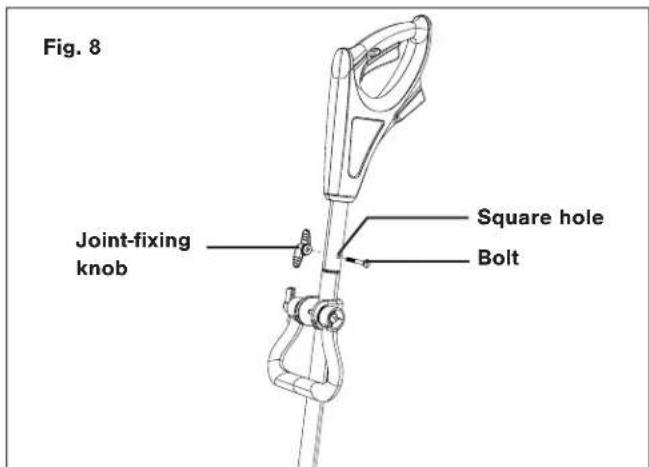
Fig. 7 Upper pole assembly Middle pole- Insert the bolt through the square hole in the pole and secure the other end with the joint-fixing knob (Fig. 8). Twist until tight.
text_image
Fig. 8 Joint-fixing knob Square hole BoltOperation
WARNING! Keep the area to be cleared free of stones, toys or other foreign objects that the rotor blades might pick up and throw. Such items could be covered by snow and are easy to overlook, so be sure to conduct a thorough inspection of the area before beginning work.
Starting the Machine
- Slide the battery down in the battery compartment until it clicks to lock it into position (Fig. 9).
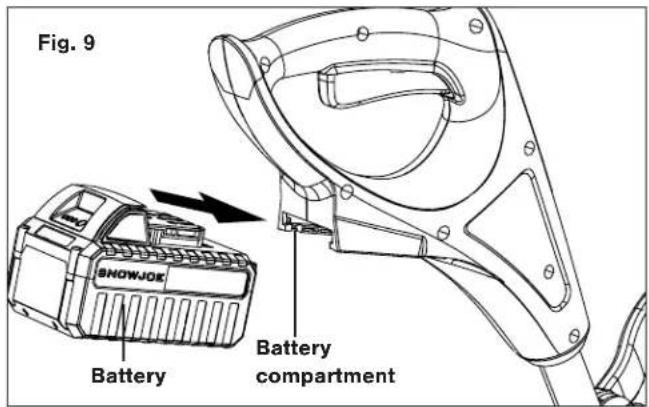
text_image
Fig. 9 SNOWJOK Battery Battery compartment- To start the cordless snow shovel, push and hold the safety lock switch on the side of the handle grip with your thumb and then squeeze the trigger switch with your fingers. Once the machine powers on, you can release the safety lock switch and proceed with operation (Fig. 10).
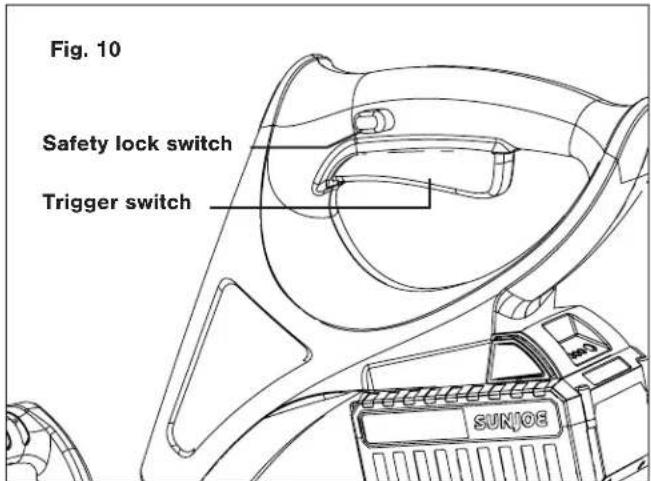
text_image
Fig. 10 Safety lock switch Trigger switch SUNIOE- To stop the cordless snow shovel, release the trigger switch.
Handle Adjustment
To adjust the angle of the auxiliary handle, follow the instructions below:
- Stop the machine and remove the battery. Wait until the blade comes to a complete stop.
- Loosen the auxiliary handle by turning the handle knob counterclockwise. Rotate the auxiliary handle to a comfortable position (Fig. 11).
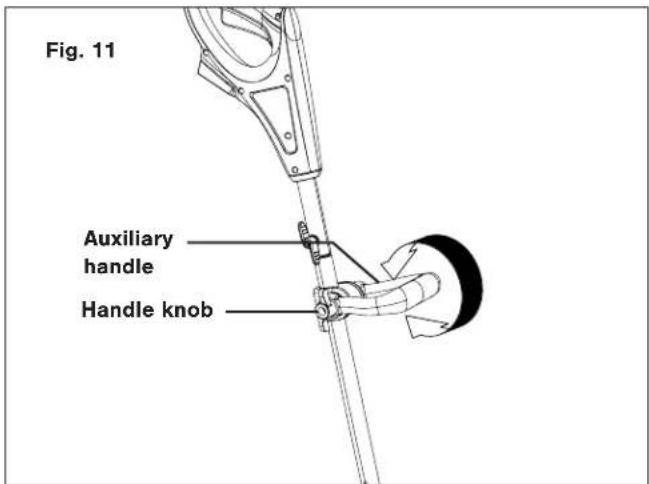
text_image
Fig. 11 Auxiliary handle Handle knob- Fix the handle by tightening the handle knob. Insert the battery and resume working.
To adjust the position of the auxiliary handle, follow the instructions below:
- Stop the machine and remove the battery. Wait until the blade comes to a complete stop.
- Loosen handle knob slightly and adjust auxiliary handle as needed to desired position. Retighten handle knob securely (Fig. 12).
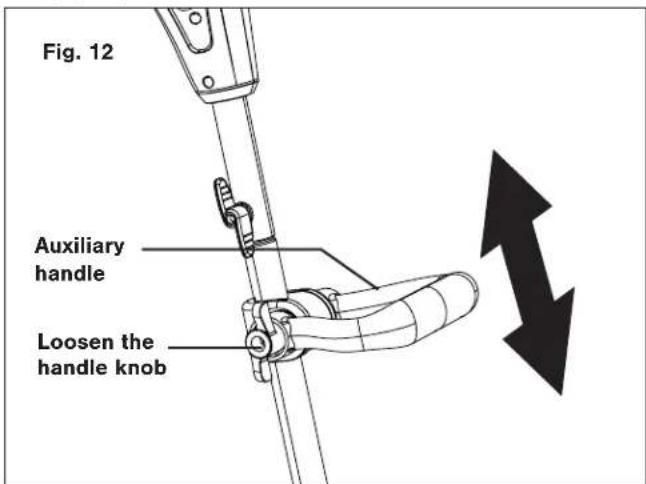
text_image
Fig. 12 Auxiliary handle Loosen the handle knob- Insert the battery and resume working.
NOTE: In order to prevent the auxiliary handle from moving around or sliding on the pole, be sure to tighten securely.
Operating Tips
- Start the cordless snow shovel. Push the shovel forward at a comfortable rate, yet slow enough to clear the path completely. The clearing width of the snow shovel and the depth of snowfall should dictate your forward speed.
- Direct the snow discharge to the right or to the left by holding the cordless snow shovel at a slight angle.
-
To remove snow most efficiently, throw the snow downwind and slightly overlap each swath.
-
If you need to clear snow from a crushed rock or gravel surface, push down on the handle to keep the scraper blade clear of any loose material that the rotor blades could throw.
- This cordless snow shovel cuts a path 11 in. (28 cm) wide and up to 7 in. (17.8 cm) deep in one pass.
- When clearing deeper drifts, hold the cordless snow shovel by the upper and auxiliary handles and use a swinging or sweeping motion. Remove up to 7 in.
(17.8 cm) of snow with each pass and repeat as many times as needed. - Remove the battery after using the cordless snow shovel. Hang the shovel so it will not be misplaced or damaged.
Maintenance
To order genuine replacement parts or accessories for the Snow Joe ^® 24V-SS11 cordless snow shovel, please visit shopjoe.com or contact the All Season Power Customer Service at 1-866-225-9723.
Proper Care for Battery + Charger
⚠ WARNING! To reduce the risk of injury, always unplug the charger and remove the battery pack from the charger before performing any maintenance task. Never disassemble the battery pack or charger. Contact your All Season Power Customer Service center for ALL repairs.
- To reduce the risk of injury and damage, never immerse your battery pack or charger in liquid or allow any liquid to flow inside these components.
- Clean out dust and debris from charger vents and electrical contacts by blowing with compressed air.
- Use only mild soap on a damp cloth to clean the battery pack and charger, keeping away from all electrical contacts. Certain cleaning agents and solvents are harmful to plastics and other insulated parts. Some of these include gasoline, turpentine, lacquer thinner, paint thinner, chlorinated cleaning solvents, ammonia and household detergents containing ammonia. Never use flammable or combustible solvents around battery packs, battery chargers or tools.
- The IONMAX 24VCHRG-QC lithium-ion battery charger has no serviceable parts.
Lubricating the Cordless Snow Shovel
This cordless snow shovel does not need lubrication. All bearings are lubricated at the factory for the life of the product.
Storage
-
Examine the cordless snow shovel thoroughly for worn, loose or damaged parts. Should you need to repair or replace a part, contact an authorized All Season Power Customer Service center at 1-866-225-9723 for assistance.
-
Remove the battery from the cordless snow shovel before storing.
-
Store the cordless snow shovel indoors in a locked, dry place out of the reach of children to prevent unauthorized use or damage.
Battery + Charger Off-Season Storage
- Do not expose your battery pack or charger to water, rain or allow them to get wet. This could permanently damage the charger and the battery pack. Do not use oil or solvents to clean or lubricate your battery pack as the plastic casing can become brittle and crack, causing a serious risk of injury.
- Store the battery pack and charger at room temperature away from moisture. Do not store in damp locations where corrosion of terminals may occur. As with other battery pack types, permanent capacity loss can result if the pack is stored for long periods of time at high temperatures (over 120^ F/49°C).
- IONMAX 24VBAT lithium-ion battery packs maintain their charge during storage longer than other battery pack types. As a general practice, it is best to unplug the battery charger and remove the battery pack when they are not in use. Recharge the battery pack every 6 months to 50% capacity (2 lights on) during off-season storage to maintain optimal battery performance.
Battery Caution + Disposal
Always dispose of your battery pack according to federal, state, and local regulations. Contact a recycling agency in your area for recycling locations.
⚠️CAUTION! Even discharged battery packs contain some energy. Before disposing, use electrical tape to cover the terminals to prevent the battery pack from shorting, which could cause a fire or explosion.
⚠ WARNING! To reduce the risk of injury or explosion, never burn or incinerate a battery pack even if it is damaged, dead or completely discharged. When burned, toxic fumes and materials are emitted into the surrounding atmosphere.
- Batteries vary according to device. Consult your manual for specific information.
- Install only new batteries of the same type in your product (where applicable).
- Failure to insert batteries in the correct polarity, as indicated in the battery compartment or manual, may shorten the life of the batteries or cause batteries to leak.
- Do not mix old and new batteries.
- Do not mix Alkaline, Standard (Carbon-Zinc) or Rechargeable (Nickel Cadmium, Nickel Metal Hydride, or Lithium-Ion) batteries.
- Do not dispose of batteries in fire.
- Batteries should be recycled or disposed of as per state and local guidelines.
Service and Support
If your Snow Joe ^® 24V-SS11-ULT cordless snow shovel requires service or maintenance, please call the All Season Power Customer Service center at 1-866-225-9723.
Model and Serial Numbers
When contacting the company, reordering parts or arranging service from an authorized dealer, you will need to provide the model and serial numbers, which can be found on the decal located on the housing of the unit. Copy these numbers into the space provided below.
Record the following numbers from the housing or handle of your new product:

text_image
Model #: 2 4 V - S S 1 3 2 4 V - S S 1 3 - U L TSerial #:

Optional Accessories
⚠ WARNING! ALWAYS use only authorized Snow Joe® + Sun Joe® replacement parts and accessories. NEVER use replacement parts or accessories that are not intended for use with this cordless snow shovel. Contact All Season Power if you are unsure whether it is safe to use a particular replacement part or accessory with your cordless snow shovel. The use of any other attachment or accessory can be dangerous and could cause injury or mechanical damage.
| ModelAcces | |||
| 1 | 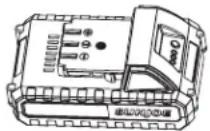 | IONMAX 24V 2.0 Ah Lithium-Ion Battery | 24VBAT-LTE |
| 2 | 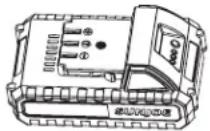 | IONMAX 24V 2.5 Ah Lithium-Ion Battery | 24VBAT-LT |
| 3 | 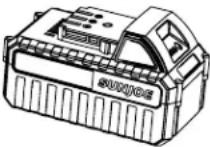 | IONMAX 24V 4.0 Ah Lithium-Ion Battery | 24VBAT |
| 4 | 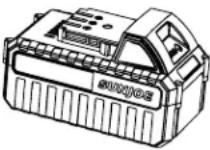 | IONMAX 24V 5.0 Ah Lithium-Ion Battery | 24VBAT-XR |
| 5 | 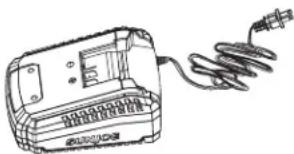 | IONMAX 24V Lithium-Ion Battery Quick Charger | 24VCHRG-QC |
| 6 | 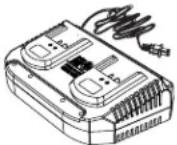 | IONMAX 24V Lithium-Ion Battery Dual Port Charger | 24VCHRG-DPC |
NOTE: Accessories are subject to change without any obligation on the part of All Season Power Customer Service center at 1-866-225-9723.
OUR CUSTOMER PROMISE + LIMITED WARRANTY
ABOVE ALL ELSE, All Season Power, LLC ("All Season Power") is dedicated to you, our customer. We strive to make your experience as pleasant as possible. Unfortunately, there are times when a Snow Joe ^® , Sun Joe ^® , Aqua Joe ^® or Auto Joe ^® product ("Product") does not work or breaks under normal operating conditions. We think it's important that you know what you can expect from us. That's why we have a Limited Warranty ("Warranty") for our Products.
OUR WARRANTY:
All Season Power warrants new, genuine, powered and non-powered Products to be free from defects in material or workmanship when used for ordinary household use for a period of two years from the date of purchase or delivery by the original, end-user purchaser when purchased from All Season Power or from one of All Season Power's authorized sellers with proof of purchase. Because All Season Power is unable to control the quality of its Products sold by unauthorized sellers, unless otherwise prohibited by law, this Warranty does not cover Products purchased from unauthorized sellers. If you have any questions about how to buy from an authorized seller, chat with us at shopjoe.com/support or call us at 1-866-225-9723. If your Product does not work or there's an issue with a specific part that is covered by the terms of this Warranty, All Season Power will elect to either (1) send you a free replacement part, (2) replace the Product with a new or comparable product (which may include a refurbished, like-new product) at no charge, or (3) repair the Product. How cool is that!
PRODUCT REGISTRATION:
All Season Power strongly encourages you to register your Product. You can register online at shopjoe.com/register, by chatting with us at shopjoe.com/support or calling our Customer Service Department at 1-866-225-9723. Failure to register your Product will not diminish your warranty rights. However, registering your Product will allow All Season Power to better serve you with any of your customer service needs.
WHO CAN SEEK LIMITED WARRANTY COVERAGE:
This Warranty is extended by All Season Power to the original purchaser and original owner of the Product.
WHAT IS NOT COVERED?
This Warranty does not apply if the Product has been used commercially or for non-household or rental applications. This Warranty also does not apply if the Product was purchased from an unauthorized seller. This Warranty also does not cover cosmetic changes that do not affect performance. Wearing parts like belts, augers, chains and tines are not covered under this Warranty, and can be purchased at shopjoe.com or by calling 1-866-225-9723.

CERTIFIED AUTHENTIC
We encourage you to use CERTIFIED AUTHENTIC Snow Joe ^® , Sun Joe ^® , Aqua Joe ^® + Auto Joe ^® replacement parts + accessories. Damage caused by the use of any other parts + accessories on your Product will not be covered under the warranty. Genuine parts + accessories can be found and purchased here by entering the model number of your product.
When you register your powered or non-powered Product with All Season Power at shopjoe.com/register, you will receive an additional 90 days of warranty coverage. In addition, you will have the option of purchasing extended warranty coverage beyond the standard 2-year manufacturer's warranty. Choose from one, two, or three years of extended coverage through Extend, Inc. Additional charges apply. When you Go With Joe®, you're not just buying an extended warranty; you're buying total peace of mind to know that you can rely on our top-notch tools, top-tier customer support, complete product coverage + no hassle return policy. Chat with us at shopjoe.com/support or call us at 1-866-225-9723 7 days a week 10AM-6PM EST. We've got you covered!
There are no warranties which extend beyond those stated herein. ANY IMPLIED WARRANTIES THAT MAY BE APPLICABLE TO PRODUCTS, INCLUDING IMPLIED WARRANTIES OF MERCHANTABILITY OR FITNESS FOR A PARTICULAR PURPOSE, ARE LIMITED IN DURATION TO THE DURATION OF THIS WARRANTY. Some States do not allow limitations on how long an implied warranty lasts, so the above limitation may not apply to you.
UNDER NO CIRCUMSTANCES SHALL WE BE LIABLE FOR ANY SPECIAL, INCIDENTAL, OR CONSEQUENTIAL DAMAGES BASED UPON BREACH OF THIS LIMITED WARRANTY, BREACH OF CONTRACT OR STRICT LIABILITY. Some States do not allow the exclusion or limitation of incidental or consequential damages, so the above limitation or exclusion may not apply to you. This warranty gives you specific legal rights, and you may also have other rights which vary from State to State. This warranty supersedes those printed in product manuals.

PALA QUITANIEVE INAL MBRICA
24 V MAX.* | 4.0 Ah | 28 CM
Modelo 24V-SS11 (24V-SS11-ULT)
Form No. ASP-24V-SS11-ULT-880E-M (S)
natural_image
Technical line drawing of a snow anti-lock push-button tool with two internal components and a labeled base (no text or symbols beyond branding)Form No. ASP-24V-SS11-ULT-880E-M (S)
natural_image
Technical line drawing of a snow anti-locking tool with two plastic enclosures and a mounted device (no text or symbols)MERCI POUR VOTRE ACHAT!

text_image
SCANNEZ ENREGISTREZ EN LIGNE AUJOURD'HUI