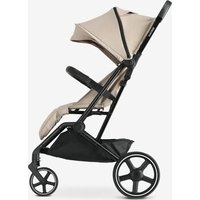
XP - Stroller Deryan - Free user manual and instructions
Find the device manual for free XP Deryan in PDF.


User questions about XP Deryan
0 question about this device. Answer the ones you know or ask your own.
Ask a new question about this device
Download the instructions for your Stroller in PDF format for free! Find your manual XP - Deryan and take your electronic device back in hand. On this page are published all the documents necessary for the use of your device. XP by Deryan.
USER MANUAL XP Deryan
natural_image
Line drawing of a stroller with adjustable seat and wheels (no text or symbols)Rolo XL
User manual
Important: Read carefully and keep for future references
INDEX
Warnings (EN) 3
Care and maintenance
- Read these instructions carefully before assembly and use and
- keep for future reference. The child may be hurt if you do not follow these instructions.
- Before using, remove and dispose of any plastic bags and other packaging (e.g. fasteners, fixing ties, etc.) and keep them out of reach of children.
- WARNING! This vehicle is intended for one child from birth (0 months) and up to a maximum weight of 22kg or 4 years, whichever comes first.
- WARNING! Stroller is not suitable for children under 6 months when angle of seat and backrest less than 150 degrees.
- WARNING! Never leave the child unattended.
- WARNING! Ensure that all locking devices are engaged before use. WARNING! To avoid injury ensure that your child is kept away when unfolding and folding this product.
- WARNING! Do not let your child play with this product. WARNING! ALWAYS USE THE HARNESS RESTRAINT SYSTEM.
- WARNING! Always use the crotch strap in combination with the waist belt section of the harness.
- WARNING! This product is not suitable for running or skating. WARNING! Use the most reclined position for new born babies. WARNING! Any load attached to the handle affects the stability of the stroller.
- YOUR CHILD'S SAFETY IS YOUR RESPONSIBILITY.
- Do not let children play with or hang on the stroller.
- Do not overload this stroller with additional children, goods or accessories.
- Bags and other items should not be hung from the handle as this can affect the stability of the stroller.
• Overloading, incorrect folding and the use of non-approved accessories is unsafe and may damage or break this stroller. -
Do not use parts or accessories which are not approved by the manufacturer.
• Always apply the parking brake when the stroller is stationary. -
Ensure the parking brake is engaged during the loading and
- unloading of children.
- Do not allow your child to climb into the stroller.
• Never leave a raincover, hood or apron on indoors, in a hot
• atmosphere or near a heat source as your child my overheat. - Be careful when going up or down kerbs.
- Remove your child and fold the stroller when going up or down
• escalators.
• If your stroller is used by someone unfamiliar with it e.g.
• Grandparents, always show them how it works. - Do not use this stroller near an open fire or exposed flame.
• Take care in windy conditions.
• To prevent damage, always remove the raincover before folding the stroller. - Do not place anything on top of the raincover.
• To prevent your child overheating, always fold or remove a raincover when indoors or in warm environments. - A basket is provided for the carriage of 3kg of items evenly distributed.
• This product conforms to EN 1888-2:2018+A1:2022
WAARSCHUWINGEN
natural_image
Technical line drawing of a mechanical clamp or bracket assembly (no text or symbols)A. B.
natural_image
Technical line drawing of two wheel rim components with no text or symbols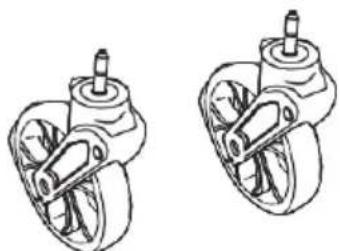
natural_image
Two identical line drawings of mechanical components with no text or symbolsC. D.
natural_image
Line drawing of a curved, elongated object with two protrusions (no text or symbols)A. Stroller
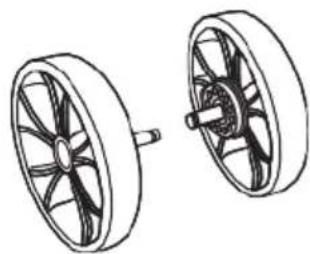
B. Rear wheels 2x
C. Front wheels 2x
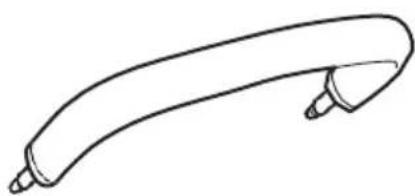
D. Bumper bar
Notice. The wheel lubricant may cause stains on carpets. Place a protective cover or cloth underneath the stroller during assembly. Wipe any stains immediately with a damp cloth.
UNFOLDING
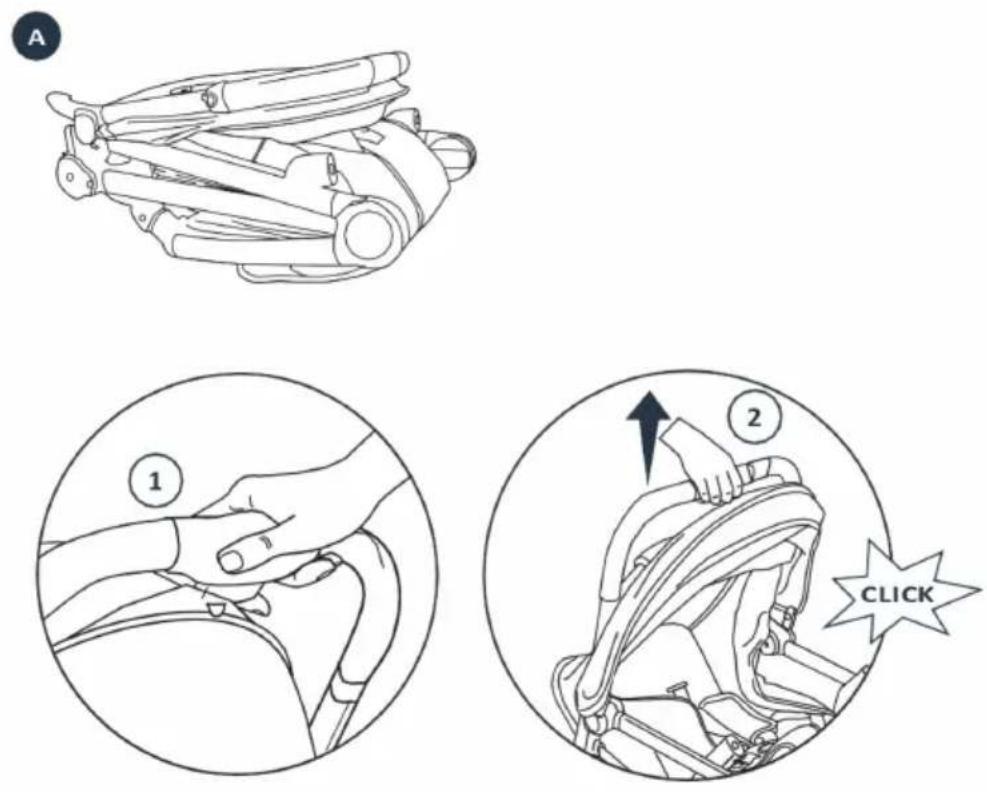
Unpack all contents and check that all parts are present before starting assembly. Please refer to the parts list.
- Located on the stroller (A), hold the handle and quickly pull up the stroller until it is fully open and you hear a 'click'. The stroller will then be fully open and secure.
ASSEMBLY WHEELS
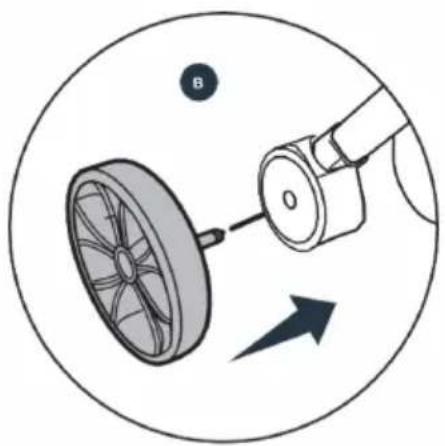
To assemble the rear wheels: Insert the rear wheel steel pin into the rear leg (B) until you hear the 'click'.
natural_image
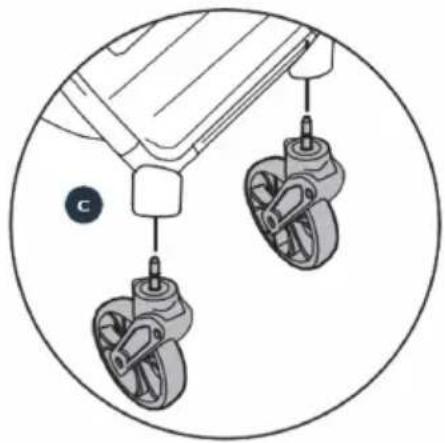
Diagram of a car wheel assembly with a lever and directional arrow (no text or symbols)To assemble the front wheels: Insert the front wheel steel pin into the front leg (C) until you hear the 'click'.
natural_image
Diagram of two mechanical components with labeled parts, no text or symbols presentBUMPER BAR ASSEMBLY
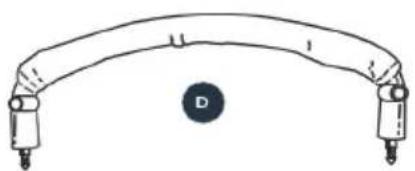
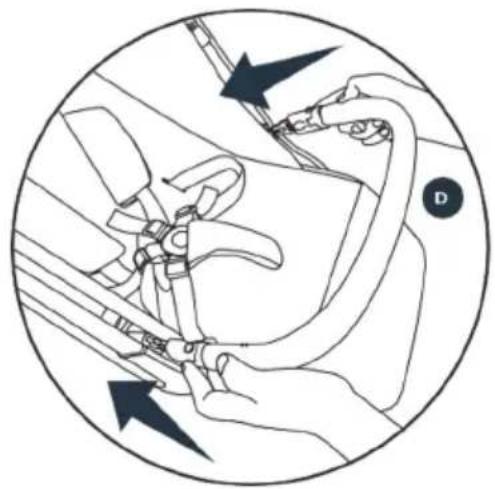
Insert the ends of the bumper bar into the attachment points on the stroller frame.
natural_image
Simple line drawing of a curved mechanical or structural component with two end ports and a central circular label labeled 'D' (no text or symbols on the diagram itself)Wait to hear them "click" into position. Lift gently to ensure the bumper bar is locked into place.
natural_image
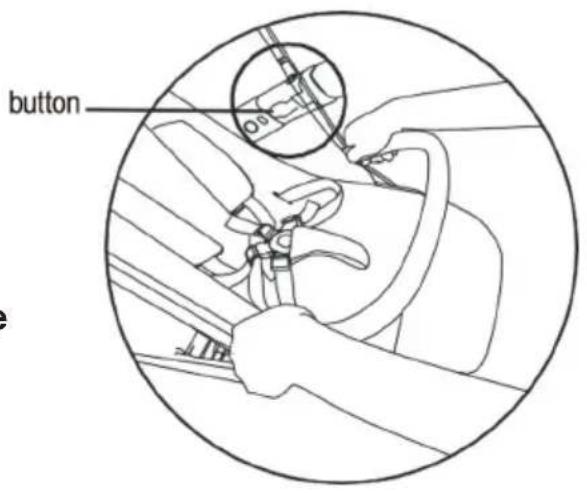
Diagram of a car interior showing steering wheel, gear, and dashboard (no text or labels)To remove, press buttons located either side of the bumper bar housing. Lift to remove bumper bar from stroller. WARNING! To prevent accidental injury, do not remove the front bumper when children are in the stroller.
text_image
buttonBACKREST ADJUSTMENT
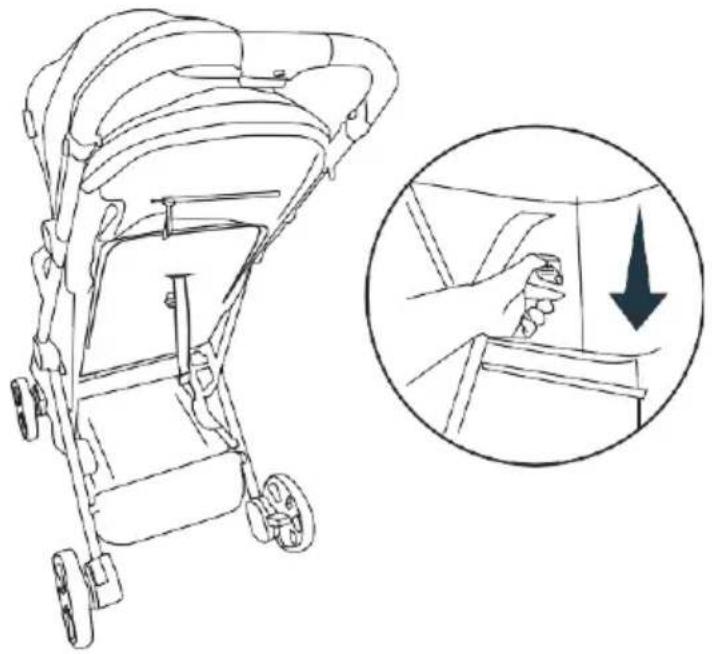
Locate the backrest adjustment mechanism at the rear of the seat. Press down the adjusting button on the backrest to adjust the backrest into a lower position.
natural_image
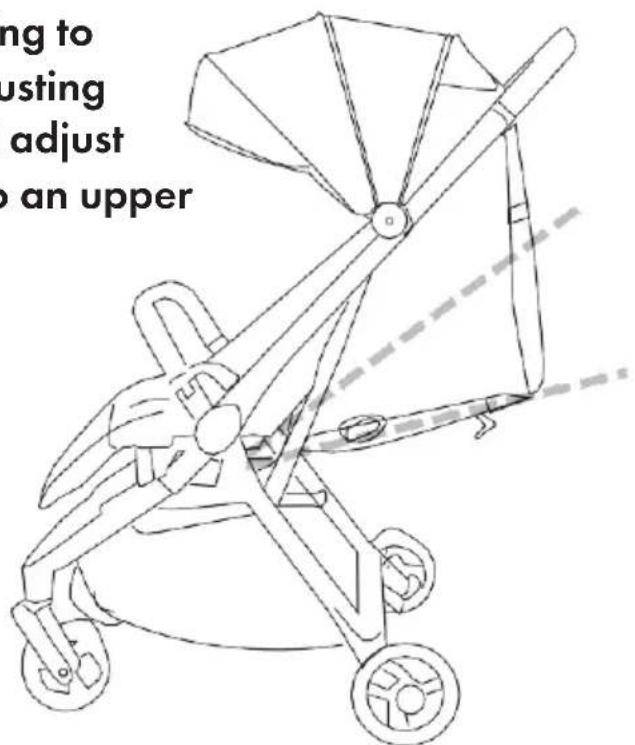
Line drawing of a stroller with an inset showing hand holding a tool, no text or symbols presentLift up the D-ring to reveal the adjusting strap. This will adjust the backrest to an upper position
text_image
ng to usting adjust o an upper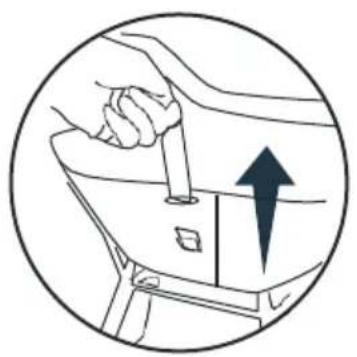
natural_image
Diagram of a hand holding a tool inside a car seatbelt, with an upward arrow indicating motion (no text or symbols present)CANOPY
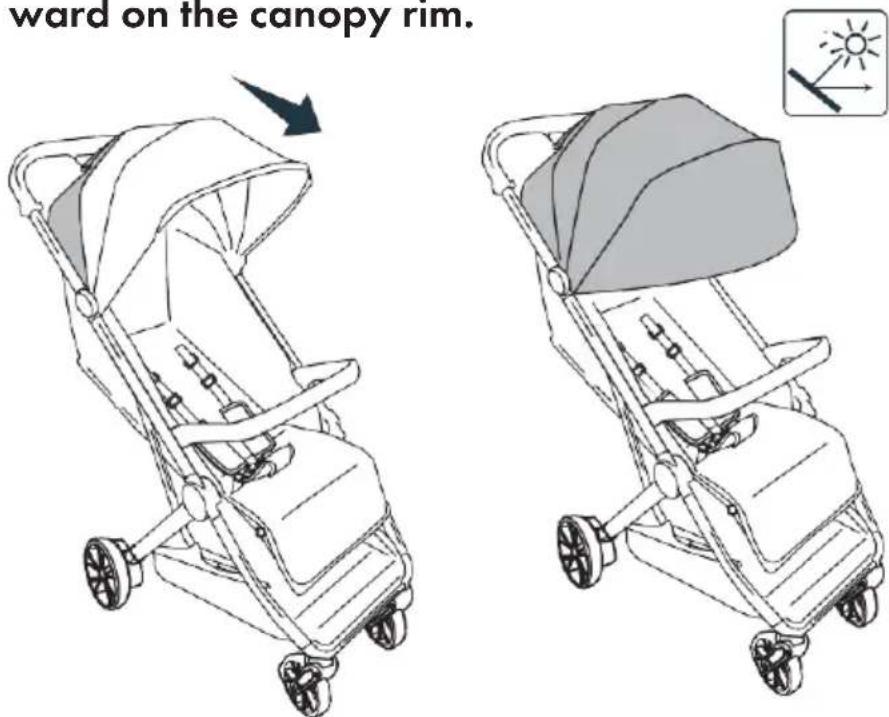
The canopy can be opened or closed by pulling forward or backward on the canopy rim.
text_image
ward on the canopy rim.FOOTREST ADJUSTMENT
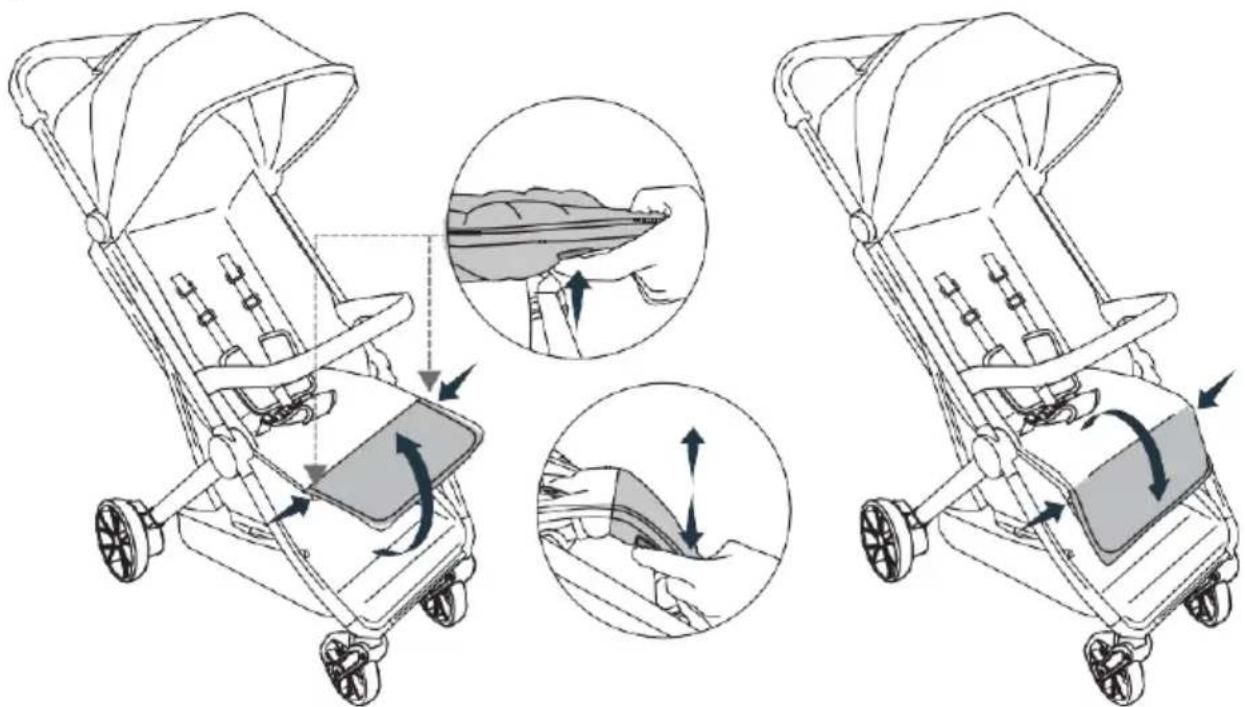
Locate the adjustment buttons underneath both sides of the footrest. Push the buttons simultaneously to adjust to the required position. Listen for the 'click' signalling that the footrest is locked into position.
text_image
Diagram illustrating the step-by-step instructions for using a stroller to adjust body parts, with magnified views showing changes in the interior.HARNESS
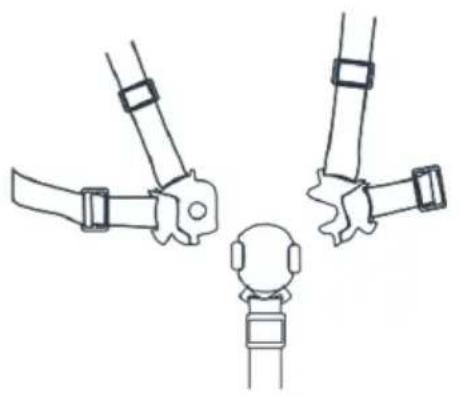
To unlatch the buckle, press the buttons on both sides and remove the male ends of each side.
Combine the shoulder/waist buckles together, then place the crotch buckle on top of the combined buckles until all parts are in place.
To extend the seat belt length, pull the strap in the opposite direction and tighten.
WARNING! Always adjust the harness to fit your child correctly for their comfort and safety. A loose fitting harness can be very dangerous.
natural_image
Diagram of a robot head with two arms and a small human figure below, no text or symbols present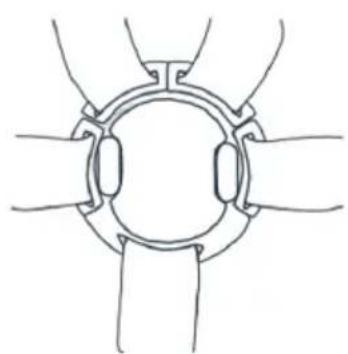
natural_image
Simple line drawing of a circular mechanical or electrical component with symmetrical arms (no text or symbols)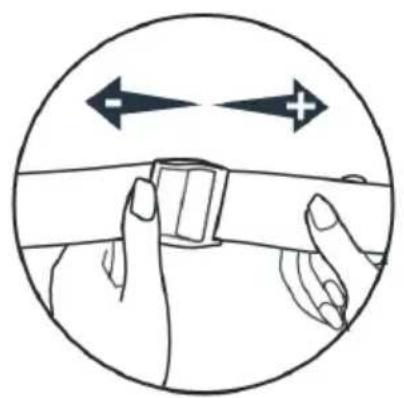
natural_image
Illustration of hands holding a belt switch inside a circular frame with directional arrows (no text or symbols)The stroller has 3 shoulder height positions.
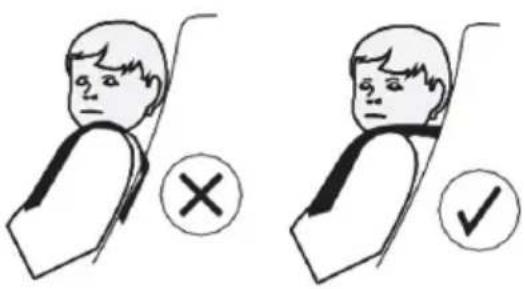
To adjust the height unzip the back of the stroller to reveal the strap and buckle. Feed the buckle through to the front. At the front adjust to the correct height and feed the buckle back through to secure.
WARNING! Adjust the shoulder strap height according to baby height.
text_image
Illustration showing correct and incorrect posture of a person with a cross mark indicating the correct stance.BRAKES
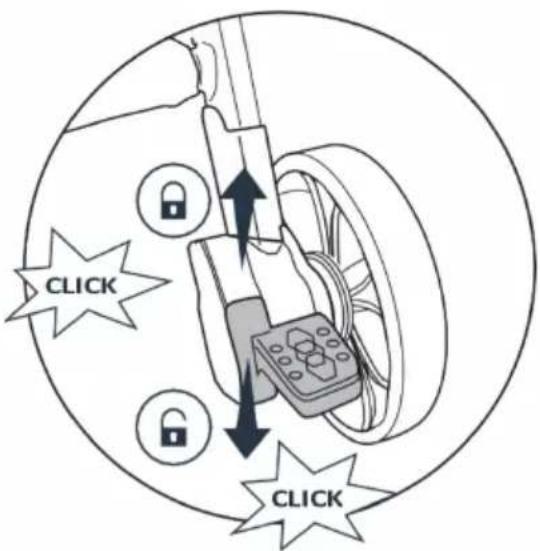
To engage the brake push down brake locking pedal.
Lift up pedal to release brake.
The brake will "click" when locked into position.
WARNING! Always apply the parking brake when the stroller is stationary.
WARNING! Ensure the parking brake is engaged during the loading and unloading of children.
text_image
CLICK CLICKWHEELS
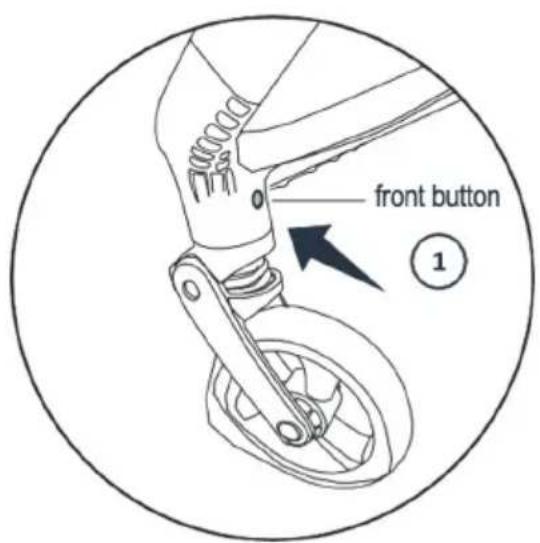
To remove the front wheels, press the button and pull down the wheel. Repeat on both sides.
To remove the rear wheels, pull and hold the locking pin at the bottom surface of the rear wheel axle and pull the wheel off.
text_image
front button ①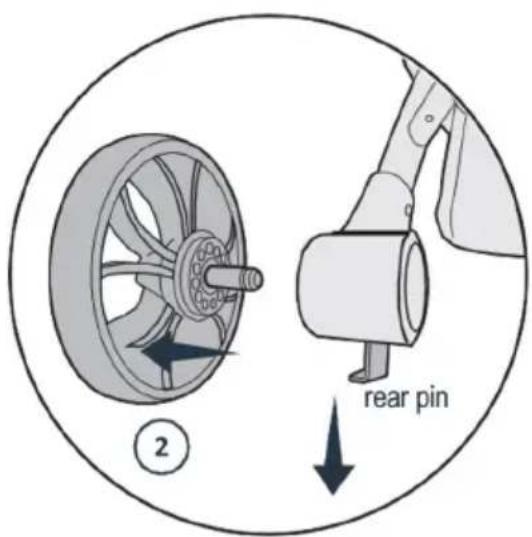
text_image
② rear pinRAINCOVER
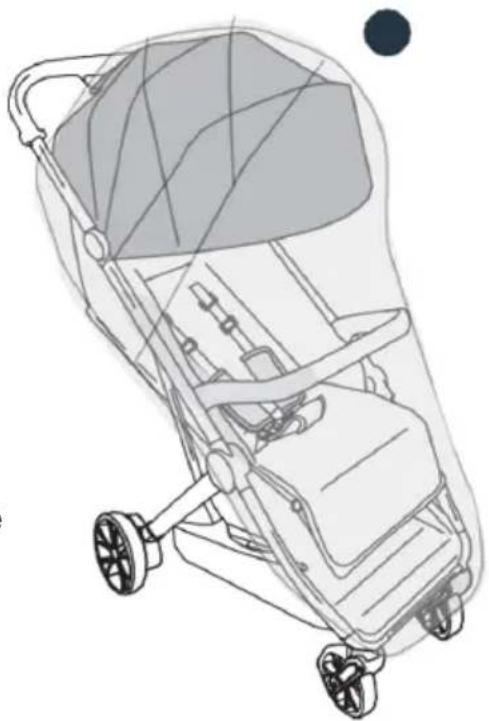
Pull the raincover down over the stroller starting at the top of the canopy and pulling down towards the footrest.
Please note that the raincover is sold separately and is NOT included in the standard package!
natural_image
Line drawing of a stroller with wheels and seat cover, no text or symbols presentFOLDING
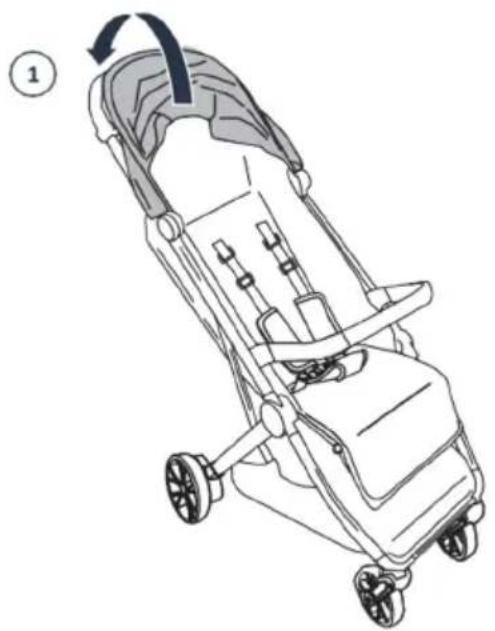
- Fold the canopy back.
- Hold the handle and press the second lock button 1 while pressing button 2 at the same time.
- After folding, the stroller is automatically locked. Note. the bumper bar can be used as a handle or it can be removed.
natural_image
Line drawing of a stroller with a curved arrow indicating rotation (no text or symbols)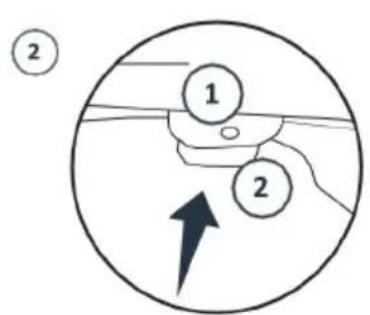
text_image
② 1 2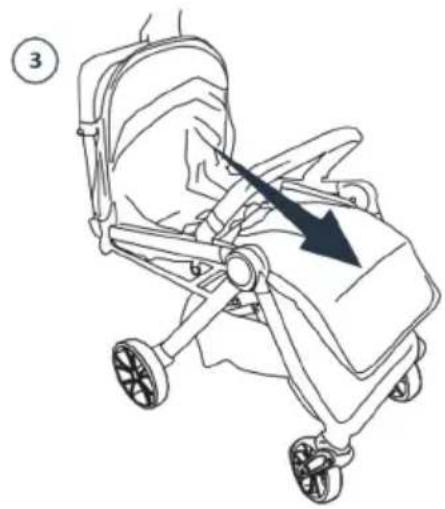
natural_image
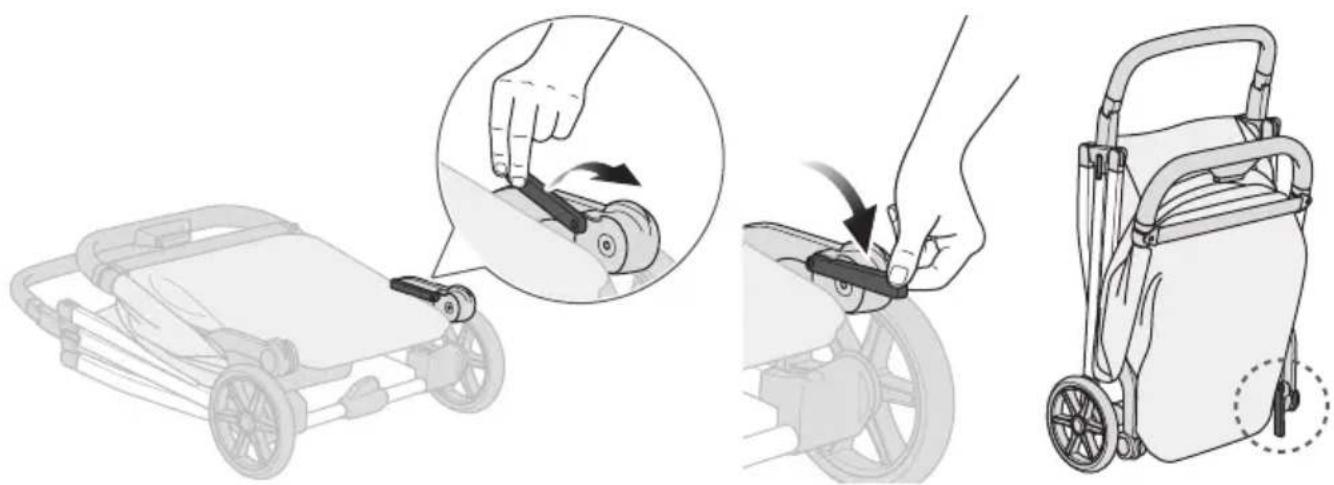
Line drawing of a stroller with a hand pointing to the seat area, no text or symbols presentIn order for the folded stroller to stand on its own, follow the next steps:
natural_image
Illustration of a stroller with hand operating a key, showing step-by-step assembly and mounting (no text or symbols)CARE AND MAINTENANCE
- This product requires regular maintenance to ensure correct and safe performance.
- All assembly fittings are to be tightened properly.
• Always check your stroller for loose screws, worn parts, torn material or stitching. - Replace or adjust parts as needed.
- Lubricate moving parts regularly, especially the wheels.
- Wipe metals and plastics clean with a damp cloth.
- Sponge clean fabrics with warm soapy water. Rinse well with clean water to avoid staining. Dry in shade.
- Do not bleach.
- Do not iron.
- Do not dry clean.
- Do not use abrasive pads, bleach or strong household cleaners.