GAWU16LSPK - LED Lighting Gladiator - Free user manual and instructions
Find the device manual for free GAWU16LSPK Gladiator in PDF.

User questions about GAWU16LSPK Gladiator
0 question about this device. Answer the ones you know or ask your own.
Ask a new question about this device
Download the instructions for your LED Lighting in PDF format for free! Find your manual GAWU16LSPK - Gladiator and take your electronic device back in hand. On this page are published all the documents necessary for the use of your device. GAWU16LSPK by Gladiator.
USER MANUAL GAWU16LSPK Gladiator
GAWU16LSPK - Graphite
TABLE OF CONTENTS
Light Bar Safety....2
Lithium-Ion Battery Operated Product Disposal 3
Light Bar Parts....4
Light Bar Features....4
Operating Instructions 5
Getting Started 5
Battery Status When Charging 5
Battery Status When Light Bar is ON 5
Quick Charge Information....5
Basic Operation....5
Select the Light Color 5
Reset the Light Bar....5
Installation Instructions 6
Unpack the Light Bar....6
Removing the Light Bar from the Universal Mounting Bracket (UMB)......6
Mounting the Universal Mounting Bracket (UMB) to the GearTrack® Channels or GearWall® Panels 6
Mounting the Universal Mounting Bracket (UMB) Directly to the Wall....7
Attaching the Light Bar to the Universal Mounting Bracket (UMB) 7
Mounting the Light Bar to a Steel Surface 7
Mounting Options 8
When Using Gladiator GearTrack® Channels or GearWall® Panels 8
When Using Rear Facing Magnets....8
When Using The Pull-out Hanging Hook....9
Product Specifications....10
User-Maintenance Instructions 10
Troubleshooting....10
Accessories....11
Warranty....11
LIGHT BAR SAFETY
IMPORTANT SAFETY INSTRUCTIONS
WARNING: When using the Light Bar, basic safety precautions should always be followed, including the following:
- Read all safety warnings and instructions. Failure to follow the warnings and instructions may result in fire and/or serious injury.
WARNING: To reduce the risk of injury, do not stare at operating Light Bar. Serious eye injury could occur.
■ To avoid electrical shock, do not place the Light Bar, USB Charging Adapter, or USB Charging Cable in water or other liquid.
■ This product is not intended for use by children or by persons with reduced physical, sensory, or mental capabilities, or lack of experience and knowledge. Close supervision is necessary when the Light Bar is used near children. Always supervise children to ensure that they do not play with the Light Bar.
■ Disconnect and turn the Light Bar off before cleaning. To unplug the charging cable, grasp the plug end and pull from the Light Bar. Never pull from the cable.
■ Do not use an extension cord. Plug the USB charging adapter directly into an electric outlet.
- Do not modify or attempt to repair the Light Bar or internal batteries except as indicated in the user-maintenance instructions.
■ Use only the provided USB charging cable. Do not attempt to charge this Light Bar with any charging adapter other than the recommended USB charging adapter.
- Do not incinerate this appliance even if it is severely damaged. The batteries can explode in a fire.
■ Do not operate Light Bar if it is damaged or malfunctions. Return the Light Bar to the nearest Authorized Service Center for examination, repair or replacement.
■ Do not let charging cable hang over edge of table or counter. Never leave the Light Bar unattended while it is in operation.
■ Refer to the "User-Maintenance Instructions" section for instructions on cleaning the Light Bar. Recharge only with the charging adapter specified by Gladiator.
■ Under abusive conditions, liquid may be ejected from the Battery; avoid contact. If contact accidentally occurs, flush with water. If liquid contacts eyes, additionally seek medical help. Liquid ejected from the Battery may cause irritation or burns.
■ Do not use Light Bar if it is damaged or modified. Damaged or modified batteries may exhibit unpredictable behavior resulting in fire, explosion or risk of injury.
■ Do not expose the Light Bar to fire or excessive temperature. Exposure to fire or temperature above 265^ F ( 130^ C) may cause explosion.
■ Follow all charging instructions and do not charge the Light Bar outside of the temperature range specified in the instructions. Charging improperly or at temperatures outside of the specified range may damage the Light Bar and increase the risk of fire.
SAVE THESE INSTRUCTIONS
IMPORTANT SAFETY INSTRUCTIONS
■ Use only UL Listed ITE/Class 2 USB charging adapter to charge this device. Use of any non-UL Listed USB charging adapters may create a risk of fire.
■ Service of Light Bar should only be performed by the manufacturer or an Authorized Service provider, using only identical replacement parts. This will ensure that the safety of the product is maintained.
■ Do not use Light Bar in rain or wet conditions. Do not expose to rain — store indoors.
SAVE THESE INSTRUCTIONS
LITHIUM-ION BATTERY OPERATED PRODUCT DISPOSAL
Always dispose of battery operated products according to federal, state and local regulations. Contact a recycling agency in your area for recycling locations.

text_image
Prohibition sign with battery and flame symbol, indicating no fire or explosion hazardWARNING: Do not incinerate this product even if severely damaged. The batteries can explode in a fire.
USE REQUIREMENTS
■ Intended for use in the garage.
■ Use in a dry location.
LIGHT BAR PARTS
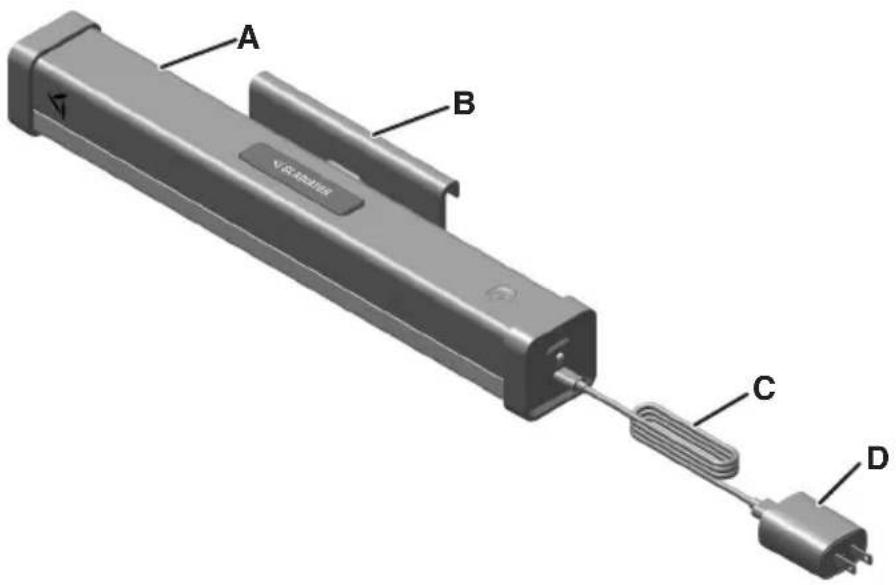
text_image
A B C DA. Light Bar
B. Universal Mounting Bracket (UMB)
C. USB-A to USB-C Charging Cable
D. USB-A Charging Adapter (not included)
NOTE: Use a UL Listed ITE/Class 2 USB Charging Adapter rated at 2.0 A or higher for best performance.
LIGHT BAR FEATURES
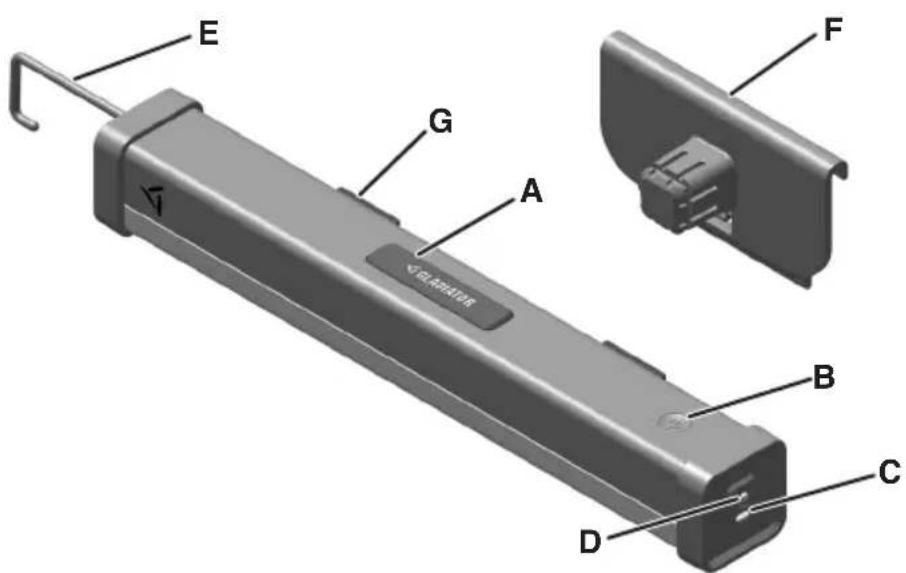
text_image
E G A VOLATION F B C DA. Push Button
B. Power Button
C. USB-C Charging Input
D. LED Charge Indicator Light
E. Pull-Out Hook Used for Hanging
F. Universal Mounting Bracket (UMB)
G. Rear Mounting Magnets
OPERATING INSTRUCTIONS
GETTING STARTED
- Remove and properly dispose all the packaging materials, if present.
- Before first use, charge the battery until the battery status indicator turns solid green.
- Use the included USB Charging Cable to charge the Light Bar, along with a Class 2 USB Charging Adapter that is a certified product (not included).
- When the USB Charging Cable is connected, the charge level status will be indicated by the LED Light on the end of the Light Bar.
BATTERY STATUS WHEN CHARGING
| LED BATTERY STATUS | |
| Solid Green >90% | |
| Blinking Green 30% | - 90% |
| Blinking Yellow 15% | - 30% |
| Blinking Red <15% | |
BATTERY STATUS WHEN LIGHT BAR IS ON
| LED BATTERY STATUS | |
| Green 30% - 100% | |
| Yellow 15% - 30% | |
| Red <15% | |
QUICK CHARGE INFORMATION
In 10 minutes, the Light Bar will quick charge. The Light Bar will stay On for a short period with one quick charge.
IMPORTANT: Make sure to charge the battery when battery status indicator is yellow.
NOTE: The best practice is to store your Light Bar at room temperature.
BASIC OPERATION
■ Press the Power button to turn On the Light Bar. It will light at the brightest level on the previously set light color (refer to the section "SELECT THE LIGHT COLOR").
■ Press the Power button a second time to Dim the light.
■ Press the Power button a third time to turn Off the Light Bar.
SELECT THE LIGHT COLOR
■ With the Light Bar On, hold down the Power button to initiate the light color change process.
■ While holding the Power button, the light color will cycle through the three available options.
■ Release the button when the desired light color is displayed. The light bar is now set to that color.
COLOR AND BRIGHTNESS SETTINGS
| COLOR | COLOR TEMP | HIGH | LOW |
| Blend | 4500 K | 600 lm | 240 lm |
| Soft White (Warm Light) | 3000 K | 300 lm | 120 lm |
| Daylight (Cool Light) | 6000 K | 300 lm | 120 lm |
RESET THE LIGHT BAR
■ To reset the Light Bar back to the factory setting, hold the Power button down while the light is Off. The LED light on the side will blink three times.
■ Release the Power button after the three blinks and the factory setting will be restored.
■ Factory setting includes color temperature of 4500 K "Blend" color mode.
INSTALLATION INSTRUCTIONS
UNPACK THE LIGHT BAR
- Remove and verify the contents as shown in "LIGHT BAR PARTS."
- Dispose of or recycle all packaging materials.
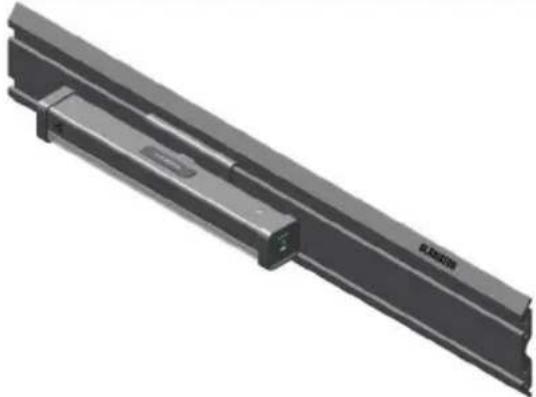
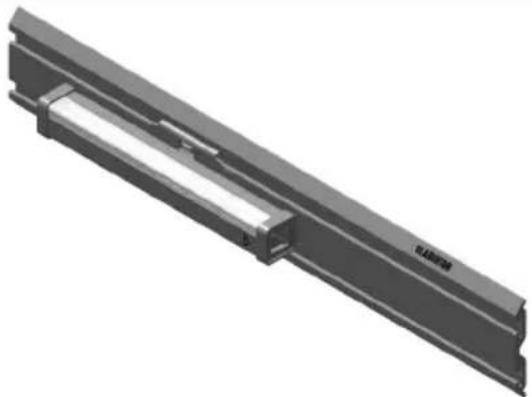
REMOVING THE LIGHT BAR FROM THE UMB
Remove the Light Bar from the UMB
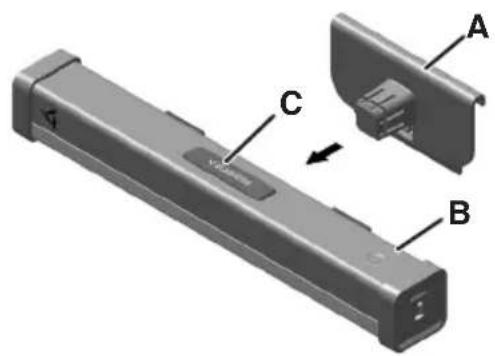
text_image
Technical diagram of a device with labeled parts A, B, and C, showing internal structure and component alignment.A. Universal Mounting Bracket (UMB)
B. Light Bar
C. Push Button
■ Press down on the Push Button and pull the UMB straight out.
NOTE: Light Bar can be attached in three ways:
- Universal Mounting Bracket to GearTrack® Channels or GearWall® Panels.
- Universal Mounting Bracket directly to the Wall.
- Using Rear Mounting Magnets on a Steel Surface.
TOOLS REQUIRED
NOTE: No tools are required if using Gladiator® GearTrack® Channels or GearWall® Panels.
MOUNTING THE UMB TO THE GEARTRACK® CHANNELS OR GEARWALL® PANELS
NOTE: Gladiator® GearTrack® channels and GearWall® panels are sold separately. For installation of the Gladiator® GearTrack® Channels and GearWall® Panels to a Wall, refer to "Instruction Manual" included with the Gladiator® GearTrack® Channels and GearWall® Panels.
- Align to GearTrack® Channels or GearWall® Panels
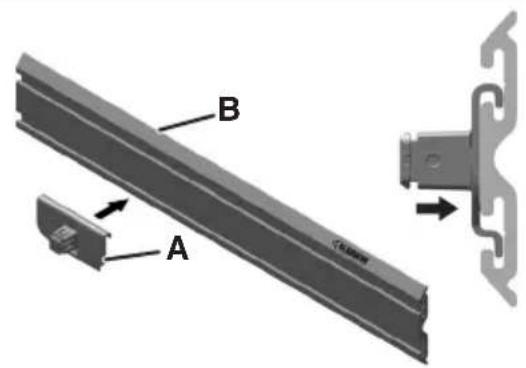
text_image
B AA. Universal Mounting Bracket (UMB) B. GearTrack® Channels or GearWall® Panels
■ Align the hook on the UMB into the slots.
- Slide onto GearTrack® Channels or GearWall® Panels
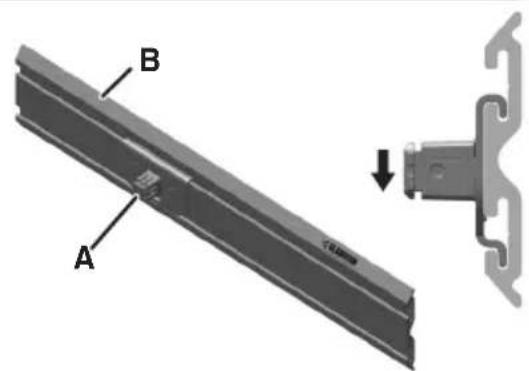
text_image
A BA. Universal Mounting Bracket (UMB) B. GearTrack® Channels or GearWall® Panels
■ Slide the UMB down into slots until it "Snaps" into place.
NOTE: Bottom tab on the Universal Mounting Bracket will be over the bottom edge of the center strip.
MOUNTING THE UMB DIRECTLY TO THE WALL
TOOLS REQUIRED
Gather the required tools before starting installation.
■ #2 Phillips head screwdriver (not included)
■ #8 Phillips head screws with threaded drywall anchors (not included)
■ Level (not included)
■ Tape measure (not included)
- Place Marking on the Wall
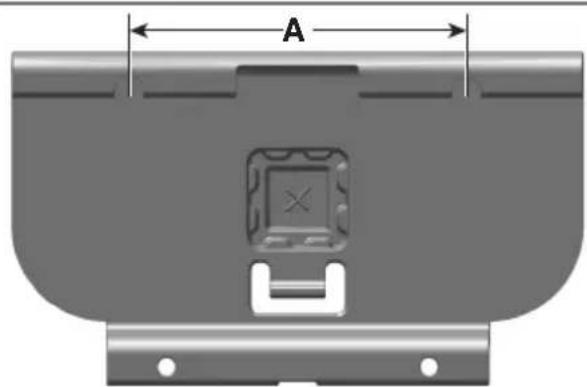
natural_image
Technical diagram of a mechanical component with labeled dimension A (no text or symbols beyond label)A. 5 inches
- Make a mark on the Wall.
- Measure 5 inches horizontally and place another mark.
- Place the Screws in the Wall where the marks are present, leaving them out enough to hang the UMB.
NOTE: Make sure to use a Level for the best results.
- Attach the UMB to the Wall

natural_image
3D diagram of a mechanical component with labeled parts A and B, showing internal structure and connection lines (no text or symbols beyond labels)A. Universal Mounting Bracket (UMB)
B. Screws
NOTE: It is recommended to use threaded anchors when mounting to drywall.
- Place the UMB over the top two Screws.
- Place the Screws into the two remaining holes.
ATTACHING THE LIGHT BAR TO THE UMB
Attach Light Bar to the UMB
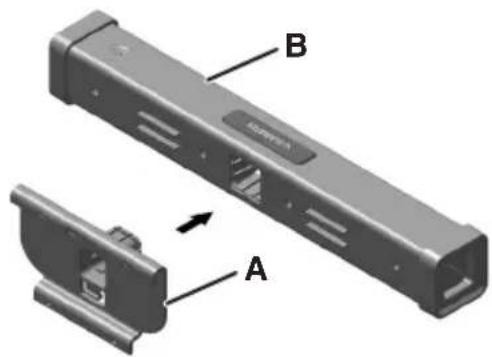
text_image
B AA. Universal Mounting Bracket (UMB)
B. Light Bar
- Insert the UMB into the Light Bar as shown.
IMPORTANT: Make sure that the rails and the grooves line up.
- Press firmly until the Light Bar locks in place.
MOUNTING THE LIGHT BAR TO A STEEL SURFACE
Place Magnets against the Steel Surface

natural_image
3D rendering of a black rectangular electronic component with labeled points A and B, showing internal slots and port (no text or symbols beyond labels)A. Rear Mounting Magnets
■ Place the Rear Mounting Magnets against Steel Surface.
NOTE: It is recommended to use a Steel Surface at least 0.5 mm thick.
MOUNTING OPTIONS
WHEN USING GLADIATOR® GEARTRACK® CHANNELS OR GEARWALL® PANELS
| Horizontal Down Horizontal Up | |
 |  |
| Vertical Left Vertical Right | |
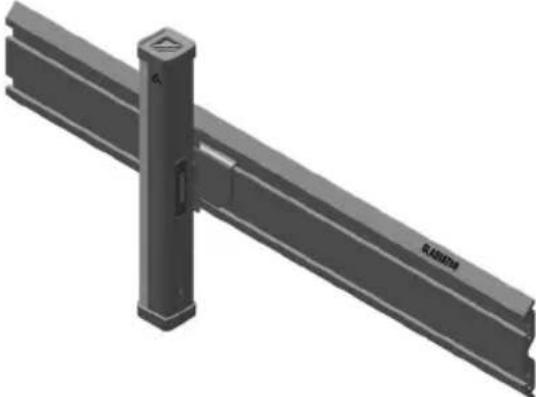 | 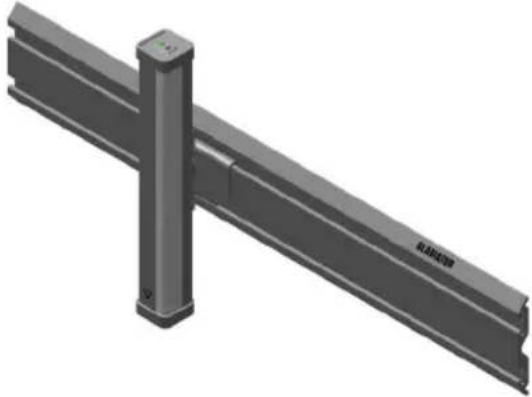 |
WHEN USING REAR FACING MAGNETS
NOTE: Magnets adhere to most flat steel surfaces.
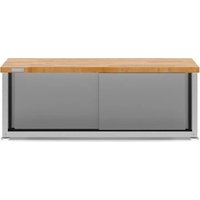
| Bottom of a Cabinet Outward Bottom of a Cabinet Inward | |
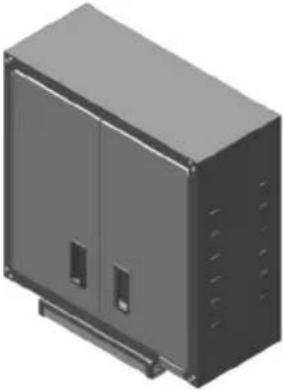 | 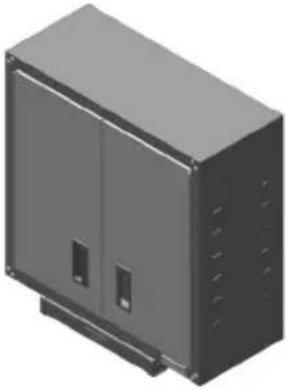 |
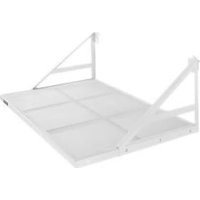
Flat Surface of the Cabinet Down, Up, or at Any Angle
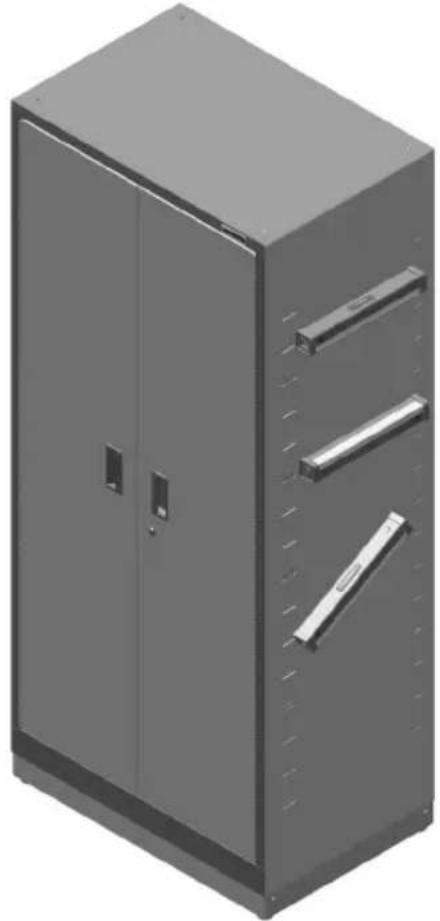
natural_image
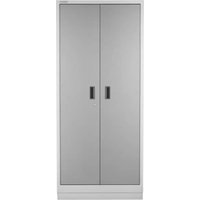
3D rendering of a gray industrial cabinet with two doors and three horizontal bars (no text or symbols visible)WHEN USING THE PULL-OUT HANGING HOOK
Hang the Light Bar from the Pull-Out Hanging Hook and Rotate to the Desired Direction
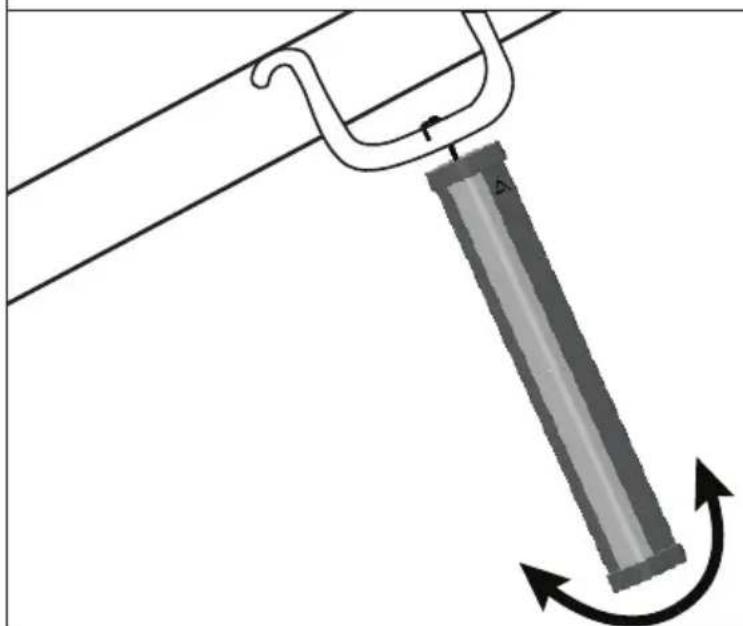
natural_image
Diagram of a hook attached to a rod with a curved arrow indicating rotation (no text or symbols)PRODUCT SPECIFICATIONS
| CHARGING CABLE | |
| Length 4 ft Kink/Tangle Resistant | |
| Type USB-A to USB-C | |
| CHARGING | |
| USB-A Charging Adapter (not included) | 5 V/2 ANOTE: Use a UL Listed ITE/Class 2 USBCharging Adapter rated at 2.0 A or higher for best performance. |
| BATTERIES | |
| Dual Battery 5200 mAh | |
| Charging Time (Light Bar is Off) | Approx. 3 hoursNOTE: Charge time extends when the Light Bar is in use. |
| Run Time (Full Charge) | Approx. 6 hours on lowApprox. 2 hours on high (varies with color selection) |
| ENCLOSURE | |
| Drop Protection 10 ft | |
| TEMPERATURE | |
| Operating Temperature 40°F to 100°F (4.44°C to 37.8°C) | |
| Storage Temperature | 32°F to 140°F (0°C to 60°C)NOTE: It is best to store in cool, dry, and well-ventilated area. |
USER-MAINTENANCE INSTRUCTIONS
■ Use mild dish soap to clean surfaces.
■ Wipe with damp cloth.
■ Do not immerse in water.
■ Do not use abrasive cleaners.
TROUBLESHOOTING
| PROBLEM SOLUTION | |
| If the Light Bar fails to light | Check if the Light Bar is charged. Charge the battery when the battery status indicator is red or when the battery is completely drained. |
| If the Light Bar is not getting charged | Replace the Charging Cable. Replace the USB adapter. |
| If the problem cannot be corrected | See the “Warranty” section. Do not return the Light Bar to the retailer. Retailers do not provide service. |
ACCESSORIES
To order accessories, call 1-866-342-4089 and ask about available accessories, contact your authorized Gladiator® dealer or visit our website at www.gladiatorgarageworks.com In Canada, call 1-800-807-6777 or visit our website at www.gladiatorgarageworks.ca
WARRANTY
For warranty information:
In the U.S.A. call 1-866-342-4089 or visit our website at
www.gladiatorgarageworks.com
In Canada call 1-800-807-6777 or visit our website at
www.gladiatorgarageworks.ca
Modèle
GAWU16LSPK – Graphite
TABLE DES MATIÈRES
text_image
Prohibition sign with battery and flame symbol, indicating no fire or explosion hazardtext_image
Diagram of a device component with labeled parts A, B, and C, showing a close-up view of the internal structure.A. Support de montage universel (UMB)
B. Barre lumineuse
C. Bouton-poussoir
natural_image
Technical diagram of a mechanical component with labeled dimension A (no text or symbols beyond label)A. 5 po
natural_image
3D diagram of a mechanical component with labeled points A and B, showing internal structure and dashed lines indicating connections (no text or symbols beyond labels)A. Support de montage universel (UMB)
B. Vis
natural_image
3D rendering of a mechanical component with labeled section A (no text or symbols beyond label)natural_image
3D rendering of a gray industrial cabinet with two doors and three horizontal bars (no text or symbols visible)AVEC LE CROCHET DE SUSPENSION ESCAMOTABLE
natural_image
Diagram of a hook attached to a rod with a curved arrow indicating rotation (no text or symbols)SPÉCIFICATIONS DU PRODUIT
www.gladiatorgarageworks.com
www.gladiatorgarageworks.ca
Modelo
GAWU16LSPK - Grafito
ÍNDICE
text_image
Prohibition sign with battery and flame symbol, indicating no fire or energy hazardtext_image
E G A F B C Dtext_image
Technical diagram of a device component with labeled parts A, B, and C, showing a close-up view of the internal structure.natural_image
Technical diagram of a mechanical component with labeled dimension A (no text or symbols beyond label)A. 5 pulgadas
natural_image
3D diagram of a mechanical component with labeled parts A and B, showing internal structure and connection lines (no text or symbols beyond labels)natural_image
3D rendering of a black rectangular electronic device casing with internal slots and labeled points A (no text or symbols beyond labels)natural_image
3D rendering of a gray industrial cabinet with two doors and three horizontal bars (no text or symbols visible)CUANDO UTILICE EL GANCHO COLGANTE EXTRAÍBLE
natural_image
Diagram of a hook attached to a rod with a curved arrow indicating rotation (no text or symbols)www.gladiatorgarageworks.ca
GARANTÍA
www.gladiatorgarageworks.com
www.gladiatorgarageworks.ca