
Zermatt 1800W - Fireplace Klarstein - Free user manual and instructions
Find the device manual for free Zermatt 1800W Klarstein in PDF.

| Product type | Decorative electric fireplace with heater |
| Brand | Klarstein |
| Model | Zermatt 1800W |
| Article numbers | 10035264, 10035265 |
| Power supply | 220-240 V ~ 50/60 Hz |
| Nominal heat output | 1800 W (1.8 kW) |
| Minimum heat output | 900 W (0.9 kW) |
| Standby consumption | 0.00028 kW |
| Temperature control type | Mechanical thermostat |
| Flame effect | Yes, with 6 brightness levels and 3 colors (yellow, yellow+blue, blue) |
| Heating function | Yes, with adjustable thermostat and automatic on/off |
| Remote control | Yes, with CR2025 battery |
| Timer | Yes, adjustable from 0 to 8 hours |
| Temperature display | °C or °F selectable |
| Included accessories | Screws (4x25mm) x4, wall plugs x2, chimney duct x1, bracket x2, remote control |
| Minimum safety distance | 15 cm from walls and objects, 1 m from flammable materials |
| Overheat protection | Yes, automatic shutdown |
| Cleaning | Glass panel: dry or damp cloth (non-abrasive) |
| Wall mounting | Wall fixation with bracket and wall plugs |
| Manufacturer | Chal-Tec GmbH, Wallstraße 16, 10179 Berlin, Germany |
Frequently Asked Questions - Zermatt 1800W Klarstein
User questions about Zermatt 1800W Klarstein
0 question about this device. Answer the ones you know or ask your own.
Ask a new question about this device
Download the instructions for your Fireplace in PDF format for free! Find your manual Zermatt 1800W - Klarstein and take your electronic device back in hand. On this page are published all the documents necessary for the use of your device. Zermatt 1800W by Klarstein.
USER MANUAL Zermatt 1800W Klarstein
Note: This product is only suitable for well insulated spaces or occasional use.
INHALTSVERZEICHNIS
Produktdatenblatt 4
natural_image
Hand-drawn sketch of a cabinet with a wall-mounted pipe and internal compartments, labeled 'Wand' in the top-left corner (no other text or symbols)natural_image
Smart home control panel with six function icons arranged in a grid (no text or symbols)natural_image
Line drawing of a two-tiered storage cabinet with internal compartments and a hanging control panel (no text or symbols)natural_image
Symbol of a trash bin crossed with a diagonal line, no text or numbers presentBerlin Brands Group UK Limited
PO Box 42
272 Kensington High Street
London, W8 6ND
United Kingdom
Congratulations on purchasing this device. Please read the following instructions carefully and follow them to prevent possible damages. We assume no liability for damage caused by disregard of the instructions and improper use. Scan the QR code to get access to the latest user manual and more product information.
CONTENTS
Product Data Sheet 16
Safety Instructions 17
Accessories 19
Installation 19
Commissioning and Operation 21
Cleaning and Maintenance 23
Disposal Considerations 24
Declaration of Conformity 24
TECHNICAL DATA
| Item number 10035264, 10035265 | |
| Power supply 220-240 V~ 50/60 Hz | |
| Power (Watts) 1800 W |
PRODUCT DATA SHEET
| Model identifier(s): 10035264, 10035265 | ||||||
| Item Symbol Value Unit Item Unit | ||||||
| Heat output Type of heat input, for electric storage local space | heaters only | |||||
| Nominal heat output P | nom | 1.8 kW | manual heat | charge control, with integrated thermostat | no | |
| Minimum heat output (indicative) | Pmin | 0.9 kW | manual heat | charge control with room and/or outdoor temperature feedback | no | |
| Maximum continuous heat output | Pmax,c | 1.8 kW | electronic heat | charge control with room and/or outdoor temperature feedback | no | |
| Auxiliary electricity consumption | fan assisted heat output no | |||||
| At nominal heat output el | max | N/A kW | Type of heat output/room temperature control | |||
| At minimum heat output el | min | N/A kW | single stage | heat output and no room temperature control | no | |
| In standby mode | elSB | 0.00028 | W | Two or more manual stages, no room temperature control | no | |
| with mechanic thermostat room temperature control | yes | |||||
| with electronic room temperature control | no | |||||
| electronic room temperature control plus day timer | no | |||||
| electronic room temperature control plus week timer | no | |||||
| Other control options (multiple selections possible) | ||||||
| room temperature control, with presence detection | no | |||||
| room temperature control, with open window detection | no | |||||
| with distance control option | no | |||||
| with adaptive start control no | ||||||
| with working time limitation | no | |||||
| with black bulb sensor | no | |||||
| Contact details | Chal-Tec GmbH, Wallstraße 16, 10179, Berlin, Germany | |||||
SAFETY INSTRUCTIONS
Note: Find a location for the electric heater that is protected from direct sunlight. Do not plug the electric heater into the power outlet before you read all instructions.
- Please read all instructions carefully before operating the appliance and retain for future reference.
- Check that the voltage indicates on the data plate corresponds with that of the local network before connecting the appliance to the mains power supply.
- Never use the appliance unsupervised when in use.
- If you have to leave even for a short moment please stop the appliance.
- Keep out of reach of children and do not allow them to operate this appliance.
- Only use the appliance for domestic purposes and in the way indicated in these instructions.
- From time to time, check the cord for damage. Never use the appliance if the cord or any part of the appliance shows signs of damage.
- If the power cord is damaged, it must be replaced by the manufacturer, customer service or a similarly qualified person in order to avoid a hazard.
• Make sure that the power cord does not touch hot surfaces.
• In order to avoid overheating, do not cover the heater. - Keep the appliance at least 15 cm from walls and any other thing, to permit a good air circulation.
- Do not use the appliance outdoors
- Do not use if you have wet hands.
- Never use the appliance on or near hot surfaces.
- Never move the appliance by pulling the cord.
- Before cleaning the appliance, make sure it is unplugged from the power and that it is completely cooled.
- Do not clean the appliance with abrasive chemicals.
- Never use accessories that are not recommended or supplied by the manufacturer. It could cause danger to the user or damage to the appliance.
- Never route the mains cable beneath carpet.
- Never use the heater to dry clothes or any other similar items.
- The heater must not be located immediately below a socket outlet.
• This heater must not be used with an extension lead. - Dot use this heater with a programmer, timer or any other device that switches the heater on automatically, since a fire risk exists if the heater is covered or positioned incorrectly.
- In order to avoid a hazard due to inadvertent resetting of the thermal cutout, this appliance must not be supplied through an external switching device, such as a timer, or connected to a circuit that is regularly switched on and off by the utility.
-
Do not use this heater in the immediate surroundings of a bath, a shower or a swimming pool.
-
Children over the age of 8 and persons with reduced physical, sensory or mental capabilities or those with a lack of experience and knowledge may only use the appliance if they are instructed on how to do so by a person responsible for their safety, or if they are supervised and understand the hazards associated with the use of the appliance.
• Make sure that children do not play with the appliance. - Cleaning and user maintenance shall not be made by children without supervision.
• Children of less than 3 years should be kept away unless continuously supervised. - Children aged from 3 years and less than 8 years shall only switch on/off the appliance provided that it has been placed or installed in its intended normal operating position and they have been given supervision or instruction concerning use of the appliance in a safe way and understand the hazards involved. Children aged from 3 years and less than 8 years shall not plug in, regulate and clean the appliance or perform user maintenance.
- This heater is not equipped with a device to control the room temperature. Do not use this heater in small rooms when they are occupied by persons not capable of leaving the room on their own, unless constant supervision is provided.
- To reduce the risk of fire, keep textiles, curtains, or any other flammable material a minimum distance of 1 meter from the air outlet.
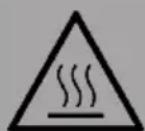
CAUTION
Risk of burns! Some parts of this product can become very hot and cause burns. Particular attention has to be given where children and vulnerable people are present.
ACCESSORIES
| A | 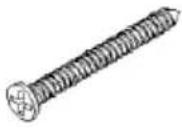 | Screws (4 x 25 mm) | 4 pieces |
| B | 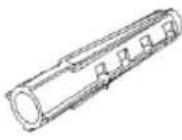 | Anchors 2 pieces | |
| C | 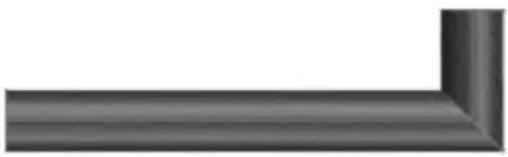 | Chimney 1 pieces | |
| D | 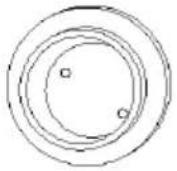 | Flanges 2 pieces |
INSTALLATION
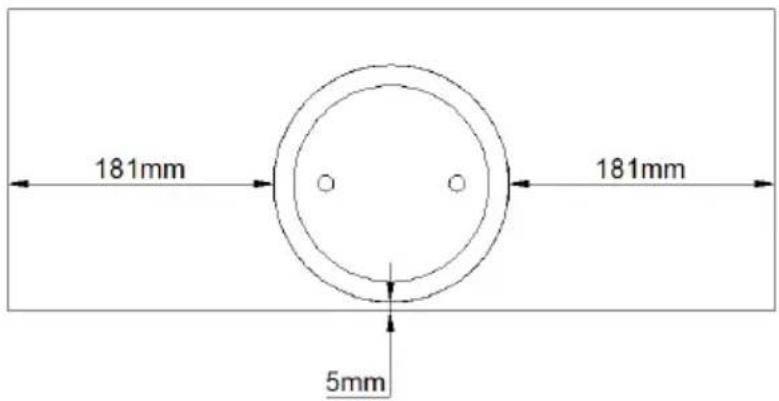
- Attach the flange [D] to the top of the electric fireplace. The edge of the flange [D] should be 5 mm from the rear edge of the appliance and 181 mm from the left and right sides of the appliance. When you have positioned the flange [D] correctly, fasten it with 2 screws [A].
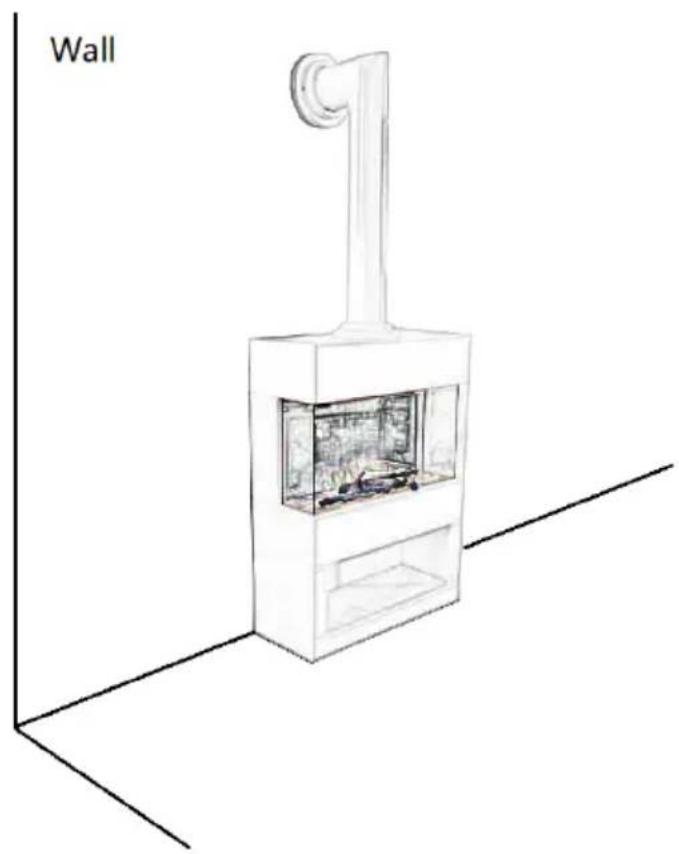
- Flange the chimney head [C and D]. Insert the bottom of the decorative chimney into the flange on the top of the appliance.
- After the chimney is stabilized, make the back of the electric fireplace lean against the wall. When the flange [D] fits the wall, one hand holds the flange [D] and the other hand removes the electric fireplace and chimney [C].
- There are 2 fixing holes on the flange [D]. Mark 2 drill holes with a pencil. Drill 2 holes 8 mm in diameter and 43 mm deep on the marked locations. Install the wall anchors [B] into the holes and gently tap them into place with a hammer until the flange of the wall anchor [B] is flush with the wall surface.
- Secure the flange [D] to the wall anchors using the 2 anchor screws [A].
- Place the electric fireplace in its place and insert the chimney pipe into the flange on the wall.
- Plug the power lead in. The electric fireplace is now ready to use.
natural_image
3D architectural sketch of a wall-mounted appliance with internal compartments and ventilation duct (no text or symbols)COMMISSIONING AND OPERATION
Once the appliance has been properly installed and connected to a grounded electrical outlet, it is ready to operate.
Note: Ensure the circuit breakers for the power supply are turned on.
Control Panel
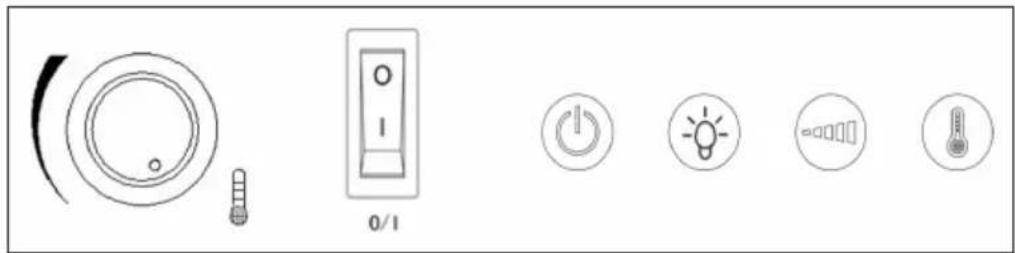
natural_image
Pure electrical control icons without any text or labelsThe heater controls are located right of the heater outlet.
Remote Control
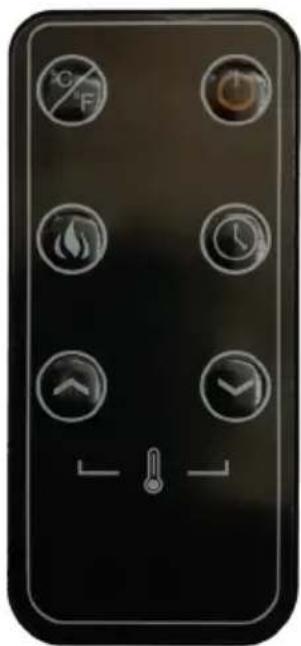
natural_image
Smartphone home screen with six function icons arranged in a grid (no text or symbols)Remote Control Battery Replacement
Replace with a CR2025 battery and follow the diagram at the back of remote handset to install the new battery.
Note: Do not throw the old battery into the garbage can. Please recycle batteries through designated channels.
Magnetic Holder for the Remote Control
On the right side of the electric fireplace there is a magnet to which you can easily attach the remote control.
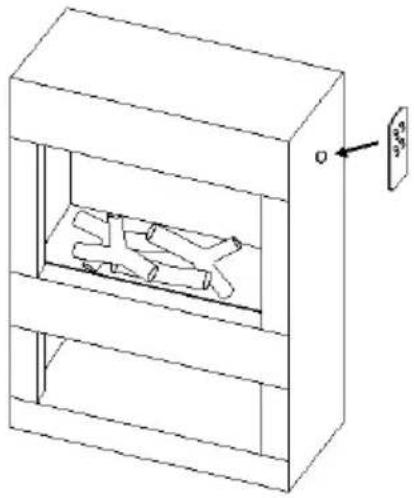
natural_image
Line drawing of a two-tiered storage unit with internal compartments and a hanging control panel (no text or symbols)| Operation by the Control Panel | |
| O/I | Press this switch, the unit power-on. When the O/I switch is turned off, all other functions are also stopped. |
 | Press this button to turn ON the fireplace. Press again to turn off the fireplace and the fan will continue to work for 60 seconds without heat. |
 | Press this button to change the flame colour. If you press the button once, the flames light up yellow. Press twice for yellow and blue flames. Press three times for blue flames. |
| Press this button to change flame effect. Press again to decrease the flame intensity. There are 6 light intensities for your selection. The flame optics will go lower under the sequence of 6 - 5 - 4 - 3 - 2 - 1. Pressing the button again will stop the flame effect. | |
 | Press this button to the desired temperature. When desired ambient temperature is reached, the heater will automatically stop heating. When the ambient temperature drops below the desired temperature 2 °C, the heater will resume heating. |
| Operation by the Remote Control | |
 | Press this button to turn ON the fireplace. Press again to turn off the fireplace and the fan will continue to work for 60 seconds without heat. |
[GHST] | Press this button to toggle between the two temperature scales Celsius (°C) or Fahrenheit (°F). The current setting is displayed on the LED screen.Press this button for timer function. “0H” to “8H” is displayed on the LED screen. “0H” means there is no set running time and heater will run continuously. The displays “1H” to “8H” indicate the number of hours the heater will operate before shutting off. |
 | Press this button to change flame effect. Press again to decrease the flame intensity. There are 6 light intensities for your selection. The flame optics will go lower under the sequence of 6 – 5 – 4 – 3 – 2 – 1. Pressing the button again will stop the flame effect. By default the flame colour is yellow. Hold it for about 3 seconds to change flame colour. The flame colour will change under the sequence of yellow – yellow and blue – blue. |
| [2x48] | Press up or down button to the desired temperature. When desired ambient temperature is reached, the heater will automatically stop heating. When the ambient temperature drops below the desired temperature 2 °C, the heater will resume heating |
CLEANING AND MAINTENANCE
WARNING
Risk of electric shock and fire! Before attempting any cleaning and maintenance, switch the appliance off and disconnect it completely from the power supply. Maintenance should only be carried out by a qualified technician.
- Before cleaning any part of the appliance, turn off all controls and switches and unplug the power cord from the wall outlet. Wait until the appliance has cooled down completely.
Cleaning Glass Panel
- Remove dust with a clean dry cloth.
- Remove fingerprints and other marks from the glass panel by using a clean damp cloth. Do not use abrasive cleaners or spray liquids on the glass surface.
- Metal and metal painted parts should be cleaned with clean damp cloth only. Do not use abrasive cleaners or spray liquids on these surfaces.
DISPOSAL CONSIDERATIONS
natural_image
Symbol of a trash bin crossed with a diagonal line, representing no waste or discharge (no text or labels)If there is a legal regulation for the disposal of electrical and electronic devices in your country, this symbol on the product or on the packaging indicates that this product must not be disposed of with household waste. Instead, it must be taken to a collection point for the recycling of electrical and electronic equipment. By disposing of it in accordance with the rules, you are protecting the environment and the health of your fellow human beings from negative consequences. For information about the recycling and disposal of this product, please contact your local authority or your household waste disposal service.
This product contains batteries. If there is a legal regulation for the disposal of batteries in your country, the batteries must not be disposed of with household waste. Find out about local regulations for disposing of batteries. By disposing of them in accordance with the rules, you are protecting the environment and the health of your fellow human beings from negative consequences.
DECLARATION OF CONFORMITY
CE UK CA
Manufacturer:
Chal-Tec GmbH, Wallstrasse 16, 10179 Berlin, Germany.
Importer for Great Britain:
Berlin Brands Group UK Limited
PO Box 42
272 Kensington High Street
London, W8 6ND
United Kingdom
Hereby, Chal-Tec GmbH declares that the radio equipment type Zermatt is in compliance with Directive 2014/53/EU. The full text of the EU declaration of conformity is available at the following internet address: use.berlin/10035264
For Great Britain: Hereby, Chal-Tec GmbH declares that the radio equipment type Zermatt is in compliance with the relevant statutory requirements. The full text of the declaration of conformity is available at the following internet address: use.berlin/10035264
Chère cliente, cher client,
SOMMAIRE
FICHE DE DONNÉES PRODUIT
natural_image
Line drawing of a simple kitchen appliance with a mounted chimney and display case (no text or symbols)MISE EN SERVICE ET FONCTIONNEMENT
natural_image
Isometric line drawing of a two-tiered storage unit with internal compartments and a hanging control panel (no text or symbols)natural_image
Symbol of a trash bin crossed with a diagonal line, no text or numbers presentBerlin Brands Group UK Limited
PO Box 42
272 Kensington High Street
London, W8 6ND
United Kingdom
Estimado cliente:
ÍNDICE
natural_image
Line drawing of a two-tiered storage unit with internal compartments and a hanging control panel (no text or symbols)natural_image
Symbol of a trash bin crossed with a diagonal line, no text or numbers presentBerlin Brands Group UK Limited
PO Box 42
272 Kensington High Street
London, W8 6ND
United Kingdom
INDICE
natural_image
Line drawing of a simple 3D model of a rectangular stove or appliance with a vertical pipe and labeled 'Parete' (no other text or symbols)MESSA IN FUNZIONE E UTILIZZO
natural_image
Isometric line drawing of a two-tiered storage unit with internal components and a hanging control panel (no text or symbols)natural_image
Symbol of a trash bin crossed with a diagonal line, no text or labels presentBerlin Brands Group UK Limited
PO Box 42
272 Kensington High Street
London, W8 6ND
United Kingdom


- INHALTSVERZEICHNIS
- CONTENTS
- SAFETY INSTRUCTIONS
- CAUTION
- ACCESSORIES
- INSTALLATION
- COMMISSIONING AND OPERATION
- Control Panel
- Remote Control
- Remote Control Battery Replacement
- Magnetic Holder for the Remote Control
- CLEANING AND MAINTENANCE
- WARNING
- Cleaning Glass Panel
- DISPOSAL CONSIDERATIONS
- DECLARATION OF CONFORMITY
- CE UK CA
- Manufacturer:
- Importer for Great Britain:
- Chère cliente, cher client,
- SOMMAIRE
- MISE EN SERVICE ET FONCTIONNEMENT
- Estimado cliente:
- ÍNDICE
- INDICE
- MESSA IN FUNZIONE E UTILIZZO
Brand : Klarstein
Model : Zermatt 1800W
Category : Fireplace