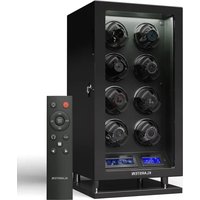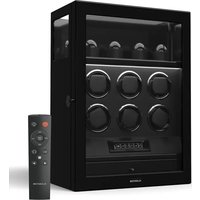
SecureTouch - Watch winder Klarstein - Free user manual and instructions
Find the device manual for free SecureTouch Klarstein in PDF.


User questions about SecureTouch Klarstein
0 question about this device. Answer the ones you know or ask your own.
Ask a new question about this device
Download the instructions for your Watch winder in PDF format for free! Find your manual SecureTouch - Klarstein and take your electronic device back in hand. On this page are published all the documents necessary for the use of your device. SecureTouch by Klarstein.
USER MANUAL SecureTouch Klarstein
text_image
QR code image containing encoded data, no visible human-readable textINHALT
Technische Daten 1
text_image
55mm 60mm 40mmnatural_image
Symbol of a trash bin crossed with no text or labels, accompanied by a horizontal line and a rectangular block below (no text or symbols present)Berlin Brands Group UK Limited
35 Ballards Lane
London, N3 1XW
United Kingdom
Dear customer,
Congratulations on your purchase. Please read the following instructions carefully and follow them to prevent potential damage. We accept no liability for damage caused by disregarding the instructions and improper use. Please scan the QR code to access the latest operating instructions and further information about the product.

text_image
QR code image containing encoded data, no visible human-readable textCONTENTS
Technical Data 16
Safety Instructions 17
Product Overview 17
Switches and connections 19
Modes 20
Fixing the watch in place 23
Fingerprint Lock 24
Disposal Considerations 26
Manufacturer & importer (UK) 26
TECHNICAL DATA
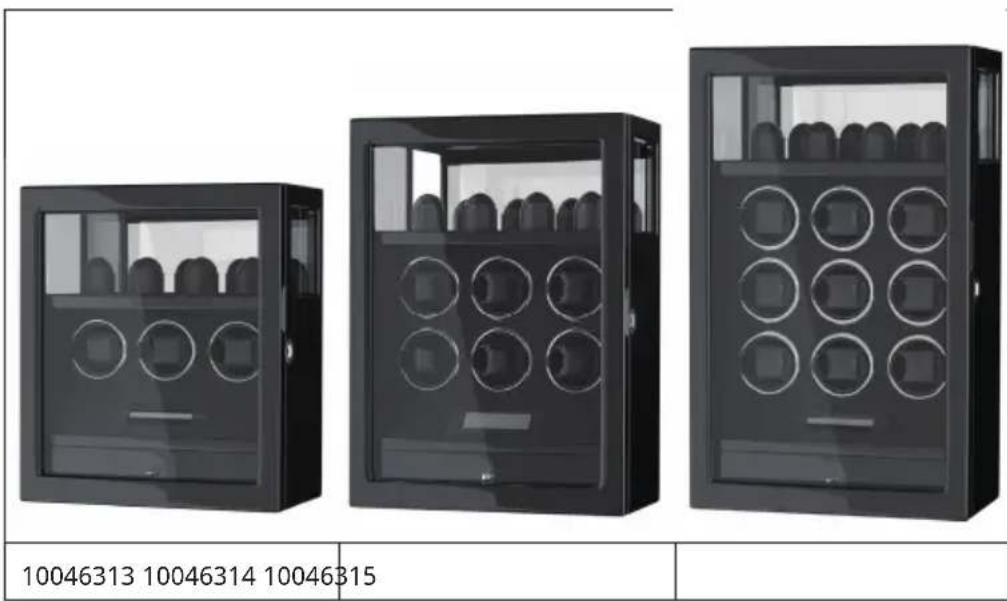
| Article number | 10046313 10046314 10046315 | ||
| Power supply (power adapter) | 100-240 V AC, 50/60 Hz5 V DC /3 A | ||
| Power consumption in standby mode | <0.2 W(Switch to standby mode after 30 min) | ||
| Maximum watch diameter | 55 mm 55 mm | 55 mm | |
| Maximum circumference (strap) | 62 mm 62 mm | 62 mm | |
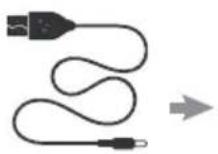
USB-connection EU
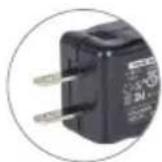
US Standard
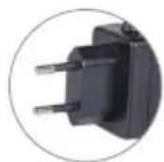
Standard
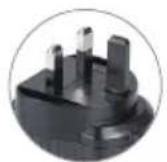
UK Standard
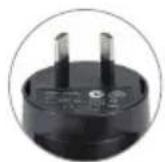
AU Standard
SAFETY INSTRUCTIONS
• Children from the age of 8 years and mentally, sensory and physically impaired persons may only use the device if they have been informed in detail about the functions and safety precautions by a supervisor responsible for them beforehand and understand the associated risks.
• Children must be supervised not to play with the appliance.
- Only use the supplied power adapter.
- Do not rotate the watch winder manually as this could damage the watch winder.
- To avoid damaging the box, do not place the watch winder in direct sunlight and do not expose it to water, moisture or extreme temperatures.
• Children must be supervised not to play with the appliance.
PRODUCT OVERVIEW
text_image
10046313 10046314 10046315Control panel Working Hour/ Motor options
TPD
ALL Mode
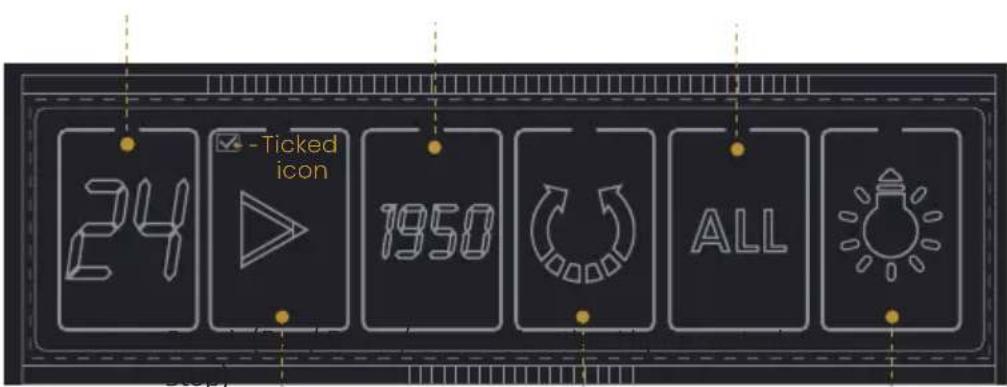
text_image
24 -Ticked icon 1950 ALLSwitch
natural_image
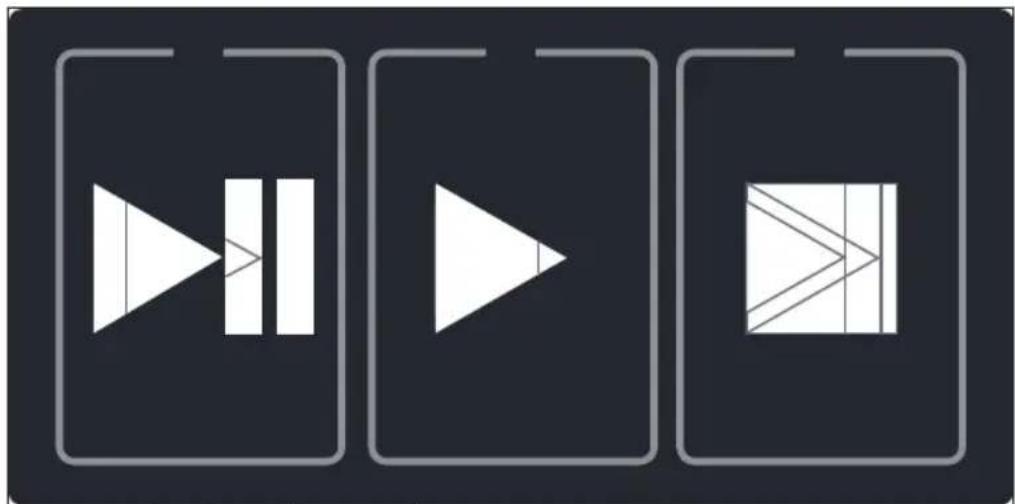
Three rectangular panels with white geometric shapes on dark background: play button, play triangle, and abstract geometric pattern (no text or symbols)Pause Direction Lights control
- If you press the pause button and open the front cover, all watch holders will stop.
- If you press the pause button again and open the front cover, all watch holders will continue to work.
Remote Control
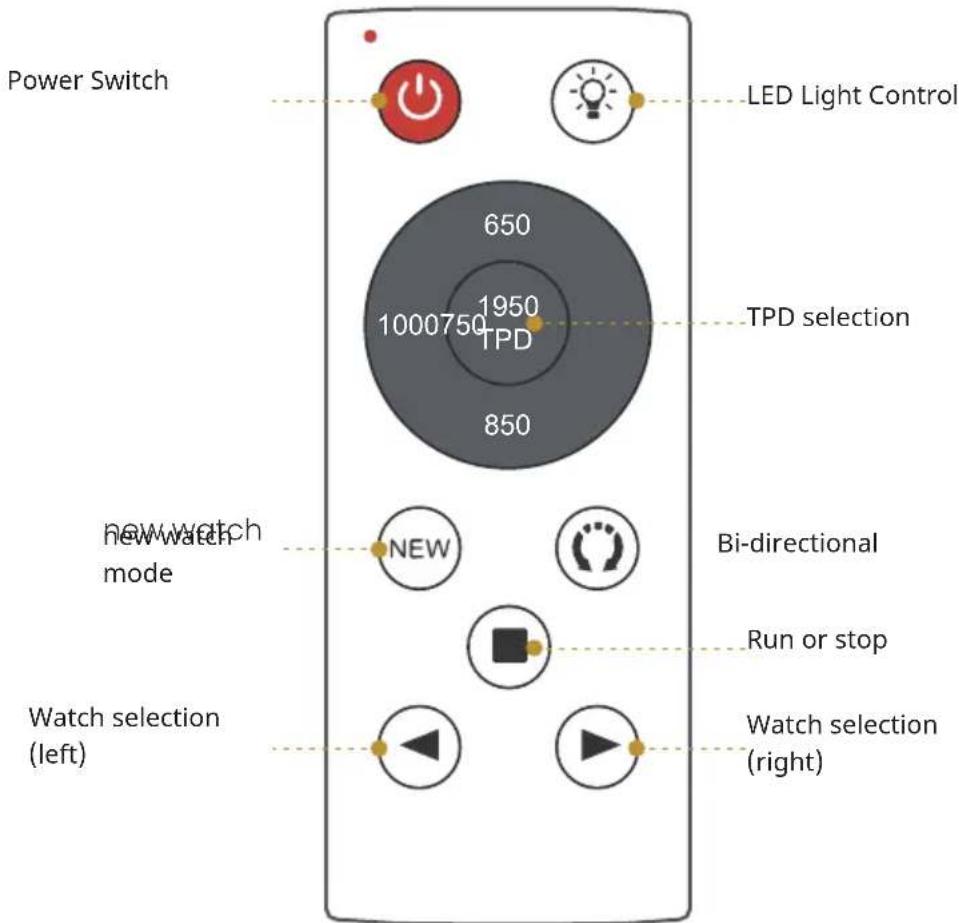
text_image
Power Switch LED Light Control 650 1950 TPD 1000750 850 TPD selection new watch mode NEW Bi-directional Run or stop Watch selection (left) Watch selection (right)SWITCHES AND CONNECTIONS
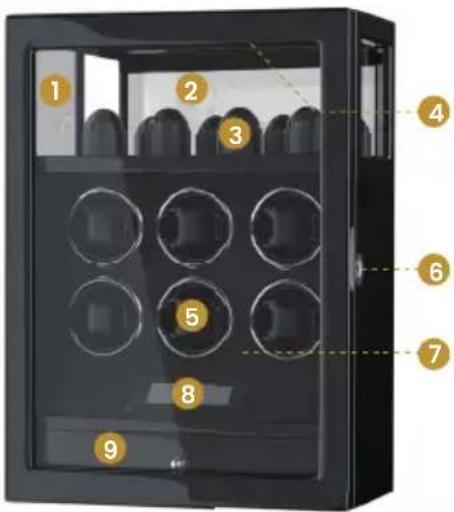
text_image
Diagram of a black device with numbered components, likely a display or control panel with labeled parts 1 through 9.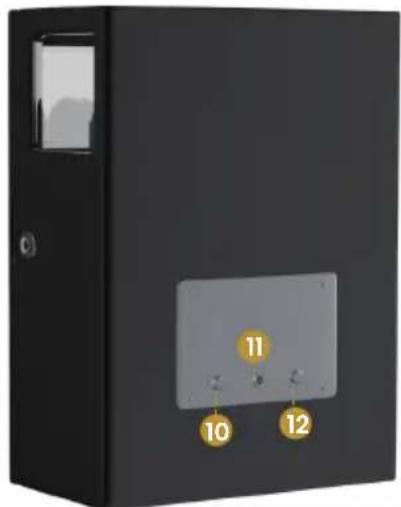
natural_image
Black rectangular device with two labeled buttons (10 and 12) on its side, no visible text or symbols on the device itself.| 1 | Perspex perspective display window | 7 Remote control infrared sensor |
| 2 Mirror 8 LCD Touch Screen Panel | ||
| 3 Watch Deck 9 Drawer | ||
| 4 LED Light Stripe 10 Power Switch | ||
| 5 Watch Cuff 11 Power Port | ||
| 6 | Fingerprint Lock Charge Port and Key Port | 12 Pause Switch |
MODES
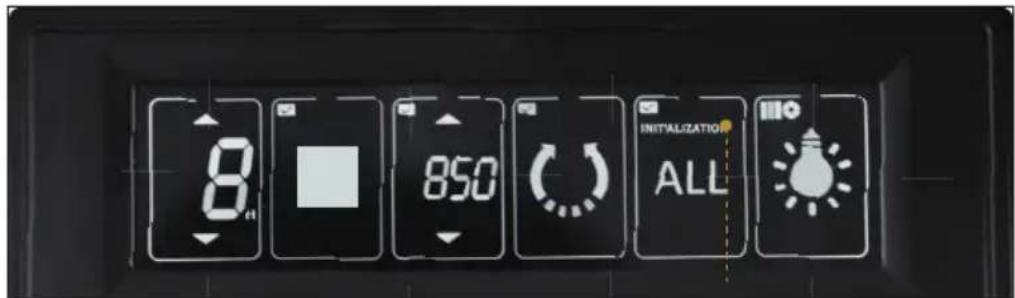
Initialization Mode
text_image
8 850 INITIALIZATION ALLInitialization Mode
① Hold down the "ALL" button for 5 seconds to display Initialization. Press the "Switch" button to perform initialization. The ticked icon will appear in the upper left corner of the middle four choices, representing the "ALL" Mode. When you choose any other button, initialization mode will go off and the appliance will return to the original operation mode.
② Initialization parameter: TPD=850; Direction=bidirectional; Switch =Stop; Motor Selection=01 group; ALL=ALL selected. Working Hours=24 hours.
③ When you change any of the parameters: Switch - TPD - Direction - Lights, the initialization mode will exit and the initialization prompt will go off.
All Mode
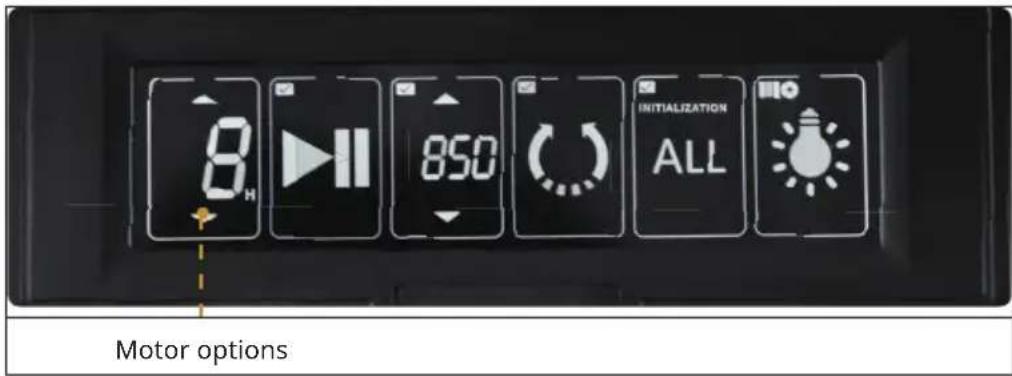
Tap the "ALL" button 4 times until the top left corner of each of the four options shows a ticked icon, or Press the "motor selection" and "Run" buttons at the same time for 5 seconds, and then tap the "Run" button. All watches will be set to the current mode. . If you change the parameters of "Switch - TPD - Direction", all watches will be changed to the current parameters.
Custom Mode
text_image
8 H 11 850 INITIALIZATION ALL Motor optionsIf the current mode is "ALL", just tap the "ALL" button again, the "Motor Options" will appear, and you can set the mode of each motor individually.
New watch mode
Press and hold the „TPD“ button until the “----” diagram is displayed.
Note: During the new watch mode, any operation will cause the new watch mode to exit and return to the previous settings.
| Direction Setting Working | Time Rest Time | |
| Clockwise 4 hours 8 hours | ||
| Counterclockwise 4 hours | 8 hours | |
| Bi-directional Clockwise for | 2 hoursand counterclockwise for2 hours | 8 hours |
| Finally return to the previous setting mode | ||
Winding Modes
The TPD value is between 300 - 2300. By turning up and down to change the TPD value, above 300 TPD will return to 2300 TPD cycle.
TPD calculation method: 10 turns per cycle
24-hour mode duty cycle (minutes) = 1440/(TPD/10 revolutions); 12-hour mode duty cycle (minutes) = 1440/(TPD/10 revolutions) /2; 8-hour mode operating cycle (minutes) = 1440/(TPD/10 revolutions) /3; e.g: TPD set to 650, clockwise, 24-hour mode. Then the running time (minutes) = 22.2, i.e. each cycle lasts 22.2 minutes.
Cycle execution: the time required for the motor to rotate clockwise 10 times + the motor stop time = 22.2 minutes. In the 12 (8 hour) operating mode, the cycle runs for 12 (8 hour) hours and then stops; stops for 12 (16 hour) hours and then restarts the cycle.
Note
There is no magic number of revolutions that will wind your watch. Things such as how active you are, how many complications your watch has, how often you use the chronograph function, how often you wear your watch, the make of your watch, how long it has been since it was last serviced and a host of other variables will all affect how many revolutions your watch needs to stay wound.
And a watch winder won't wind a watch that's completely stopped. You will therefore need to manually wind the watch to get it going. You will have to determine this by trying out the different settings.
LED Light Stripe
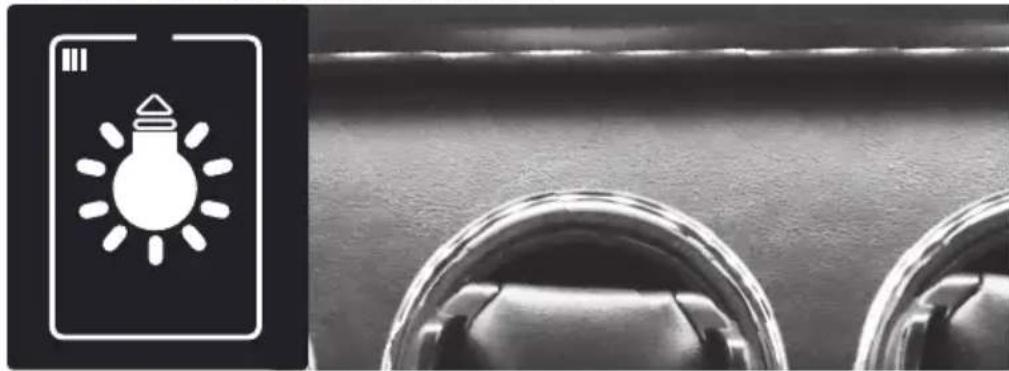
There are two LED light strips embedded in the top and bottom of the watch box. The LED light has 3 levels to help users read the watch's status. It is activated when the power is turned on, when the front cover is opened, or when the programme has been manipulated. To save power, the backlight automatically turns off when no input is detected for about 30 seconds; the LED light remains on unless you turn it off.

Grade of the light strip, in total 3 grades
natural_image
Black and white photo showing a light bulb icon next to two circular buttons, no text or symbols present.FIXING THE WATCH IN PLACE
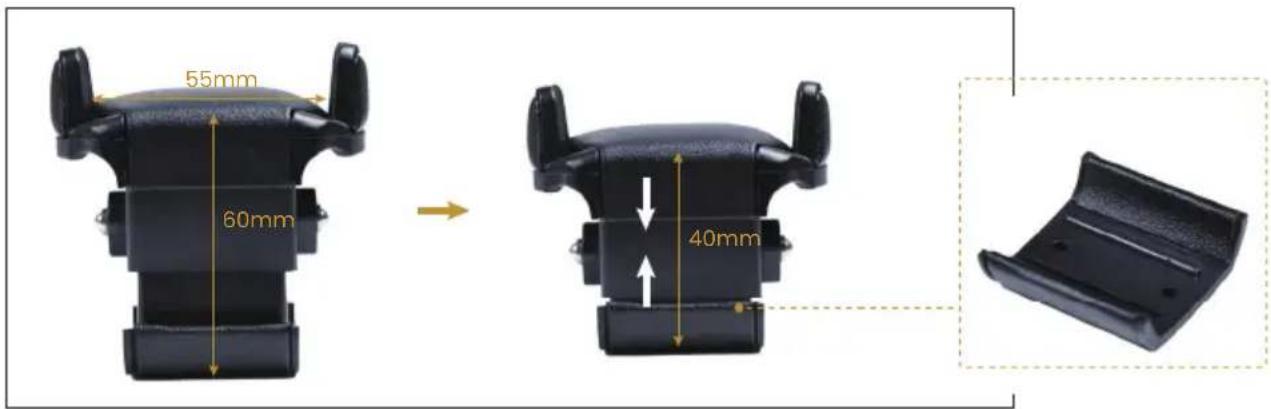
This unique patent design is best match for different size of watch bracelet/wrist. It can fit max. 55 mm watch diameter, the watch thickness is up to 20 mm and the bracelet/ wrist diameter is limited from 35-62mm.
text_image
55mm 60mm 40mmHow to fix the watch in place
| 1 | Remove the watch holder from the device by pulling the two tabs on the side. |
| 2 | Close the strap or bracelet of your watch. |
| 3 | Compress the cuff, and slide your watch over the cuff, watch dial facing outward. |
Note: If the strap is too short, you can push out the detachable part at the bottom at the bottom and then follow the steps to put the watch inside. Push the cuff into the drum until it locks into place and an audible click is heard.
FINGERPRINT LOCK
text_image
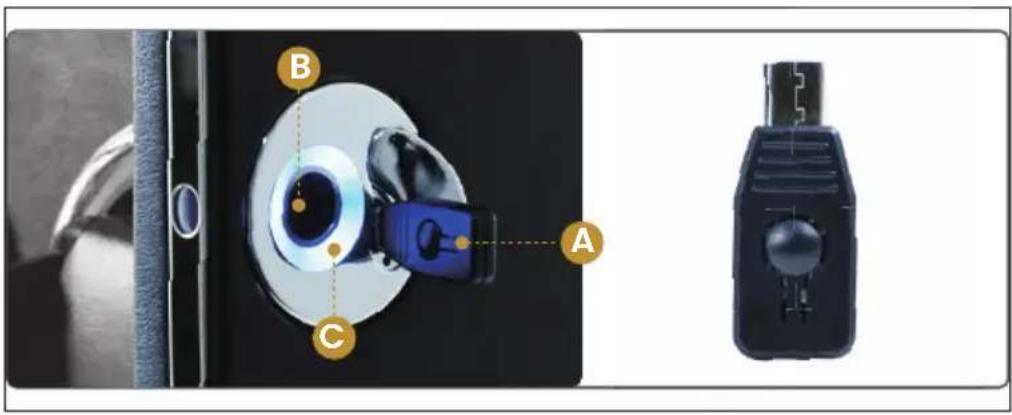
B A C| A Admin Key |
| B Fingerprint sensor panel: Put your finger here to identify |
| C LED Status: In total there are 3 LED status – blue light, red light and pink light. |
Factory mode: Any fingerprint can be unlocked
Successful fingerprint capture status: The blue light is on for 2 seconds.
Unsuccessful fingerprint status: The red light flashes 3 times.
The fingerprint sensor can create up to 20 fingerprint users (2 administrator and 18 user accounts). The first two fingerprints entered are administrators by default.
Initial administrator fingerprint account setting
Press and hold the fingerprint sensor panel for 7 seconds, release your finger when the blue indicator flashes for the first time, then you can see the blue indicator flash two more times until the pink indicator flashes once, indicating that it will enter the fingerprint registration state: Using the fingerprint you have defined as the administrator, enter 6 valid presses continuously on the panel, the blue light will flash once each time until the system has enrolled your fingerprints 6 times, the blue light will flash for 2 seconds to indicate that the first fingerprint enrolment is successful, and exit the fingerprint enrolment mode.
Note: If the red light flashes during fingerprint capture, it is an invalid capture and it is necessary to continuously capture valid fingerprints for 6 times with the blue light flashing 6 times.
Second administrator fingerprint account setting
Do the same as 1) above. When the pink light flashes once, indicating that you need to enter your first administrator fingerprint once to confirm, then place your second administrator fingerprint on the panel and press valid fingerprint 6 times continuously. The blue light will flash once each time you press until the system has enrolled your fingerprints 6 times, the blue light will stay on for 2 seconds, indicating that the second administrator fingerprint enrolment is successful.
The 3-20 fingerprint accounts setting:
The fingerprint entry steps are the same as the method for entering the second administrator fingerprint account.
Note: The mode of using the admin key is not required administrator fingerprint confirmation during any fingerprint entry process
Using the Admin Key setting mode
Insert the key, briefly press the key once, then the blue light flashes 3 times to indicate that you can enter your fingerprint: Using the fingerprint you have defined as the administrator, enter 6 valid presses continuously on the panel, the blue light will flash once each time you press until the system has collected your fingerprints 6 times, the blue light will flash for 2 seconds to indicate that the first fingerprint entry is successful.
Note: The Admin key mode does not require the Admin fingerprint to be validated during each fingerprint enrolment.
Remove/Reset Fingerprint Accounts
There are two ways to remove fingerprints: Using Fingerprint Verification or using the Admin Key.
1. Using Fingerprint Verification
Press and hold the sensor with any finger, do not release your finger, the blue light will flash 3 times during this time, do not release your finger, continue to press, then the red light will flash 3 times, prompting you to enter the Admin fingerprint twice, each valid press will be accompanied by the pink indicator light, indicating that the verification was successful. After releasing the finger, the blue light will remain on for 2 seconds to indicate that all fingerprints have been cleared and the factory default is restored.
2. Using Admin key
Insert the key, press and hold the key button for about 5 seconds, the blue light is always on, when the pink light is displayed, it means that all fingerprints have been cleared, and the factory mode is restored.
DISPOSAL CONSIDERATIONS
natural_image
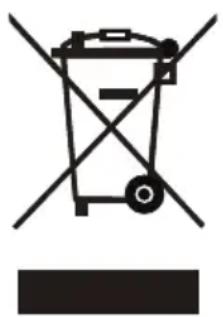
Symbol of a trash bin with crossed lines and a horizontal bar below (no text or labels)If there is a legal regulation for the disposal of electrical and electronic devices in your country, this symbol on the product or on the packaging indicates that this product must not be disposed of with household waste. Instead, it must be taken to a collection point for the recycling of electrical and electronic equipment. By disposing of it in accordance with the rules, you are protecting the environment and the health of your fellow human beings from negative consequences. For information about the recycling and disposal of this product, please contact your local authority or your household waste disposal service.
MANUFACTURER & IMPORTER (UK)
Manufacturer:
Chal-Tec GmbH, Mühlenstrasse 25, 10243 Berlin, Germany.
Importer for Great Britain:
Berlin Brands Group UK Limited
35 Ballards Lane
London, N3 1XW
United Kingdom
Contact: info@electronic-star.de
Estimado cliente:
text_image
QR code image containing encoded data, no visible human-readable textCONTENIDO
Datos técnicos 27
natural_image
Black and white photo showing a light bulb icon next to two circular buttons, no text or symbols present.text_image
55mm 60mm 40mmnatural_image
Symbol of a trash bin with crossed lines indicating no waste, and a solid black rectangle below (no text or labels)Berlin Brands Group UK Limited
35 Ballards Lane
London, N3 1XW
United Kingdom
Cher client, chère cliente,
text_image
QR code image containing encoded data, no visible human-readable textSOMMAIRE
Fiche technique 39
natural_image
Close-up of a light bulb icon next to two circular mechanical components (no text or symbols)FIXATION DES MONTRES
text_image
55mm 60mm 40mmnatural_image
Symbol of a trash bin with crossed lines indicating no waste or discharge, and a solid black rectangle below (no text or labels)Berlin Brands Group UK Limited
35 Ballards Lane
London, N3 1XW
United Kingdom
Gentile cliente,
text_image
QR code image containing encoded data, no visible human-readable textINDICE
Dati tecnici 51
text_image
I am lit in the lumina luminosa, tre gradi in totale.text_image
55mm 60mm 40mmnatural_image
Symbol of a trash bin with crossed x and y axes, no text or labels presentBerlin Brands Group UK Limited
35 Ballards Lane
London, N3 1XW
United Kingdom

bar
| Category | Value | |---|---| | Category 1 | 100 | | Category 2 | 100 | | Category 3 | 100 | | Category 4 | 100 | | Category 5 | 100 | | Category 6 | 100 | | Category 7 | 100 | | Category 8 | 100 | | Category 9 | 100 | | Category 10 | 100 | | Category 11 | 100 | | Category 12 | 100 | | Category 13 | 100 | | Category 14 | 100 | | Category 15 | 100 | | Category 16 | 100 | | Category 17 | 100 | | Category 18 | 100 | | Category 19 | 100 | | Category 20 | 100 | | Category 21 | 100 | | Category 22 | 100 | | Category 23 | 100 | | Category 24 | 100 | | Category 25 | 100 | | Category 26 | 100 | | Category 27 | 100 | | Category 28 | 100 | | Category 29 | 100 | | Category 30 | 100 | | Category 31 | 100 | | Category 32 | 100 | | Category 33 | 100 | | Category 34 | 100 | | Category 35 | 100 | | Category 36 | 100 | | Category 37 | 100 | | Category 38 | 100 | | Category 39 | 100 | | Category 40 | 100 | | Category 41 | 100 | | Category 42 | 100 | | Category 43 | 100 | | Category 44 | 100 | | Category 45 | 100 | | Category 46 | 100 | | Category 47 | 100 | | Category 48 | 100 | | Category 49 | 100 | | Category 50 | 100 | | Category 51 | 100 | | Category 52 | 100 | | Category 53 | 100 | | Category 54 | 100 | | Category 55 | 100 | | Category 56 | 100 | | Category 57 | 100 | | Category 58 | 100 | | Category 59 | 100 | | Category 60 | 100 | | Category 61 | 100 | | Category 62 | 100 | | Category 63 | 100 | | Category 64 | 100 | | Category 65 | 100 | | Category 66 | 100 | | Category 67 | 100 | | Category 68 | 100 | | Category 69 | 100 | | Category 70 | 100 | | Category 71 | 100 | | Category 72 | 100 | | Category 73 | 100 | | Category 74 | 100 | | Category 75 | 100 | | Category 76 | 100 | | Category 77 | 100 | | Category 78 | 100 | | Category 79 | 100 | | Category 80 | 100 | | Category 81 | 100 | | Category 82 | 100 | | Category 83 | 100 | | Category 84 | 100 | | Category 85 | 100 | | Category 86 | 100 | | Category 87 | 100 | | Category 88 | 100 | | Category 89 | 100 | | Category 90 | 100 | | Category 91 | 100 | | Category 92 | 100 | | Category 93 | 100 | | Category 94 | 100 | | Category 95 | 100 | | Category 96 | 100 | | Category 97 | 100 | | Category 98 | 100 | | Category 99 | 100 | | Total (Total) = [sum of bars] / [values] * (sum of bars + bars) * (sum of bars + bars) * (sum of bars + bars). The values in the table represent the sum of the bars and the corresponding sum of the bars. There is no additional data series or categories specified in the code.