
ZX0901 ITEM 10T - Hydraulic cylinder Vevor - Free user manual and instructions
Find the device manual for free ZX0901 ITEM 10T Vevor in PDF.
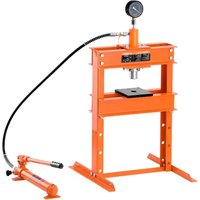


| Product Type | Hydraulic Cylinder for Workshop Press |
| Brand | Vevor |
| Model | ZX0901 ITEM 10T |
| Rated Capacity | 10 tons (10T) |
| Maximum Stroke | 58 mm |
| Maximum Working Distance | 383 mm |
| Minimum Working Distance | 130 mm |
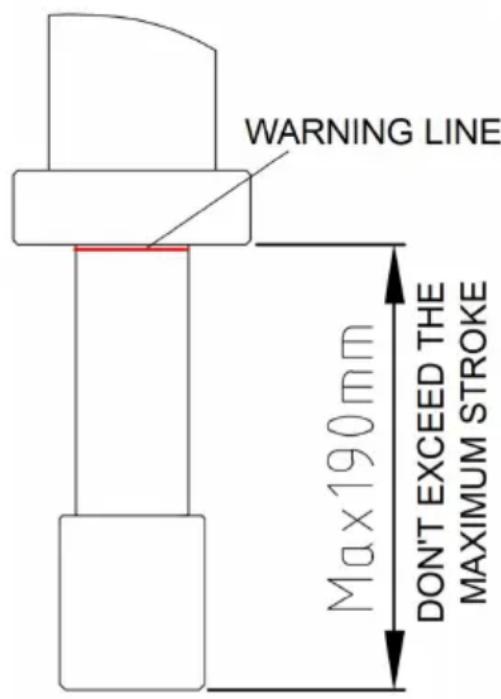
| Stroke Warning Line | 190 mm (do not exceed) |
| Pump Type | Manual (integrated jack handle) |
| Recommended Hydraulic Fluid | High-quality 15# Hydraulic Oil |
| Main Material | Heavy-duty Steel |
| Estimated Weight | Approx. 8 kg (without accessories) |
| Safety | Relief valve, overload protection device, warning line |
| Maintenance | Check oil level before each use, bleed air if necessary |
| Cleaning | Wipe with a clean, damp cloth |
| Included Spare Parts | See packing list: bolts, washers, arbor plates, handle, etc. |
| Application | Pressing, bending, straightening, forming in automotive and industrial workshops |
| Warranty | Electronic warranty certificate available at www.vevor.com/support |
| Storage | In a cool, dry place, covered with a protective cloth |
Frequently Asked Questions - ZX0901 ITEM 10T Vevor
User questions about ZX0901 ITEM 10T Vevor
0 question about this device. Answer the ones you know or ask your own.
Ask a new question about this device
Download the instructions for your Hydraulic cylinder in PDF format for free! Find your manual ZX0901 ITEM 10T - Vevor and take your electronic device back in hand. On this page are published all the documents necessary for the use of your device. ZX0901 ITEM 10T by Vevor.
USER MANUAL ZX0901 ITEM 10T Vevor
Technical Support and E-Warranty Certificate www.vevor.com/support
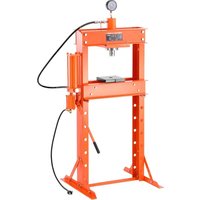
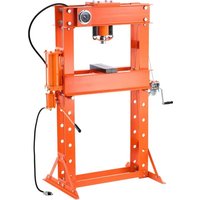
SHOP PRESS
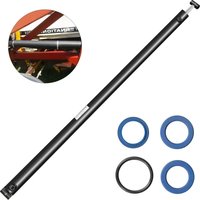
( HYDRAULIC CYLINDER )
MODEL: ZX0901 ITEM 10T
We continue to be committed to provide you tools with competitive price. "Save Half", "Half Price" or any other similar expressions used by us only represent estimate of savings you might benefit from buying certain tools with us compared to top brands and does not necessarily mean to cover all categories of tools offered. We kindly remind you to verify carefully when you are placing an order with us that you are actually saving half in comparison with the top major brands.
VEVOR®
TOUGH TOOLS, HALF PRICE
SHOP PRESS
MODEL: ZX0901 ITEM 10T
NEED HELP? CONTACT US!
Have product questions? Need technical support? Please feel free to contact us:
Technical Support and E-Warranty Certificate www.vevor.com/support
This is the original instruction. Please read all manual instructions carefully before operating. VEVOR reserves a clear interpretation of the user manual. The appearance of the product shall be subject to the product you received. Please forgive us that we won't inform you of any technology or software updates on our product.
WARNING: PLEASE READ THESE INSTRUCTIONS CAREFULLY. NOTE THE SAFE OPERATIONAL REQUIREMENTS, WARNINGS AND CAUTIONS.
SPECIFIC PRODUCT WARNINGS
- Do not operate the Shop Press beyond rated capacity.
- Warning! If you detect anything that may indicate imminent structural failure of the Shop Press, discontinue use immediately.
- Do not install this equipment on any asphalt, wooden, soft or tiled surface. Make sure the Shop Press is firmly secured to a dry, oil/grease free, flat, level concrete surface capable of supporting the combined weight of the Shop Press, the work piece being pressed, and any additional tools and equipment. Do not install the Shop Press on expansion seams or on cracked, defective concrete.
- Maintain a safe work environment. Do not use the Shop Press near wet areas and do not expose to moisture. Make sure there is adequate surrounding work space. Do not operate in the presence of flammable liquids, gases, or dust.
- Read and understand all instructions and safety precautions in the manufacturer's manual for the work piece you are pressing, when applicable. Always use the manufacturer's recommended pressing points, minimum/maximum pressing force required, etc. for the work piece you are pressing.
- Avoid off-center loads. If the Jack Plate seems unusually hard to press, immediately stop the operation. Adjust the work piece to eliminate or diminish an off-center load. Do not operate the Shop Press if the work piece tilts or binds during the down movement of the Pressure Head Assembly.
- Prior to lowering the Jack Plate remove tool trays, stands, and all other tools and equipment from the Press Apron.
- Always keep hands, fingers, and feet away from the Jack Plate and Press Apron during the pressing process. Make sure the Jack Plate(s) are in good condition before use.
- Never attempt to remove a work piece stuck in the moving parts the Shop Press. Unscrew the Release Valve and, only after returning the Jack Ram to its neutral position, should you attempt to remove a work piece.
- The work piece must be supported and controlled at all times during operation. Use a roller stand (not provided) with a larger work piece. Whenever possible, secure the work piece with clamps (not provided).
- Once contact between the pressure head and work piece has be made, step away as far as possible and continue to slowly apply pressure until the procedure is complete.
- Never leave a compressed work piece unattended. When a work piece is compressed, there is a large degree of force that has been stored in the work piece, which must be controlled until the pressure from the Head Assembly is released.
- Before performing service or maintenance release the load from the Shop Press.
Warning: The warnings, cautions, and instructions discussed in this instruction manual cannot cover all possible conditions and situations that may occur. It must be understood by the operator that common sense and caution are factors which cannot be built into this product, but must be supplied by the operator.
SAVE THESE INSTRUCTIONS
TECHNICAL DATA
| Capacity | Max working distance | Min working distance | Stroke |
| 10T | 383mm | 58mm | 130mm |
Forward
This Shop Press is designed for automotive, truck, implement, fleet, and industrial repair shops where pressing, bending, straightening, and forming is required. Typical applications include installation and removal of alternator and power steering pump bearings, axle bearings, transmission bearings, seals, u-joints, and others. It is not intended for use as an assembly table or as a fixture stand used to secure a large assembly component. Unlike presses equipped with a separately mounted pump, the power unit on this press cannot be equipped with a pressure gauge, therefore monitoring the load must be done by other means, such as a load cell digital indicator. Whatever means is chosen, the load measuring means shall be calibrated annually.
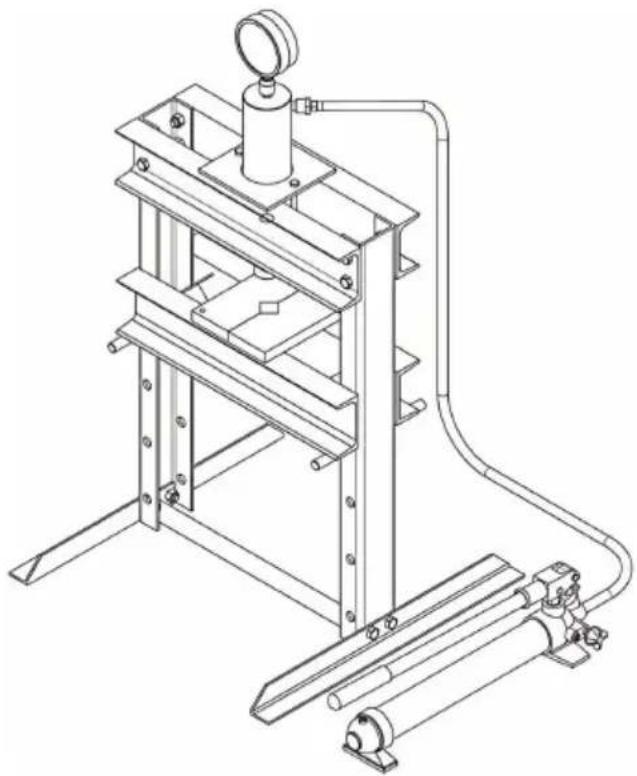
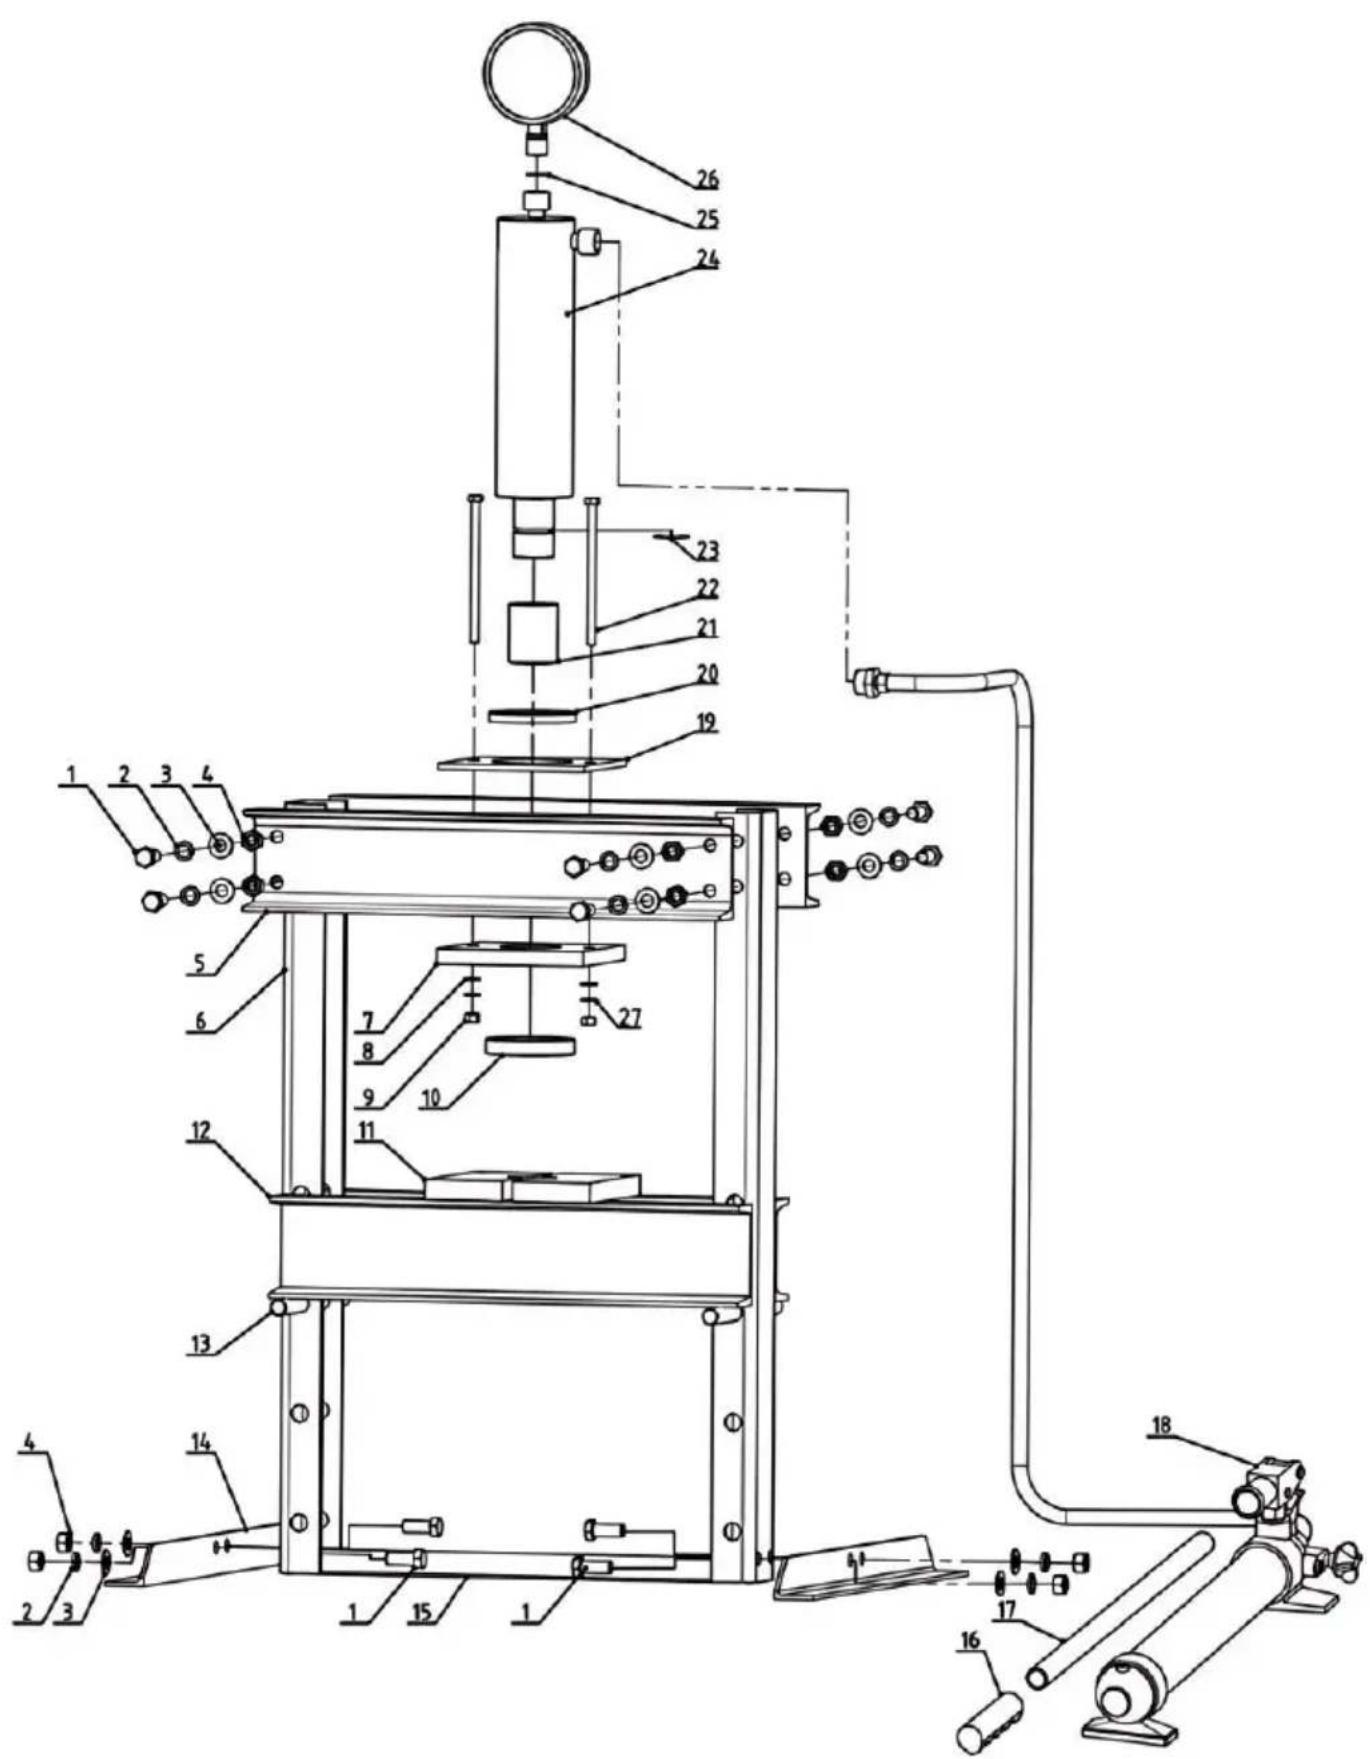
PACKING LIST
| NO. | DESCRIPTION | QTY | NO. | DESCRIPTION | QTY |
| 1 | Hex Bolt M12*30 | 12 | 15 | Rung | 1 |
| 2 | Spring Washer φ12 | 12 | 16 | Handle Cover | 1 |
| 3 | Washerφ12 | 12 | 17 | Handle | 1 |
| 4 | Hex Nut M12 | 12 | 18 | Pomp | 1 |
| 5 | Boom | 2 | 19 | Cylinder Fixing Board | 1 |
| 6 | Main Post | 2 | 20 | Up-Loop | 1 |
| 7 | Cylinder Fixing Board 2 | 1 | 21 | Head | 1 |
| 8 | Washer φ10 | 2 | 22 | Hex Bolt M10*140 | 2 |
| 9 | Hex Nut M10 | 2 | 23 | Wire Ring | 1 |
| 10 | Down-Loop | 1 | 24 | Cylinder Part | 1 |
| 11 | Block | 2 | 25 | Nylon Gasket | 1 |
| 12 | Welded Parts Of Workbench | 1 | 26 | 10T Gauge | 1 |
| 13 | Cotter Pin | 2 | 27 | Spring Washer φ10 | 2 |
| 14 | Foot | 2 |
1. The 10-Ton Shop Press comes with two Arbor Plates. The Arbor Plates can be used individually or connected as shown below by the Arbor Lock. 2. The gap between the two plates is expandable from 0-5". To adjust the gap between the two Arbor Plates, loosen each bolt on the side of the plates, adjust the gap between the plates, then retighten the bolts before use. 3. To set the Aprons at a specific height, slide the two Pins through opposite adjustment holes on the Press Frame legs and secure in place using the two R-Clips. 4. Place the Arbor Plate onto the Press Apron, making sure to center it on the Press Apron. 5. WARNING! If the Arbor Plates rest on an obstruction (such as a bolt, debris) an uneven base can be created. This can lead to unusual stress on the Arbor Plates and possibly a break and/or personal injury. 6. Insert the narrower jack handle (the end with the pin) into the larger handle and engage the pin into the "T" slot. 7. Using the slotted end of the jack handle, tighten (turn clockwise) the relief valve of the Jack. 8. Insert the larger tube of the jack handle into the Jack Handle Connector located on the side of the Jack. 9. Pump the handle up and down to extend the Jack and operate the Shop Press. 10. WARNING! Should you detect any kind of structural failure, stop using the Shop Press immediately. If necessary, have the unit repaired by a qualified technician. 11. When finished, remove the jack handle from the Jack Handle Connector and loosen (turn counter-clockwise) the relief valve of the Jack.
Bleeding
- Remove the Oil Fill Plug located on the back of the Jack to expose the Oil Fill Hole.
- Open the Release Valve located on the front of the Jack, above. Insert the Handle into the Pump Core. Slowly pump the handle to force air out of the Oil.
- As soon as the oil starts to come out of the hole, stop pumping. Replace the Fill Plug. Close the Release Valve.
- Check the oil level. It must be just below the oil fill hole. If necessary, add high-quality hydraulic oil 15#.
WARNING!
Do not overstroke or overload. It may cause the cylinder to not reset, oil leaking, equipment damage, or personal injury.
- Do not operate the shop press beyond its stroke. When you see the limit line of the cylinder, please stop pressing down immediately.
- Do not operate the shop press beyond its capacity.
- Avoid off-center loads.
- Always keep hands, fingers, and feet away from the jack plate and press apron during the pressing process.
MAINTENANCE
- Caution: Always release load from the shop press before performing any inspection, maintenance, or cleaning.
- Before each use, inspect the general condition of the shop press. Check for structural failure, loose, cracked, bent, or damaged parts, misalignment or binding of moving parts, and any other condition that may affect its safe operation. If abnormal noise or vibration occurs, have the problem corrected before further use. Do not use damaged equipment.
- To prevent rust, coat all exposed surfaces with a light-weight oil.
- Always keep the arbor plates and press apron area clean and free of other lubricants.
- To clean, wipe with a clean, damp cloth.
- When storing, keep the Shop Press covered with a clean drop cloth in a dry location.
VEVOR®
TOUGH TOOLS, HALF PRICE
Technical Support and E-Warranty Certificate
www.vevor.com/support
VEVOR®
TOUGH TOOLS, HALF PRICE
NEED HELP? CONTACT US!
PRODUCT-SPECIFIC WARNINGS
OPERATING INSTRUCTIONS
OPERATING INSTRUCTIONS
www.vevor.com/support
VEVOR®
TOUGH TOOLS, HALF PRICE
INSTRUCTIONS FOR USE
electronics www.vevor.com/support
VEVOR®
TOUGH TOOLS, HALF PRICE
NEED HELP? CONTACT US!
OPERATING INSTRUCTIONS
NEED HELP? CONTACT US!
www.vevor.com/support
OPERATING INSTRUCTIONS
www.vevor.com/support
VEVOR®
TOUGH TOOLS, HALF PRICE
Technical support and e-warranty certificate www.vevor.com/support
SHOP PRESS
(HYDRAULIC CYLINDER)
MODEL: ZX0901 ITEM 10T
NEED HELP? CONTACT US!
SPECIFIC PRODUCT WARNINGS
INSTRUCTIONS FOR USE
warranty certificate www.vevor.com/support
Brand : Vevor
Model : ZX0901 ITEM 10T
Category : Hydraulic cylinder