H11L1 - Heated blanket/cushion Vevor - Free user manual and instructions
Find the device manual for free H11L1 Vevor in PDF.

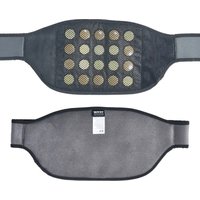
| Product Type | Jade Stone Heating Cushion |
| Brand | Vevor |
| Model | H11L1 |
| Stone Material | Jade stone |
| Heating Type | Far Infrared |
| Maximum Temperature | 70 °C (159 °F) |
| Adjustable Temperature Range | 40 °C to 70 °C (103 °F to 159 °F) |
| Adjustable Timer | 0 to 720 minutes (12 hours) |
| Auto Shut-off | Yes, after 720 minutes if not set |
| Memory Function | Yes, remembers temperature and time settings |
| Display | Digital Screen |
| Control | Touch buttons (on/off, temperature+, temperature-, time+, time-, memory) |
| Power Supply Voltage | 220-240 V ~ 50/60 Hz (standard estimate) |
| Recommended Cleaning | Wipe with a soft, damp cloth; do not immerse |
| Safety | Auto shut-off, overheat protection |
| Recommended Use | 20 minutes per session for the first few weeks |
| Certifications | CE, UKCA, FCC Part 15 |
| Included Accessories | Digital controller, power cord, storage bag |
| Warranty and Support | www.vevor.com/support |
Frequently Asked Questions - H11L1 Vevor
User questions about H11L1 Vevor
0 question about this device. Answer the ones you know or ask your own.
Ask a new question about this device
Download the instructions for your Heated blanket/cushion in PDF format for free! Find your manual H11L1 - Vevor and take your electronic device back in hand. On this page are published all the documents necessary for the use of your device. H11L1 by Vevor.
USER MANUAL H11L1 Vevor
Technical Support and E-Warranty Certificate www.vevor.com/support
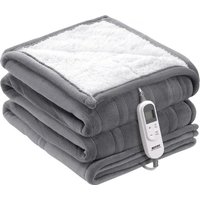
JADE STONE HEATING PAD
MODEL: H11M3 / H11M2 / H11N1
H11S2 / H11L1
We continue to be committed to provide you tools with competitive price. "Save Half", "Half Price" or any other similar expressions used by us only represent estimate of savings you might benefit from buying certain tools with us compared top brands and does not necessarily mean to cover all categories of tools offered are kindly reminded to verify carefully when you are placing an order with us actually saving half in comparison with the top major brands.
MODEL: H11M3 / H11M2 / H11N1 / H11S2 / H11L1
natural_image
Abstract composition of colored geometric shapes and textures, including green, yellow, purple, black, and brown blocks (no text or symbols)NEED HELP? CONTACT US!
Have product questions? Need technical support? Please feel fr contact us:
Technical Support and E-Warranty Certificate www.vevor.com/support
This is the original instruction, please read all manual instruction carefully before operating. VEVOR reserves a clear interpretation user manual. The appearance of the product shall be subject to product you received. Please forgive us that we won't inform you there are any technology or software updates on our product.
 | Warning-To reduce the risk of injury, user must read ins manual carefully. |
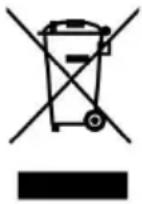 | CORRECT DISPOSALThis product is subject to the provision of European Dire 2012/19/EC. The symbol showing a wheelie bin crossed through indicates that the product requires separate refuse collection in the European Union. This applies to the pro and all accessories marked with this symbol. Products ma as such may not be discarded with normal domestic was must be taken to a collection point for recycling electrica electronic devices |
 | Compliance is a EC & UK security certification. |
FCC INFORMATION
CAUTION: Changes or modifications not expressly approved by the party responsible for compliance could void the user's authority to operate the equipment!
This device complies with Part 15 of the FCC Rules. Operation is subject to following two conditions:
1) This product may cause harmful interference.
2) This product must accept any interference received, including interference that may cause undesired operation.
WARNING: Changes or modifications to this product not expressly approved by the party. responsible for compliance could void the user's authority to operate product.
Note: This product has been tested and found to comply with the limits for B digital device pursuant to Part 15 of the FCC Rules, These limits are des provide reasonable protection against harmful interference in a residential installation.
This product generates, uses and can radiate radio frequency energy, and if installed and used in accordance with the instructions, may cause harmful
interference to radio communications. However, there is no guarantee that interference will not occur in a particular installation. If this product does cause harmful interference to radio or television reception, which can be determined by turning the product off and on, the user is encouraged to try to correct the interference by one or more of the following measures.
- Reorient or relocate the receiving antenna.
- Increase the distance between the product and receiver.
- Connect the product to an outlet on a circuit different from that to which receiver is connected.
- Consult the dealer or an experienced radio/TV technician for assistance.
The device has been evaluated to meet general RF exposure requirement. The device can be used in portable exposure condition without restriction.
IMPORTANT SAFEGUARDS
Thank you for using this product. In order to make sure that you can opera machine correctly, read this instruction carefully before operation and keep it properly for future reference. Please be sure to read the precautions and saf rules on this page to ensure your safe use.
This manual will outline safety warnings and precautions, operating, maintenance and cleaning. The warnings and instructions reviewed in this manual cannot call all possible conditions and situations that may occur. Caution and common se are not built into this product, since we believe that the uses will comply with codes. If you have any problems, please call us. Do not try to fix the problem yourself, or it will cause injury or property damage.
Please read ALL the instructions before using your machine.
- Please check the product before each use. If you find that the jade is b the product is damaged, please do not use it.
- Do not let children, minors, and pets get close to or touch the machine.
- Do not immerse the appliance in water or any other liquid.
- Do not disassemble the product.
-
Using any accessories or attachments that are not provided or recommend by the manufacturer may cause injury.
-
Please start to use after the collect is fixed well.
-
Do not leave the product hanging over the edge of table or counter or I into contact with any hot surfaces.
-
Do not place the product on or near hot air, electric burners or heaters.
-
Do not apply this unit to any other purposes than the indicated usage.
-
KEEP IT OUT OF CHILDREN'S REACH.
-
DO NOT CLEAN IT WITH ANY ABRASIVE MATERIAL.
-
Please clean it regularly, at least once a month.
-
Do not cover the mat with a quilt or blanket or pillow and so on when mat.
Note: The quilt/blanket/pillow...may be burned when the heat of the mat is hi
-
Do not partially cover this pad to avoid partially overheating.
-
Do not use this pad on a latex/silicone/sponge.bed mattress or sofa that soft.
-
Do not use this pad together with other heating products
-
Do not use while unconscious or while sleeping.
-
Do not use on an infant.
-
Do not use if you are pregnant or think you may be pregnant
-
Do not use over any malignancy. Anyone with diabetes, poor blood circulation or with disabilities should consult their physician before use.
-
Place pad directly where heat is desired.
Note: Burns can occur regardless of control setting. Check skin under pad frequently to avoid burning and blistering.
-
Do not use in any oxygen enriched environment or near equipment with or emit oxygen.
-
Do not fold pad and apply weight (Do not fold sharply).
-
Do not use pins, nails, screws, or any other metallic means to fasten this p place
-
Never pull the pad by the power supply cord or use the cord as a hair
-
Carefully examine inner cover before each use, discard the pad if inner covering shows any signs of deterioration such as blistering or cracking.
-
If smoke is ever detected from this device, immediately remove the power from the outlet.
-
Do not use this pad with liniments, salves or ointments that contain heat
producing ingredients, skin burns could result.
- Use wherever hot applications are desirable for personal comfort, and whenever recommended by your physician for the relief or pain.
- Keep you pad in its carrying bag or in a dry, cool place
- Do not hang pad by the power cord.
- Do not use this pad in the presence of flammable mixture.
- LIFE SAFETY WARNING: Do not use this product after drinking alcohol taking other medications.
- LIFE SAFETY WARNING: Pregnant women, skin diseases, heart diseases, hypertension, brain diseases, and other diseases should consult a doctor before using this product.
- This appliance is not intended for use by persons (including children) with reduced physical, sensory or mental capabilities, or lack of experience or knowledge, unless they have been given supervision or instruction concerning use of the appliance by a person responsible for their safe.
CAUTION:
If you have any health concerns, do not hesitate to consult your doctor befo using this product.
Never leave the appliance unattended under any circumstance. Never use this product directly on swollen or inflamed areas of skin.
Do not use this product if you suffer from a physical ailment that would limit impair your ability to operate the controls. This unit should not be used by without adult supervision.
LIFE SAFETY WARNING
The list below contains known conditions when the far infrared heating pad is not be used or only be used under the supervision of a physician. This list exhaustive. If you suffer from any serious condition that might be affected by use of the product, please consult with your physician before using the heating pad.
- Do not use directly over open wounds
- Do not use directly over acute injuries.
-
Do not use directly over face or genitals.
-
Do not use if you are insensitive to heat, including paraplegic and quadrip have poor blood circulation that affects your ability to feel heat or cold sensa
- Do not use if you are immobile or incapacitated or not able to remove the pad from your body.
- Do not use this product with infants or children under the age of 6. Child under age of 14 should always use the pad under adult supervision. In the pregnancy, diabetes, hemophilia, malignancy or other serious conditions, consult with your physician before applying the heating pad.
BEFORE USING
Before using the appliance for the first time, peel off any promotional and packaging materials and check that the product is clean and dust-free. Please dispose of all plastic bags carefully and keep them away from children and Check all components provided according to the list in this manual.
First, open the bag and confirm all components are included. Then perform the following:
Step 1: Connect the digital controller to the pad by matching up the two er the 5-pin connector.
Step 2: Plug the Power Cord into the wall outlet.
The Heating Pad is now assembled.
Note: Before each use, it is necessary to check whether the product is and whether the connector links are reliable.
PRODUCT PARAMETERS
| MODEL | Timer | Automatic closing time | Temperature |
| H11M3 | 0-240 min | 240 min | Max 70°C (159°F) |
| H11M2 | 0-240 min | 240 min | Max 70°C (159°F) |
| H11N1 | 0-240 min | 240 min | Max 70°C (159°F) |
| H11S2 | 0-240 min | 240 min | Max 70°C (159°F) |
| H11L1 | 0-720 min | 720 min | Max 70°C (159°F) |
Note: Please use the correct power source voltage.
CONTROLLER INSTRUCTIONS
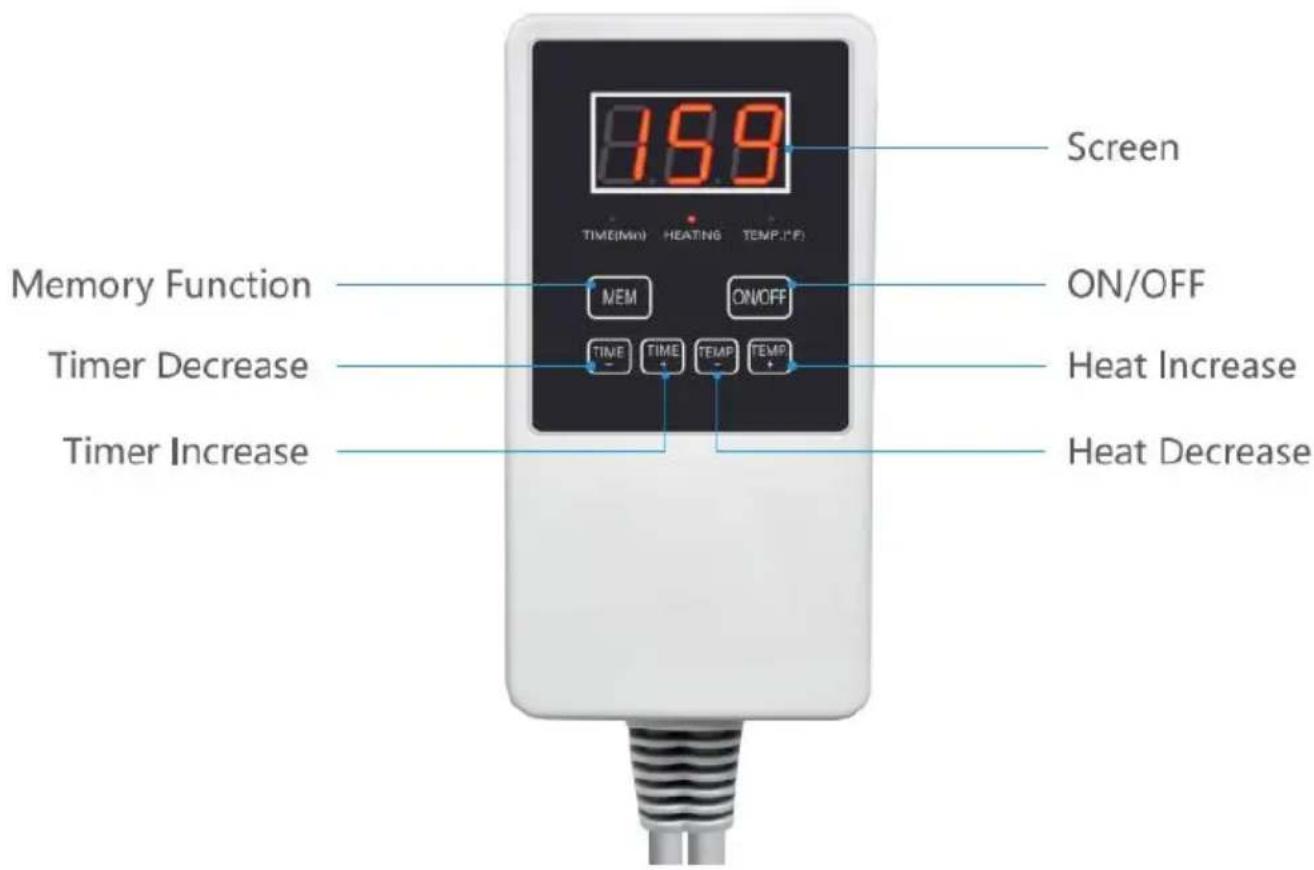
ON /OFF:
The digital controller allows you to turn the unit "ON" or "OFF", simply by p the ON/OFF button.
Memory function:
The digital controller has a memory function that remembers the settings (temperature &time). Simply press the MEM button once and it will beep once start blinking showing the saved temperature. If you press the MEM button for seconds it will beep twice, this will save the temperature and time you just Once you turn the unit on the unit will remember the last setting that you default setting if the MEM button is 109°F /43°C (4hours).
Heat:
The digital controller allows you to adjust the heat to a temperature that you comfortable with. Simply press the (TEMP+) button to increase the temperature press the (TEMP-) button to lower the temperature by 1F or 1^ increments, temperature range is 103^ - 159^ (40°C - 70°C).
When you press the Temp+ or the Temp-button the Temp light will be on, start blinking four times showing the temperature you set. The screen will then return to show the current temp. Of the pad.
If the heating light is ON all the time, it means the digital controller is heat order to reach the temp that you set.
If the heating light is blinking it means the current temp of the pad is close temp that you set, the controller will slow the heating down.
If the heating light is NOT on it means the current temp of the pad has all reached the temp that you set, so the controller will stop heating up the pad. Once the temp of the pad has dropped it will turn back on to reach the test set and the heating light will turn back on.
Important Note: This Far Infrared Heating Pad works a little differently that your standard coil heating pad. Please allow 5 to 10 minutes for the Far Infrared energy in the stones to build up and for the pad to heat up. You are ready to use, please adjust the temperature to your olerance.
Timer:
The digital controller allows you to set the timer automatically to shut off. By pressing the (TIME +) or (TIME -) buttons you can adjust the time by 15 n increments. The timer can beset for as long as 240 minutes at a time. Once timer counts itself all the way down, it will automatically shut off.
When you press the TIME+ or the TIME- button the TIME (Min) will start bl and the screen will blink 4 times showing the time you set. Then the screen return to show the current temp.of the pad.
If you do not adjust the timer, the unit will count up 4 hours and shut itse
Note: Always unplug this device when not in use.
TIPS
- After taking a shower, using this product will help the body relax more.
- Before use, set the temperature to the lowest level and wait for the hum to adapt to the temperature before adjusting to the desired temperature.
- Before each use, make sure that all connections are tight and snug.
- Before each use, plug the pad into the wall outlet, the use of a surge p
recommended.
- Before each use, make sure that all of the functions of the digital control working correctly.
- It is suggested that you get in a comfortable position, either sitting or lyir
- It is suggested that you place a small towel (folded in half) as a protect between you and the stones. There will not be a loss of effectiveness if the has to travel through the protective layer or even your clothing.
- In other words, the stones do not need to be touching your skin to be. For safety reasons, the stones should not be touching your skin directly.
- Depending on the thickness of the protective layers, you will need to adjust temperature to your tolerance level. The temperature should never be set hot than you can comfortably tolerate it
- The pad should be positioned directly over the affected area. You may be on the pad, wrap the pad around the effected body part or lay the pad on body or body part. Remember to use a protective layer (ex.Small towel) for you and the pad to keep it clean.
- When using this pad, please have the jade stones facing your body.
- There is no specific protocol for any individual using a heating pad. With being said everyone responds differently to different modalities and it is suggested that you limit the use of the pad to 20 minutes per session of continuous use first several weeks to see how you tolerate the heat. Once you have become comfortable with the use of the pad, you can begin to use it for longer duration continuous use. Please note that the longer the duration, the lower the heat to be, learning to adjust the heat to your tolerance will be a key to achieve results.
CLEANING
- Before cleaning, the product plug must be unplugged. Put the product in power-off state.
- Use a soft and moist cloth for cleaning, do not rinse directly with water.
- Please keep accessories and products together.
- Do not fold excessively during storage to avoid damaging internal wiring.
-
Do not submerge controller, Converter or pad in water.
-
Do not dry clean any part of the heating pad.
- Do not use bleach or detergent as cleaning agents.
- Do not use a wringer
- Do not put in Microwave.
- Do not put in washing machine or dryer.
- Do not Iron
- Do not use mothballs or repellent sprays of any kind
- Do not put any of the power cords into water
- Do not use unless the pad is completely dry.
-
Do not attempt to clean each individual jade stone.
-
Acceptable cleaning method
- Wipe the pad before the initial use and after each use.
- Use a gentle nonabrasive soap with a slightly moist towel.
- Let the heating pad dry completely before using.
- Routine maintenance for safe performance
- Inspect the heating pad both before and after each use.
- Examine the surface of the heating pad for any sign of abnormal or excise and tear including blistering and cracking
- Examine the power cord for cracks, blisters, frays or exposed wires
STORAGE
To store your heating pad, completely clean the unit, let it completely dry and the heating pad back into the supplied storage bag. Store the heating pad in and dry place away from any risk of damage while the pad is not in use. Only transport the heating Pad inside of the storage bag provided. Do not let pad get wet or exposed to any moisture.
- Do not hang the heating pad by the power cord.
- Do not bend or put any additional weight on the heating pad.
- Do not allow the power cord to be pinched.
VEVOR®
TOUGH TOOLS, HALF PRICE
Technical Support and E-Warranty Certificate
www.vevor.com/support
VEVOR®
TOUGH TOOLS, HALF PRICE
natural_image
Abstract composition of colored geometric shapes and textures, no text or symbols presentBESOIN D'AIDE? CONTACTEZ-NOUS!
PARAMÈTRES DU PRODUIT
natural_image
Abstract composition of colored geometric shapes and textures, no text or symbols presentwww.vevor.com/support
VEVOR®
TOUGH TOOLS, HALF PRICE
natural_image
Abstract composition of colored geometric shapes and textures, no text or symbols presentelettronica www.vevor.com/support
VEVOR®
TOUGH TOOLS, HALF PRICE
natural_image
Abstract composition of colored geometric shapes and textures, no text or symbols presentnatural_image
Abstract composition of colored geometric shapes and textures, no text or symbols presentPOTRZEBUJESZ POMOCY? SKONTAKTUJ SIĘ Z NAMI!
natural_image
Abstract composition of colored geometric shapes and textures, including green, yellow, purple, black, and gray blocks (no text or symbols)HULP NODIG? NEEM CONTACT MET ONS OP!
garantiecertificaat www.vevor.com/support
VEVOR®
TOUGH TOOLS, HALF PRICE
natural_image
Abstract composition of colored geometric shapes and textures, including green, yellow, purple, black, and gray blocks (no text or symbols)BEHÖVER HJÄLP? KONTAKTA OSS!
www.vevor.com/support