
GF1150ND1-3KG - Electric oven Vevor - Free user manual and instructions
Find the device manual for free GF1150ND1-3KG Vevor in PDF.
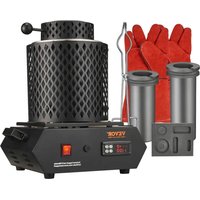


| Product Type | Electric Melting Furnace |
| Brand | Vevor |
| Model | GF1150ND1-3KG |
| Input Voltage | AC 120 V 60 Hz |
| Maximum Power | 1350 W |
| Maximum Temperature | 1150 °C |
| Temperature Error | ±5 °C |
| Operating Temperature | 0-50 °C |
| Body Material | Steel |
| Color | Black |
| Supplied Crucible Capacity | 1 kg and 3 kg |
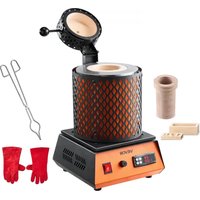
| Included Accessories | Melting furnace, crucible tongs, power cord, insulated gloves, 1 kg crucible, 3 kg crucible, graphite oil tank (5 holes), user manual |
| Main Functions | Metal melting (gold, silver, copper), programmable temperature control, digital display, heat preservation |
| Maintenance and Cleaning | Clean the exterior and interior regularly; use a soft damp cloth; do not use harsh detergents |
| Safety | Grounding mandatory; never exceed 1150 °C; do not leave unattended; use safety gloves; keep a fire extinguisher nearby |
| Spare Parts and Repairability | Replaceable heating coil (resistance about 12 Ω); thermocouple; fan; fuse |
| General Information | Operates less than 3 hours continuously; 30 min stop after 2 h; FCC Class B compliant |
Frequently Asked Questions - GF1150ND1-3KG Vevor
User questions about GF1150ND1-3KG Vevor
0 question about this device. Answer the ones you know or ask your own.
Ask a new question about this device
Download the instructions for your Electric oven in PDF format for free! Find your manual GF1150ND1-3KG - Vevor and take your electronic device back in hand. On this page are published all the documents necessary for the use of your device. GF1150ND1-3KG by Vevor.
USER MANUAL GF1150ND1-3KG Vevor
Technical Support and E-Warranty Certificate www.vevor.com/support
ELECTRIC MELTING FURNACE
MODEL: GF1150ND1-3KG / GF1150ND2-3KG
We continue to be committed to providing you with tools at competitive prices. "Save Half", "Half Price", or any other similar expressions used by us only represent the savings you might benefit from buying certain tools with us compared to top brands, and do not necessarily mean to cover all categories of tools offered. We kindly remind you to verify carefully when placing an order with us to ensure you are actually saving half in comparison with the top major brands.
MODEL: GF1150ND1-3KG / GF1150ND2-3KG
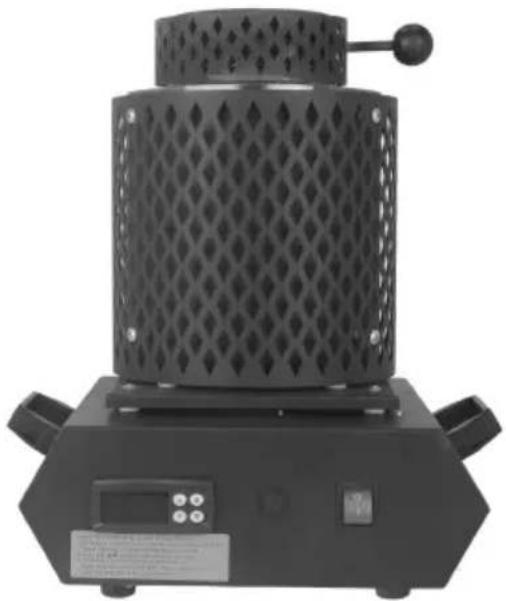
NOTE: Periodically check the intactness of the crucible to avoid damage to the heating coil!
NEED HELP? CONTACT US!
Have product questions? Need technical support? Please feel free to contact us:
Technical Support and E-Warranty Certificate www.vevor.com/support
This is the original instruction. Please read all manual instructions carefully before operating. VEVOR reserves a clear interpretation of the user manual. The appearance of the product shall be subject to the product you received. Please forgive us that we won't inform you of any technology or software updates on our product.
 | Warning - To reduce the risk of injury, user must read instruct manual carefully. |
 | CORRECT DISPOSALThis product is subject to the provision of european Directive 2012/19/EU. The symbol showing a wheelie bin crossed through indicates that the product requires separate refuse collection in the European Union. This applies to the product and all accessories with this symbol. Products marked as such may not be discarded normal domestic waste, but must be taken to a collection point for recycling electrical and electronic devices. |
SAFETY INSTRUCTIONS
1.1 General safety information for the use of electrical devices:
To avoid injury or electric shock, please ensure compliance with safety instructions when using this device. Please read the instructions carefully and make sure that you understand them well. Keep the manual near the equipment to be able to read it at any time.
1.1.1 Always use current sources connected to the ground and provide the necessary voltage (indicated on the label on the device). If you have any doubts, let an electrician check that the unit is properly grounded. Never use a damaged power cable.
1.1.2 Do not expose the unit to solar radiation. Use the device in a protected location to avoid damaging the equipment or endangering others. Make sure the device is able to cool down after hours of constant working and avoid placing it too close to other devices that produce heat.
1.1.3 Before cleaning, disconnect it. Use a soft damp cloth for cleaning. Avoid using detergent and make sure that no liquid enters the unit. If the metal contains acid or materials, a chemical reaction may occur that could corrode the heating element. Please keep the top cover open during the melting process.
1.1.4 No internal element of this device needs to be maintained by the user. Please do not disassemble or repair it yourself.
1.2 General safety information for the use of melting furnaces:
- The user manual should be kept close to the device and should always be accessible to the users. Instruct your employees on how to use the melting furnace properly.
- Make sure your working area is well aerated.
- Keep the escape routes clear.
- Keep a fire extinguisher ready for use. Always use safety gloves.
- Do not place melting furnaces on combustible supports or close to combustible materials.
- Do not let the device be without surveillance during the heating.
- Do not overfill the crucible, in order to prevent it from overflowing during the heating.
- Add solid melting materials by inserting them slowly into the hot liquid mass.
1.3 Specific safety information for the use of melting furnaces:
- In order to ensure long durability and good function of your device, we strongly advise you to work less than 3 hours at a time. Please ensure to stop for 30 minutes after 2 hours of continuous work.
- The maximal operating temperature tolerated by the melting furnace is 1150°C. Never exceed this value.
- Recycled gold or silver contains acid and alkali which may corrode the heating element. If you want to melt that kind of metal, please open the cover of the melting chamber regularly to let the toxic substance evaporate.
FCC Information
CAUTION:
Changes or modifications not expressly approved by the party responsible for compliance could void the user's authority to operate the equipment!
This device complies with Part 15 of the FCC Rules. Operation is subject to the following two conditions:
1) This product may cause harmful interference. 2) This product must accept any interference received, including interference that may cause undesired operation.
WARNING:
Changes or modifications to this product not expressly approved by the party responsible for compliance could void the user's authority to operate the product.
Note:
This product has been tested and found to comply with the limits for a Class B digital device pursuant to Part 15 of the FCC Rules. These limits are designed to provide reasonable
protection against harmful interference in a residential installation.
This product generates, uses and can radiate radio frequency energy, and if not installed and used in accordance with the instructions, may cause harmful interference to radio communications. However, there is no guarantee that interference will not occur in a particular installation. If this product does cause harmful interference to radio or television reception, which can be determined by turning the product off and on, the user is encouraged to try to correct the interference by one or more of the following measures:
- Reorient or relocate the receiving antenna.
- Increase the distance between the product and receiver.
- Connect the product to an outlet on a circuit different from that to which the receiver is connected.
- Consult the dealer or an experienced radio/TV technician for assistance.
MODEL AND PARAMETERS
| Model | GF1150ND1-3KG | GF1150ND2-3KG |
| Input | AC 120V 60Hz | AC 230V 50Hz |
| Max. Power | 1350W | 1350W |
| Max. Temperature | 1150°C | 1150°C |
| Temperature Error | ±5°C | ±5°C |
| Working Temperature | 0-50°C | |
| Material | Steel | |
| Color | Black | |
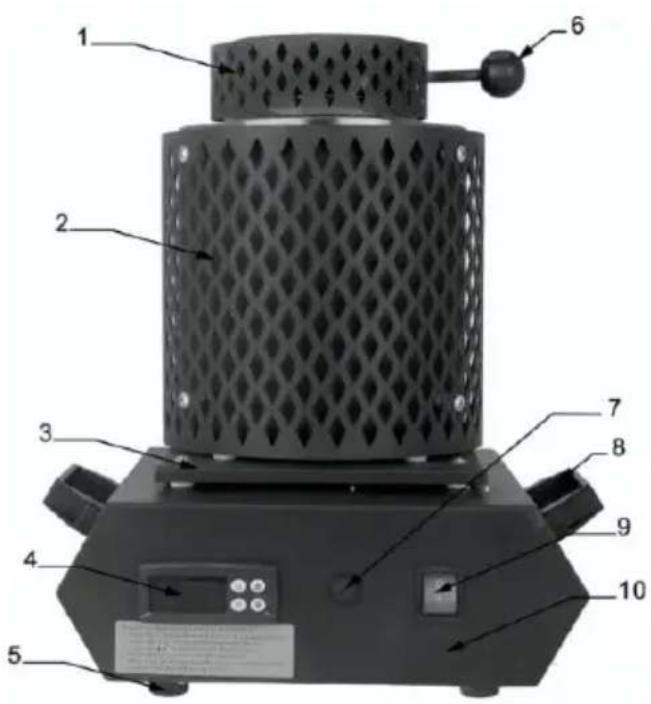
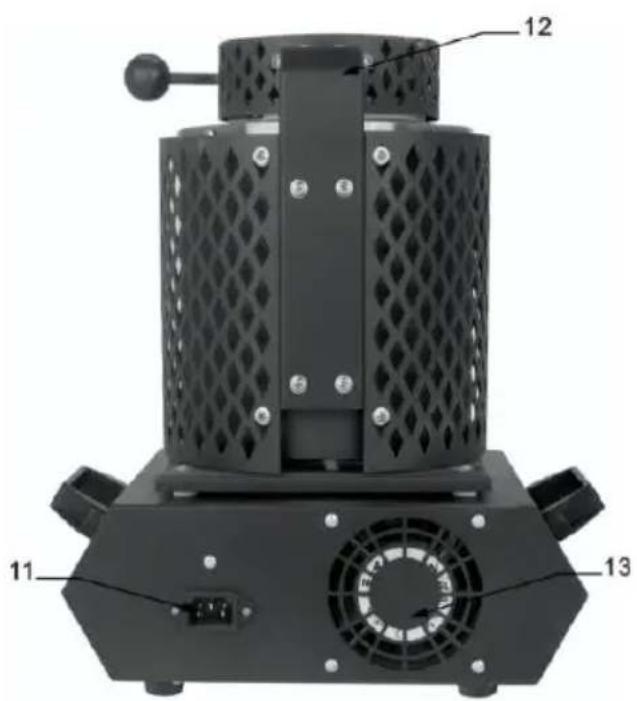
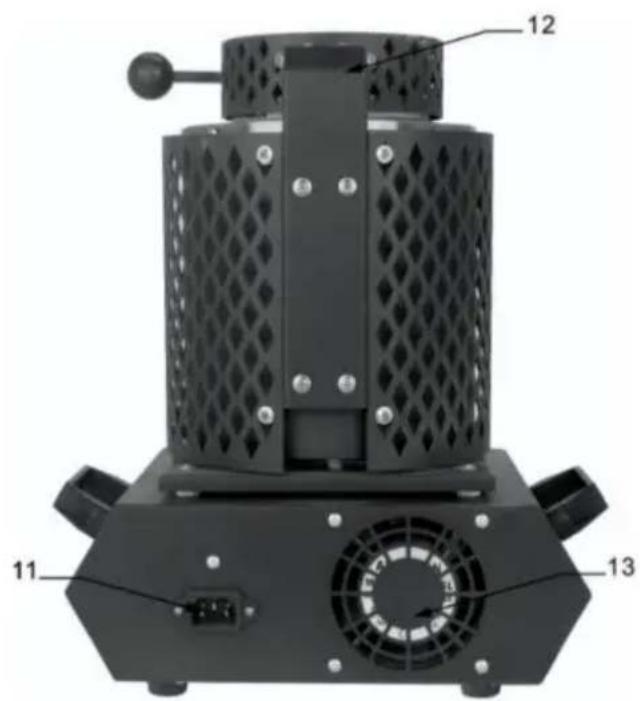
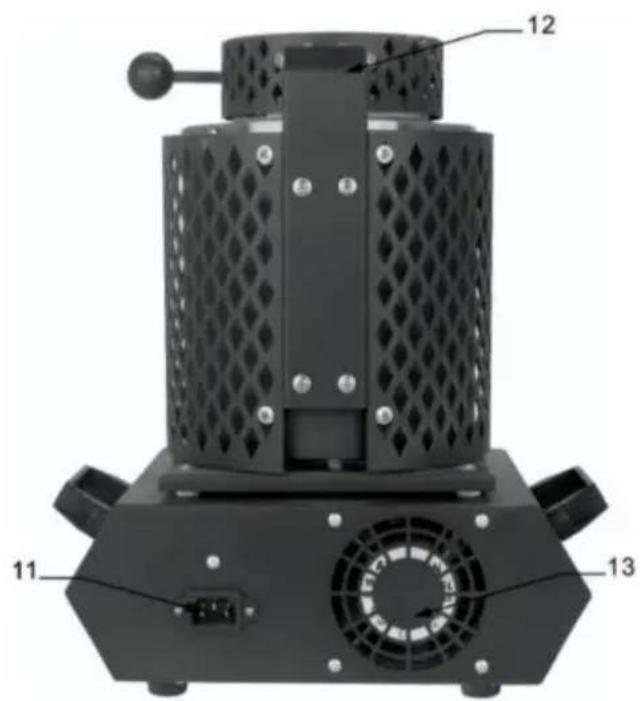
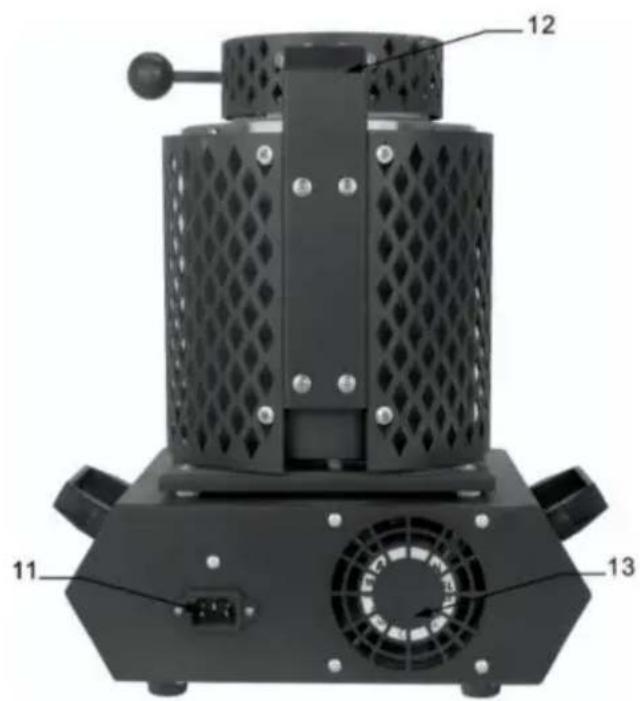
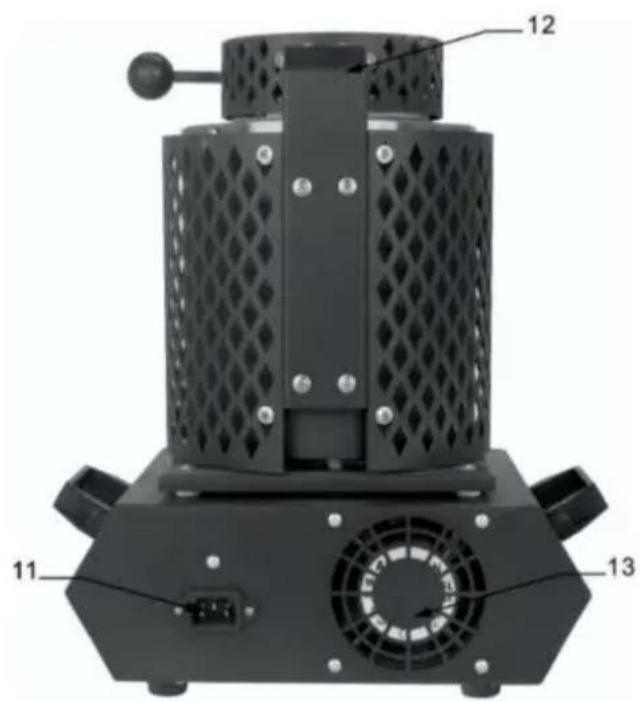
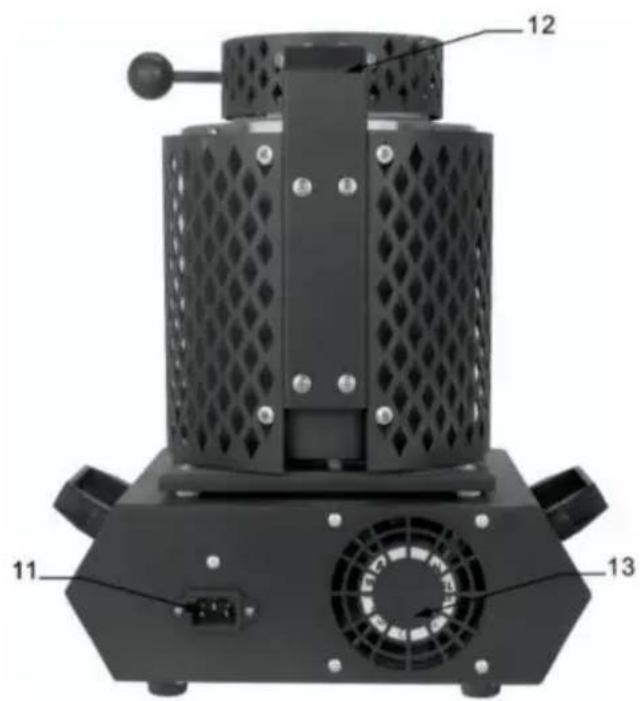
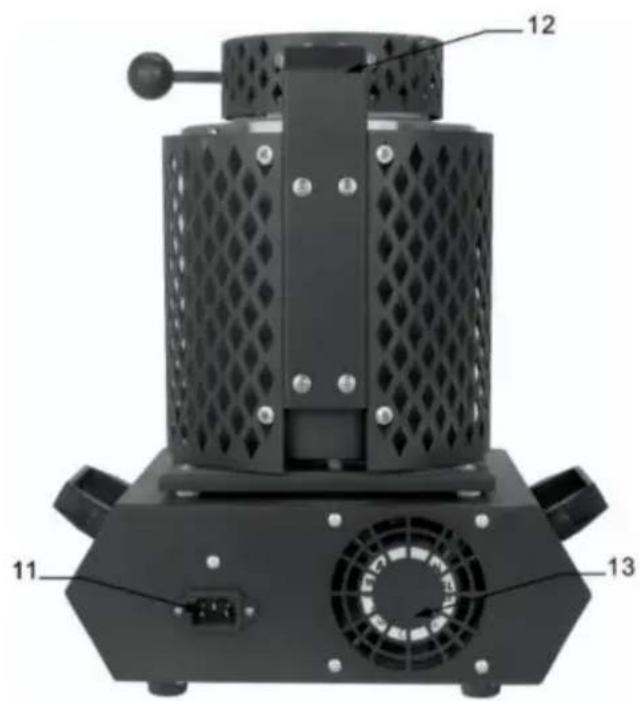
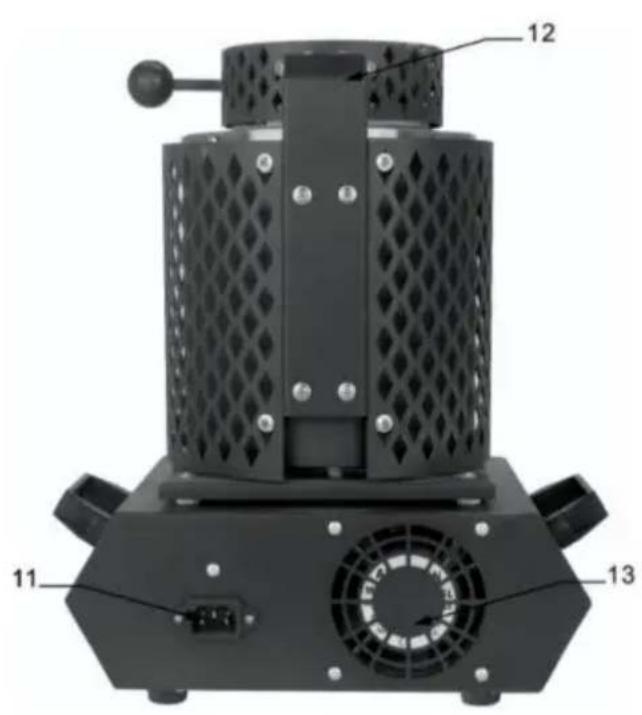
1. Cover Protective Cover 2. Protective Cover 3. Insulation 4. Temperature Control Meter 5. Foot Pads 6. Cover Opening Handle 7. Fuse 8. Machine Grip 9. Power Switch 10. Machine Body 11. Power Outlet 12. Cover Auxiliary Rod 13. Cooling Fan
PARTS LIST
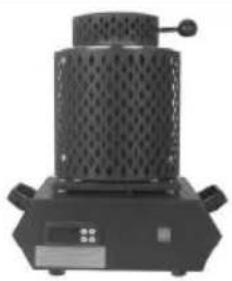 | 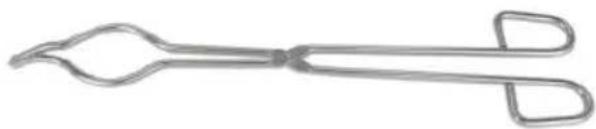 |
| Melting Furnace x1 | Crucible Tong x1 |
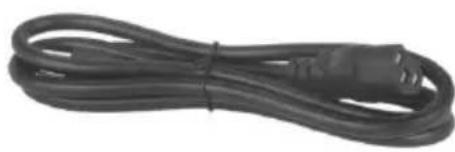 | 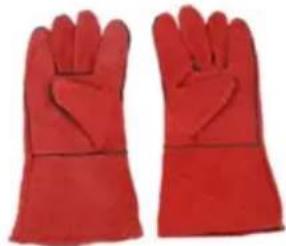 |
| Power Cord x1 | Insulated Gloves x1 |
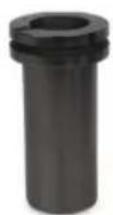 | 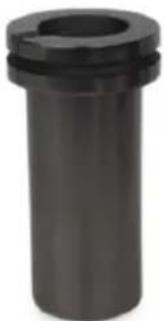 |
| 1kg Crucible x1 | 3kg Crucible x1 |
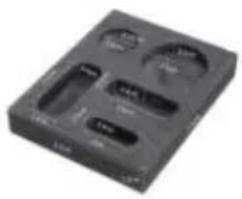 |  |
| Graphite Oil Tank(5 Holes) x1 | User Manual x1 |
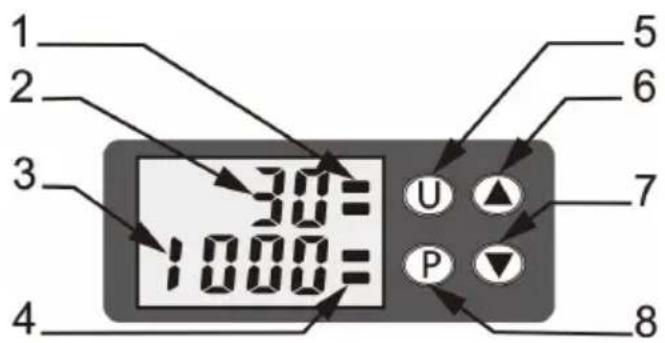
- Heat display symbol
- Shows the actual temperature in the furnace
- Displays the set temperature
- Heat preservation display symbol
- U button to set the temperature (After pressing the button, the set temperature will blink.) 6. Add temperature (Display setting temperature flicker to add temperature)
- Reduce temperature (Display setting temperature flicker to reduce temperature.)
- Start heating/Confirm setting temperature
Procedure:
- The temperature on the display is the actual temperature inside the furnace.
- Press the key U, the temperature number under the display will flash. When flashing, it means the temperature can be set.
- Press the key to adjust the required temperature. Short press the number will progressively increase by 1 degree, long press the number will speedily increase. Short press the number will progressively decrease by 1 degree, long press the number will speedily decrease.
- Press the key P to confirm the setting temperature.
- Upside the display, the symbol = means heating and insulation. Upside the display, the symbol flashing means increasing the temperature. Below the display, the symbol flashing means the holding temperature.
MELTING PROCEDURE
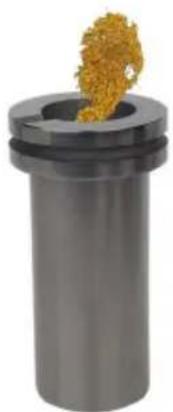
- Put the metal to be melted into the crucible.
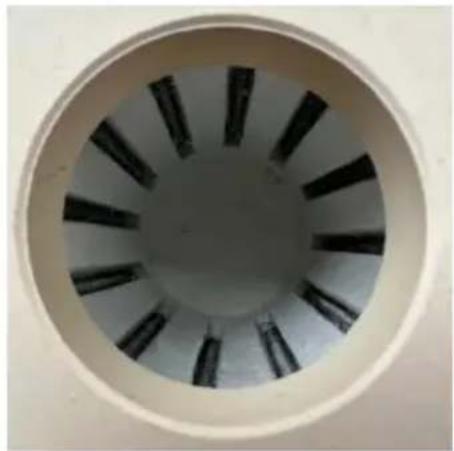
- Internal heating wire diagram, please do not fall into the metal ma It will cause the heating wire to burn.
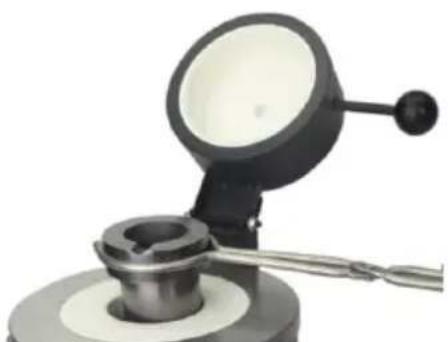
- Put the crucible into the machine before starting.
NOTE: Periodically check the intactness of the crucible, to avoid damage to the heating coil!
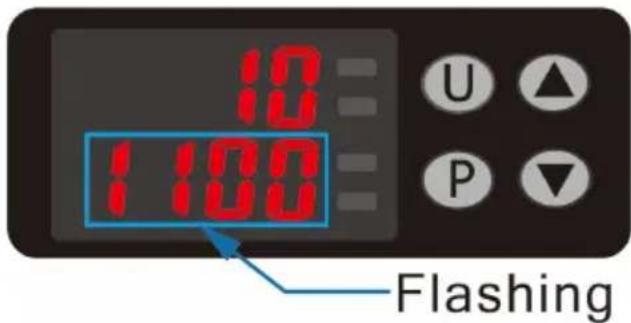
- Press U to set the temperature. The number below blinks. Press adjust the temperature. Press P to confirm.
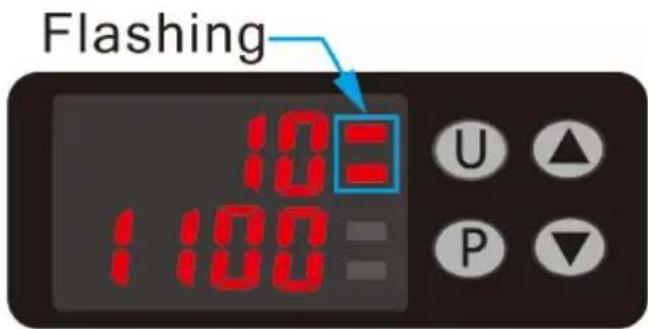
- Press the P key and the " " blink for the start of heating.
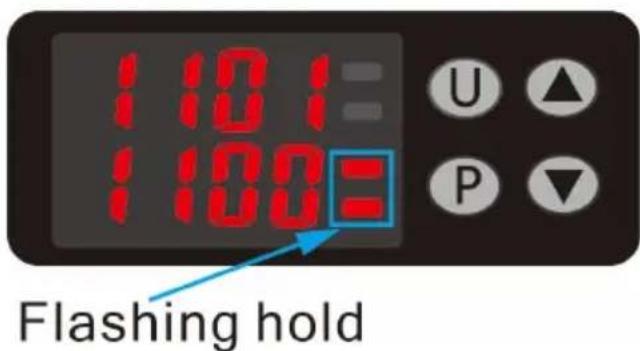
- “=” blinking in the lower right corner indicates heat preservation.
INSTRUCTIONS FOR METALS MELTING
IMPORTANT: The graphite crucible is only adapted to melt gold, silver, copper and other noble metals!
List of the metal types which can be molten in the crucible provided with the device:
| Metal | Symbol | Density | Density Fusion Point |
| Copper | Cu | 8.92g/cm3 | 1084.62°C |
| Silver | Ag | 0.49g/cm3 | 962.78°C |
| Gold | Au | 19.30g/cm3 | 1064.18°C |
Please consider that the crucible shouldn't be completely filled to reach an optimal result. If you overfill the crucible, the device won't be able to produce the heat needed to let the metal melt. Moreover, the melting process often produces a if you overfill the crucible, it can lead to overpressure and the use of the gets dangerous for the user, at the latest by opening the cover.
Please buy an adapted crucible to melt other metals. Always inform yourself about the production of vapors during the melting process to check the compatibility of the device with your intentions.
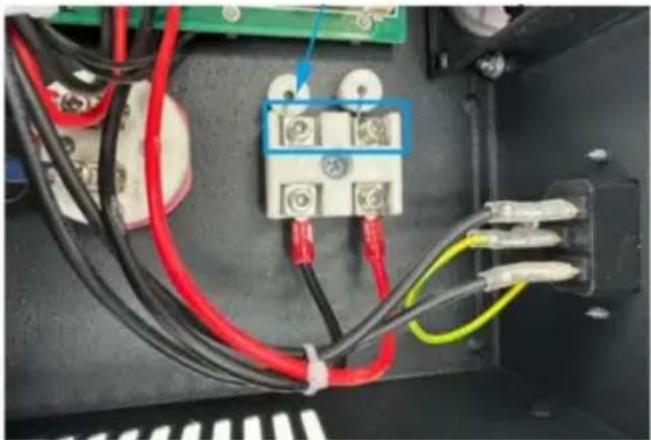
HOW TO DETECT HEATING COIL
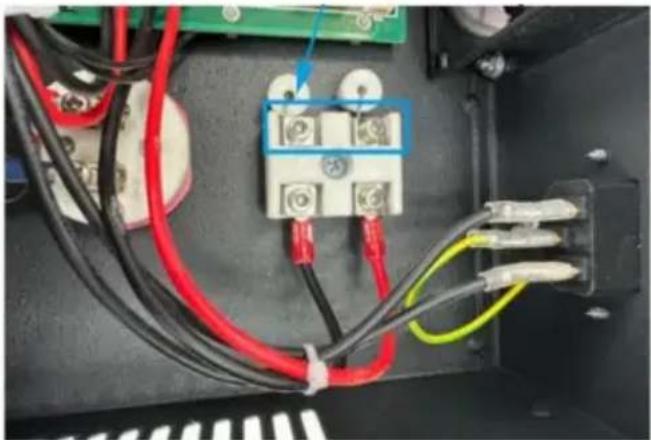
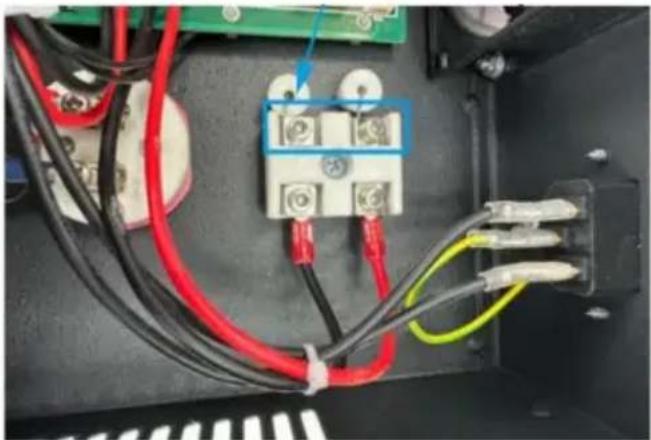
CAUTION: Never open the device without the authorization of your service. The heating coil may get damaged, and you have to exchange it. To do it, please follow these given instructions: Check the function of heating coil.
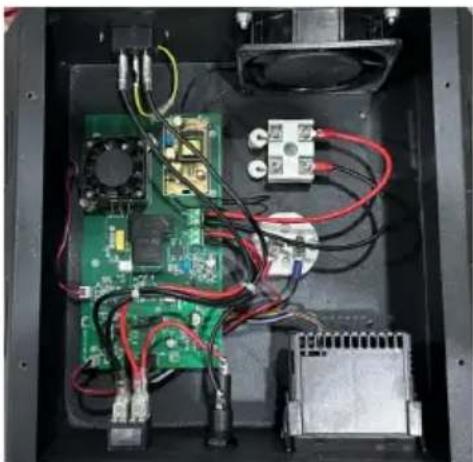
- First open the bottom of the furnace.
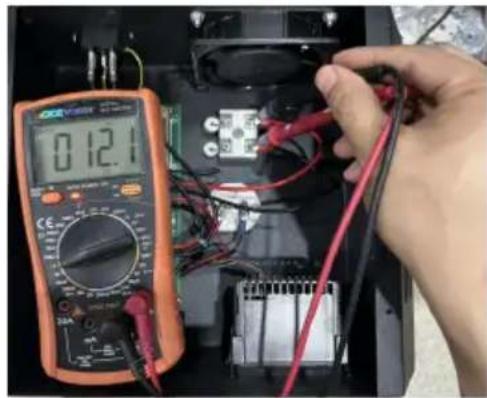
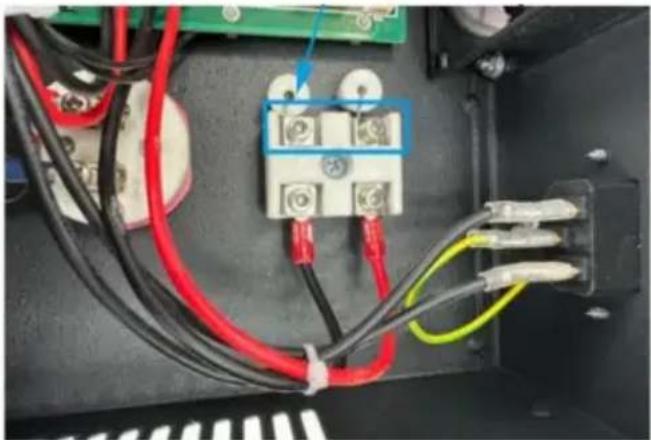
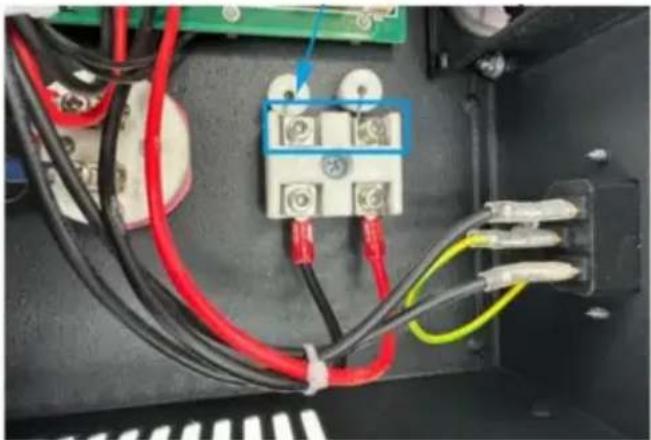
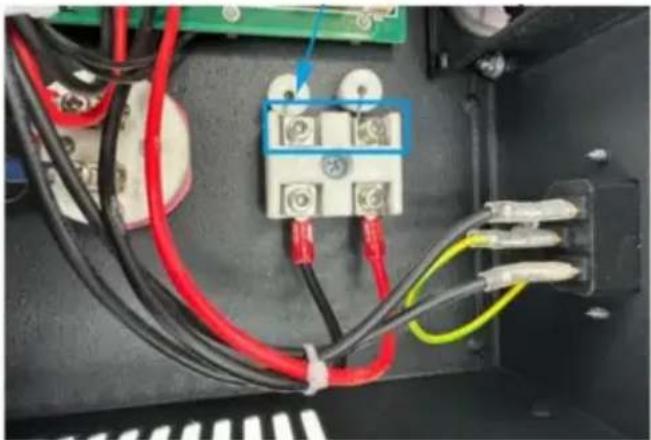
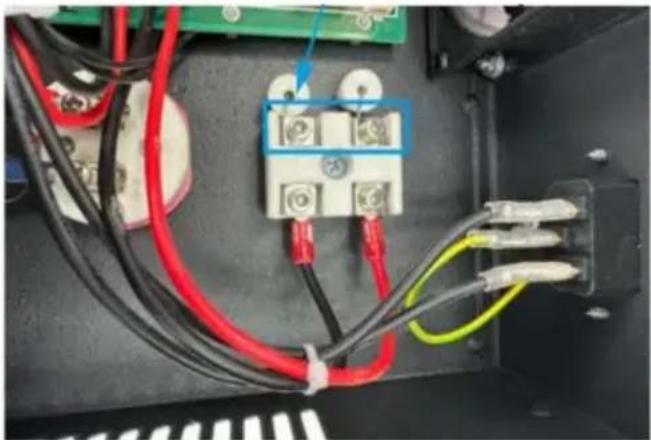
- Check the resistance of the heating coil like this.
NOTE: The resistance is about 12 Ω . If there is no resistance, the heating wire is broken, and you need to change a new heating coil.
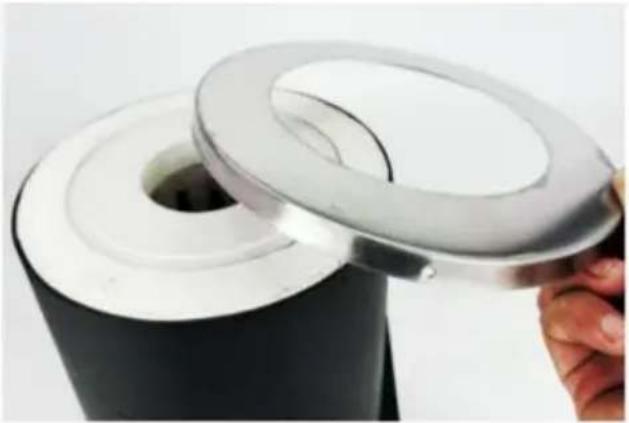
REPLACE THE HEATING COIL
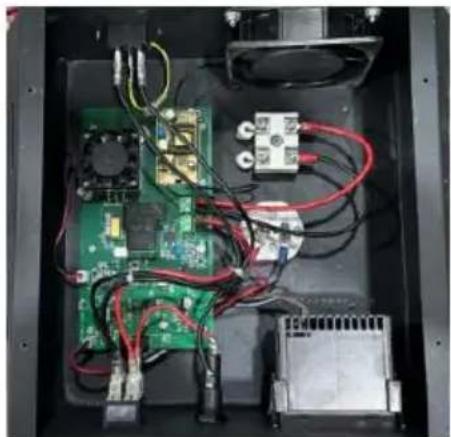
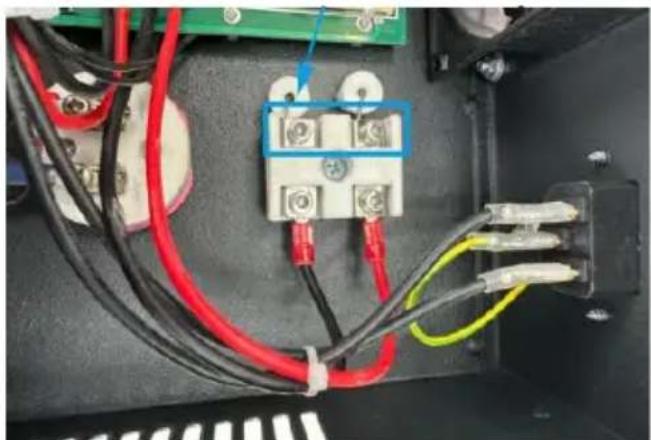
- Remove the heating wire connector and remove the two bolts.
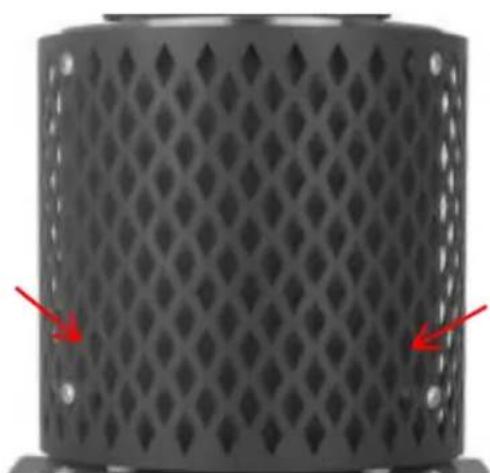
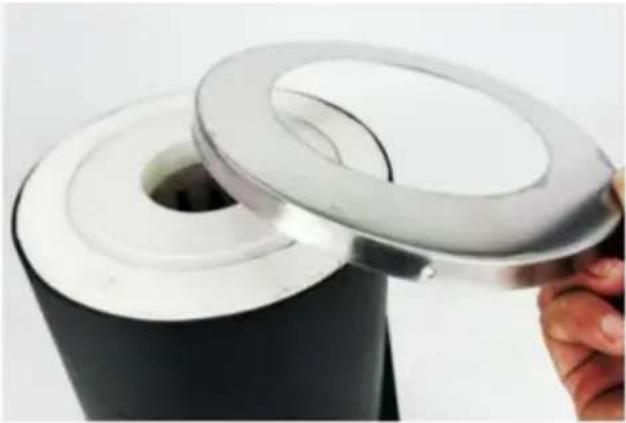
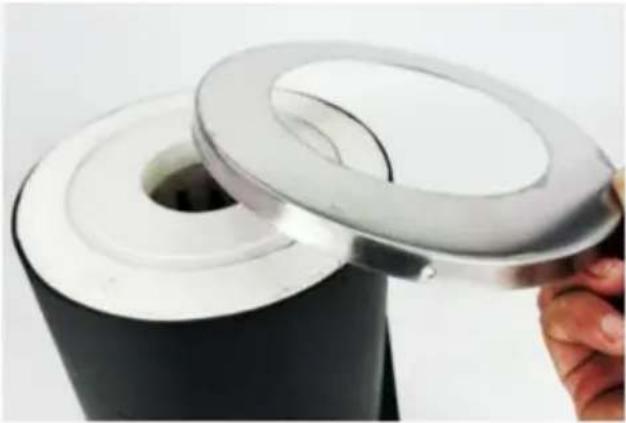
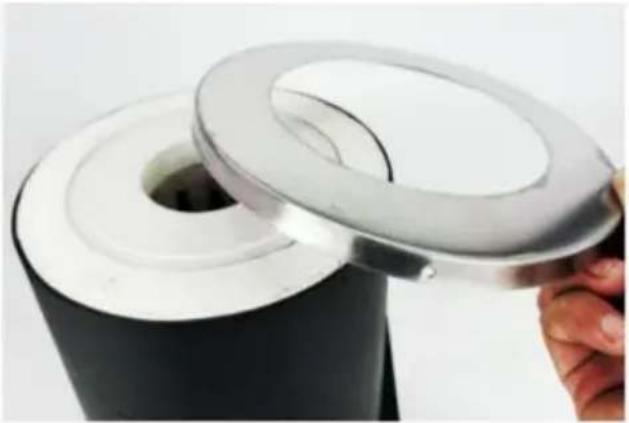
- Remove the protective cover.
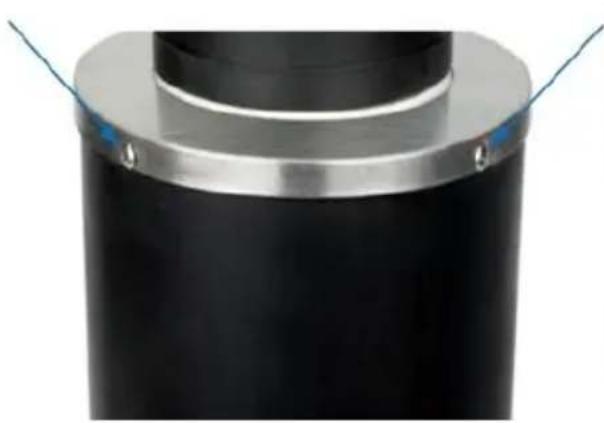
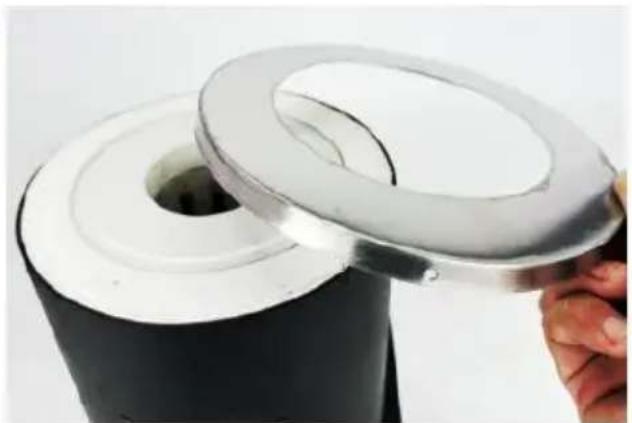
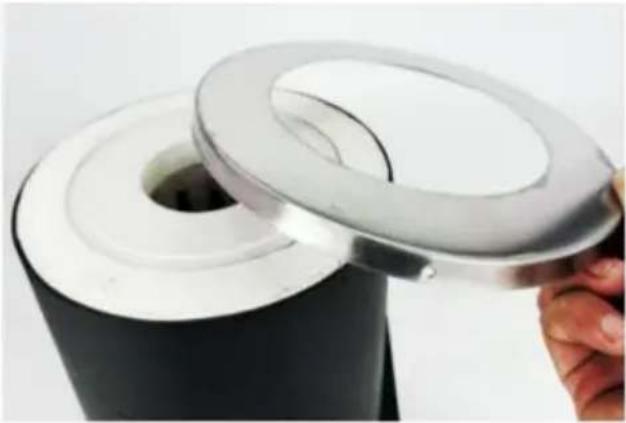
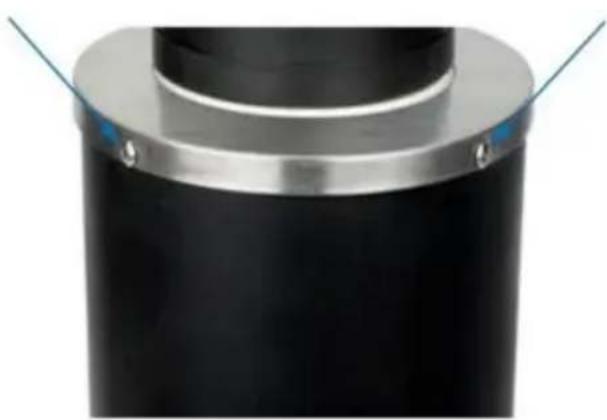
- Open the screws on the stainless steel and remove the cover.
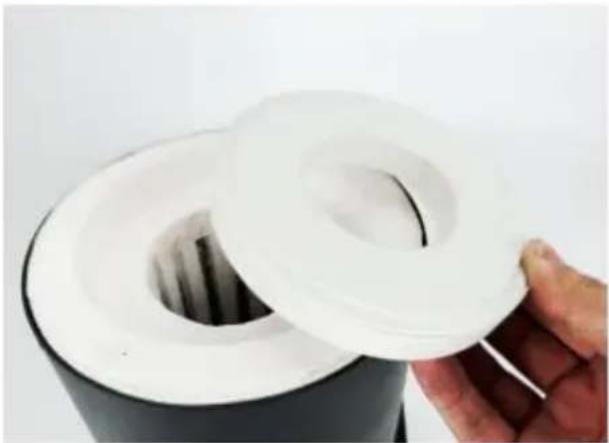
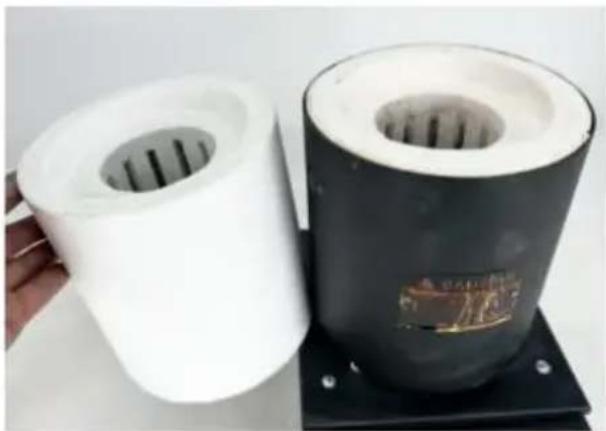
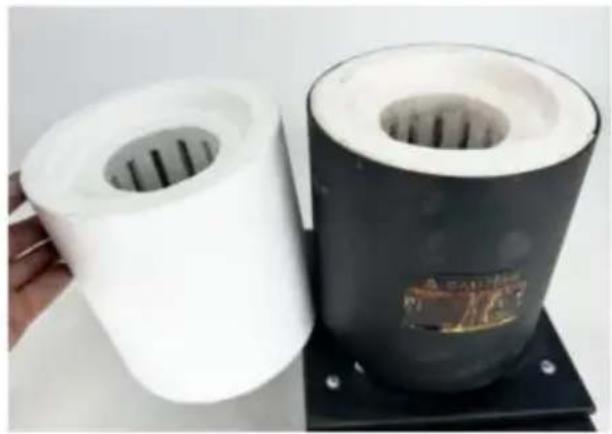
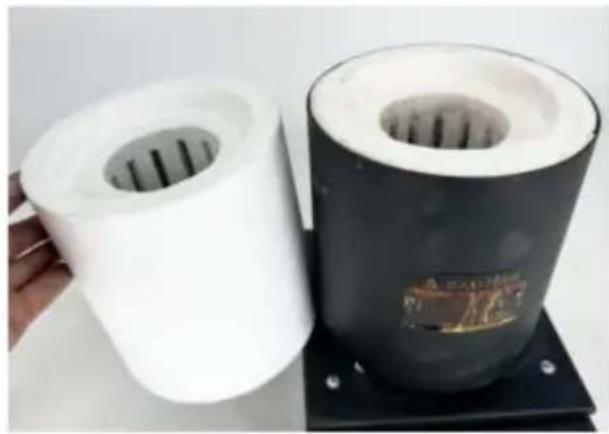
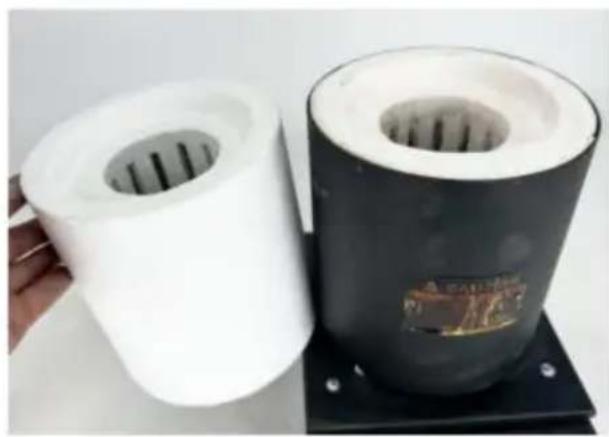
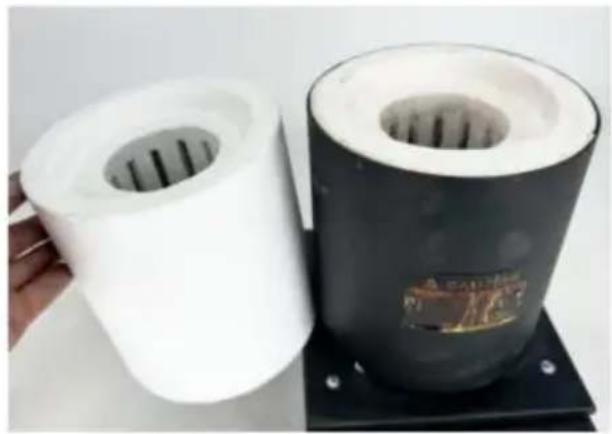
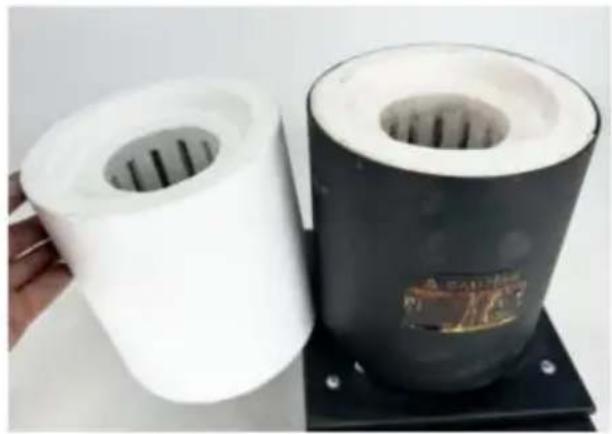
- Take out the circle ceramic. You can take out the thermal insulating cylinder.
Put on the new heating wire cylinder, and install the heating wire cylinder back according to the steps previously removed.
MATTERS NEEDING ATTENTION
Display error codes to determine machine problems
- ERR1: The temperature measuring circuit on the board is broken
- ERR2: The thermocouple is broken or not connected
- ERR3: Thermocouple temperature measurement is out of range
- ERR4: The temperature sensing element on the board is broken or faulty
- ERR5: The fan is broken or falls off
- ERR6: The temperature control element is high

NOTE:
- Metal material falling into the heating wire cylinder short circuit, in work of the crucible broken metal flow heating wire cylinder burned out. This you need to buy a replacement heating wire cylinder.
- After pressing the P key, the upper right corner flashes on the bed of heating, and it can be judged that the heating wire is burned off heated within one minute.
MAINTENANCE
- Clean the exterior and interior regularly to avoid impurities and residues.
- Before and after use, you need to check whether the device is in good condition.
VEVOR®
TOUGH TOOLS, HALF PRICE
Technical Support and E-Warranty Certificate www.vevor.com/support
VEVOR®
TOUGH TOOLS, HALF PRICE
NOTE:
- Remove the protective cover.
NOTE:
NEED HELP? CONTACT US!
NOTE:
- Remove the circular ceramic. You can remove the heat insulation wire
cylinder.
NOTE:
- Metal materials falling into the heating wire cylinder cause a short circuit, in
NOTE:
NOTE:
NOTE:
- ELECTRIC MELTING FURNACE
- MODEL: GF1150ND1-3KG / GF1150ND2-3KG
- NEED HELP? CONTACT US
- SAFETY INSTRUCTIONS
- GENERAL SAFETY INFORMATION FOR THE USE OF ELECTRICAL DEVICES
- GENERAL SAFETY INFORMATION FOR THE USE OF MELTING FURNACES
- SPECIFIC SAFETY INFORMATION FOR THE USE OF MELTING FURNACES
- FCC INFORMATION
- CAUTION
- WARNING
- NOTE
- PARTS LIST
- PROCEDURE
- MELTING PROCEDURE
- INSTRUCTIONS FOR METALS MELTING
- HOW TO DETECT HEATING COIL
- REPLACE THE HEATING COIL
- MATTERS NEEDING ATTENTION
- MAINTENANCE
- VEVOR®
- TOUGH TOOLS, HALF PRICE
Brand : Vevor
Model : GF1150ND1-3KG
Category : Electric oven