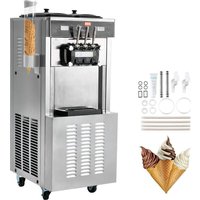
CK400PRO-A19-B - Ice machine Vevor - Free user manual and instructions
Find the device manual for free CK400PRO-A19-B Vevor in PDF.


| Product Type | Professional Ice Cream Machine |
| Model | CK400PRO-A19-B |
| Brand | Vevor |
| Power Supply | 220-240 V, 50 Hz (according to rating plate) |
| Refrigerant | R290 (flammable) |
| Hopper Capacity | 2 hoppers (mixing and dispensing) |
| Main Functions | Automatic mode, cleaning, standby, hardness adjustment, speed test, cup counter |
| Display | Digital screen with temperature, hardness and speed indicators |
| Sterilization Temperature | Do not exceed 60°C |
| Cleaning | Daily washing of cylinders, cleaning of condenser every 6 months, disassembly of parts in contact with the mixture |
| Safety | Low/high voltage protection, temperature sensors, automatic stop in case of fault (zero speed, overheating, etc.) |
| Materials | Stainless steel, food-grade plastic components |
| Spare Parts | Beater, O-rings, pistons, belt, dispensing door, etc. (full list in the manual) |
| Repairability | Maintenance by professional recommended (R290 refrigerant) |
| Dimensions (approx.) | Approximately 50 x 60 x 80 cm (estimate) |
| Weight (approx.) | Approximately 80 kg (estimate) |
| Noise | Moderate noise level (compressor and beater) |
| Accessories Included | Feeding tube, seals, cleaning tools (according to packing list) |
| Warranty | Electronic warranty certificate available at www.vevor.com/support |
| Standards | Compliant with WEEE Directive 2012/19/EC, FCC Class B |
Frequently Asked Questions - CK400PRO-A19-B Vevor
User questions about CK400PRO-A19-B Vevor
0 question about this device. Answer the ones you know or ask your own.
Ask a new question about this device
Download the instructions for your Ice machine in PDF format for free! Find your manual CK400PRO-A19-B - Vevor and take your electronic device back in hand. On this page are published all the documents necessary for the use of your device. CK400PRO-A19-B by Vevor.
USER MANUAL CK400PRO-A19-B Vevor
Technical Support and E-Warranty Certificate www.vevor.com/support
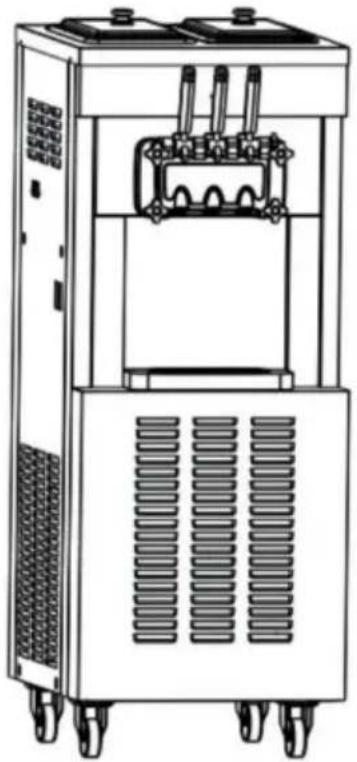
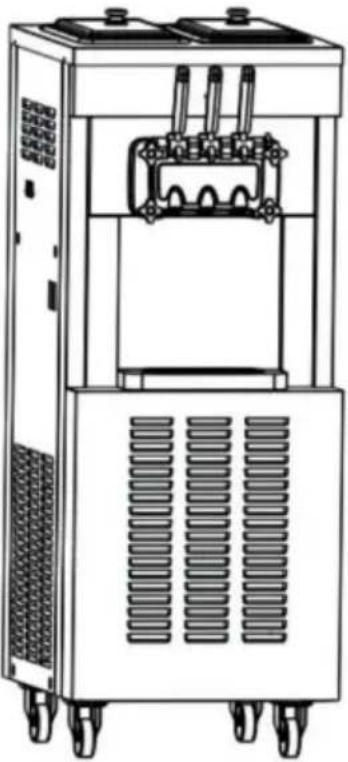
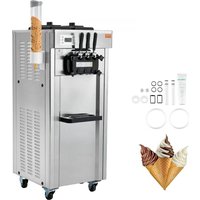
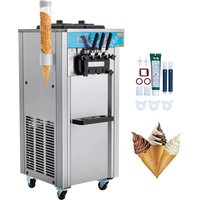
ICE CREAM MACHINE
MODEL:CKX400PRO-A19-B
We continue to be committed to provide you tools with competitive price. "Save Half", "Half Price" or any other similar expressions used by us only represent the estimate of savings you might benefit from buying certain tools with us compared to top brands and doses not necessarily mean to cover all categories of tools offered. Are kindly reminded to verify carefully when you are placing an order with us actually saving half in comparison with the top major brands.
MODEL:CKX400PRO-A19-B

NEED HELP? CONTACT US!
Have product questions? Need technical support? Please feel fr contact us:
Technical Support and E-Warranty Certificate www.vevor.com/support
This is the original instruction, please read all manual instruction carefully before operating. VEVOR reserves a clear interpretation user manual. The appearance of the product shall be subject to product you received. Please forgive us that we won't inform y there are any technology or software updates on our product.
| Warning-To reduce the risk of injury, user must read instructions manual carefully. | |
| CORRECT DISPOSAL This product is subject to the provision of European 2012/19/EC. The symbol showing a wheelie bin crossethrough indicates that the product requires separate retcollection in the European Union. This applies to the and all accessories marked with this symbol. Products marked as such may not be discarded with normal dewaste, but must be taken to a collection point for red electrical and electronic devices |
I. Safety precaution
Before using the appliance, please read this user manual to ensure you gain the maximum benefit from it.
WARNING:
This appliance is not intended for use by persons (including children with reduced physical, sensory or mental capabilities, or lack of experience and knowledge, unless they have been given supervision or instruction concerning use of the appliance by a person responsible for their safety.
Children should be supervised to ensure that they do not play with appliance.
This appliance can be used by children aged from 8 years and all and persons with reduced physical, sensory or mental capabilities or of experience and knowledge if they have been given supervision or
instruction concerning use of the appliance in a safe way and under the hazards involved. Children shall not play with the appliance. Clea and user maintenance shall not be made by children without supervis
If the supply cord is damaged, it must be replaced by the manufa its service agent or similarly qualified persons in order to avoid a ha
To avoid a hazard due to instability of the appliance, it must be 1 accordance with the instructions.
When positioning the appliance, ensure the supply cord is not trapped or damaged.
Do not locate multiple portable socket-outlets or portable power sup at the rear of the appliance.
Keep ventilation openings, in the appliance enclosure or in the built structure, clear of obstruction.
Do not damage the refrigerant circuit.
Do not store explosive substances such as aerosol cans with a flammable propellant in this appliance.
Children aged from 3 to 8 years are allowed to load and unload refrigerating appliances.
Note: This appliance contains flammable refrigerant R290 and foam in agent cyclopentane.
Please avoid contact fire when you transport and use it.
Please ask professional for servicing when the machine broke down. Please send it to your local appointed disposal station when you disc

During using, service and disposal the appliance, please pa
attention to symbol similar as left side, which is located on rear of appliance (rear panel or compressor) and with yellow or orange color risk of fire warning symbol. There are flammable materials in refriger
pipes and compressor. Please be far away fire source during using, service and disposal.
NOTE:
Please keep the water or other conductive liquids away from the machine;
Don't stick clubs into the machine;
During the movement of the machine, it should be carefully carried angle of less than 45 degrees.
Prohibit water discharge pipe or water supply pipe from being benc order that the pipes are damaged and water leak out from the pipes
The distance between the air outlets and the wall should be more 20 cm. Besides, keep good ventilation, also, make sure the machine and clean.
Warning:
This machine should be operated by professionals or trained persor
Make sure the machine is reliably connected to the ground in order to keep safe;
Use the power which is consistent with the one in the nameplate, the bias voltage is less than ± 10% of rated voltage. The wiring mud done by the professionals;

WARING
The wire must be replaced by the manufacturers or its department or workers of the similar field;
Before maintaining the machine, make sure you have cut off the power;
Don't wet or sprinkle the liquid onto the plugs, motorselectrical parts so as to avoid electric shock;
The materials of the bubble tier are easy to catch fire, customers mustn't discard them at random or handle them themselves. The materials should be recycled and dealt with some specified departments according to related rules by the country.
WARNING: Changes or modifications to this product not expressly approved by the party.responsible for compliance could void the user's authority to operate the product.
Note: This product has been tested and found to comply with the IIR a Class B digital device pursuant to Part 15 of the FCC Rules, The are designed to provide reasonable protection against harmful interference in a residential installation.
This product generates, uses and can radiate radio frequency energy, if not installed and used in accordance with the instructions, may cause harmful interference to radio communications. However, there is no guarantee that interference will not occur in a particular installation. If product does cause harmful interference to radio or television reception, which can be determined by turning the product off and on, user is encouraged to try to correct the interference by one or more following measures.
- Reorient or relocate the receiving antenna.
- Increase the distance between the product and receiver.
- Connect the product to an outlet on a circuit different from that to the receiver is connected.
- Consult the dealer or an experienced radio/TV technician for assista
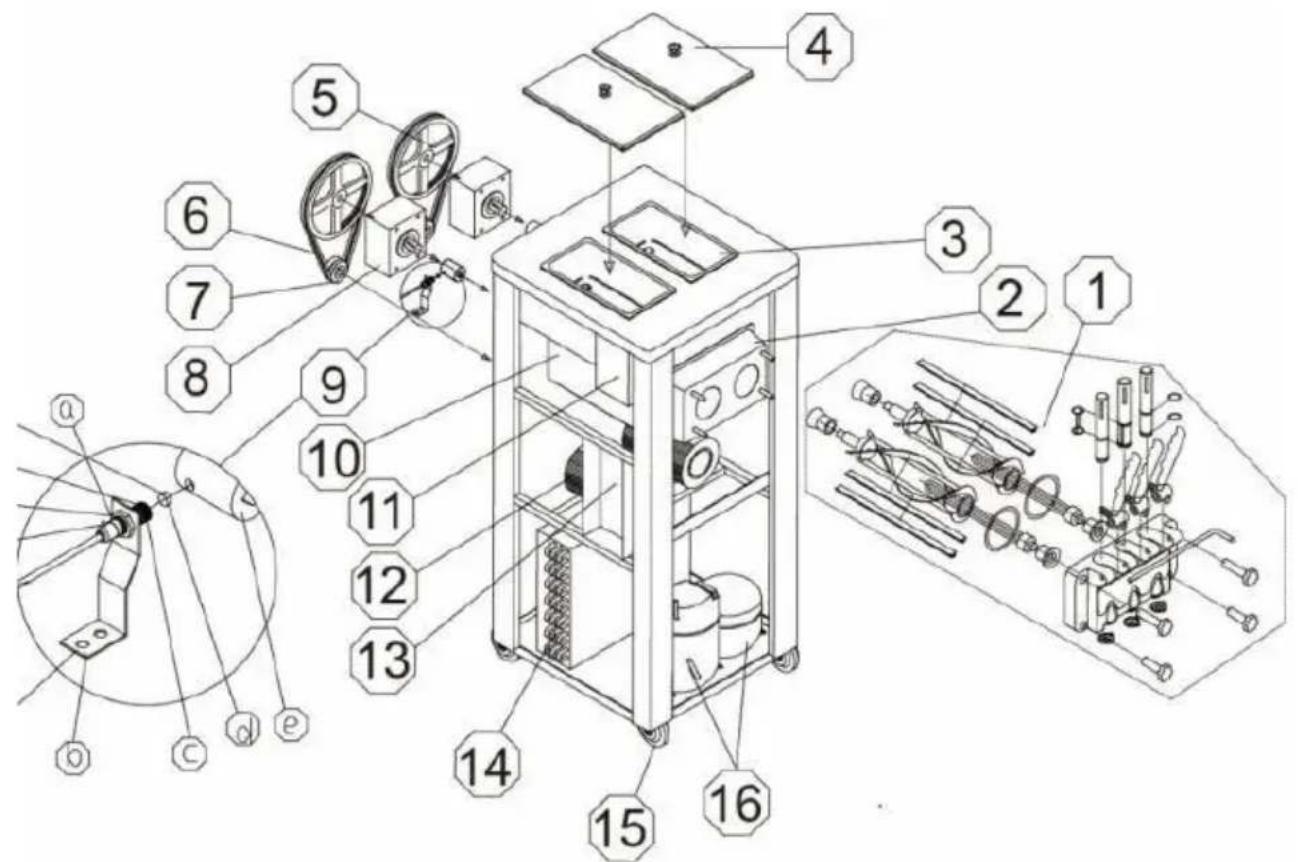
II.Exploded Diagram
| No. | Part name | No. | Part name |
| 1 | Dispenser and agitator assembly | 9 | Proximity switch |
| 2 | Dispenser valve seat | 10 | evaporator |
| 3 | Hopper | 11 | Vertical mixing assembly |
| 4 | Hopper cover | 12 | Beater motor |
| 5 | Driven pulley | 13 | Electric box |
| 6 | Belt | 14 | condenser |
| 7 | Drive pulley | 15 | Caster |
| 8 | Gear reducer | 16 | compressor |
III.Installations& Adjusting
A、unpack & inspect
1) Open the wooden case by nipper pliers.
2) Remove the foam.
3) Inspect carefully whether there is defective appearance or not.
4) Check the accessories with packing list.
B、Installation
a、Place the machine on a level counter that is stable and strong enough to safely support its weight.
b、Place the machine in a location that allows adequate space at the end and each side for proper ventilation. Keep 50cm space from all sides of ventilation. The machine should be shaded from the sun and should be located too close to the units that radiate excessive heat.
2)POWER SUPPLY
a、Select the proper power supply according to the voltage and power the nameplate.
b、Connect the power wire and the power supply, ensuring the yellow green wire was connected with the ground wire firmly.

Caution
a、For safety, ensure the ground connection is in good condition.
b、All the exterior wires and other appliances must with national standard.
C、Testing Running
Step 1: Place the main switch in "on" position, you can hear a long
"di" and see the corresponding indicating pattern lightens in fluorescer screen.
Step 2: Press the key of "clean", you can see the corresponding inc pattern lightens and hear the beater works.
Step 3: Press the key of "auto", you can see the corresponding indi pattern lightens as well as hear the beater works. 3 seconds later, the refrigerating system starts to work.
a) Clearing & Sterilizing
Step 1: Prepare 5-6 liters of warm water, mix with food detergent according to manufacturer's specifications. And this is the sterilizing solution.
Step 2: Pour the solution into the two hoppers. While the solution is into the freezing cylinder, brush and clean the mix hoppers.
Step 3: Press the key of "wash", and let the machine running for a minutes.
Step 4: Place an empty pail beneath the draw spout and pull down handle. Draw off all solution.
Step 5: Repeat this operation for 2-3 times with clean water only.

Notice
a、The temperature of the sterilizing solution can not overpass 60 C , or else it will damage the spare parts b、Draw off all the water in the hopper after clearin it will damage the beater while the compressor is run c、While press the key of “wash”, pay attention to indicating pattern in order to avoid pressing the wrong
D、Feed Tube Installation
Charge the feed tube with one end having a hole into the hopper time dispensing product, new mix flow into freezing cylinder from sma
hole on the tube, while the air flow into the freezing cylinder from t This will keep the cylinder properly loaded and maintain overrun).
Charge the mix feed tube with the end does not having a hole if necessary, in order to prevent the mix flowing into the freezing cylind
| No. | Name | ||
| 1 | Feed Tube Plug | Optional | 1 2 3 |
| 2 | Plug Seal | ||
| 3 | Feed Tube O-ring | ||
| 4 | Feed Tube | ||
| 5 | Feed Hole | ||
| Notice | When adding mix to the hopper tank, please do no the top of the feed tube with the mix. |
Feed Tube (II) Installation
a. Place the sealing ring in the groove of the feed joint. Use a small amount of vaseline to lubricate it during installation to facilitate installation b. Insert the inner tube of the feed tube into the outer cylinder of the
tube in the direction shown in the figure. Pay attention to the alignm the air inlet and feed hole of the inner tube and the outer cylinder.

c. Insert the outer cylinder of the feed tube into the feed port in the When using the feed tube, you can adjust the size of the feed hole inlet by rotating the inner tube to adjust the overrun rate of the ice Note: When adjusting the aperture size of the feed tube,do not comp block the feed port and air inlet to prevent the machine from freezin to lack of material in the refrigeration cylinder.
| No. | Name |
| 1a | Air inlet |
| 2 | Expanded tube |
| 3a | Feeding inlet |
| 1b | Air inlet |
| 4 | Extruder tube |
| 3b | Feeding inlet |
| 5 | O-ring |
IV. Operation Instruction
A.Key Instruction
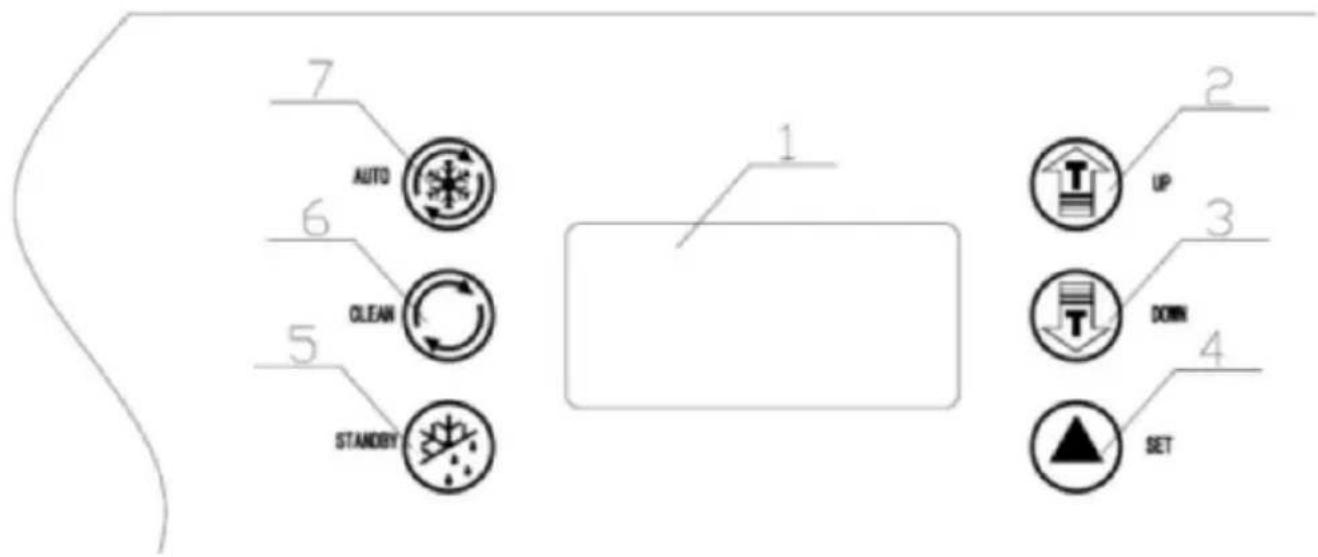
1—digital displayer
2—adjust key (up)
3—adjust key (down)
4-set up
5-keep fresh key
6-clean key
7—auto key
a. Hardness setting
In the mode of standby or working, Press the " " or " " key, hold seconds, the hardness setting number flashes, just press "or " to adjust the hardness level ( range: 1-10 ), if you don't operate " " or " within 5 seconds, the hardness level will stop flashing, Automatically back to the hardness level that set and reserve the value.
b. Test on line
In the mode of cleaning, Press the "CLEAN KEY", the digital screen display "END" which means it has tested the speed. And the buzzer and saves the speed value.
Cup number display:
In the mode of standby, long press “ ” 5S, enter the cup number (interface, the display hardness percentage digital tube is thousands of digits, the display gear position display window digital tube is ten dig automatically return to standby after 10 seconds.
c. Clean
In the standby mode, press the " " key then the "Clean" indicator's Clean pattern is in the dynamic rotate mode, the whole machine con the "Clean" mode, the beater motor begin to work, press the " "key, clean pattern is off and stop rotating, the beater motor stop working, the Clean mode and the standby pattern is on.
d. Standby
Press "STANDBY" and "FRESH" key are on, the display hardness percentage display window shows the cylinder temperature, the display gear display window shows the temperature of the hopper, "press " ", "STANDBY" and "FRESH again" " key is off
e. Auto
Press "FRESH", "AUTO" and "FRESH" key are on, the display gear display window displays the gear position, the display hardness percentage window is from "00" to "99", then press "FRESH", "AUTO" and the "FRESH" key is off.
B. Fault and Alarm Description
a、When the temperature sensor is open, the hardness percentage window of the display screen flashes alternately the "RL" (cylinder)/ "I" (mix hopper) alarm, and the buzzer stops buzzing after the intermitter buzzer of 5S. The temperature control sensor is normal, and the ala state is cancelled.
b、When the temperature sensor is short-circuiting, the hardness percentage window of the display screen flashes alternately to display "RH" alarm (cylinder)/ "bH" (mix hopper), and the buzzer stops buzz after 5S. The temperature control sensor is normal, and the alarm st cancelled.
c、In the mode of auto, when the temperature of left or right cylinder
lower than the setting temperature of too low temperature, the hardness percentage window of the display screen displays "LL" (parameter F5) and the corresponding cylinder stops working.
d、In the process of automatic or cleaning, when the rotation speed or right cylinder is 0 (that is the switch is open), the hardness perc window of the display screen displays "--", the whole machine stops, buzzer keeps ringing, and the alarm state can only be lifted when the power is on again after troubleshooting.
e、In the automatic or cleaning process, when the rotation speed of the left or right cylinder is too low, the hardness percentage window of the screen will display low "nL", the whole machine will stop and the but will keep ringing, and the alarm state can only be cancelled after this is removed and the power is switched on again.
f、The discharging switch is open for too long, the hardness percentage display window shows "Cb", the buzzer buzzes, and the whole machi stops.
g、Under automatic state and overnight state, when there is a mix shortage in the mix hopper, the hardness percentage of the display screen and window percentage of the display screen will be displayed alternately (left)/ the display window tap position and the CL position will be dis alternately (right).
h、Voltage level alarm
A. When the voltage is 252V (C5), the display screen displays "UH" and the buzzer sounds intermittently.
B. When voltage and low voltage is 187V (C6), the display screen of "UL" alarm, and the buzzer sounds intermittently.
i、Poor or not refrigeration, machine refrigeration timeout (1 hour), the display screen displays "ERR", the buzzer intermittent buzz.
C. The method of making ice cream
-
Pour the mix into the mix hopper, and make sure there isn't any in the mix so that the mix can flow into the freezing cylinder from hole of the feed tube smoothly.
-
Press, the machine will run in auto position; press first and the mix even agitates, then press the key of "auto".
SETTING FIRMNESS: Pressing "UP" or "DOWN" button till the num "SET" on the display screen flashes and the number "SET" indicates setting point of hardness, don't set a high level for the first setting, from level 2, if the ice cream is too soft, press", till the hardness appropriate.
The hardness level on the display screen can be observed while the machine is working, the number increases gradually, and when the hardness reaches 95% of setting value, the machine will stop working then ice cream is ready to serve.
Draw off ice cream. Put a cone under the dispensing door, pull down handle, the ice cream draw off, after the cone is full of ice cream, back the handle, it will stop drawing.
V. Use & Maintenance
Different machines must be used and maintained according to their different using conditions and environment conditions.
Washing refrigeration cylinders
Clean the refrigeration cylinders once everyday for a longer useful life for the health of customers.
A.Cleaning methods are as follow:
-
Press draw off all the rest mix in the refrigeration hoppers, and press
-
Prepare two gallons of approved sterilizing solution, and pour the
solution into the hoppers.
- Press and let the beater works for five minutes, draw off all the sterilizing solution.
- Repeatedly clean the hopper with rinse water for two to three times above.
- Turn off the power, take apart and wash the parts.
a, unscrew the four fastening screws in front of the dispensing door, remove the dispenser door;
b, remove the components as follow: pin of handle, handle, piston, C for piston and O-ring for dispenser door from the dispenser door;
c, draw the beater from the refrigeration cylinder, then remove the gas for beater.

1.Piston
2.O-ring for piston
3.Handle
4.pin of handle
9/supporting sleeve
10.gasket for dispensing valve
11.flow plug
12.blade
| 5.screw nut (down) | 13.beater |
| 6.screw nut (up) | 14.gasket for beater |
| 7.Modelling cap | 15.New design middle piston O-ring |
| 8 DISPENSING valve | 16.New design middle piston |
d, put the components into disinfecting solution to clean, check the big gasket for beater, O-ring for dispensing door, supporting sleeve and (e) for piston, if they are worn oldy, they should be replaced; e, After cleaning, lubricate the parts with Vaseline, then install the pa according to the method of taking apart.
Notice: Before installing the piston, O-ring for piston, beater and gasl for beater, you should lubricate Vaseline (lubricating Vaseline onto the groove of the gasket, do not onto the beater's end), using the Vase frequently can extend the serving life of components.
B.Cleaning machine cabinet
Keep the machine cabinet clean, use wet towel to clean the cabinet, do not flush the machine with water directly.
C.Cleaning condenser
After being used over a period of time, the condenser maybe thick ' dust, and this will affect radiating heat and cause refrigeration differer so it needs periodic cleaning (every half year)
Cleaning methods:
Step 1: Disconnected the main power switch.
Step 2: Remove the back panel and side panels.
Step 3: Clean dust with tools such as vacuum cleaner, high-pressure and hairbrush, be careful while cleaning to avoid damaging the fins or condenser.
D.Belt adjustment
After be used over a period of time, the belt of the machine maybe elongated, so it needs to be adjusted. Disconnected the main power machine, remove the back panel and side panels, adjust the tension of beater motor and make sure the belt is in appropriate tension.
VI.Trouble Shooting Guide
| Problems | Probable cause | Remedy |
| Machine does not run | Machine is not plugge into the wall receptacle | Plug machine in |
| The circuit breaker switch is open | Find and solve the problem then restart machine | |
| Protect circuit | Remove the trouble and restart machine | |
| Machine in clean position does not run | The tie wire of functi switch is unfastened | Check and fasten the wire |
| The beater motor brok | Repair or change the beaker motor | |
| The circuit breaker switch is open | Find and solve the problem | |
| Machine in clean position does not run | The tie wire of functi switch is unfastened. | Check and fasten the wire |
| There is some problem with control panel. | Replace the control panel | |
| Compressor does not run | Low voltage | Solve the problem of low voltage |
| Contactor broke | change contactor | |
| The relay of the compressor broke | Change the relay. | |
| There is some problem with control panel. | Change the control panel | |
| The self-protection of the compressor because of overload. | Find and solve the problem | |
| The compressor broke | Change the compressor | |
| The capacitor of the compressor broke | Change the capacitor | |
| Machine do not freeze down | Leakage of the refrigerant | Find and repair the leak the pipe, then vacuum ar recharge the refrigerant |
| Solenoid valve broke | Change the solenoid valve | |
| Fan motor do not run | Repair or change the fa motor | |
| The capacitor of the f motor broke | Change the capacitor of f motor | |
| Machine non-stop | The setting value of hardness is too low | Increase the setting value |
| There is some problem with control panel. | Change the control panel | |
| Bad cooling | Check and repair the refrigerating system | |
| Product does not dispense | The proportion of mix incorrect, and causes the freezing cylinders frozen | Make up a proper proportion of mix. |
| No mix in the hoppe | Pour the mix into the hoppe | |
| Limited switch broke off the tie wire is unfastened. | Change the switch or fast the wire | |
| The belt is unfastened skid around | Change or adjust the belt | |
| The bearing sleeve of the beater shaft is w/ | Change the bearing sleeve or the beater shaft. | |
| The product too soft | The proportion of the formula is wrong | Compound the mix according to the formula given by the supplier. |
| The setting hardness is too low | Increase the setting value | |
| Leakage | Drawing piston leaking | Reassemble or change the O-ring. |
| Dispensing door leaking | Tighten the screws or change the O-ring | |
| Drip tray leaking | Fix well or change the ga for beater | |
| Buzzer rings | Low voltage protection | Stop the machine, solve problem and restart 5 minutes later. |
VII.Schematic wiring diagram
- Technology parameters are on the nameplate
The electrical schematic diagram is on the board inner
Address: Baoshanqu Shuangchenglu 803long 11hao 1602A-1609shi Shanghai
Imported to AUS: SIHAO PTY LTD, 1 ROKEVA STREETEASTWOOD NSW 2122 Australia
Imported to USA: Sanven Technology Ltd. Suite 250, 9166 Anaheim Place, Rancho Cucamonga, CA 91730
SHUNSHUN GmbH
EC REP Römeräcker 9 Z2021,76351
Linkenheim-Hochstetten, Germany
euvertreter@gmail.com
+49 1727041930
Pooledas Group Ltd
Unit 5 Albert Edward House, The Pavilions Preston, United Kingdom
pooledas123@gmail.com
01772418127
Made In China
VEVOR
TOUGH TOOLS, HALF PRICE
Technical Support and E-Warranty Certificate
www.vevor.com/support
VEVOR®
TOUGH TOOLS, HALF PRICE
Assistance technique et certificat de garantie electronique www.vevor.com/support
MACHINE À GLACE
MODELE: CKX400PRO-A19-B
MODELE: CKX400PRO-A19-B
BESOIN D'AIDE? CONTACTEZ-NOUS!
Unit 5 Albert Edward House, The
Pavilions Preston, United Kingdom
pooledas123@gmail.com
01772418127
Fabrique en Chine
VEVOR®
TOUGH TOOLS, HALF PRICE
www.vevor.com/support
VEVOR®
TOUGH TOOLS, HALF PRICE
MODELL:CKX400PRO-A19-B
MODELL:CKX400PRO-A19-B
BRAUCHEN SIE HILFE? KONTAKTIERE UNS!
Unit 5 Albert Edward House, The
Pavilions Preston, United Kingdom
pooledas123@gmail.com
01772418127
www.vevor.com/support
VEVOR®
TOUGH TOOLS, HALF PRICE
Importato in Australia: SIHAO PTY LTD, 1 ROKEVA STREETEASTWOOD
NSW 2122Australia
Rancho Cucamonga, CA 91730
SHUNSHUN GmbH
Romeracker 9 Z2021,76351
Unit 5 Albert Edward House, The
Pavilions Preston, United Kingdom
pooledas123@gmail.com
01772418127
Made in China
VEVOR®
TOUGH TOOLS, HALF PRICE
www.vevor.com/support
VEVOR®
TOUGH TOOLS, HALF PRICE
Soporte专业技术 y certificate de garantía electrónica www.vevor.com/support
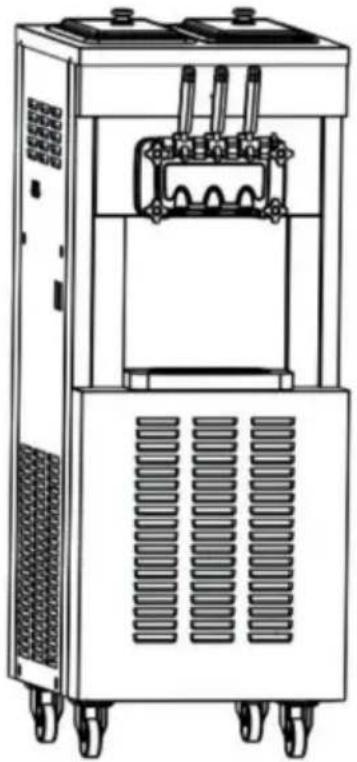
MAQUINA DE HELADOS
MODELO:CKX400PRO-A19-B
Seguimos comprometidos a proporcionarle herramrientas a precios competivos.
www.vevor.com/support
VEVOR®
TOUGH TOOLS, HALF PRICE
MODEL: CKX400PRO-A19-B
MODEL: CKX400PRO-A19-B
POTRZEBUJE POMOCY? SKONTAKTUJ SIE Z NAMI!
Import do AUS: SIHAO PTY LTD, 1 ROKEVA STREETEASTWOOD
www.vevor.com/support
VEVOR®
TOUGH TOOLS, HALF PRICE
Technische ondersteuning en e-garantiecertificaat www.vevor.com/support
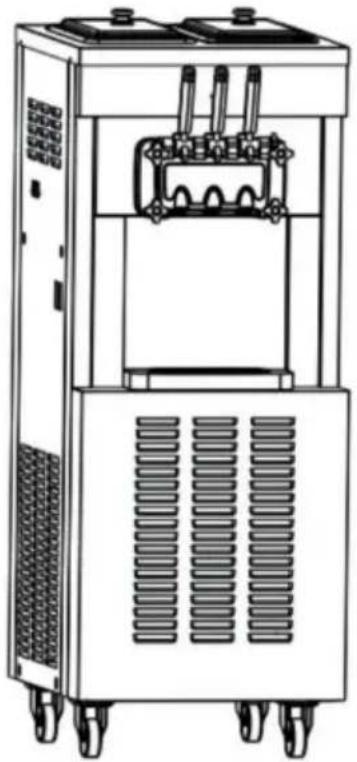
IJSMACHINE
MODEL:CKX400PRO-A19-B
MODEL:CKX400PRO-A19-B
HULP NODIG? NEEM CONTACT MET ONS OPI!
www.vevor.com/support
VEVOR®
TOUGH TOOLS, HALF PRICE
MODELL: CKX400PRO-A19-B
MODELL: CKX400PRO-A19-B
BEHÖVS HJÄLP? KONTAKTA OSS!
www.vevor.com/support
- ICE CREAM MACHINE
- MODEL:CKX400PRO-A19-B
- NEED HELP? CONTACT US!
- Safety precaution
- WARNING:
- NOTE:
- WARING
- III.Installations& Adjusting
- A、unpack & inspect
- B、Installation
- C、Testing Running
- D、Feed Tube Installation
- Feed Tube (II) Installation
- Operation Instruction
- A.Key Instruction
- a. Hardness setting
- b. Test on line
- c. Clean
- d. Standby
- e. Auto
- Fault and Alarm Description
- The method of making ice cream
- Use & Maintenance
- B.Cleaning machine cabinet
- C.Cleaning condenser
- D.Belt adjustment
- VI.Trouble Shooting Guide
- VII.Schematic wiring diagram
- VEVOR
- VEVOR®
- TOUGH TOOLS, HALF PRICE
- MACHINE À GLACE
- BESOIN D'AIDE? CONTACTEZ-NOUS!
- MODELL:CKX400PRO-A19-B
- BRAUCHEN SIE HILFE? KONTAKTIERE UNS!
- MAQUINA DE HELADOS
- MODELO:CKX400PRO-A19-B
- MODEL: CKX400PRO-A19-B
- IJSMACHINE
- HULP NODIG? NEEM CONTACT MET ONS OPI!
- MODELL: CKX400PRO-A19-B
- BEHÖVS HJÄLP? KONTAKTA OSS!
Brand : Vevor
Model : CK400PRO-A19-B
Category : Ice machine