QYC500-WB - Electric winch Vevor - Free user manual and instructions
Find the device manual for free QYC500-WB Vevor in PDF.

| Brand | Vevor |
| Model | QYC500-WB |
| Product Type | Manual trailer jack |
| Maximum Load Capacity | 500 lbs |
| Mount Type | Bolted |
| Crank Type | Top-Wind |
| Height Range | 13 to 23.2 inches |
| Wheel Diameter | 9 inches |
| Material | Steel |
| Main Use | Move and support trailers |
| Lifting Method | Manual by crank or impact wrench |
| Brake Function | Integrated hand brake |
| Lubrication Required | Multi-purpose grease on chain |
| Tire Maintenance | Check and inflate regularly |
| Check Before Use | Check bolt tightness |
| Storage | Dry after use to prevent rust |
| Recommended Safety Gear | Safety goggles and gloves |
| Spare Parts | Contact Vevor support |
| Warranty | Electronic warranty certificate at vevor.com/support |
Frequently Asked Questions - QYC500-WB Vevor
User questions about QYC500-WB Vevor
0 question about this device. Answer the ones you know or ask your own.
Ask a new question about this device
Download the instructions for your Electric winch in PDF format for free! Find your manual QYC500-WB - Vevor and take your electronic device back in hand. On this page are published all the documents necessary for the use of your device. QYC500-WB by Vevor.
USER MANUAL QYC500-WB Vevor
Technical Support and E-Warranty Certificate www.vevor.com/support
We continue to be committed to provide you tools with competitive price. "Save Half", "Half Price" or any other similar expressions used by us only represents an estimate of savings you might benefit from buying certain tools with us compared to the major top brands and does not necessarily mean to co all categories of tools offered by us. You are kindly reminded to verify carefully when you are placing an order with us if you are actually Saving Half in comparison with the top major brands.
VEVOR®
TOUGH TOOLS, HALF PRICE
MANUAL TRAILER MOVE
MODEL:QYC500-WB
natural_image
Mechanical device with attached lever and multiple metal components (no visible text or symbols)NEED HELP? CONTACT US!
Have product questions? Need technical support? Please feel from contact us:
Technical Support and E-Warranty Certificate www.vevor.com/support
This is the original instruction, please read all manual instruction carefully before operating. VEVOR reserves a clear interpretation user manual. The appearance of the product shall be subject to product you received. Please forgive us that we won't inform your data on your product.
SAFETY INSTRUCTIONS

WARNING: Read and understand all instructions. Failure to follow actions listed below may result in serious injury.
-
Check whether the tire has enough gas before use. If the tire gas enough, please inflate the tire before use.
-
Check whether the screw part is loose, if yes, please tighten it. 3. I overload.

CAUTION: Please read the instructions for safe operation carefully
Assembly Precautions
-
Assemble only according to these instructions. Improper assembly can create hazards.
-
Wear ANSI-approved safety goggles and heavy-duty work gloves du assembly.
-
Keep assembly area clean and well-lit.
-
Keep bystanders out of the area during assembly.
5.Do not assemble when tired or when under the influence of alcohol drugs or medication.
- Weight capacity and other product capabilities apply to properly and completely assembled product only.
Use Precautions
TO PREVENT SERIOUS INJURY AND DEATH FROM TIPPING:
-
Do not sit, stand or climb on this item.
-
This product is not a toy. Do not allow children to play with or no item.
3.Do not lift while loaded.
-
To prevent tipping, push/pull using supplied handle only. 5. Use as intended only.
-
Inspect before every use. Do not use it if parts are loose or dama
-
After use, please dry before storage to avoid rusting of bolts affecti use.
SAVE THESE INSTRUCTIONS
MODEL AND PARAMETERS
| Model | QYC500-WB |
| Max. Gross Trailer WT | 500 lbs |
| Mounting Bracket Type | Bolt-On Mounting Bracket |
| Crank Type | Top-Wind |
| Range(Height of the receiving tube above ground) | 13-23.2inch |
| Wheel | 9" |
| Material | Steel |
STRUCTURE DIAGRAM
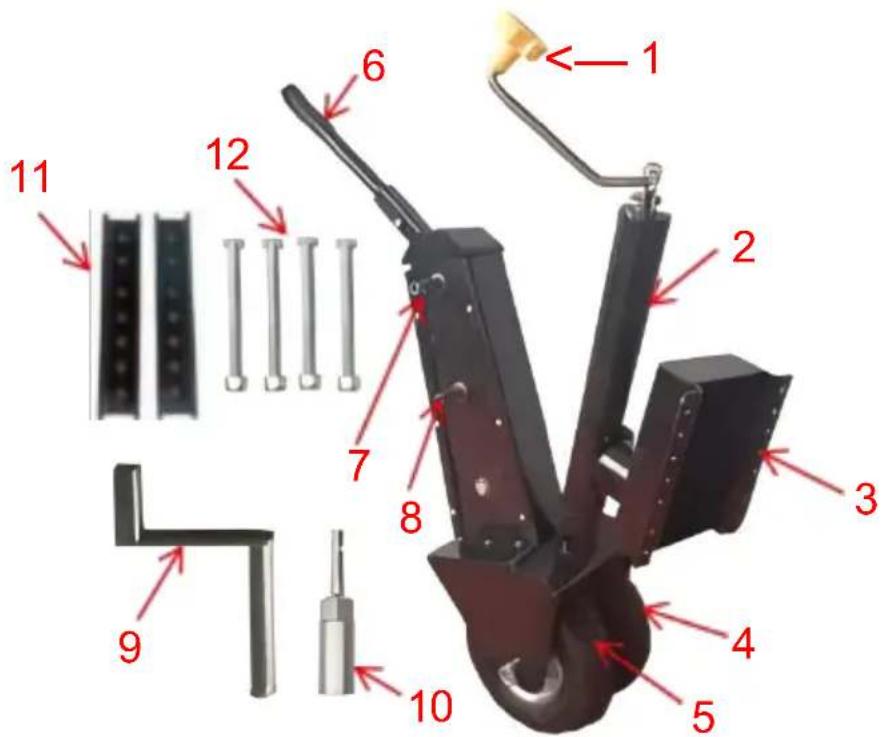
- Jack Handle 2. Jack 3. Connecting Plate 4. Wheels 5. Gear Chains
- Steering/Brake Handle 7. Low Gear Driveshaft 8. Medium Gear Driveshaft
- Drive Handle 10. Sleeve 11. Mounting Fittings 12. Mounting bolts
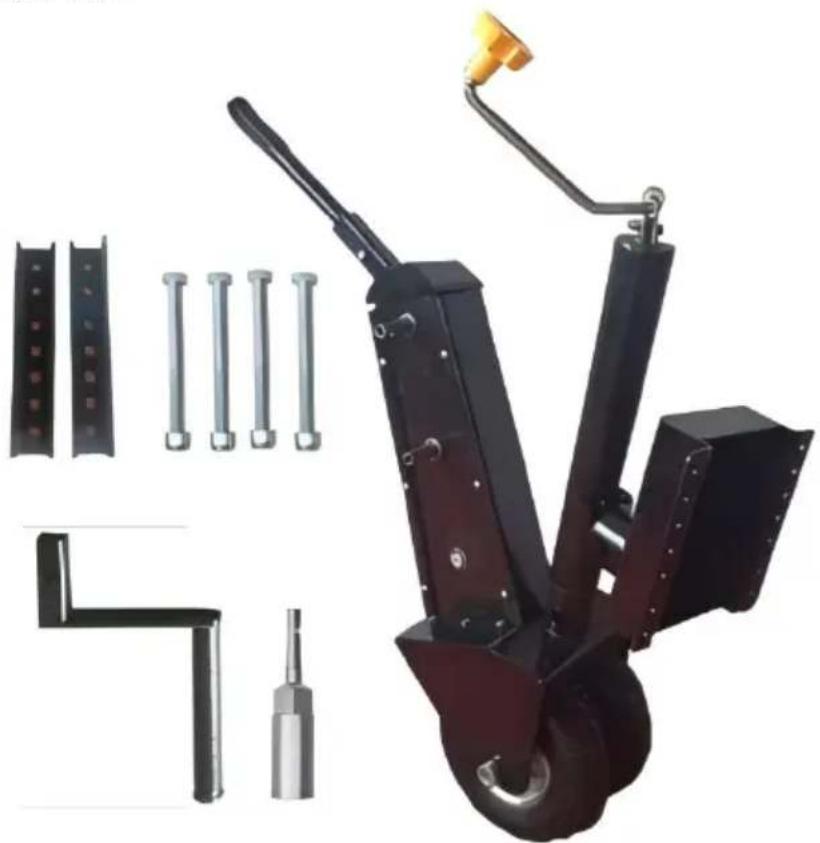
COMPONENTS
 A ×1 A ×1 |  B ×1 B ×1 |  C ×1 C ×1 |
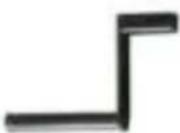 D ×1 D ×1 | 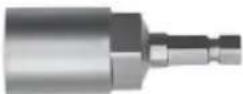 E ×1 E ×1 |  F ×2 F ×2 |
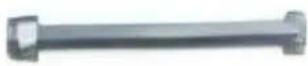 G ×4 G ×4 |  H ×1 H ×1 |  I ×1 I ×1 |
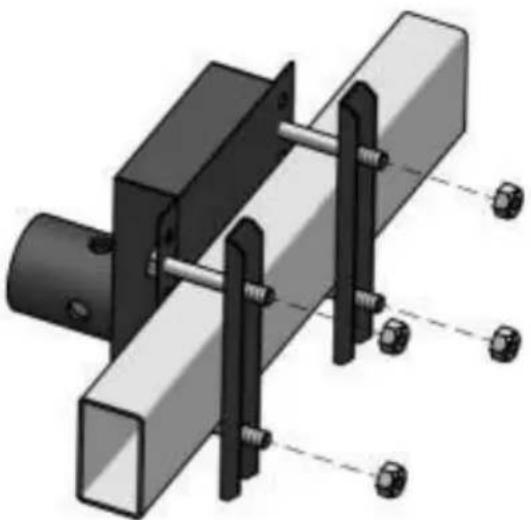
ASSEMBLY
natural_image
Mechanical assembly diagram showing a bracket with mounting holes and connecting rods (no text or symbols)-
When mounting trailer jack, it is best to hook up to the tow vel to make sure the trailer is secure.
-
Mount jack based on drawing shown above.
- Make sure bolts and nylock nut are securely tightened. Regularly check to make sure bolts and nylock nuts are securely tight.
TESTING THE ASSEMBLY:
WARNING!
Always ensure the operator and bystanders are aware of the stability the load.
1) Lower the trailer gradually until the jack is above ground and the is completely supported by the Trailer Valet.
NOTE: Keeping the trailer jock close to the ground prevents serious damages from occurring due to unexpected failures.
NOTE: If the tires on the Trailer Valet seem too deflated and unable to hold the weight, then you must lower the jack and remove the device check air pressure.
ATTACHING DRIVER
Option 1: Manual Operation
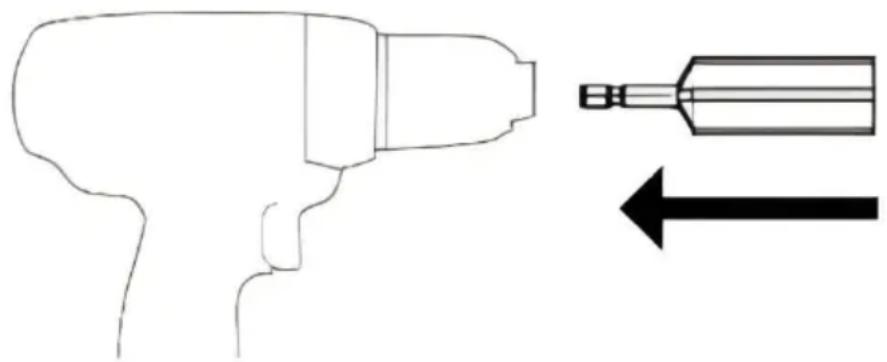
1) Attach the drive handle to the low or medium gear driveshaft. Option 2: Using the Drill socket

WARNING!
If you are using a cordless drill, be sure your battery pack is fully charged before use. Follow your drill/driver manufacturer's recommendations.
1) Using the chuck of your drill/driver, connect to the drill socket.
natural_image
Line drawing of a hairdryer with an arrow indicating direction (no text or symbols)
WARNING!
2) Always tighten drill to drill socket. Drill can come lose and cause ir
3) If using a corded drill/driver, verify that power cords and extension cords are positioned so that the tires on the Trailer Valet or moving
vehice will not damage the cords or that cords can not be stepped tripped over, or otherwise subjected to damage or stress.
4) Align and insert the drill socket to the low gear driveshaft.
OPERATING DEVICE

WARNING!
Hold the drill/driver firmly when engaging. Drill will have high initial torque
1) When you're getting ready to operate the device, make sure you have one hand gripped firmly on the brake, and the other hand gripped firmly on the drive handle.
2) Slowly lift the steering handle until the brake is disengaged and start cranking.
NOTE: It is important that you steer the device only when you are cranking and the trailer is moving. Attempting to turn the steering hand at a dead stop will cause the gears to fall out of alignment.
REMOVING THE DEVICE
1) Remove the drill/drive handle.
2) Lower the jack until the Trailer Valet is above the ground.
3) Losen the lock nut and release the mounting fittings.
MAINTENANCE
- Do not overload.
- After use, please dry before storage to avoid rusting of bolts affecting use.
- Check bolts regularly for looseness.
- Apply multipurpose grease to the chain by removing the front cover of the device.
- Inspect tires for damage. Replace tire immediately if damaged.
Manufacturer: Shanghaimuxinmuyeyouxiangongsi
Address:Shuangchenglu803nong11hao1602A-1609shi,baoshanqu, shanghai 200000 CN.
Imported to AUS: SIHAO PTY LTD, 1 ROKEVA STREETEASTWOOD NSW 2122 Australia
Imported to USA: Sanven Technology Ltd., Suite 250, 9166 Anaheim Place, Rancho Cucamonga, CA 91730
| EC | REP |
E-CrossStu GmbH
Mainzer Landstr.69, 60329 Frankfurt am Main.
| UK | REP |
YH CONSULTING LIMITED.
C/O YH Consulting Limited Office 147, Centurion House, London Road, Staines-upon-Thames, Surrey, TW18 4AX
VEVOR®
TOUGH TOOLS, HALF PRICE
Technical Support and E-Warranty Certificate www.vevor.com/support
VEVOR®
TOUGH TOOLS, HALF PRICE
natural_image
Mechanical device with attached lever and multiple metal components (no visible text or symbols)NEED HELP? CONTACT US!
Have product questions? Need technical support? Please feel from contact us:
Technical Support and E-Warranty Certificate www.vevor.com/support
This is the original instruction, please read all manual instruction carefully before operating. VEVOR reserves a clear interpretation user manual. The appearance of the product shall be subject to product you received. Please forgive us that we won't inform your data on your product.
SAFETY INSTRUCTIONS

natural_image
Mechanical assembly diagram showing a clamping mechanism with bolted joints and mounting brackets (no text or symbols)natural_image
Line drawing of a hairdryer with an arrow indicating direction (no text or symbols)
AVERTISSEMENT!
natural_image
Mechanical device with attached lever and multiple metal components (no visible text or symbols)NEED HELP? CONTACT US!
Have product questions? Need technical support? Please feel from contact us:
Technical Support and E-Warranty Certificate www.vevor.com/support
This is the original instruction, please read all manual instruction carefully before operating. VEVOR reserves a clear interpretation user manual. The appearance of the product shall be subject to product you received. Please forgive us that we won't inform your data on your product.
SAFETY INSTRUCTIONS

natural_image
Mechanical assembly diagram showing a bracket with mounting holes and fasteners (no text or symbols)natural_image
Line drawing of a hairdryer with an arrow indicating direction (no text or symbols)
WARNUNG!
natural_image
Mechanical device with attached lever and multiple metal components (no visible text or symbols)NEED HELP? CONTACT US!
Have product questions? Need technical support? Please feel from contact us:
Technical Support and E-Warranty Certificate www.vevor.com/support
This is the original instruction, please read all manual instruction carefully before operating. VEVOR reserves a clear interpretation user manual. The appearance of the product shall be subject to product you received. Please forgive us that we won't inform your data on your product.
SAFETY INSTRUCTIONS

natural_image
Mechanical assembly diagram showing a bracket with mounting holes and fasteners (no text or symbols)natural_image
Line drawing of a hairdryer with an arrow indicating direction (no text or symbols)
AVVERTIMENTO!
natural_image
Mechanical device with attached lever and multiple metal components (no visible text or symbols)NEED HELP? CONTACT US!
Have product questions? Need technical support? Please feel from contact us:
Technical Support and E-Warranty Certificate www.vevor.com/support
This is the original instruction, please read all manual instruction carefully before operating. VEVOR reserves a clear interpretation user manual. The appearance of the product shall be subject to product you received. Please forgive us that we won't inform your data on your product.
SAFETY INSTRUCTIONS

natural_image
Mechanical assembly diagram showing a bracket with mounting holes and fasteners (no text or symbols)natural_image
Line drawing of a hairdryer with an arrow indicating direction (no text or symbols)
¡ADVERTENCIA!
natural_image
Mechanical device with attached lever and multiple metal components (no visible text or symbols)NEED HELP? CONTACT US!
Have product questions? Need technical support? Please feel from contact us:
Technical Support and E-Warranty Certificate www.vevor.com/support
This is the original instruction, please read all manual instruction carefully before operating. VEVOR reserves a clear interpretation user manual. The appearance of the product shall be subject to product you received. Please forgive us that we won't inform your data on your product.
SAFETY INSTRUCTIONS
natural_image
Mechanical assembly diagram showing a bracket with bolts and mounting holes (no text or symbols)natural_image
Line drawing of a hairdryer with an arrow indicating direction (no text or symbols)
OSTRZEŻENIE!
natural_image
Mechanical support system with attached components and a separate view of six bolts (no text or symbols visible)NEED HELP? CONTACT US!
Have product questions? Need technical support? Please feel from contact us:
Technical Support and E-Warranty Certificate www.vevor.com/support
This is the original instruction, please read all manual instruction carefully before operating. VEVOR reserves a clear interpretation user manual. The appearance of the product shall be subject to product you received. Please forgive us that we won't inform your data on your product.
SAFETY INSTRUCTIONS

natural_image
Mechanical assembly diagram showing a bracket with bolts and mounting holes (no text or symbols)natural_image
Line drawing of a hairdryer with an arrow indicating direction (no text or symbols)
WAARSCHUWING!
natural_image
Mechanical device with attached lever and six metallic components, shown alongside a separate diagram of mechanical parts (no text or symbols visible)NEED HELP? CONTACT US!
Have product questions? Need technical support? Please feel from contact us:
Technical Support and E-Warranty Certificate www.vevor.com/support
This is the original instruction, please read all manual instruction carefully before operating. VEVOR reserves a clear interpretation user manual. The appearance of the product shall be subject to product you received. Please forgive us that we won't inform your data on your product.
SAFETY INSTRUCTIONS

natural_image
Mechanical assembly diagram showing a bracket with mounting holes and fasteners (no text or symbols)natural_image
Line drawing of a hairdryer with an arrow indicating direction (no text or symbols)