
SEC16800T - Electric winch Vevor - Free user manual and instructions
Find the device manual for free SEC16800T Vevor in PDF.
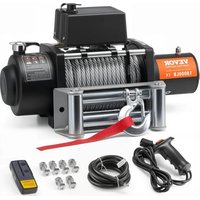


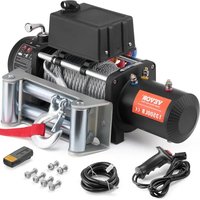
| Brand | Vevor |
| Model | SEC16800T |
| Product Type | Electric Vehicle Winch |
| Supply Voltage | 12 V DC |
| Power Rating | 5.7 HP |
| Gear Ratio | 312.4:1 |
| Towing Capacity (1st Layer) | 18,000 lb (8,163 kg) |
| Towing Capacity (4th Layer) | 9,530 lb (4,321 kg) |
| Cable Type | Steel, 7/16 inch (11 mm) |
| Cable Length | 85 ft (25.9 m) |
| Control | Wireless and Wired |
| Mounting Dimensions (Center Distance) | 254 x 114.3 mm |
| Recommended Mounting Plate Material | Steel at least 6 mm thick |
| Recommended Fasteners | Stainless steel bolts 3/8" UNC x 1-1/4" |
| Protection | Do not use for lifting people or loads |
| Maintenance | Factory lubricated, high-temperature lithium grease; oil the cable regularly |
| Recommended Usage Frequency | At least once a month |
| Warranty | See manufacturer's terms |
| Compliance | FCC Part 15, EU Directive 2012/19/EC |
| Manufacturer | Shanghaimuxinmuyeyouxiangongsi, Shanghai, China |
| Spare Parts | Available from the dealer |
Frequently Asked Questions - SEC16800T Vevor
User questions about SEC16800T Vevor
0 question about this device. Answer the ones you know or ask your own.
Ask a new question about this device
Download the instructions for your Electric winch in PDF format for free! Find your manual SEC16800T - Vevor and take your electronic device back in hand. On this page are published all the documents necessary for the use of your device. SEC16800T by Vevor.
USER MANUAL SEC16800T Vevor
ELECTRIC WINCH
USER MANUAL
MODEL: S6000 / S10000 / S12000 / SC13000 / SEC16800T
MODEL: S6000 / S10000 / S12000 / SC13000 / SEC16800T
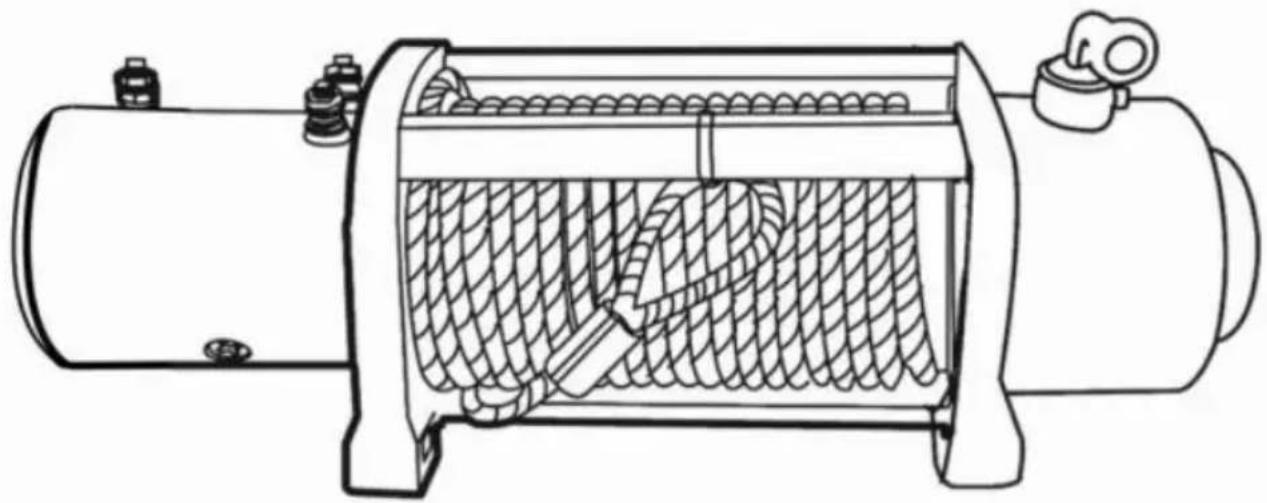
This is the original instruction. Please read all manual instructions carefully before operating. VEVOR reserves a clear interpretation of our user manual. The appearance of the product shall be subject to the product received. Please forgive us that we won't inform you again if there are technology or software updates on our product.
READ AND UNDERSTAND THIS GUIDE BEFORE INSTALLATION & OPERATION
Warning! Observe safety precautions for personal safety and the safety of others. Improper equipment operation may cause personal injury and equipment damage.
Read the following carefully before attempting to operate your winch and keep the instructions for future reference.
SYMBOL INDEX
| SYMBOL | EXPLANATION |
 | Always Read All Product Literature |
 | Never Use As a Hois |
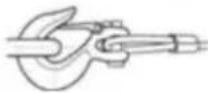 | Always Properly Seat Load in Throat of Ho |
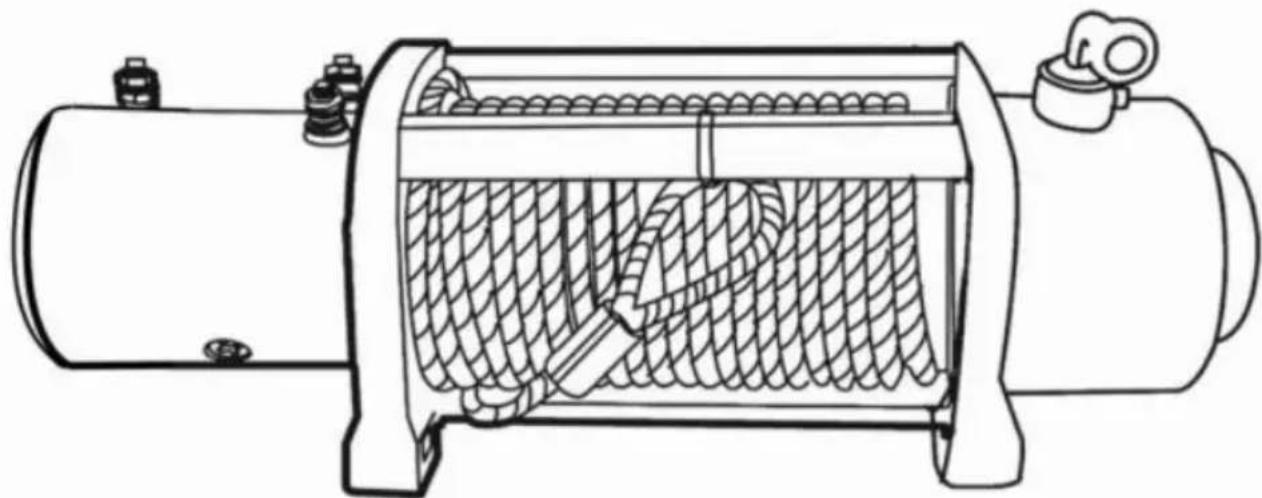
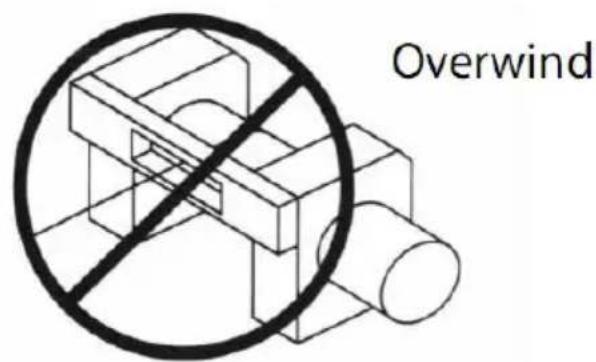
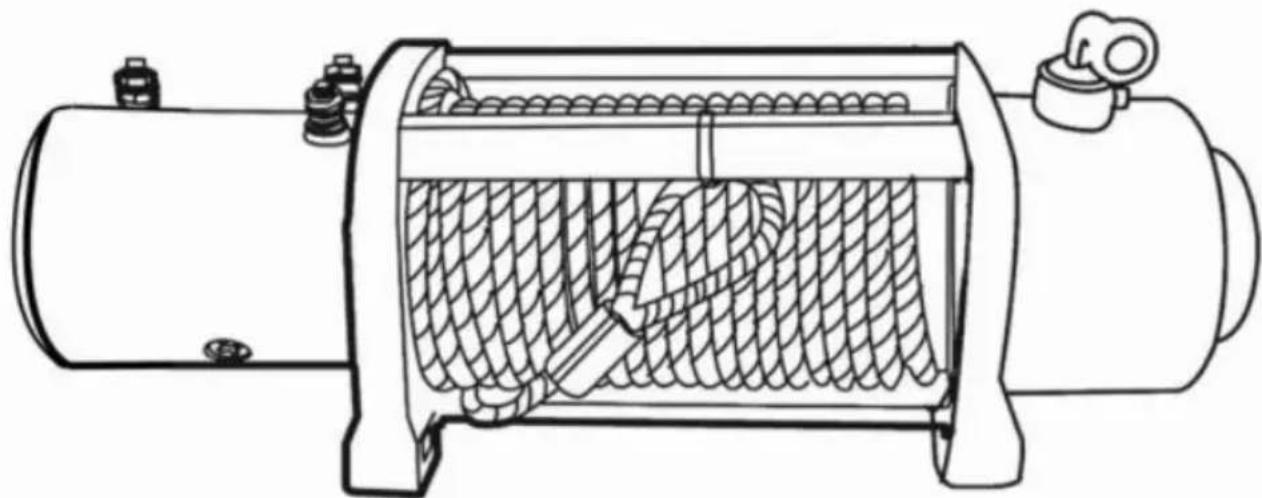
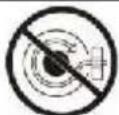 | Never wind winch rop on bottom of drum |
 | Lock(Engage) |
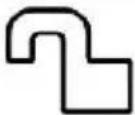 | Unlock(Disengage) |
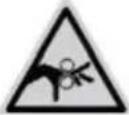 | Finger/Fairlead Crushing Hazard |
 | Hand Piercing/Cutting Hazard |
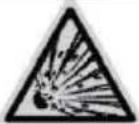 | Explosion/Bursting Hazard |
| SYMBOL | EXPLANATION |
 | Instructions for use |
 | Always Wear Gloves |
 | Never Move People |
 | Always Use Supplied Hook Strap |
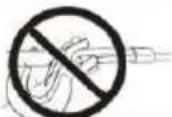 | Never Apply Load to Hook Tip or Latch |
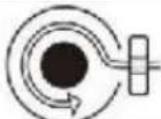 | Always Wind winch rope from top of drum |
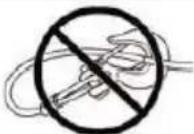 | Never Hook Back o Rope |
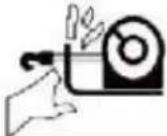 | Fairlead Pinch Point |
Warning
Dress Properly:
- Don't wear loose clothing or jewelry. They can be caught in moving parts.
- Wear leather gloves when handling winch cable. Do not handle cable with bare hands; broken wires can cause injuries. Non-skid footwear is recommended.
- Protective hair covering to contain long hair.
Keep a Safe Distance:
- Ensure that all persons stand well clear of winch cable and load during operation, 1.5 times the cable length recommended. If a cable pulls loose or breaks under load it can lash back and cause serious personal injury or death.
- Don't step over the cable.
- All visitors and onlookers should be kept away from the work area.
- Keep proper footing and balance at all times.
Don't Abuse the Cord:
- Never carry your winch by the cord or yank it to disconnect it from the receptacle.
- Keep cord from heat, oil and sharp edges.
Don't Overwork the winch:
- If the motor becomes uncomfortably hot to touch, stop and let it cool for minutes.
- Don't maintain power to the winch if the motor stalls.
- Don't exceed maximum line pull ratings shown in tables. Shock loads must exceed these ratings.
Avoid Unintentional Starting:
- Winch clutch should be disengaged when not in use and fully engaged with use.
Check Damaged Parts:
- Before using, you should check your winch carefully. Any part that is damaged should be properly repaired or replaced by an authorized service center.
Repair Your Winch:
- When repairing, use only identical replacement parts or it may cause considerable danger for the user.
Re-spool the Cable:
- Leather gloves must be worn while re-spooling. To re-spool correctly, it is necessary to keep a slight load on the cable. Hold the cable with one hand and the remote-control switch with the other. Start as far back and in the center as possible. Walk up keeping load on the cable as the winch is powered in.
- Do not allow the cable to slop through your hand and do not approach the winch too closely.
- Turn off the winch and repeat the procedure until all the cable except 1m
- Disconnect the remote-control switch and finish spooling in cable by rotating drum by hand with clutch disengaged.
- On hidden winches, spool in cable under power but keep hands clear.
Warning: The use of any other accessory or attachment other than those recommended in the instruction manual may present a risk of personal injury. Warning: Always UNPLUG remote control before working in or around fairlead wire rope drum (danger zone). Never tuck hand control under arm or allow it to hold it when in danger zone so that hand control cannot be accidentally activated.
Read the following carefully before attempting to operate your winch and keep instructions for future reference.
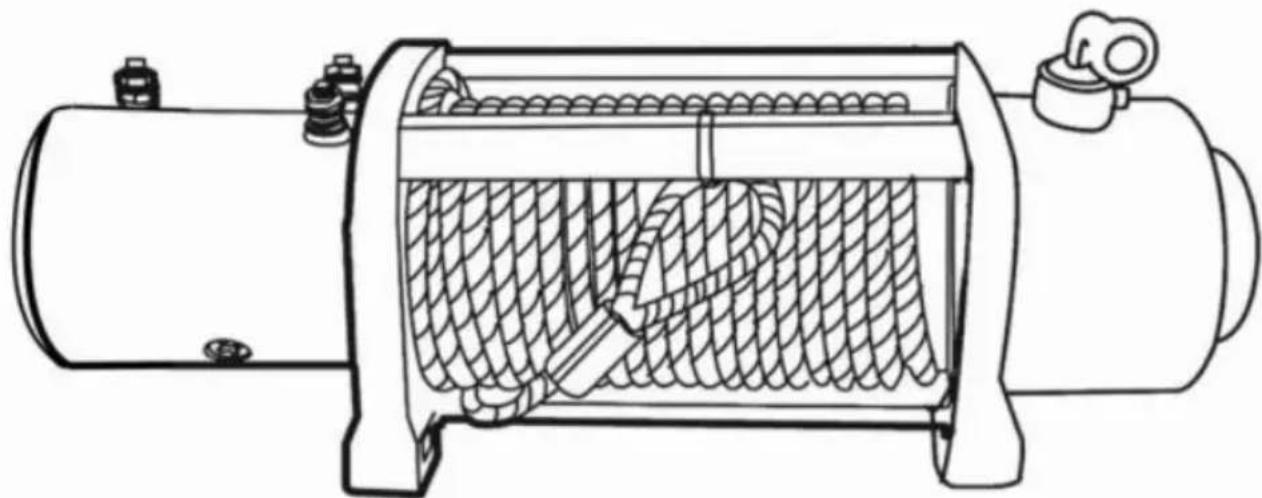
- The uneven spooling of cable, while pulling a load, is not a problem, unless there is a cable pile up on one end of the drum. If this happens reverse to relieve the load and move your anchor point further to the center of the • After the job is done you can unspool and rewind for a neat lay of the
- Store the remote control switch inside your vehicle where it will not become damaged, inspect it before you plug it in.
- When ready to begin spooling in, plug in remote control switch with clutch disengaged, do not engage clutch with motor running.
- Never connect the hook back to the cable. This causes cable damage. Always use a sling or chain of suitable strength.
- Observe your winch while winching, if possible while standing at a safe distance. Stop the winching process every meter or so to assure the cable is pulling up in one corner. Jamming the cable can break your winch.
- Do not attach tow hooks to winch mounting apparatus. They must be attached to vehicle frame.
- The use of a snatch block will aid recovery operations by providing a doubling of the winch capacity and a halving of the winching speed, and the means to maintain a direct line pull to the center of the fairlead. When double loading stationary winching, the winch hook should be attached to the chassis of the vehicle.
- Ensure rated “D” or bow shackles are used in conjunction with an approved trunk protector to provide a safe anchor point.
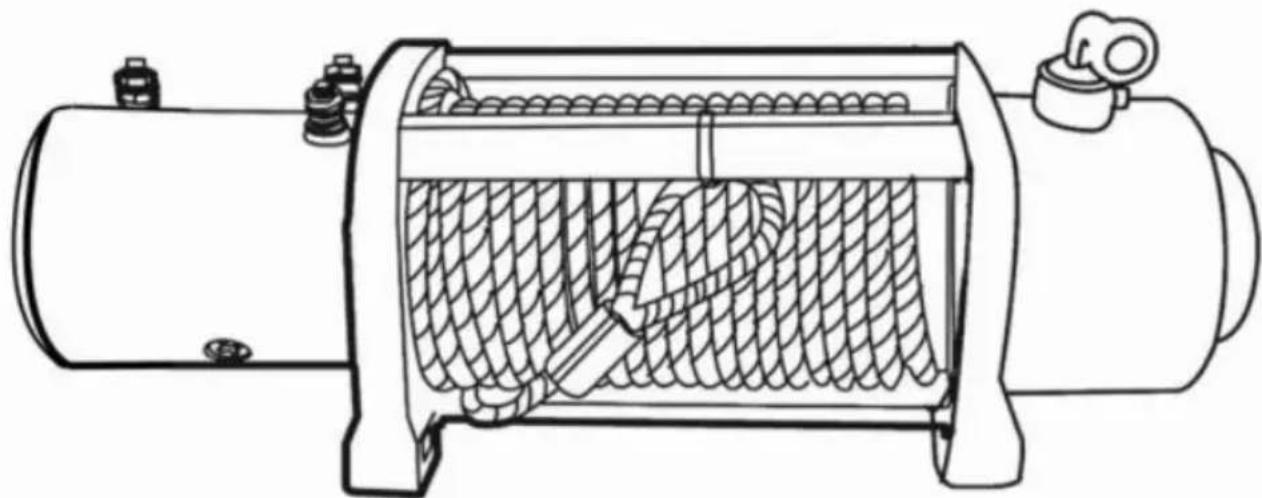
- When extending winch cable, ensure that at least five wraps of cable remain on the drum at all times. Failure to do this could result in the cable parting from the drum under load. Serious personal injury or property damage may result.
- All winches are provided with a red cable marking to identify that 5 wraps of cable remain on the winch drum when this mark appears at the fairlead. No recovery should be attempted beyond this marking.
- Since the greatest pulling power is achieved on the innermost layer of your winch, it is desirable to pull off as much line as you can for heavy pulls (leave at least 5 wraps minimum on the drum-red cable). If this is not practical, use a snatch block and double line arrangement.
- Draping a heavy blanket or similar object over the extended winch cable is recommended as it will dampen any back lash should a failure occur.
- Neat, tight spooling avoids cable binding, which is caused when a load is applied and the cable is pinched between the others. If this happens, alternately power the winch in and out. Do not attempt to work a bound cable under load free by hand.
- Apply blocks to wheels when vehicles are on an incline.
Battery:
- Be sure that the battery is in good condition. Avoid contact with battery and other contaminants.
• Always wear eye protection when working around a battery.
- Have the engine running when using the winch, to avoid flattening the battery.
Winch Cable:
- Be sure that the cable is in good condition and is attached properly.
- Do not use the winch if cable is frayed.
- Do not move the vehicle to pull a load.
- The life of the cable is directly related to the use and care it receives. For its first and subsequent uses, a cable must be wound onto the drum under a load of at least 500 lbs (230 kg) or the outer wraps will draw into the inner wraps and severely damage the cable during winching. The first winch use should be a familiarization run while in a relaxed, non-recovery situation. Spool out the cable until the red cable appears (about five wraps on the drum), then rewind it onto the drum under a load of 500 lbs (230 kg) or more. This will slightly tighten and stretch the new cable and create a tight cable wrap around the drum. Failure to do so may result in cable damage and reduced cable life.
- When the cable is replaced, be sure to apply Lactate, or an equal compound, to the cable clamp thread. Tighten the clamp screw properly but do not over-tighten. The lactate will prevent loosening of the screw in arduous conditions.
- Loctite 7471 Primer and 222 Thread locker are recommended.
Do not attempt to exceed the pulling limits of this winch.
DO NOT drive your vehicle to assist the winch in any way. Vehicle movement in combination with winch operation may overload the cable, the winch itself, or cause damaging shock loads.
Shock loads when winching are dangerous! A shock load occurs when an increased force is suddenly applied to the cable. A vehicle rolling back on a cable may induce a damaging shock load.
The winches shown in this manual are solely for vehicle, non-industrial applications.
Do not use winch in hoisting applications due to required hoist safety factors and features.
Do not use the winch to lift, support or otherwise transport people.
Disconnect the power cable from the battery when the winch is not in use.
Stay clear of cable while pulling.
Never exceed the pulling capabilities listed above.
Do not use the winch by just pulling out a bit of rope. It is highly recommended that only the last layer of rope be left on the winch when using the winch capacity.
The winch has a huge working current under loading, so it cannot continue rewinding the cable for a long time. It is highly recommended to pause the wire every 2 meters of cable rewinding to allow the motor to dissipate heat.
DO NOT "move" your vehicle to assist the winch in pulling the load. The combination of the winch and vehicle pulling together could overload the wire rope and the winch.
Inspect wire rope and equipment frequently. A frayed wire rope with broken strands should be replaced immediately.
Use heavy leather gloves when handling wire rope. Do not let wire rope slide through your hands.
Never winch with less than 5 turns of wire rope around the winch drum since the wire rope end fastener may NOT withstand full load.
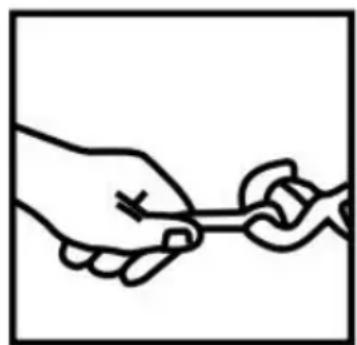
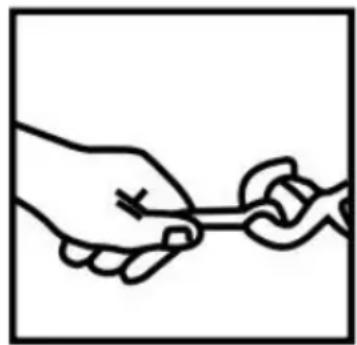
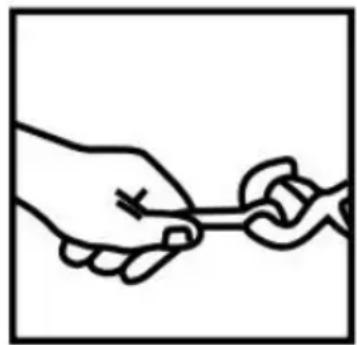
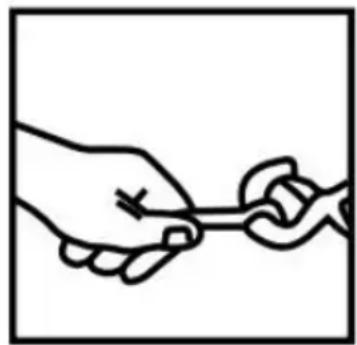
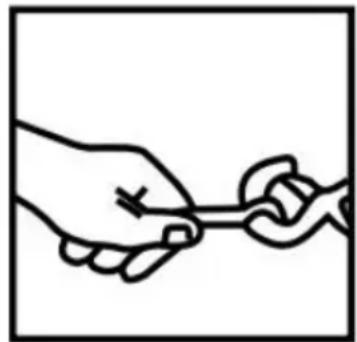
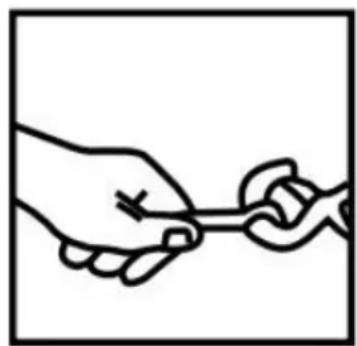
Never put your finger through the hook. If your finger should become trapped in the hook, you could lose your finger.
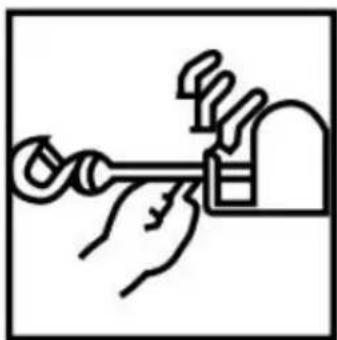
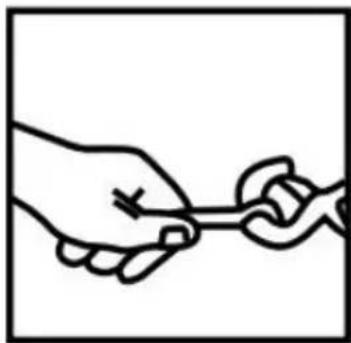
ALWAYS USE THE HAND SAVER when guiding the wire rope in or out. (See Figure). Do not use winch in hoisting applications due to required hoist safety factors and features.
ALWAYS STAND CLEAR OF WIRE ROPE, HOOK AND WINCH. IN THE UNLIKELY EVENT ANY COMPONENT FAILURE, IT'S BEST TO BE OUT OF HARM'S WAY.
Warning: The use of any other accessory or attachment other than the recommended in the instruction manual may present a risk of personal injury.
WINCH INSTALLATION
MOUNTING YOUR WINCH
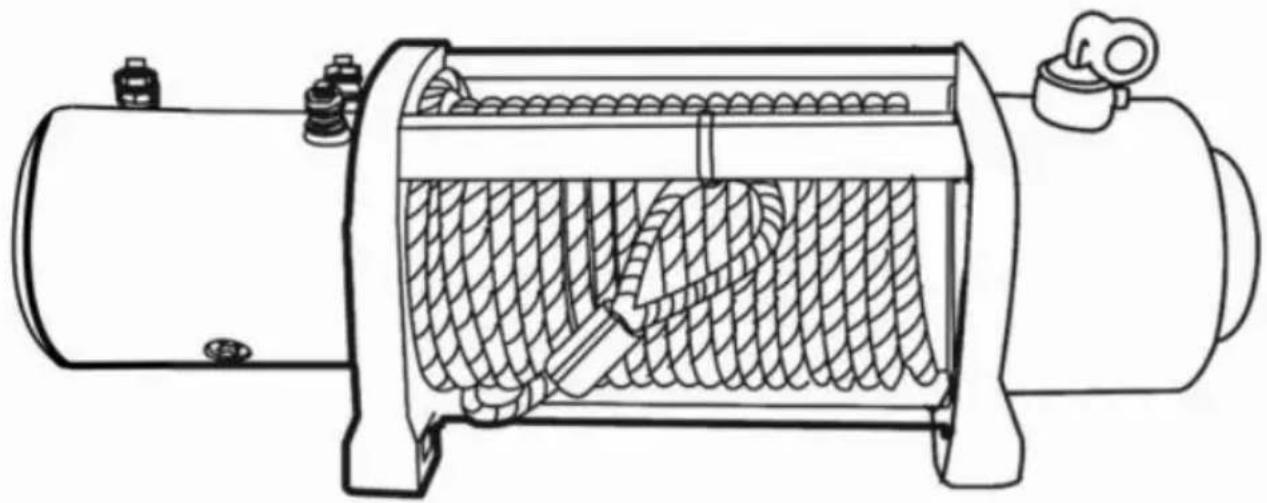
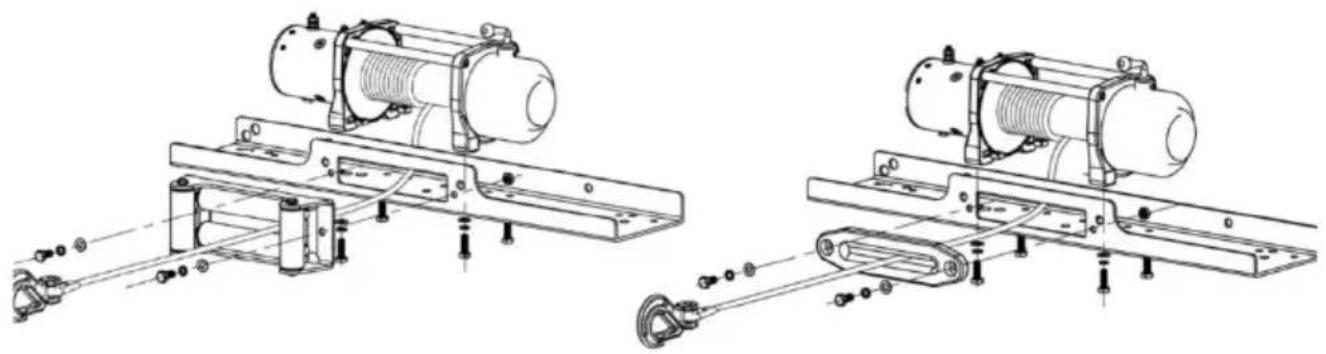
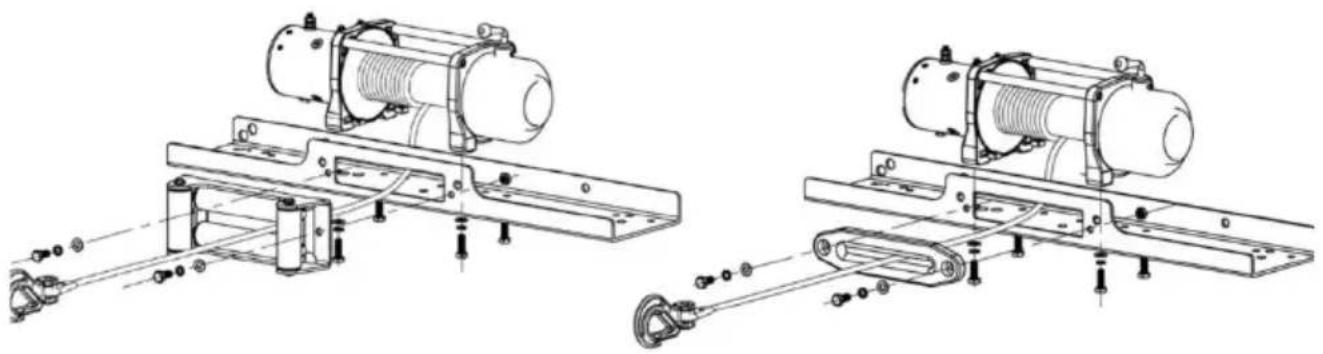
The winch is to be mounted into a suitable steel mounting frame using the 4-point foot mounting system in either a horizontal or vertical plane.
It's very important that the winch be mounted on a flat surface so that the three sections (motor, cable drum and gear housing) are properly aligned.
Before commencing installation, ensure the mounting facility being used is capable of withstanding the winch's rated capacity.
The fitment of winches and/or a frontal protection system may affect the triggering of SRS air bags. Check that the mounting system has been tested and approved for winch fitment in the airbag equipped vehicle.
Winch mounting frames and/or Frontal Protection Systems are suggested to suit most popular vehicles. Winch frames are packaged with detailed fitting instructions.
Should you wish to manufacture your own mounting plate, the dimensions below will assist. A steel mount plate 6mm thick is recommended. Fasteners should be steel high tensile grade 5 or better. A poorly designed mount may void warranty.
The winch should be secured to the mounting with 3/8"UNC x 1-1/4" stainless steel bolts and spring washers provided.
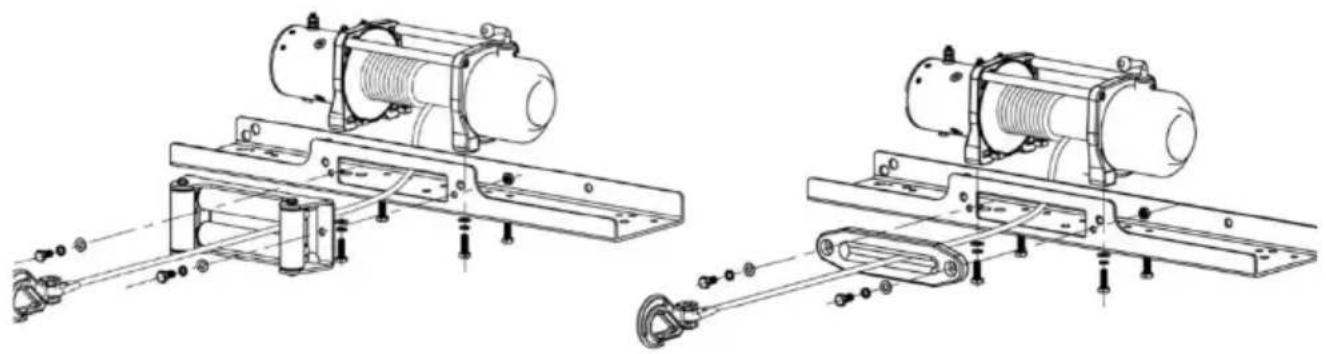
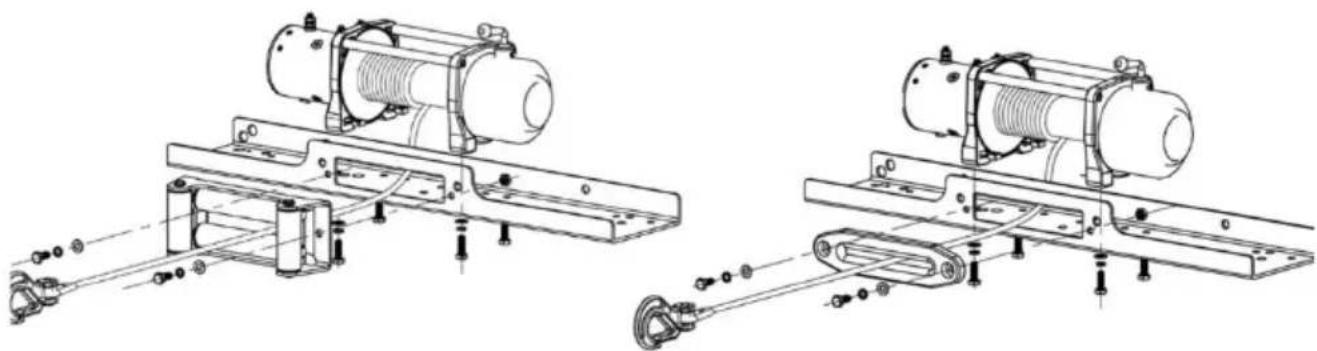
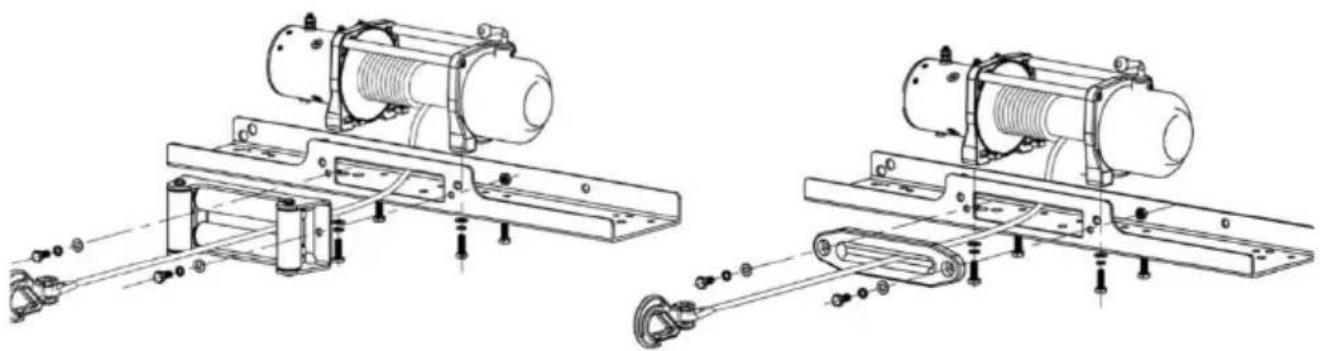
The fairlead is to be mounted so as to guide the cable onto the drum evenly.
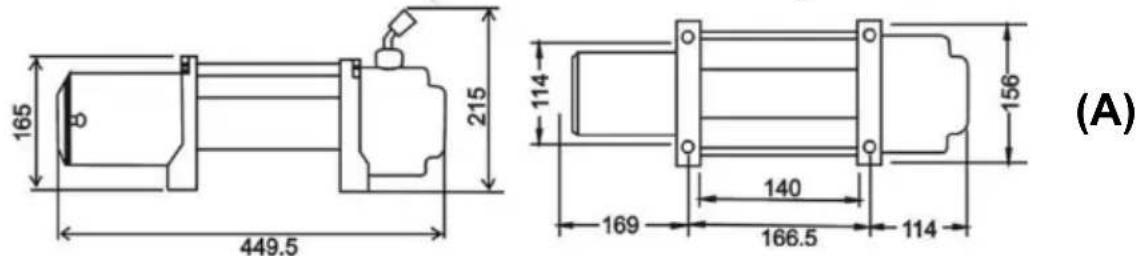
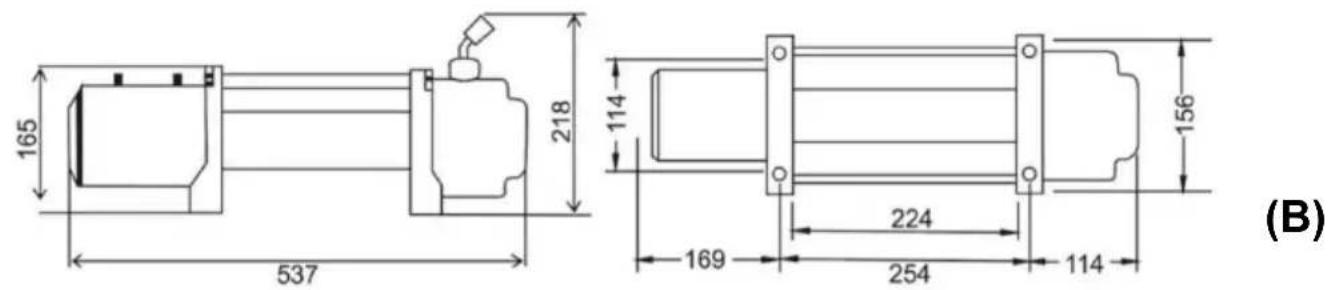
A is dimensions of 6000lbs, while B is dimensions of 10000lbs-13500lbs.
WARNING:
• Always choose a mounting location that is sufficiently strong to withstand the pulling capacity of your winch. - Always complete the winch installation and attach the hook before installing the wiring. - Never use bolts that are too long.
Front bumper (Mounting plate is not included in the winch configuration. Customers should decide whether they need to purchase a mounting plate according to their own front bumpers' type.)
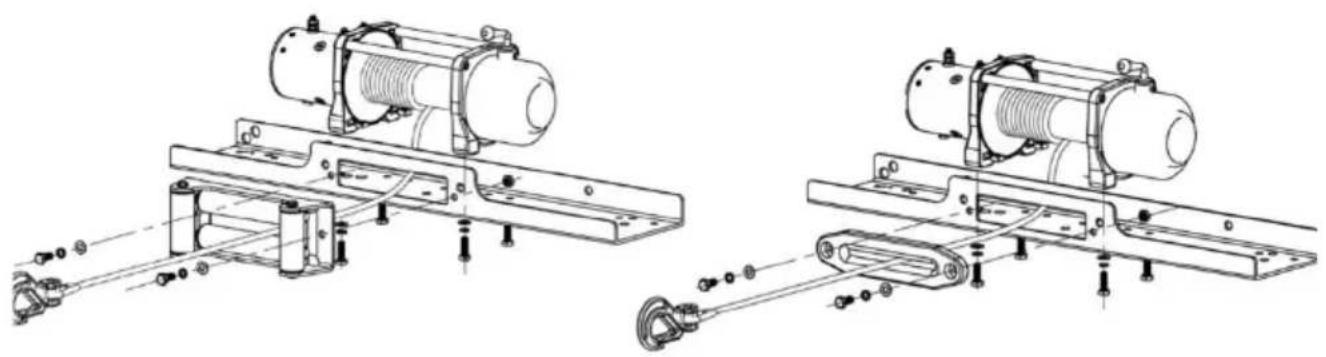
(For winch with steel cable) (For winch with steel synthetic rope)
LUBRICATION INSTALLATION
All moving parts in the winch are permanently lubricated with high temperature lithium grease at the time of assembly. Under normal conditions factory lubrication will suffice. Lubricate cable periodically using light penetrating oil. Inspect for broken strands and replace if necessary. If the cable becomes worn or damaged it must be replaced.
CABLE INSTALLATION
Unwind the new cable by rolling it along the ground, to prevent kinking. Remove old cable and observe the manner in which it is attached to the flange.
ELECTRICAL CONNECTION
For normal self-recovery work, your existing electrical system is adequate. A fully charged battery and proper connections are essential. Run the vehicle engine during winching operations to keep the battery charged.
Pay close attention to proper electrical cable connection as follows (refer to Diagram 1).
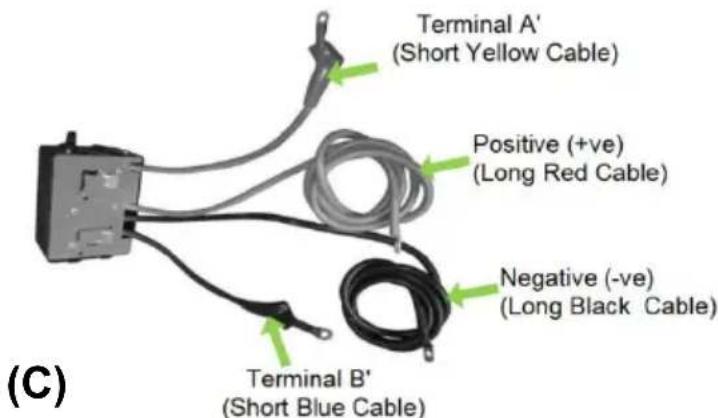
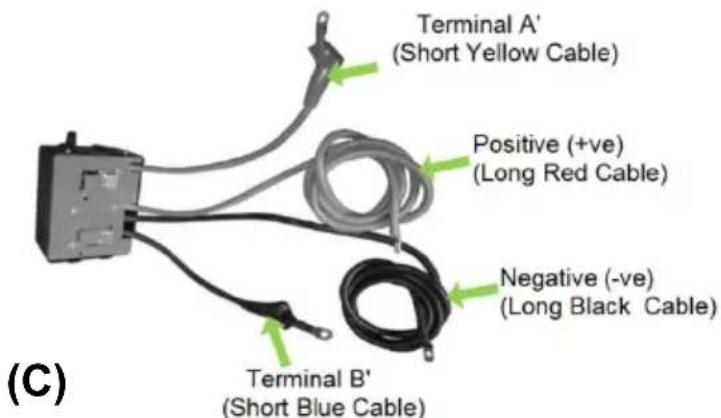
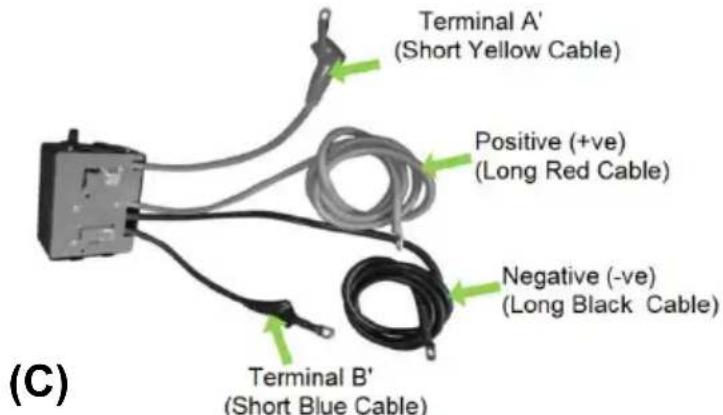
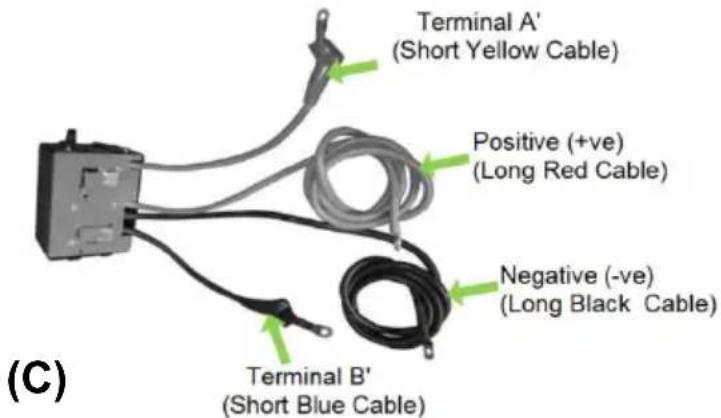
Pay close attention to proper electrical cable connection as follows (C is dimensions of 6000 lbs).
- Short Yellow cable (A') connecting to the yellow terminal (A) of the motor.
- Short Blue Cable (B') connecting to the blue terminal (B) of the motor.
- Long black cable (1.8m), connecting to negative (-) terminal of battery.
- Long red cable (1.8m), connecting to positive (+) terminal of battery.
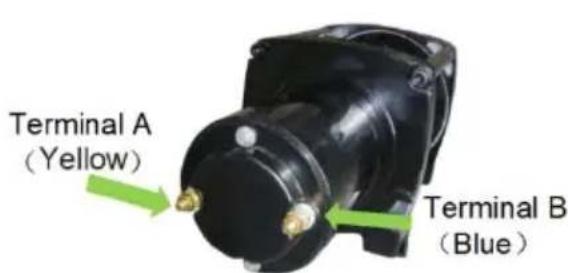
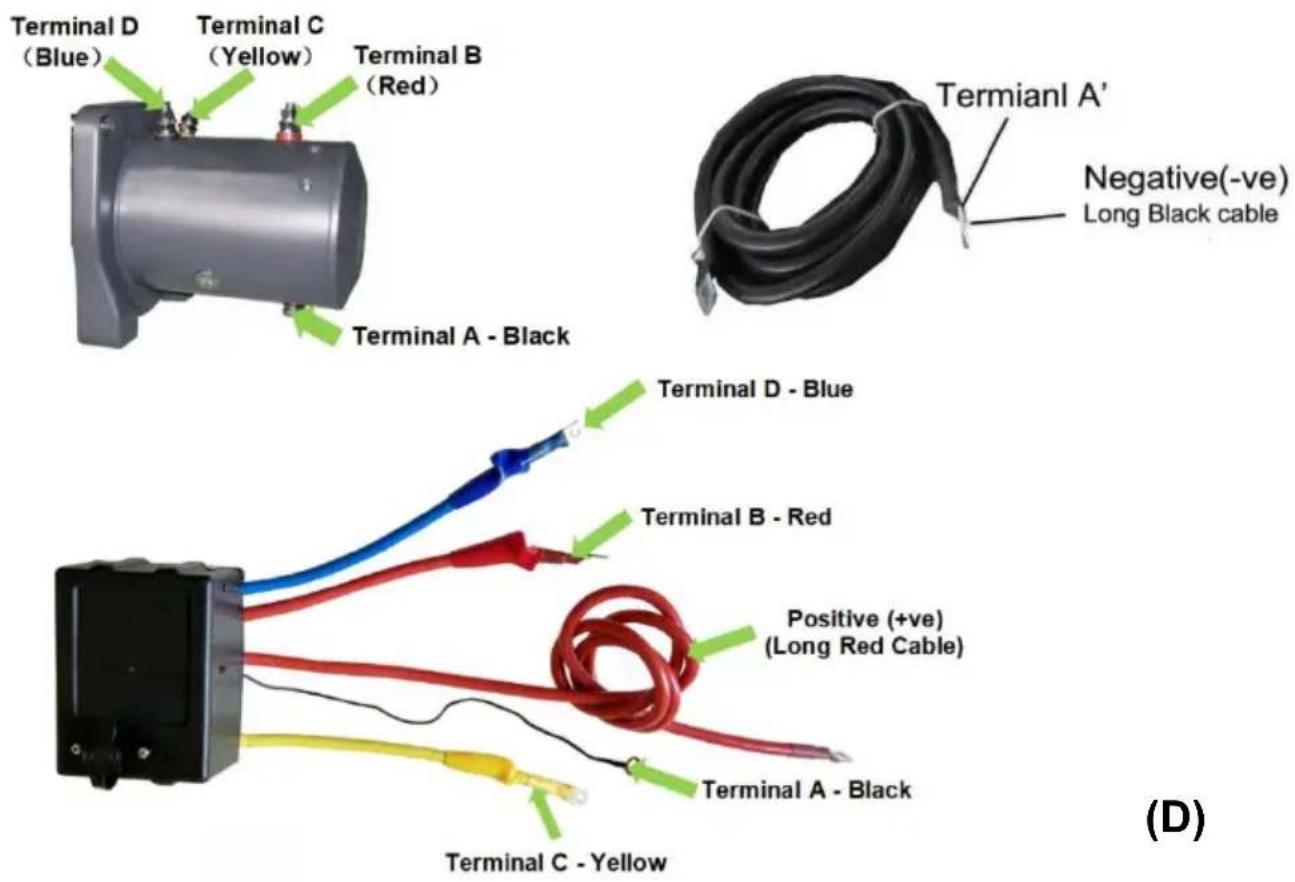
Pay close attention to proper electrical cable connection as follows (D is dimensions of 10000 lbs - 18000 lbs).
Short red cable (B') connecting to the red terminal (B) of the motor.
- Short Yellow cable (C') connecting to the yellow terminal (C) of the motor.
- Short Blue Cable (D') connecting to the blue terminal (D) of the motor.
- Thin black cable (a') connecting to terminal (A) of the motor.
- Long black cable (1.8m), one terminal (A') connecting to the bottom terminal (A) of the motor, and the other terminal negative (-) connecting to negative (-) terminal of battery.
- Long red cable positive (+) connecting to positive (+) terminal of battery.
NOTE
- Your battery must be kept in good condition.
- Be sure battery cables are not drawn taut across any surfaces, which could possibly damage them. Corrosion on electrical connections will reduce performance or may cause a short.
- Clean all connections, especially in remote control switch and receptacle. In salty environments, use a silicone sealer to protect from corrosion.
- DO NOT ATTEMPT TO INSTALL WIRING WHEN THE BATTERY IS CONNECTED. Automotive batteries contain flammable and explosive gases. Wear eye protection during installation and remove all metal jewelry. Do not lean over battery while making connections.
Do not connect winch to high-frequency power supply.
WINCH OPERATION
SUGGESTION:
The best way to get acquainted with how your winch operates is to make a test run before you actually need to use it. Plan your test in advance. Remember you can hear your winch as well as you can see it operate. Get to recognize the sound of a light steady pull, a heavy pull, and sounds caused by load jerking or shifting. Soon you will gain confidence operating your winch and its use will become second nature to you.
OPERATING:
- Ensure the vehicle is secure by applying the parking brake or chocking the wheels.
- Pull out the winch cable the desired length and connect to an anchor point.
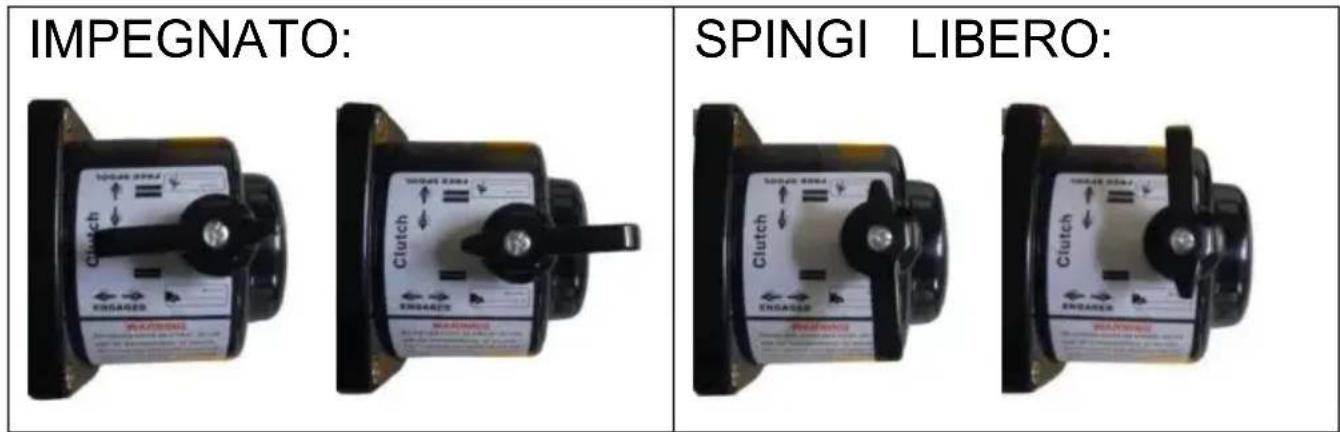
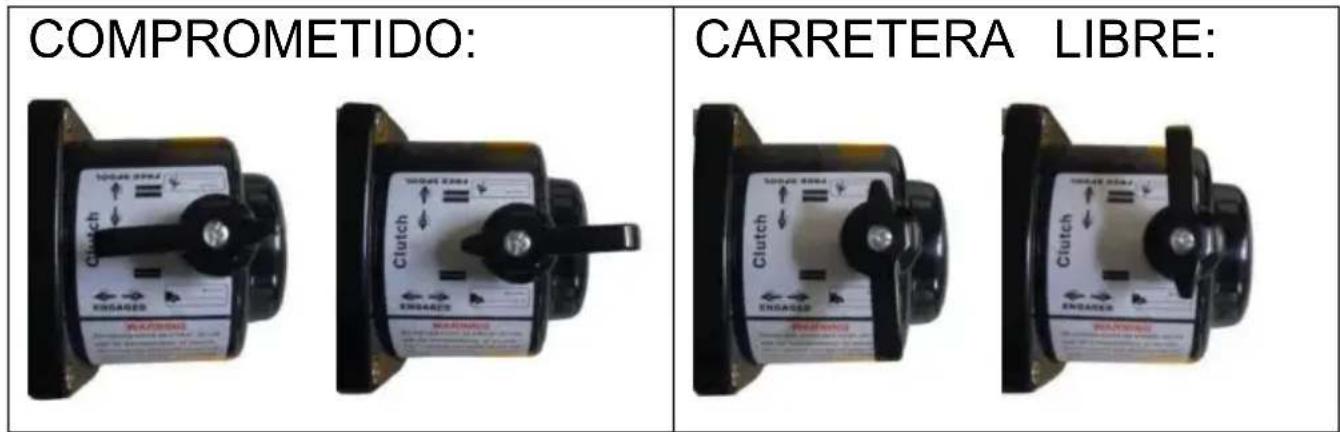
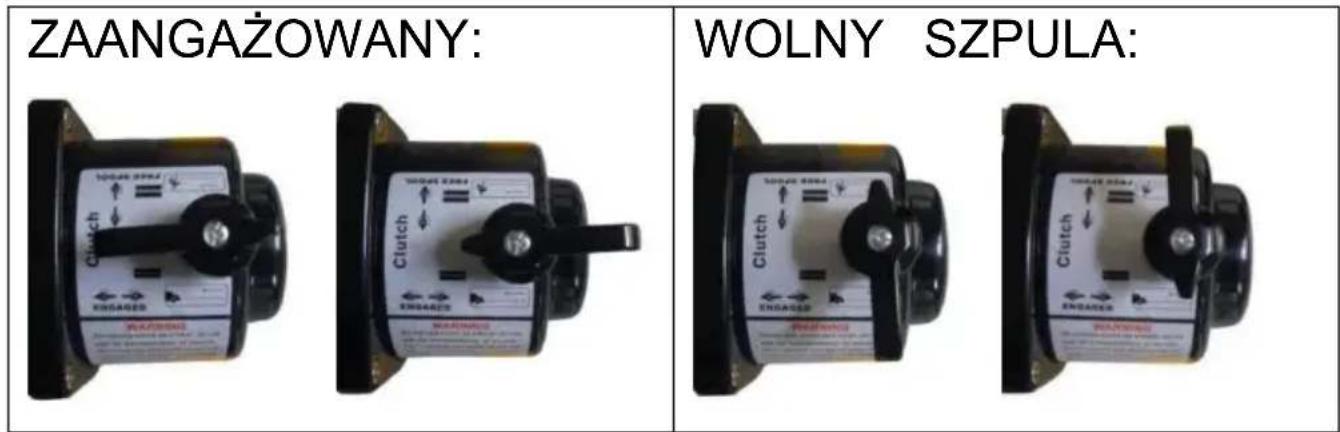
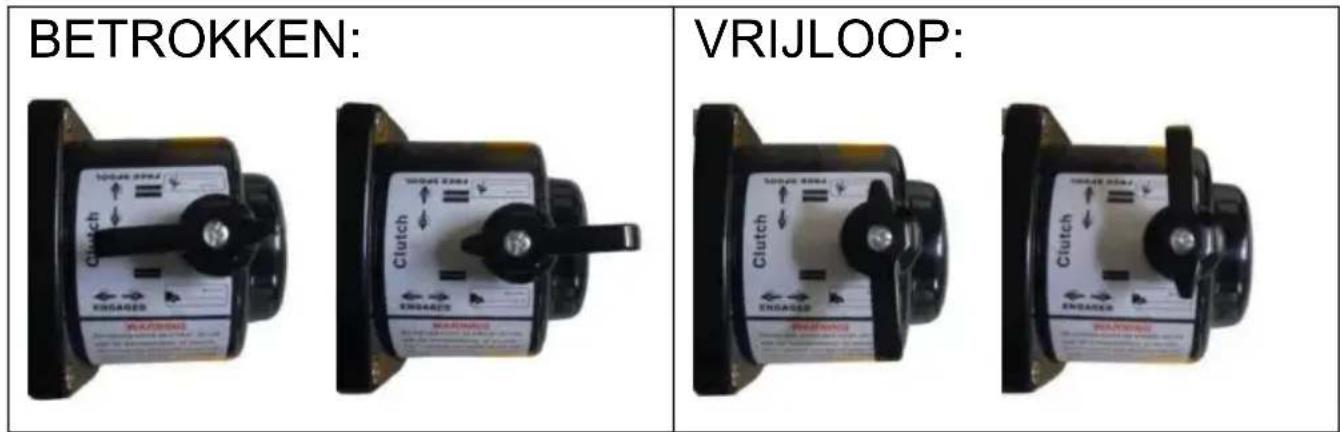
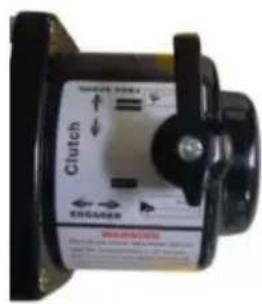
The winch clutch allows rapid uncoiling of the cable for hooking onto the load or anchor point. The shifter tab located on the gear housing of the winch operates the clutch as follows:
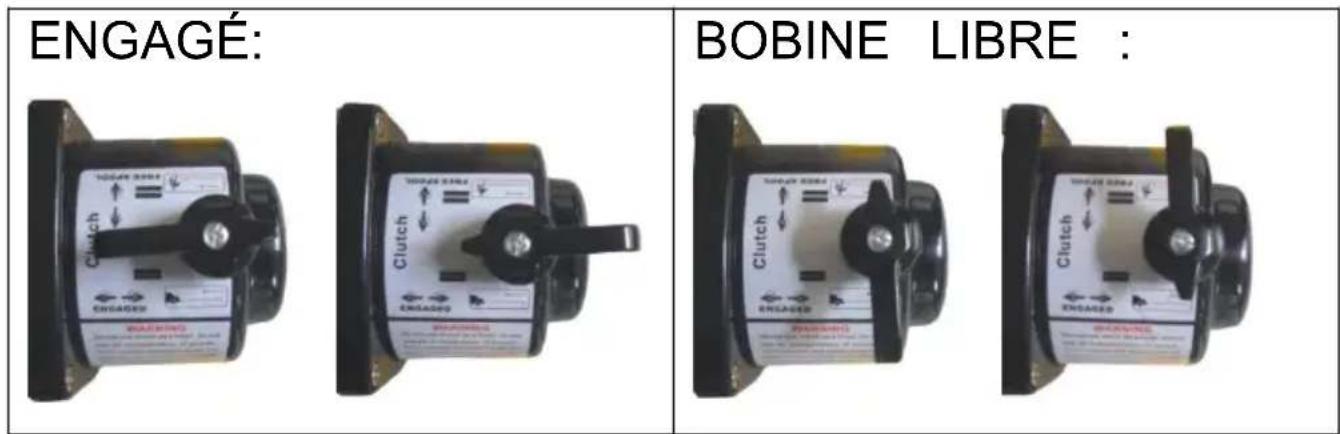
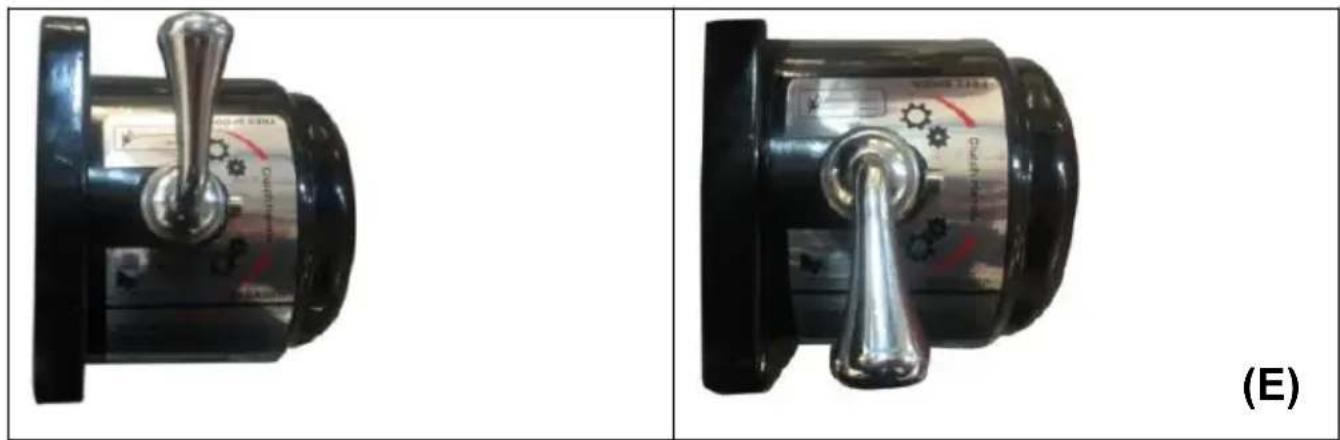
- Pull and rotate the clutch lever CLOCKWISE to the “Disengaged” position shown in the figure below. If there is a load on the wire rope, the clutch lever will not turn easily. DO NOT FORCE THE CLUTCH LEVER. Release tension on the wire rope by jogging out some of the wire rope, then try releasing the clutch.
- Pull out the wire rope and secure it to anchor or load.
- Make sure there's at least five turns of wire rope or eight turns of synthetic rope left on the drum.
- Re-engage the drum by rotating the clutch lever to the "ENGAGED" position.
- CAUTION: LEVER MUST BE IN THE ENGAGED POSITION AND LOCKED BEFORE WINCHING.
FREESPOOL: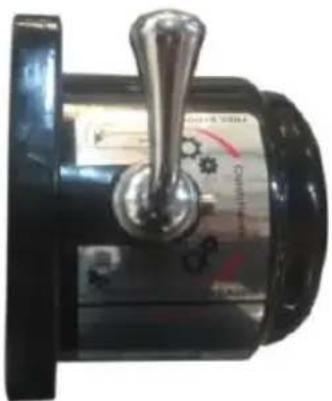
ENGAGED:
(E)
ENGAGED: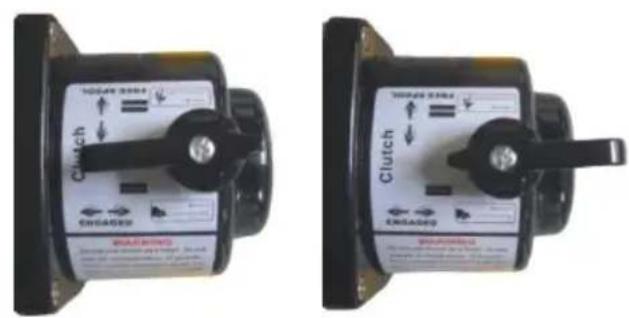
FREESPOOL: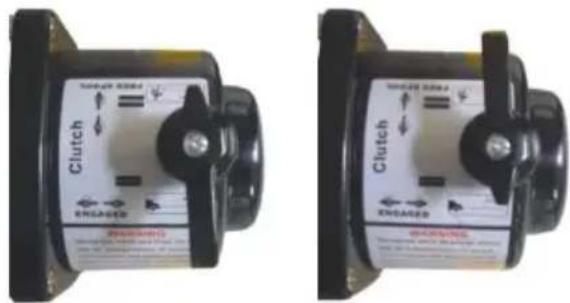
(F)
IMPORTANT NOTICE: The shifter tab could only be moved counterclockwise.
E has dimensions of 6000lbs/13500lbs, while F has dimensions of 18000lbs.
If you want to turn off the wireless remote controller, you need to press and hold the red on key for about 0.3 seconds, and the green signal light will turn off and the remote control is out of work.
If you need to match the new wireless remote controller with the wireless receiver of the winch, when the wireless remote controller is turned on, press the OUT and IN together, at this time the green signal light will go into a flashing state. And power the wireless receiver at the same time, then the matching is successfully paired!
Recheck all cable rigging before proceeding.
Plug in the winch hand control. It is recommended that the winching operation takes place from the driver's position to ensure safe operation. To commence winching operation, start vehicle engine, select neutral in transmission, maintain engine speed at idle.
Operate the hand control or the wireless remote control until the vehicle has been retrieved. Regularly check the winch to ensure cable is winding onto the drum evenly.
Note:
- Never winch with your vehicle in gear or in park, which would damage your vehicle's transmission.
- Never wrap the cable around the object and hook onto the cable itself. This can cause damage to the object being pulled, and kink or fray the cable.
- Keep hands, clothing, hair and jewelry clear of the drum area and cable while winching.
- Never use the winch if the cable is frayed, kinked or damaged.
- Never allow anyone to stand near the cable or in line with the cable behind the winch while it is under power. If the cable should slip or
break, it can suddenly whip back towards the winch, causing a hazard for anyone in the area. Always stand well to the side while winding.
- Don't leave the switch plugged in when winch is not in use.
CHECK THE WINCH CAREFULLY AND THOROUGHLY BEFORE OPERATING!
MAINTENANCE
It is highly recommended that the winch be used regularly (once a month). Simply power the cable out 15m, free spool 5m and then power back in. This will keep all components in good working condition so that the winch can be relied on when needed. Contact your authorized outlet for technical assistance and repairs.
SPARE PARTS
A comprehensive range of spare parts is available.
Please kindly contact the distributor or the local retailer.
WINCHING CAPACITY
- Pulling capacity is reduced as the incline increases.
- Winch is not intended as a load securing device.
NOTE:
The safety precautions and instructions discussed in this manual cannot cover all possible conditions and situations that may occur. It must be understood by the operator that common sense and caution are factors which cannot be built into this product, but must be applied by the operator.
NOTE:
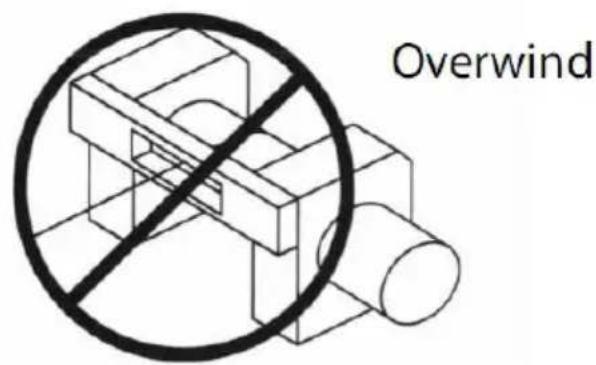
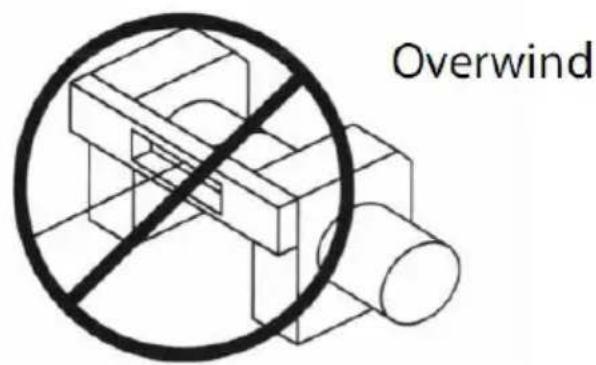
This winch must be mounted with the wire rope in the under wound direction.
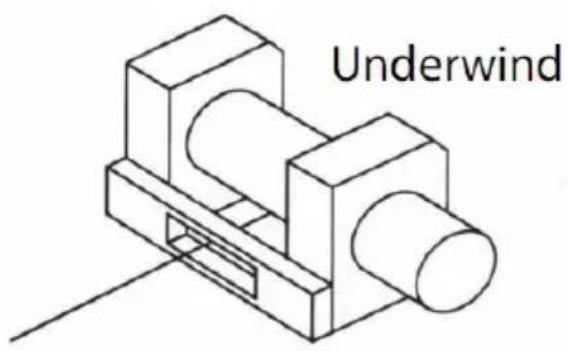
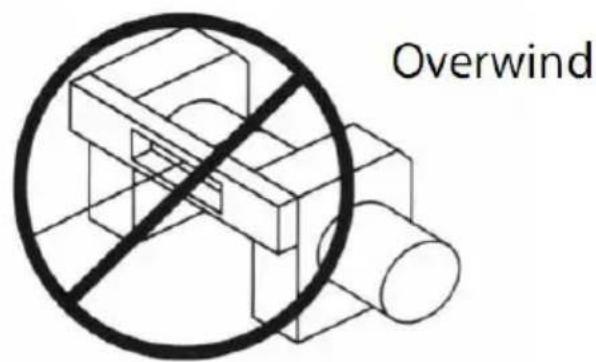
NOTE:
The safety precautions and instructions discussed in this manual cannot cover all possible conditions and situations that may occur. It must be understood by the operator that common sense and caution are factors which cannot be built into this product, but must be applied by the operator.
Maintenance
- Inspect all electrical components frequently to ensure clean and secure connections.
- This item is exposed to the elements; moisture can accumulate inside when exposed to rain, pressure cleaners, steam cleaning, river crossings, and common car wash. To prevent corrosion, it is best practice to use the winch at least once a month, even if just to unwind a few metres and wind back in; the generated heat will help to dissipate any condensation.
- Regularly check all bolts and fittings are tight and secure; these could work loose under hard working conditions. Under normal conditions, the winch should not require servicing. If you use the winch regularly, you should consider a servicing schedule to maximise the life and performance of the winch.
- If the winch is fully submersed in water, please ensure it is serviced at the appropriate interval before storage.
Ensure the winch motor is clean and dry; renew grease in the gearbox and other parts using a quality bearing-type grease.
- Check the winch cable before use for any signs of wear; if wear signs are apparent, replace before use.
- Wind cable neatly on the drum. After each use of the winch, the cable should be unspooled to the point where the cable lays neatly on the drum and respooled under load.
FEATURES & SPECIFICS
| Model SPEC. | S6000 | S10000 | S12000 | SC13000 | SEC16800T |
| Voltage | 12V DC | 12V DC | 12V DC | 12V DC | 12V DC |
| Rated power | 2.5HP | 3HP | 5.5HP | 6.6HP | 5.7HP |
| Gear ratio | 195.8: 1 | 265: 1 | 265: 1 | 265: 1 | 312.4: 1 |
| Length of wire | 1.8m | 1.8m | 1.8m | 1.8m | 1.8m |
| Rope or Cable | Synthetic , 1/4 inch * 55ft | Synthetic , 7/20inch * 65f or steel 21/64inch*65ft | Synthetic 7/20inch * 75.5ft or steel 7/20inch*85ft | Synthetic 3/8inch * 80ft or steel 3/8inch*80ft | Steel , 7/16inch * 85ft |
| Mounting Bolt Pattern | 166.4x114.3mm | 254x114.3mm | 254x114.3mm | 254x114.3mm | 254x114.3mm |
| Rated line pul | 6000lb | 10000lb | 12000lb | 13500lb | 18000lb |
6000 LBS LINE PULL AND CABLE CAPACITY
| Layer of cable | 1 | 2 | 3 | |
| Rated line pull per layer | Lbs | 6000 | 4200 | 3700 |
| Kgs | 2721 | 1900 | 1678 | |
| Cumulative Cable capacity | Ft | 14.7 | 29.5 | 55 |
| M | 4.5 | 9.0 | 16.5 | |
10000 LBS LINE PULL AND CABLE CAPACITY
| Layer of cable | 1 | 2 | 3 | 4 | |
| Rated line pull per layer | Lbs | 10000 | 7930 | 6500 | 5600 |
| Kgs | 4536 | 3596 | 2948 | 2540 | |
| Cumulative Cable capacity | Ft | 17 | 38.7 | 64.6 | 65 |
| M | 5.2 | 11.8 | 19.7 | 19.8 | |
12000 LBS LINE PULL AND CABLE CAPACITY
| Layer of cable | 1 | 2 | 3 | 4 | |
| Rated line pull per layer | Lbs | 12000 | 9210 | 8030 | 6900 |
| Kgs | 5440 | 4170 | 3640 | 3125 | |
| Cumulative Cable capacity | Ft | 17 | 41 | 72 | 85 |
| M | 5.1 | 12.4 | 21.7 | 26 | |
13500 LBS LINE PULL AND CABLE CAPACITY
| Layer of cable | 1 | 2 | 3 | 4 | |
| Rated line pull per layer | Lbs | 13500 | 10500 | 9200 | 7120 |
| Kgs | 6122 | 4762 | 4173 | 3229 | |
| Cumulative Cable capacity | Ft | 15 | 34.6 | 58.6 | 80 |
| M | 4.58 | 10.54 | 17.87 | 24 | |
18000 LBS LINE PULL AND CABLE CAPACITY
| Layer of cable | 1 | 2 | 3 | 4 | |
| Rated line pull per layer | Lbs | 18000 | 13779 | 11202 | 9530 |
| Kgs | 8163 | 6250 | 5081 | 4321 | |
| Cumulative Cable capacity | Ft | 16.64 | 37.78 | 63.40 | 85 |
| M | 5.1 | 11.5 | 19.3 | 26 | |
TROUBLESHOOTING
| Symptoms | Possible Causes | Corrective Action |
| Motor will not operate or only in one direct | 1.Switch inoperative2.Broken wires or bad connection3.Damaged motor | 1.Replace switch2.Check for poor connections3.Replace or repair motor |
| Motor runs extremely hot | 1.Long period of operation2.failed or removed overload3.Damaged motor | 1.low to cool2.place or repair overload3.place or repair motor |
| Motor runs, but with insufficient power or line speed | 1.Weak battery2.Battery to winch wire to long3.Poor battery connection4.Poor ground5.Damaged motor | 1.Recharge or replace battery and check charging system2.Keep winch within distance allowed by lead wires3.check battery terminals for corrosion and clean as require4.check and clean connections5.place or repair motor |
| Winch runs backwards | 1.tor wires reversed2.itch wires reversed3.battery switch installed incorrectly | 1.heck wiring2.check wiring3.check battery connections |
| Motor runs but drum doesn't turn | 1.Clutch not engaged | 1. Engage clutch |
| Winch coasts | 1.Excessive load | 1.Reduce load or double line |
| Motor operations but stops | 1.Excessive load/overload | 1.Allow to cool |
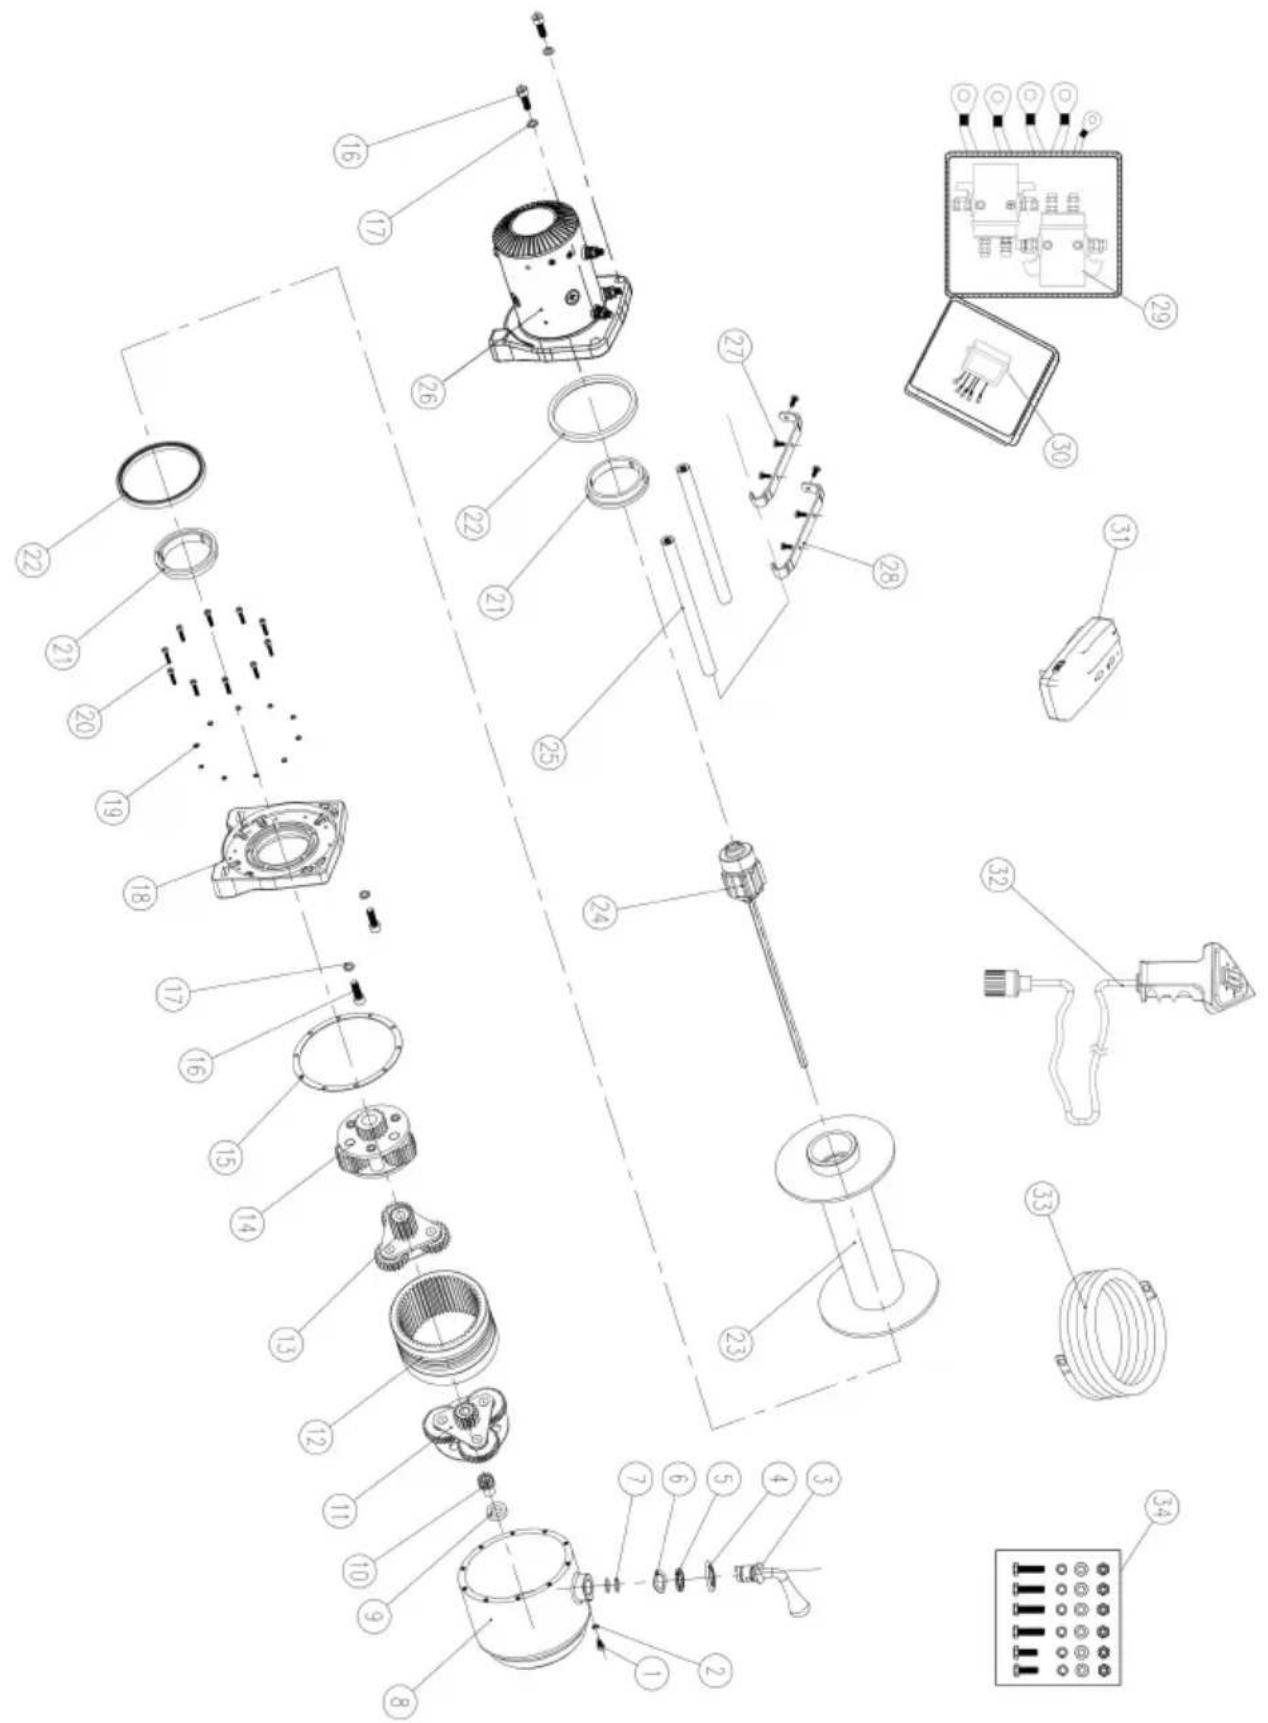
6000-13500LB WINCH PARTS LIST
| Item No. | Description | Qty | Item No. | Description | Qty |
| 1 | Hexagon screw | 1 | 18 | Gear box bracket | 1 |
| 2 | Spring washer | 1 | 19 | Spring washer | 10 |
| 3 | Clutch handle | 1 | 20 | Hexagon screw | 10 |
| 4 | Nut cap | 1 | 21 | Bearing bush | 2 |
| 5 | Cup gasket | 1 | 22 | Sealing washer | 2 |
| 6 | Spring washer | 1 | 23 | Durm assembly | 1 |
| 7 | O-ring | 2 | 24 | Brake assembly | 1 |
| 8 | Gear box housing | 1 | 25 | Tie bar | 2 |
| 9 | shaft sleeve | 1 | 26 | Motor assembly | 1 |
| 10 | sun gear | 1 | 27 | Cross Recess Head Scre | 4 |
| 11 | 3rdPlanetary gear assy | 1 | 28 | Mounting bracket assembly for control box | 2 |
| 12 | Dual inner gear | 1 | 29 | Solenoid | 2 |
| 13 | 2nd Planetary gear assy | 1 | 30 | Wireless remote receiver | 1 |
| 14 | 1st Planetary gear assy | 1 | 31 | Wireless remote transmitter | 1 |
| 15 | Sealing washer | 1 | 32 | Wired remote control | 1 |
| 16 | Hexagon screw | 4 | 33 | Battery negative (-) cord | 1 |
| 17 | Spring washer | 4 | 34 | Screw kit installation | 1 |
FCC Information:
CAUTION: Changes or modifications not expressly approved by the party responsible for compliance could void the user's authority to operate the equipment!
This device complies with Part 15 of the FCC Rules. Operation is subject to the following two conditions:
1) This product may cause harmful interference. 2) This product must accept any interference received, including interference that may cause undesired operation.
WARNING: Changes or modifications to this product not expressly approved by the party responsible for compliance could void the user's authority to operate the product.
Note: This product has been tested and found to comply with the limits for a Class B digital device, pursuant to Part 15 of the FCC Rules. These limits are designed to provide reasonable protection against harmful interference in a residential installation.
This product generates, uses and can radiate radio frequency energy, and if installed and used in accordance with the instructions, it may cause harmful interference to radio communications. However, there is no guarantee that interference will not occur in a particular installation. If this product does cause harmful interference to radio or television reception, which can be determined by turning the product off and on, the user is encouraged to try to correct the interference by one or more of the following measures.
- Reorient or relocate the receiving antenna.
- Increase the distance between the product and receiver.
- Connect the product to an outlet on a circuit different from that to which the receiver is connected.
- Consult the dealer or an experienced radio/TV technician for assistance.
CORRECT DISPOSAL
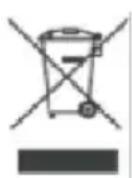
This product is subject to the provisions of European Directive 2012/19/EU. The symbol showing a wheelie bin crossed through indicates that the product requires separate refuse collection in the European Union. This applies to the product and all accessories marked with this symbol. Products marked as such may not be
discarded with normal domestic waste, but must be taken to a collection point for recycling electrical and electronic devices.
Manufacturer: Shanghai Muxin Muye Youxian Gongsi
Address: Shuangchenglu 803nong11hao1602A-1609shi, Baoshanqu, Shanghai 200000 CN.
Imported to AUS: SIHAO PTY LTD. 1 ROKEVA STREET EASTWOOD NSW 2122 Australia
Imported to USA: Sanven Technology Ltd. Suite 250, 9166 Anaheim Place, Rancho Cucamonga, CA 91730
| UK | REP |
YH CONSULTING LIMITED. C/O YH Consulting
Limited Office 147, Centurion House, London Road, Staines-upon-Thames, Surrey, TW18 4AX
| EC | REP |
E-CrossStu GmbH
Mainzer Landstr.69,
60329 Frankfurt am Main.

VEVOR
Affordable. Reliable. Home Improvement.
ELECTRIC WINCH USER MANUAL
MODEL: S6000 / S10000 / S12000 / SC13000 / SEC16800T
MODEL: S6000 / S10000 / S12000 / SC13000 / SEC16800T
COMMITTED: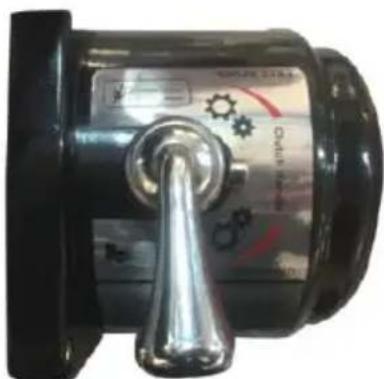
(E)
(F)
NOTE:
FCC Information:
Place, Rancho Cucamonga, CA 91730
| UK | REP |
YH CONSULTING LIMITED. C/O YH Consulting
Limited Office 147, Centurion House, London
Road, Staines-upon-Thames, Surrey, TW18 4AX
| EC | REP |
E-CrossStu GmbH
Mainzer Landstr.69,
60329 Frankfurt am Main.

VEVOR
Affordable. Reliable. Home Improvement.
ELECTRIC WINCH USER MANUAL
MODEL: S6000 / S10000 / S12000 / SC13000 / SEC16800T
MODEL: S6000 / S10000 / S12000 / SC13000 / SEC16800T
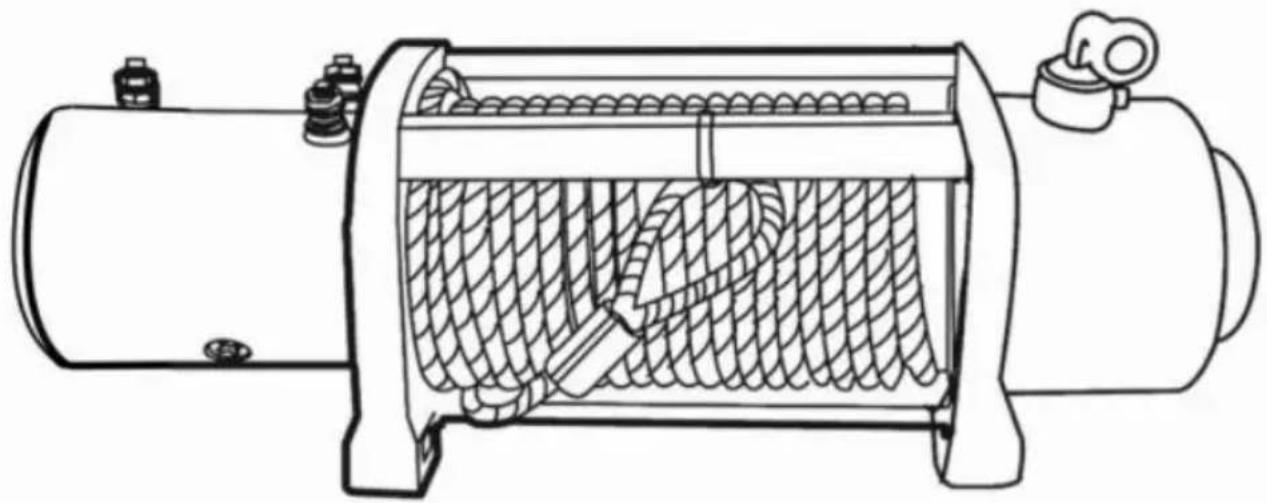
Underwind
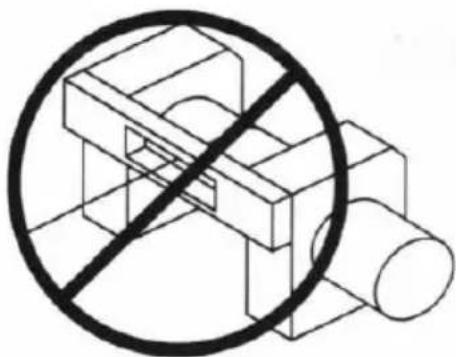
Overwind
NOTE:
FCC Information:
YH CONSULTING LIMITED. C/O YH Consulting
Limited Office 147, Centurion House, London
Road, Staines-upon-Thames, Surrey, TW18 4AX
| EC | REP |
E-CrossStu GmbH
Mainzer Landstr.69,
60329 Frankfurt am Main.

VEVOR
Affordable. Reliable. Home Improvement.
ELECTRIC WINCH
USER MANUAL
MODEL: S6000 / S10000 / S12000 / SC13000 / SEC16800T
VEVOR
Affordable, Reliable, Home Improvement.
MODEL: S6000 / S10000 / S12000 / SC13000 / SEC16800T
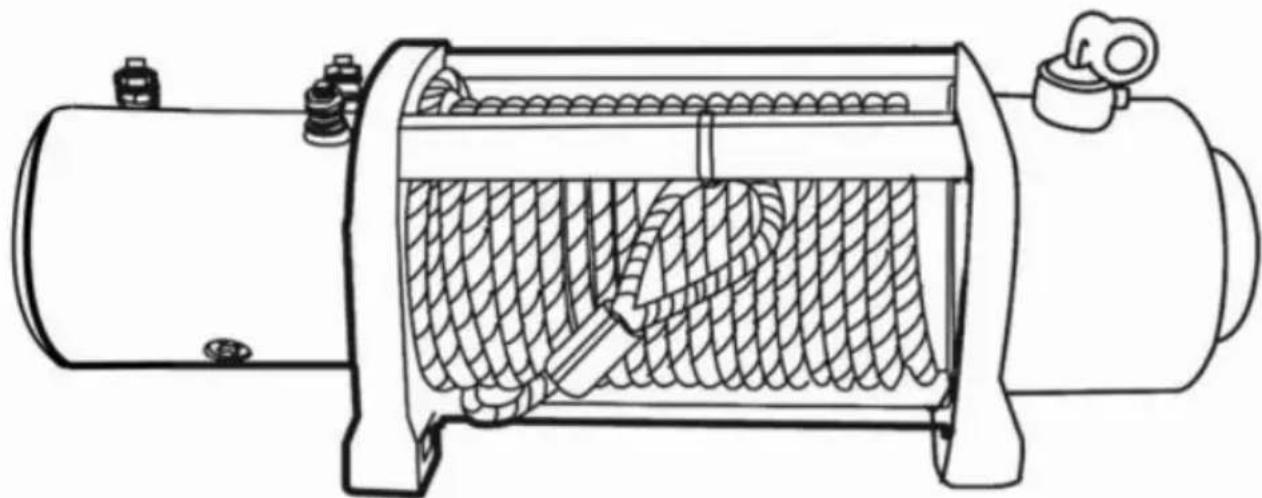
Front bumper (Mounting plate is not included in the winch configuration. Customers should decide whether they need to purchase a mounting plate according to their own front bumpers' type.)
(F)
NOTE:
FCC Information:
Imported into AUS: SIHAO PTY LTD. 1 ROKEVA STREET EASTWOOD
New South Wales 2122 Australia
Imported into USA: Sanven Technology Ltd. Suite 250, 9166 Anaheim
Place, Rancho Cucamonga, CA 91730
| UK | REP |
YH CONSULTING LIMITED. C/O YH Consulting
Limited Office 147, Centurion House, London
Road, Staines-upon-Thames, Surrey, TW18 4AX
| EC | REP |
E-CrossStu GmbH
Mainzer Landstr.69,
60329 Frankfurt am Main.

VEVOR
Affordable. Reliable. Home Improvement.
Affordable, Reliable, Home Improvement.
MODEL: S6000 / S10000 / S12000 / SC13000 / SEC16800T
Front bumper (Mounting plate is not included in the winch configuration; customers should decide whether they need to purchase a mounting plate according to their own front bumper type.)
(F)
NOTE:
YH CONSULTING LIMITED. C/O YH Consulting
Limited Office 147, Centurion House, London Road, Staines-upon-Thames, Surrey, TW18 4AX
| EC | REP |
E-CrossStu GmbH
Mainzer Landstr.69,
60329 Frankfurt am Main.

VEVOR
Affordable. Reliable. Home Improvement.
ELECTRIC WINCH OPERATING INSTRUCTIONS
MODELS: S6000 / S10000 / S12000 / SC13000 / SEC16800T
VEVOR
Affordable, Reliable, Home Improvement.
MODELS: S6000 / S10000 / S12000 / SC13000 / SEC16800T
Front bumper (Mounting plate is not included in the winch configuration; customers should decide whether they need to purchase a mounting plate according to their own front bumpers' type.)
| WOLNY SZPULA: | ZAANGAŻOWANY: |
(F)
FCC Information:
YH CONSULTING LIMITED. C/O YH Consulting
Limited Office 147, Centurion House, London Road, Staines-upon-Thames, Surrey, TW18 4AX
| EC | REP |
E-CrossStu GmbH
Mainzer Landstr.69,
60329 Frankfurt am Main.

VEVOR
Affordable. Reliable. Home Improvement.
ELECTRIC WINCH
USER MANUAL
MODEL: S6000 / S10000 / S12000 / SC13000 / SEC16800T
VEVOR
Affordable, Reliable, Home Improvement.
MODEL: S6000 / S10000 / S12000 / SC13000 / SEC16800T
Front bumper (Mounting plate is not included in the winch configuration; customers should decide whether they need to purchase a mounting plate according to their own front bumper type.)

(F)
NOTE:
FCC information:
YH CONSULTING LIMITED. C/O YH Consulting
Limited Office 147, Centurion House, London
Road, Staines-upon-Thames, Surrey, TW18 4AX
| EC | REP |
E-CrossStu GmbH
Mainzer Landstr.69,
60329 Frankfurt am Main.

VEVOR
Affordable. Reliable. Home Improvement.
ELECTRIC WINCH
USER MANUAL
MODEL: S6000 / S10000 / S12000 / SC13000 / SEC16800T
VEVOR
Affordable, Reliable, Home Improvement.
MODEL: S6000 / S10000 / S12000 / SC13000 / SEC16800T
Front bumper (Mounting plate is not included in the winch configuration. Customers should decide whether they need to purchase a mounting plate according to their own front bumper type.)

ENGAGERAD: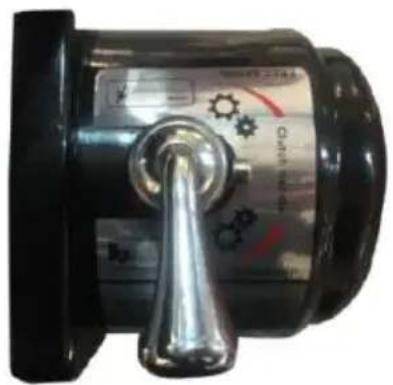
(E)
ENGAGERAD: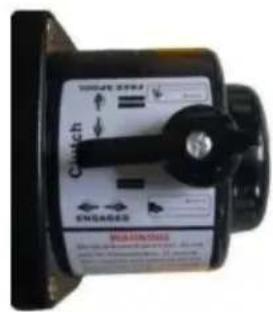
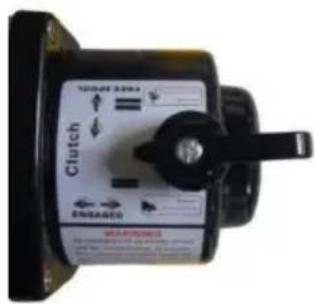
GRATISSPOOL: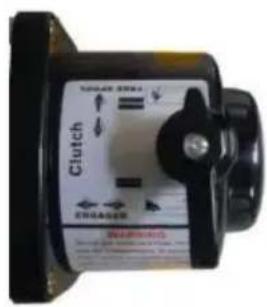
(F)
IMPORTANT NOTICE: The gear lever tab can only be moved counterclockwise.
FCC Information:
YH CONSULTING LIMITED. C/O YH Consulting
Limited Office 147, Centurion House, London
Road, Staines-upon-Thames, Surrey, TW18 4AX
| EC | REP |
E-CrossStu GmbH
Mainzer Landstr. 69,
60329 Frankfurt am Main.


- ELECTRIC WINCH
- USER MANUAL
- READ AND UNDERSTAND THIS GUIDE BEFORE INSTALLATION & OPERATION
- WARNING
- DRESS PROPERLY
- KEEP A SAFE DISTANCE
- DON'T ABUSE THE CORD
- DON'T OVERWORK THE WINCH
- AVOID UNINTENTIONAL STARTING
- CHECK DAMAGED PARTS
- REPAIR YOUR WINCH
- RE-SPOOL THE CABLE
- BATTERY
- WINCH CABLE
- WINCH INSTALLATION
- LUBRICATION INSTALLATION
- CABLE INSTALLATION
- ELECTRICAL CONNECTION
- NOTE
- WINCH OPERATION
- SUGGESTION
- OPERATING
- CHECK THE WINCH CAREFULLY AND THOROUGHLY BEFORE OPERATING
- MAINTENANCE
- SPARE PARTS
- WINCHING CAPACITY
- FCC INFORMATION
- CORRECT DISPOSAL
- VEVOR
- AFFORDABLE. RELIABLE. HOME IMPROVEMENT
- ELECTRIC WINCH USER MANUAL
- ELECTRIC WINCH OPERATING INSTRUCTIONS
- (F)
Brand : Vevor
Model : SEC16800T
Category : Electric winch