ZC-DYSY-01 - Tent Vevor - Free user manual and instructions
Find the device manual for free ZC-DYSY-01 Vevor in PDF.

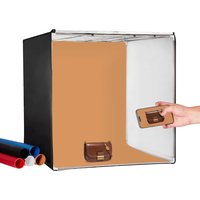
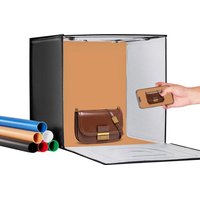
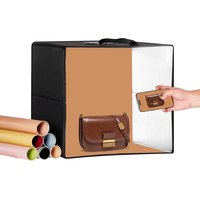
| Product Type | Foldable LED Ring Light Studio Box |
| Brand | Vevor |
| Model | ZC-DYSY-01 |
| Cabinet Dimensions | Approximately 40 x 30 cm |
| Ring Light Panel Diameter | 20 cm |
| Weight | Approximately 1 kg |
| Power Supply | USB Port (5V / 2A recommended) |
| Power Consumption | 0.5 - 13 W |
| Number of LED Beads | 120 (model 2835) |
| Luminous Flux | 0 - 480 lumens, adjustable |
| Color Temperature | 3000 K - 5600 K, adjustable (3 modes) |
| Color Rendering Index (CRI) | ≥ 95 |
| Dimming Levels | 10 |
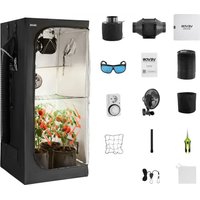
| Box Contents | Main studio box, background cloth (2 pieces), backdrops (6 pieces) |
| Care and Cleaning | Clean with a soft, dry cloth. Do not use abrasive products. |
| Safety | Complies with FCC Part 15. European Directive 2012/19/EC (WEEE). |
| Spare Parts and Repairability | Not designed for user repair. Contact Vevor technical support. |
| General Information | Manufacturer: Shanghaimuxinmuyeyouxiangongsi, Shanghai, China. EU Importer: E-CrossStu GmbH, Frankfurt. AU Importer: SIHAO PTY LTD. US Importer: Sanven Technology Ltd. |
Frequently Asked Questions - ZC-DYSY-01 Vevor
User questions about ZC-DYSY-01 Vevor
0 question about this device. Answer the ones you know or ask your own.
Ask a new question about this device
Download the instructions for your Tent in PDF format for free! Find your manual ZC-DYSY-01 - Vevor and take your electronic device back in hand. On this page are published all the documents necessary for the use of your device. ZC-DYSY-01 by Vevor.
USER MANUAL ZC-DYSY-01 Vevor
Technical Support and E-Warranty Certificate
www.vevor.com/support
Foldable LED Ring Light studio Box USER MANUAL
MODEL: ZC-DYSY-01
We continue to be committed to provide you tools with competitive price. "Save Half", "Half Price" or any other similar expressions used by us only represent estimate of savings you might benefit from buying certain tools with us compared top brands and does not necessarily mean to cover all categories of tools offered are kindly reminded to verify carefully when you are placing an order with us actually saving half in comparison with the top major brands.
MODEL:ZC-DYSY-01
natural_image
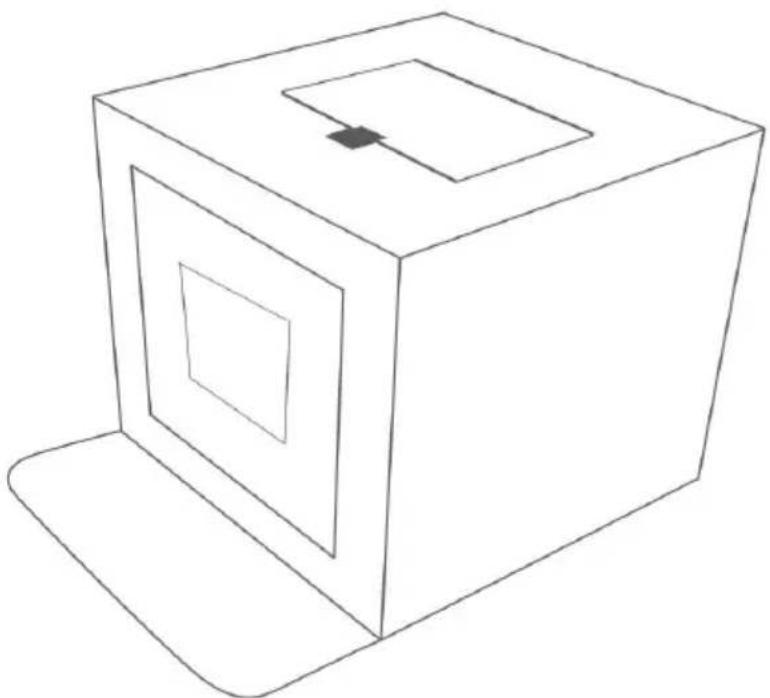
Simple line drawing of a 3D cube with nested square cutouts and a small rectangular top (no text or symbols)(The picture is for reference only, please refer to the actual obje
NEED HELP? CONTACT US!
Have product questions? Need technical support? Please feel fr contact us:
Technical Support and E-Warranty Certificate www.vevor.com/support
This is the original instruction, please read all manual instruction carefully before operating. VEVOR reserves a clear interpretation user manual. The appearance of the product shall be subject to product you received. Please forgive us that we won't inform you there are any technology or software updates on our product.
 | Warning-To reduce the risk of injury, user must read in manual carefully. |
 | This device complies with Part 15 of the FCC Rules. (1) This device is subject to the following two conditions: (1) This device cause harmful interference, and (2) this device must accept interference received, including interference that may cause undesired operation. |
 | This product is subject to the provision of European Di 2012/19/EC. The symbol showing a wheelie bin crossed through indicates that the product requires separate refuse collection in the European Union. This applies to the product and all accessories marked with this symbol. Products are such may not be discarded with normal domestic waste must be taken to a collection point for recycling electric electronic devices |
PACKAGE LIST
natural_image
Black briefcase with a handle, no visible text or symbolsMain Studio Box*1 Colors Backdrops*6 Soft Cloth*1


SPECIFICATIONS
- Number of lamp beads: 120PCS
- Lamp bead model: 2835
3.luminous flux: 0-480LM adjustable
4.Color temperature range: 3000K-5600K adjustable - Dimming level: 10 stops
6.CRI:Greater than or equal 95 - Operating voltage: 5V
- Power consumption: 0.5-13W
- Ring light board size: 20cm.
- Power supply: USB port power supply.
QUESTIONS AND ANSWERS
- What causes the flickering light?
a. Poor USB port connector.
b. LED panel does not fit voltage, proper supplying voltage is 5V/2A.
c.Environmental temperature is too high, it may have over temperature protection.
d. Air environment is too humid.
e. Cable control itself has quality issue.
- What may cause weak light?
a. Adjust cable control light dimmer switch “+”.
b. Power supply is too small, it should ensure above 5V/2.0A.
c. If there is other light sources around.
d. Cable control quality is poor.
FUNCTIONAL CONTROL DESCRIPTION

(1)Brightness "+" switch.
(2)Color temperature mode switch (3 color temperature modes).
(3)Brightness "-" switch.
(4)Power switch (ON/OFF).
SUITABLE FOR USB INTERFACE

natural_image
Black USB cable connector with two ports, no text or symbols visible
natural_image
Computer setup with monitor, keyboard, tower, and mouse (no visible text or symbols)Computer Host

natural_image
Illustration of a laptop with a colorful abstract wallpaper on screen (no text or symbols visible)Laptop
natural_image
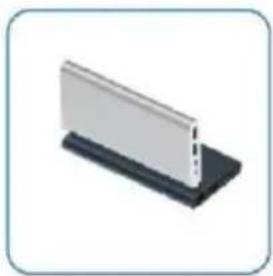
Isometric view of a white rectangular panel mounted on a black base (no text or symbols visible)Power Bank
natural_image
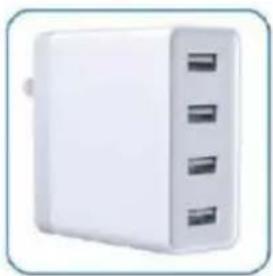
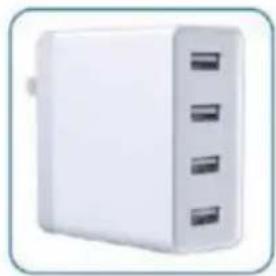
White rectangular electronic device with three side slots, no visible text or symbolsUSB Charger
- Setting-up the photo studio light box
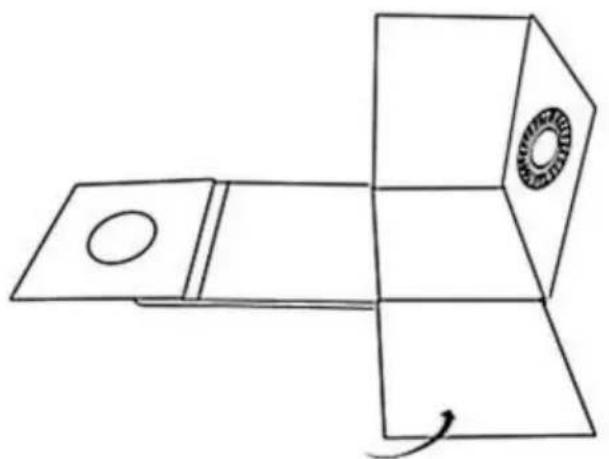
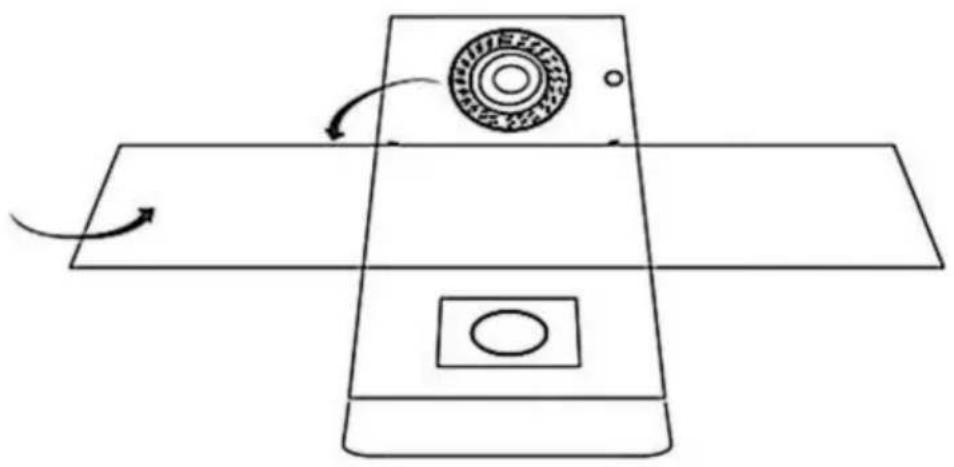
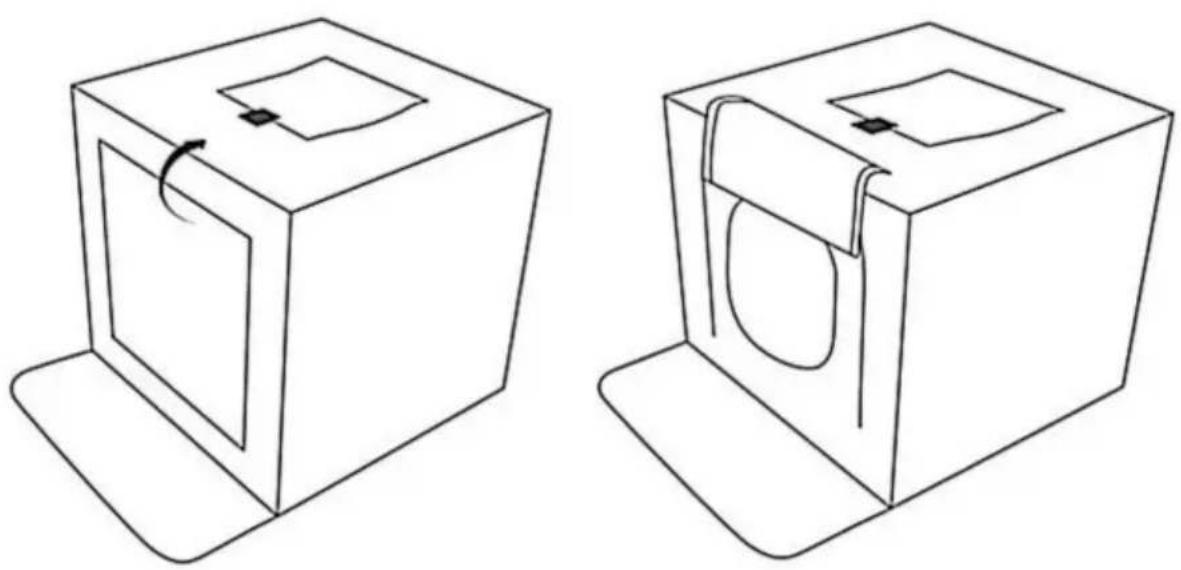
① Put the light box on a flat surface and unfold it.
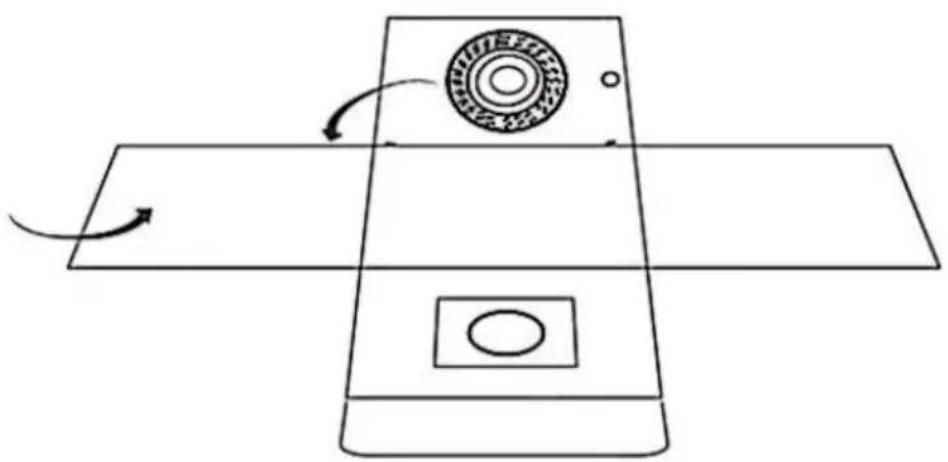
natural_image
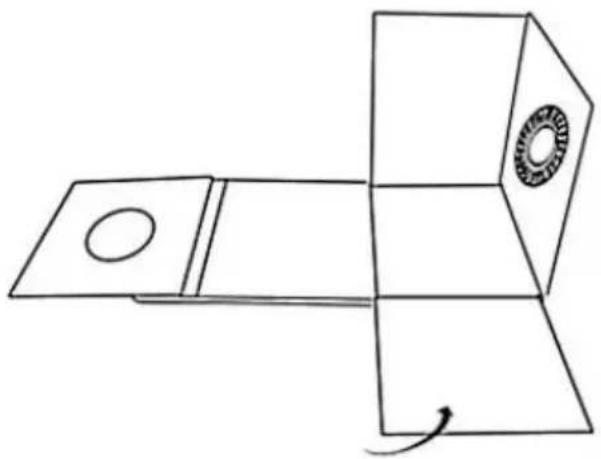
Diagram of a device with a circular component and directional arrows indicating motion (no text or symbols)② Set up the light box to form a cube.
natural_image
Simple line drawing of a mechanical component with a circular hole and a ring, no text or symbols present.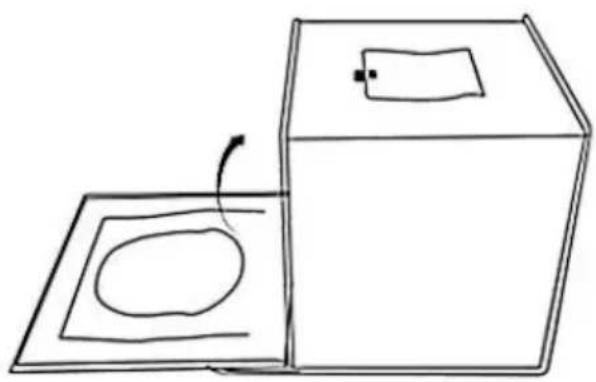
natural_image
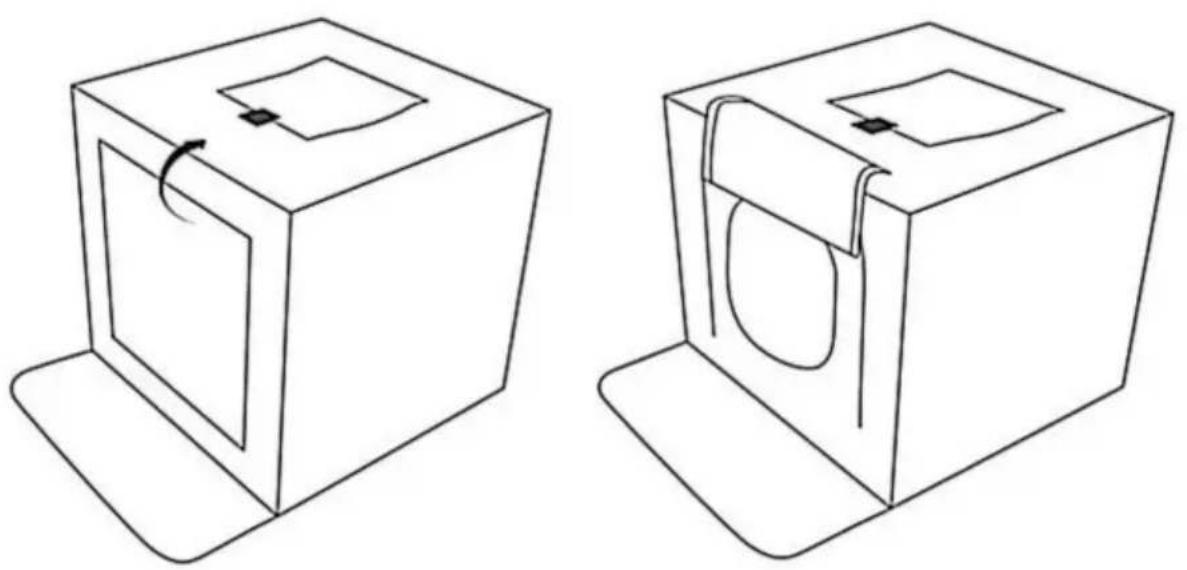
Simple line drawing of a box and a square with an oval inside, no text or symbols present③ Lift up the front panel of the shooting window and fix it with the hook-and-loop fastener on the top of the light box. You can also shoot from the top of the box—simply open the flap that covers the shooting window at the top.
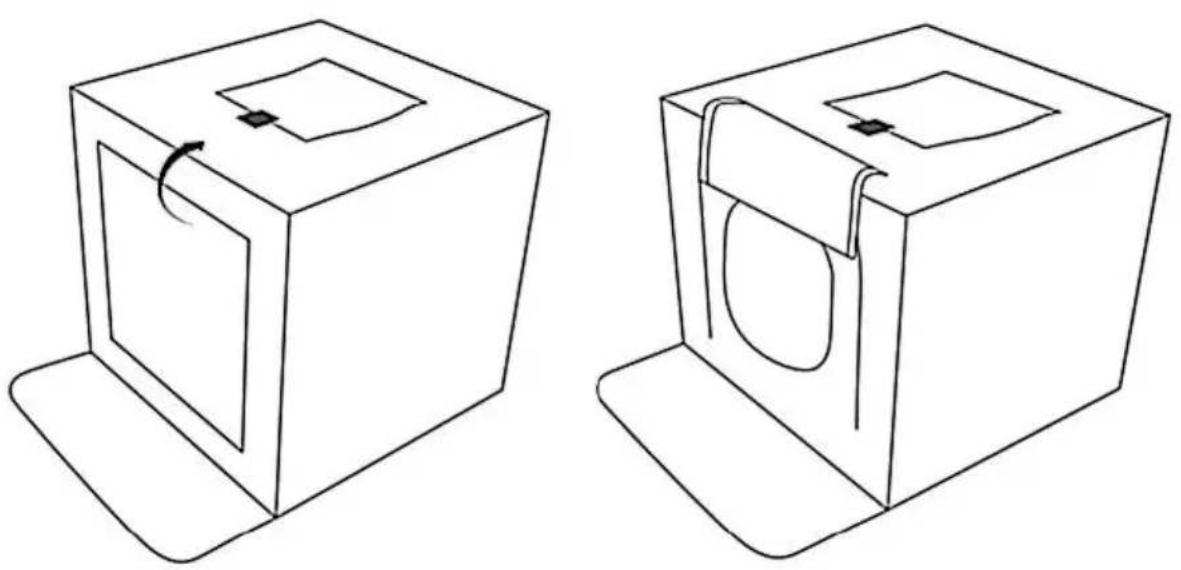
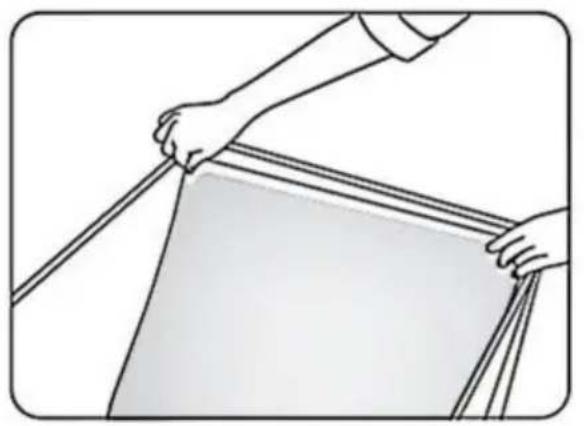
2. Attaching the color backdrop cloth
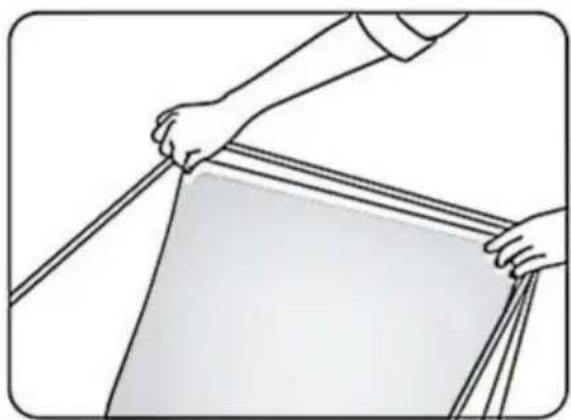
Open the top of the light box and tuck the bottom edge of the backdrop cloth into the gap in the front of the box.
natural_image
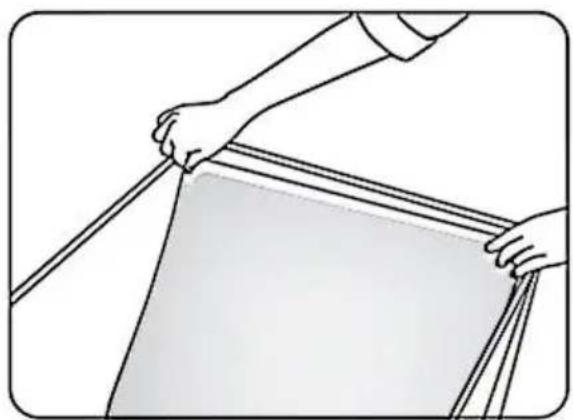
Illustration of hands holding a ruler or measuring tape, no text or symbols present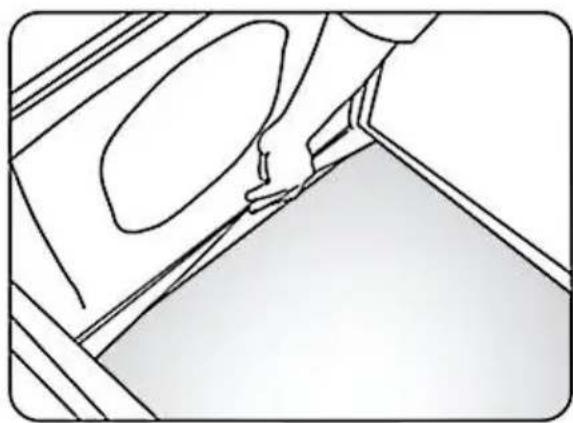
natural_image
Line drawing of a hand holding a small object near a window (no text or symbols)Cabinet size: about 40*30cm
Manufacturer: Shanghaimuxinmuyeyouxiangongsi
Address: Shuangchenglu 803nong11hao1602A-1609shi, baoshanqu, shanghai 200000 CN.
Imported to AUS: SIHAO PTY LTD, 1 ROKEVA STREETEASTWOOD NS 2122 Australia
Imported to USA: Sanven Technology Ltd., Suite 250, 9166 Anaheim Pla Rancho Cucamonga, CA 91730
| EC | REP |
E-CrossStu GmbH
Mainzer Landstr.69, 60329 Frankfurt am Ma
| UK | REP |
YH CONSULTING LIMITED.
C/O YH Consulting Limited Office 147, Centurion H
London Road, Staines-upon-Thames, Surrey, TW18 4
VEVOR®
TOUGH TOOLS, HALF PRICE
Technical Support and E-Warranty Certificate
www.vevor.com/support
VEVOR®
TOUGH TOOLS, HALF PRICE
natural_image
Line drawing of a 3D cube with nested square cutouts and a small arrow on top (no text or symbols)natural_image
Black briefcase with a handle, no visible text or symbols

natural_image
Close-up of a black USB cable with two metallic connector pins (no text or symbols visible)
natural_image
Computer setup with monitor, keyboard, tower, and mouse (no visible text or symbols)Computer Host

natural_image
Illustration of a laptop with a colorful abstract screen displaying green and yellow patterns (no text or symbols visible)Laptop

natural_image
Isometric view of a white rectangular panel mounted on a black base (no text or symbols visible)Power Bank

natural_image
White portable electronic device with three ports, no visible text or symbolsUSB Charger
ÉTAPES D'INSTALLATION
1. Setting-up the photo studio light box
① Put the light box on a flat surface and unfold it.

natural_image
Pure diagram of a mechanical device with rotating components and directional arrows, no text or symbols present.② Set up the light box to form a cube.

natural_image
Pure line drawing of a mechanical component with no text, numbers, or symbols
natural_image
Simple line drawing of a box and a square with an oval inside, no text or symbols present.③ Lift up the front panel of the shooting window and fix it with the hook-and-loop fastener on the top of the light box. You can also shoot from the top of the box—simply open the flap that covers the shooting window at the top.

2. Attaching the color backdrop cloth
Open the top of the light box and tuck the bottom edge of the backdrop cloth into the gap in the front of the box.
natural_image
Illustration of hands holding a ruler or measuring tape, no text or symbols present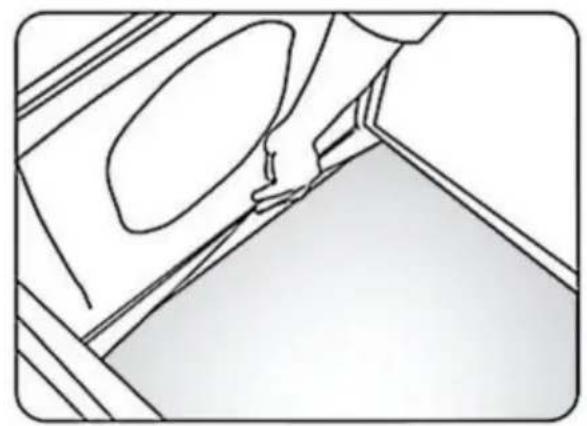
natural_image
Line drawing of a hand holding a small object near a wall, with no visible text or symbolsC/O YH Consulting Limited Bureau 147, Centurion House, London Road, Staines-upon-Thames, Surrey, TW18 4AX
VEVOR®
TOUGH TOOLS, HALF PRICE
www.vevor.com/support
VEVOR®
TOUGH TOOLS, HALF PRICE
www.vevor.com/support
natural_image
Line drawing of a 3D cube with nested square cutouts and a small arrow on top (no text or symbols)natural_image
Black briefcase with a handle, no visible text or symbols

natural_image
Close-up of a black USB cable with two metallic connector pins (no text or symbols visible)
natural_image
Computer setup with monitor, keyboard, tower, and mouse (no visible text or symbols)Computer Host

natural_image
Illustration of a laptop with a colorful abstract wallpaper on screen (no text or symbols visible)Laptop

natural_image
Isometric illustration of a white rectangular panel mounted on a black base (no text or symbols)Power Bank
natural_image
White rectangular electronic device with three side slots, no visible text or symbolsUSB Charger
INSTALLATIONSSCHRITTE
- Setting-up the photo studio light box
① Put the light box on a flat surface and unfold it.

natural_image
Pure diagram of a mechanical device with rotating components and directional arrows, no text or symbols present.② Set up the light box to form a cube.
natural_image
Pure 3D geometric diagram showing a rectangular prism with a circular hole and a circular inset (no text or symbols)
natural_image
Simple line drawing of a box and a square with an oval inside, no text or symbols present.③ Lift up the front panel of the shooting window and fix it with the hook-and-loop fastener on the top of the light box. You can also shoot from the top of the box—simply open the flap that covers the shooting window at the top.

2. Attaching the color backdrop cloth
Open the top of the light box and tuck the bottom edge of the backdrop cloth into the gap in the front of the box.

natural_image
Illustration of hands holding a ruler or measuring tape, no text or symbols present
natural_image
Line drawing of a hand pressing down on a wall with a circular opening (no text or symbols)C/O YH Consulting Limited Office 147, Centurion House, London Road, Staines-upon-Thames, Surrey, TW18 4AX
VEVOR®
TOUGH TOOLS, HALF PRICE
www.vevor.com/support
VEVOR®
TOUGH TOOLS, HALF PRICE
elettronica www.vevor.com/support
natural_image
Line drawing of a 3D cube with nested square cutouts and a small arrow on top (no text or symbols)natural_image
Black briefcase with a handle, no visible text or symbols
Fondali colorati*6
natural_image
Close-up of a black USB cable with two metallic pins (no text or symbols visible)
natural_image
Computer setup with monitor, keyboard, tower, and mouse (no visible text or symbols)Computer Host

natural_image
Illustration of a laptop with a colorful abstract wallpaper on screen (no text or symbols visible)Laptop

natural_image
Isometric view of a white rectangular panel mounted on a black base (no text or symbols visible)Power Bank

natural_image
White rectangular electronic device with three side slots, no visible text or symbolsUSB Charger
- Setting-up the photo studio light box
① Put the light box on a flat surface and unfold it.

natural_image
Pure diagram of a device with a circular component and directional arrows, no text or symbols present.② Set up the light box to form a cube.

natural_image
Pure technical line drawing of a mechanical component with no text or symbols
natural_image
Simple line drawing of a box and a square with an oval inside, no text or symbols present.③ Lift up the front panel of the shooting window and fix it with the hook-and-loop fastener on the top of the light box. You can also shoot from the top of the box—simply open the flap that covers the shooting window at the top.

2. Attaching the color backdrop cloth
Open the top of the light box and tuck the bottom edge of the backdrop cloth into the gap in the front of the box.

natural_image
Illustration of hands holding a ruler or measuring tape, no text or symbols present
natural_image
Line drawing of a hand pressing down on a wall with a circular opening, no text or symbols presentImportato in AUS: SIHAO PTY LTD, 1 ROKEVA STREETEASTWOOD NSW 2122 Australia
C/O YH Consulting Limited Ufficio 147, Centurion House, London Road, Staines-upon-Thames, Surrey, TW18 4AX
VEVOR®
TOUGH TOOLS, HALF PRICE
natural_image
Line drawing of a 3D cube with nested square cutouts and a small arrow on top (no text or symbols)natural_image
Black briefcase with a handle, no visible text or symbols

(1)Interruptor de brillo "+".
(2) Interruptor de modo de temperatura de color (3 modos de temperatura de color).
(3) Interruptor de brillo "-".
(4)Interruptor de encendido (ON/OFF).
ADECUADO PARA INTERFAZ USB

natural_image
Close-up of a black USB cable with two metallic connector ends (no text or symbols visible)
natural_image
Computer setup with monitor, keyboard, tower, and mouse (no visible text or symbols)Computer Host

natural_image
Illustration of a laptop with a colorful abstract wallpaper on screen (no text or symbols visible)Laptop

natural_image
Isometric view of a white rectangular panel mounted on a black base (no text or symbols visible)Power Bank

natural_image
White rectangular electronic device with three side slots, no visible text or symbolsUSB Charger
1. Setting-up the photo studio light box
① Put the light box on a flat surface and unfold it.
natural_image
Pure diagram of a device with a circular component and directional arrows, no text or symbols present.② Set up the light box to form a cube.

natural_image
Pure line drawing of a mechanical component with no text, numbers, or symbols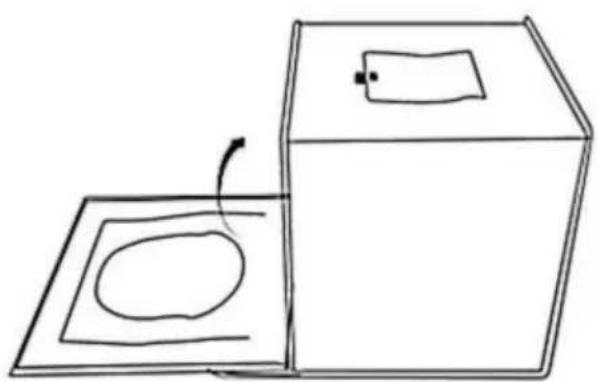
natural_image
Simple line drawing of a box and a square with an oval inside, no text or symbols present.③ Lift up the front panel of the shooting window and fix it with the hook-and-loop fastener on the top of the light box. You can also shoot from the top of the box—simply open the flap that covers the shooting window at the top.

2. Attaching the color backdrop cloth
Open the top of the light box and tuck the bottom edge of the backdrop cloth into the gap in the front of the box.

natural_image
Illustration of hands holding a ruler or measuring tape, no text or symbols present
natural_image
Line drawing of a hand holding a small object near a wall, with no visible text or symbolsFabricante: Shanghaimuxinmuyeyouxiangongsi
Dirección: Shuangchenglu 803nong11hao1602A-1609shi, baoshanqu, shanghai 200000 CN.
Importado a AUS: SIHAO PTY LTD, 1 ROKEVA STREETEASTWOOD NSW 2122 Australia
Importado a EE. UU.: Sanven Technology Ltd., Suite 250, 9166 Anaheim Place, Rancho Cucamonga, CA 91730

E-CrossStu GmbH
C/O YH Consulting Limited Oficina 147, Centurion House, London Road, Staines upon Thames, Surrey, TW18 4AX
VEVOR®
TOUGH TOOLS, HALF PRICE
natural_image
Line drawing of a 3D cube with nested square cutouts and a small arrow on top (no text or symbols)natural_image
Black briefcase with a handle, no visible text or symbols

natural_image
Close-up of a black USB cable with two metallic connector pins (no text or symbols visible)
natural_image
Computer setup with monitor, keyboard, tower, and mouse (no visible text or symbols)Computer Host

natural_image
Illustration of a laptop with a colorful abstract wallpaper on screen (no text or symbols visible)Laptop
natural_image
Isometric view of a white rectangular panel mounted on a black base (no text or symbols visible)Power Bank

natural_image
White rectangular electronic device with three side slots, no visible text or symbolsUSB Charger
KROKI INSTALACJI
1. Setting-up the photo studio light box
① Put the light box on a flat surface and unfold it.

natural_image
Pure diagram of a device with a circular component and directional arrows, no text or symbols present.② Set up the light box to form a cube.

natural_image
Pure 3D geometric diagram showing a rectangular prism with a circular hole and a circular inset (no text or symbols)
natural_image
Simple line drawing of a box and a square with an oval inside, no text or symbols present.③ Lift up the front panel of the shooting window and fix it with the hook-and-loop fastener on the top of the light box. You can also shoot from the top of the box—simply open the flap that covers the shooting window at the top.
2. Attaching the color backdrop cloth
Open the top of the light box and tuck the bottom edge of the backdrop cloth into the gap in the front of the box.

natural_image
Illustration of hands holding a ruler or measuring tape, no text or symbols present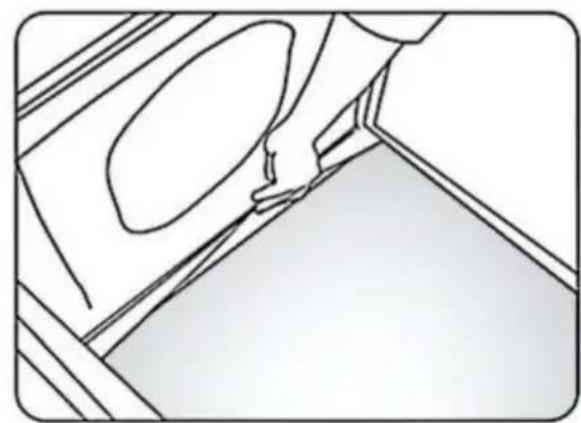
natural_image
Pure technical line drawing of a mechanical component or bracket (no text or symbols)Import do AUS: SIHAO PTY LTD, 1 ROKEVA STREETEASTWOOD NSW 2122 Australii
Import do USA: Sanven Technology Ltd., Suite 250, 9166 Anaheim Place, Rancho Cucamonga, CA 91730
| REPREZENT KE |
E-CrossStu GmbH
Mainzer Landstr.69, 60329 Frankfurt nad Menem.
C/O YH Consulting Limited Office 147, Centurion House, London Road, Staines-upon-Thames, Surrey, TW18 4AX
VEVOR®
TOUGH TOOLS, HALF PRICE
www.vevor.com/support
VEVOR®
TOUGH TOOLS, HALF PRICE
www.vevor.com/support
Opvouwbare LED-ringlichtstudiobox HANDLEIDING
MODEL: ZC-DYSY-01
natural_image
Line drawing of a 3D cube with nested square cutouts and a small arrow on top (no text or symbols)HULP NODIG? NEEM CONTACT MET ONS OP!
natural_image
Black briefcase with a handle, no visible text or symbolsnatural_image
Close-up of a black USB cable with two metallic connector pins (no text or symbols visible)
natural_image
Computer setup with monitor, keyboard, tower, and mouse (no visible text or symbols)Computer Host

natural_image
Illustration of a laptop with a colorful abstract wallpaper on screen (no text or symbols visible)Laptop

natural_image
Isometric view of a white rectangular panel mounted on a black base (no text or symbols visible)Power Bank

natural_image
White rectangular electronic device with three side slots, no visible text or symbolsUSB Charger
INSTALLATIESTAPPEN
- Setting-up the photo studio light box
① Put the light box on a flat surface and unfold it.

natural_image
Pure diagram of a device with a circular component and directional arrows, no text or symbols present.② Set up the light box to form a cube.

natural_image
Pure line drawing of a mechanical component with no text, numbers, or symbols
natural_image
Simple line drawing of a box and a square with an oval inside, no text or symbols present.③ Lift up the front panel of the shooting window and fix it with the hook-and-loop fastener on the top of the light box. You can also shoot from the top of the box—simply open the flap that covers the shooting window at the top.
2. Attaching the color backdrop cloth
Open the top of the light box and tuck the bottom edge of the backdrop cloth into the gap in the front of the box.
natural_image
Illustration of hands holding a ruler or measuring tape, no text or symbols present
natural_image
Line drawing of a hand pressing down on a wall with a circular opening (no text or symbols)C/O YH Consulting Limited Kantoor 147, Centurion House, London Road, Staines-upon-Thames, Surrey, TW18 4AX
VEVOR®
TOUGH TOOLS, HALF PRICE
Technische ondersteuning en e-garantiecertificaat www.vevor.com/support
VEVOR®
TOUGH TOOLS, HALF PRICE
www.vevor.com/support
Vikbar LED-ringljus studiobox ANVÄNDARMANUAL
MODELL: ZC-DYSY-01
natural_image
Line drawing of a 3D cube with nested square cutouts and a small rectangular object on top (no text or symbols)natural_image
Black briefcase with a handle, no visible text or symbols

Main Studio Box*1 Mjuk duk*1 Färger Bakgrunder*6
SPECIFIKATIONER
INSTALLATIONSSTEG
- Setting-up the photo studio light box
① Put the light box on a flat surface and unfold it.

natural_image
Pure diagram of a device with a circular component and directional arrows, no text or symbols present.② Set up the light box to form a cube.

natural_image
Pure line drawing of a mechanical component with no text, numbers, or symbols
natural_image
Simple line drawing of a box and a square with an oval inside, no text or symbols present.③ Lift up the front panel of the shooting window and fix it with the hook-and-loop fastener on the top of the light box. You can also shoot from the top of the box—simply open the flap that covers the shooting window at the top.

2. Attaching the color backdrop cloth
Open the top of the light box and tuck the bottom edge of the backdrop cloth into the gap in the front of the box.

natural_image
Illustration of hands holding a ruler or measuring tape, no text or symbols present
natural_image
Line drawing of a hand pressing down on a wall with a circular opening, no text or symbols presentSkåpstorlek: ca 40*30cm
Tillverkare: Shanghaimuxinmuyeyouxiangongsi
Adress: Shuangchenglu 803nong11hao1602A-1609shi, baoshanqu, shanghai 200000 CN.
Importerad till AUS: SIHAO PTY LTD, 1 ROKEVA STREETEASTWOOD NSW 2122 Australien
Importerad till USA: Sanven Technology Ltd., Suite 250, 9166 Anaheim Place, Rancho Cucamonga, CA 91730
| EC | REP |
E-CrossStu GmbH
Mainzer Landstr.69, 60329 Frankfurt am Main.
| UK | REP |
YH CONSULTING LIMITED.
C/O YH Consulting Limited Office 147, Centurion House, London Road, Staines-upon-Thames, Surrey, TW18 4AX
VEVOR®
TOUGH TOOLS, HALF PRICE
www.vevor.com/support