
XRS040 - DIY tool Vevor - Free user manual and instructions
Find the device manual for free XRS040 Vevor in PDF.
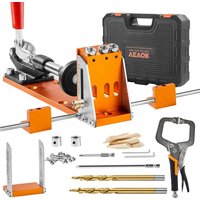


| Product type | Pocket hole jig |
| Brand | Vevor |
| Model | XRS040 |
| Material | Anodized aluminum alloy |
| Number of drill holes | 3 |
| Number of chip holes | 3 |
| Package contents | 1 pocket hole jig, 1 simple connector, 2 drill bits, 1 cross bit 6", 1 cross bit 2-1/2", 2 stop collars, 10 pocket hole plugs, 10 screws, 2 hex keys, 2 sliding blocks, 2 extension rods, 1 clamping pliers, plastic tool box |
| Approximate dimensions | 30 x 15 x 10 cm (approx.) |
| Approximate weight | 1.2 kg (approx.) |
| Thickness adjustment | Yes, with imperial and metric markings |
| Drilling depth adjustment | Yes, via stop collar on the drill bit |
| Extension capability | Yes, with sliding blocks and extension rods |
| Intended use | Drilling pocket holes for wood joints |
| Maintenance | Wipe off anti-rust oil after use to prevent rust |
| Cleaning | Clean with a dry cloth, avoid moisture |
| Required protective equipment | Safety glasses, respirator mask, gloves, protective clothing |
| Safety precautions | Use in a clean and well-lit workspace, keep children away, do not use under the influence of drugs or alcohol |
| Warranty | Electronic warranty via www.vevor.com/support |
| Customer service | ServiceClient@vevor.com |
| Certifications | Compliant with safety standards (ANSI Z87.1 for glasses) |
| Country of origin | China (Shanghai) |
| Repairability | Spare parts available from the manufacturer |
Frequently Asked Questions - XRS040 Vevor
User questions about XRS040 Vevor
0 question about this device. Answer the ones you know or ask your own.
Ask a new question about this device
Download the instructions for your DIY tool in PDF format for free! Find your manual XRS040 - Vevor and take your electronic device back in hand. On this page are published all the documents necessary for the use of your device. XRS040 by Vevor.
USER MANUAL XRS040 Vevor
Technical Support and E-Warranty Certificate
www.vevor.com/support
POCKET HOLE JIG
MODEL: XRS030, XRS040
We continue to be committed to providing you with tools at competitive prices. "Save Half", "Half Price", or any other similar expressions used by us only represent an estimate of savings you might benefit from buying certain tools with us compared to major top brands and do not necessarily mean to cover all categories of tools. You are kindly reminded to verify carefully when placing an order to ensure you are actually saving half in comparison with the top major brands.
VEVOR®
TOUGH TOOLS, HALF PRICE
POCKET HOLE JIG
MODEL: XRS030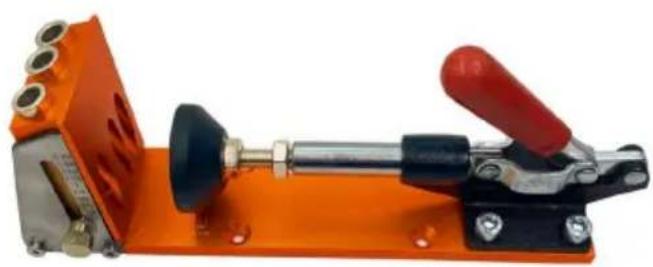
MODEL: XRS040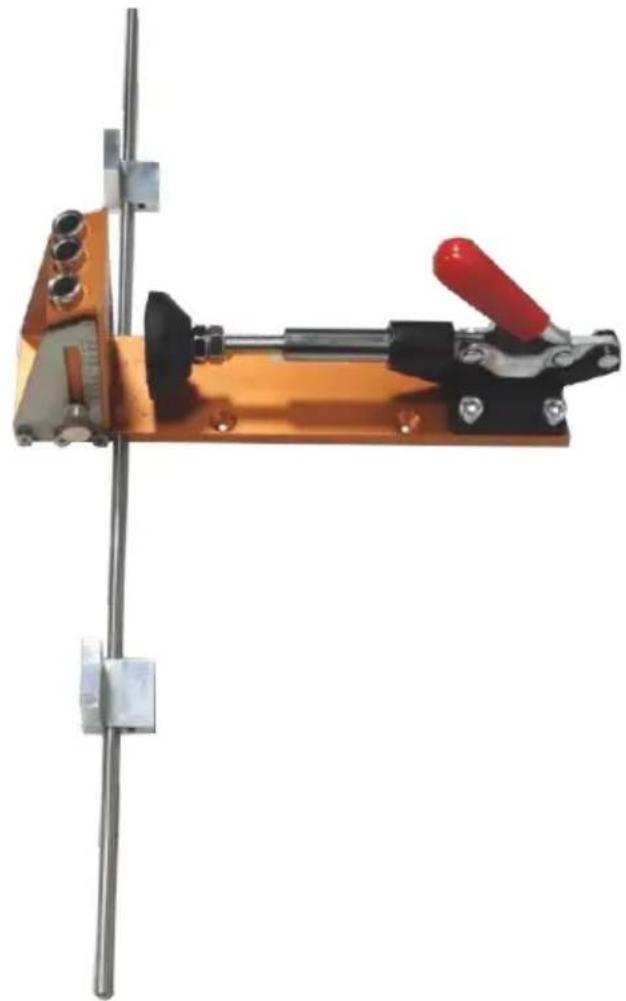
NEED HELP? CONTACT US!
Have product questions? Need technical support? Please feel free to contact us:

CustomerService@vevor.com
This is the original instruction. Please read all manual instructions carefully before operating. VEVOR reserves a clear interpretation of the user manual. The appearance of the product shall be subject to the product you received. Please forgive us that we won't inform you of any technology or software updates on our product.
INSTRUCTIONS
Thank you very much for choosing this pocket hole jig. Please read all of the instructions before using it. The information will help you achieve the best possible results.
 | Warning-To reduce the risk of injury, user must read instr manual carefully. |
 | Warning- Be sure to wear eye protectors when using this product. |
 | Caution! Wear a breathing mask. Dust which is injurious health can be generated when working on wood and othe materials. |
WARNING!
Read and understand all instructions before using this pocket hole jig. The operator must follow basic precautions to reduce the risk of personal injury and/or damage to the equipment. Keep this manual for safety warnings, precautions, operating, inspection, and maintenance instructions.
WORK AREA
- Operate in a safe work environment. Keep your work area clean, well-lit, and free of distractions.
- Keep anyone not wearing the appropriate safety equipment away from the work area.
- Store unused tools properly in a safe and dry location to prevent rust damage. Lock the pocket hole jig away and keep it out of the reach of children.
PERSONAL SAFETY
WARNING! Always wear personal protective equipment.
PERSONAL PROTECTIVE EQUIPMENT
- Always wear impact safety goggles that provide front and side protection for the eyes. Eye protection equipment should comply with CSA Z94.3-07 and ANSI Z87.1 standards based on the type of work performed.
- Wear gloves that provide protection based on the work materials or to reduce the effects of tool vibration.
- Wear protective clothing designed for the work environment and pocket hole jig.
- Non-skid footwear is recommended to maintain footing and balance in the work environment.
PERSONAL PRECAUTIONS
Control the pocket hole jig, personal movement, and the work environment to avoid personal injury or damage to the pocket hole jig.
- Do not operate any pocket hole jig when tired or under the influence of drugs, alcohol, or medications.
- Avoid wearing clothes or jewelry that can become entangled with the moving parts of a tool. Keep long hair covered or bound.
SPECIFIC SAFETY PRECAUTIONS
- Use the correct pocket hole jig for the job. This pocket hole jig was designed for a specific function. Do not modify or alter this pocket hole jig or use it for an unintended purpose.
- Keep body parts away from pinch areas while using.
- Children are not allowed to operate this product unless accompanied by an adult.
- Pay attention to safety during use to avoid crushing fingers.
WARNING!
DO NOT let comfort or familiarity with product (gained from repeated use) replace strict adherence to the tool safety rules. If you use this tool unsafely or incorrectly, you can suffer serious personal injury.
Model and Parameters
| Model | XRS030 | XRS040 |
| Number of Drilling Holes | 3 | 3 |
| Number of Chip Removal Holes | 3 | 3 |
| Material of Hole Jig | Anodized Aluminum Alloy | Anodized Aluminum Alloy |
| Packing | / | Plastic tool box |
| parts list | Fig30 | Fig40 |
Structure Diagram
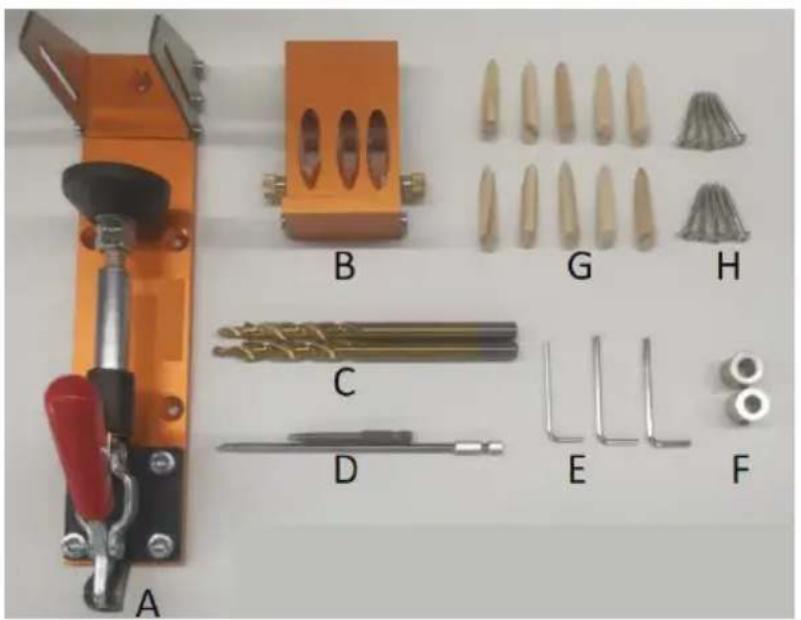
Fig030
XRS030:
A: 1 x Pocket Hole Jig B: 1 x Single fitting C: 2 x Drill Bits D: 1 x 6" Cross Bits and 1x 2-1/2" Cross Bits E: 2 x Hex Key F: 2 x Stop Collar G: 10 x Pocket Hole Plug H: 10 x Screws
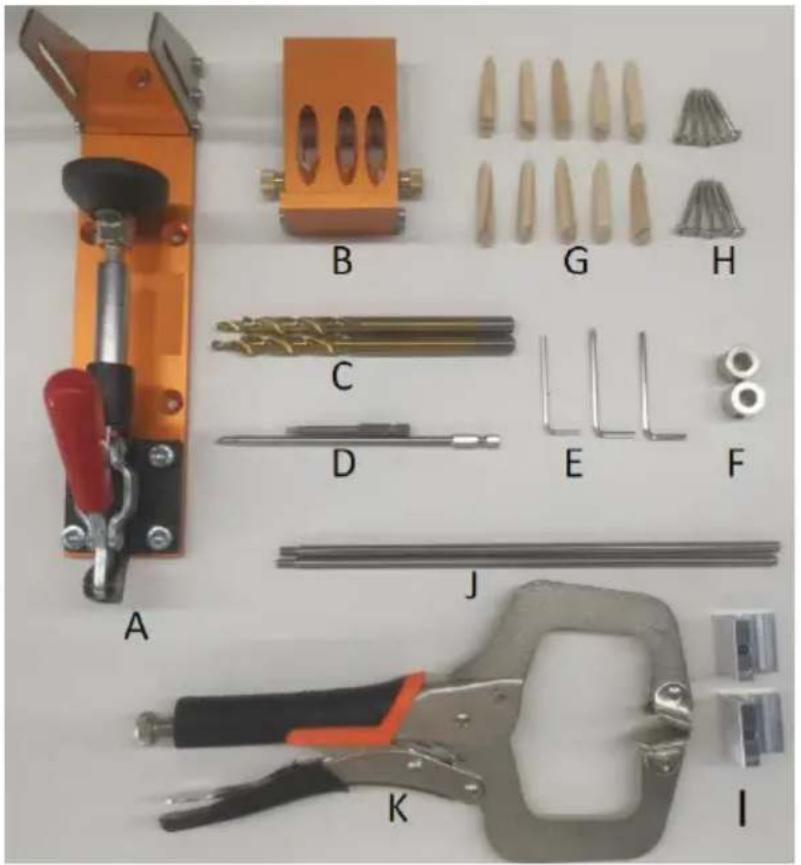
Fig040
XRS040:
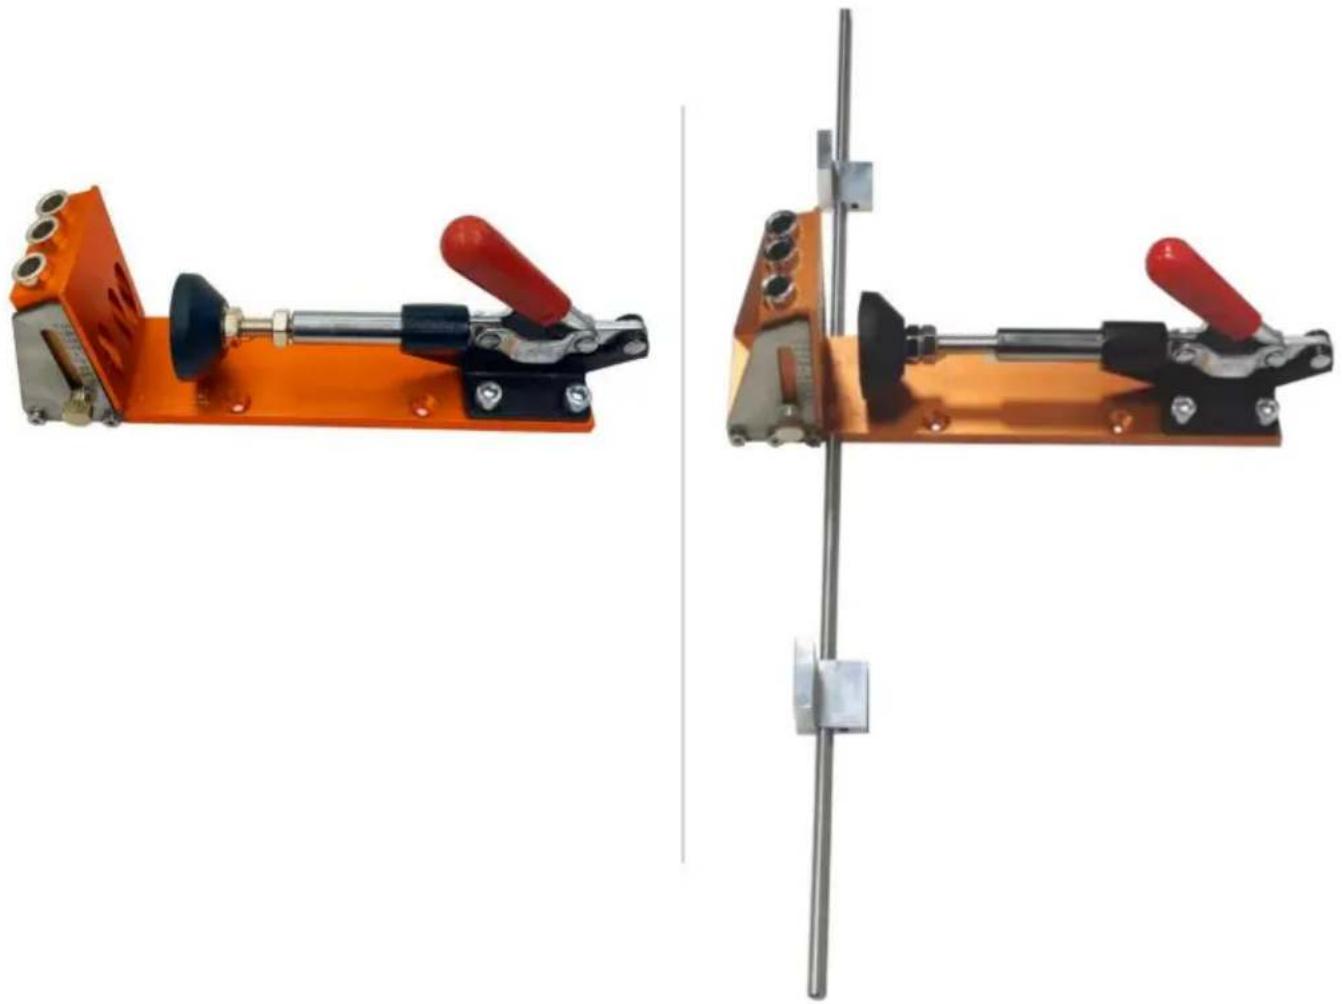
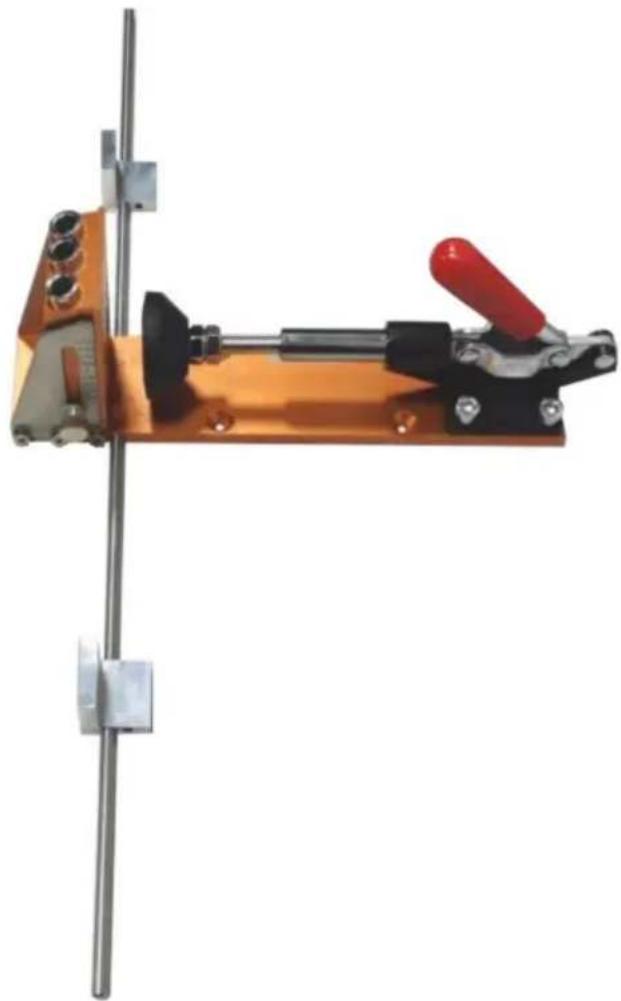
A: 1 x Pocket Hole Jig B: 1 x Single fitting C: 2 x Drill Bits D: 1 x 6" Cross Bits and 1x 2-1/2" Cross Bits E: 2 x Hex Key F: 2 x Stop Collar G: 10 x Pocket Hole Plugs H: 10 x Screws I: 2 x sliding block J: 2 x extended rods K: 1 x Clamping Pliers
Assembly and Use
1. Single Hole Jig
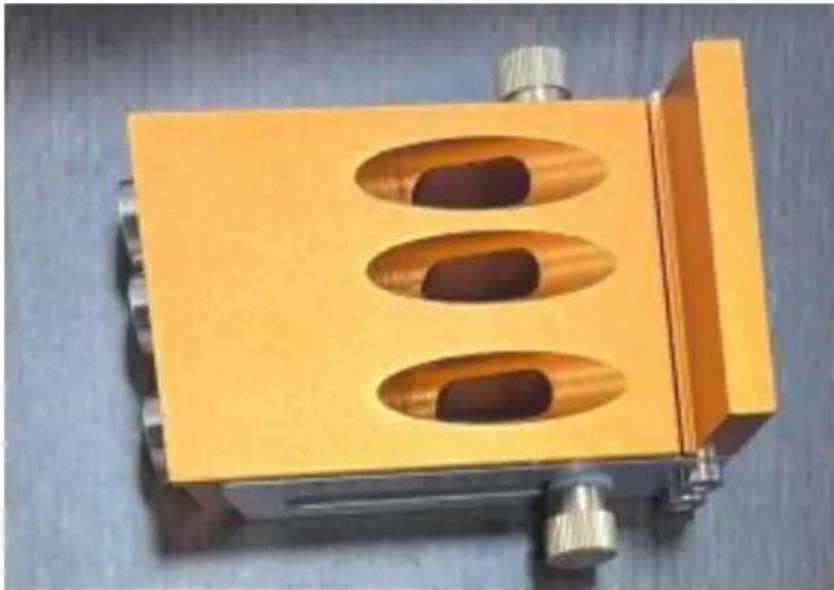
1.1 Adjustable Thickness Setting
Measure the thickness of your board. Markings are in both imperial and metric units. You can quickly adjust the height of the slider according to the thickness of the board. Lock the screws and set them to the appropriate thickness.
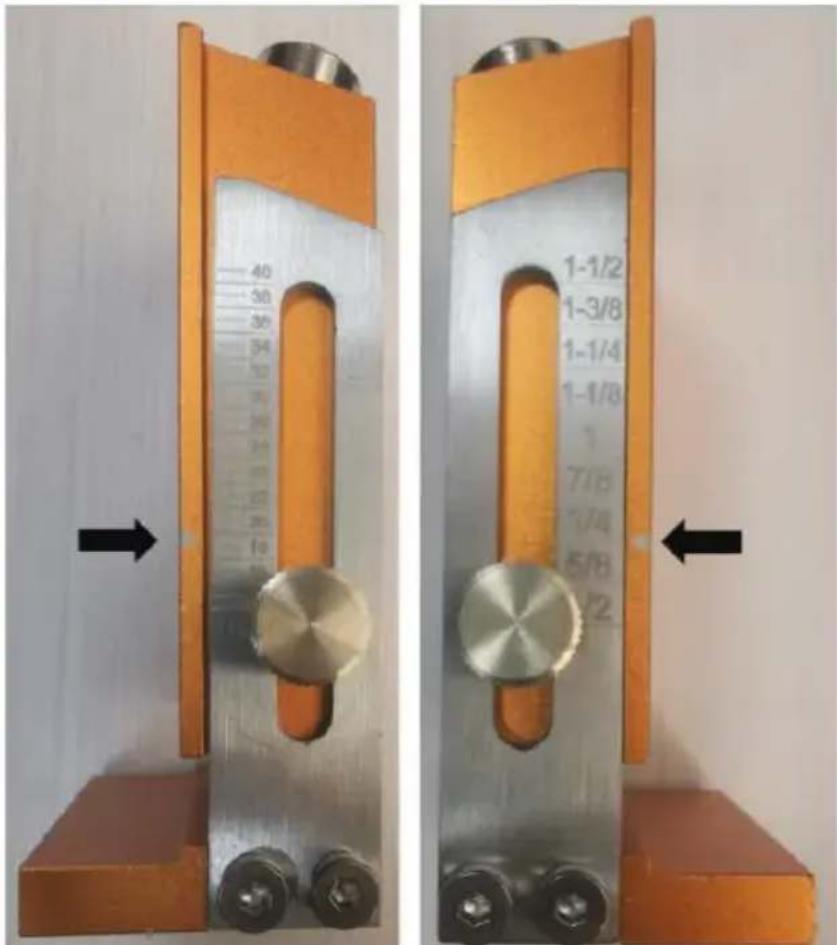
1.2 Adjust the depth of the hole
The stop collar is locked on the drill bits at a position equal to as shown.
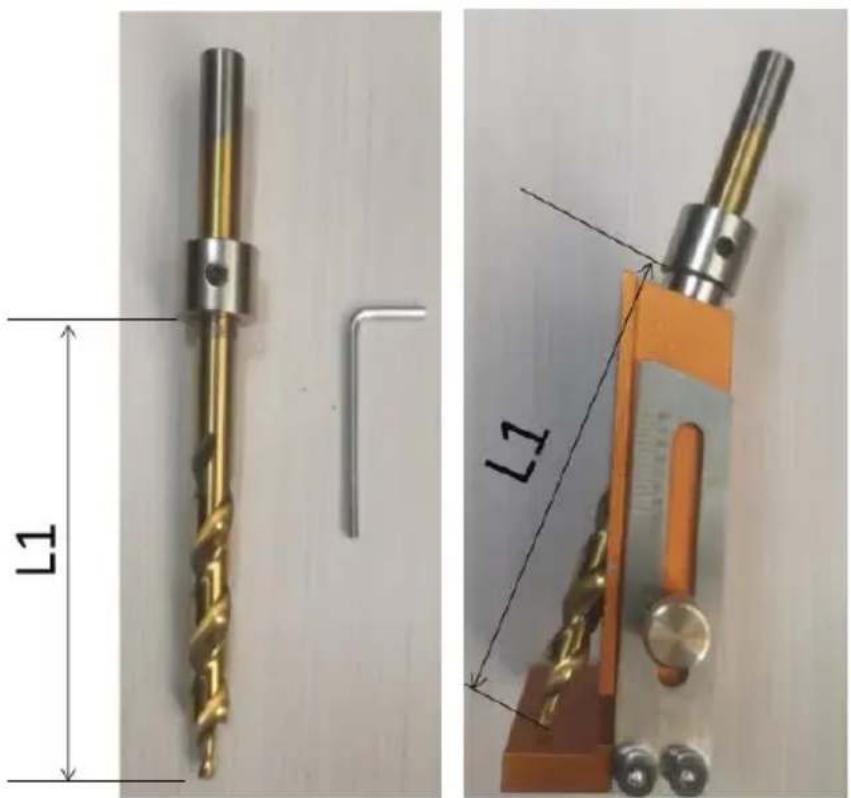
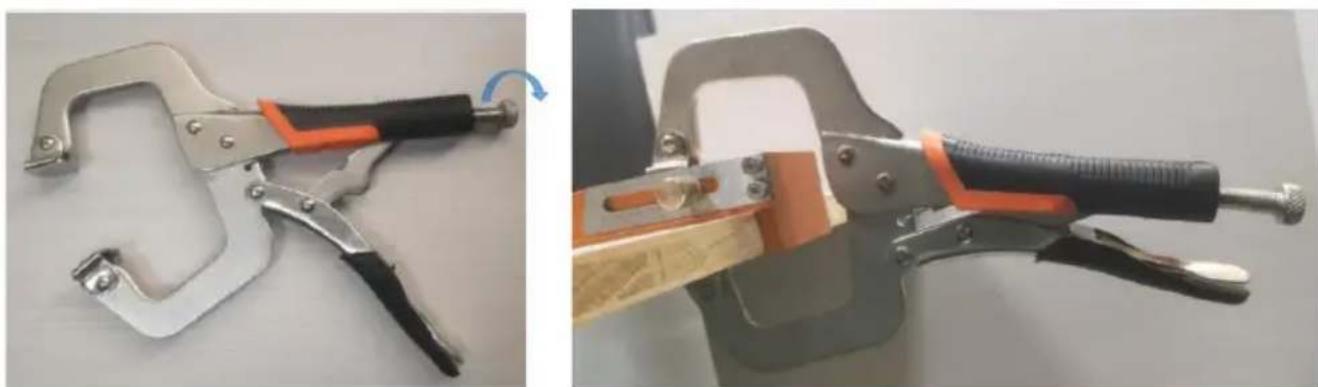
1.3 Quick Fixture
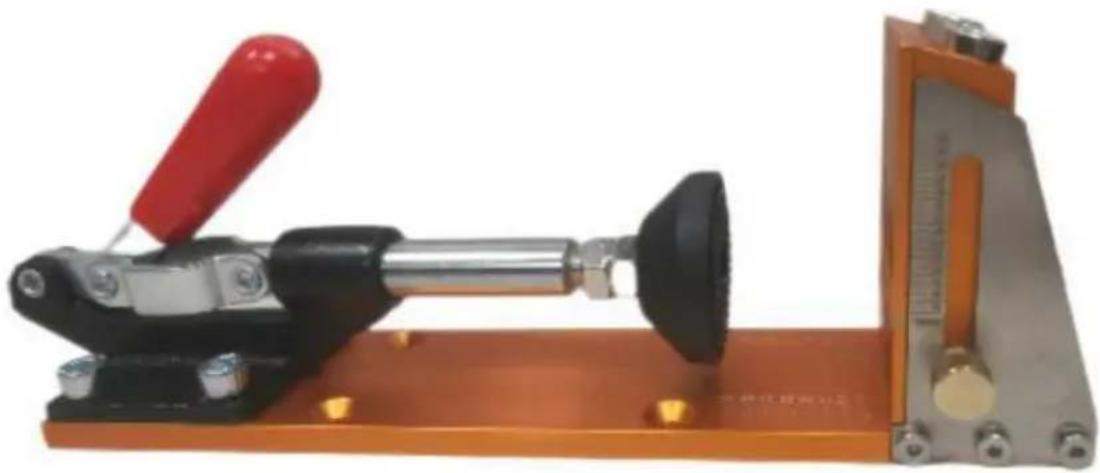
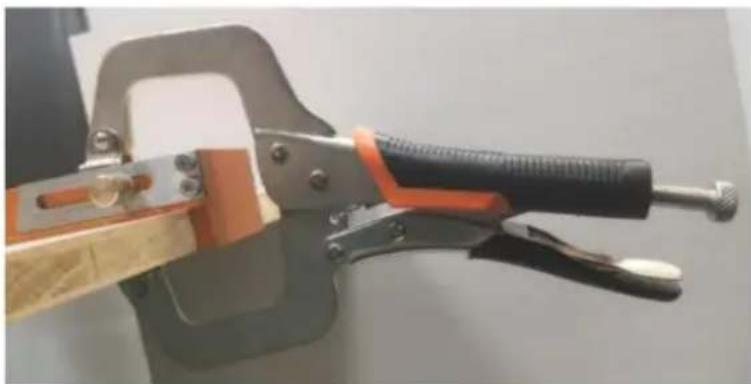
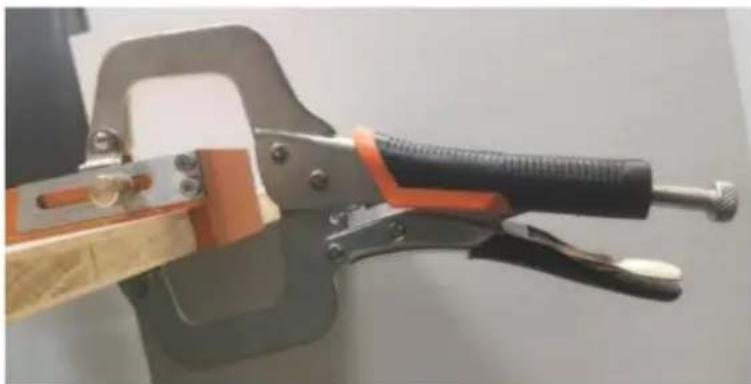
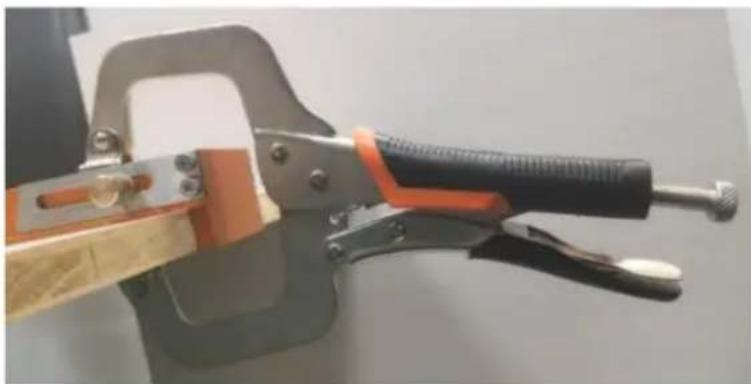
Adjust the opening size of the pliers by the bolt (slightly less than the thickness of the plate and fixture combined). Pulling the trigger causes the clamp to be fixed.
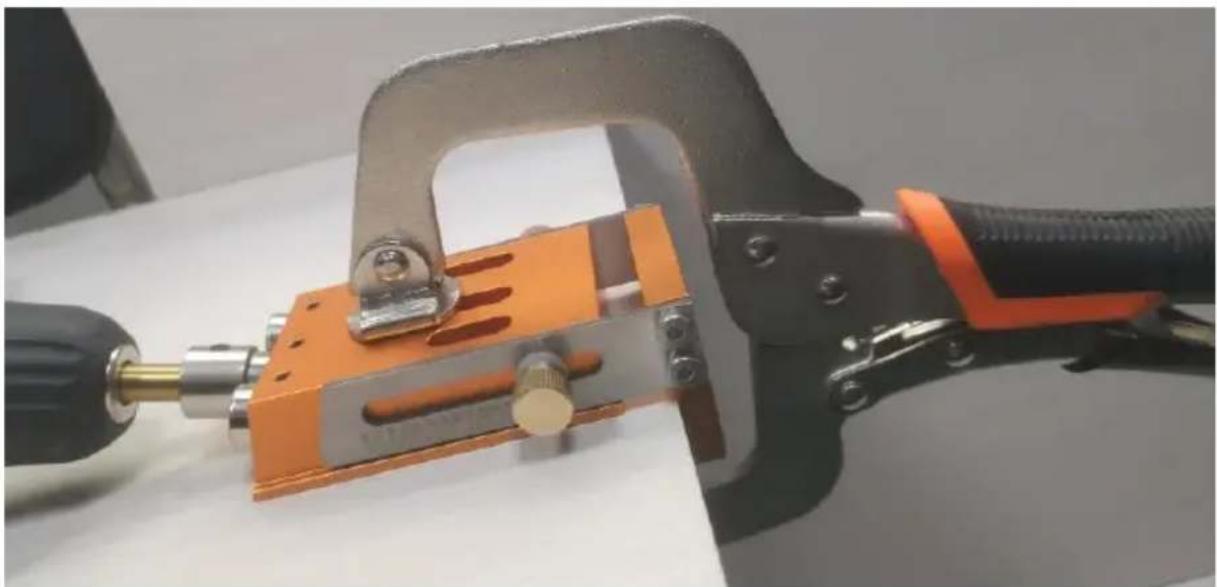
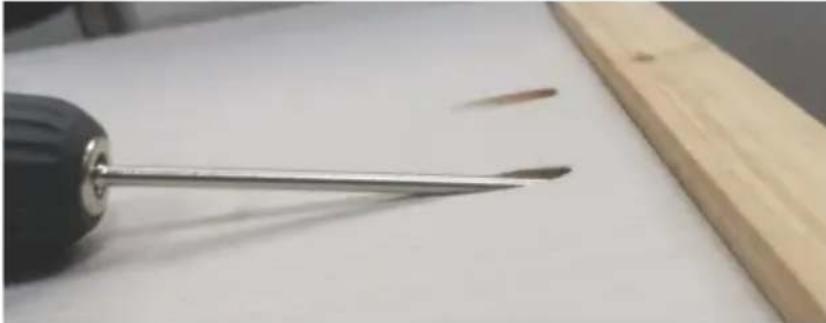
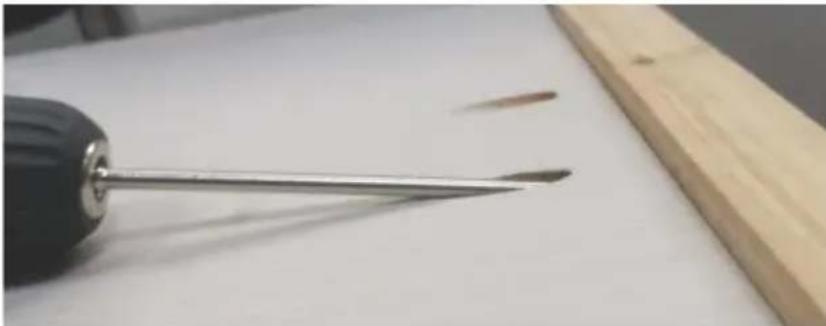
1.4 Drill hole
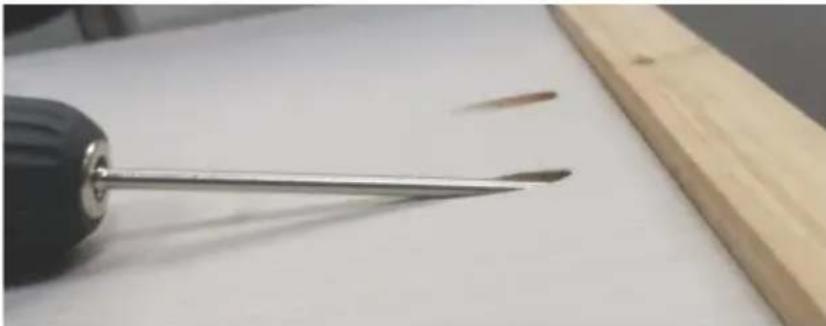
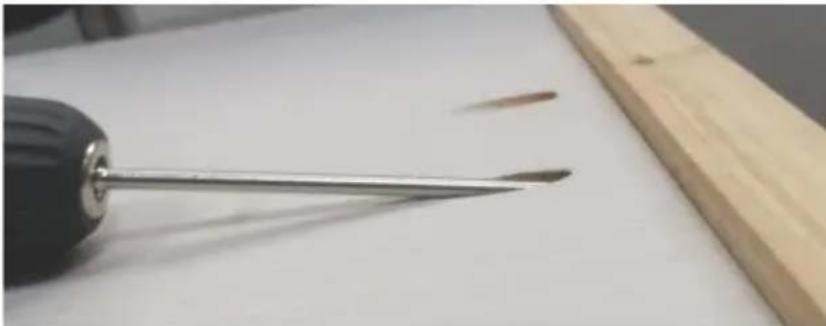
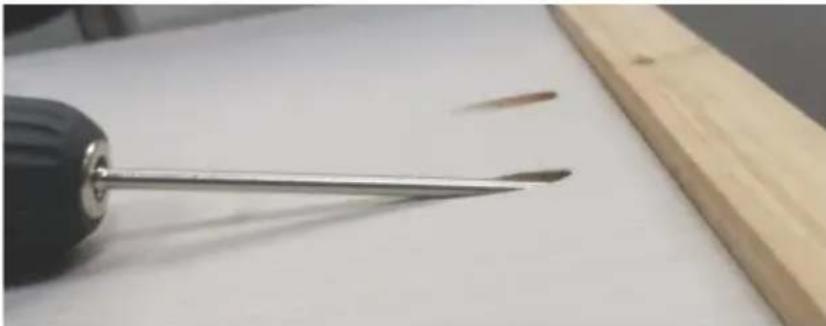
Drill depth of hole until the brake ring stops.
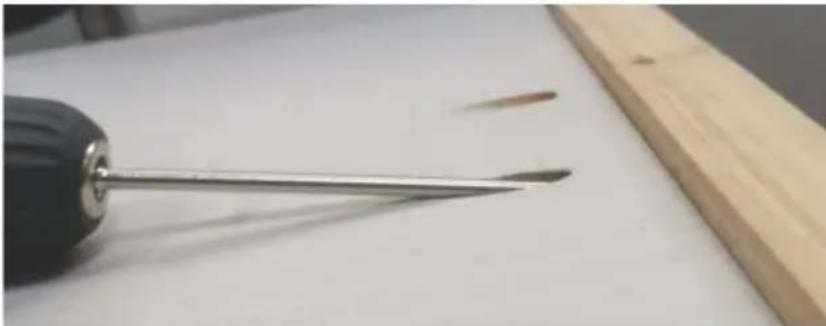
Note that the direction of drilling force is parallel to the pilot hole. Continuous operation for a long time will lead to the pilot hole heating and to the disadvantage of lifetime.
- Hole Jig Kit (XRS030)
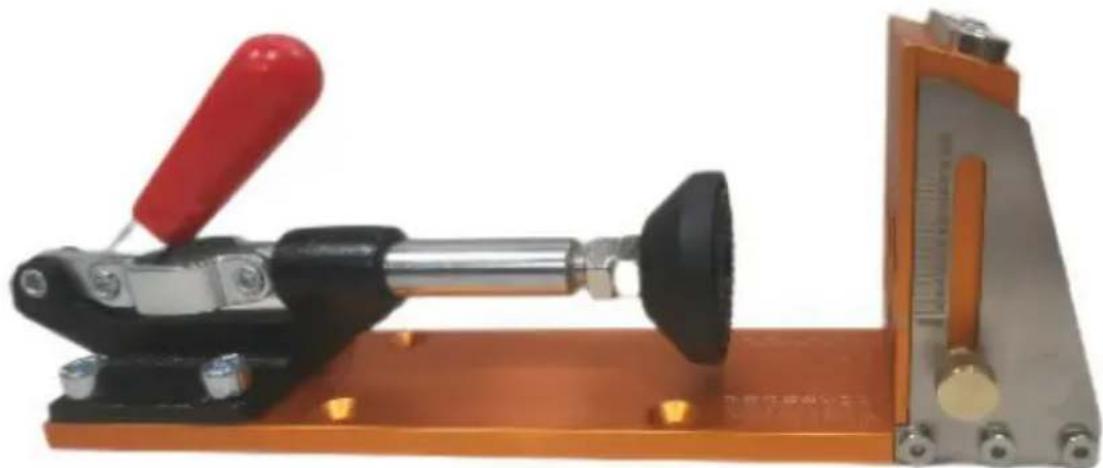
2.1 Assembly Jig kit
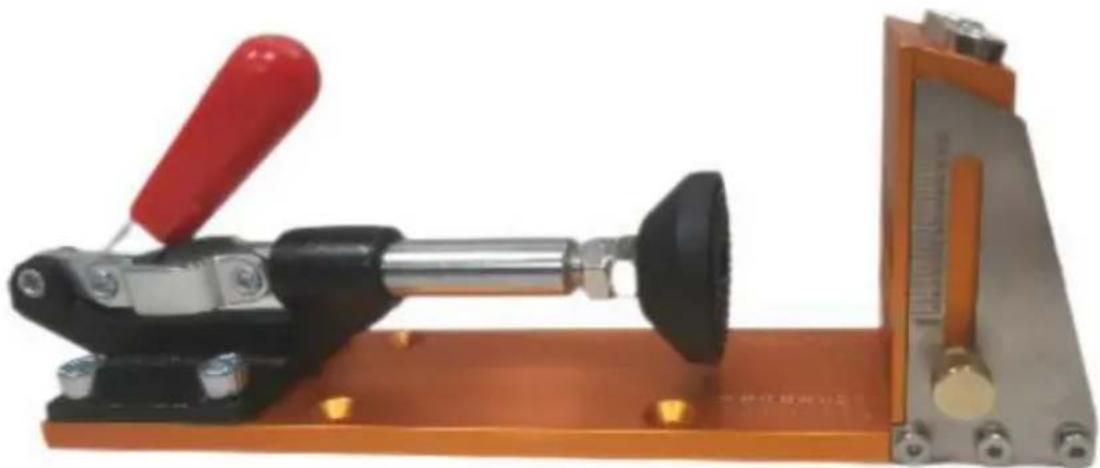
Assemble the Jig kit as shown below.

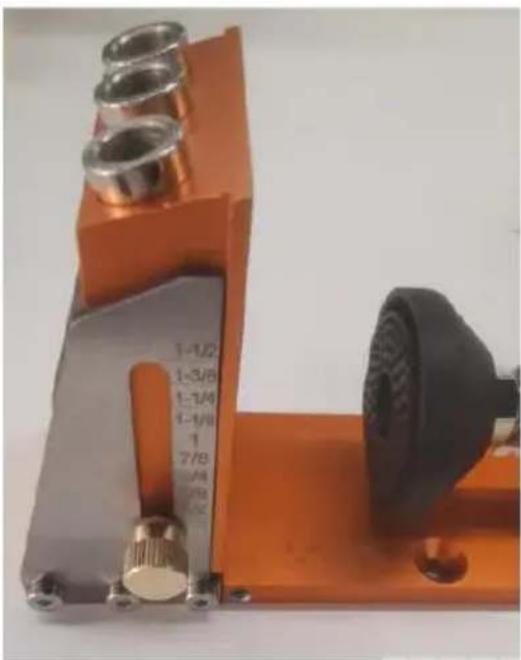
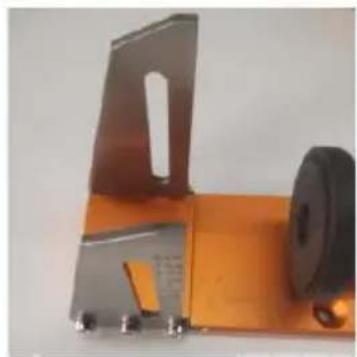
2.2 Adjustable Thickness Setting
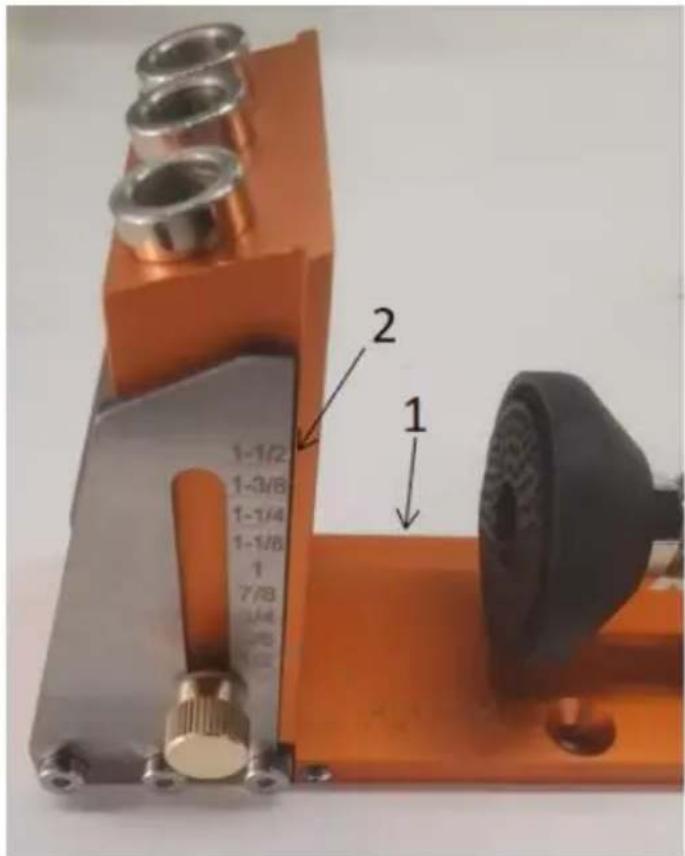
Markings are in both imperial and metric units.
Adjust the length of the foot cup and press down the board, as marking thickness of the board can be measured.
As marking 2, you can quickly adjust the height of the slider according to the thickness of the board. Lock the screws and set them to the appropriate thickness.
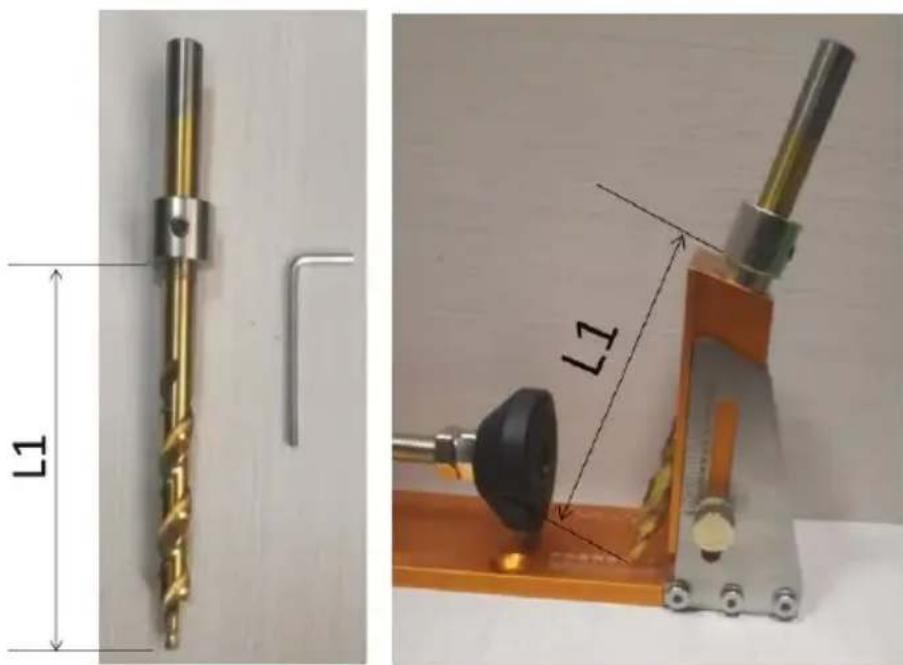
2.3 Adjust the depth of the hole
The stop collar is locked on the drill bits at a position as shown L1.
2.4 Quick Fixture
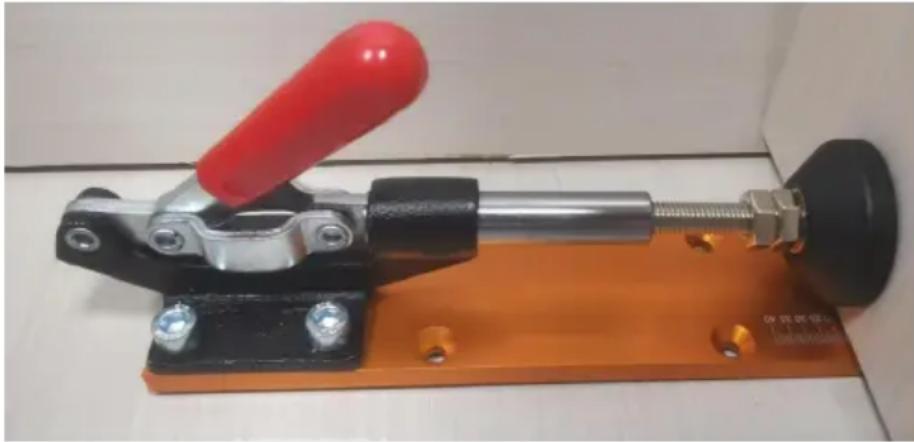
2.5 Drill hole
Drill depth of hole until the brake ring stops.
Note that the direction of drilling force is parallel to the pilot hole. Continuous operation for a long time will lead to the pilot hole heating and to the disadvantage of lifetime.
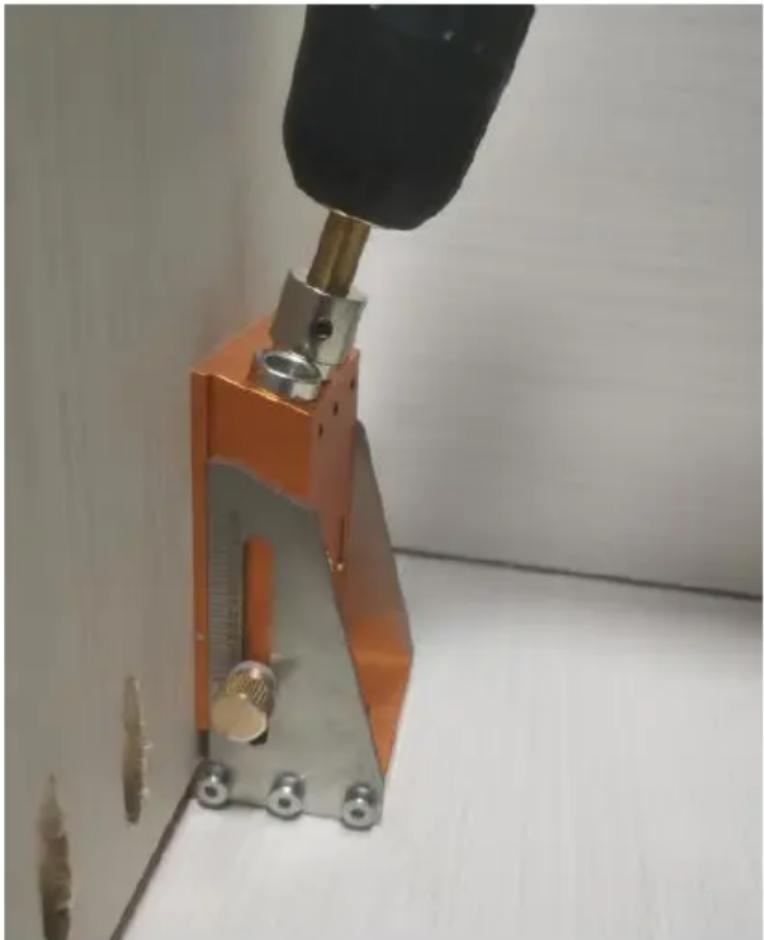
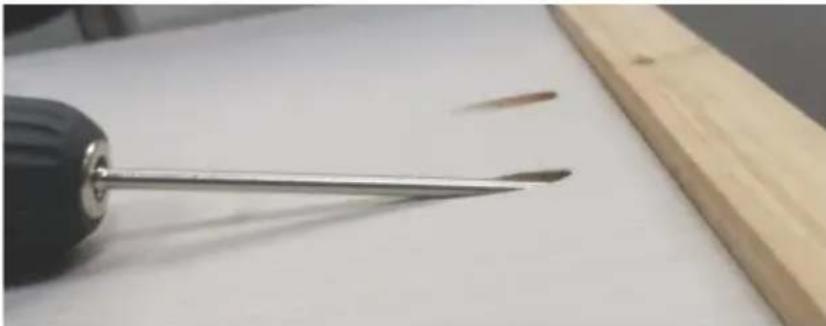
2.6 Screwing
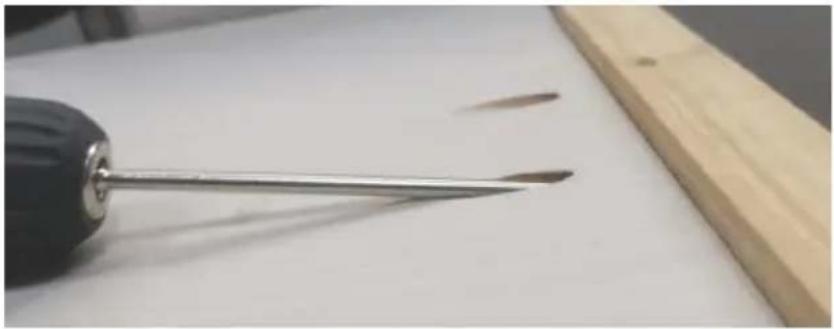
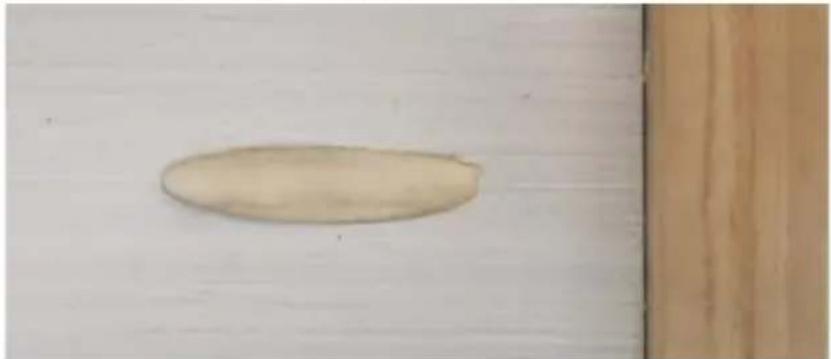
2.7 Pocket Hole Plugs
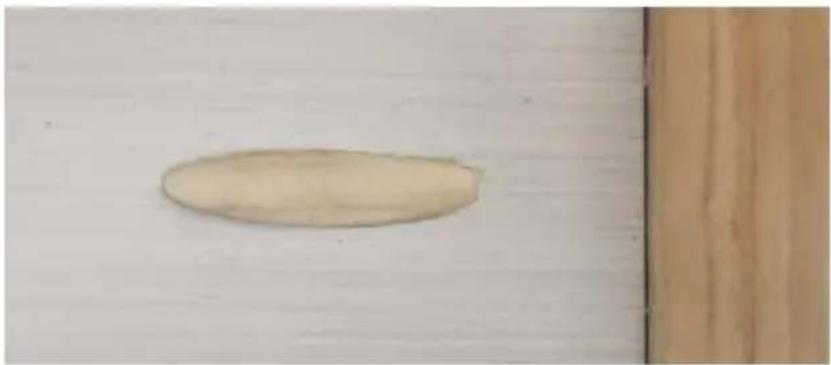
3. Hole Jig Kit (XRS040)
In addition to including the functionality of XRS030, XRS040 also adds extension capabilities.
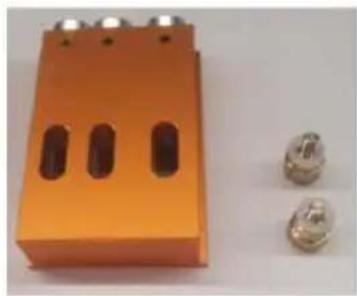
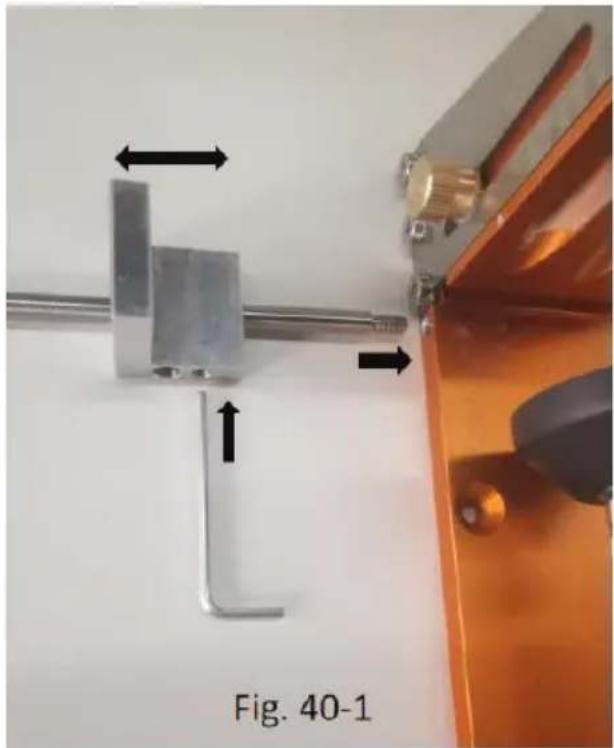
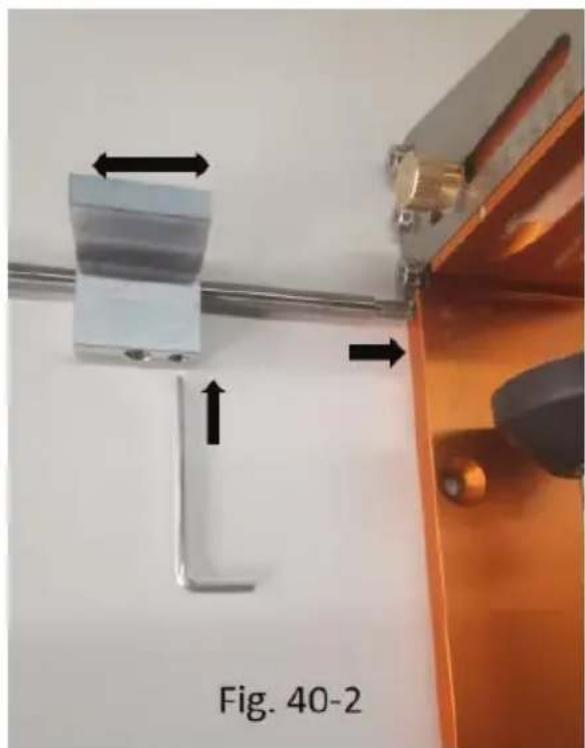
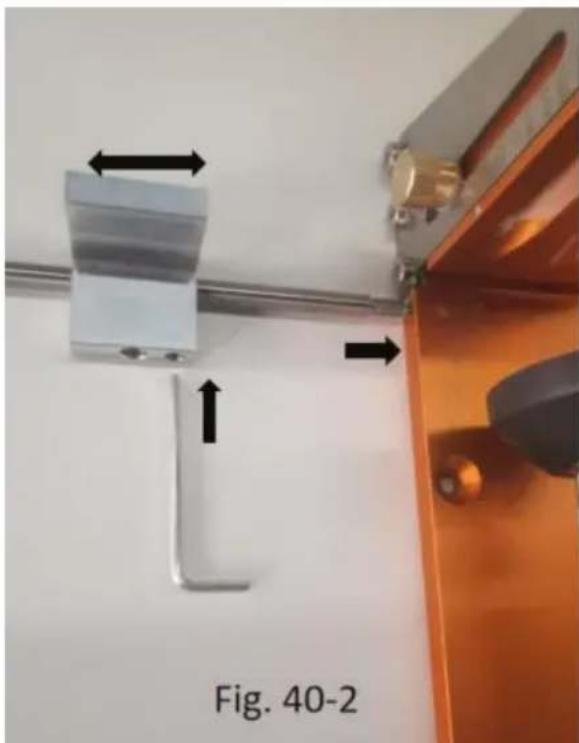
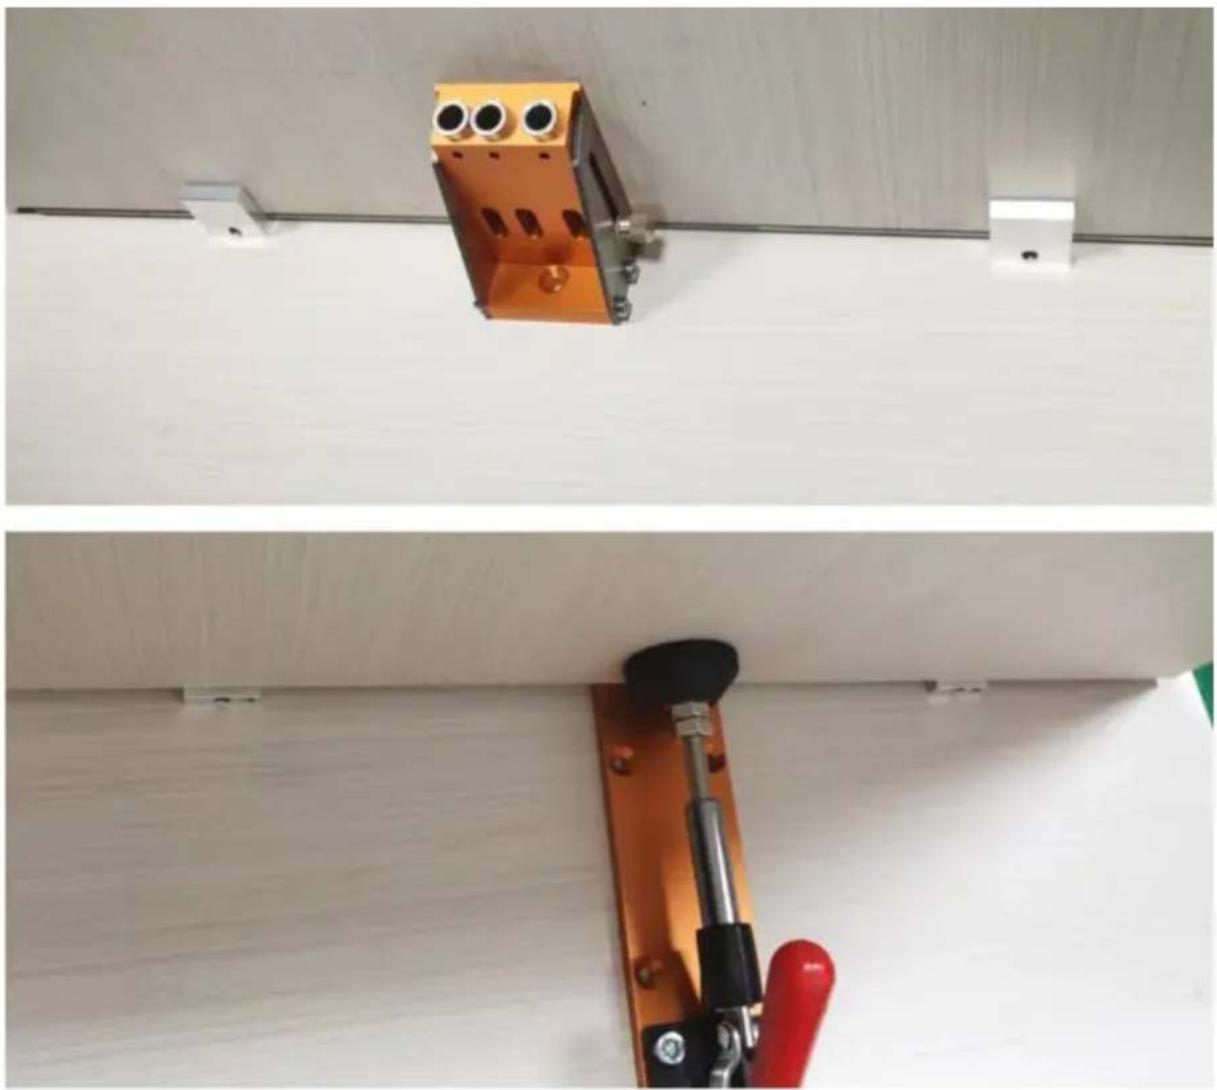
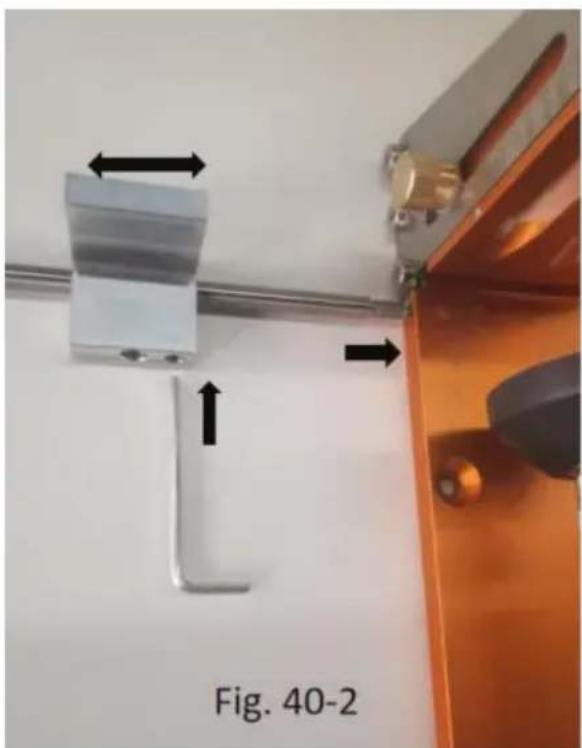
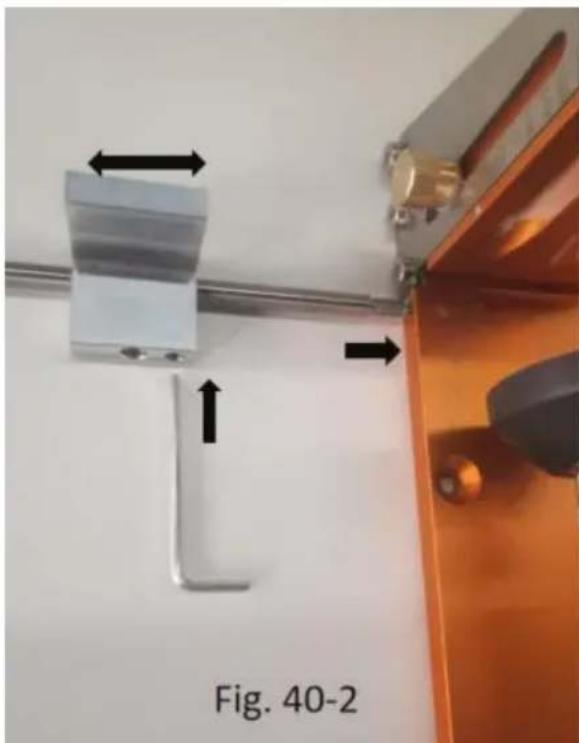
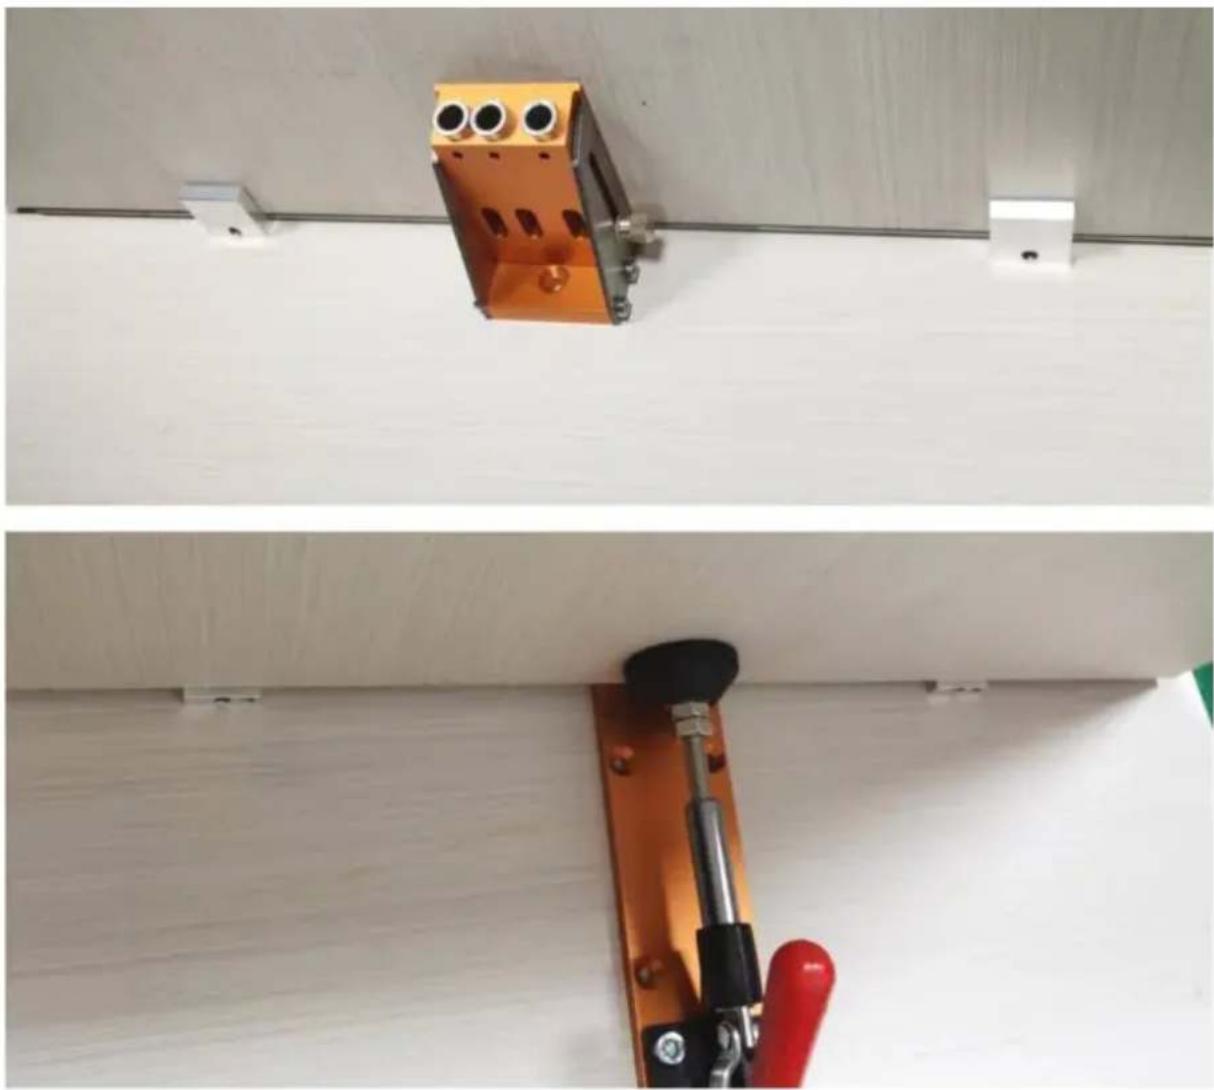
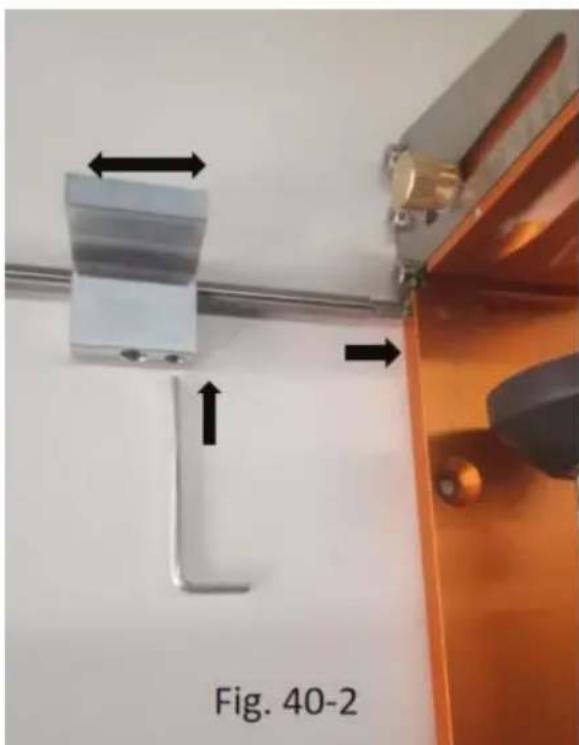
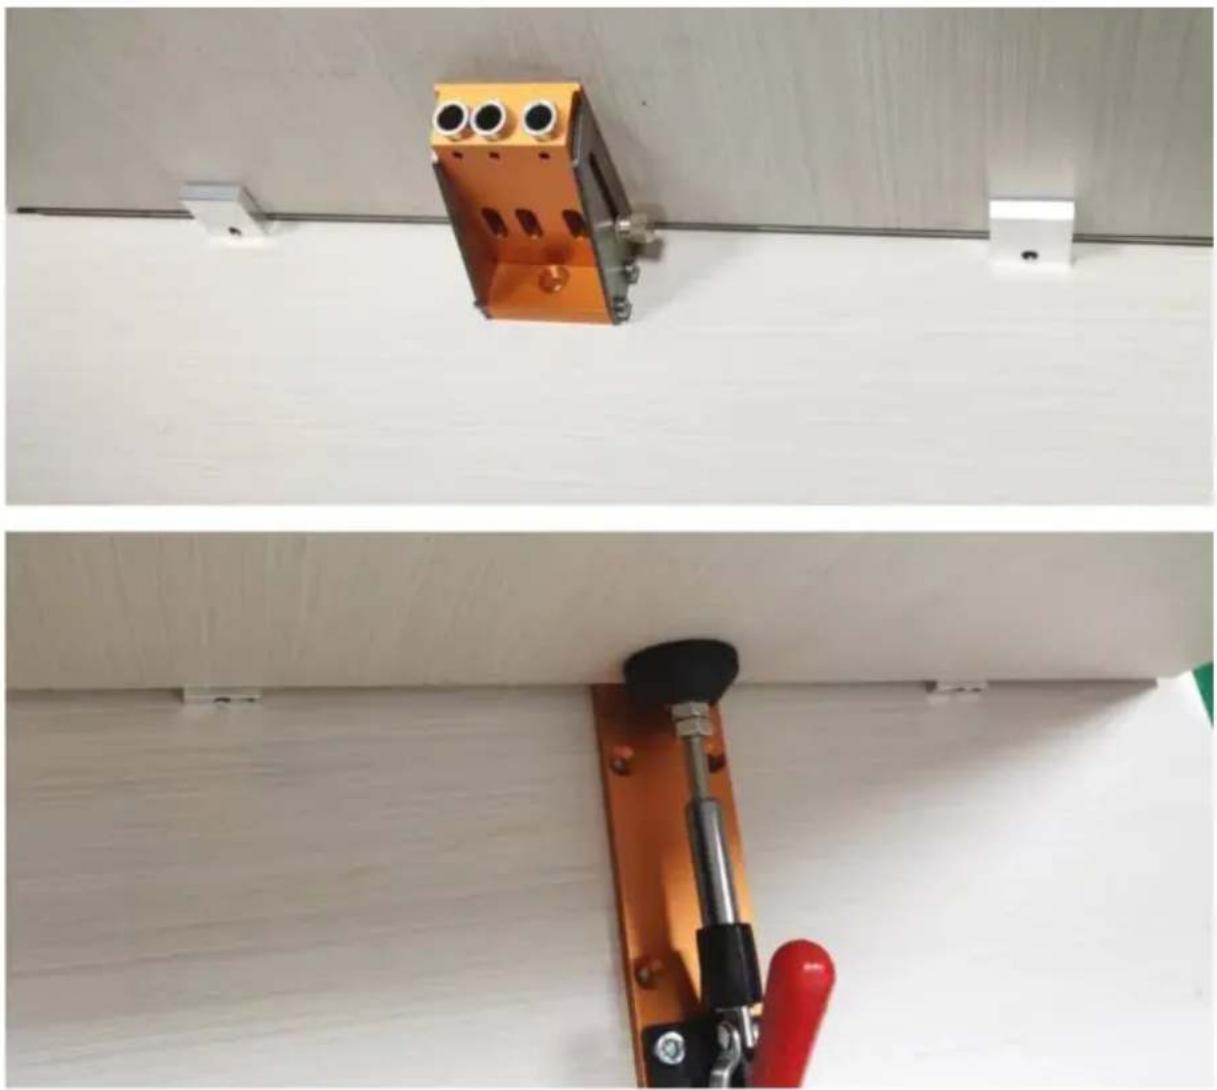
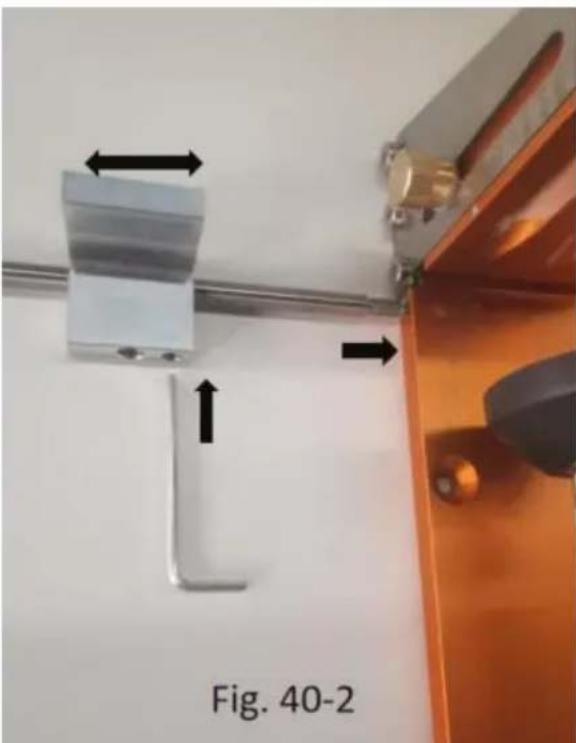
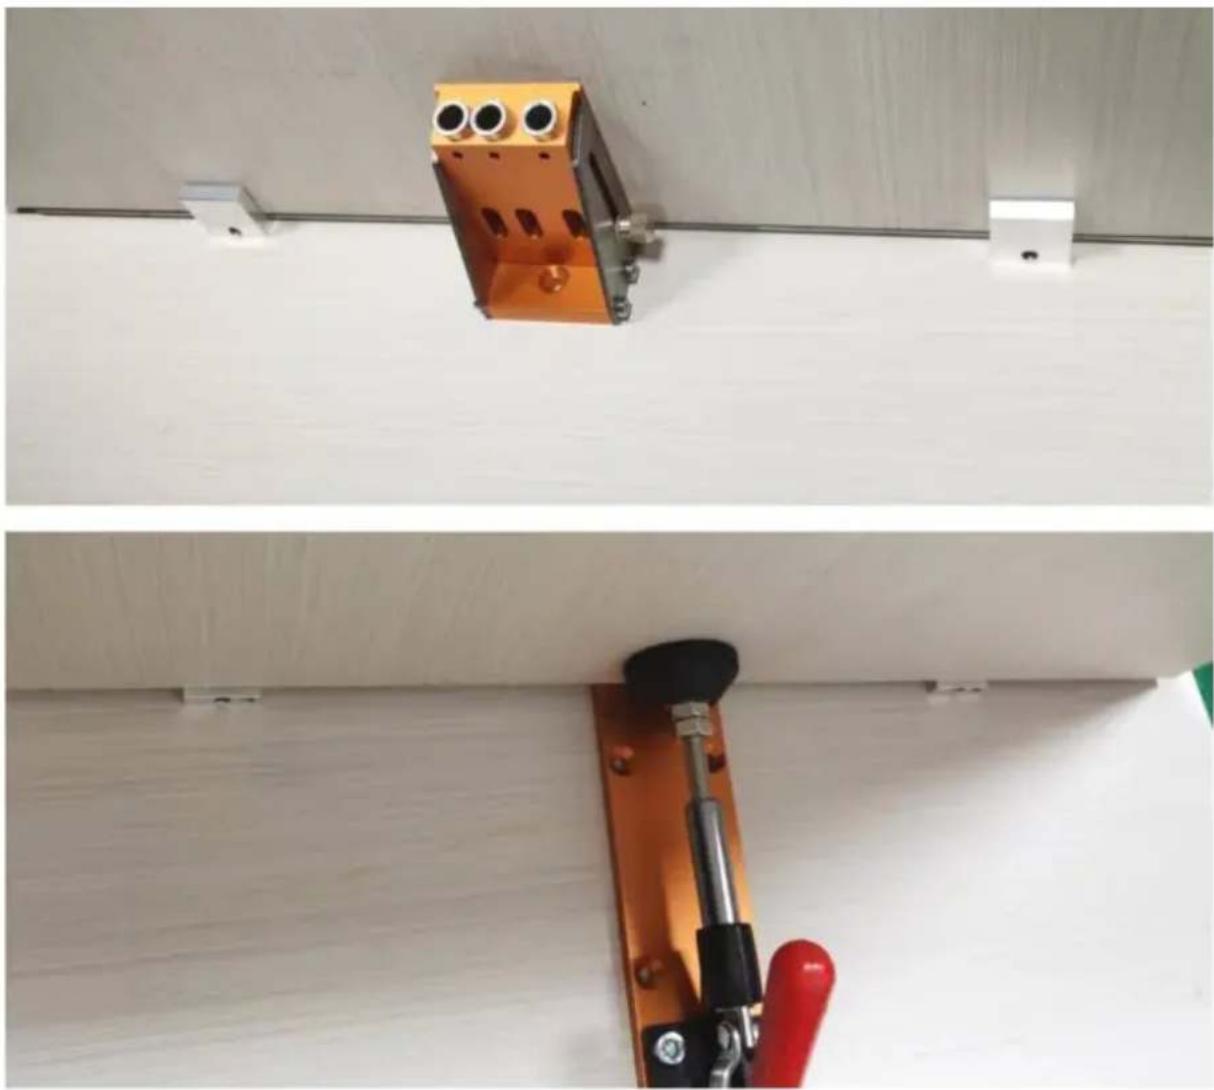
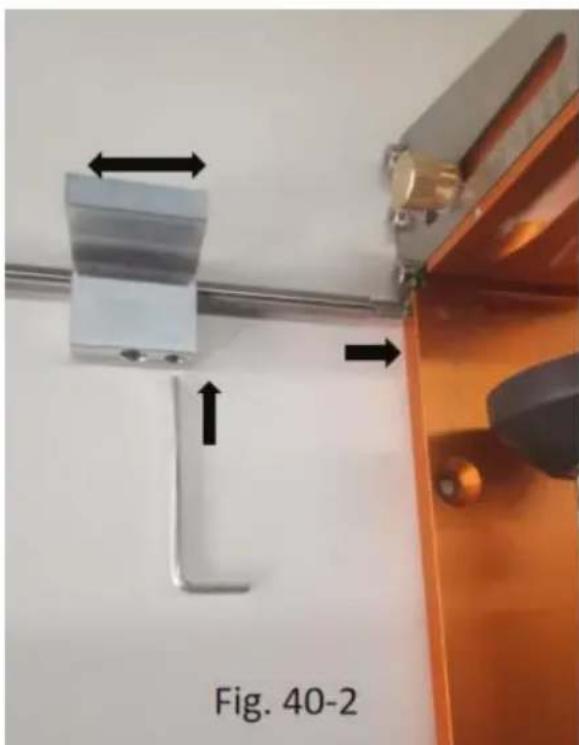
3.1 Sliding block and extended rods
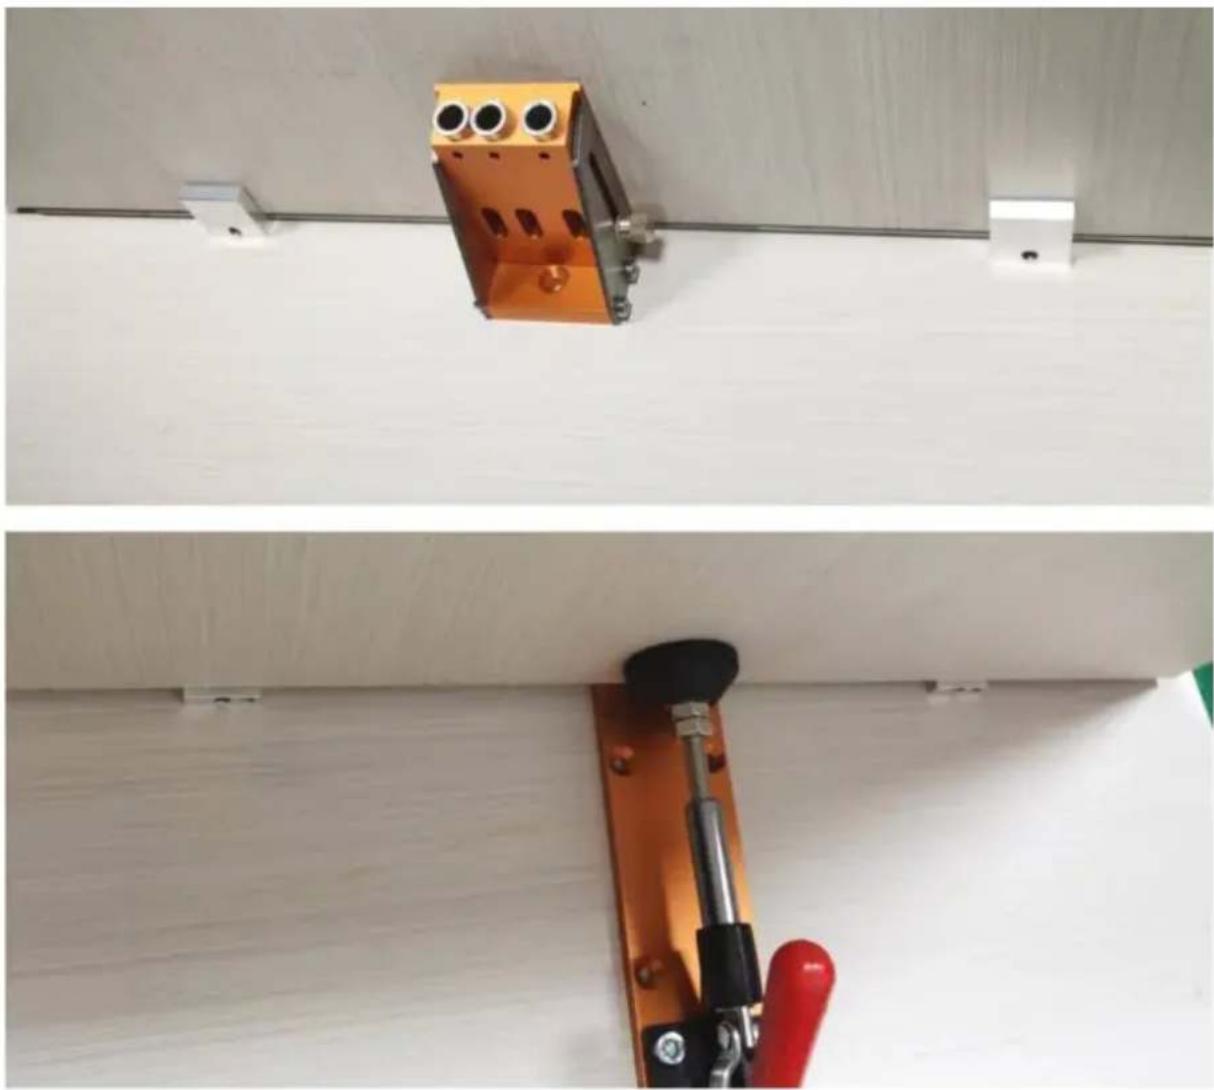
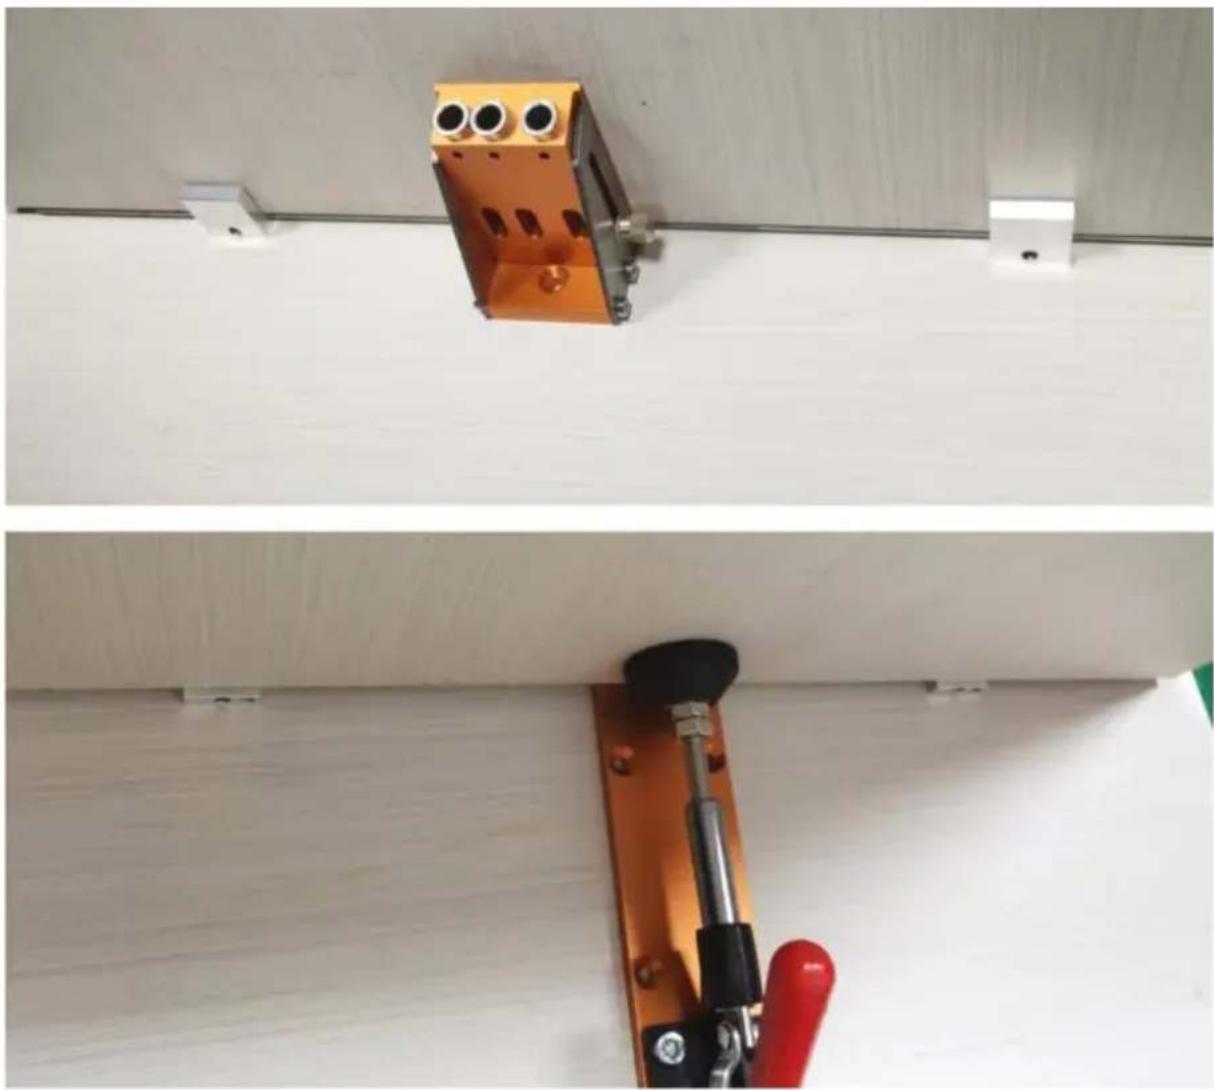
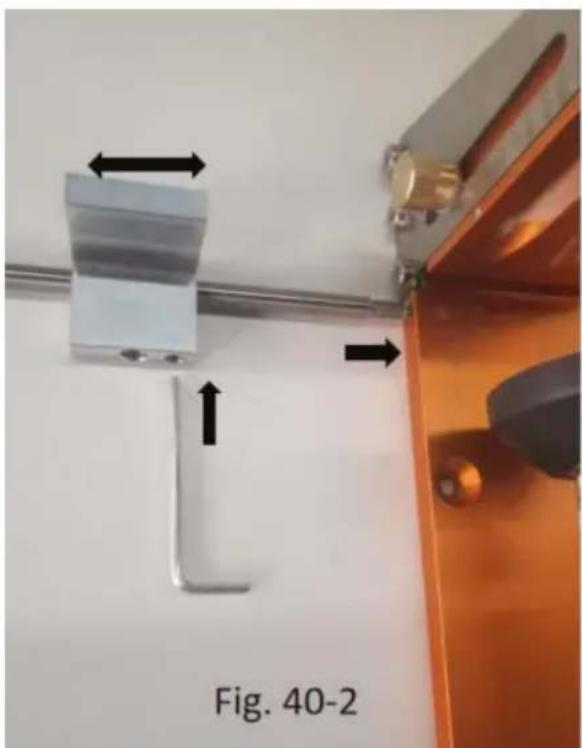
Fig40-1 and Fig 40-2 show two different assemblies. The arrow → indicates the direction of screws. The position of the slider can be shifted horizontally according to your needs.
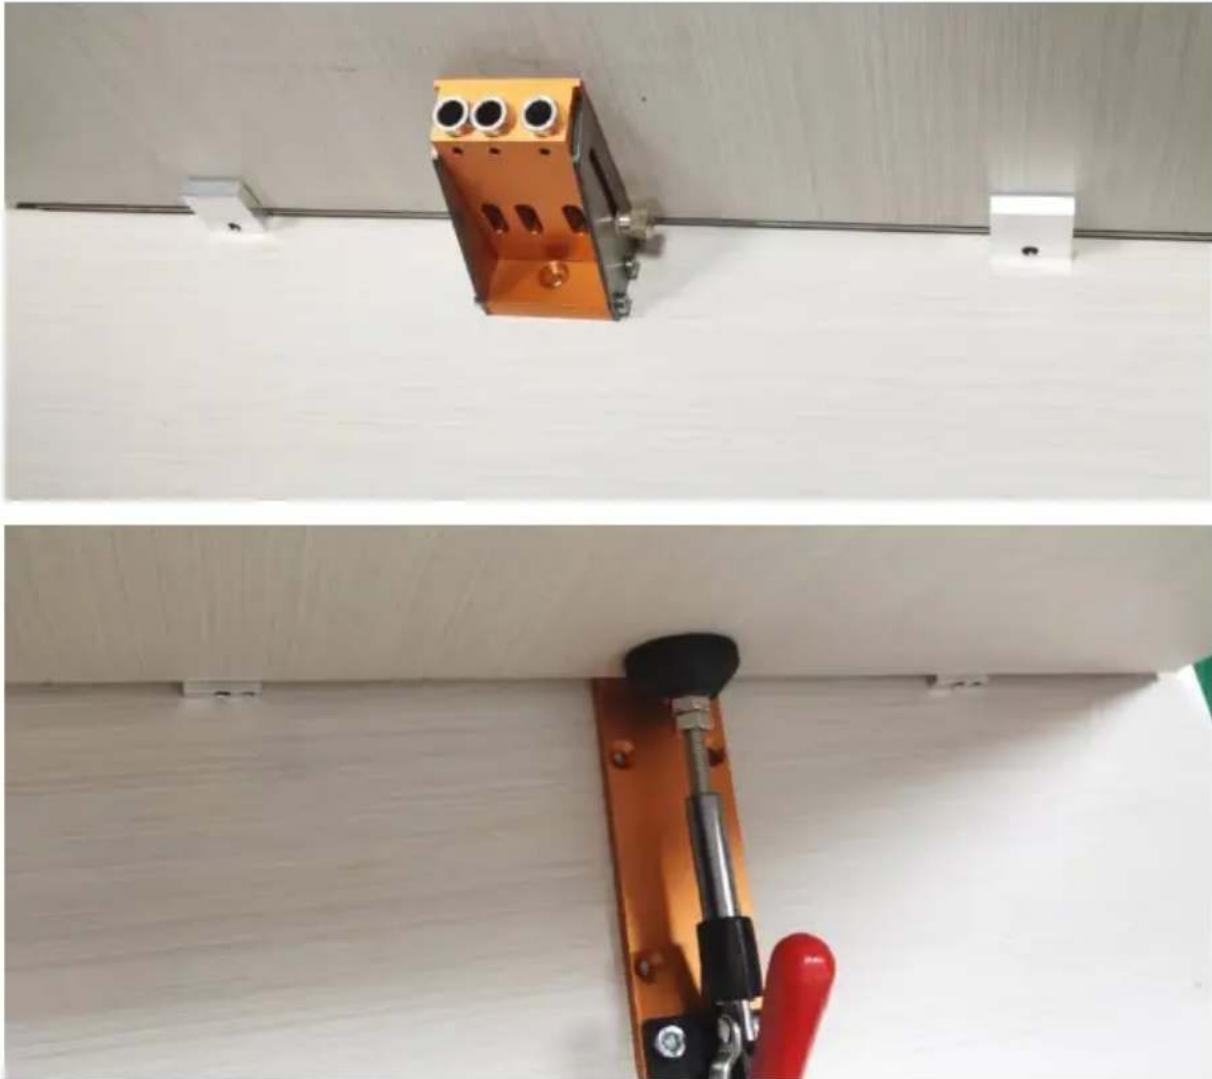
3.2 Drill hole
Troubleshooting Instruction
| Problem | Reasons | Solution |
| There are burrs around the hole. | This speed is too slow | Adjust the rotation speed of the screwdriver. |
| The hole was pierced. | 1. The hole was drilled too deep.2. The hole jig is not secured. | 1. Adjust the stop collar to the proper position on the drill bit2. Use the pliers to ensure the tool is secured.3. Buy the screws of appropriate length |
Maintenance
- Make sure that the drilling is parallel to the direction of force, so the hole sleeve is not easy to wear.
- Wipe off the anti-rust oil after using the drill to avoid rust.
Address: Baoshanqu Shuangchenglu 803long 11hao 1602A-1609shi
Shanghai
Imported to AUS: SIHAO PTY LTD, 1 ROKEVA STREETEASTWOOD NSW 2122 Australia
Imported to USA: VEVOR STORE INC, 9448 RINCHMOND PL #E
RANCHO CUCAMONGA, California, 91730 United States of America
SHUNSHUN GmbH
Römeräcker 9 Z2021,76351
Unit 5 Albert Edward House, The
Pavilions Preston, United Kingdom
MADE IN CHINA
VEVOR®
TOUGH TOOLS, HALF PRICE
Technical Support and E-Warranty Certificate www.vevor.com/support
VEVOR®
TOUGH TOOLS, HALF PRICE
MODEL: XRS030, MODEL: XRS040
Kundenservice@vevor.com
Fig. 030
XRS030:
Fig. 040
XRS040:
1.4 Drilling
- Hole gauge set (XRS030)
2.5 Drilling
2.6 Screwing
3.2 Drilling
Unit 5 Albert Edward House, The
Pavilions Preston, United Kingdom
NEED HELP? CONTACT US!
XRS030:
XRS040:
1.3 Quick fixation
1.4 Drilling a hole
2.5 Drilling a hole
2.6 Screwing
3.2 Drilling a hole
Unit 5 Albert Edward House, The
Pavilions Preston, United Kingdom
MADE IN CHINA
VEVOR®
TOUGH TOOLS, HALF PRICE
www.vevor.com/support
MODEL: XRS030 / XRS040
NEED HELP? CONTACT US!
Klantenservice@vevor.com
Figure 030
XRS030:
A: 1 x Pocket Hole Jig
B: 1 x Single Fitting
C: 2 x Drill Bits
Figure 040
XRS040:
A: 1 x Pocket Hole Jig
B: 1 x Single Fitting
C: 2 x Drill Bits
1.1 Adjustable thickness setting Measure the thickness
1.3 Quick fastening Fit
1.4 Drill hole Drill
- Hole making kit (XRS030)
2.1 Mounting Jig kit
2.5 Drill hole
2.6 Screws
2.7 Pocket hole plugs
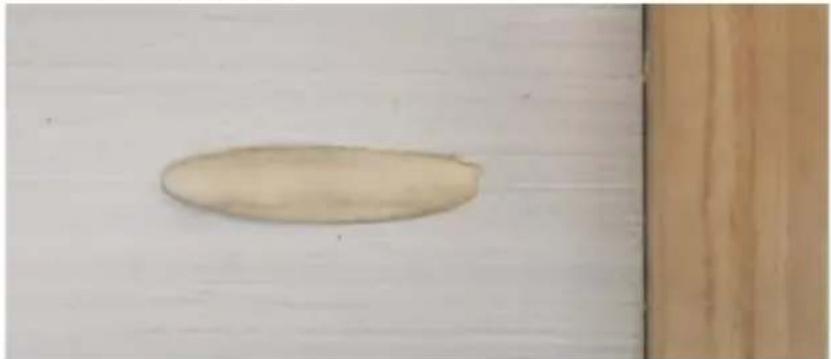
3. Hole Jig Kit (XRS040)
3.2 Drill hole
Unit 5 Albert Edward House, The
Pavilions Preston, United Kingdom
Made in China
VEVOR®
TOUGH TOOLS, HALF PRICE
Technical support and e-warranty certificate www.vevor.com/support
VEVOR®
TOUGH TOOLS, HALF PRICE
www.vevor.com/support
POCKET HOLE JIG
MODEL: XRS030, XRS040
NEED HELP? CONTACT US!
Fig030
XRS030:
A 1 x Pocket Hole Jig
B 1 x Single coupling
C 2 x drill bits
Fig040
XRS040:
A 1 x Pocket Hole Jig
Bÿ1 x Enkelkoppling
Cÿ2 x borr
1.4 Borra hål
- Håljiggsats (XRS030ÿ
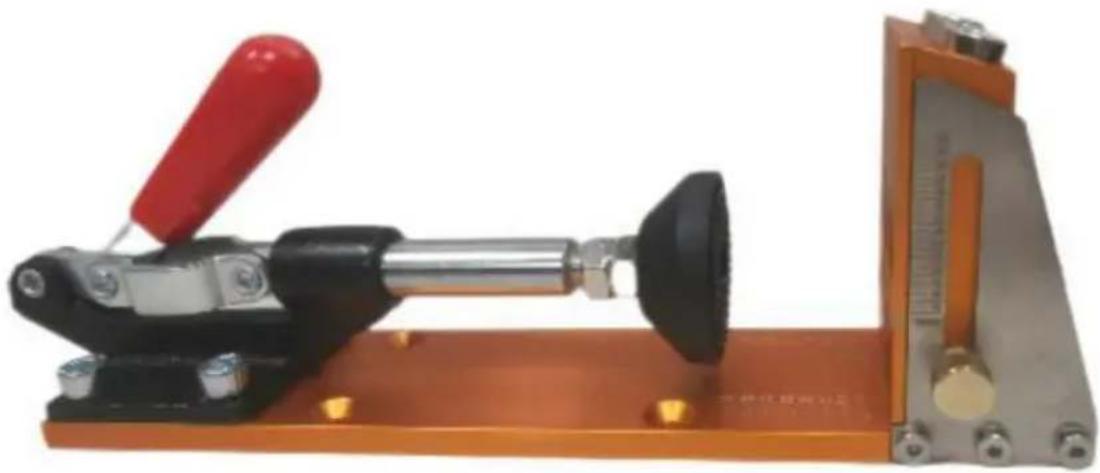
2.1 montering Jigsats
2.5 Borra hål
2.6 Skruva
2.7 Pocket Hole Plugs
3. Håljiggsats (XRS040ÿ
3.2 Borra hål
Felsökningsinstruktion
Unit 5 Albert Edward House, The
Pavilions Preston, United Kingdom
GJORT I KINA
VEVOR®
TOUGH TOOLS, HALF PRICE
www.vevor.com/support
VEVOR®
TOUGH TOOLS, HALF PRICE
www.vevor.com/support
MODEL: XRS040
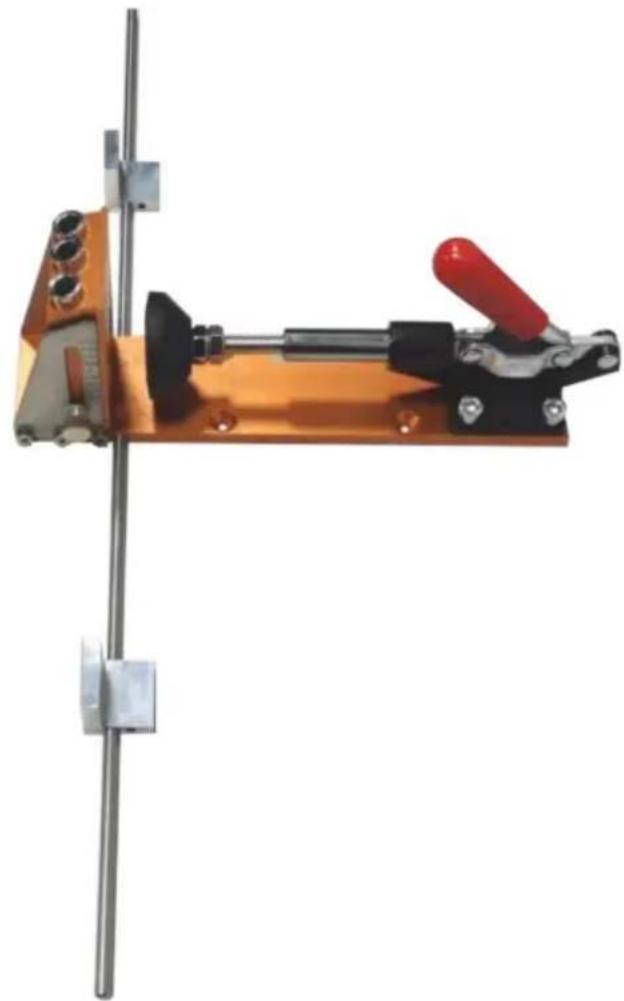
Figure 030
XRS030:
Figure 040
XRS040:
E 2 x hex wrench
F 2 x stop collar
1.1 Adjustable thickness adjustment Measure the thickness
1.4 Drill a
2.5 Drill a
2.6 Screwing
3.2 Drill a hole
Imported to Australia: SIHAO PTY LTD, 1 ROKEVA STREETEASTWOOD NSW 2122 Australia
Pooledas Group Ltd Unit 5 Albert Edward House, The Pavilions Preston, United Kingdom
MADE IN CHINA
VEVOR®
TOUGH TOOLS, HALF PRICE
www.vevor.com/support
POCKET HOLE JIG
MODEL: XRS030 XRS040
Fig030
XRS030:
Fig040
XRS040:
1.4 Drill the hole
2.5 Drilling the hole
2.6 Screwing
3.2 Drilling the hole
Imported into AUS: SIHAO PTY LTD, 1 ROKEVA STREET EASTWOOD NSW 2122 Australia
Unit 5 Albert Edward House, The
Pavilions Preston, United Kingdom
MADE IN CHINA
VEVOR®
TOUGH TOOLS, HALF PRICE
MODEL: XRS030, XRS040
NEED HELP? CONTACT US!
Fig.030
XRS030:
Fig.040
XRS040:
2.6 Screwing in
Imported into AUS: SIHAO PTY LTD, 1 ROKEVA STREETEASTWOOD NSW 2122 Australia
Imported into USA: VEVOR STORE INC, 9448 RINCHMOND PL #E
Unit 5 Albert Edward House, The
Pavilions Preston, United Kingdom
MADE IN CHINA
VEVOR®
TOUGH TOOLS, HALF PRICE
- POCKET HOLE JIG
- VEVOR®
- NEED HELP? CONTACT US
- INSTRUCTIONS
- WARNING
- WORK AREA
- PERSONAL SAFETY
- PERSONAL PROTECTIVE EQUIPMENT
- PERSONAL PRECAUTIONS
- SPECIFIC SAFETY PRECAUTIONS
- STRUCTURE DIAGRAM
- XRS
- ASSEMBLY AND USE
- SINGLE HOLE JIG
- ADJUSTABLE THICKNESS SETTING
- ADJUST THE DEPTH OF THE HOLE
- QUICK FIXTURE
- DRILL HOLE
- ASSEMBLY JIG KIT
- SCREWING
- POCKET HOLE PLUGS
- HOLE JIG KIT (XRS040)
- SLIDING BLOCK AND EXTENDED RODS
- TROUBLESHOOTING INSTRUCTION
- MAINTENANCE
- TOUGH TOOLS, HALF PRICE
- DRILLING
- QUICK FIXATION
- DRILLING A HOLE
- ADJUSTABLE THICKNESS SETTING MEASURE THE THICKNESS
- QUICK FASTENING FIT
- DRILL HOLE DRILL
- MOUNTING JIG KIT
- SCREWS
- BORRA HÅL
- MONTERING JIGSATS
- SKRUVA
- HÅLJIGGSATS (XRS040Ÿ
- FELSÖKNINGSINSTRUKTION
- ADJUSTABLE THICKNESS ADJUSTMENT MEASURE THE THICKNESS
- DRILL A
- DRILL A HOLE
- DRILL THE HOLE
- DRILLING THE HOLE
- SCREWING IN
Brand : Vevor
Model : XRS040
Category : DIY tool