ZK-RY-09 - Tent Vevor - Free user manual and instructions
Find the device manual for free ZK-RY-09 Vevor in PDF.

| Brand | Vevor |
| Model | ZK-RY-09 |
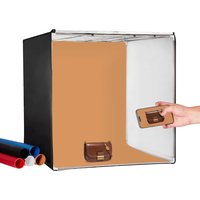
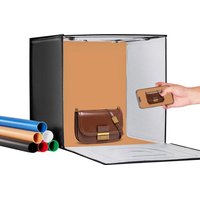
| Product Type | Foldable studio tent with built-in LED lighting |
| Power Supply | AC 110-240 V, 50/60 Hz |
| Power | 2-40 W (adjustable) |
| Illuminance | 50-3500 lux (adjustable) |
| Color Temperature | 3000-5600 K (adjustable) |
| Color Rendering Index (CRI) | ≥ 95 |
| Shooting Window Dimensions | Approx. 49 cm (20 inches) |
| External Tent Dimensions | Approx. 50 x 50 x 50 cm (cube) |
| Weight | Approx. 2.5 kg |
| Number of Color Backgrounds Included | 6 |
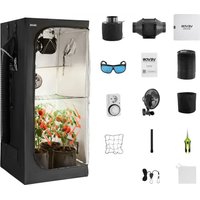
| Included Accessories | Tent, carry case/bag, power supply, light diffuser, color backgrounds (x6), instruction manual |
| Main Functions | Adjustable brightness, adjustable color temperature, diffused lighting, foldable, portable |
| Care and Cleaning | Unplug before cleaning; clean with a soft dry cloth; do not use abrasive products. Store in a dry place. |
| Safety | Do not look directly at the lit LEDs; use only the supplied adapter; do not expose to excessive humidity. |
| Spare Parts and Repairability | Replacement parts available on request from the manufacturer (adapter, diffuser, cable). |
| Warranty | Technical support and electronic warranty certificate at www.vevor.com/support |
Frequently Asked Questions - ZK-RY-09 Vevor
User questions about ZK-RY-09 Vevor
0 question about this device. Answer the ones you know or ask your own.
Ask a new question about this device
Download the instructions for your Tent in PDF format for free! Find your manual ZK-RY-09 - Vevor and take your electronic device back in hand. On this page are published all the documents necessary for the use of your device. ZK-RY-09 by Vevor.
USER MANUAL ZK-RY-09 Vevor
Technical Support and E-Warranty Certificate
www.vevor.com/support
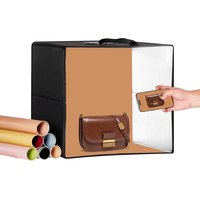
Foldable LED Ring Light studio Box USER MANUAL MODEL: ZK-RY-09
We continue to be committed to provide you tools with competitive price. "Save Half", "Half Price" or any other similar expressions used by us only represent the estimate of savings you might benefit from buying certain tools with us compared to top brands and does not necessarily mean to cover all categories of tools offered. We are kindly reminded to verify carefully when you are placing an order with us actually saving half in comparison with the top major brands.
MODEL:ZK-RY-09
(The picture is for reference only, please refer to the actual obje
NEED HELP? CONTACT US!
Have product questions? Need technical support? Please feel fr contact us:
Technical Support and E-Warranty Certificate www.vevor.com/support
This is the original instruction, please read all manual instruction carefully before operating. VEVOR reserves a clear interpretation user manual. The appearance of the product shall be subject to product you received. Please forgive us that we won't inform you there are any technology or software updates on our product.
| Warning-To reduce the risk of injury, user must read in manual carefully. | |
| This device complies with Part 15 of the FCC Rules. 0 is subject to the following two conditions:(1)This device cause harmful interference, and (2)this device must acce interference received, including interference that may cause undesired operation. | |
| This product is subject to the provision of European Di 2012/19/EC. The symbol showing a wheelie bin crossed through indicates that the product requires separate refus collection in the European Union. This applies to the p and all accessories marked with this symbol. Products r as such may not be discarded with normal domestic w must be taken to a collection point for recycling electric electronic devices |
Thank you very much for choosing Studio Box. Please read this m before using the product as it may contain some information you don know. If you have any questions, please feel free to send us email t amazon.
PACKAGE LIST
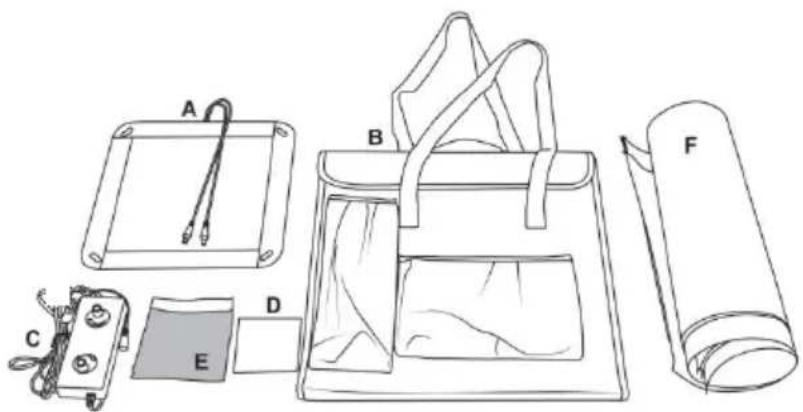
A. Studio Tent 1(It has been installed on the cabinet)
B. Box + handbag in one 1 (Box + handbag integrated light box)
C. Power Supply 1
D. Instructions 1
E. Light Diffuser 1
F. Colored Backdrops 6
STUDIO BOX ASSEMBLY
Step 1: Open the box and make sure all parts are available. See Fig

Figure 1
Step 2:Start by laying the tent on a flat surface, then open out the tent. See Figure 2.
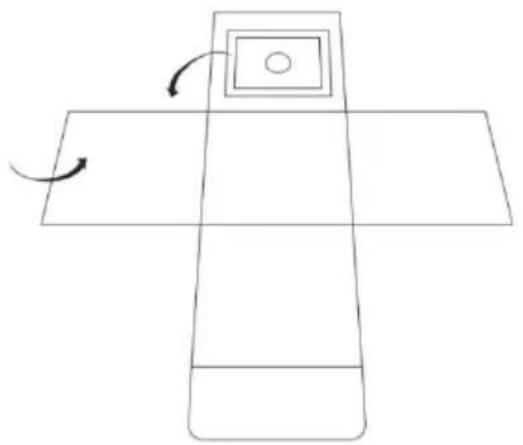
Figure 2
Step 3: Unfold the panels of the light tent, and then attach the Velcro together to form a cube. See Figure 3.
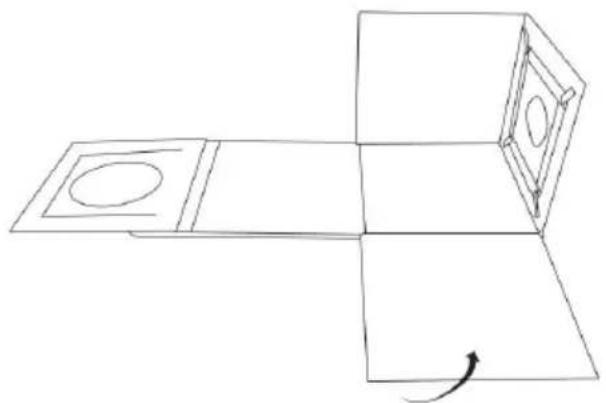
Figure 3
Step 4: Now fold the first three panels over, to attach them to the bc panel. See Figure 4.

Figure 4
Step 5:Finally fold the front panel of the tent up, and then attach it rest of the light tent using the Velcro edges. See Figure 5.
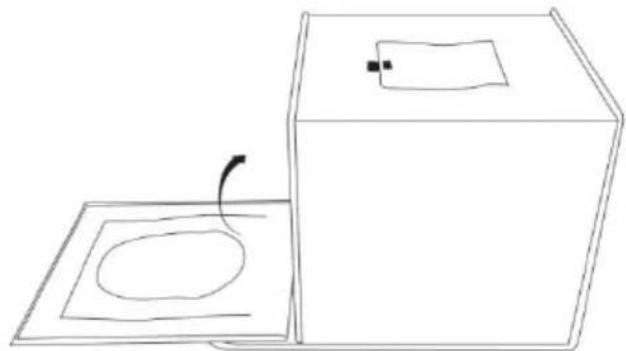
Figure 5
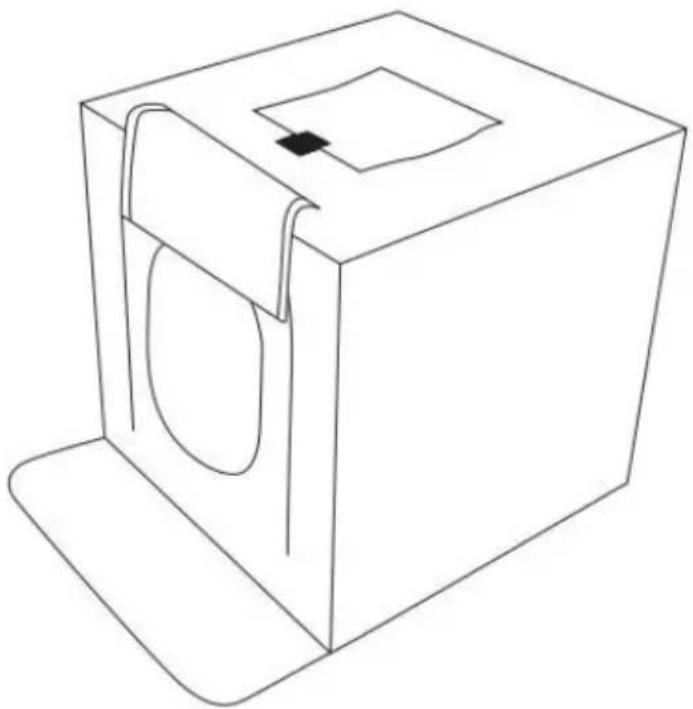
Step 6: Roll up the flaps covering the front-shooting window, and attach the Velcro at the top of the LED light tent. You can also shoot top of the light tent. Simply open the flap covering the top shoc window.See Figure 6.
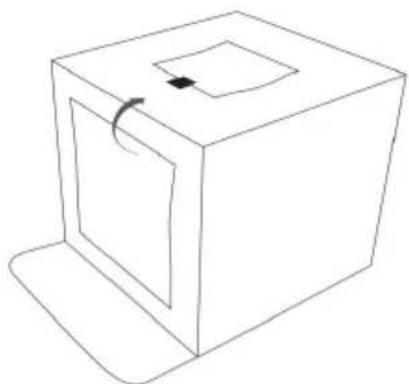
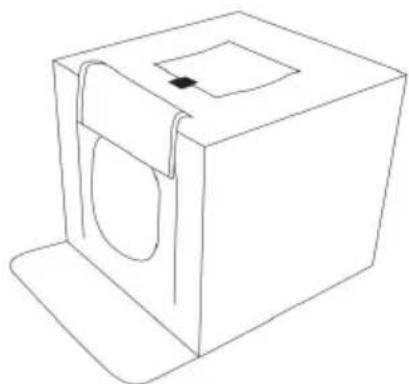
Figure 6
Step 7: To use one of the four coloured backdrops, open the top of the light and then slide in your backdrop of choice into place. Attach the backdrop to the back of the tent using the Velcro tabs located at the top left and in corners of the light tent. Tuck the bottom edge of the background into a pocket located at the front of the tent. See Figure 7.
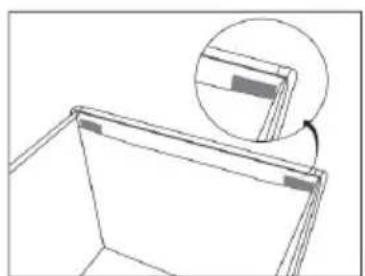

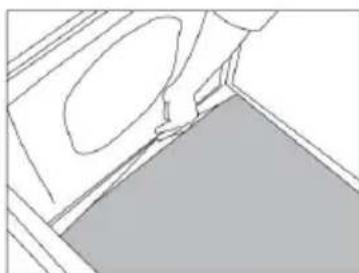
Figure 7
Step 8: Connect the cable, power the tent and switch the light on. See Figure 8.
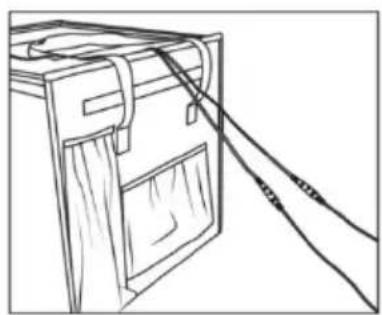
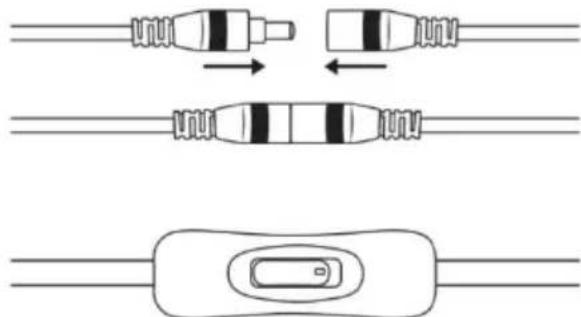
Figure 8
Step 9:Also comes with diffusion material to further diffuse light from LED. To use the diffusion material, open the top of the light tent attach the material to the left and right sides, and then close the again.See Figure 9.
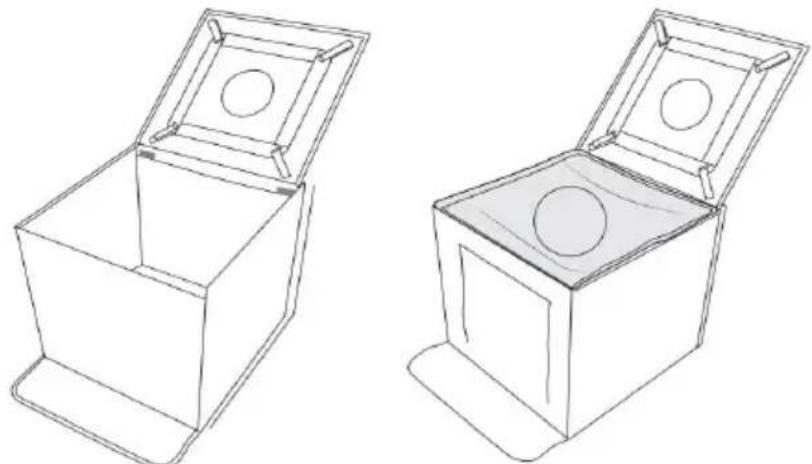
Figure 9
Step 10:Adjustable Brightness: You can adjust brightness gradually and steadily with the dimmer switch, which helps you to take professional pictures and photos of small to large sized objects. See Figure 10
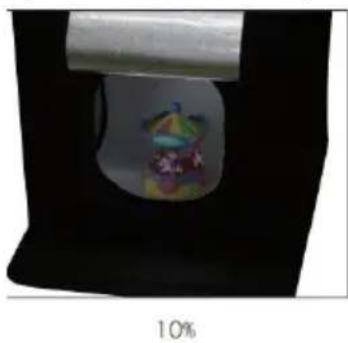
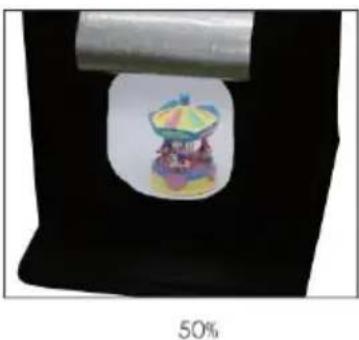
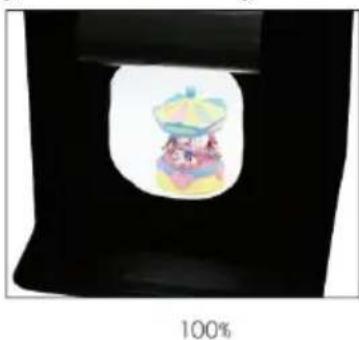
Figure 10
Step 11: Brightness can be adjusted: turn the power knob to adjust the brightness. No matter whether you're shooting with a DSLR camera or a smartphone, all photographs will be satisfying. See Figure 11.
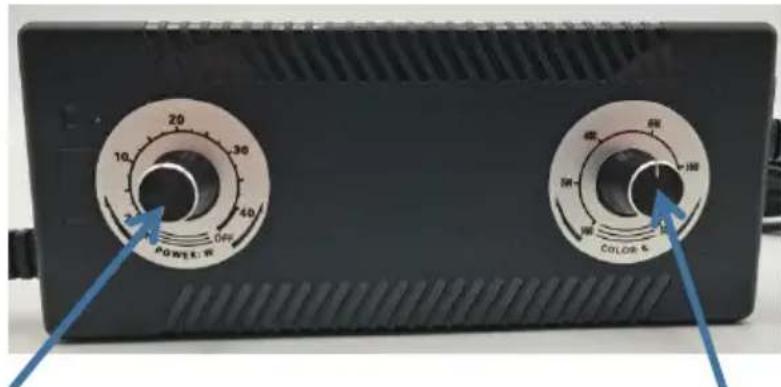
Figure 11
Brightness adjustable switch Color temperature adjustment switch
- Brightness adjustable switch: Turn off the LED light by turning it counterclockwise to the end.
- Brightness adjustable switch: Rotate clockwise to the end for maximu brightness.
Color temperature adjustment switch:Rotate clockwise to turn the color temperature up, counterclockwise to turn the color temperature down (the higher the number, the higher the temperature, the lower the number)
Caution: The light panels are very bright. Do not look directly at illuminated light panel for long time when the light panel is lit.
Note:The factory power adapter must be used, if you use a non-factory power adapter, it will cause damage to the LED light; severe cases, it may cause a fire.
Storage instructions
- Unplug the power cord, disconnect the light panel and power adapter to take out the backdrops and light diffuser.
2.Follow the steps in Figure 12 to fold the tent step by step.
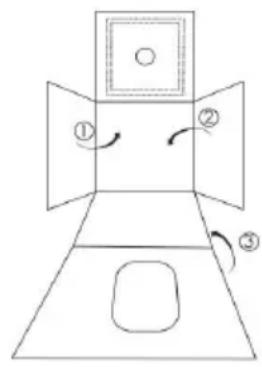

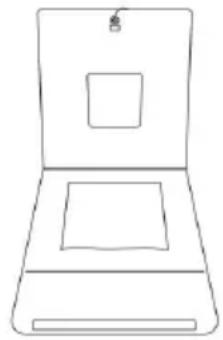

Figure 12
3.Put the adapter, light diffuser and backdrops in the pouches, now y can take your light box everywhere you want to go!See Figure 13.
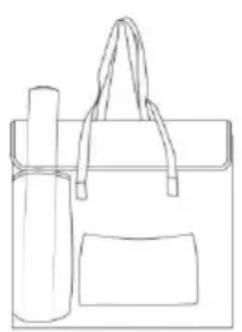

Figure 13
Specifications
| Enter the power supply | AC110-240V 50/60Hz |
| Actual Power | 2-40W adjustable |
| Illuminance | 50-3500 LM |
| Color Temperature | 3000-5600K adjustable |
| Color rendering index | ≥95 |
| Lightbox size | 20FT(49cm) |
- What causes the flickering light?
a. Whether the power adapter is not a factory accessory.
b.Environmental temperature is too high, it may have over temperature protection.
c. Air environment is too humid.
d. There was a problem with the power adapter.
- What may cause weak light?
a. Adjust the dimmer switch to 80% rotation.
b. Whether the power adapter is not a factory accessory.
c. If there are other light sources around.
d. There was a problem with the power adapter.
Manufacturer: Shanghaiuxinmuyeyouxianggsi
Address: Shuangchenglu 803nong11hao1602A-1609shi, baoshanqu, shanghai 200000 CN.
Imported to AUS: SIHAO PTY LTD, 1 ROKEVA STREETEASTWOOD NS 2122 Australia
Imported to USA: Sanven Technology Ltd., Suite 250, 9166 Anaheim Pla Rancho Cucamonga, CA 91730

E-CrossStu GmbH
Mainzer Landstr.69, 60329 Frankfurt am Ma

YH CONSULTING LIMITED.
C/O YH Consulting Limited Office 147, Centurion H, London Road, Staines-upon-Thames, Surrey, TW18 4
VEVOR
TOUGH TOOLS, HALF PRICE
Technical Support and E-Warranty Certificate www.vevor.com/support
VEVOR
TOUGH TOOLS, HALF PRICE
C/O YH Consulting Limited Bureau 147, Centurion House,
London Road, Staines-upon-Thames, Surrey, TW18 4AX
VEVOR
TOUGH TOOLS, HALF PRICE
www.vevor.com/support
C/O YH Consulting Limited Office 147, Centurion House, London Road, Staines-upon-Thames, Surrey, TW18 4AX
VEVOR
TOUGH TOOLS, HALF PRICE
Supporto technique certificate garanzia
elettronica www.vevor.com/support
Importato in AUS: SIHAO PTY LTD, 1 ROKEVA STREETEASTWOOD NSW 2122Australia
C/O YH Consulting Limited Ufficio 147, Centurion House, London Road, Staines-upon-Thames, Surrey, TW18 4AX
VEVOR
TOUGH TOOLS, HALF PRICE
Importado a AUS: SIHAO PTY LTD, 1 ROKEVA STREETEASTWOOD NSW
2122 Australia
Importado a EE. UU.: Sanven Technology Ltd., Suite 250, 9166 Anaheim Place,
Rancho Cucamonga, CA 91730
E-CrossStu GmbH
Mainzer Landstr.69, 60329 Francfort del Meno.
YH CONSULTING LIMITADO.
C/O YH Consulting Limited Oficina 147, Centurion House,
London Road, Staines upon Thames, Surrey, TW18 4AX
VEVOR
TOUGH TOOLS, HALF PRICE
Soporte专业技术o y certificate de garantia electrònica www.vevor.com/support
VEVOR
TOUGH TOOLS, HALF PRICE
Import do AUS: SIHAO PTY LTD, 1 ROKEVA STREETEASTWOOD NSW
2122 Australii
Import do USA: Sanven Technology Ltd., Suite 250, 9166 Anaheim Place, Rancho
Cucamonga, CA 91730
E-CrossStu GmbH
Mainzer Landstr.69, 60329 Frankfurt nad Menem.
YH CONSULTING SPOLEKA Z OGRANICZONA, ODPOWIEDZIALNOSCIA.
C/O YH Consulting Limited Office 147, Centurion House,
London Road, Staines-upon-Thames, Surrey, TW18 4AX
VEVOR
TOUGH TOOLS, HALF PRICE
HULP NODIG? NEEM CONTACT MET ONS OP!
C/O YH Consulting Limited Kantoor 147, Centurion House, London Road, Staines-upon-Thames, Surrey, TW18 4AX
VEVOR
TOUGH TOOLS, HALF PRICE
Technische ondersteuning en e-garantiecertificaat www.vevor.com/support
VEVOR®
TOUGH TOOLS, HALF PRICE
www.vevor.com/support
Vikbar LED-ringljus studiobox ANVÄNDARMANUAL
MODELL: ZK-RY-09
C/O YH Consulting Limited Office 147, Centurion House, London Road, Staines-upon-Thames, Surrey, TW18 4AX
VEVOR
TOUGH TOOLS, HALF PRICE