
SS-601 - Reception desk Vevor - Free user manual and instructions
Find the device manual for free SS-601 Vevor in PDF.

User questions about SS-601 Vevor
0 question about this device. Answer the ones you know or ask your own.
Ask a new question about this device
Download the instructions for your Reception desk in PDF format for free! Find your manual SS-601 - Vevor and take your electronic device back in hand. On this page are published all the documents necessary for the use of your device. SS-601 by Vevor.
USER MANUAL SS-601 Vevor
Technical Support and E-Warranty Certificate www.vevor.com/support
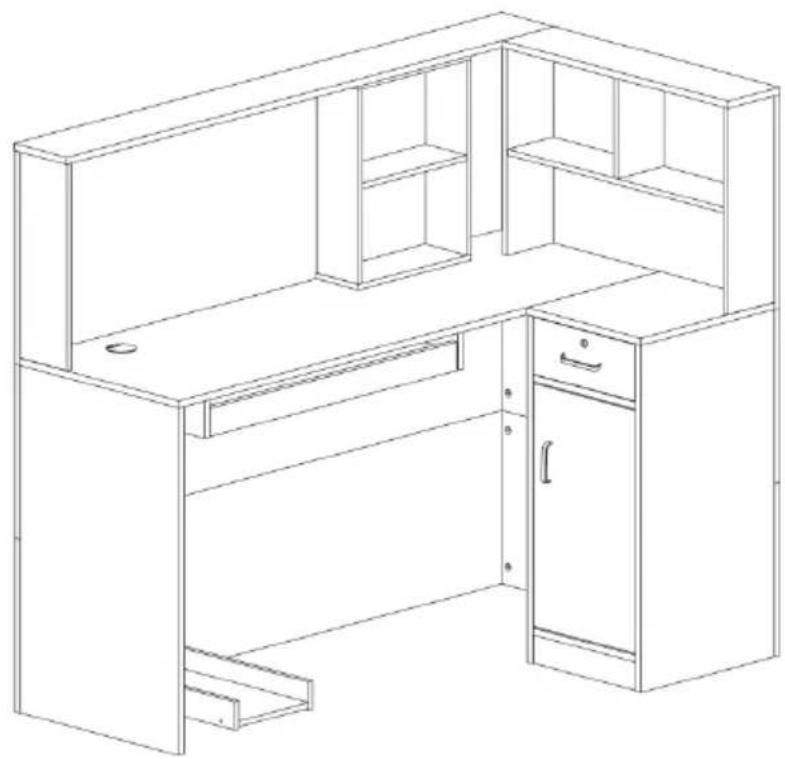
RECEPTION DESK
USER MANUAL
MODEL:SS-601
We continue to be committed to provide you tools with competitive price. "Save Half", "Half Price" or any other similar expressions used by us only represents an estimate of savings you might benefit from buying certain tools with us compared to the major top brands and does not necessarily mean to cover all categories of tools offered by us. You are kindly reminded to verify carefully when you are placing an order with us if you are actually Saving Half in comparison with the top major brands.
MODEL:SS-601
NEED HELP? CONTACT US!
Have product questions? Need technical support? Please feel free to contact us:
Technical Support and E-Warranty Certificate www.vevor.com/support
This is the original instruction, please read all manual instructions carefully before operating. VEVOR reserves a clear interpretation of our user manual. The appearance of the product shall be subject to the product you received. Please forgive us that we won't inform you again if there are any technology or software updates on our product.
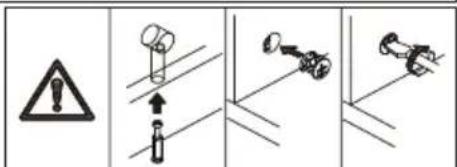
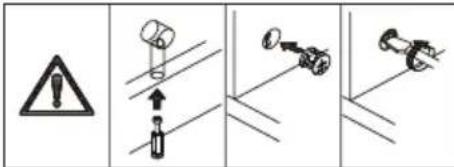
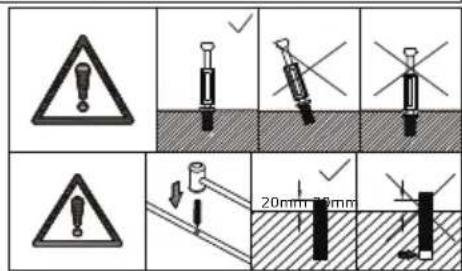
WARNING:
Read this material before using this product. Failure to do so can result in serious injury.
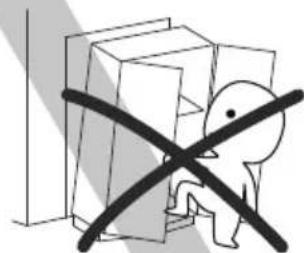
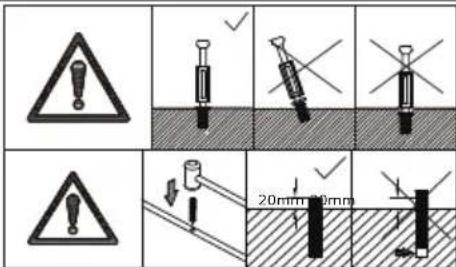
Assembly precautions
- Assemble only according to these instructions. Improper assembly can create hazards.
- Wear ANSI-approved safety goggles and heavy-duty work gloves during assembly.
- Keep the assembly area clean and well-lit.
- Keep bystanders out of the area during assembly.
- Do not assemble if tired or when under the influence of alcohol, drugs or medication.
- The product capabilities apply to properly and completely assembled products only.
- Assemble on a flat, level, hard and smooth surface capable of safely supporting the Reception Desk.
- For additional information regarding the parts listed in the following pages, please refer to the Assembly Diagram of this manual. Unwrap and separate all parts in a clean work area.
Use precautions
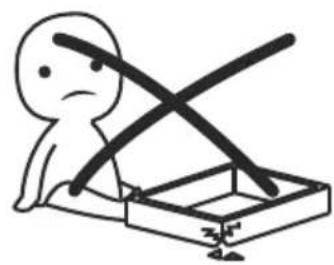
- DO NOT SIT OR STAND ON THIS ITEM.
- This product is not a toy. Do not allow children to play with or near this item.
- Do not exceed specified weight capacities.
- Use only on a flat, level, hard, and smooth surface that can safely support a fully loaded Reception Desk.
- Use as intended only.
- Inspect before every use; do not use if parts are loose or damaged.
SAVE THIS MANUAL

IMPORTANT INFORMATION!
Please read the entire manual before starting to assemble and/or using this product. Follow the manual thoroughly and keep it for further reference.

AVOID SCRATCHES!
In order to avoid scratching, this furniture should be assembled on a soft layer-could be a rug.


IMPROVE EFFICIENCY!
Try to find a partner to install with you, which can speed up the installation efficiency and shorten the time.

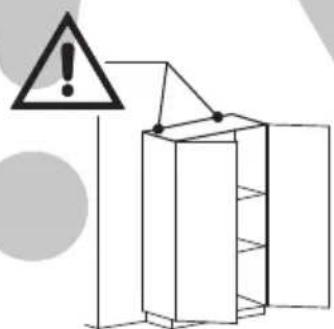
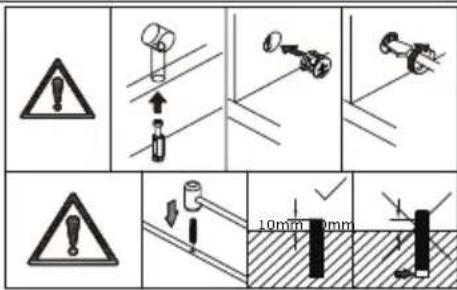
ANTI-TOPPLE WARNING!
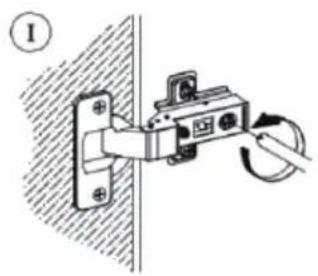
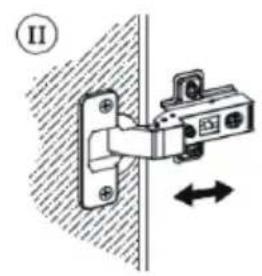
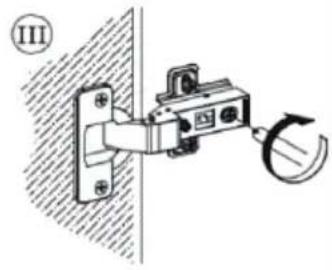
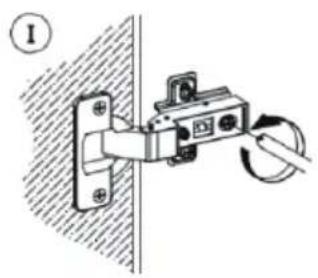
Overturned furniture can cause serious or fatal crush injuries. To prevent tipping over, be sure to use the wall attachment. If it is not included with this product, Please purchase the wall attachment that fit your wall. If unsure, seek professional advice. Please read and follow each step of the instructions carefully.
IMPORTANT!
It is important that any product which is assembled using any kind of screw is re-tightened 2 weeks after assembly, and once every 3 months - in order to assure stability through-out the lifespan of the product.
For regular maintenance and cleaning of the product, for the frame, please use a rag dipped in neutral detergent to fully wipe it, and then dry it with a clean rag. For glass materials, wipe with a rag dampened with water glass cleaner, and then dry with a dry rag.
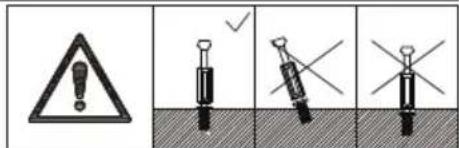
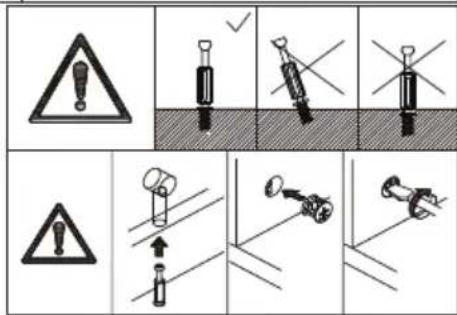
Do not use an electric screwdriver, and do not use too much force when installing, because the board is easy to break.
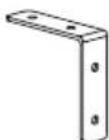
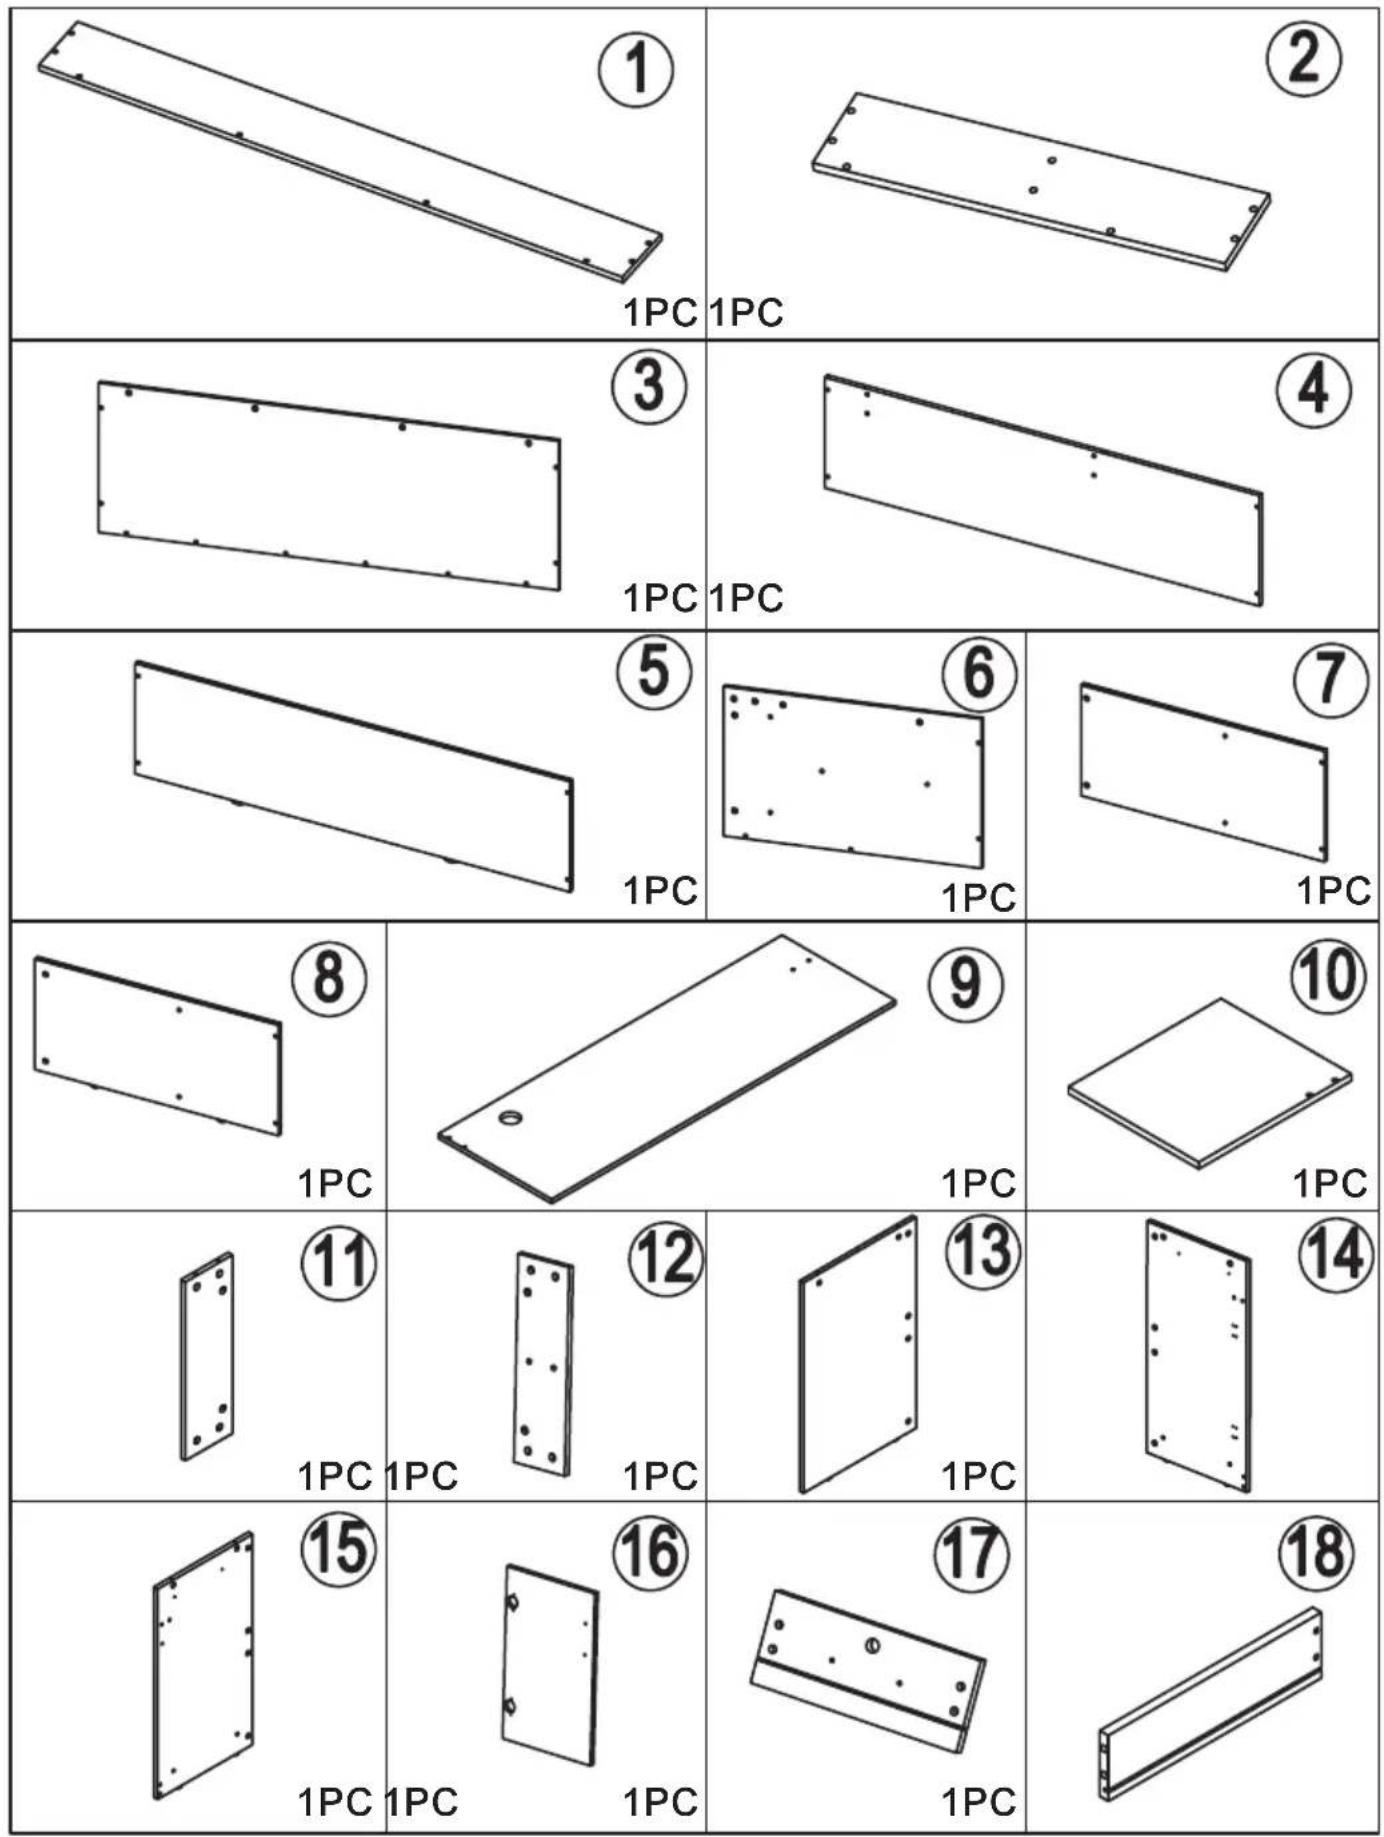
PARTS LIST

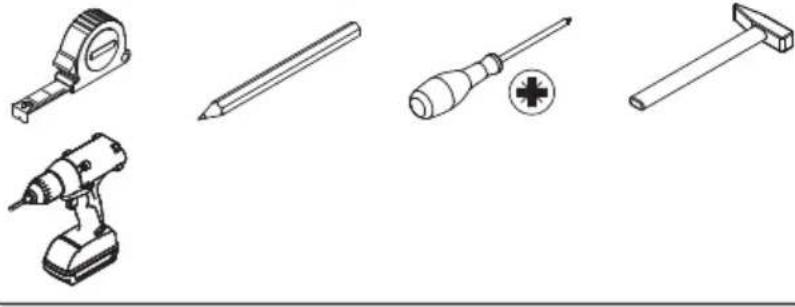
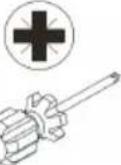
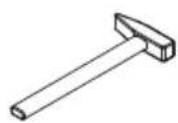
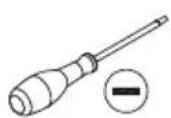
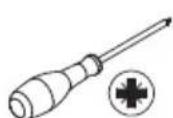
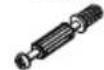
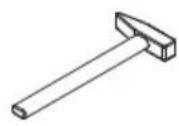
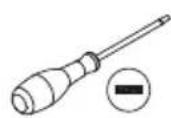
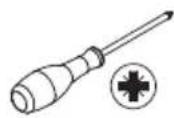
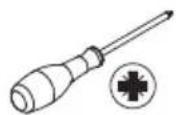
Please prepare the following tools


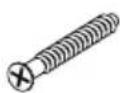
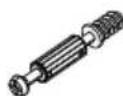
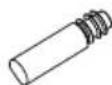
When installing, please carefully confirm whether each screw corresponds to the manual, accessories with similar shapes can be distinguished by size

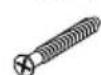
A×20B×18
M3.5×12mm
M5×40mm
C×88
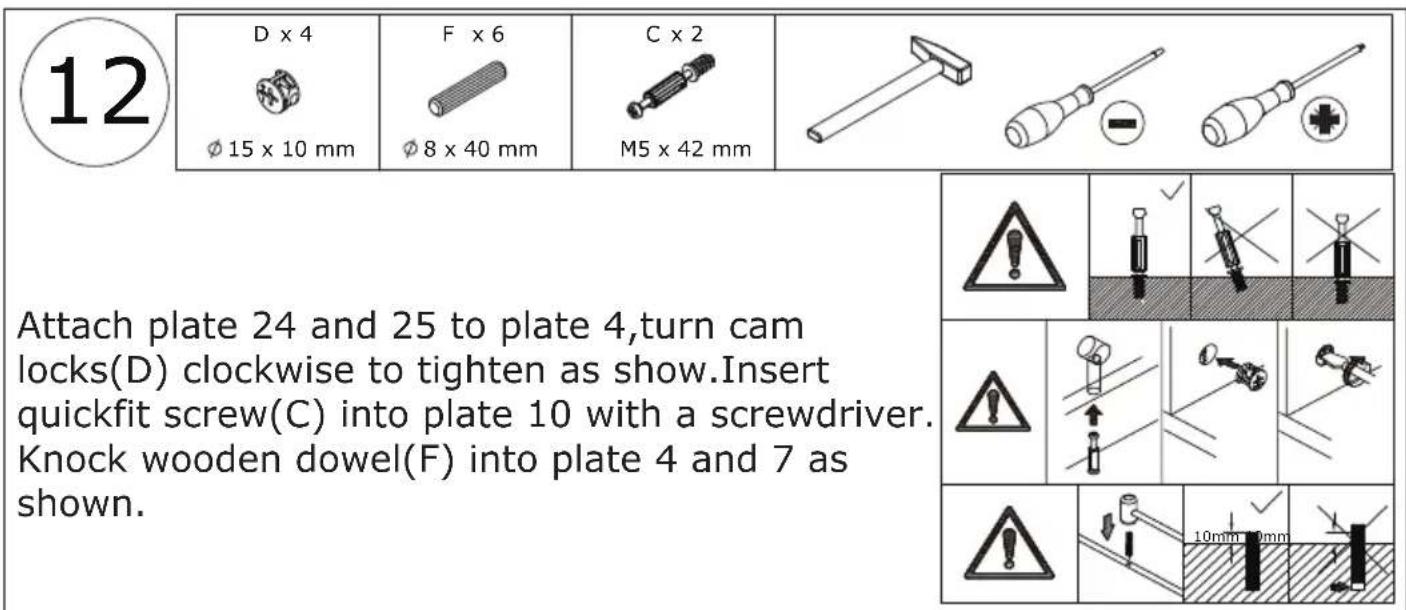
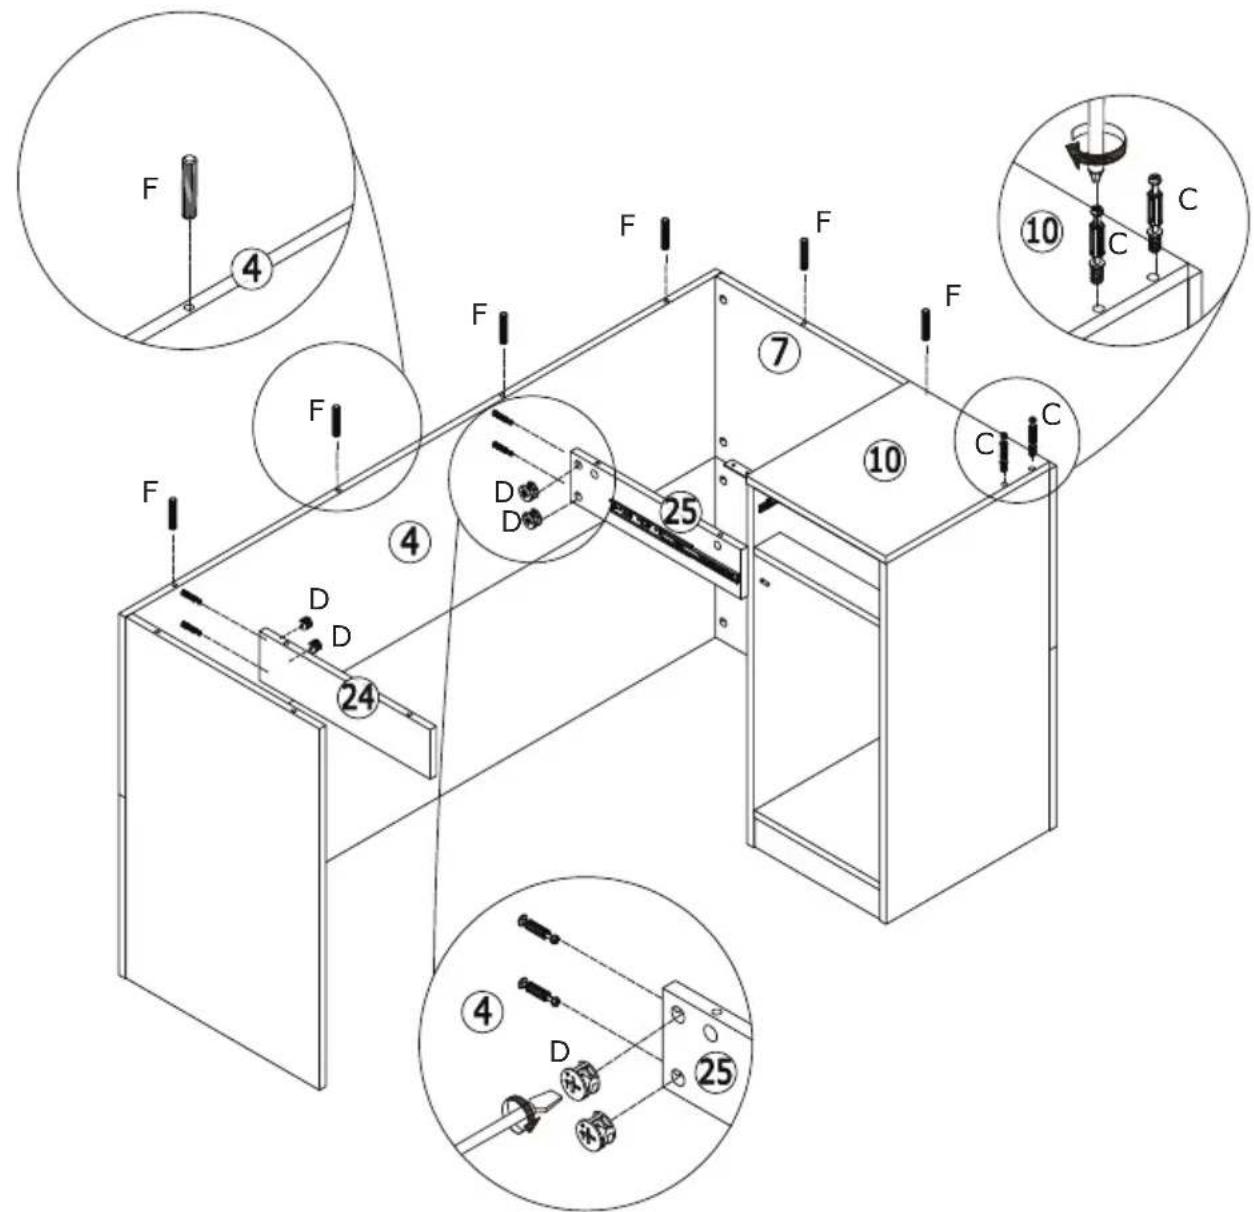
M5 x 42 mm

D x88
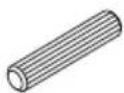
15 x 10 mm
Ex1
M5
Fx20
8× 40mm
G×2
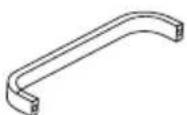
M4×96mm

H×4
M4 x 18 mm
[x1]x4
Ex1
M5
Kx2
DW
L×1
60

M×20
X1
N×1

0x12
M3.5 x 14 mm
36
X2
12"
3508W
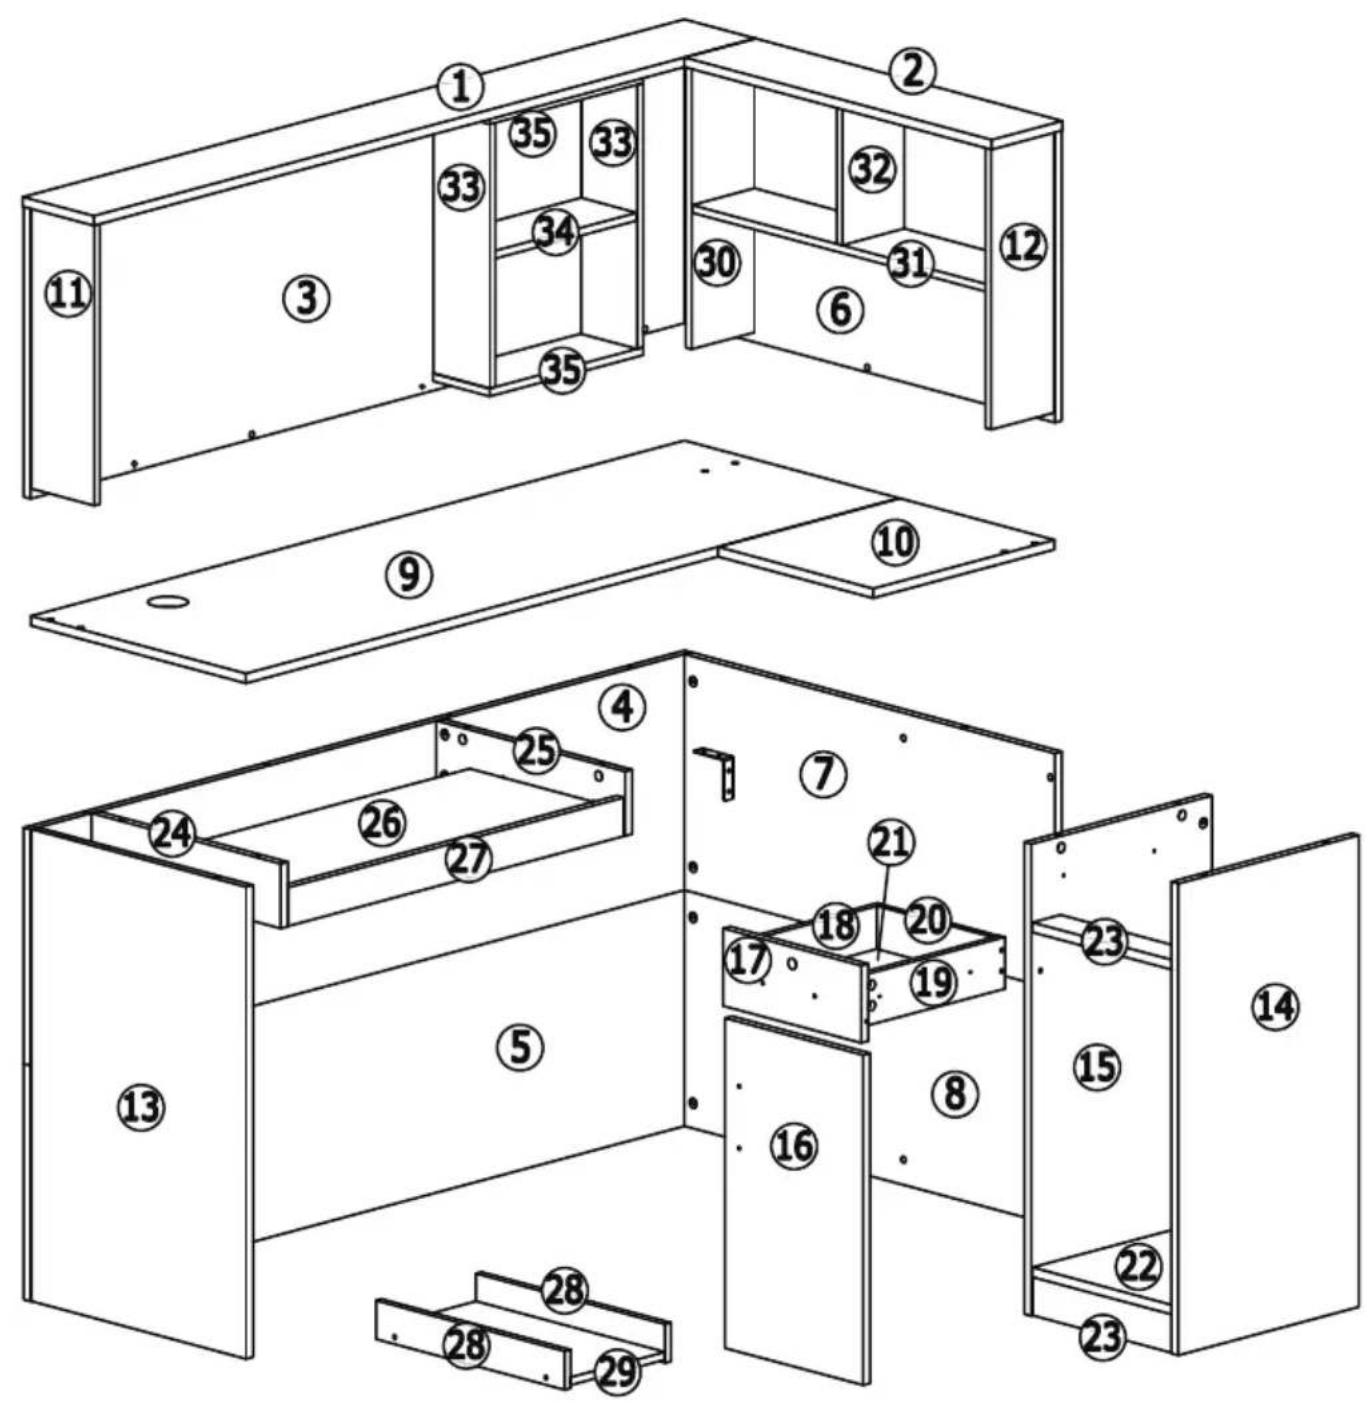
| 19 1PC | 20 1PC | 21 1PC | 22 1PC |
| 23 2PCS | 24 1PC | 25 1PC | 26 1PC |
| 27 1PC | 28 2PCS | 29 1PC | 30 3PC |
| 31 1PC | 32 1PC | 33 2PCS | 34 3PC |
| 35 2PCS | |||
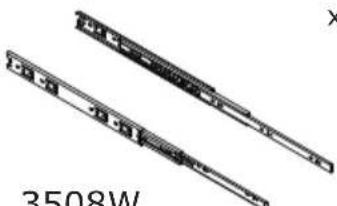
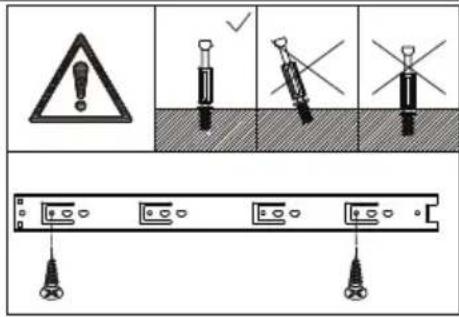
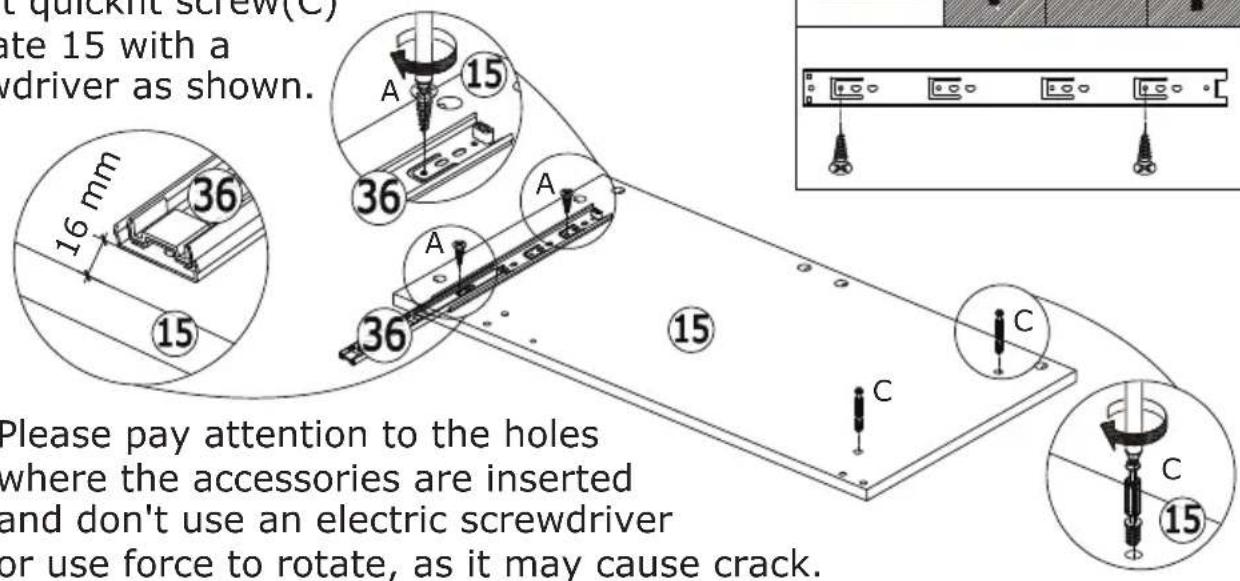
Slides must be separated before assembly. After separation, set them aside until needed for assembly.
Separate glides, fix slide rail 36 to plate 15 with screw(A) as shown.
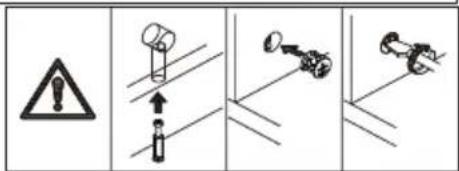
Insert quickfit screw(C) to plate 15 with a screwdriver as shown.
2
D X 2

15× 10mm
E×1

M5
F X 4

8x40mm
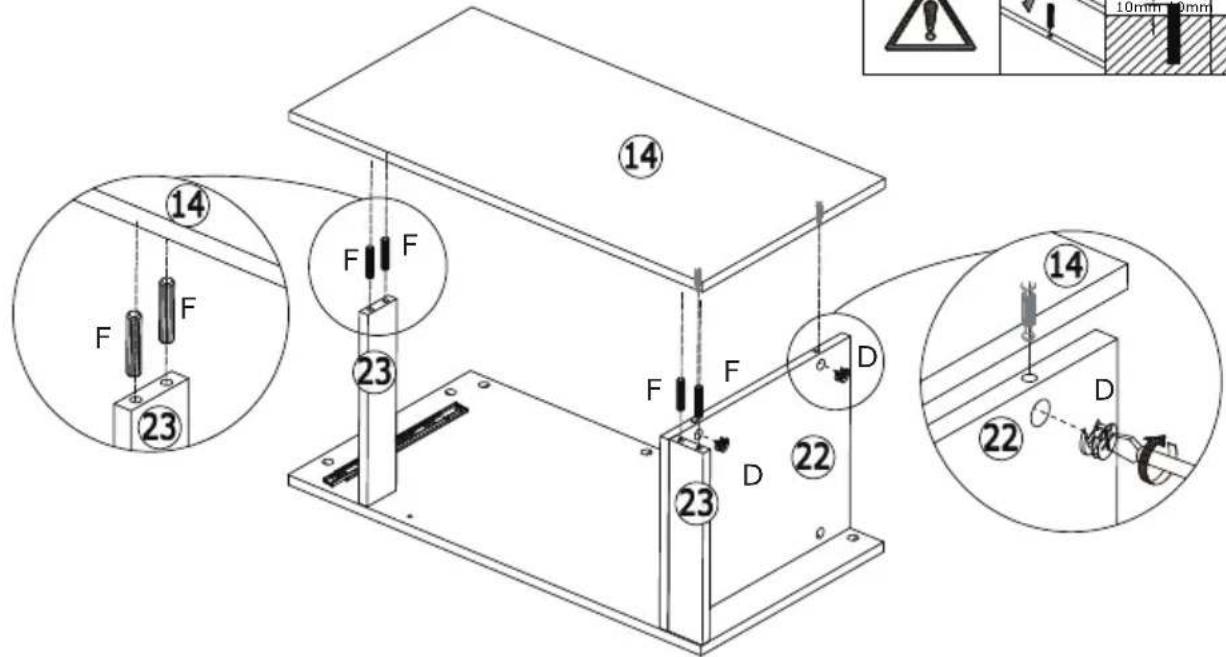
Attach plate 22 to plate 15, turn cam locks(D) clockwise to tighten as show.
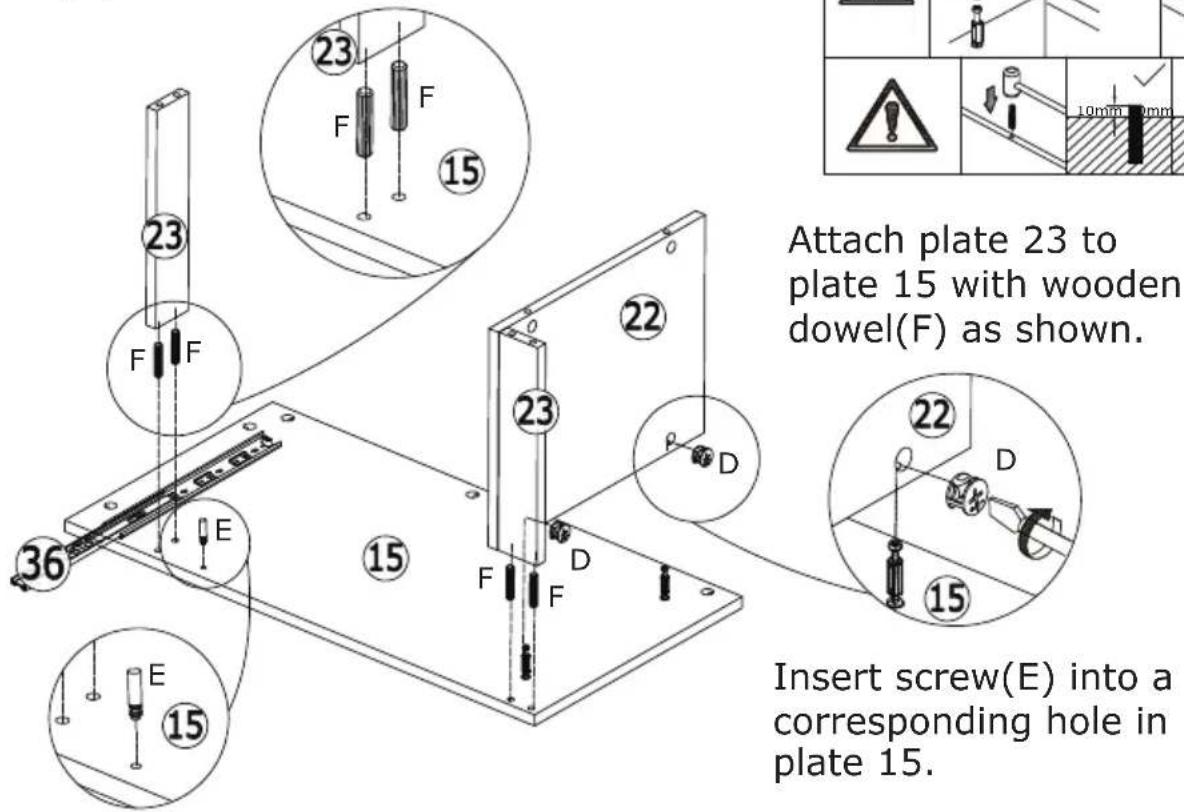
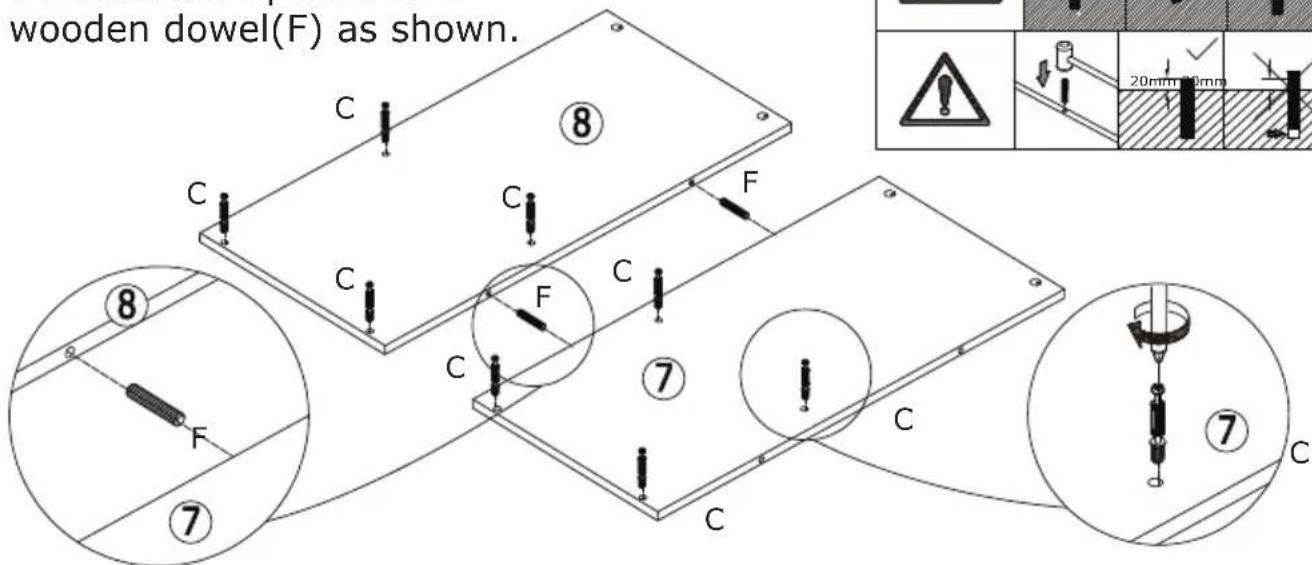
Attach plate 23 to plate 15 with wooden dowel(F) as shown.
Insert screw(E) into a corresponding hole in plate 15.
3
A X 2

M3.5 x 12 mm
C X 2
M5×42mm
Fix slide rail 36 to plate 14 with screw(A) as shown.
Insert quickfit screw(C) to plate 14 with a screwdriver as shown.

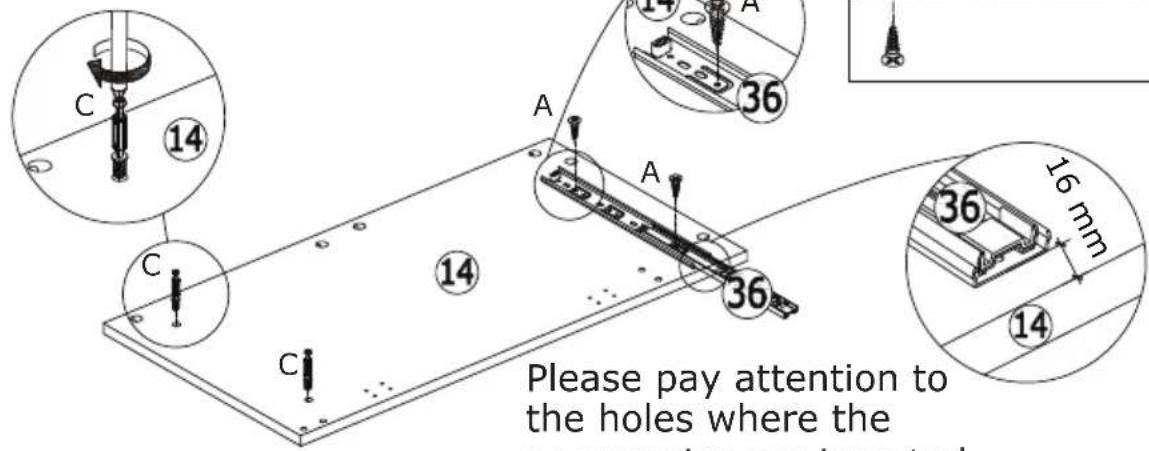
Please pay attention to the holes where the
accessories are inserted.
4
D×2

15× 10mm
F X 4

8x40mm

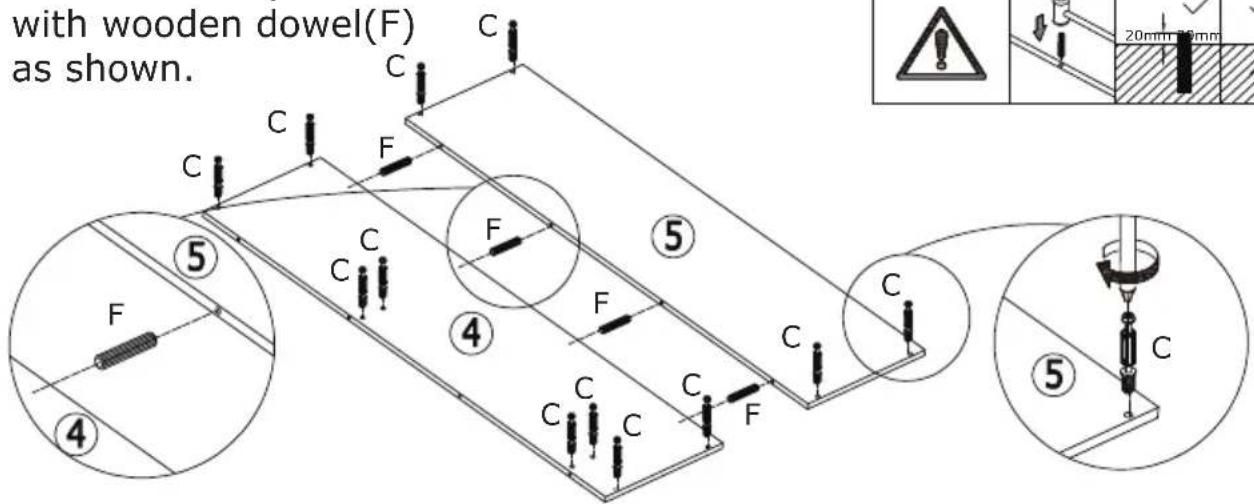
Cover plate 14 to plate 22 and 23 with wooden dowel(F), turn cam locks(D) clockwise to tighten as shown.

5
F X 2
8x40mm

C×8
M5×42mm
Insert quickfit screw(C) to plate 7 and 8. Connect both plates wiht wooden dowel(F) as shown.
6

D×8
15× 10mm

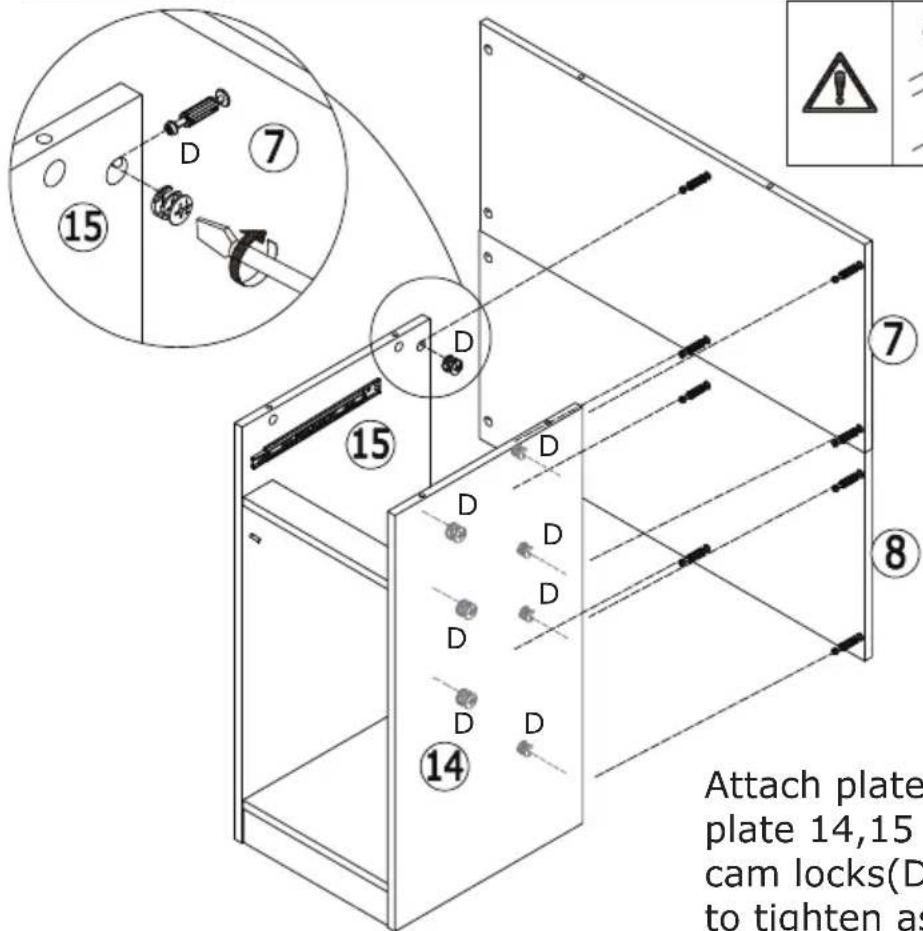
Attach plate 7,8 to plate 14,15 and turn cam locks(D) clockwise to tighten as shown.
| N x 1 | A x 2 M3.5 x 12 mm |

9
F X 4
8× 40mm
C×12
M5×42mm
Insert quickfit screw(C) into plate 4 and 5 with a screwdriver.
Connect both plates with wooden dowel(F) as shown.

10
D X 8
15× 10mm
Attach plate 4,5 to the plate 13,7,8 and turn cam locks(D) clockwise to tighten as shown.

11
A X 4

M3.5×12mm
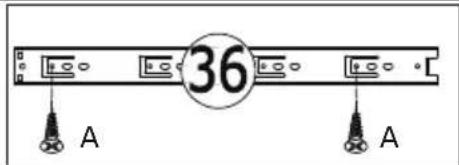
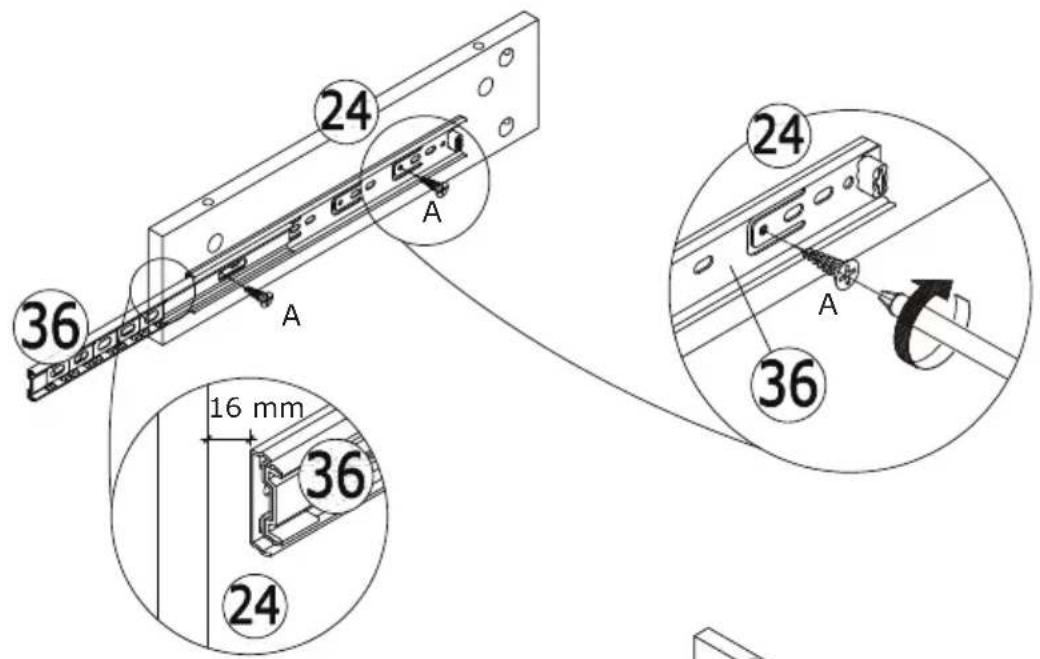

Fix slide rail 36 to plate 24,25 respectively with screw(A) as shown.
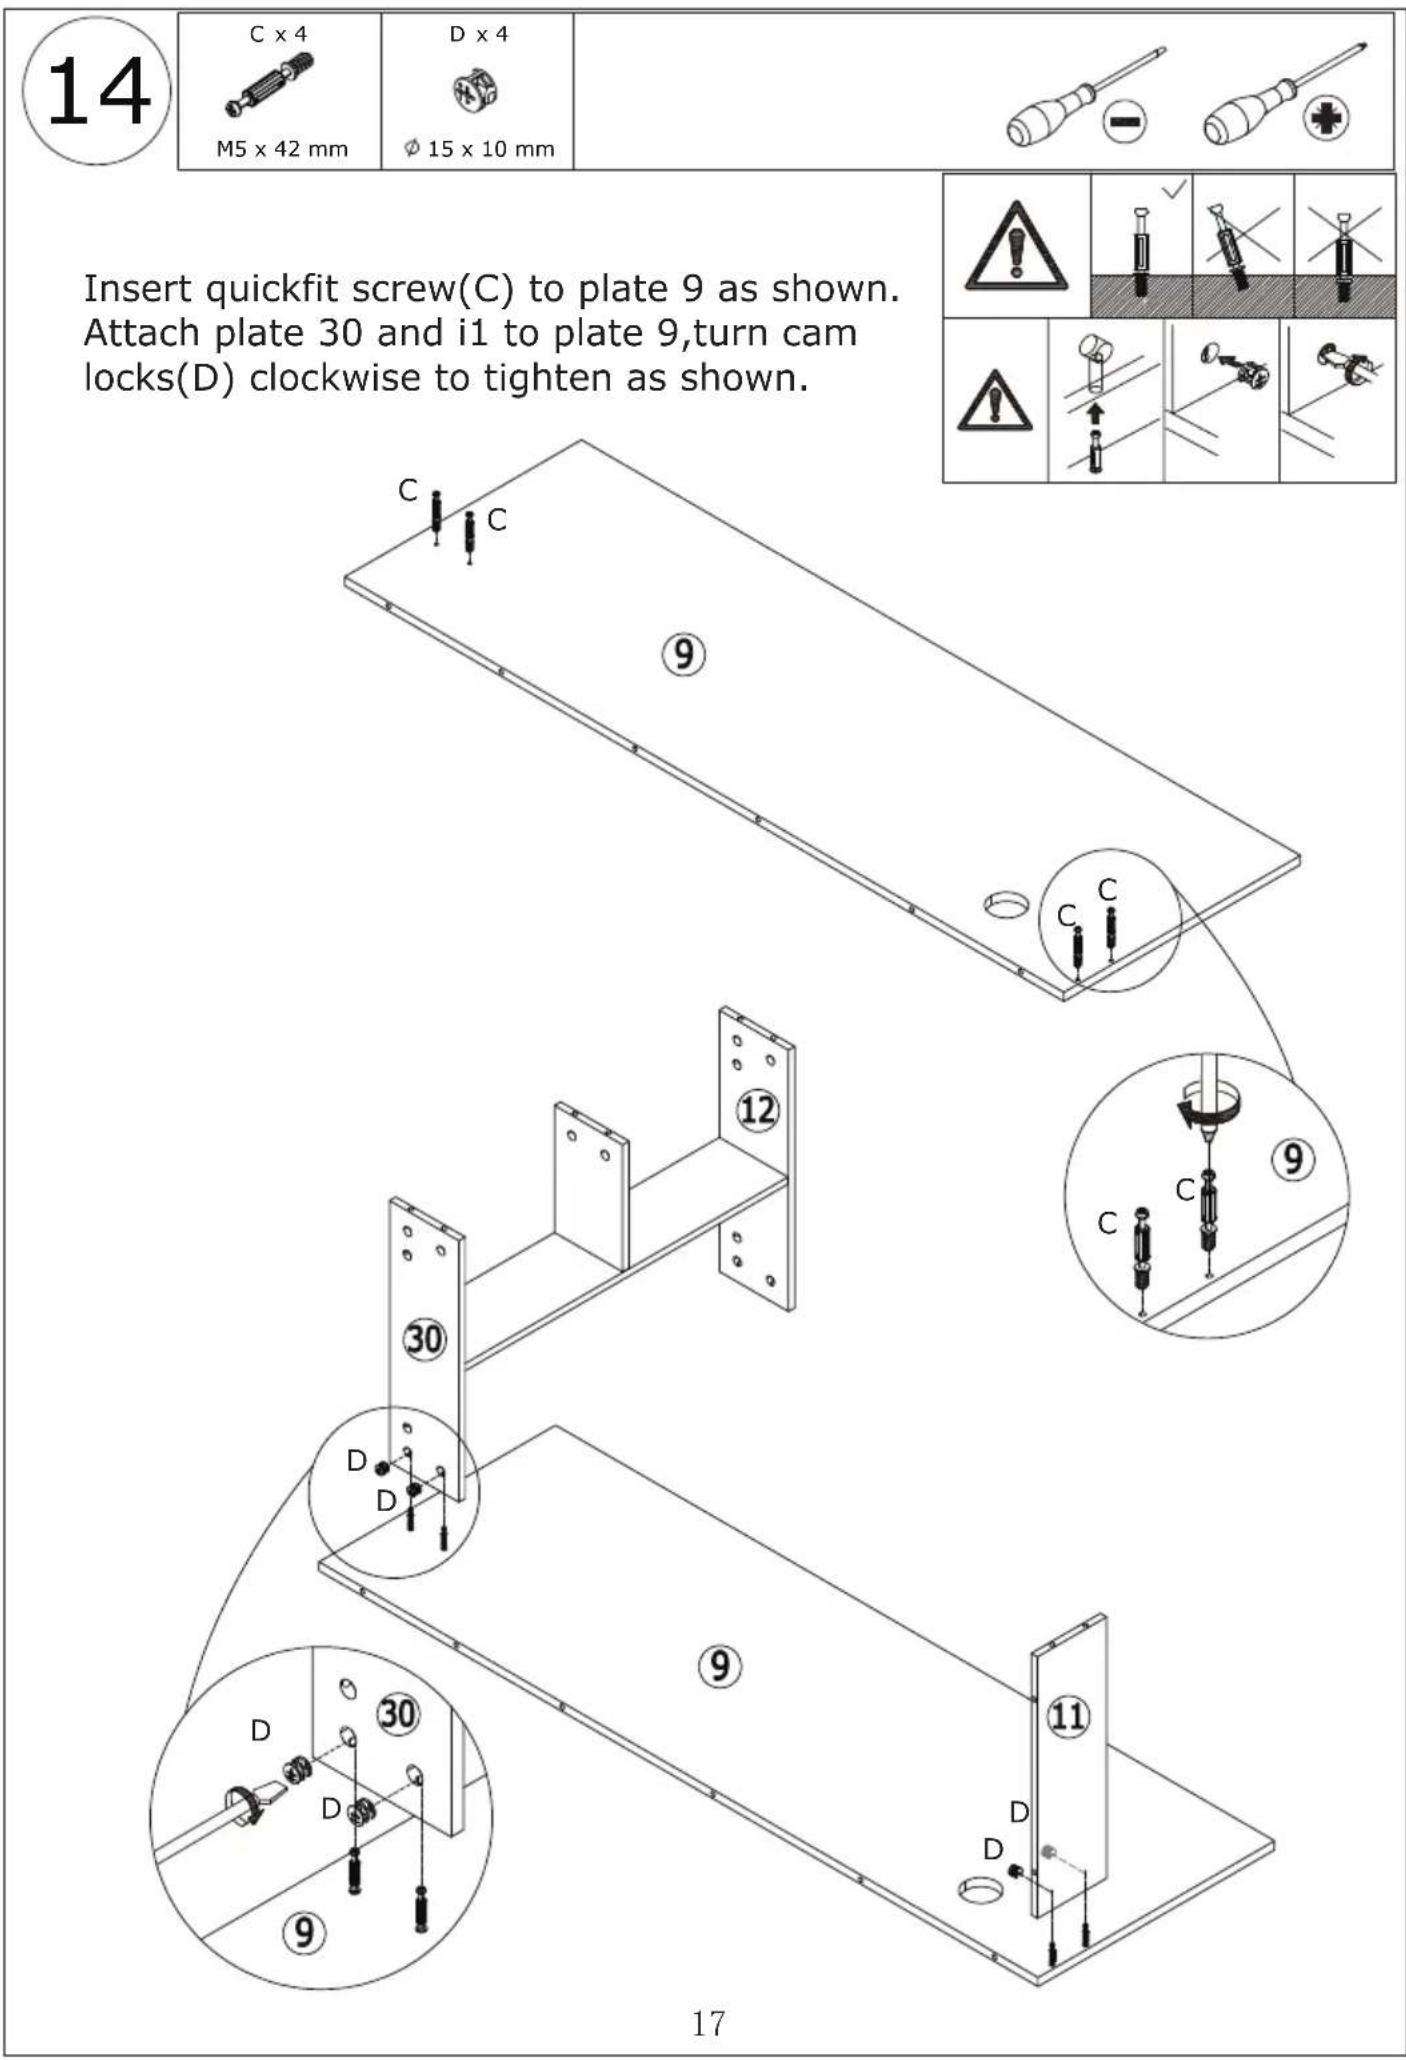
| C x 4 M5 x 42 mm | D x 4 φ15 x 10 mm | B x 2 M5 x 40 mm | ||||
| Insert quickfit screw(C) to plate 12 and 30 as shown. Attach plate 12,30 to plate 31,turn cam locks(D) clockwise to tighten as shown. Connect plate 32 to 31 with screw(B) as shown. | ||||||
| C x 8 M5 x 42 mm | D x 8 ∅ 15 x 10 mm | ||||
| Insert quickfit screw(C) to plate 6 as shown. Attach plate 6 to plate 9,12,30 and turn cam locks(D) clockwise to tighten as shown. | |||||
| C x 10 M5 x 42 mm | D x 10 φ 15 x 10 mm | ||||
| Insert quickfit screw(C) to plate 3 as shown. Cover plate 3 to plate 11,9,6 and turn cam locke(D) clockwise to tighten as shown. | |||||
| C x 16 M5 x 42 mm | D x 16 φ 15 x 10 mm | |
| C x 6 M5 x 42 mm | D x 8 φ 15 x 10 mm |
19
A X 2

M3.5 x 12 mm
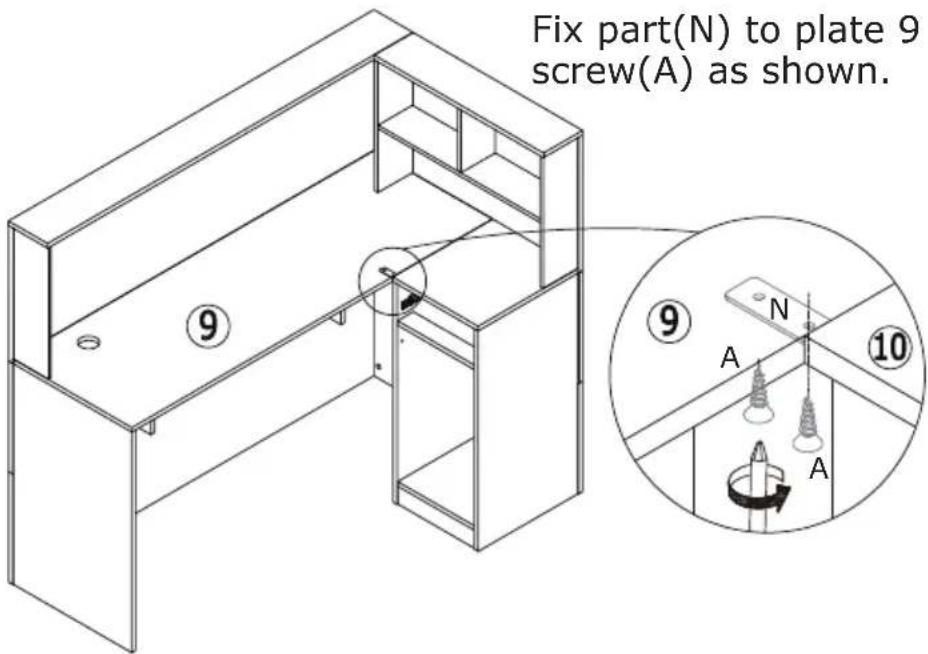
Fix part(N) to plate 9 with screw(A) as shown.
20

M5×42mm


15× 10mm
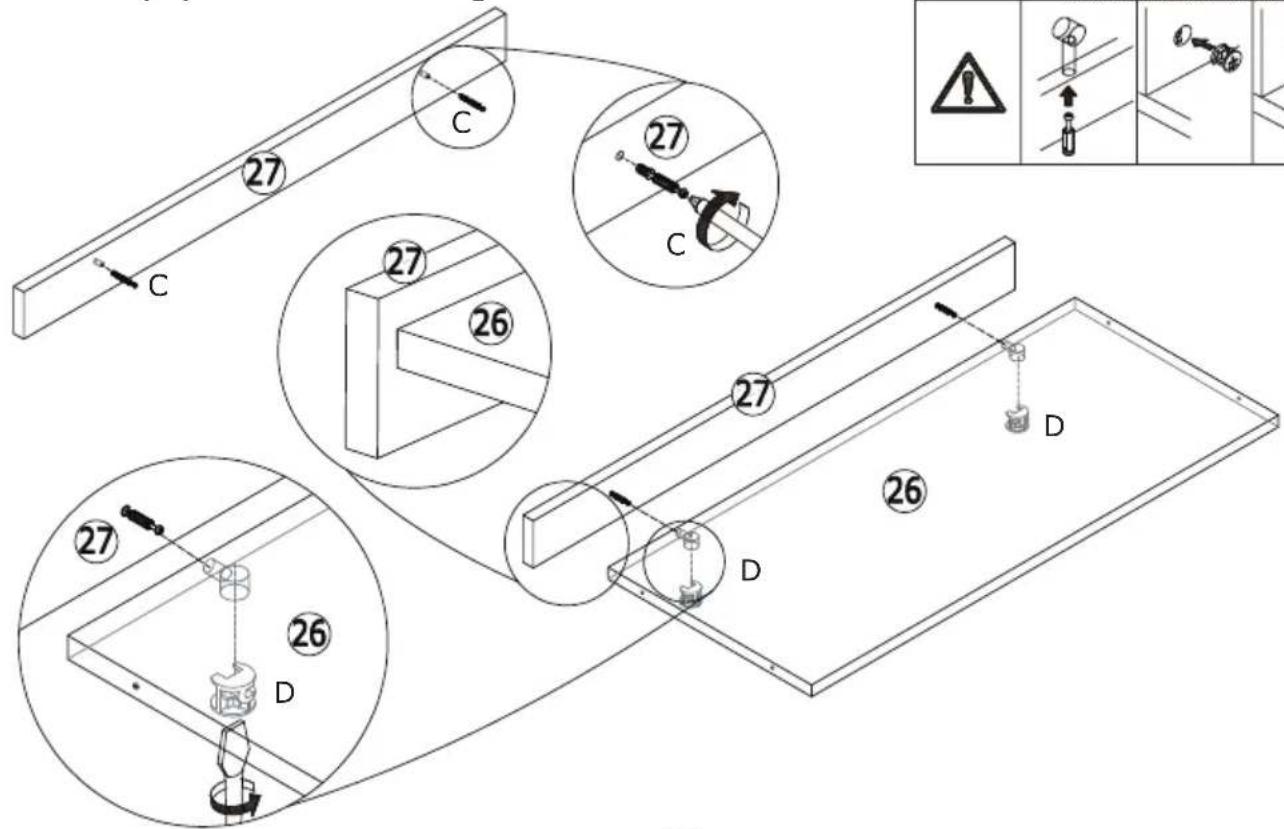
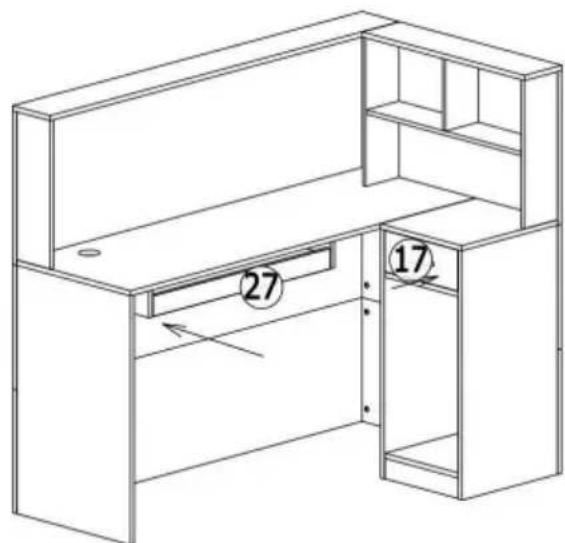
Insert quickfit screw(C) to plate 27 at first.Connect plate 27 with 26 and turn cam locks(D) clockwise to tighten as shown.

21
A×4

M3.5×12mm

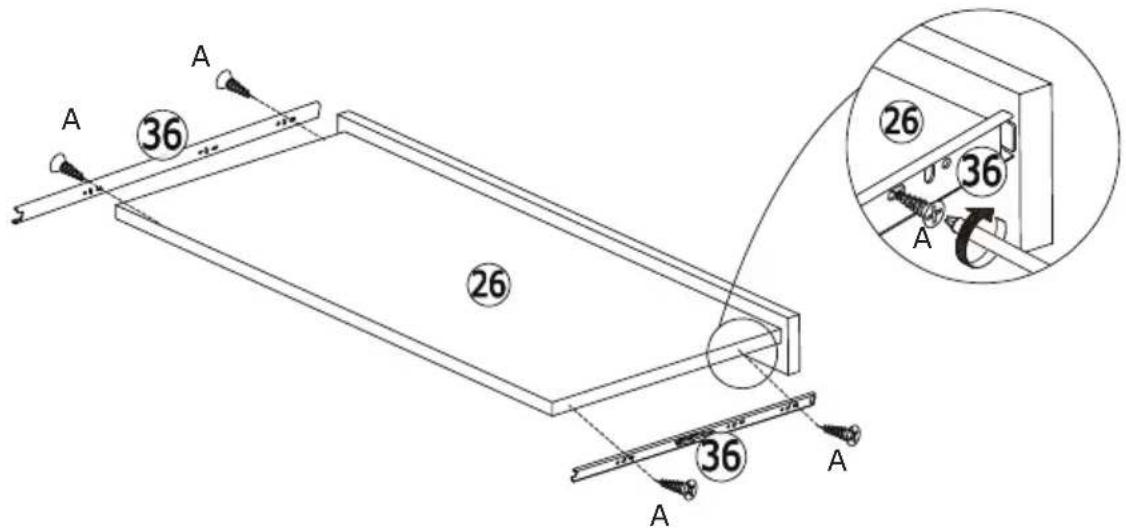
Fix runner 36 to plate 26 with screw(A) as shown.
22
B×4
M5×40mm
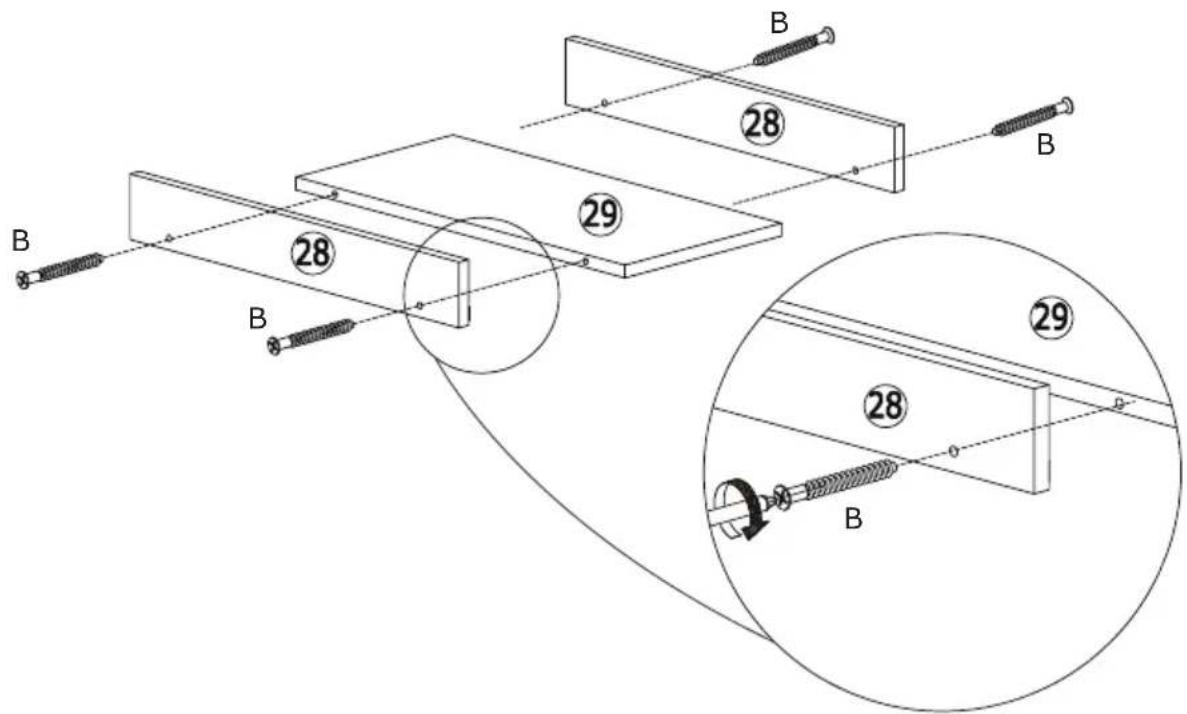
Connect plate 28 with 29 using screw(B) as shown.
| B x 4 M5 x 40 mm |
25
| C x 4 M5 x 42 mm | D x 4 φ 15 x 10 mm | G x 1 M4 x 96 mm | H x 2 M4 x 18 mm |
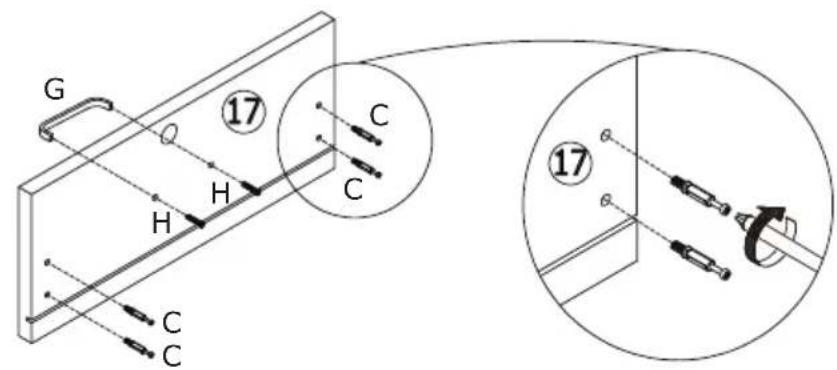
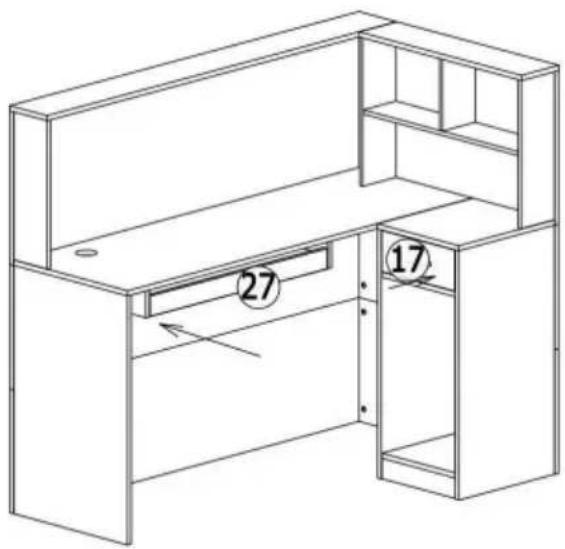
Insert quickfit screw(C) to plate 17 at first. Fix handle(G) with screw(H) as shown. Attach plate 17 to the component and turn cam locks(D) clockwise to tighten as shown.
| 26 | A x 4 M3.5 x 12 mm |
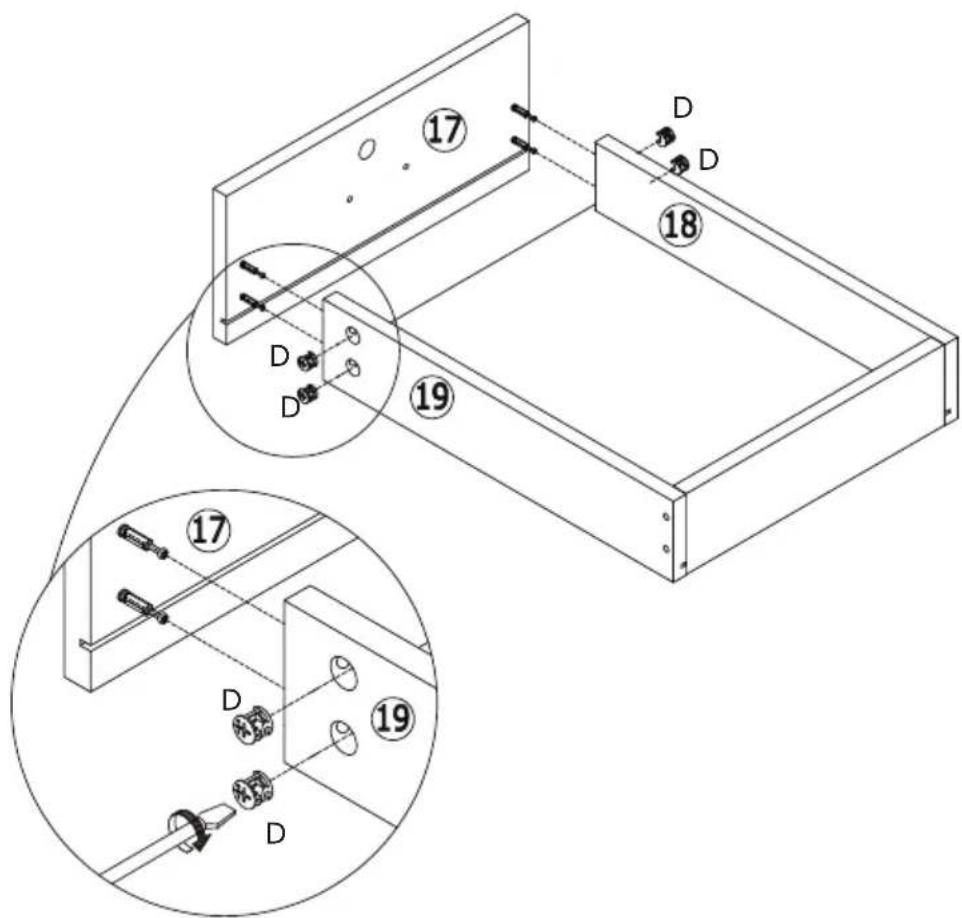
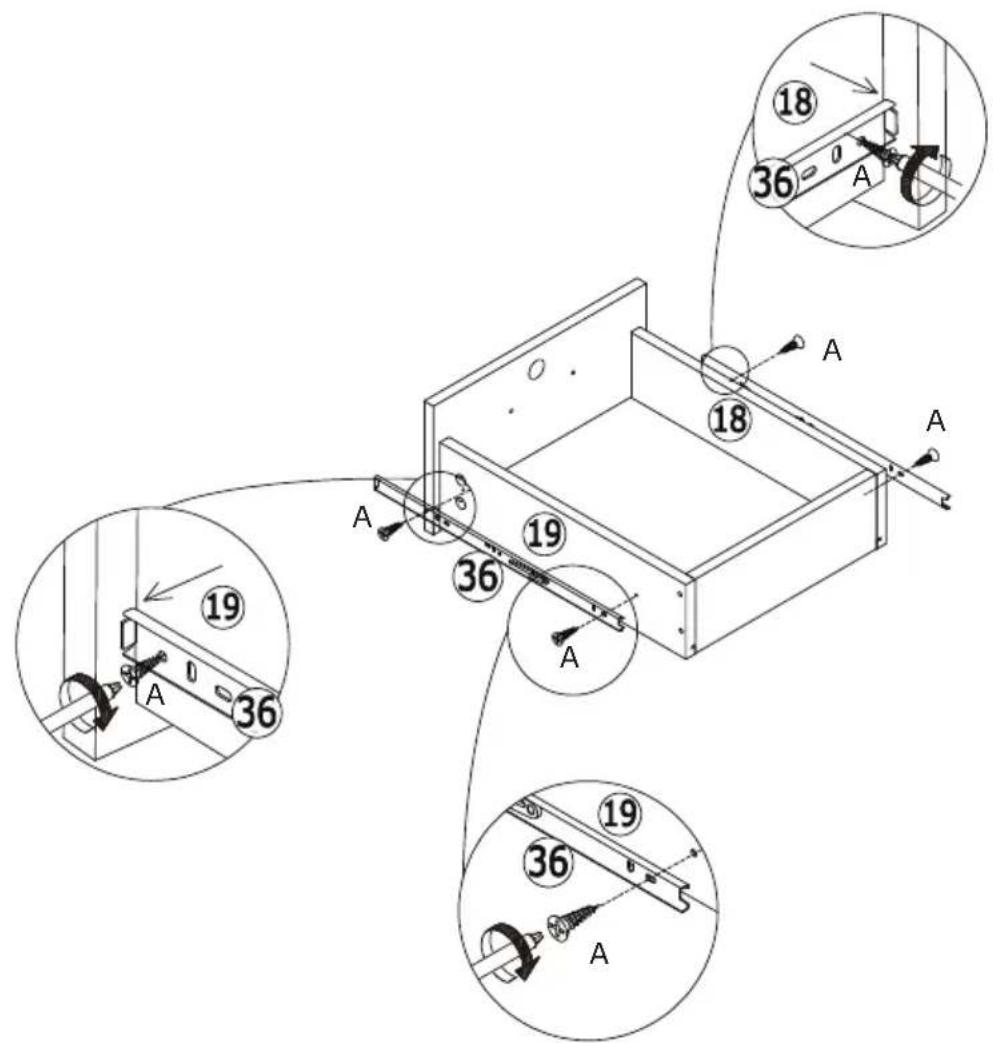
Fix slide rail 36 to plate 19,18 respectively with screw(A) as shown.
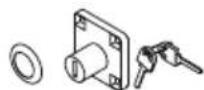
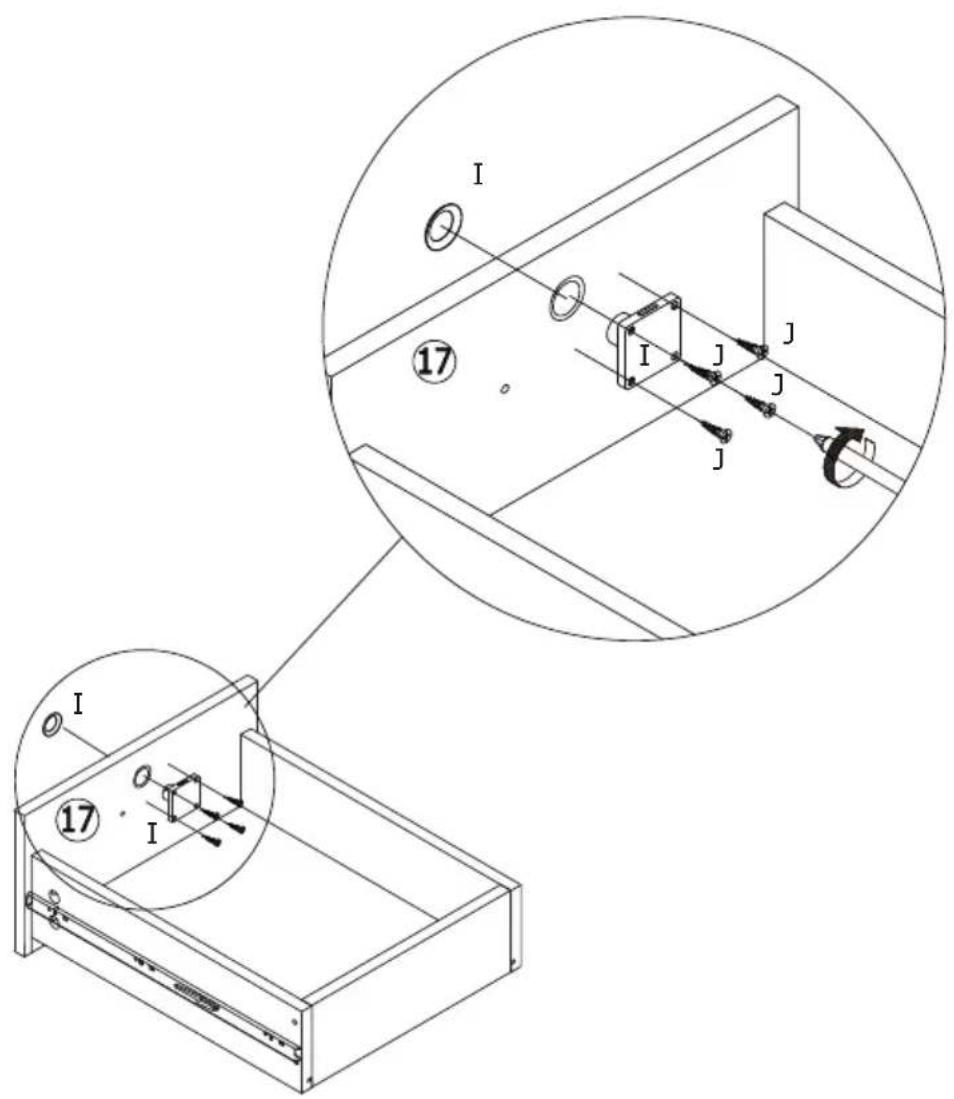
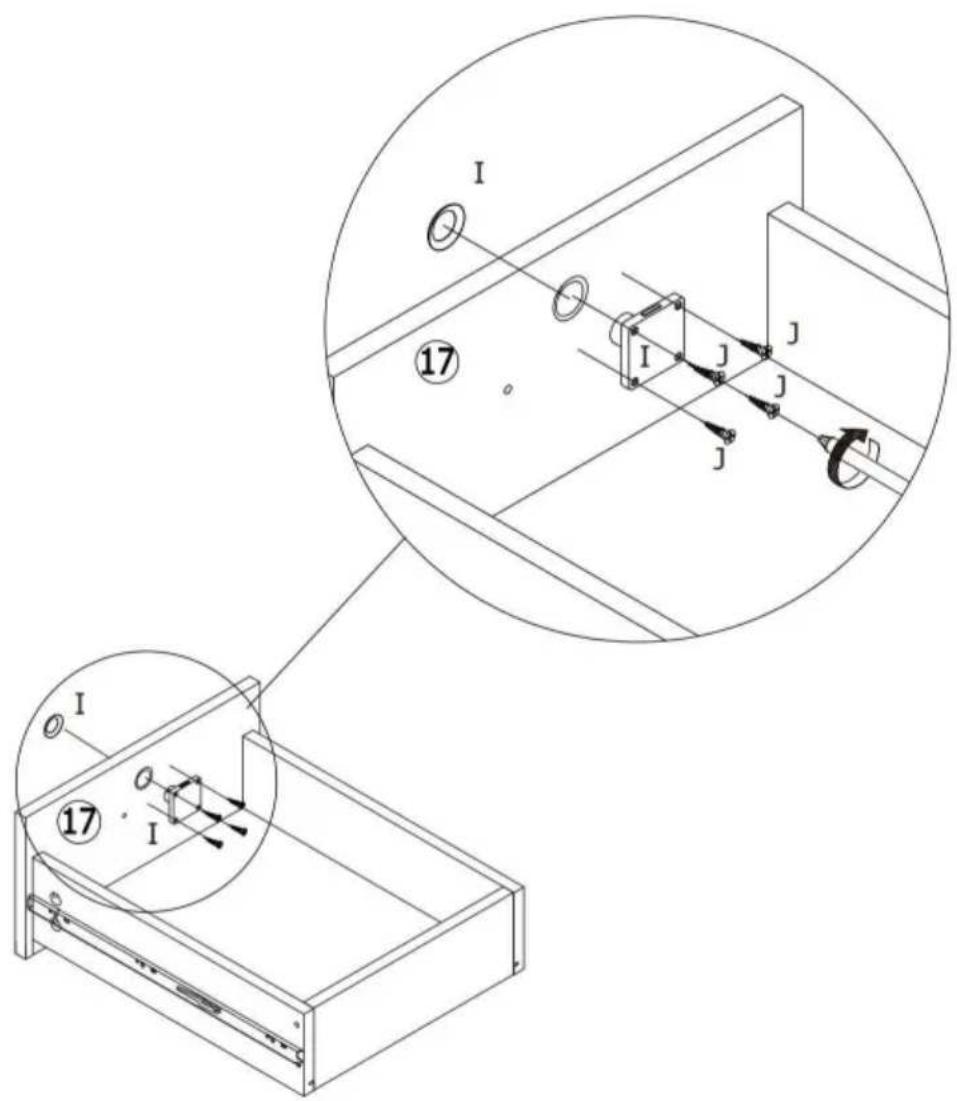
| I x 1 | J x 4 | M3 x 18 mm |
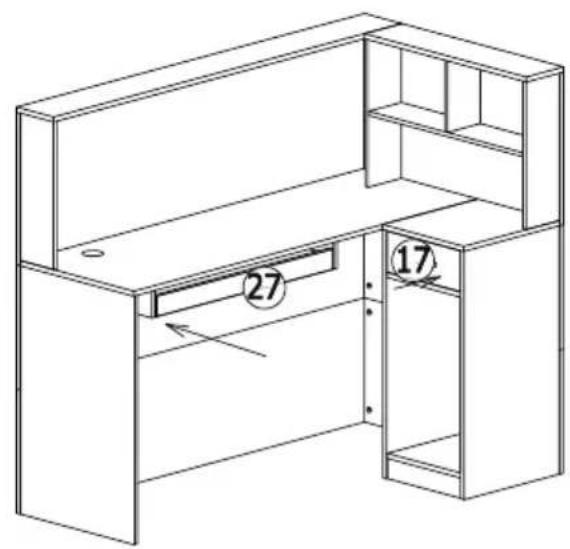
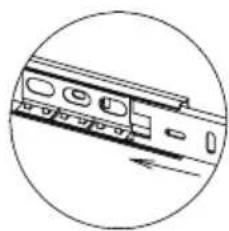
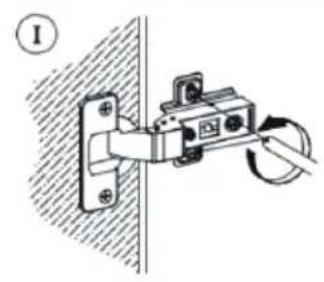
Fix part(I) to the lock hole with screw(J) as shown.
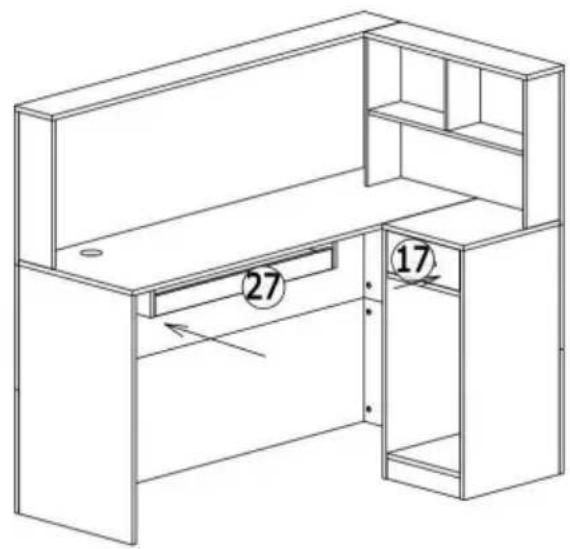
28
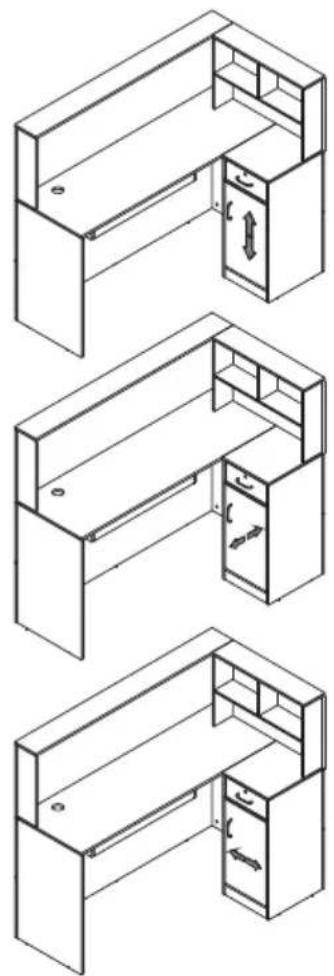
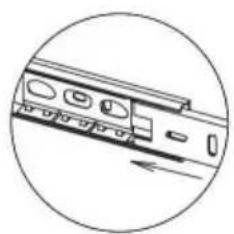
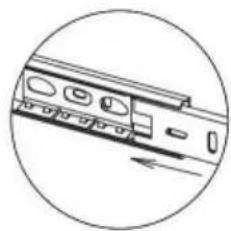
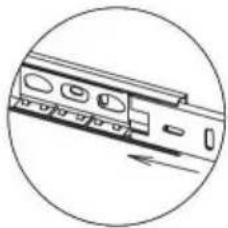
Insert the keyboard tray and drawer along the rails as shown.
29
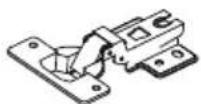
| G x 1 M4 x 96 mm | H x 2 # | O x 4 M3.5 x 14 mm | K x 2 4 x 18 rDM |
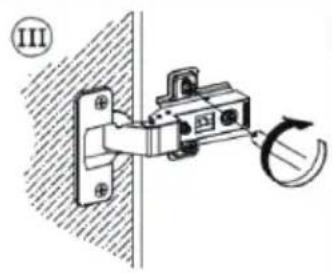
Fix hinge(K) to plate 16 with screw(o),fix handle(G) to plate 16 with screw(H)as shown.
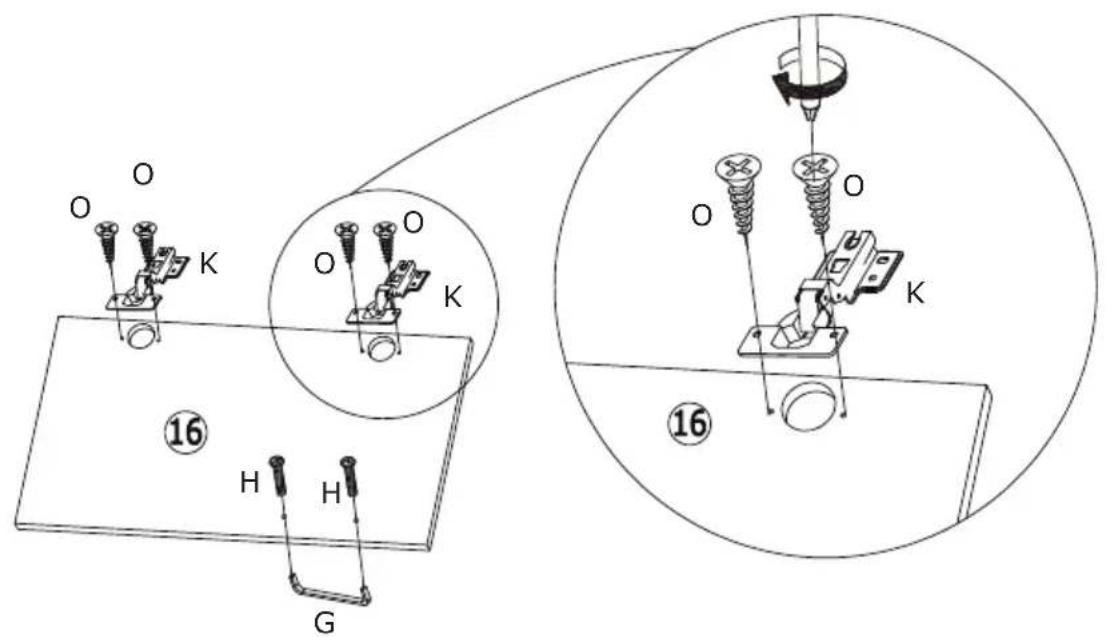

Attach plate 16 to 14 by fixing fingewith screw(o) as shown.
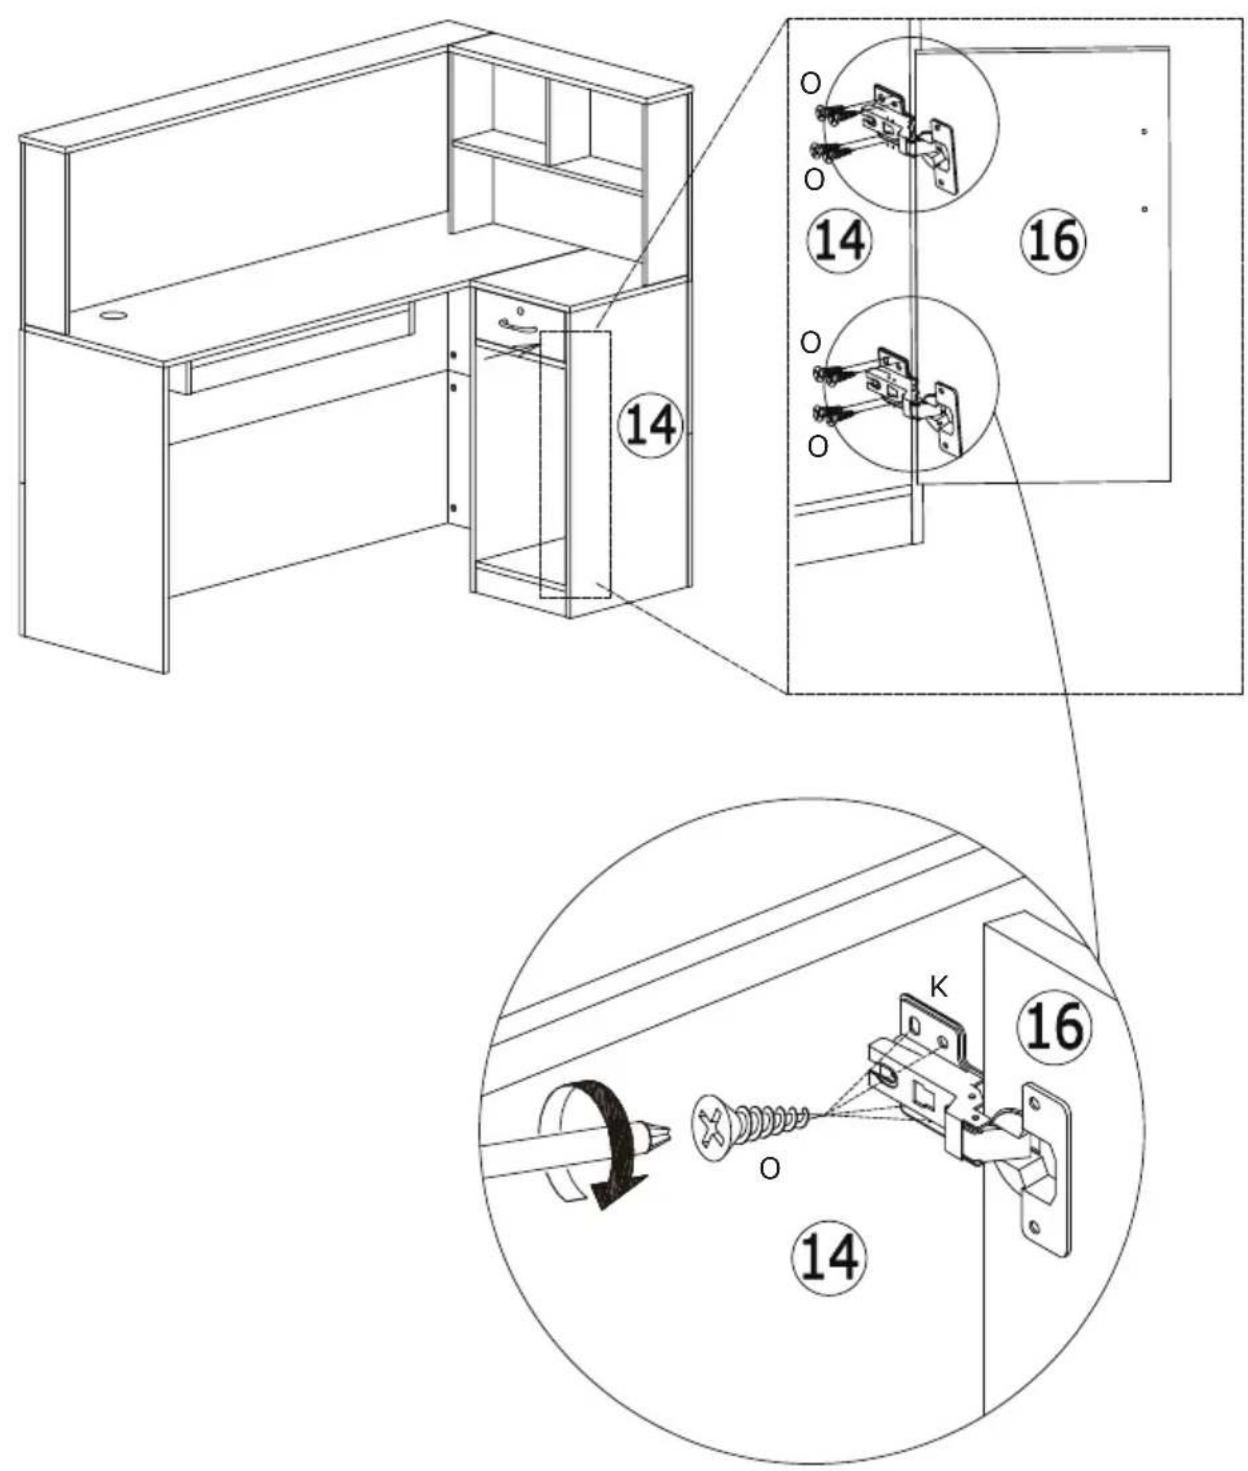
If there is misalignment after you install, adjust the screw to the best condition

| 31 | C x 4 M5 x 42 mm | D x 4 φ 15 x 10 mm | |||

Attach plate 35 to plate 33 with screw(B) as shown.

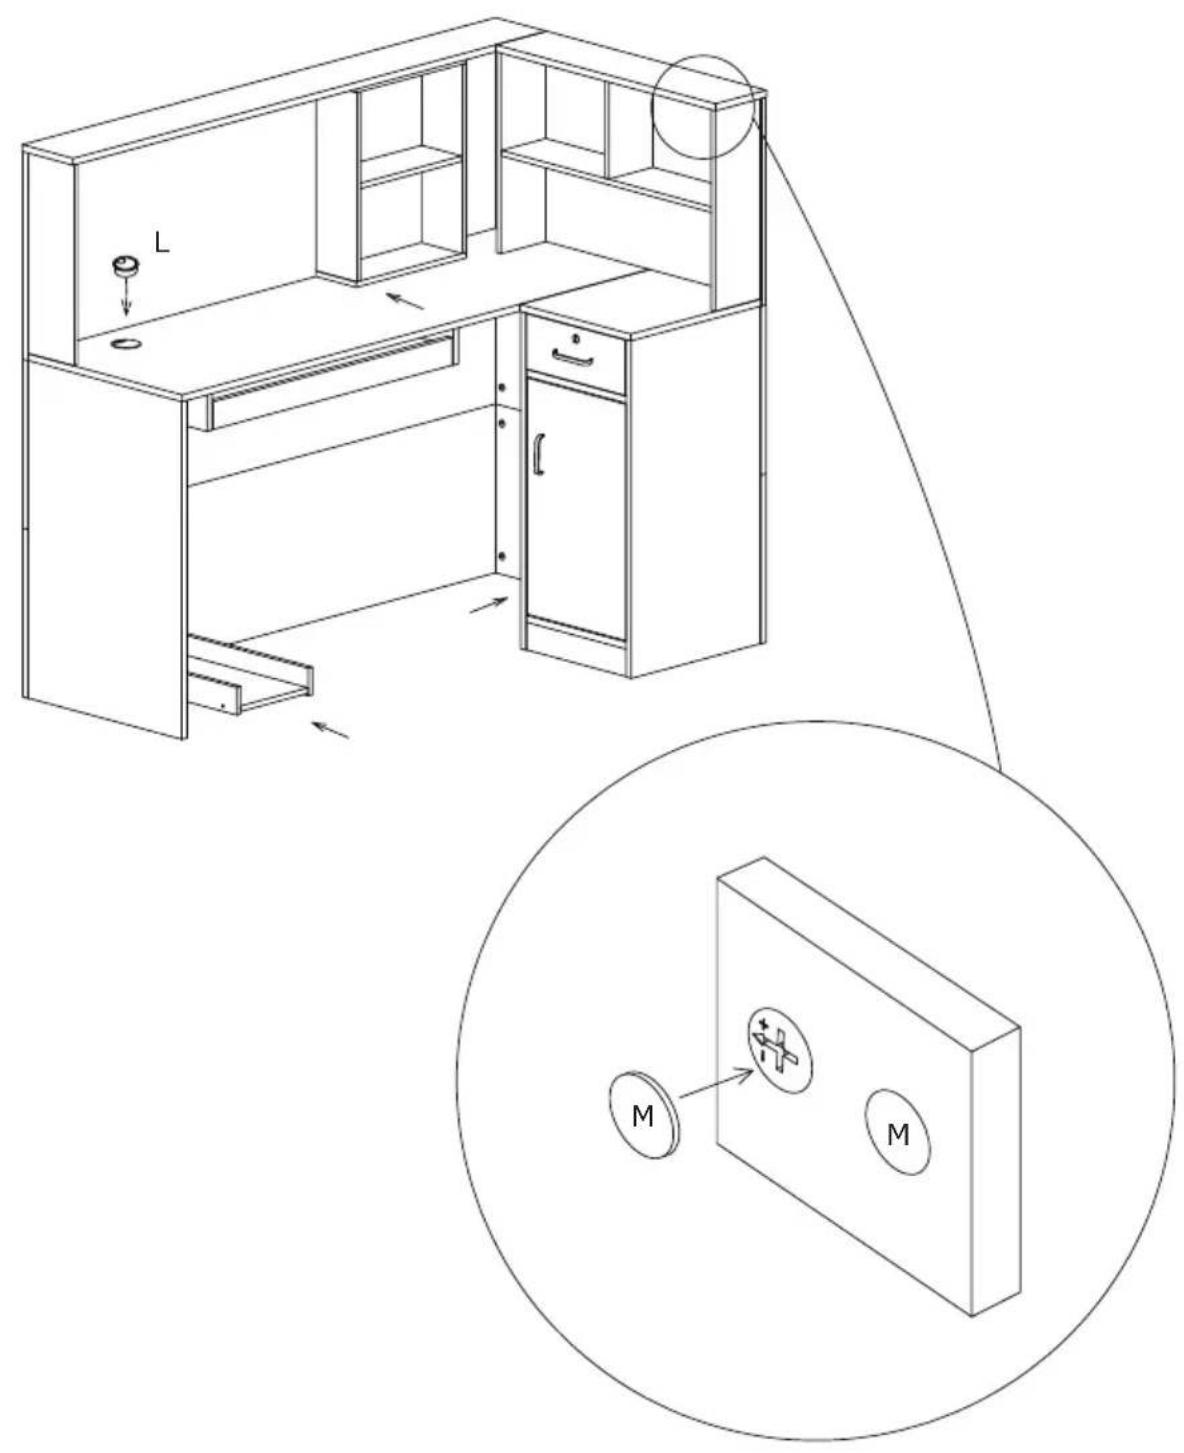
| L x 1 ∅ 60 | M x 20 ○ |
| Model | SS-601 |
| Safe Loading Weight | 50kg |
| Colour | Black |
| Product Size | 1400*800*1200 mm |
Manufacturer: Shanghaiuxinmuyeyouxianggsi
Address: Shuangchenglu 803nong11hao1602A-1609shi, baoshanqu, shanghai 200000 CN.
Imported to AUS: SIHAO PTY LTD. 1 ROKEVA STREETEASTWOOD NSW 2122 Australia
Imported to USA: Sanven Technology Ltd. Suite 250, 9166 Anaheim Place, Rancho Cucamonga, CA 91730
| EC | REP |
E-CrossStu GmbH
Mainzer Landstr.69, 60329 Frankfurt am Main.
| UK | REP |
YH CONSULTING LIMITED.
C/O YH Consulting Limited Office 147, Centurion
House, London Road, Staines-upon-Thames, Surrey, TW18 4AX
VEVOR®
TOUGH TOOLS, HALF PRICE
Technical Support and E-Warranty Certificate
www.vevor.com/support
AVERTISSEMENT:
Fix part(I) to the lock hole with screw(J) as shown.

Insert the keyboard tray and drawer along the rails as shown.


A/S YH Consulting Limited Bureau 147, Centurion
Maison, London Road, Staines-upon-Thames, Surrey,
TW18 4AX
SICHERHEITSHINWEISE
WARNING:
Fix part(I) to the lock hole with screw(J) as shown.


Insert the keyboard tray and drawer along the rails as shown.


C/O YH Consulting Limited Office 147, Centurion
Haus, London Road, Staines-upon-Thames, Surrey, TW18 4AX
AVVERTIMENTO:
Fix part(I) to the lock hole with screw(J) as shown.


Insert the keyboard tray and drawer along the rails as shown.


Importato in AUS: SIHAO PTY LTD. 1 ROKEVA STREETEASTWOOD NSW2122 Australia
Importato negli USA: Sanven Technology Ltd. Suite 250, 9166 Anaheim Place, Rancho Cucamonga, CA91730

E-CrossStu GmbH
Mainzer Landstr.69, 60329 Francoforte sul Meno.

CONSULENZA YH LIMITATA.
C/O YH Consulting Limited Ufficio 147, Centurion
Casa, London Road, Staines-upon-Thames, Surrey,
Modello TW18 4AX
ADVERTENCIA:
Fix part(I) to the lock hole with screw(J) as shown.


Insert the keyboard tray and drawer along the rails as shown.


C/O YH Consulting Limited Oficina 147, Centurion Casa, London Road, Staines-upon-Thames, Surrey, TW18 4AX
OSTRZEZENIE:
Fix part(I) to the lock hole with screw(J) as shown.


Insert the keyboard tray and drawer along the rails as shown.


C/O YH Consulting Limited Biuro 147, Centurion Dom, London Road, Staines-upon-Thames, Surrey, TW18 4AX
WAARSCHUWING:
f NTIFOPPOwAARSCHUWNG/
Fix part(I) to the lock hole with screw(J) as shown.


Insert the keyboard tray and drawer along the rails as shown.


C/O YH Consulting Limited Kantoor 147, Centurion
Huis, London Road, Staines-upon-Thames, Surrey, TW18 4AX
SAKERHETSINSTRUKTIONER
WARNING:
Fix part(I) to the lock hole with screw(J) as shown.


Insert the keyboard tray and drawer along the rails as shown.


C/O YH Consulting Limited Office 147, Centurion
House, London Road, Staines-upon-Thames, Surrey, TW18 4AX


