
SK-870L - Slicer Vevor - Free user manual and instructions
Find the device manual for free SK-870L Vevor in PDF.
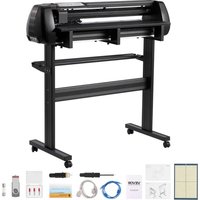


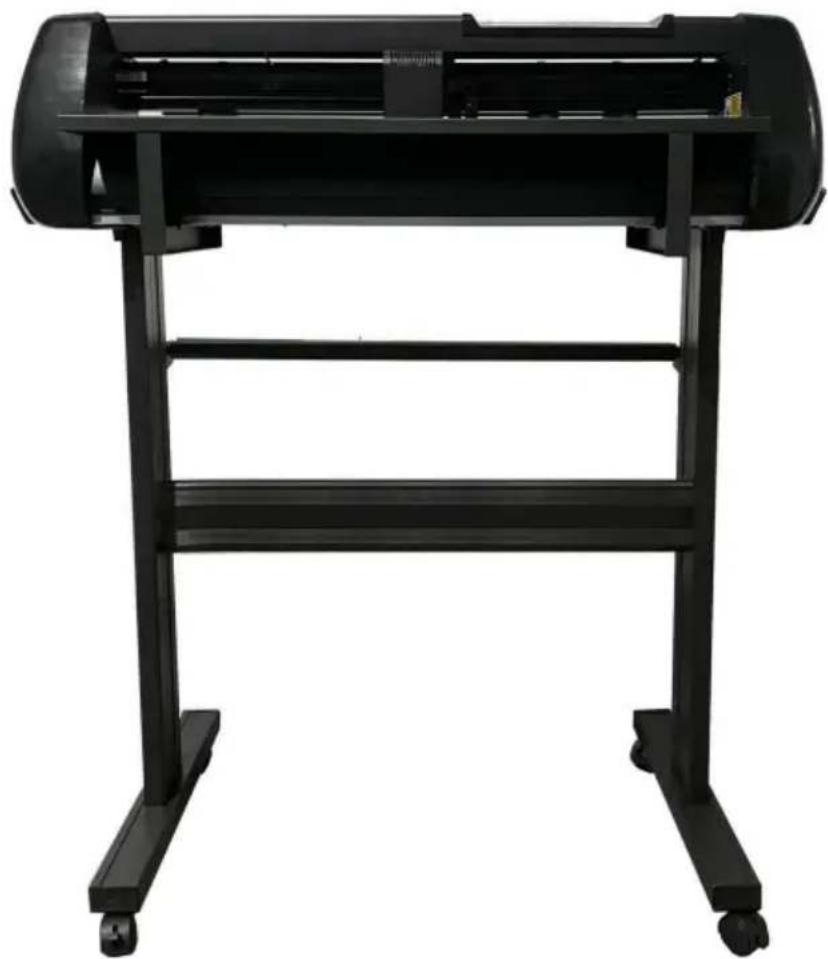
| Product Type | Professional Cutting Plotter |
| Brand | Vevor |
| Model | SK-870L |
| Maximum Cutting Width | 870 mm (34.25 inches) |
| Maximum Feeding Width | 870 mm |
| Maximum Cutting Thickness | ≤ 1 mm |
| Cutting Speed | 20 to 600 mm/s |
| Cutting Pressure | 20 to 50 gf |
| Cutting Accuracy | ± 0.1 mm |
| Resolution | 0.0245 mm/step |
| Interfaces | USB, U-DISK, Serial Port (COM) |
| Power Supply | AC 85-264 V, 50/60 Hz |
| Display | LCD Screen |
| Interface Language | Chinese, English |
| Recut Function | Yes |
| Real-time Speed Adjustment | Yes |
| Supported File Format | HPGL |
| Included Software | SignMaster CUT (Windows and Mac) |
| Package Includes | Power cable, USB cable, blade, blade holder, pen holder, embossing knife holder, USB driver, software |
| Safety | Do not touch the blade; use only the provided adapter; unplug during thunderstorms |
| Maintenance | Regularly clean residues; do not insert metal objects or liquids |
Frequently Asked Questions - SK-870L Vevor
User questions about SK-870L Vevor
0 question about this device. Answer the ones you know or ask your own.
Ask a new question about this device
Download the instructions for your Slicer in PDF format for free! Find your manual SK-870L - Vevor and take your electronic device back in hand. On this page are published all the documents necessary for the use of your device. SK-870L by Vevor.
USER MANUAL SK-870L Vevor
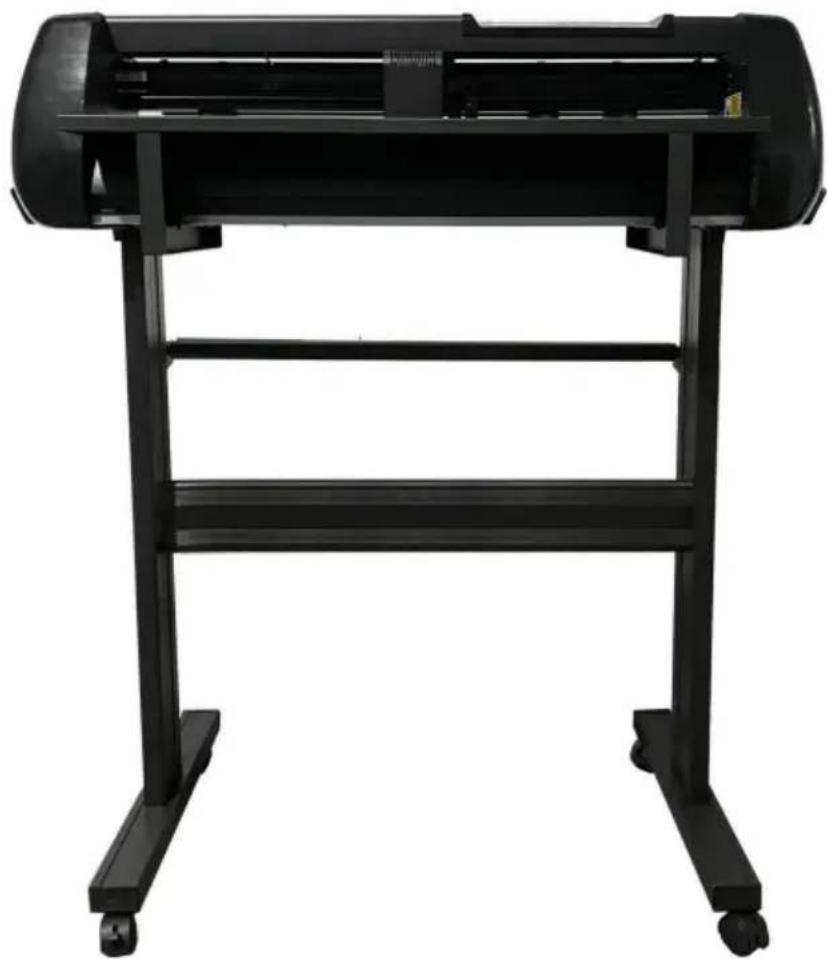
CUTTING PLOTTER
MODEL: SK-720L / SK-870L / SK-1350L
MODEL: SK-720L / SK-870L / SK-1350L
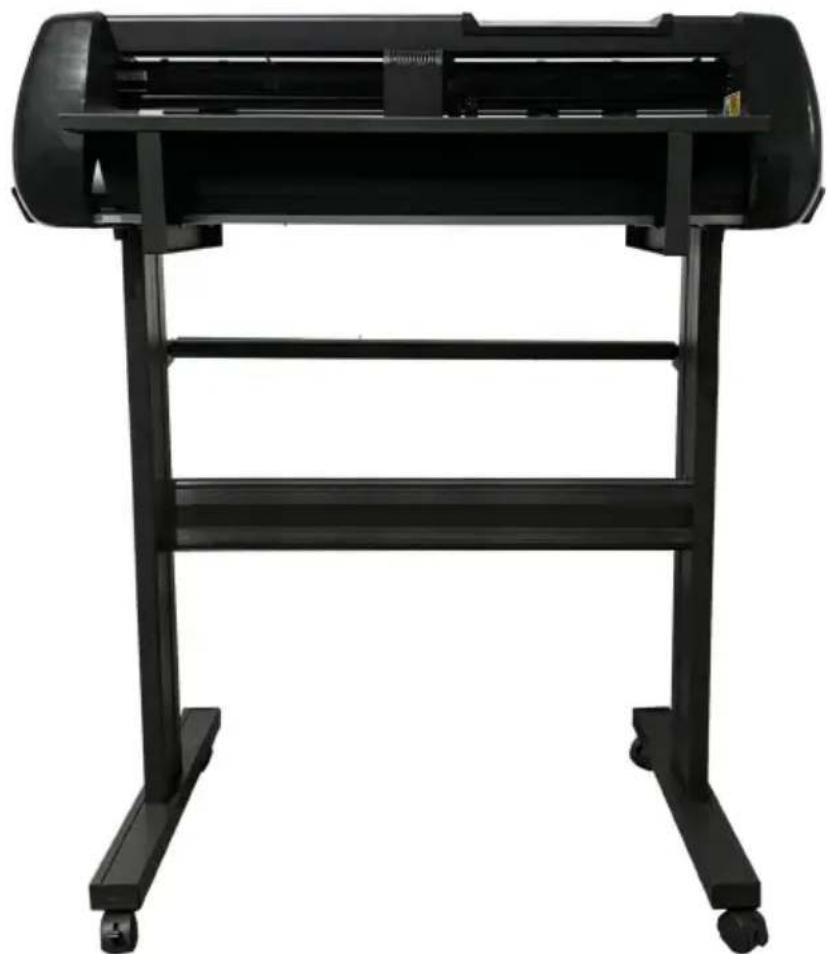
This is the original instruction. Please read all manual instructions carefully before operating. VEVOR reserves a clear interpretation of our user manual. The appearance of the product shall be subject to the product received. Please forgive us that we won't inform you again if there are technology or software updates on our product.
Contents
I. Precautions....2 II. Introduction for main parts....3 III. Technical parameters....4-5 IV. Control buttons description and operation instructions......6 V. Blade assembly....7-9 VI. Software and driver installation....10-12 VII. Connection of software and machine....13-16
I. Precautions
- Protective material must be removed before turning on the cutting plotter.
- Check the label on the back side of the plotter to confirm that the voltage required by the plotter matches the voltage of the power base.
- Firstly make sure that the power switch is off, then plug the power cord into a grounded power outlet.
- Please do not touch the power cord with wet hands to avoid electric shock.
- Please only use the power cord and data cable provided with this product or manufacturer-approved replacements.
- Please do not drop metal objects and liquids into the machine to avoid malfunction.
- After shutting down, you must wait another 5 seconds to turn on the plotter again, otherwise it will cause damage to the cutting plotter.
- In thunderstorms, turn the power switch to OFF and unplug the power.
- Please do not privately change the manufacturer's components.
- The manufacturer reserves the right to change product specifications without prior notice.
- The manufacturer only bears the legal obligations of the product itself to the users, and does not bear other losses caused by the malfunction of the product.
- Without our company's permit, no part of this manual can be copied or transmitted in any form.
- Please use the adapter provided with this product. Do not use any other adapters. Using it with an incorrect voltage adapter may cause electric shock, fire hazards, or damage to the machine.
II. Introduction to main parts
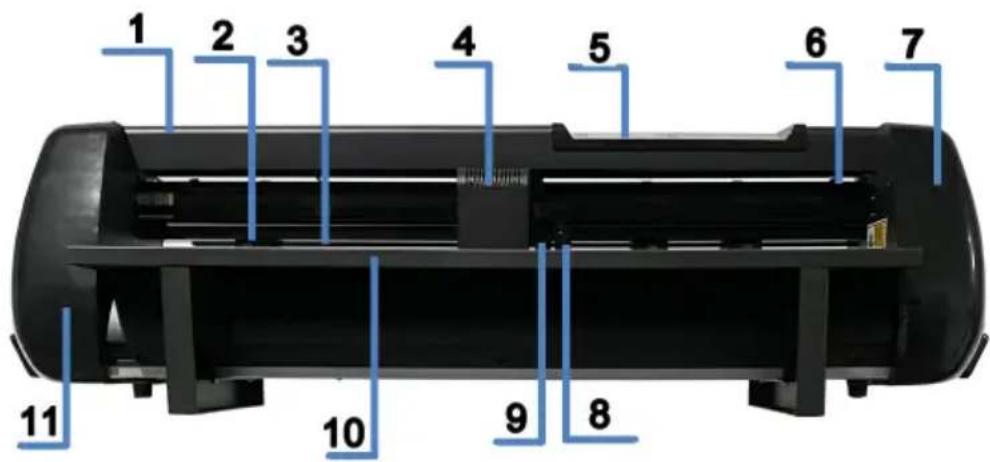
| 1.Cover for rail guide | 2. Pinch roller kit |
| 3. Roller for feeding paper | 4. Carriage |
| 5. operation panel | 6. Reset switch |
| 7. The right cover | 8. Right knife holder |
| 9. Left knife holder | 10. Working platform |
| 11. The left cover |
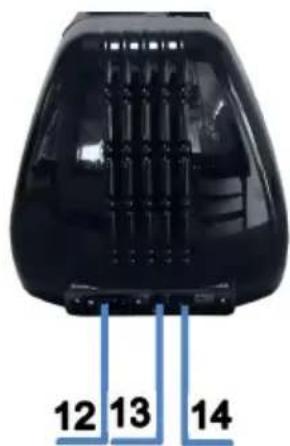
Left side
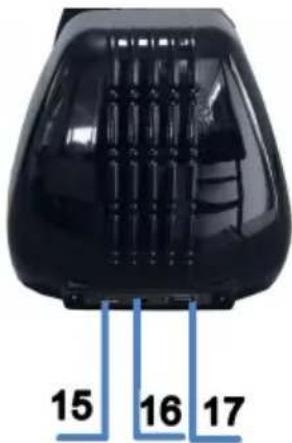
Right side
| 12.Power Socket |
| 13.Fuse holder |
| 14.The power switch |
| 15.U-disk port |
| 16.USB port |
| 17.serial port |
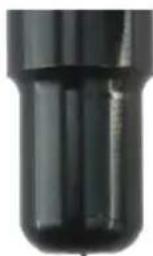
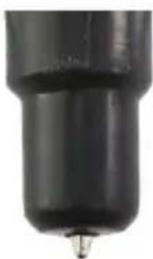
Knife holder
Pen stand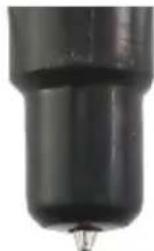
Indentation knife holder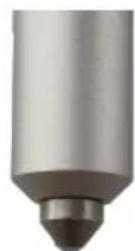
III. Technical parameters
| Model Item | SK-720L | SK-870L | SK-1350L |
| Max. feeding width | 28.3in (720mm) | 34.25inch(870mm) | 53.15inch(1350mm) |
| Max. cutting width | 23.6in (600mm) | 29.5inch (750mm) | 48.4inch (1230mm) |
| Cutting thickness | ≤1mm | ||
| Speed/Pressure | 20-600mm/s 20-500gf | ||
| Buffer | 16M | ||
| LCD display | CN/EN | ||
| Real-time Speed adjusti | Support | ||
| Interface | USB+U-DISK+COM | ||
| Re-cutting function | Support | ||
| Re-cutting accuracy | ±0.1mm | ||
| Resolution Ratio | 0.0245mm/step | ||
| Language format | HPGL | ||
| Voltage | AC85-264V, 50/60Hz | ||
Accessory box
| Item | Quantity | Unit | |
| 1 | Cutting plotter | 1 | Set |
| 2 | Power supply cable | 1 | Pc |
| 3 | Blade | 1 | Box |
| 4 | Blade holder | 1 | Pc |
| 5 | Pen holder | 1 | Pc |
| 6 | Indentation knife holder | 1 | Pc |
| 7 | USB cable | 1 | Pc |
| 8 | USB driver | 1 | Pc |
| 9 | software | 1 | pc |
| To protect the machine, use only the accessories in this accessory box | |||
IV. Control buttons description and operation instructions
P1 is the left blade speed and pressure window
P2 is the right blade speed and pressure window
P1 On-line 600mm/S 130g
Origin
Origin
P2 On-line 600mm/S 300g
Setting
Read USB disk
Setting
Set language
USB Disk

User settings Language EN

Set the Y-axis gear
User settings ScaleY 500.0

Set the X-axis gear
User settings ScaleX 502.0
Set the red light interface
Set the X-axis offset val of the left blade
User settings Laser

User settings PointX 1650
Automatic correction window

User settings Detect Auto

Set the Y-axis offset value of the left blade
User settings PointY -0770
Set the X-axis offset value of the right blade
Set the Y-axis offset value of the right blade
User settings PointX2 1200

User settings PointY2 -0060

View version interface
User settings Ver:
OFFLINE
VI. Blade assembly
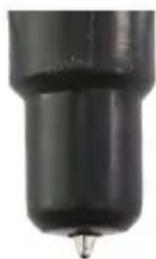
- Assemble the blade into the holder, as shown below:
(Appearance view)
(Exploded view)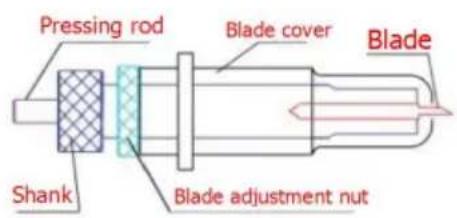
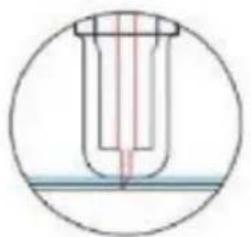
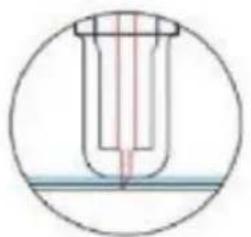
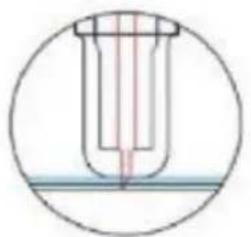
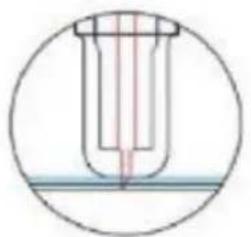
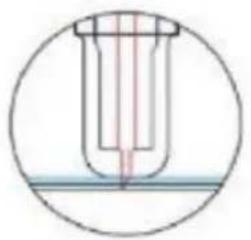
- Loosen the blade adjustment nut and rotate the shank to adjust the length of the exposed blade tip. Determine the tip length according to the thickness of the material.
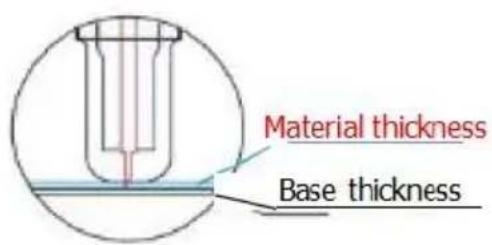
Correct

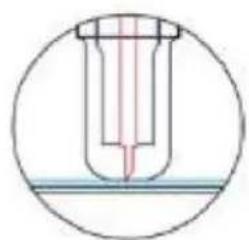
Blade tip is too long / Blade tip is too short
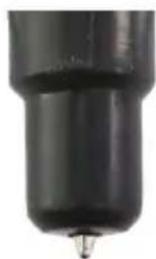
- Press the pressing rod when you want to change the blade. Take out the blade when it is exposed.

Tips:
Do not touch the blade tip with your finger, otherwise your finger will be injured and the tip will become blunt.
VII. 1. Windows system software download and installation
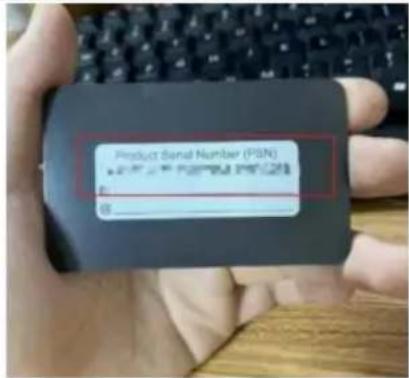
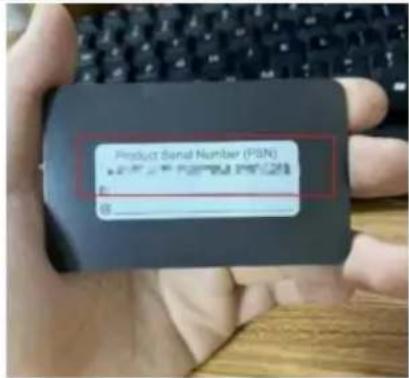
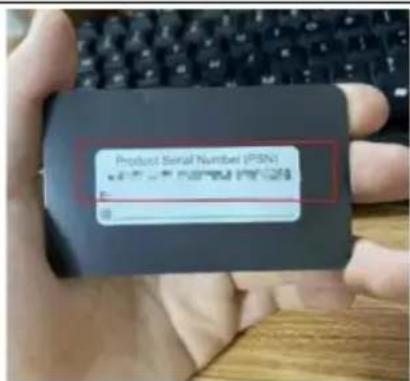
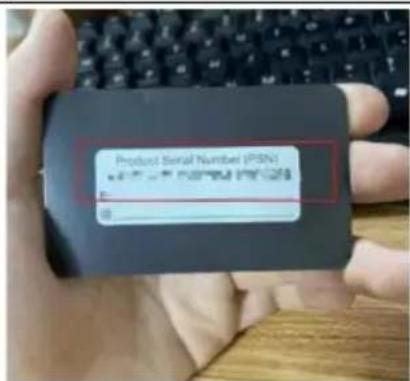
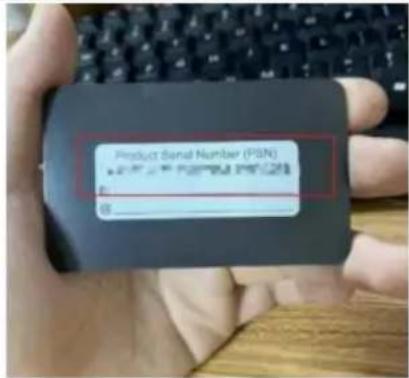
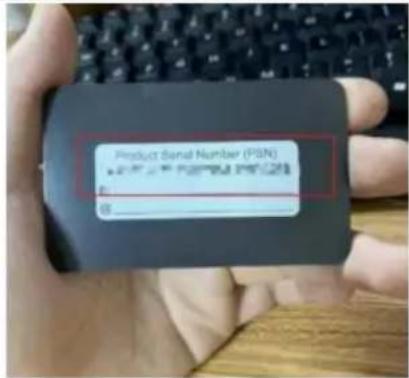
1. Open the fridge sticker (pic 1). View the activation code above (pic 2).
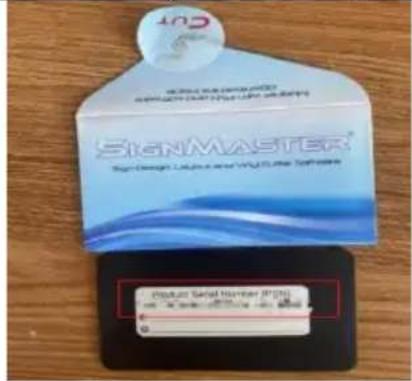
(pic 1)
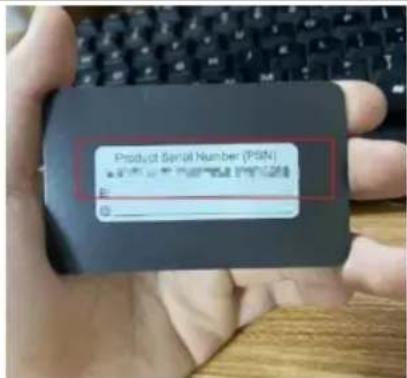
(pic 2)
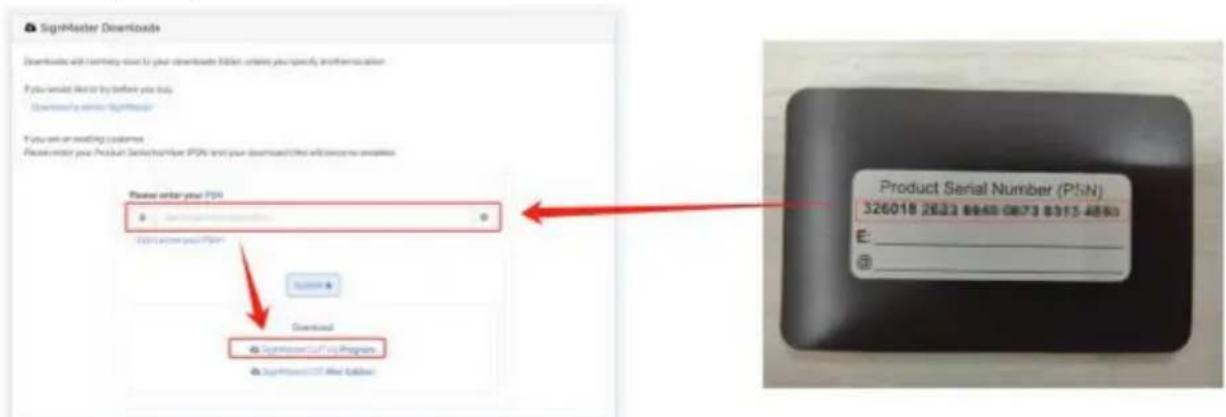
2. Open the download link below and go to the official website to download the software.
Click to Download
https://get.signmaster.software/
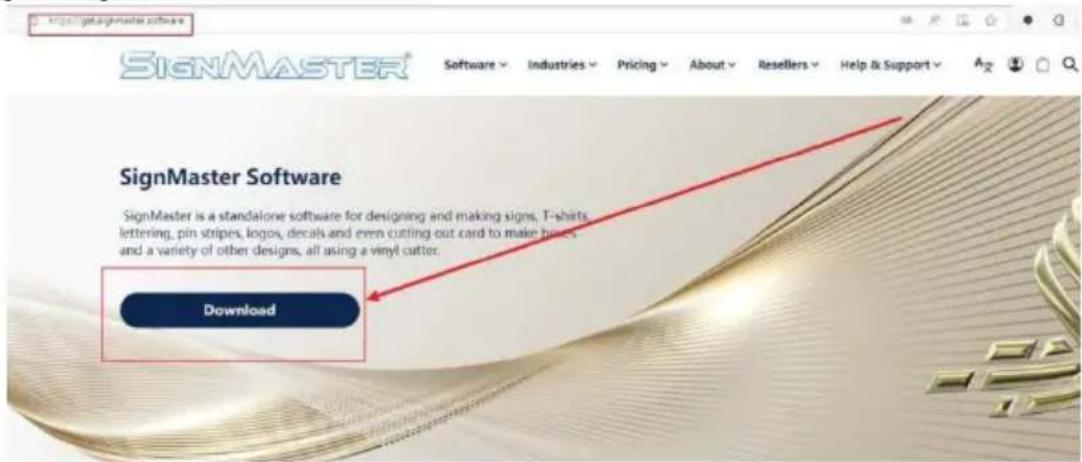
(pic 3)
- The PSN activation code required by the website is the numeric code shown in the picture above. (pic 4)
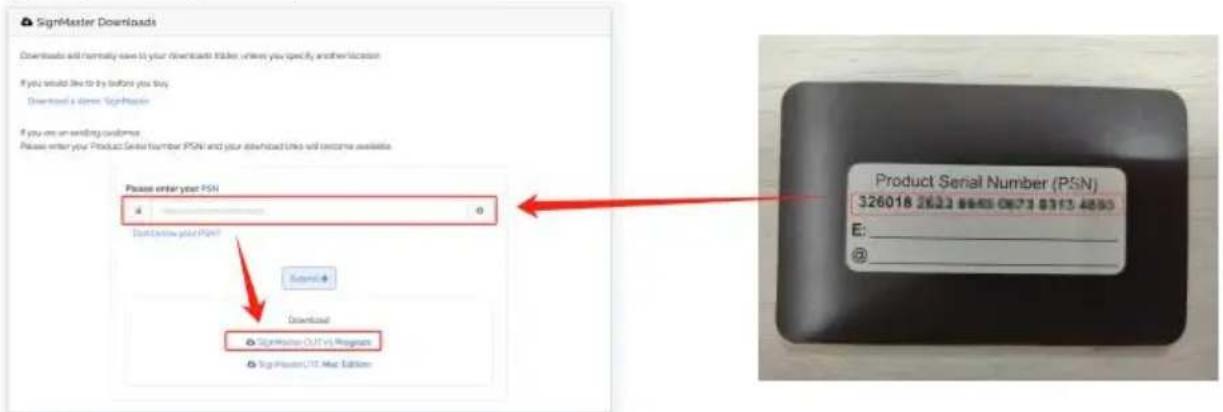
(pic 4)
- Once downloaded, close all antivirus software before installing it. (pic 4)
Double click
Select the language


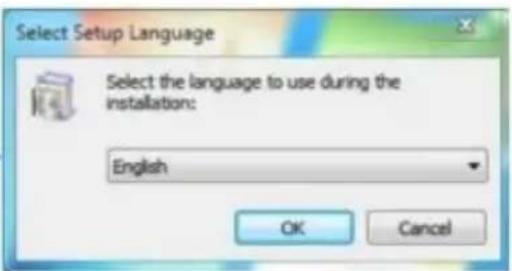
(pic 4-2)

SignMaster_UniverDSR_V5_GW .exe
(pic 4-1)
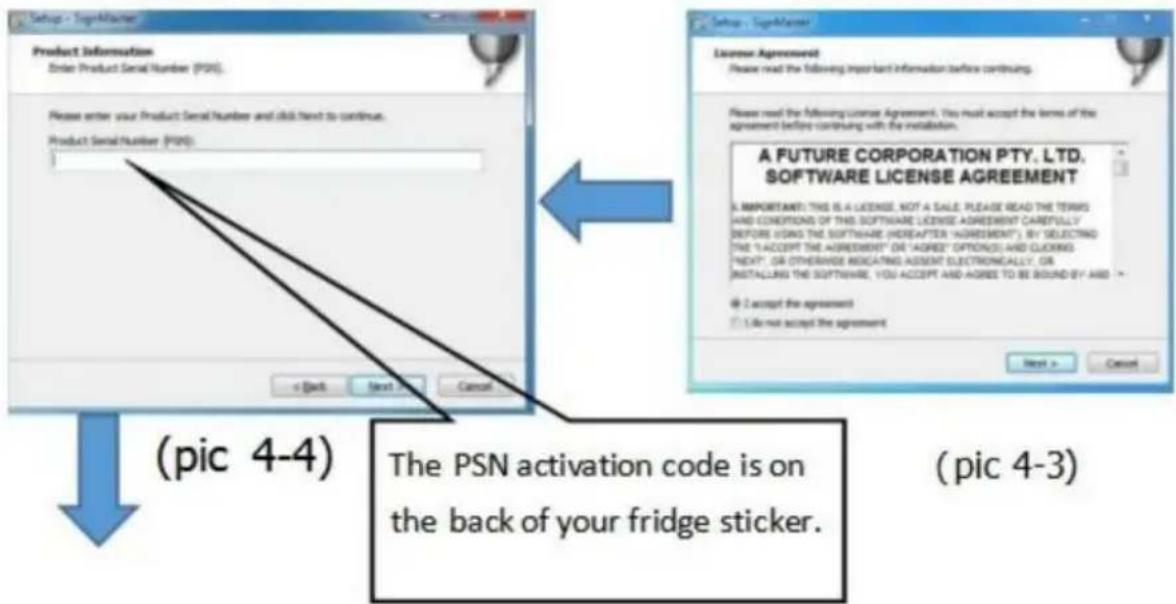
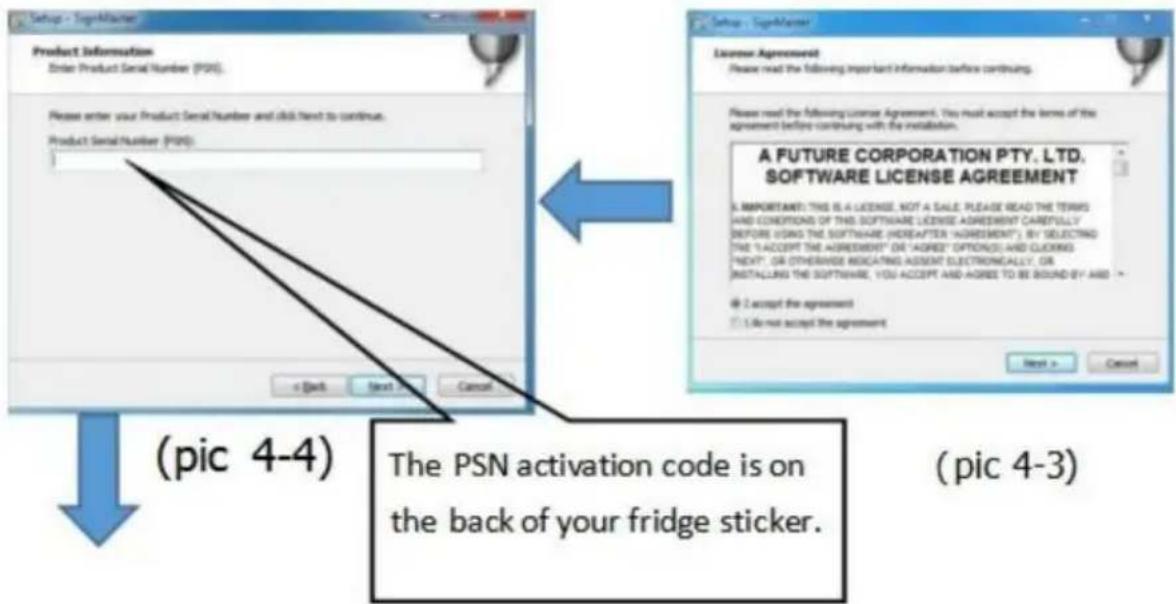
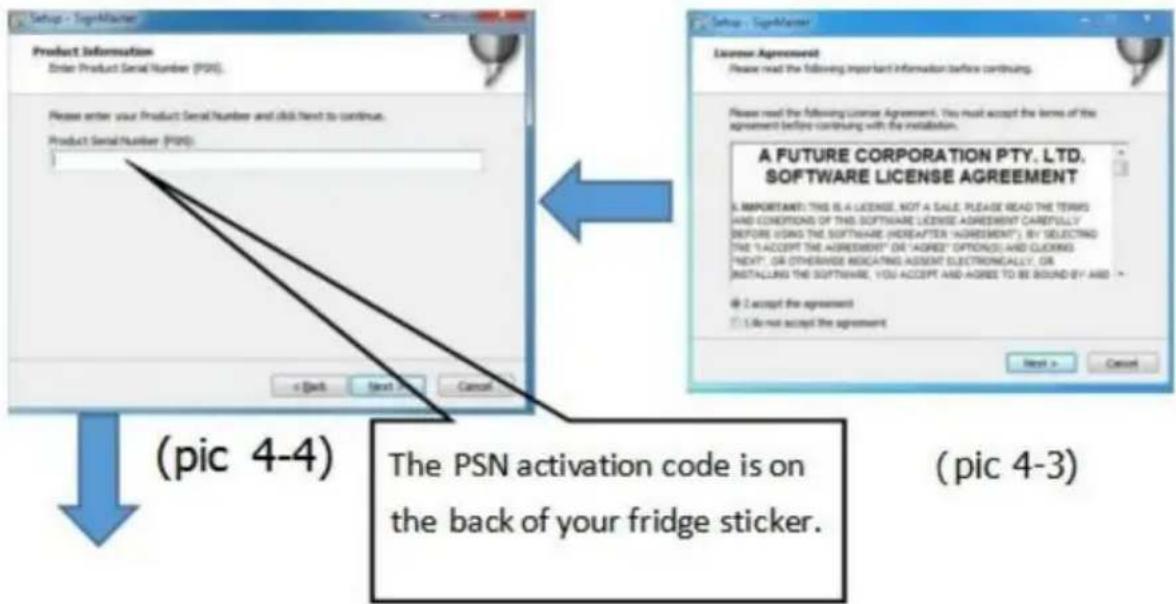
Enter the PSN code
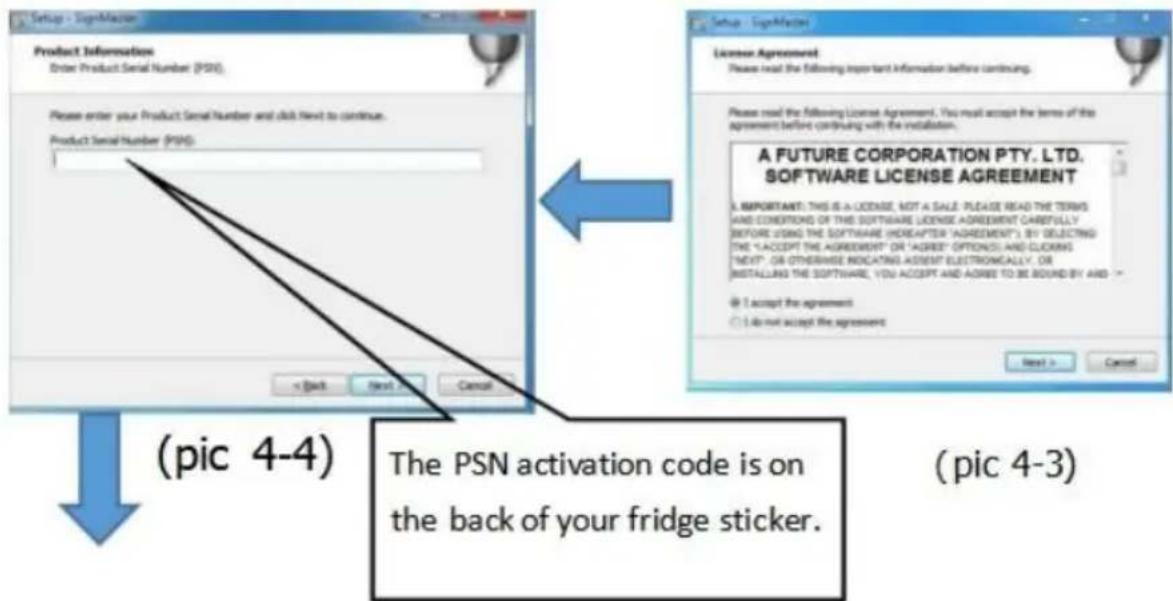
Agree to click next
Default installation path, click next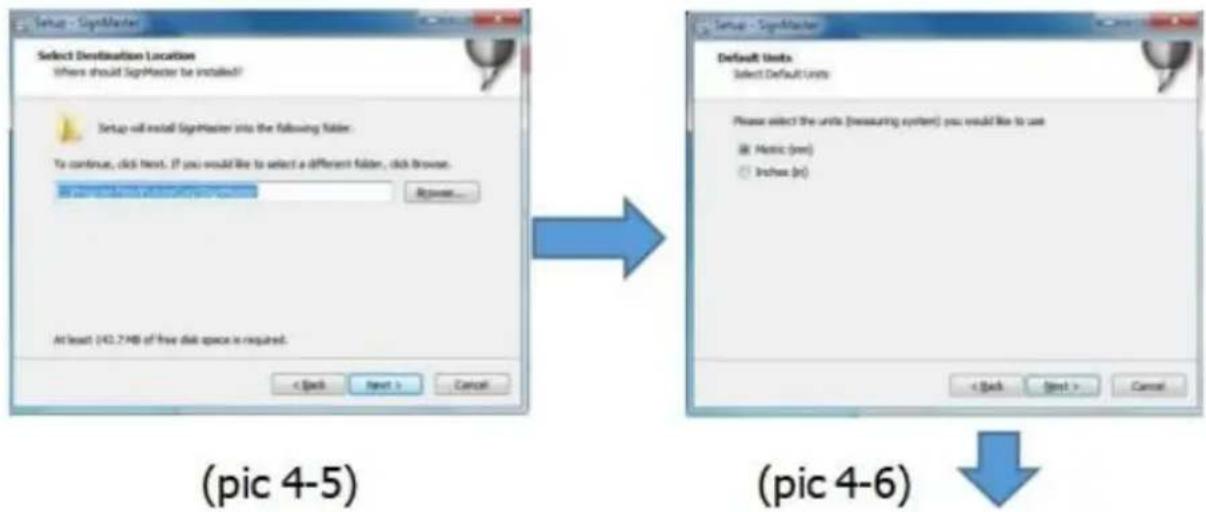
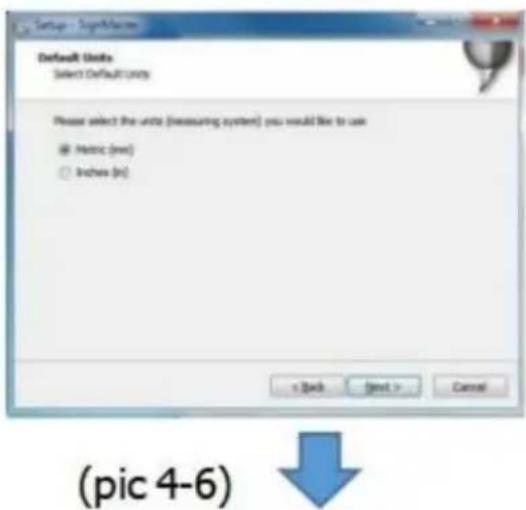
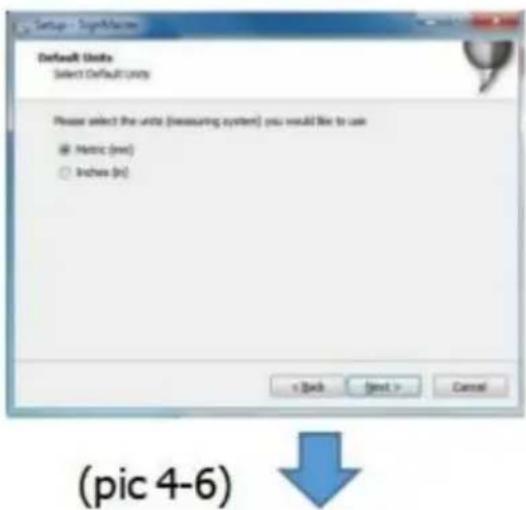
Select the unit
Select machine model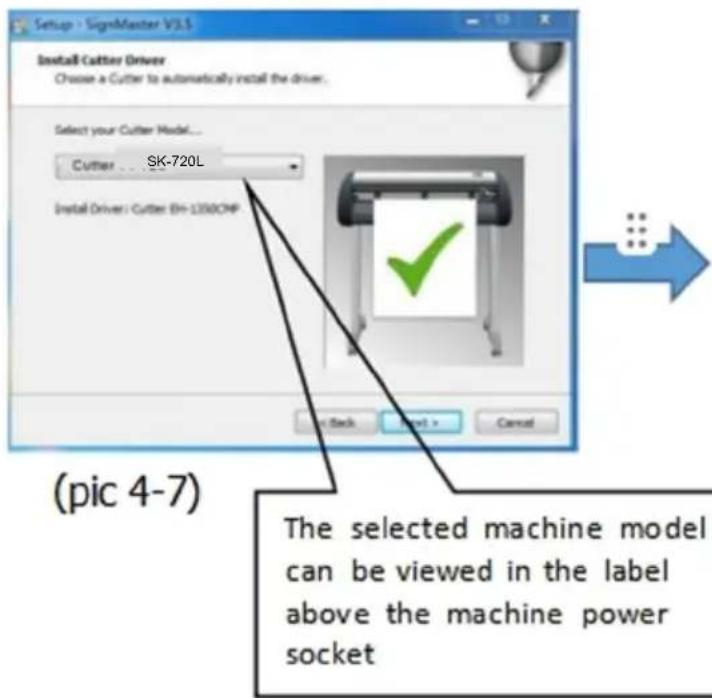
Next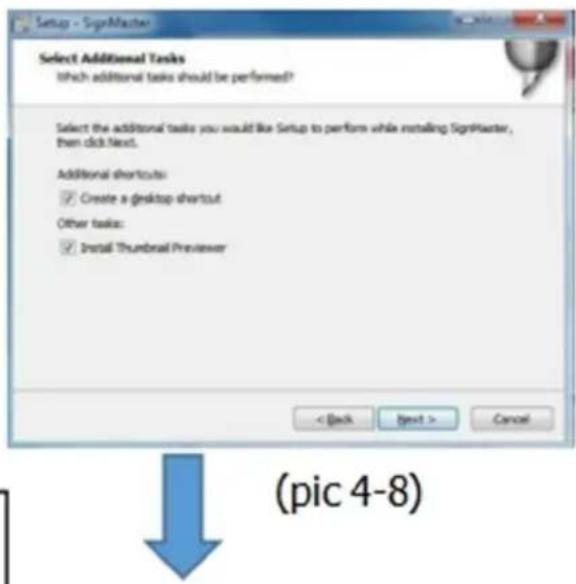
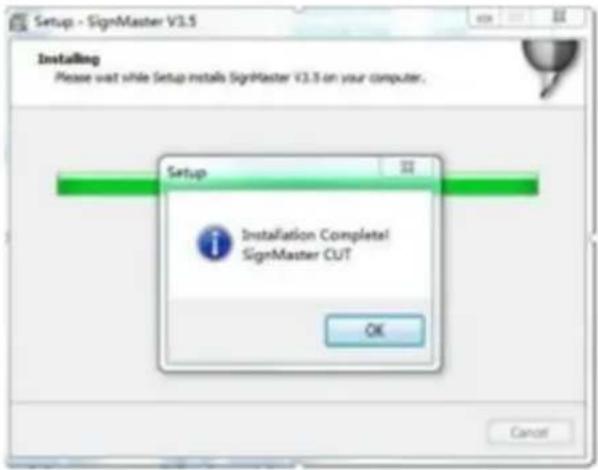
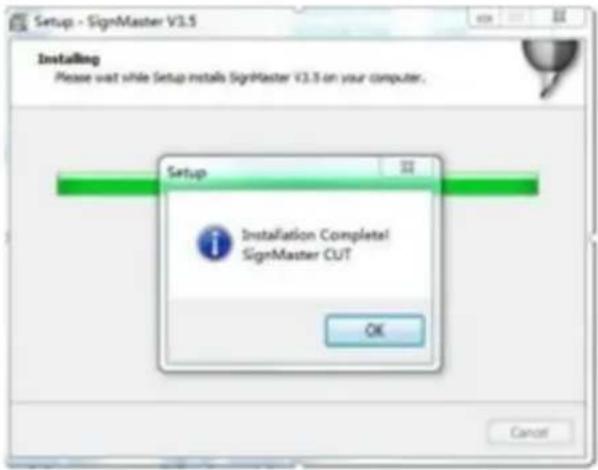
The installation is complete
This activation window appears when you open the software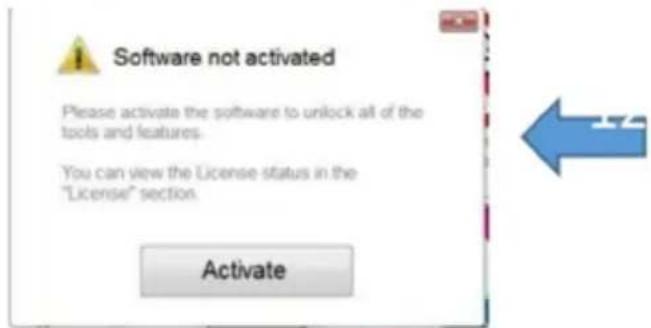
(pic 4-10)
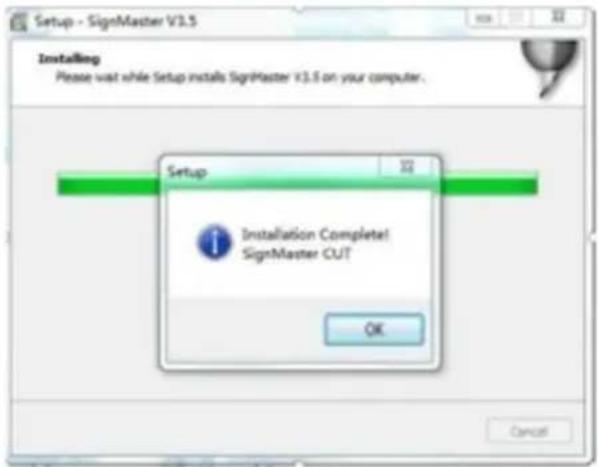
(pic 4-9)
Click activate and enter your email twice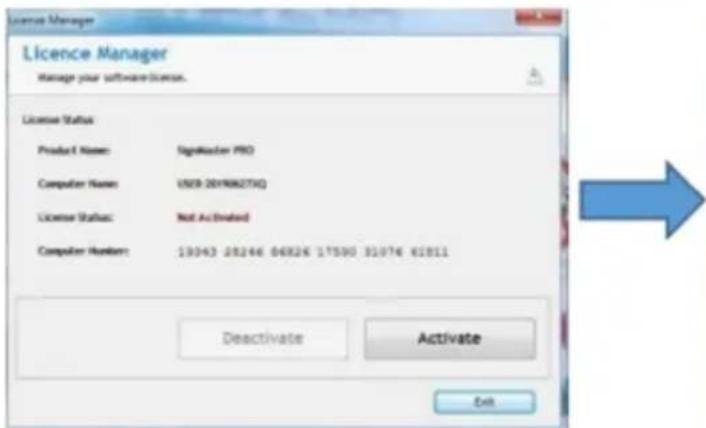
(pic 4-11)
Activation successful, exit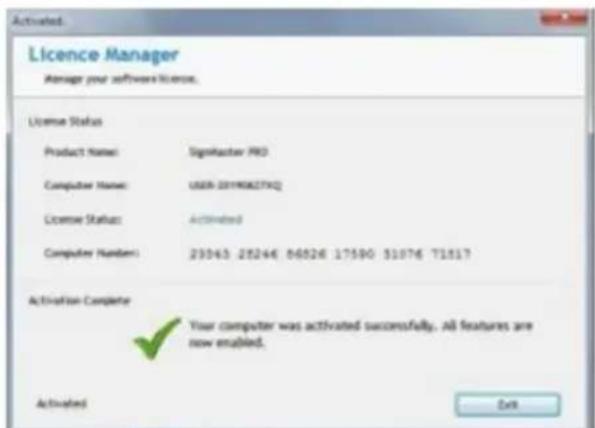
(pic 4-12)
2. Connection of software and machine
- Open the software, select cut content, and click send to the cutting plotter
Click the carving knife icon in the red box
![SignMaster CUT 3.5 - [*Untitled.vDoc] File Edit View Layout Arrange Objects Images Text Curves Colors Too x 20.732 mm 56.758 mm y 69.734 mm 55.600 mm Corner Style Round -300 -250 -200 -150 -100 -5](/content/2026/04/736446/images/9e2cbaa2ffcf394dce0a7228070544d5342afe31f4648807b6b76d433a42bf37.jpg)
(pic 5-1)
Click properties
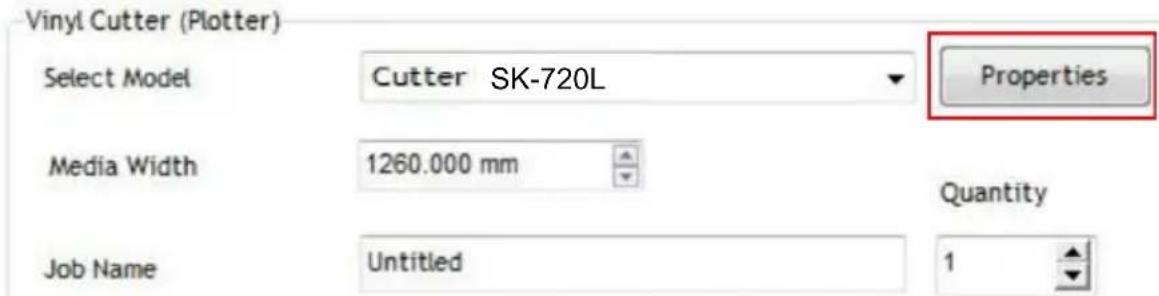
(pic 5-2)

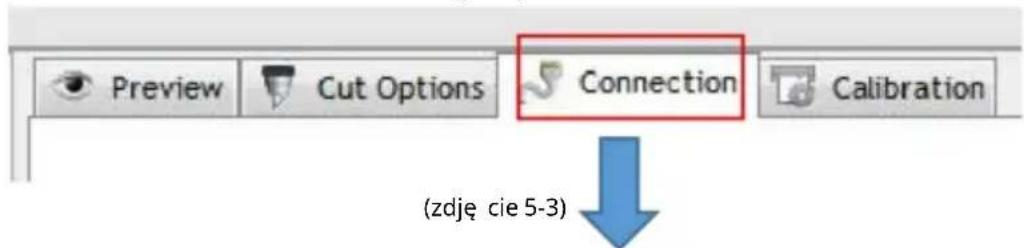
Click connect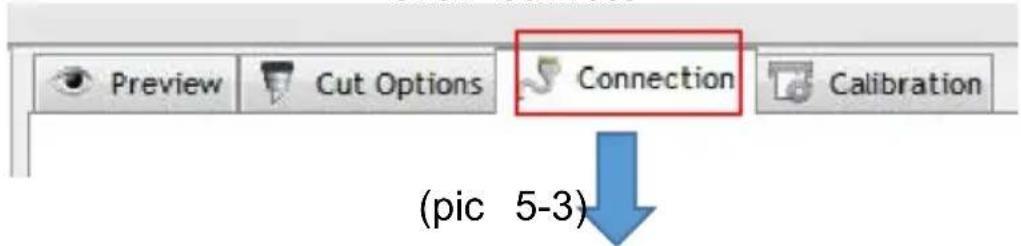
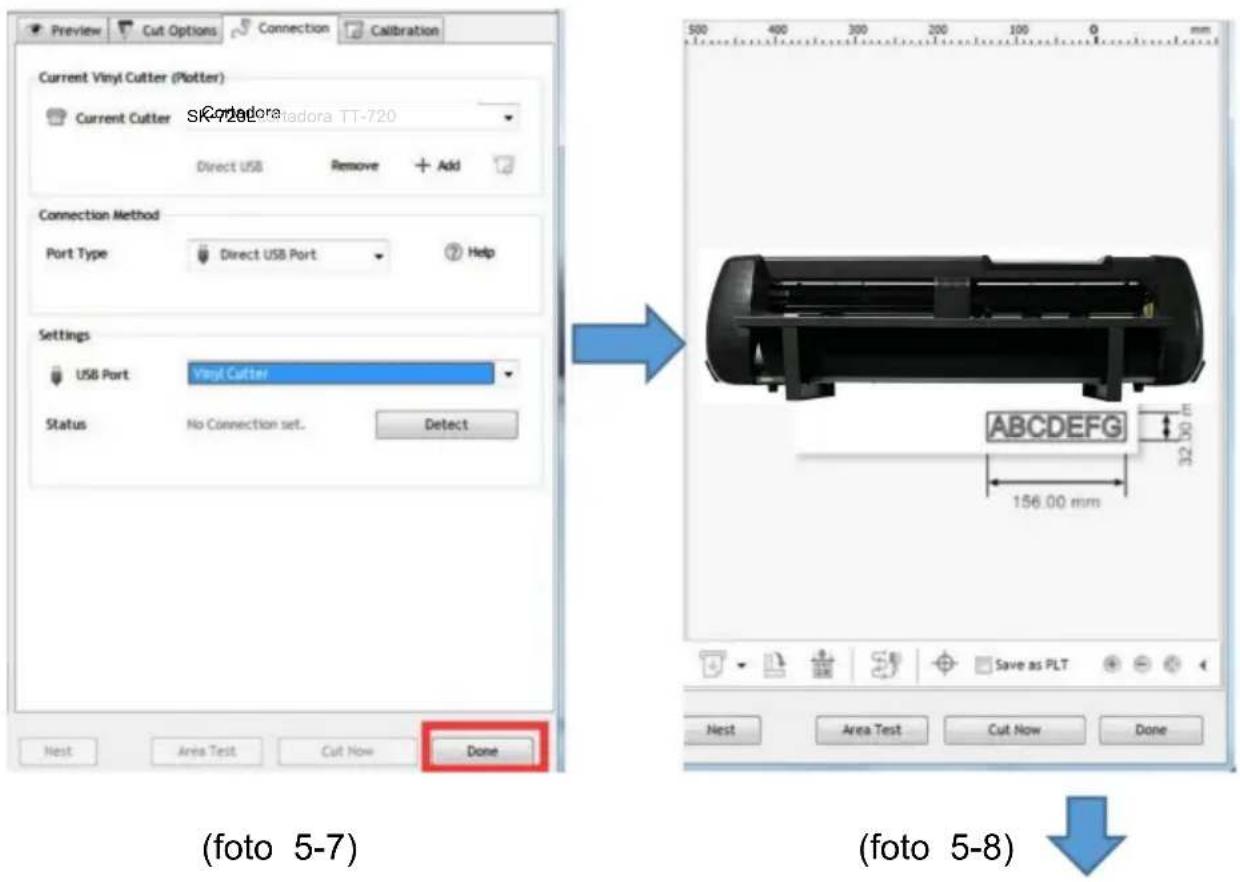
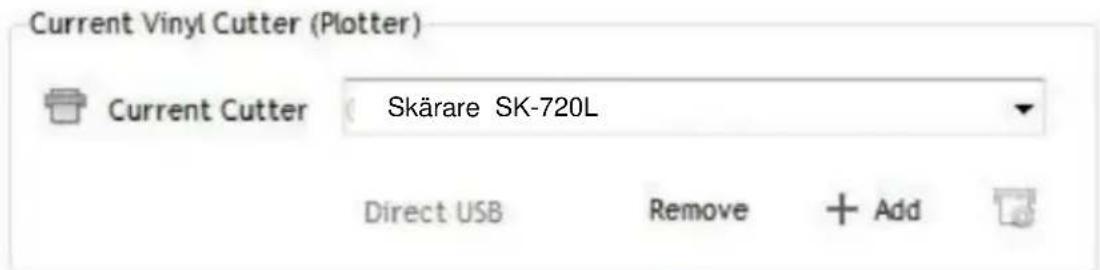
Select machine model
Current Vinyl Cutter (Plotter)

Current Cutter
Cutter SK-720L
Direct USB
Remove
+ Add

(pic
5-4)

Select Direct USB Port
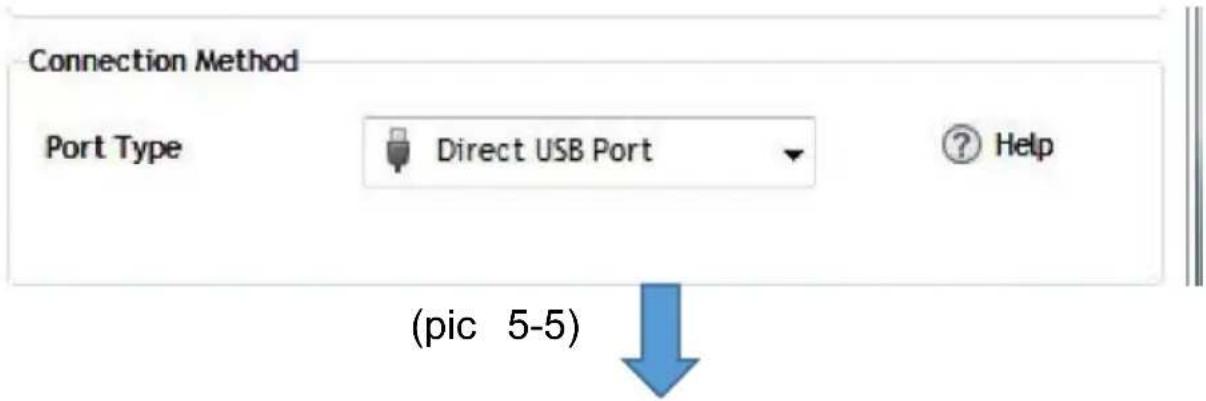
Drop-down select driver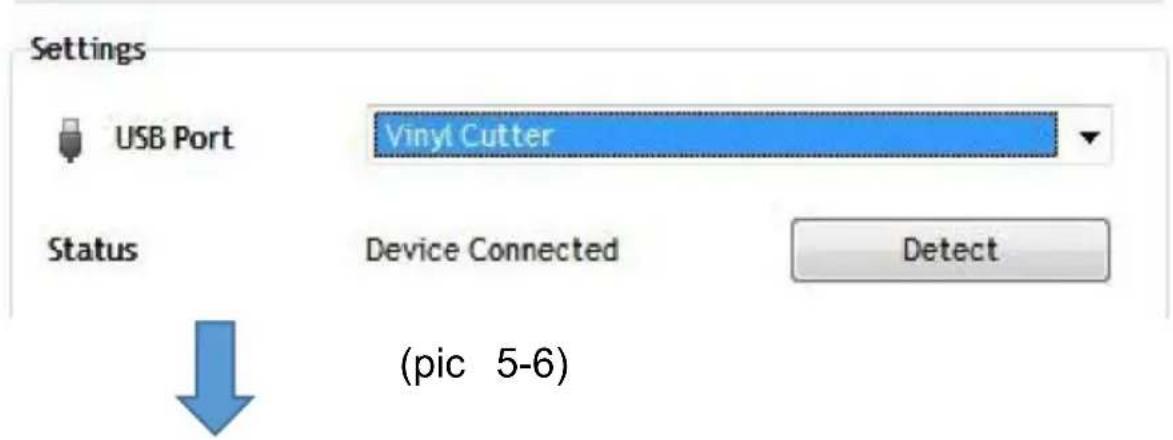
Click finish Click cut now
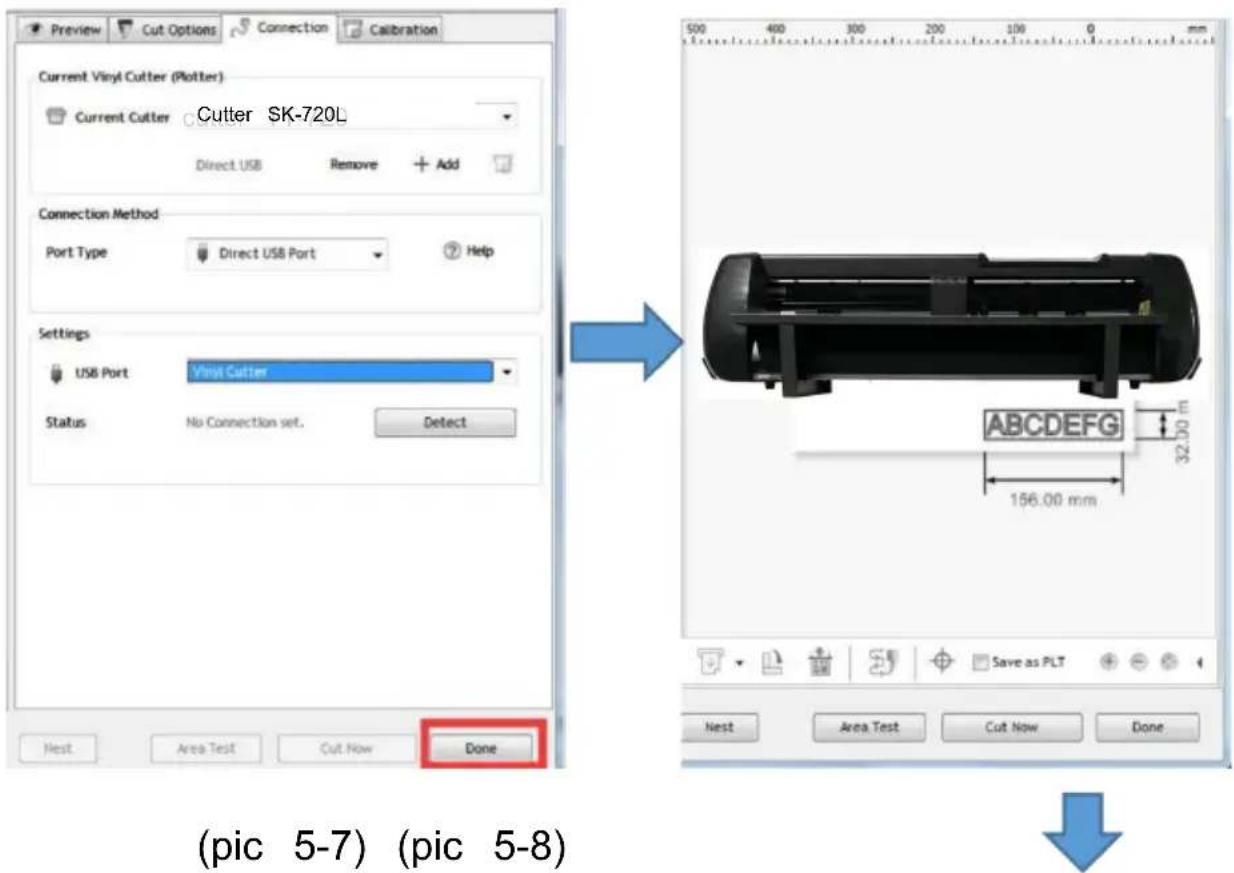
Click cut now
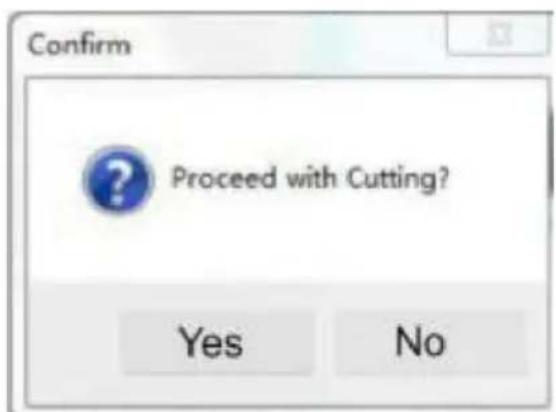

(pic 5-9)
The output is completed, and the cutting plotter is cutting
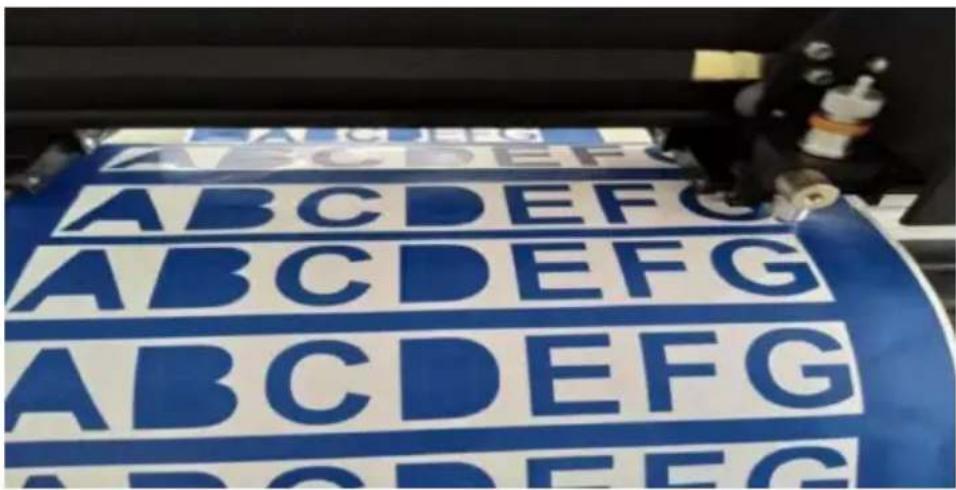
(pic 5-10)
VIII 1. MAC system software download and installation
1. Open the fridge sticker (pic 6). View the activation code above (pic 7).
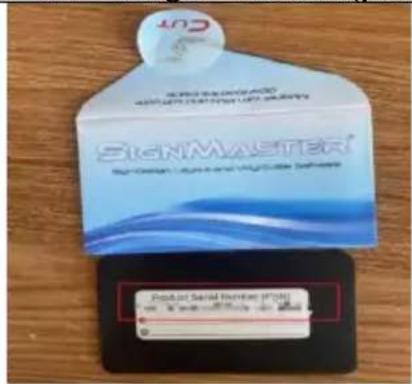
(pic 6)
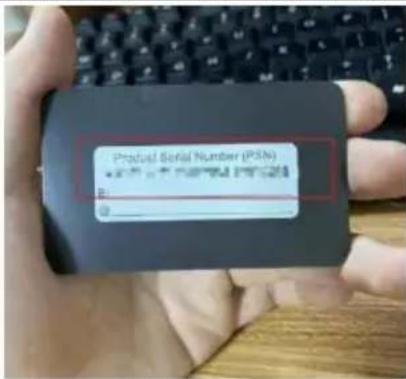
(pic 7)
2. Open the download link below and go to the official website to download the software.
Click to Download
https://get.signmaster.software/
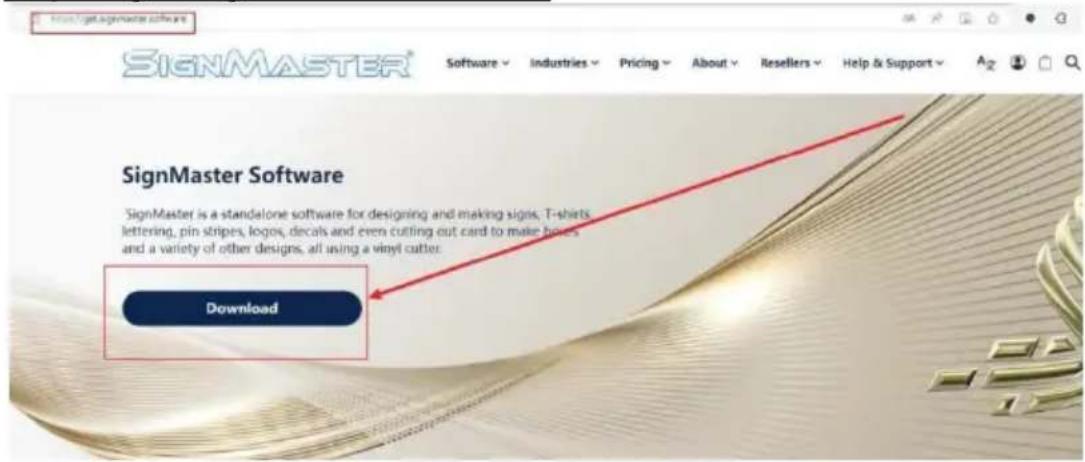
(pic 8)
- The PSN activation code required by the website is the numeric code on the fridge sticker. (pic 9)
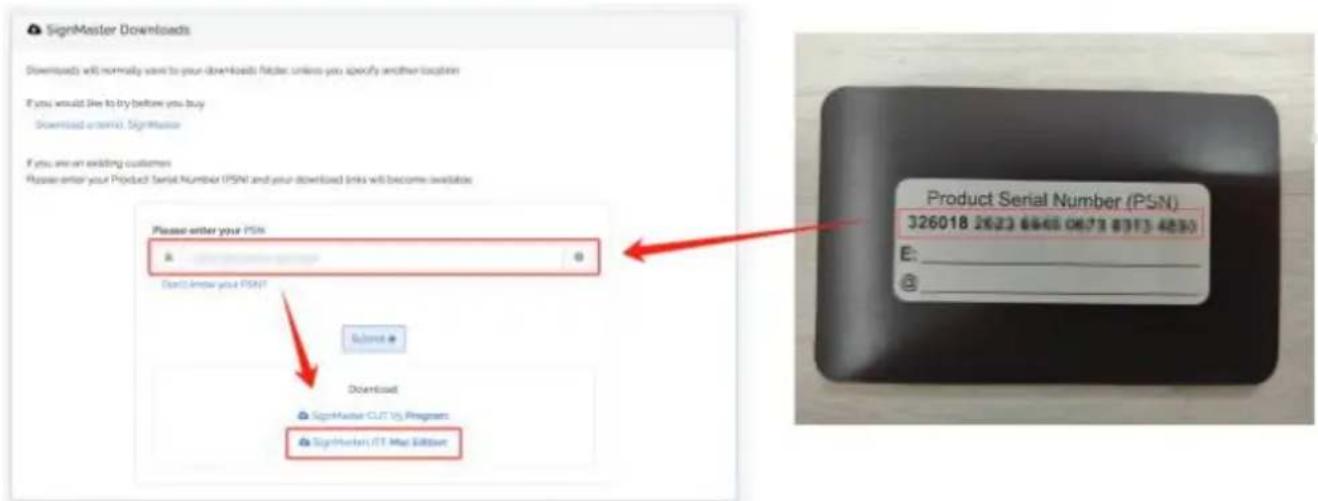
(pic 9)
 | FCC Information:CAUTION: Changes or modifications not expressly approved by the responsible for compliance could void the user's authority to operate equipment!This device complies with Part 15 of the FCC Rules. Operation is the following two conditions:1) This product may cause harmful interference.2) This product must accept any interference received, including interfere that may cause undesired operation.WARNING: Changes or modifications to this product not expressly ap by the party.responsible for compliance could void the user's authority operate the product.Note: This product has been tested and found to comply with the I Class B digital device pursuant to Part 15 of the FCC Rules, These designed to provide reasonable protection against harmful interference residential installation.This product generates, uses and can radiate radio frequency energy not installed and used in accordance with the instructions, may caus harmful interference to radio communications. However, there is no guarantee that interference will not occur in a particular installation. product does cause harmful interference to radio or television reception,which can be determined by turning the product off and on user is encouraged to try to correct the interference by one or more following measures.Reorient or relocate the receiving antenna.Increase the distance between the product and receiver.Connect the product to an outlet on a circuit different from that t receiver is connected.Consult the dealer or an experienced radio/TV technician for assist |
 | This product is subject to the provision of European Directive 2012/1 The symbol showing a wheelie bin crossed through indicates that the requires separate refuse collection in the European Union. This appli product and all accessories marked with this symbol. Products marke such may not be discarded with normal domestic waste, but must b a collection point for recycling electrical and electronic devices |
Manufacturer: Shanghai Muxin Muye Youxian Gongsi
Address: Shuangchenglu 803nong11hao1602A-1609shi, Baoshan District, Shanghai 200000 CN.
EC REP: E-CrossStu GmbH.
Mainzer Landstr. 69, 60329 Frankfurt am Main.
UK REP: YH CONSULTING LIMITED.
C/O YH Consulting Limited Office 147, Centurion House, London Road, Staines-upon-Thames, Surrey, TW18 4AX
Imported to AUS: SIHAO PTY LTD.
1 ROKEVA STREET, EASTWOOD NSW 2122, Australia
Imported to USA: Sanven Technology Ltd.
Suite 250, 9166 Anaheim Place, Rancho Cucamonga, CA 91730

VEVOR
Affordable. Reliable. Home Improvement.
PLOTER TNACY
MODEL: SK-720L/SK-870L/SK-1350L
MODEL: SK-720L/SK-870L/SK-1350L
Knife holder
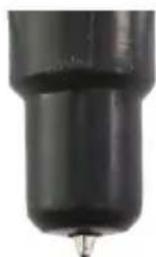
pen stand
P2 On-line 600mm/S 300g

USB Disk
User settings PointX 1650

Correct

Tips:
(photo 3)
(photo 4)
Default installation path, click next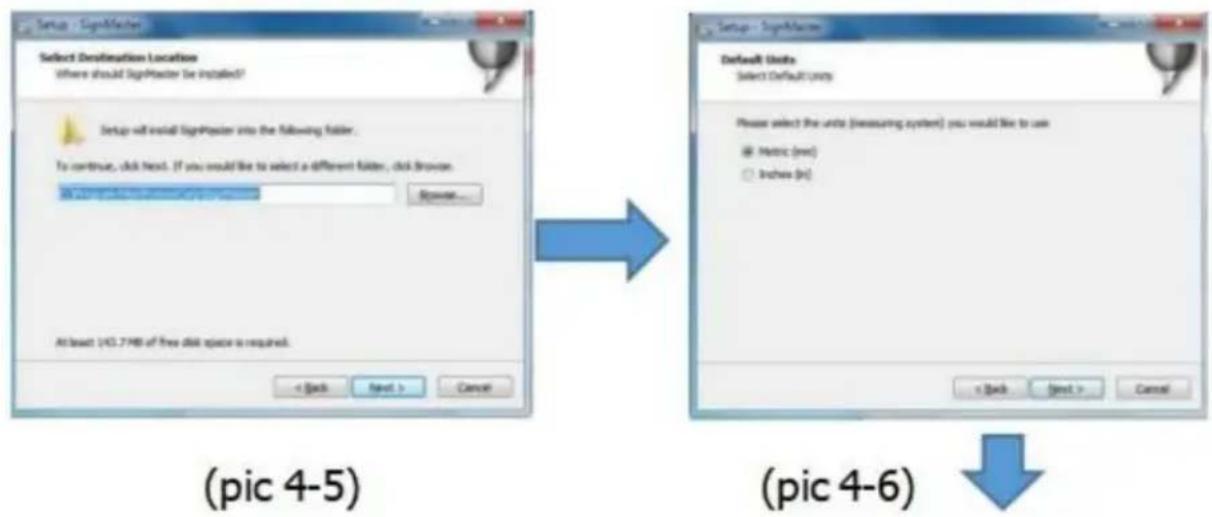
Select machine model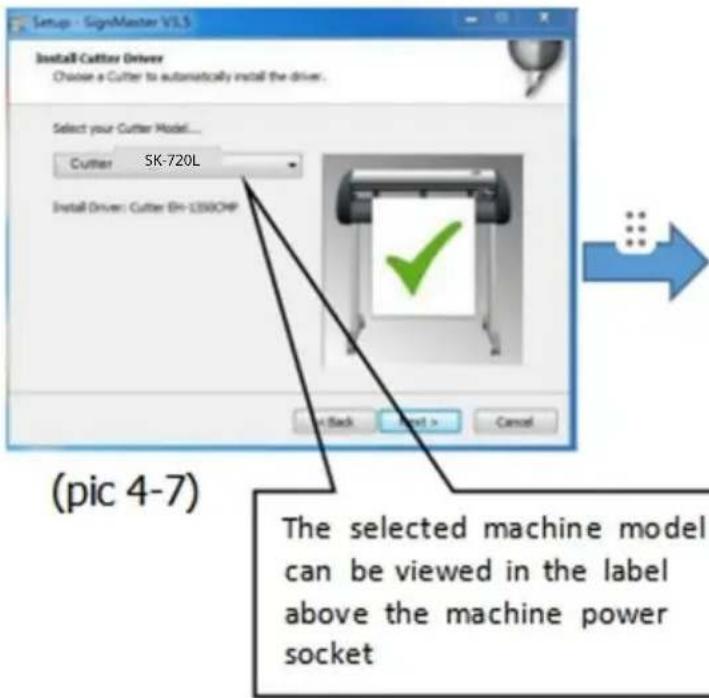
Next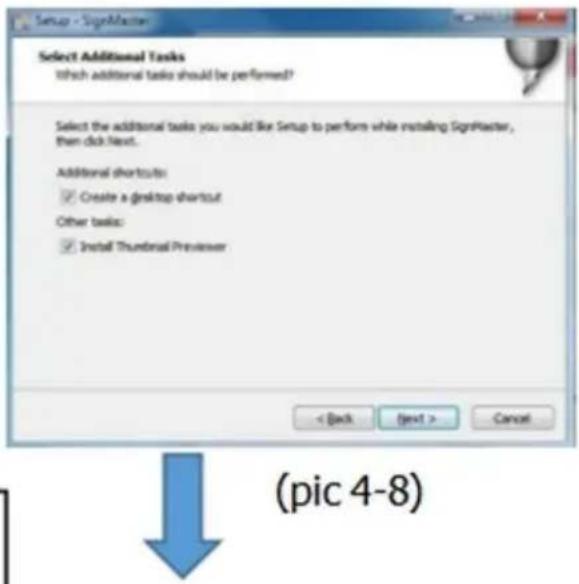
The installation is complete
This activation window appears when you open the software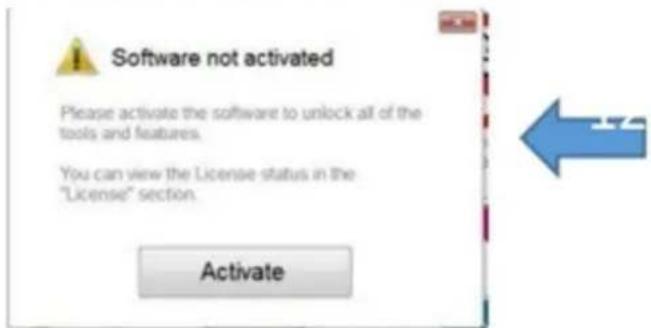
(pic 4-10)
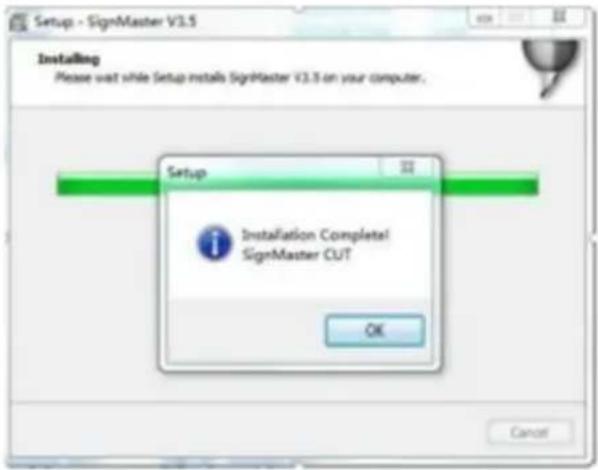
(pic 4-9)
Click activate and enter your email twice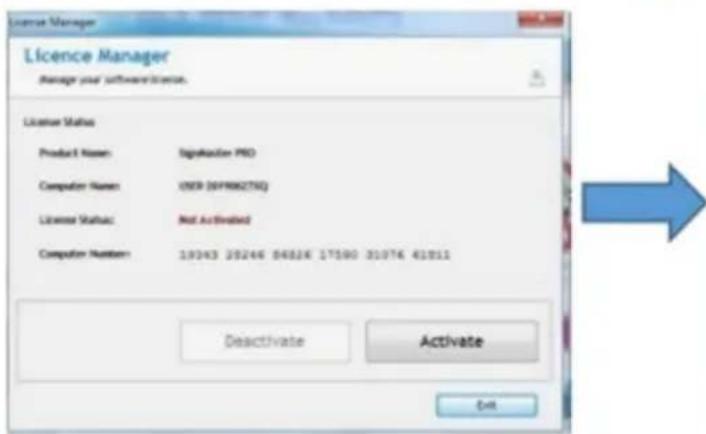
(pic 4-11)
Activation successful, exit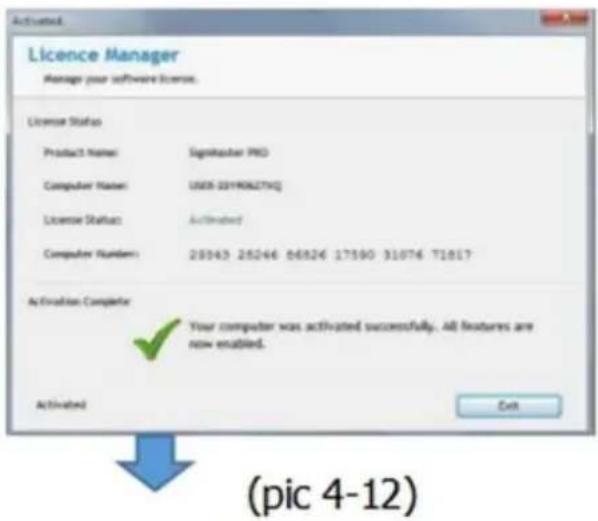
(pic 5-2)

Click Connect
Current Vinyl Cutter (Plotter)

Current Cutter
SK-720L Milling Machine
Direct USB
Remove
+ Add

(pic 5-4)


(pic 5-9)
(pic 8)
(pic 9)
C/O YH Consulting Limited, Unit 147, Centurion House, London Road, Staines-upon-Thames, Surrey, TW18 4AX
Imported into AUS: SIHAO PTY LTD.
1 ROKEVA STREET, EASTWOOD NSW 2122, Australia
Imported into USA: Sanven Technology Ltd.
Apartment 250, 9166 Anaheim Place, Rancho Cucamonga, CA 91730

VEVOR
Affordable. Reliable. Home Improvement.
CUTTING PLOTTER
MODEL: SK-720L/SK-870L/SK-1350L
MODEL: SK-720L/SK-870L/SK-1350L
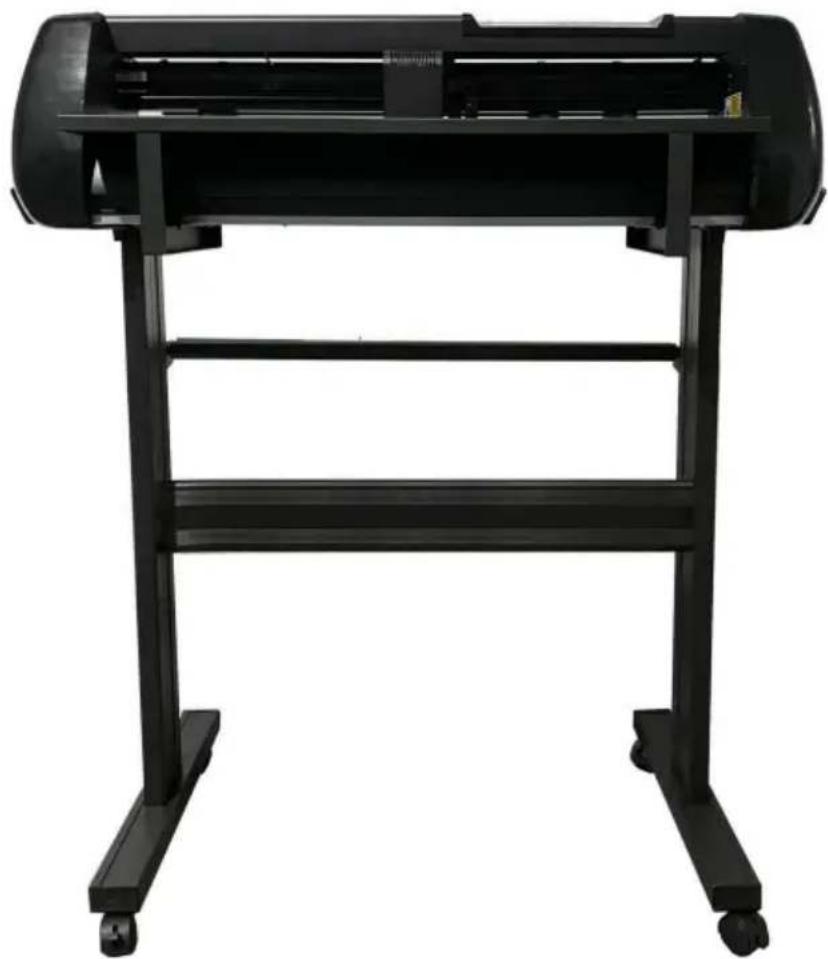
Blade holder
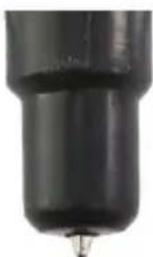
Pen holder
P2 On-line 600mm/S 300g
Placement
Read USB disk
Placement
Set the language
USB Disk

User settings Language EN

User settings PointX 1650

Correct
Tips:
(photo 1)
(photo 2)
(photo 3)
(photo 4)
SignMaster_UniverDSR_V5_GW.exe
(pic 4-2)

(pic 4-1)
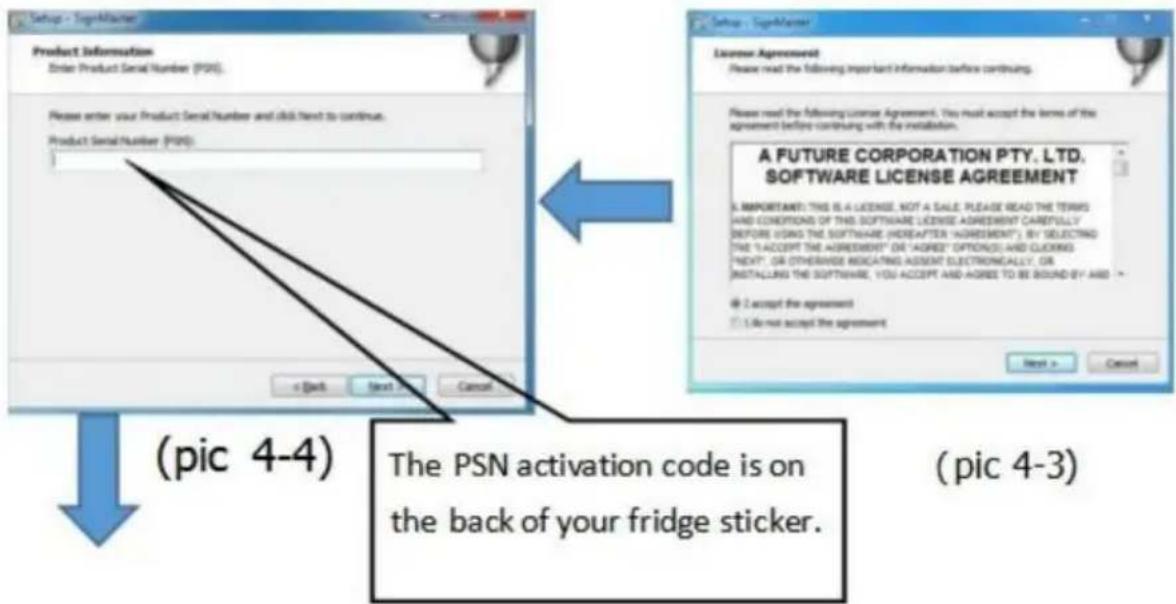
Enter the PSN code
Agree to click next
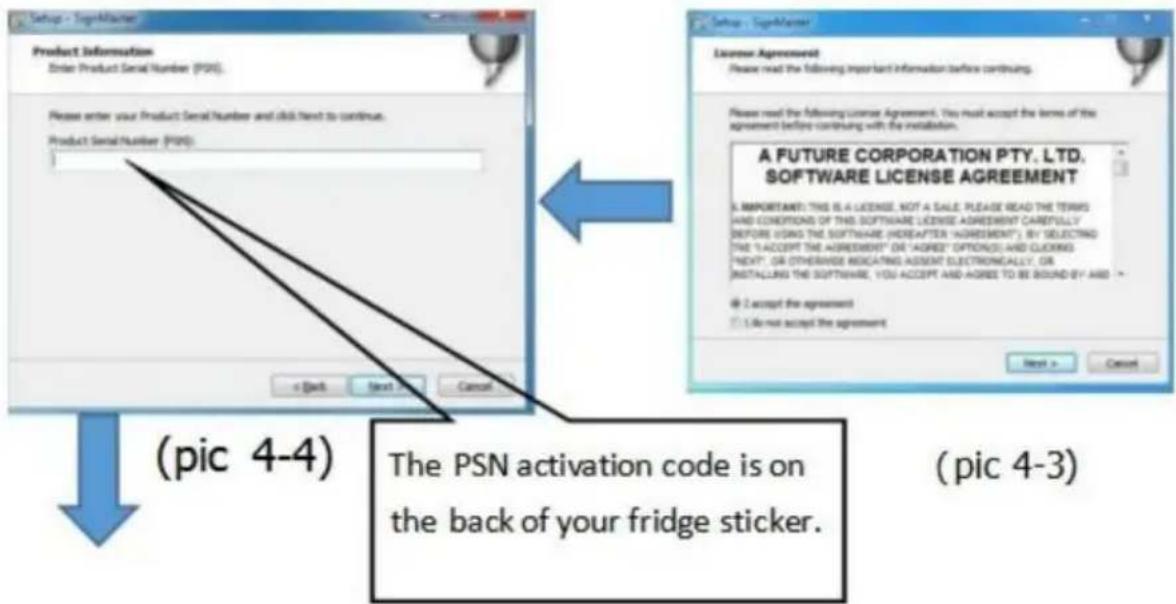
(pic 4-4)
The PSN activation code is on the back of your fridge sticker.
(pic 4-3)
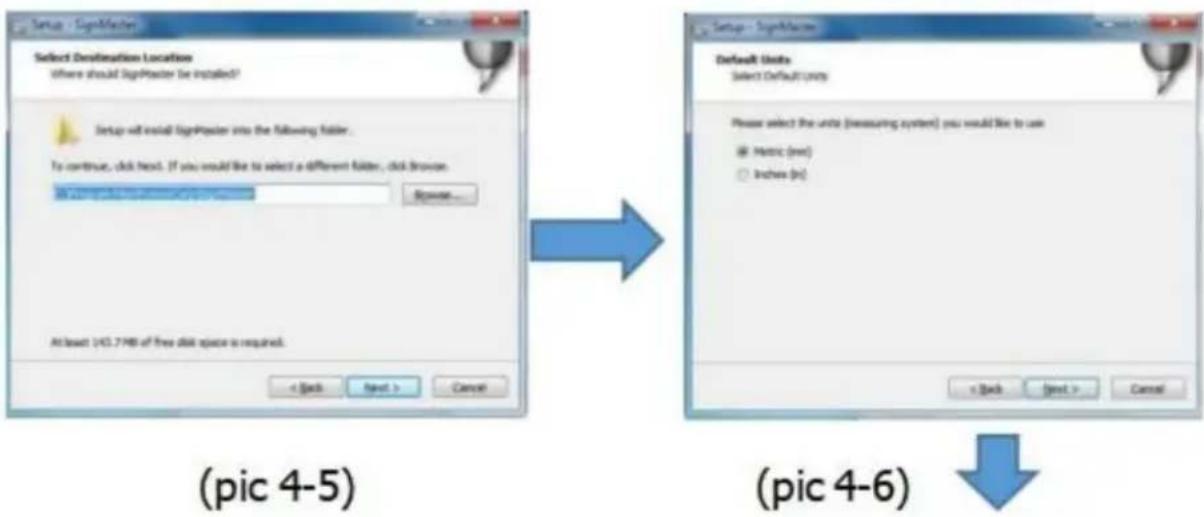
Default installation path, click next
Select the unit
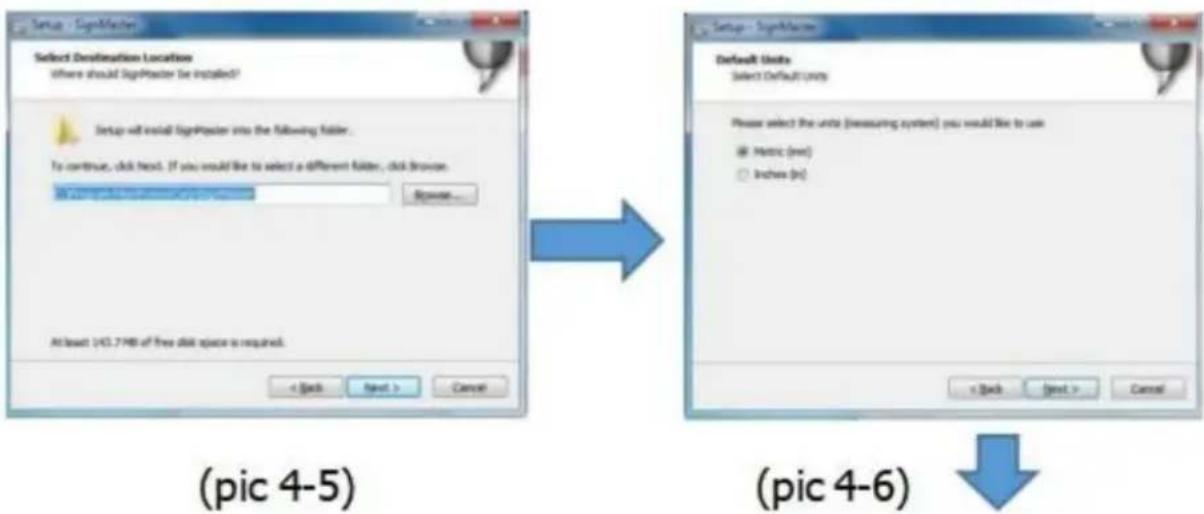

(pic 4-5)
(pic 4-6)

Select machine model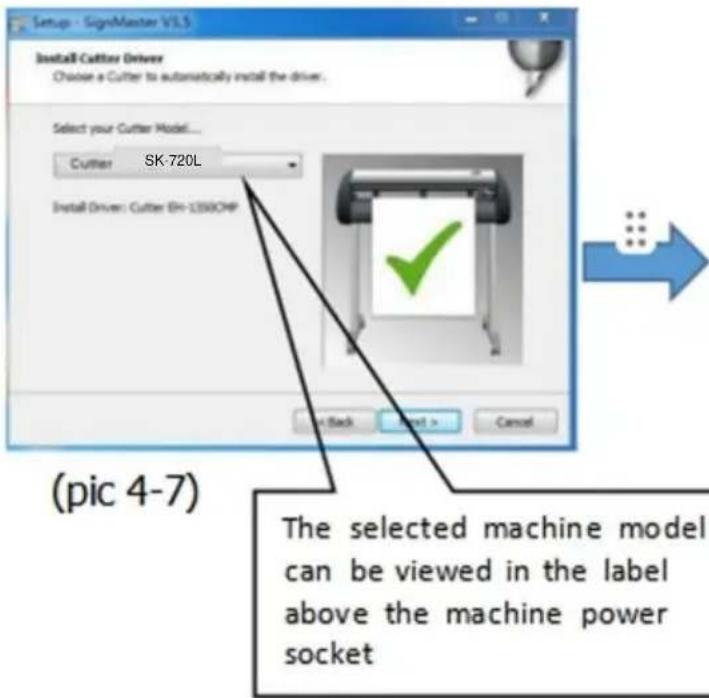
Next
The installation is complete
This activation window appears when you open the software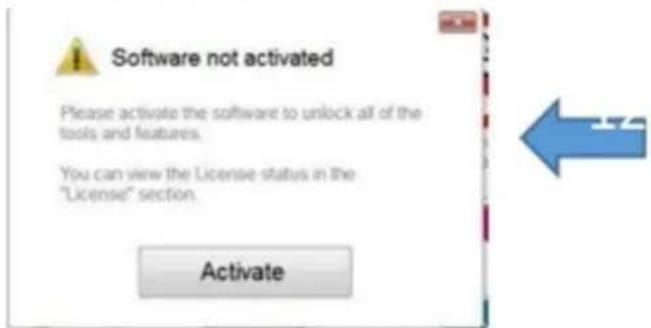
(pic 4-10)
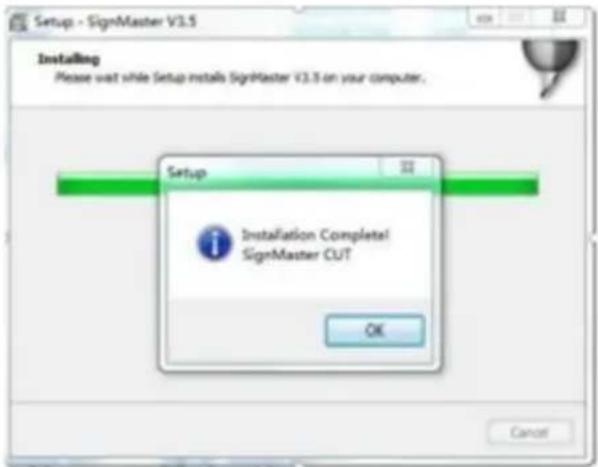
(pic 4-9)
Click activate and enter your email twice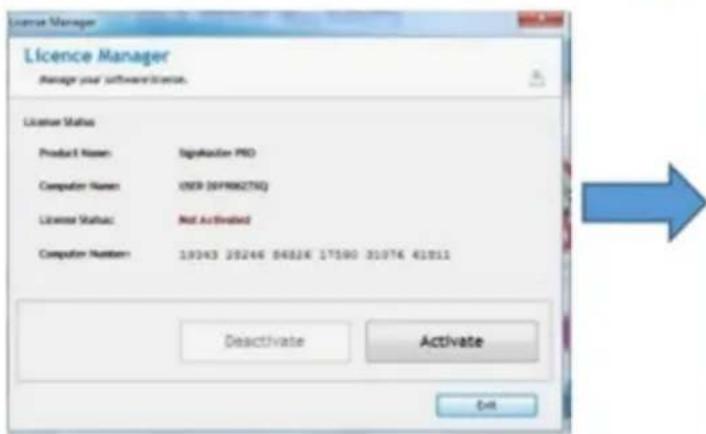
(pic 4-11)
Activation successful, exit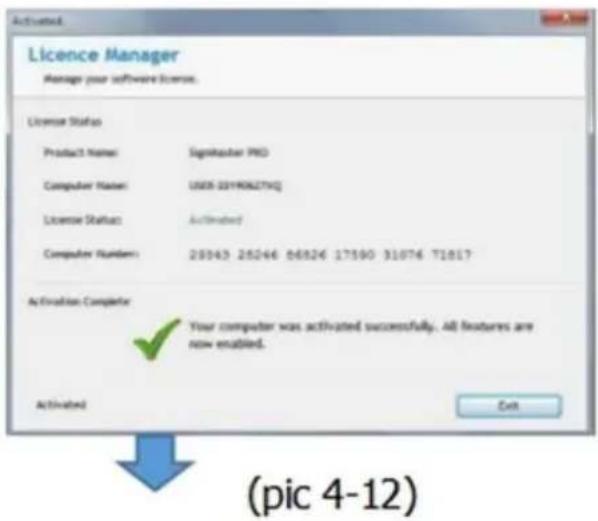
(foto 5-2)

Click on Connect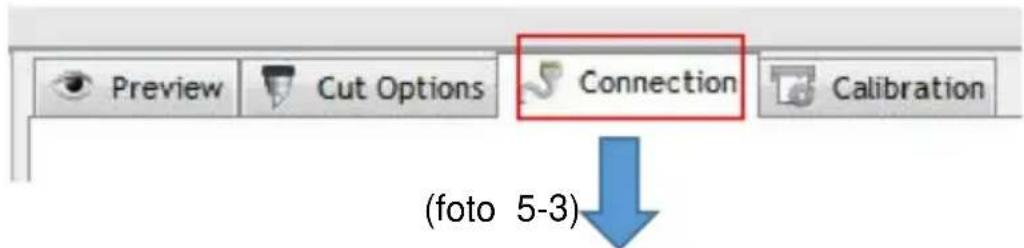
Click on Finish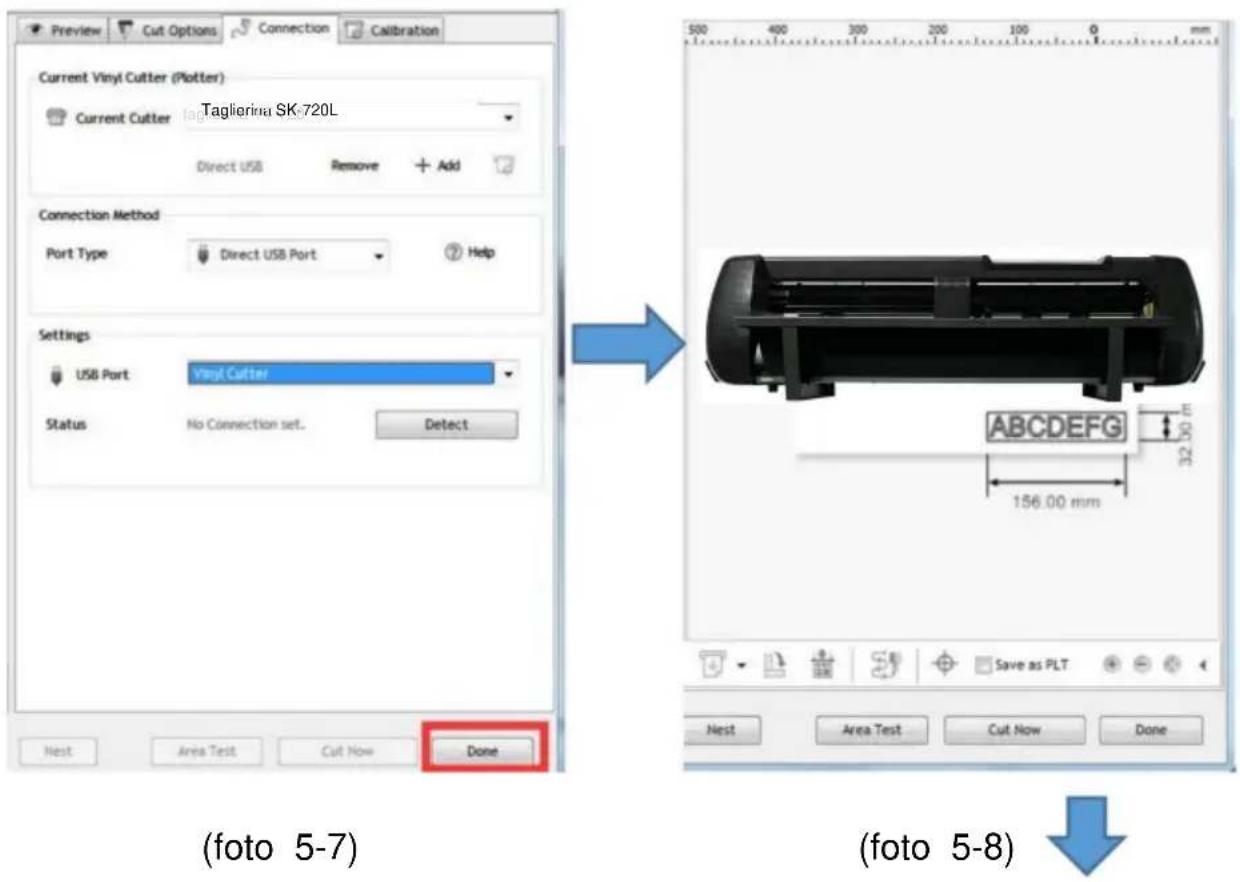

(foto 5-9)
(foto 8)
(foto 9)
C/O YH Consulting Limited Office 147, Centurion House, London Road, Staines-upon-Thames, Surrey, TW18 4AX
Imported in AUS: SIHAO PTY LTD. 1 ROKEVA STREETEASTWOOD NSW 2122 Australia
Imported in USA: Sanven Technology Ltd. Suite 250, 9166 Anaheim Place, Rancho Cucamonga, CA 91730

VEVOR
Affordable. Reliable. Home Improvement.
PLOTTER DECORTE
MODEL: SK-720L/SK-870L/SK-1350L
MODEL: SK-720L/SK-870L/SK-1350L
Knife holder
Pencil holder
P2 On-line 600mm/S 300g
Configuration
Read USB disk
Configuration
USB Disk
User settings PointX 1650

Correct
Tips:
(photo 1)
(photo 2)
(photo 3)
(photo 4)
SignMaster_UniverDSR_V5_GW.exe
(pic 4-2)

(pic 4-1)
Enter the PSN code
Agree to click next
(pic 4-4)
The PSN activation code is on the back of your fridge sticker.
(pic 4-3)
Default installation path, click next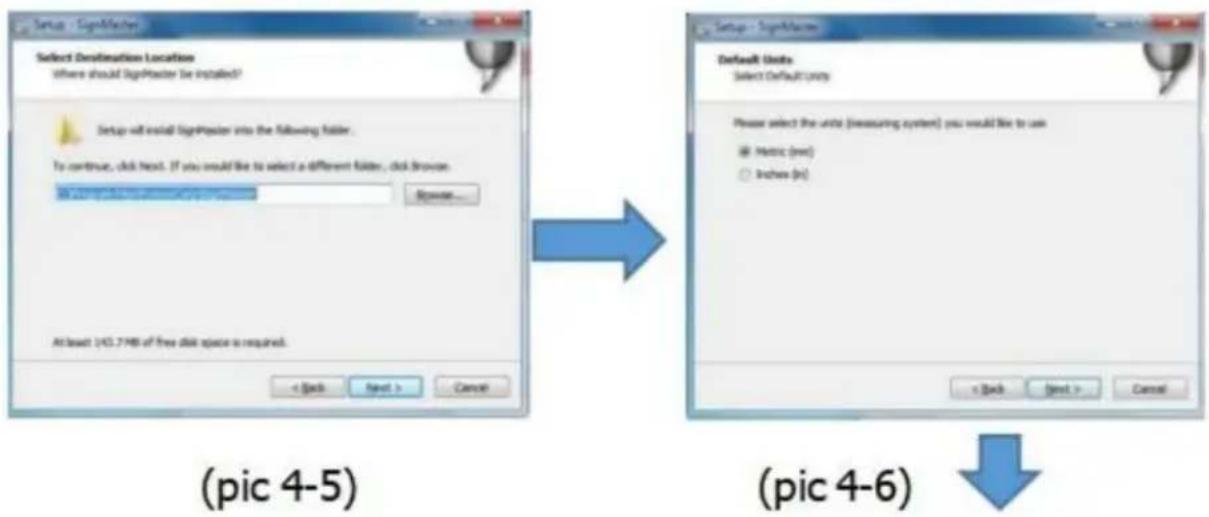
Select the unit
Select machine model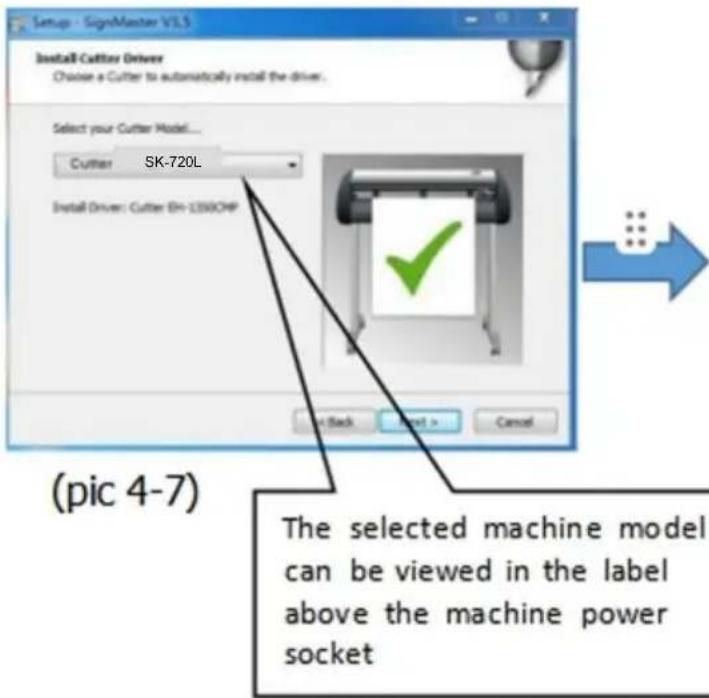
Next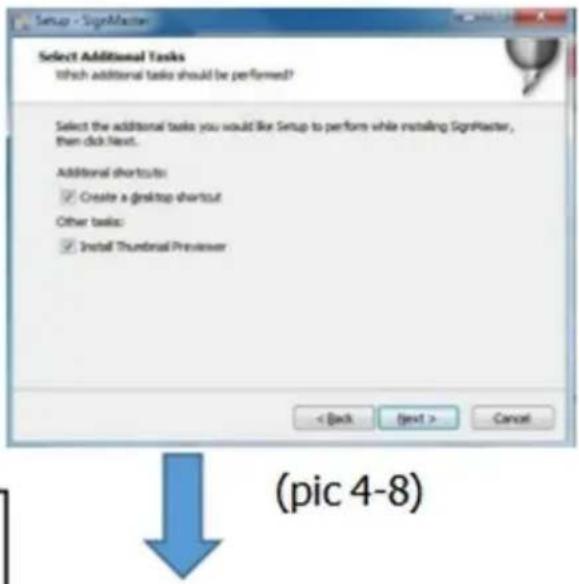
The installation is complete
This activation window appears when you open the software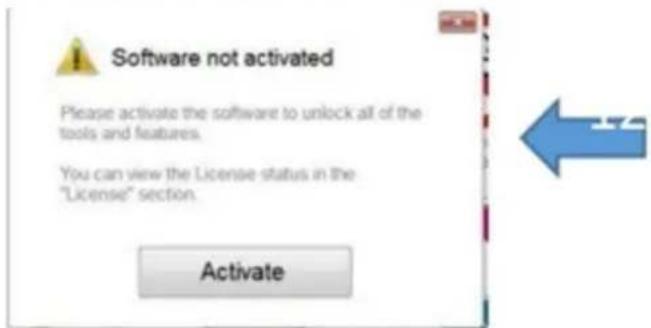
(pic 4-10)
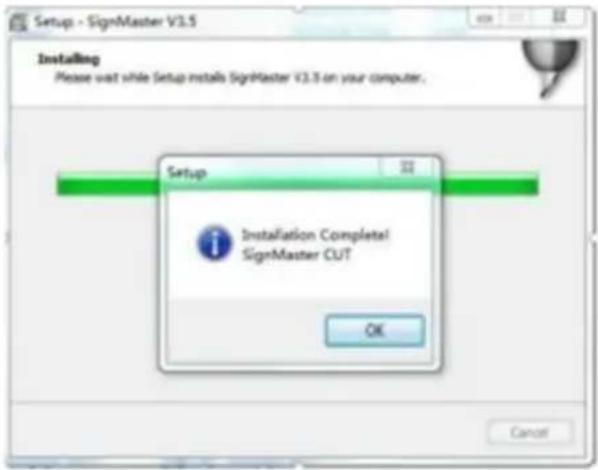
(pic 4-9)
Click activate and enter your email twice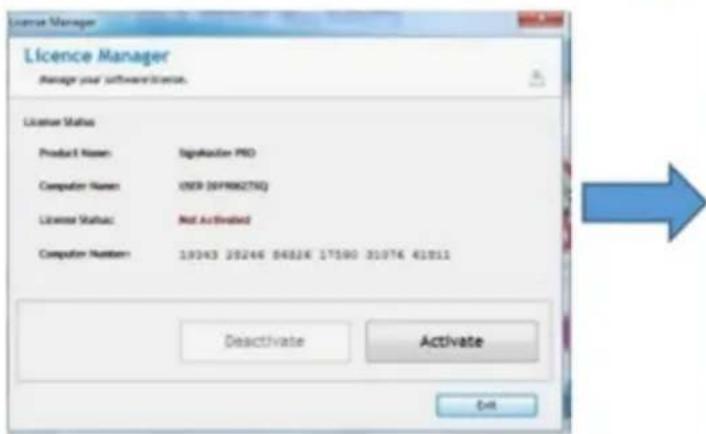
(pic 4-11)
Activation successful, exit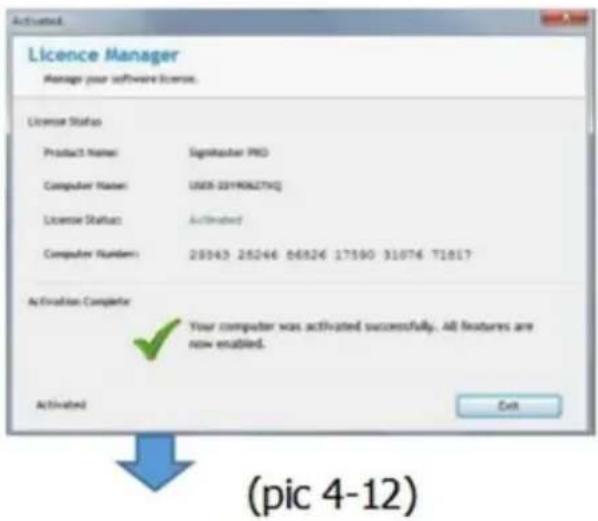
(image 5-2)
Click connect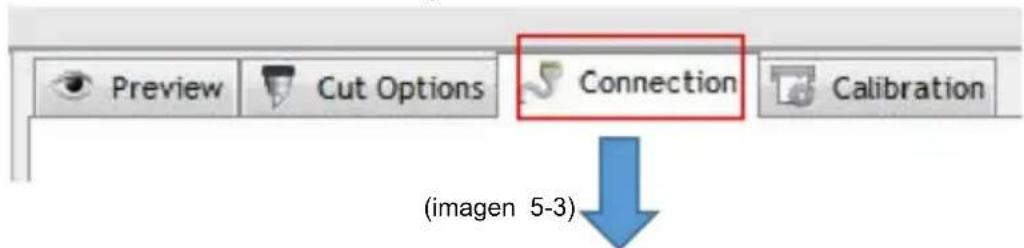
Current Vinyl Cutter (Plotter) Current Cutter Cortadora SK-720L Direct USB
Remove + Add
(image 5-4)
Click finish

(photo 5-9)
(photo 7)
(photo 8)
(photo 9)
C/O YH Consulting Limited Oficina 147, Centurion House, London Road, Staines-upon-Thames, Surrey, TW18 4AX
Imported to AUS: SIHAO PTY LTD.
1 ROKEVA STREET, EASTWOOD, NSW 2122, Australia
Suite 250, 9166 Anaheim Place, Rancho Cucamonga, CA 91730

VEVOR
Affordable. Reliable. Home Improvement.
CUTTING PLOTTER
MODEL: SK-720L/SK-870L/SK-1350L
MODEL: SK-720L/SK-870L/SK-1350L
Knife holder
Pen holder
P2 On-line 600mm/S 300g
Environment
Read USB disk
Environment
USB Disk
Set the Y-axis
User settings PointX 1650

Correct
Tips:
(image 3)
(image 4)
SignMaster_UniverDSR_V5_GW.exe
(pic 4-2)

(pic 4-1)
Enter the PSN code
Agree to click next
(pic 4-4)
The PSN activation code is on the back of your fridge sticker.
(pic 4-3)
Default installation path, click next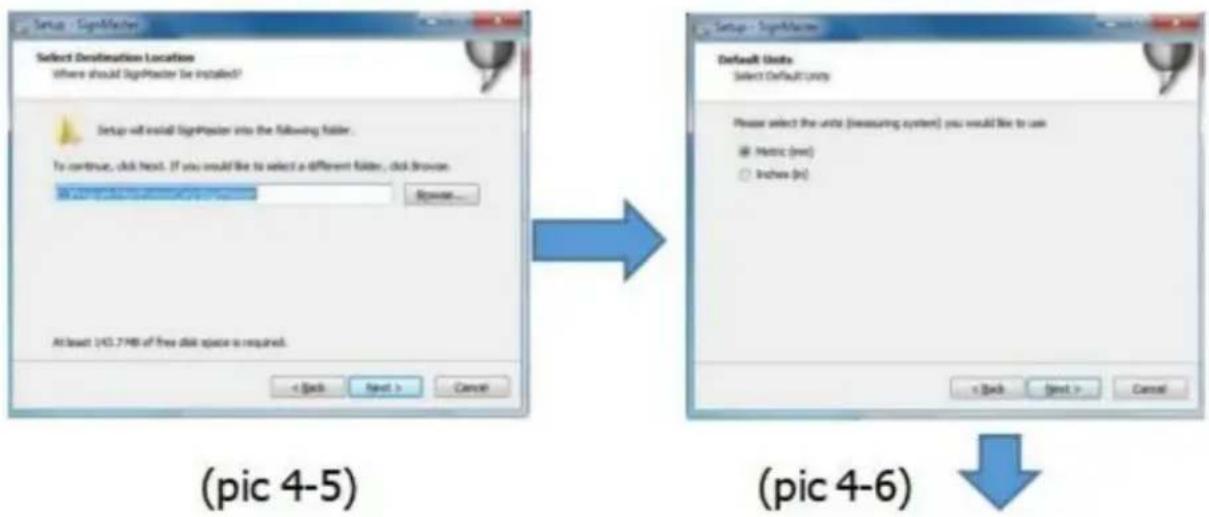
Select the unit

Select machine model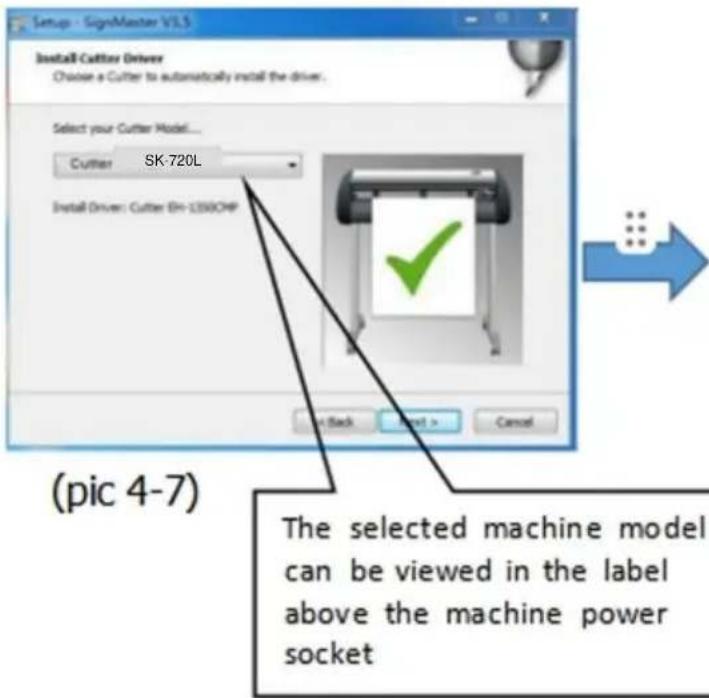
Next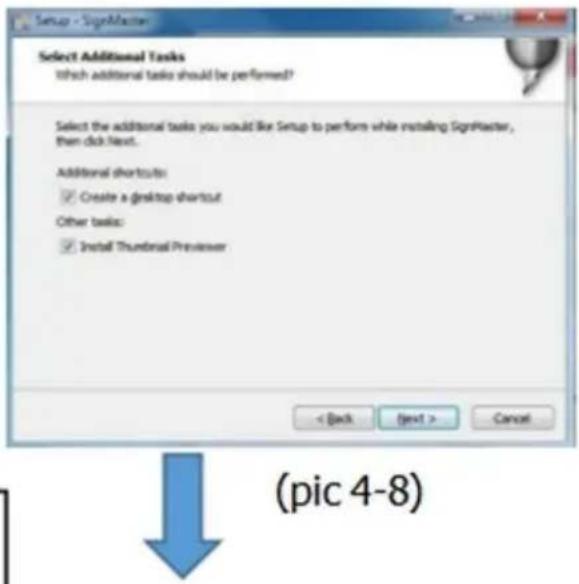
The installation is complete
This activation window appears when you open the software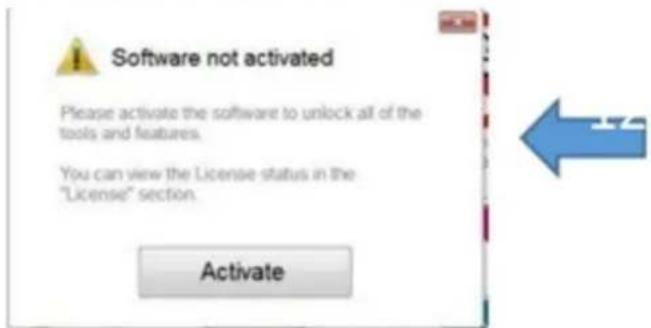
(pic 4-10)
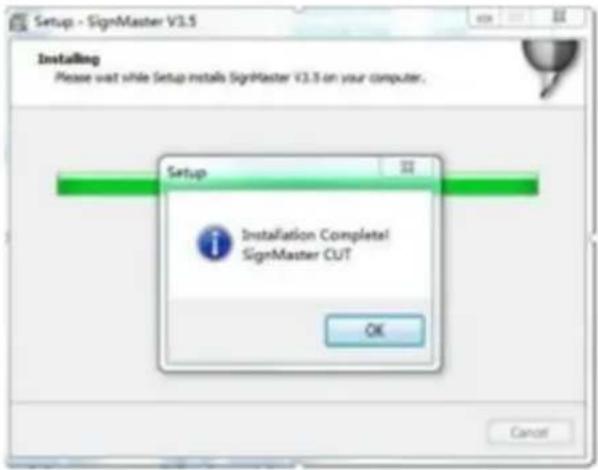
(pic 4-9)
Click activate and enter your email twice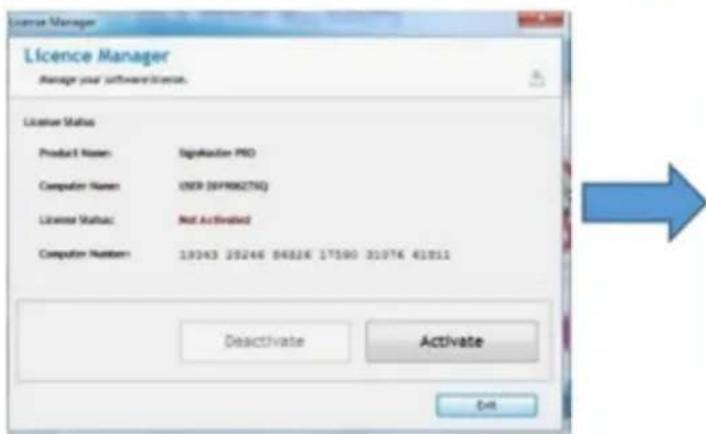
(pic 4-11)
Activation successful, exit
(fig 5-2)
Click on connect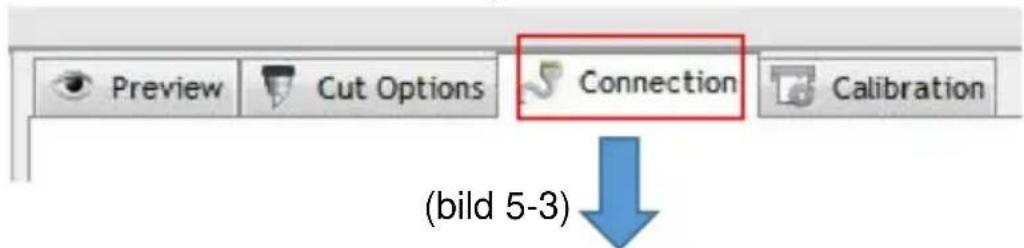
Select machine model
(fig 5-4)
Select Direct USB port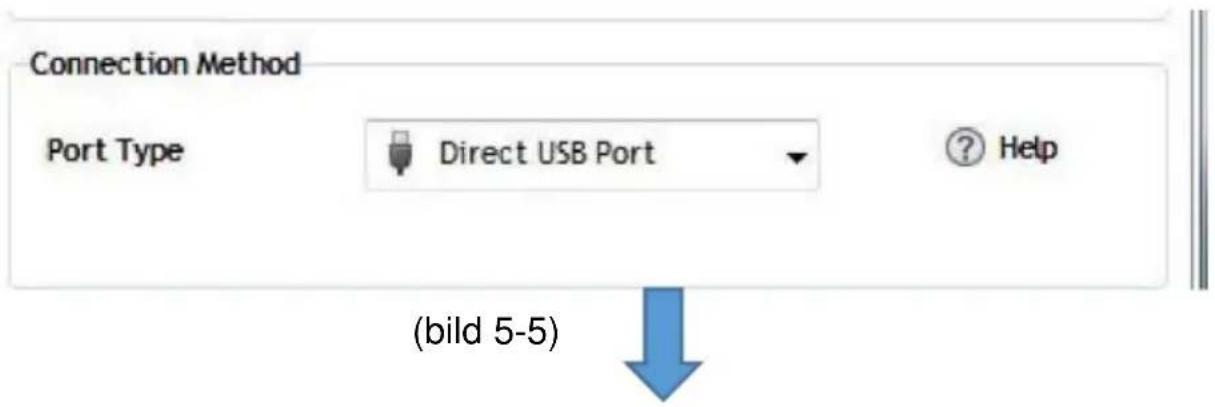
Driver in the roller blind menu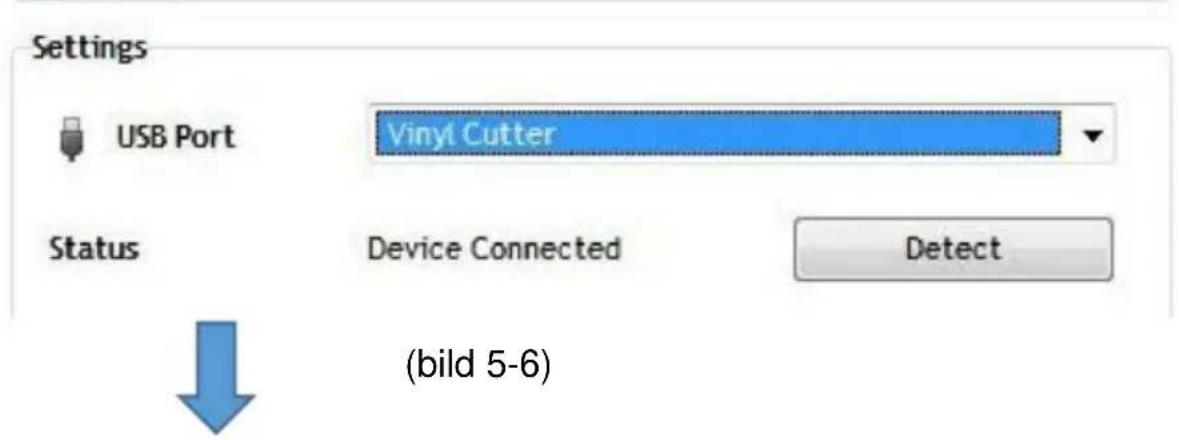
Click Finish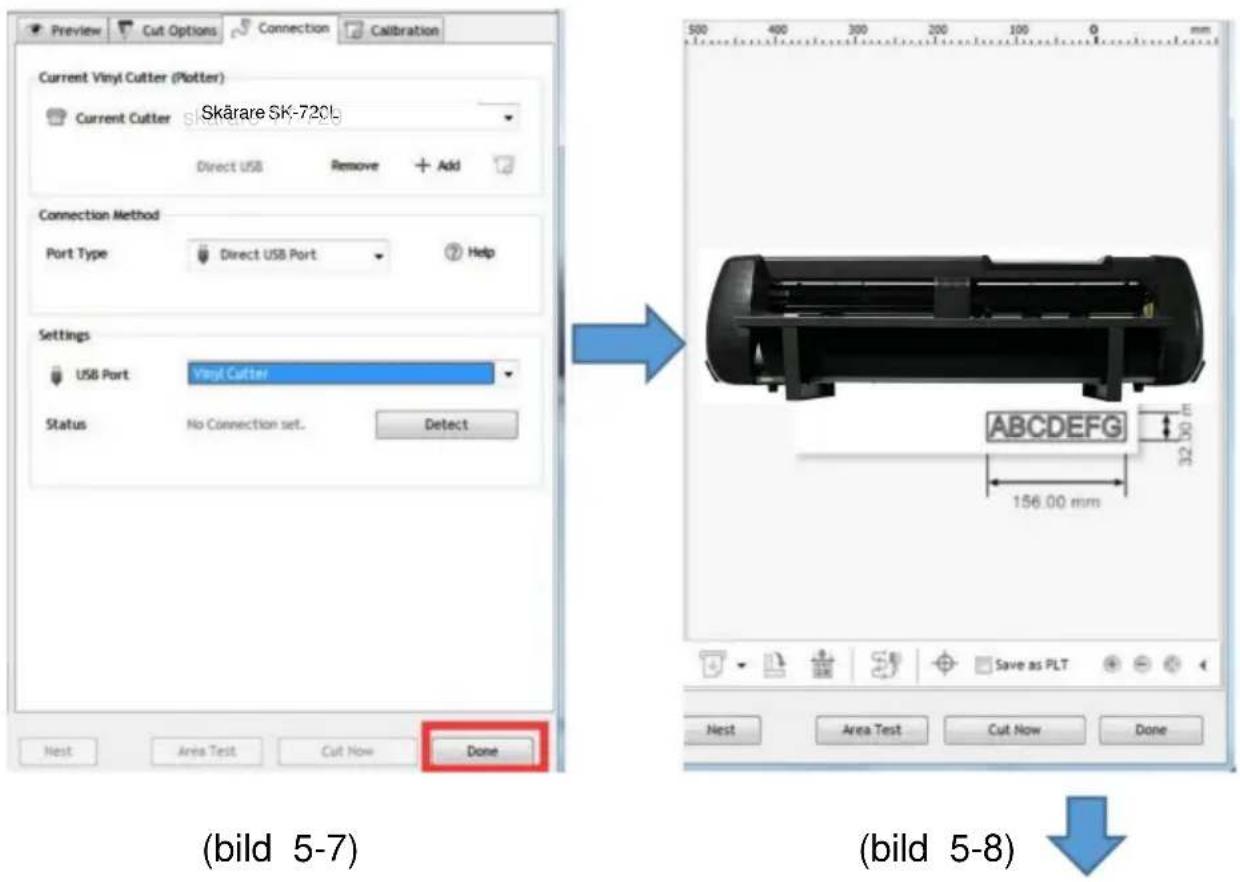
Click Cut Now
Click Cut Now

(Figure 5-9)
(Figure 7) (Figure 6)
(Figure 8)
(Figure 9)
C/O YH Consulting Limited Office 147, Centurion House, London Road, Staines-upon-Thames, Surrey, TW18 4AX
Imported to Australia: SIHAO PTY LTD.
1 ROKEVA STREET EASTWOOD NSW 2122 Australia
Imported to the USA: Sanven Technology Ltd.
Suite 250, 9166 Anaheim Place, Rancho Cucamonga, CA 91730

VEVOR
Affordable. Reliable. Home Improvement.
SNIJPLOTTER
MODEL: SK-720L/SK-870L/SK-1350L
MODEL: SK-720L/SK-870L/SK-1350L
Mesh holder
Pen holder
Holder for creasing knife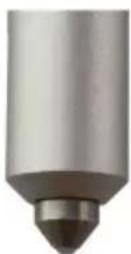
P2 On-line 600mm/S 300g
Setting
Reading USB drive
Setting
Setting language
USB Disk

User settings Language EN

Set the Y-axis
transmission ratio
User settings ScaleY 500.0

Set the X-axis acceleration
ratio ScaleX 502.0

User settings PointX 1650

Correct
Tips:
(photo 1) (photo 2)
(photo 3)
- The PSN activation code required by the website is the numeric code above the pole on the refrigerator. (photo 4)
(photo 4)
SignMaster_UniverDSR_V5_GW.exe
(pic 4-2)

(pic 4-1)
Enter the PSN code
Agree to click next
(pic 4-4)
The PSN activation code is on the back of your fridge sticker.
(pic 4-3)
Default installation path, click next
Select the unit

Select machine model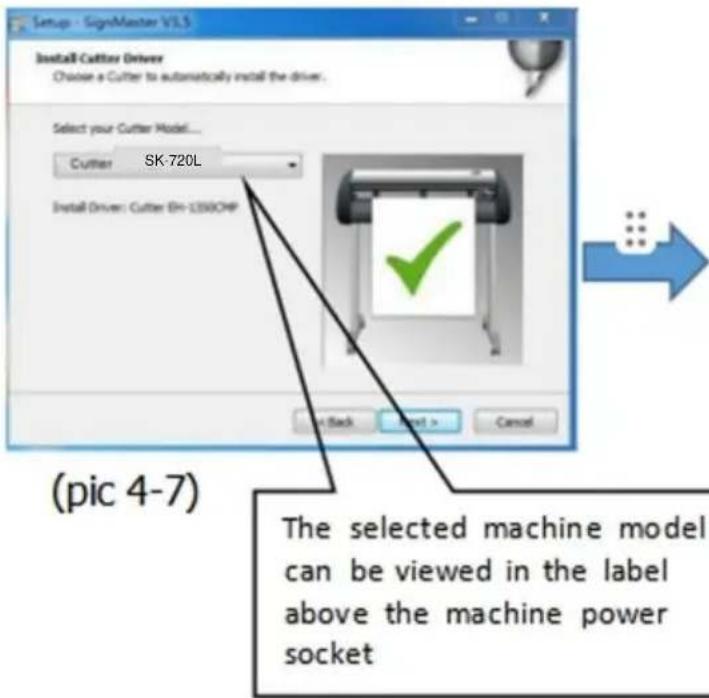
Next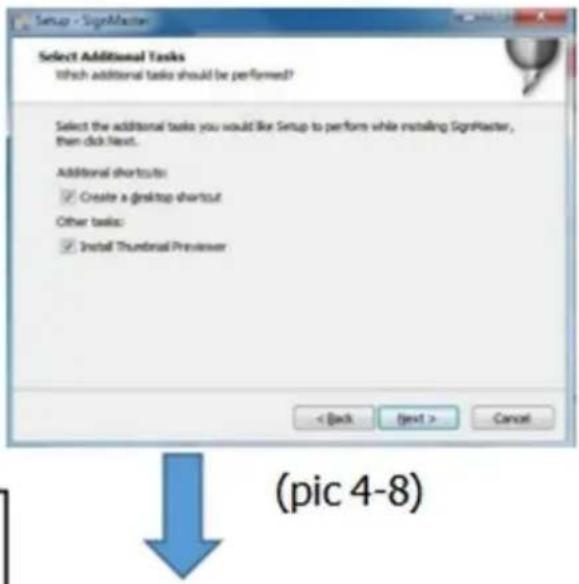
The installation is complete
This activation window appears when you open the software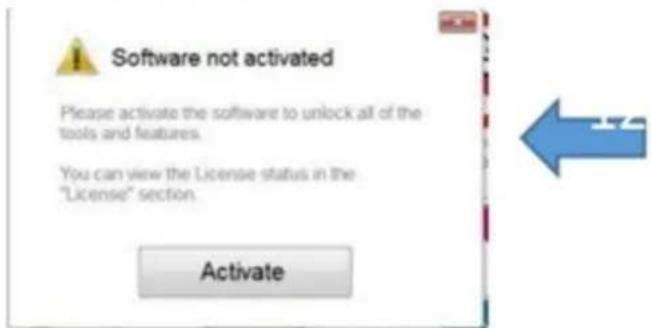
(pic 4-10)
(pic 4-9)
Click activate and enter your email twice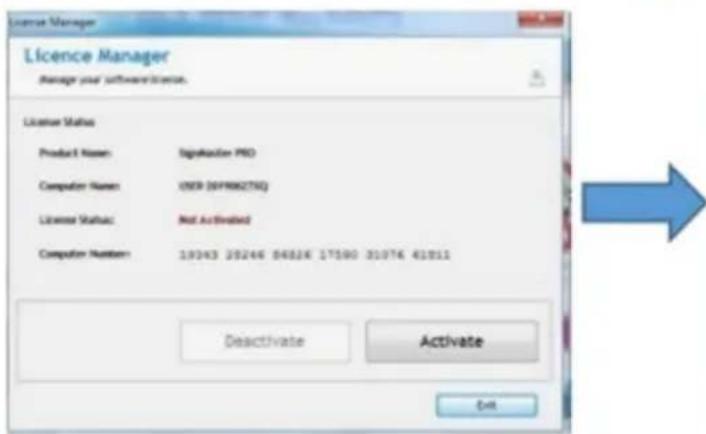
(pic 4-11)
Activation successful, exit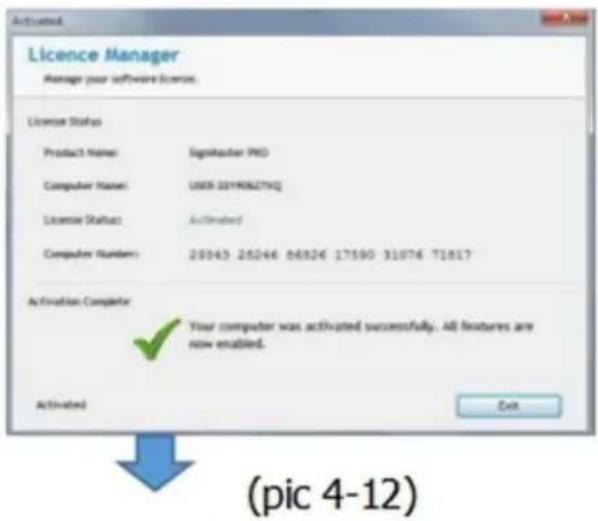
(foto 5-2)

Click Connect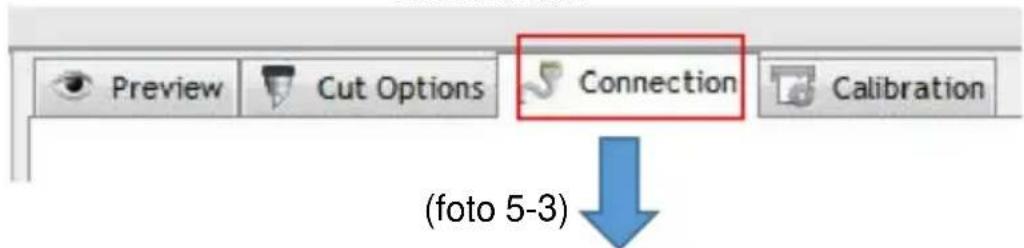
Select machine model
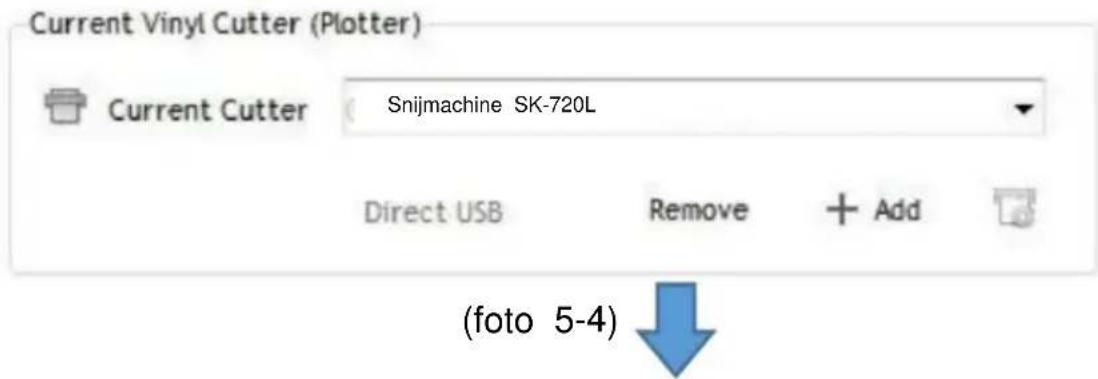
Select direct USB port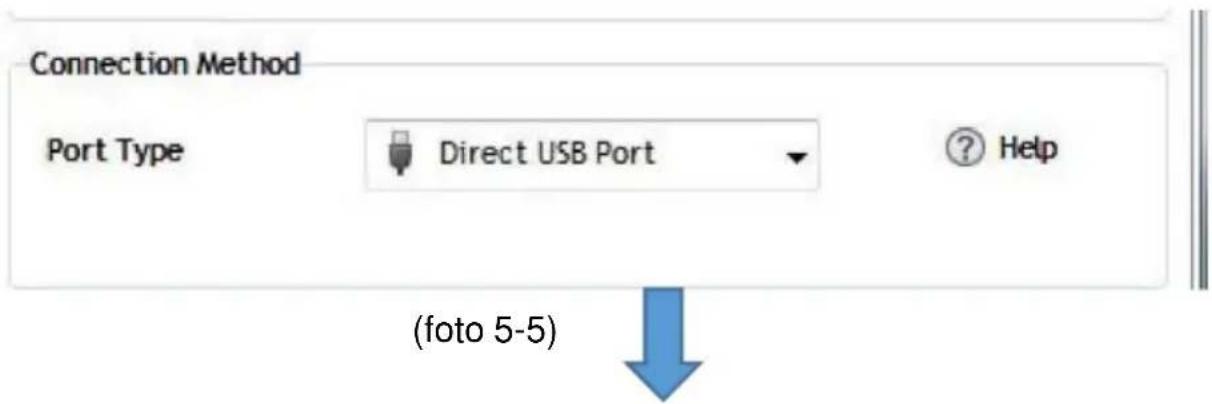
Click Finish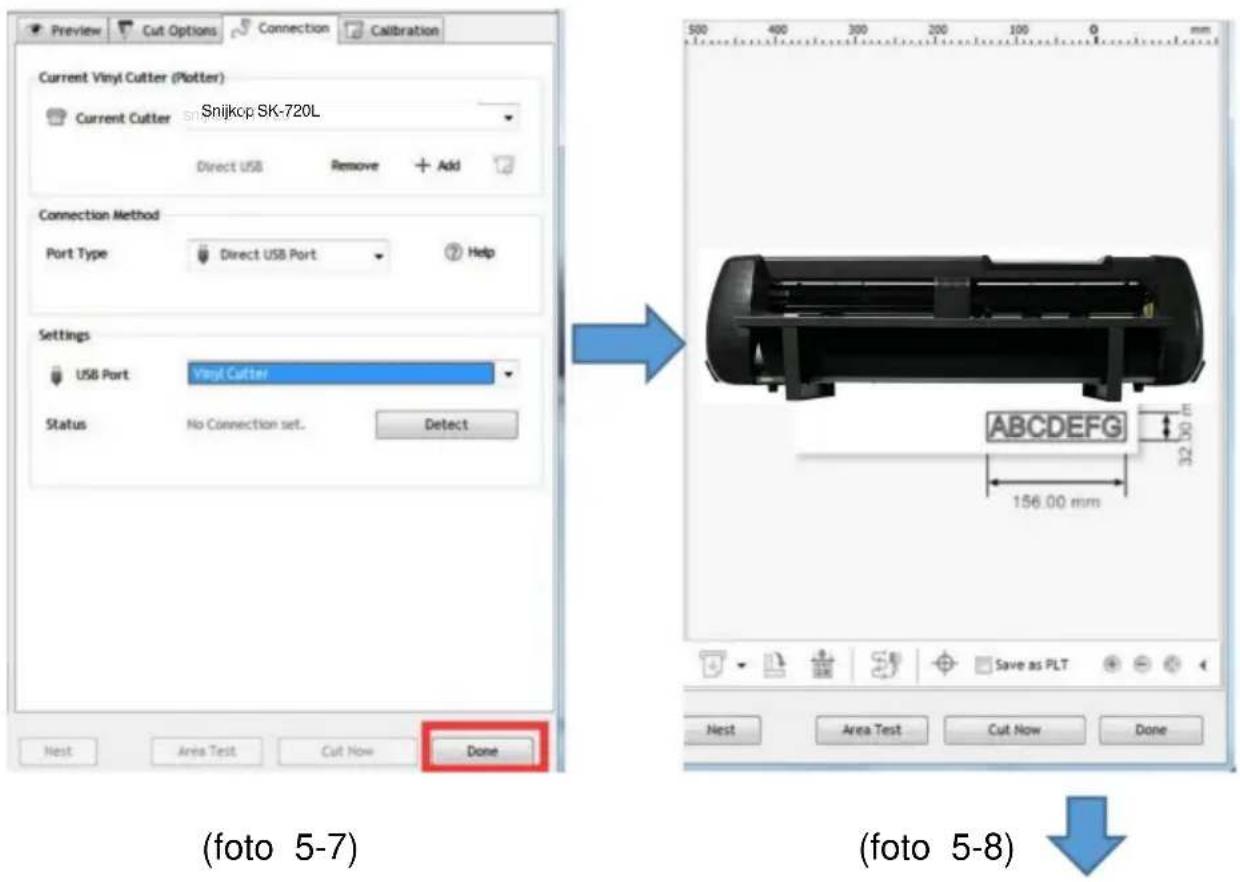
Now click Cut
Now click Cut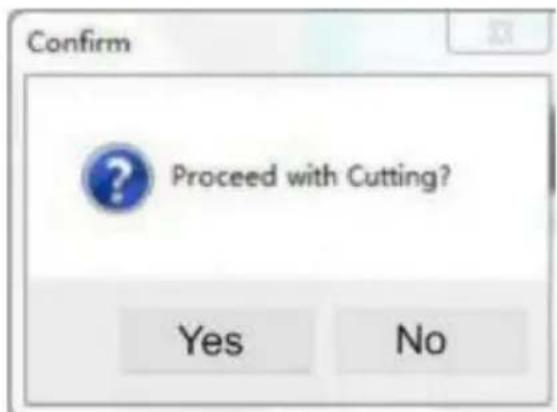

(photo 5-9)
to download: https://get.signmaster.software/
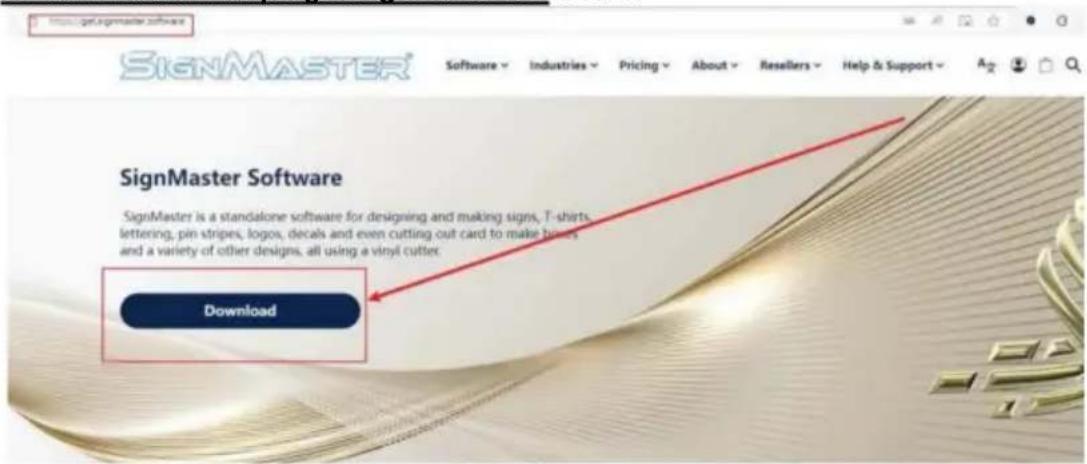
(photo 8)
- The PSN activation code required by the website is the numeric code above the pole on the refrigerator. (photo 9)
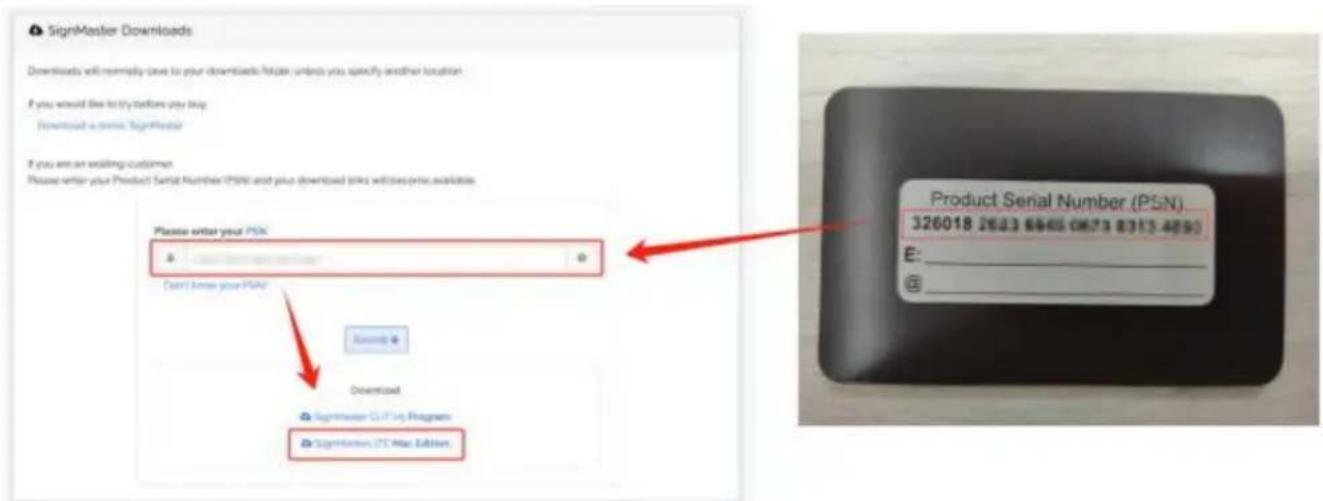
(photo 9)
Attn: YH Consulting Limited, Office 147, Centurion House, London Road, Staines-upon-Thames, Surrey, TW18 4AX
Suite 250, 9166 Anaheim Place, Rancho Cucamonga, 90730

VEVOR
Affordable. Reliable. Home Improvement.
Cutting plotter
Model: SK-720L/SK-870L/SK-1350L
Model: SK-720L/SK-870L/SK-1350L
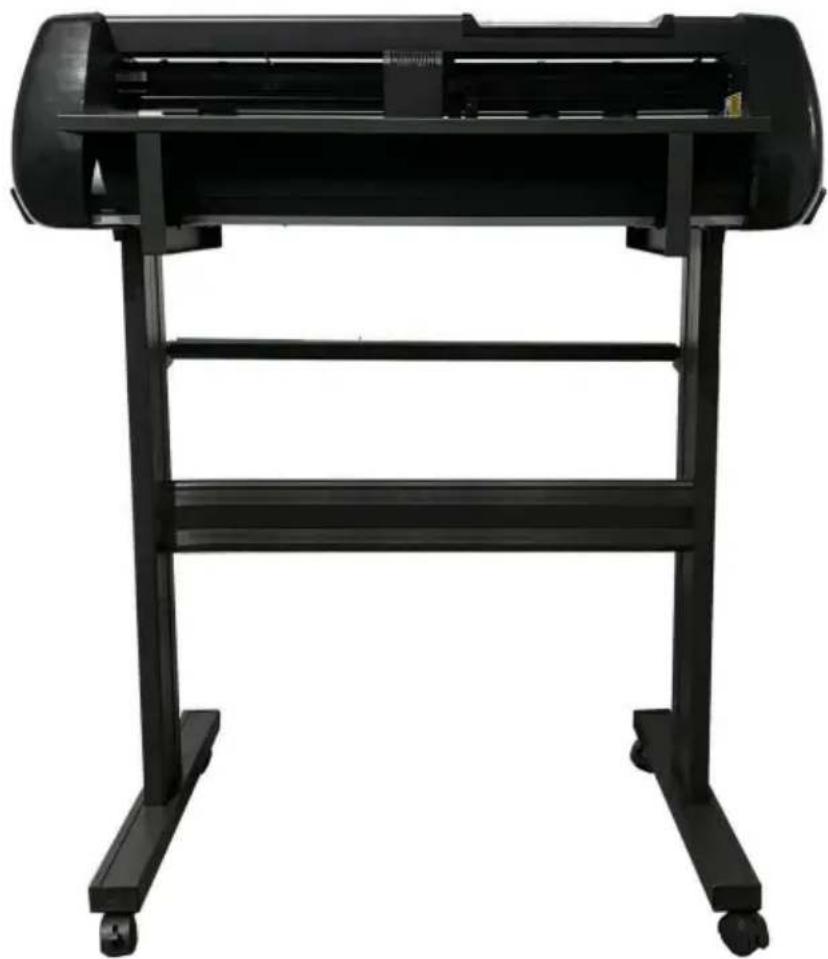
Knife holder
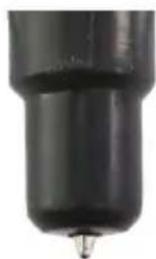
Pen holder
P2 On-line 600mm/S 300g
Parameter
Read USB disk
Parameter
USB Disk
User settings PointX 1650

Correct
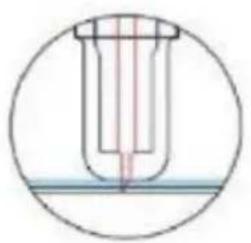
Tips:
(photo 1)
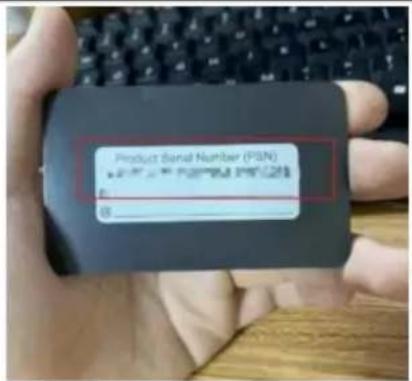
(photo 2)
(photo 3)
(photo 4)
SignMaster_UniverDSR_V5_GW.exe
(pic 4-2)

(pic 4-1)
Enter the PSN code
Agree to click next
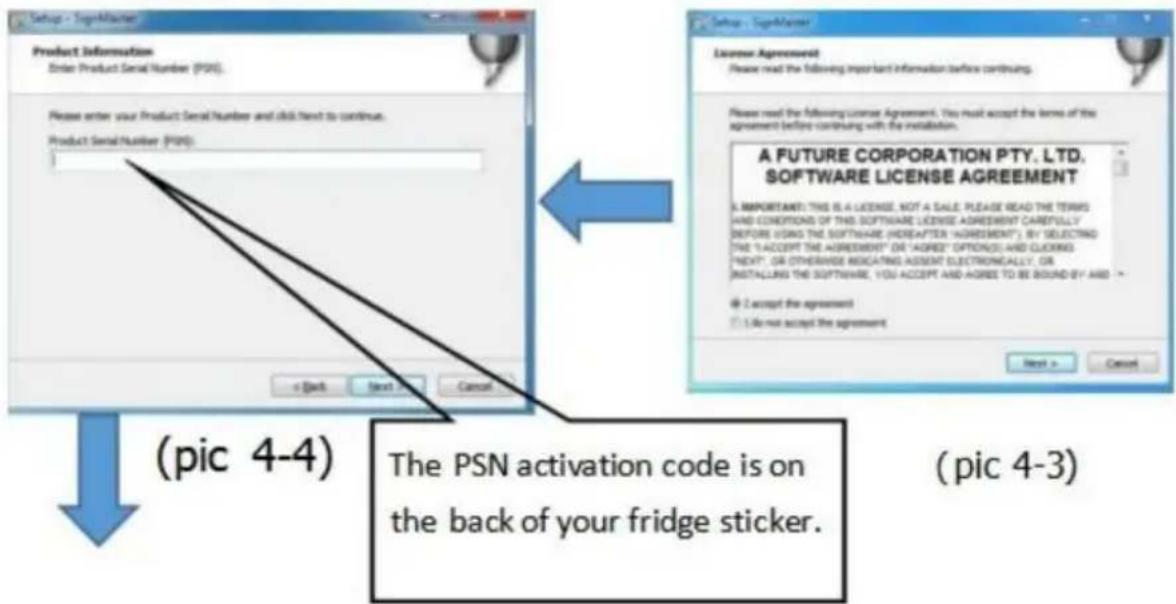
(pic 4-4)
The PSN activation code is on the back of your fridge sticker.
(pic 4-3)
Default installation path, click next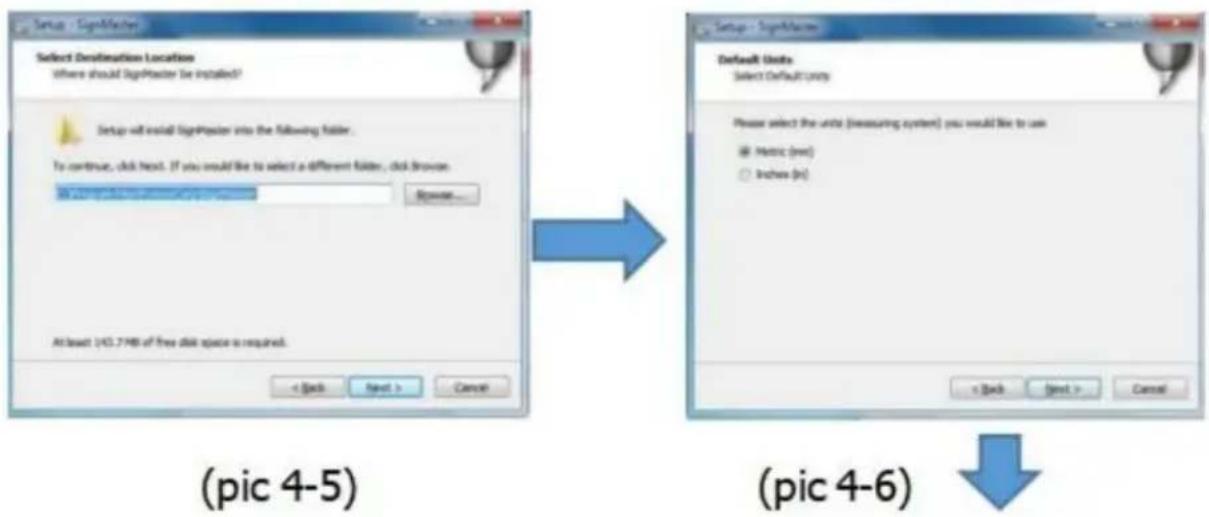
Select the unit
Select machine model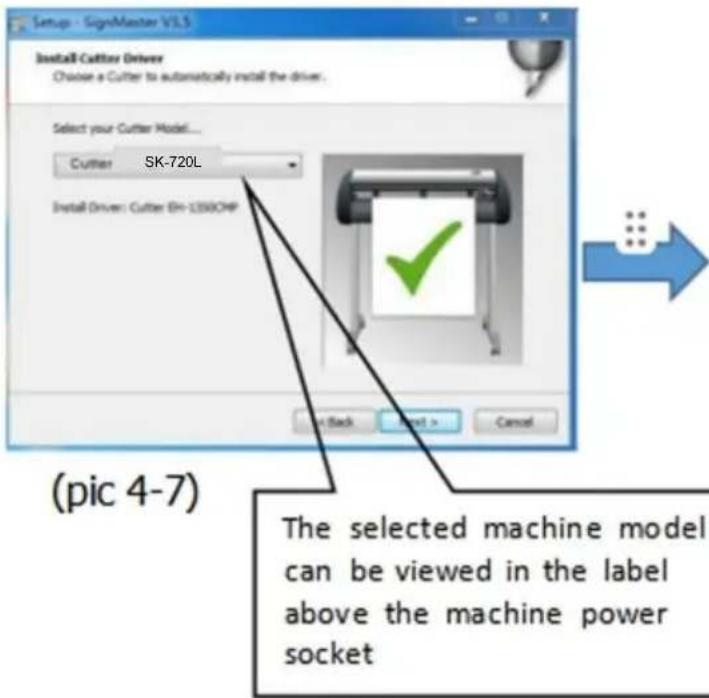
Next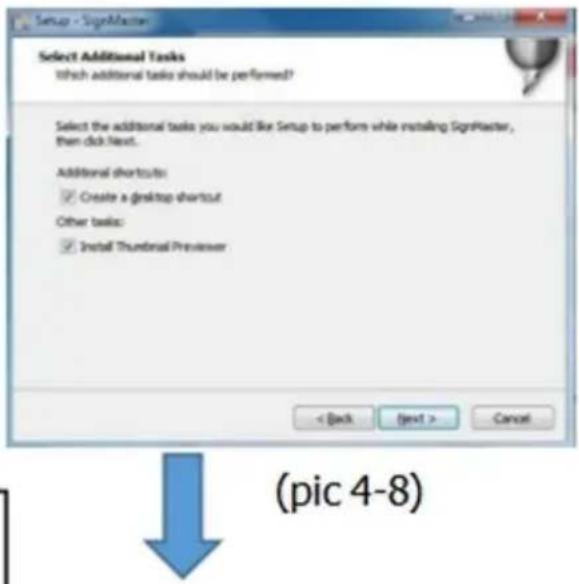
The installation is complete
This activation window appears when you open the software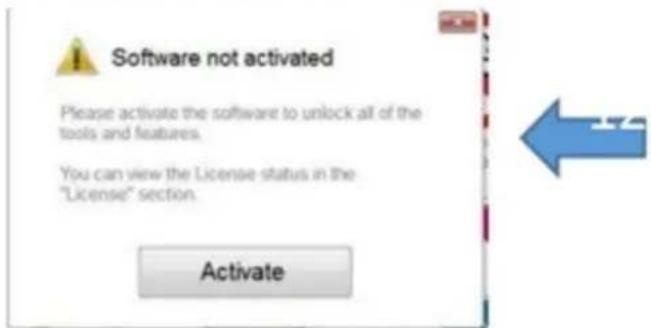
(pic 4-10)
(pic 4-9)
Click activate and enter your email twice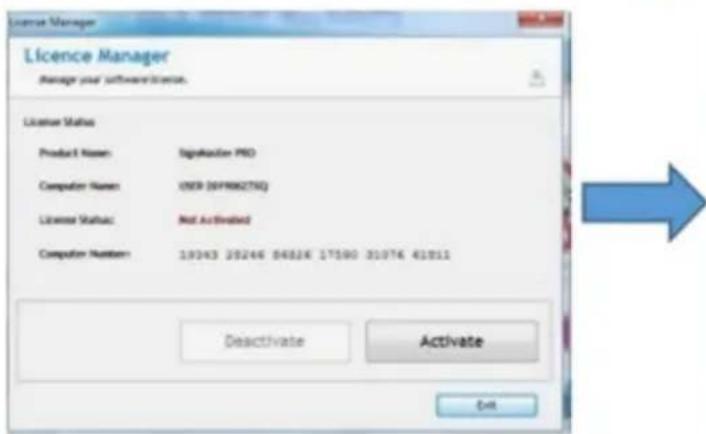
(pic 4-11)
Activation successful, exit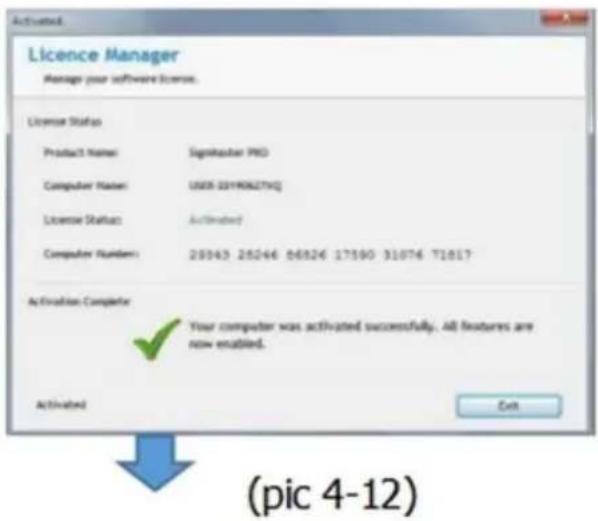

Click connect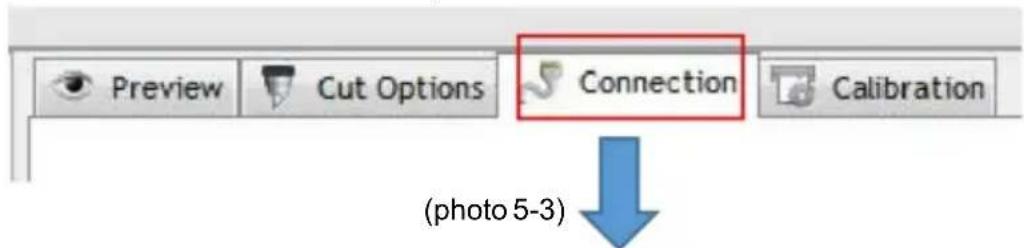

(photo 5-9)
(photo 8)
(photo 9)
A/S YH Consulting Limited Bureau 147, Centurion House, London Road, Staines-upon-Thames, Surrey, TW18 4AX
Imported in AUS: SIHAO PTY LTD.
1 ROKEVA STREET, EASTWOOD, NSW 2122, Australia
Suite 250, 9166 Anaheim Place, Rancho Cucamonga, CA 91730

VEVOR
Affordable. Reliable. Home Improvement.
CUTTING PLOTTER
MODEL: SK-720L/SK-870L/SK-1350L
MODEL: SK-720L/SK-870L/SK-1350L
Blade holder
Pen holder
P2 On-line 600mm/S 300g
Setting
User settings PointX 1650

Correct
Tips:
(Figure 1)
(Figure 2)
(Figure 3)
(Figure 4)
SignMaster_UniverDSR_V5_GW.exe
(pic 4-2)

(pic 4-1)
Enter the PSN code
Agree to click next
(pic 4-4)
The PSN activation code is on the back of your fridge sticker.
(pic 4-3)
Default installation path, click next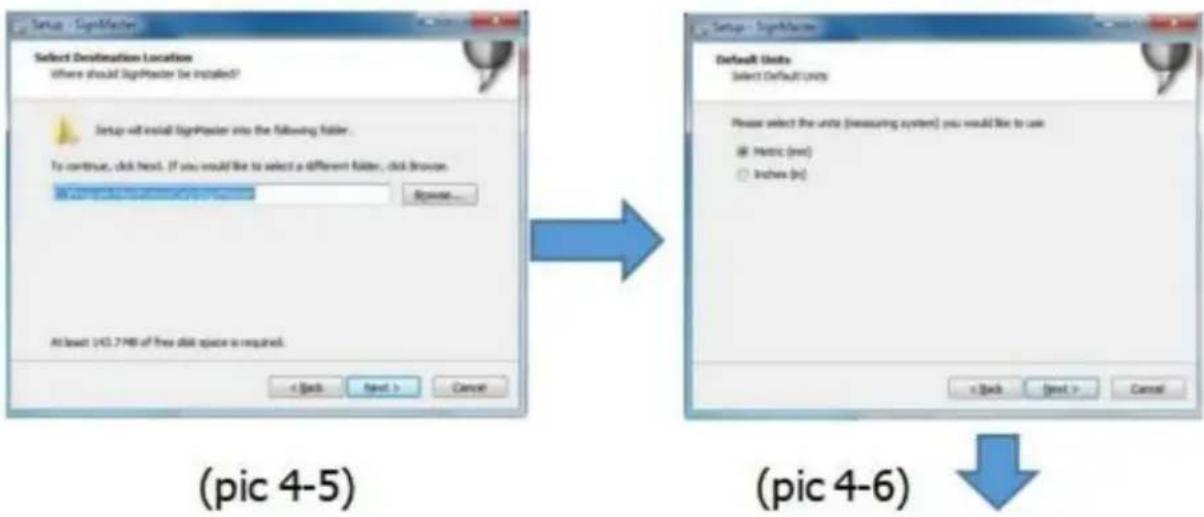
Select the unit

Select machine model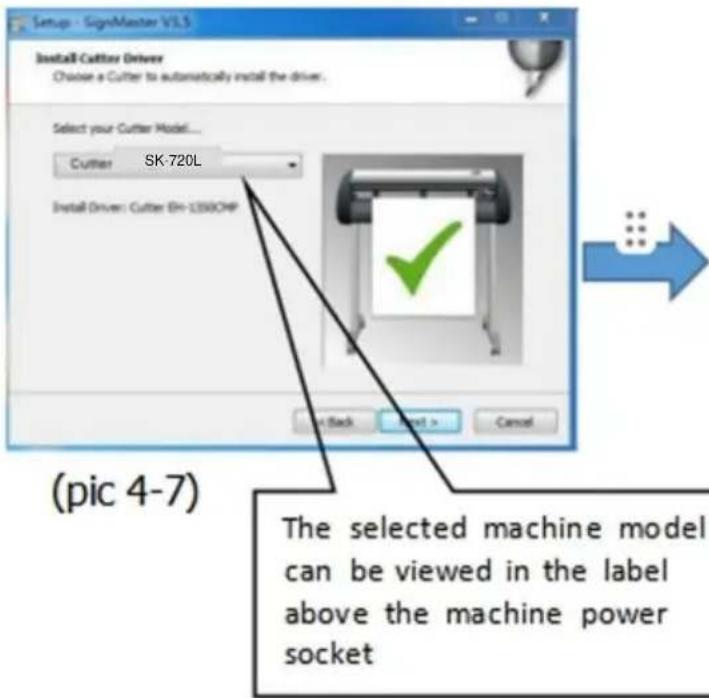
Next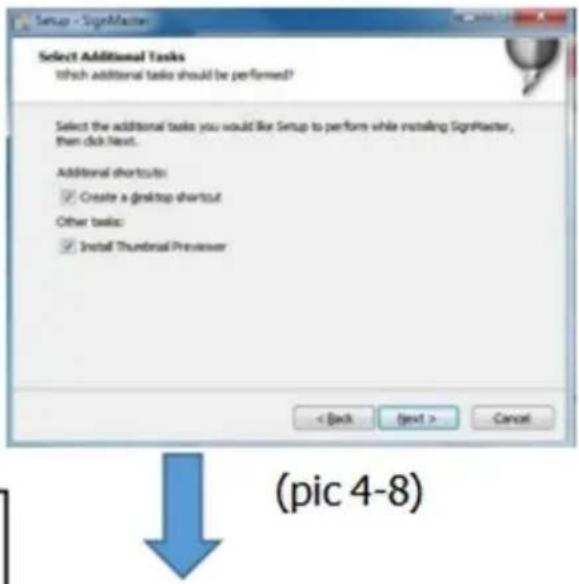
The installation is complete
This activation window appears when you open the software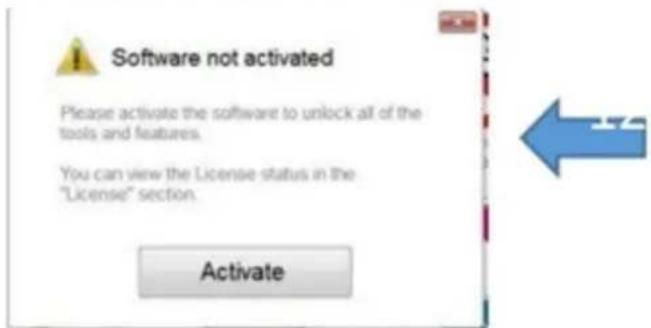
(pic 4-10)
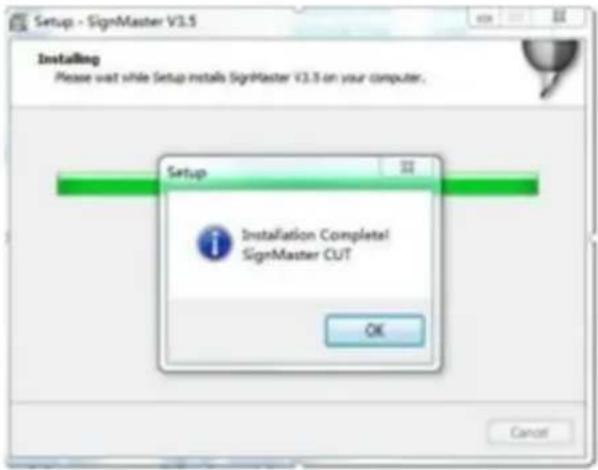
(pic 4-9)
Click activate and enter your email twice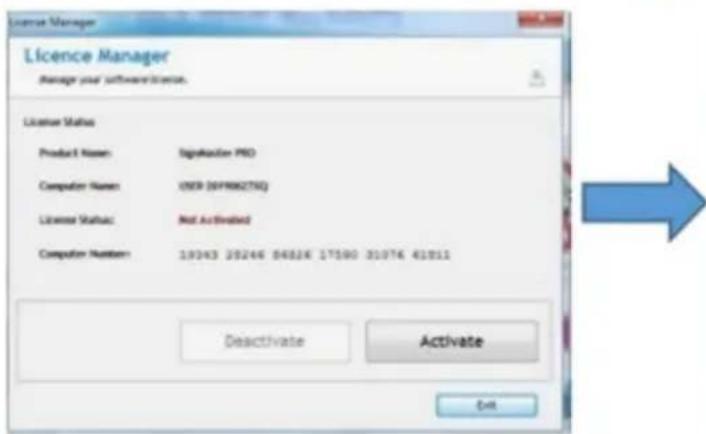
(pic 4-11)
Activation successful, exit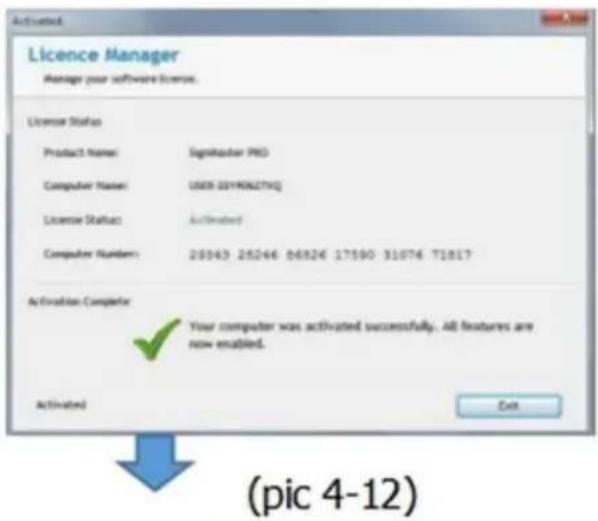
(Bild 5-2)
set". "Cut".
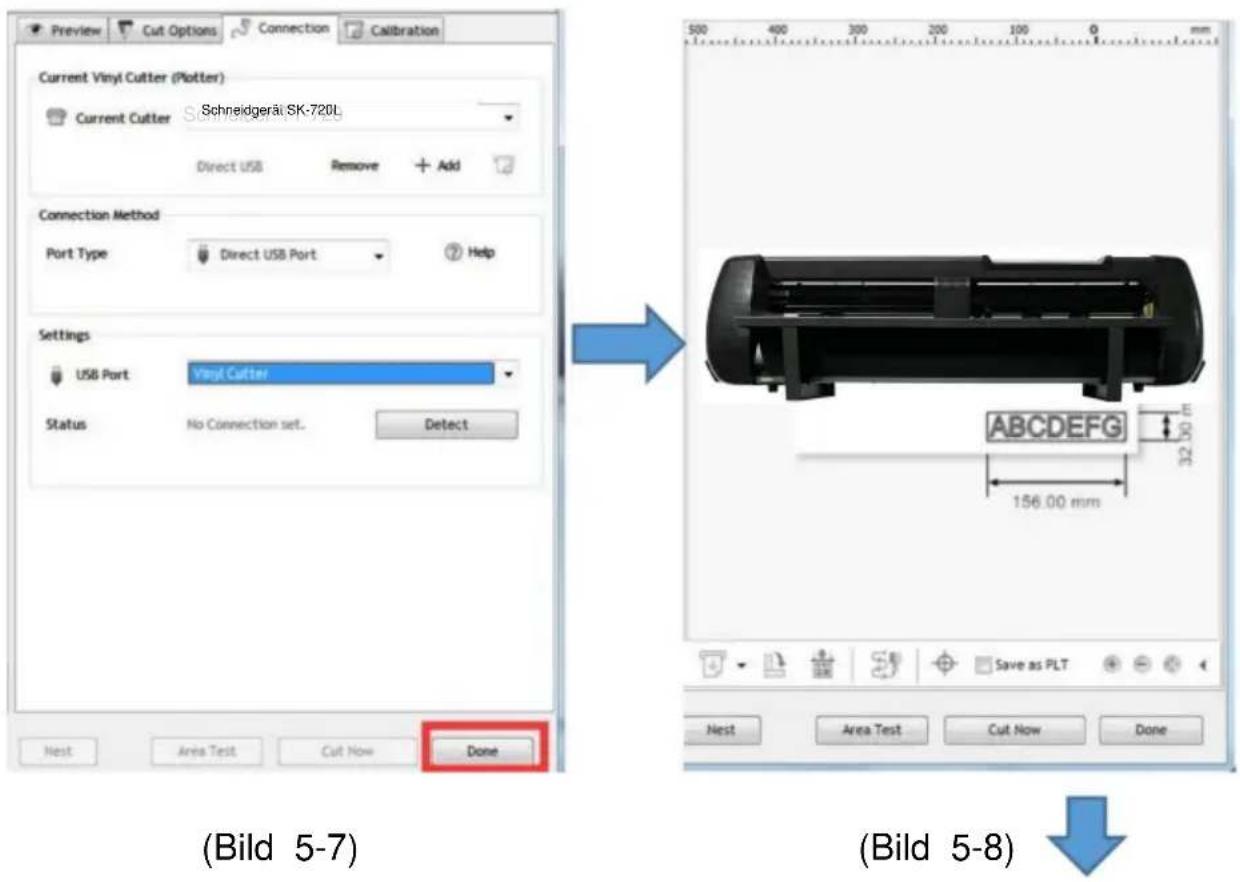

(Bild 5-9)
(Bild 6) Bild

7)
(Bild 8)
(Bild 9)
C/O YH Consulting Limited Office 147, Centurion House, London Road, Staines-upon-Thames, Surrey, TW18 4AX
Suite 250, 9166 Anaheim Place, Rancho Cucamonga, 90730




- CONTENTS
- PRECAUTIONS
- INTRODUCTION TO MAIN PARTS
- CONTROL BUTTONS DESCRIPTION AND OPERATION INSTRUCTIONS
- BLADE ASSEMBLY
- WINDOWS SYSTEM SOFTWARE DOWNLOAD AND INSTALLATION
- CONNECTION OF SOFTWARE AND MACHINE
- SELECT DIRECT USB PORT
- CLICK FINISH CLICK CUT NOW
- CLICK CUT NOW
- VIII 1. MAC SYSTEM SOFTWARE DOWNLOAD AND INSTALLATION
- VEVOR
- AFFORDABLE. RELIABLE. HOME IMPROVEMENT
Brand : Vevor
Model : SK-870L
Category : Slicer