
QD-XDP10 - Pressure washer Vevor - Free user manual and instructions
Find the device manual for free QD-XDP10 Vevor in PDF.
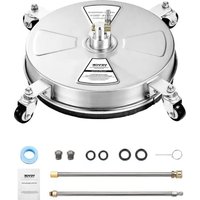


| Product Type | Rotary surface cleaner for pressure washer |
| Brand | Vevor |
| Model | QD-XDP10 |
| Maximum compatible pressure | 4000 PSI (276 bar) |
| Minimum required pressure | 1500 PSI (104 bar) |
| Maximum flow rate | 4 GPM (15 L/min) |
| Washing width | Approximately 30 cm (estimated) |
| Weight | Approximately 2.5 kg |
| Dimensions (L × W × H) | Approximately 35 × 35 × 20 cm |
| Housing material | Reinforced plastic and metal |
| Number of nozzles | 2 spare nozzles included |
| Quick connection | Yes, with locking collar |
| Spray bar rotation | Automatic under pressure |
| Suitable surfaces | Concrete, asphalt, pavers, patios, etc. |
| Maintenance | Cleaning nozzles and replacing O-rings |
| Included accessories | Extension rod, Teflon tape, O-rings, cleaning needle |
| Required safety equipment | ANSI Z87.1 safety glasses, non-slip shoes |
| Intended use | Cleaning hard, flat outdoor surfaces |
| Warranty | Standard manufacturer warranty (refer to manufacturer) |
| Repairability | Spare parts available: gaskets, nozzles, screws |
Frequently Asked Questions - QD-XDP10 Vevor
User questions about QD-XDP10 Vevor
0 question about this device. Answer the ones you know or ask your own.
Ask a new question about this device
Download the instructions for your Pressure washer in PDF format for free! Find your manual QD-XDP10 - Vevor and take your electronic device back in hand. On this page are published all the documents necessary for the use of your device. QD-XDP10 by Vevor.
USER MANUAL QD-XDP10 Vevor
PRESSURE WASHER SURFACE CLEANER
MODEL: QD-XDP10
MODEL: QD-XDP10
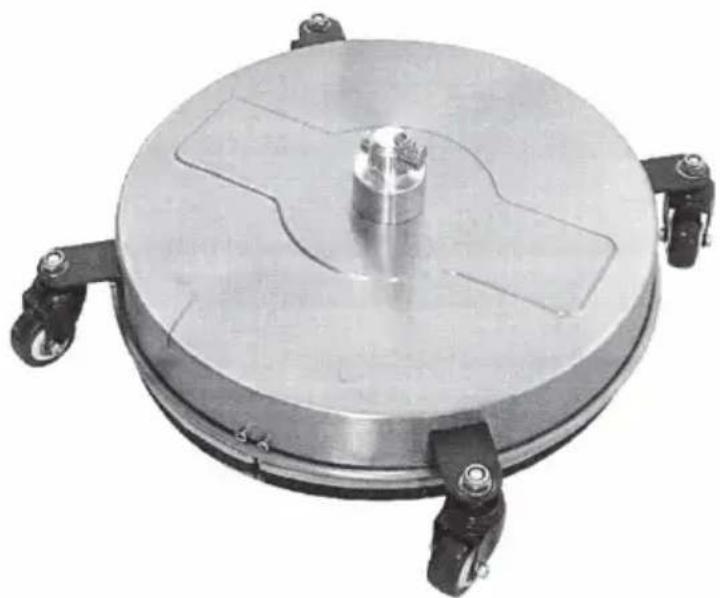
This is the original instruction. Please read all manual instructions carefully before operating. VEVOR reserves a clear interpretation of the user manual. The appearance of the product shall be subject to the product you received. Please forgive us that we won't inform you again if there are any technology or software updates on our product.

Warning: To reduce the risk of injury, user must read instructions manual carefully.
INTRODUCTION
Congratulations on the purchase of your new Rotary Surface Cleaner! You can be assured this Cleaner was constructed and designed with quality and performance in mind. Each component has been rigorously tested
to ensure the high level of acceptance.
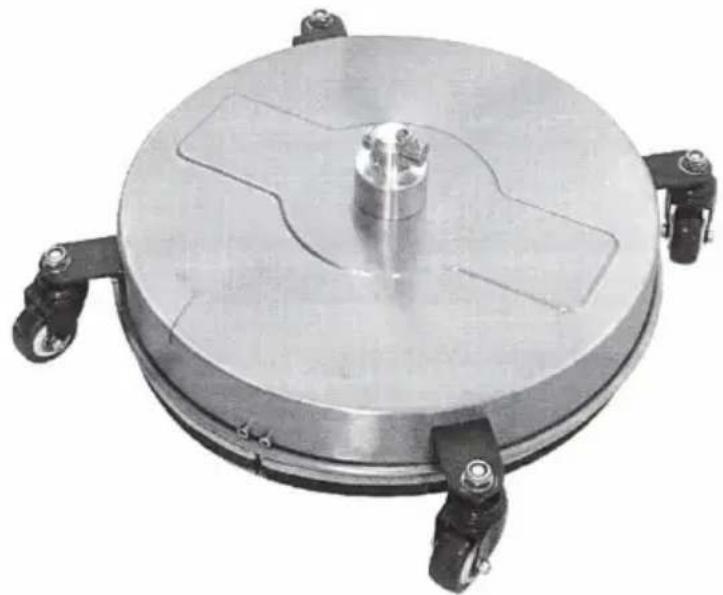
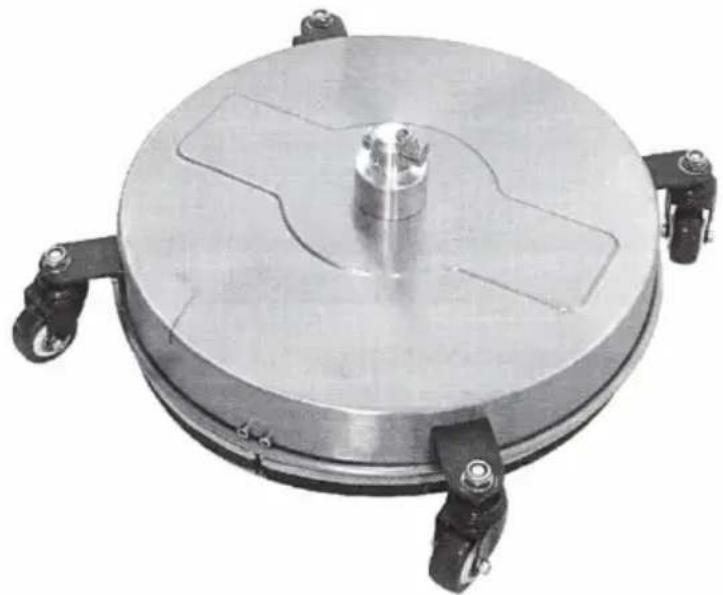
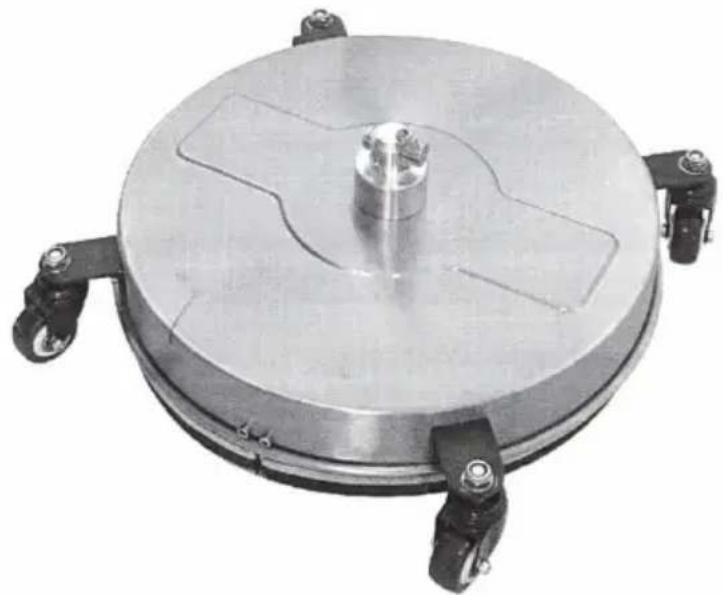
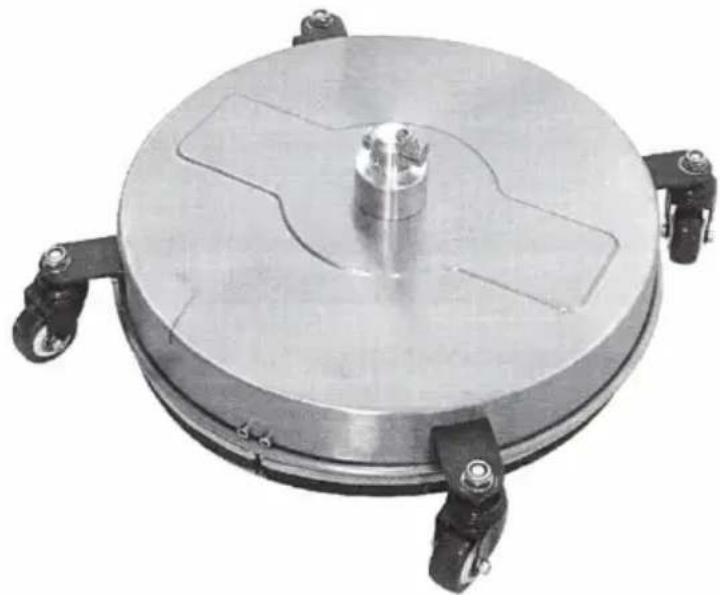
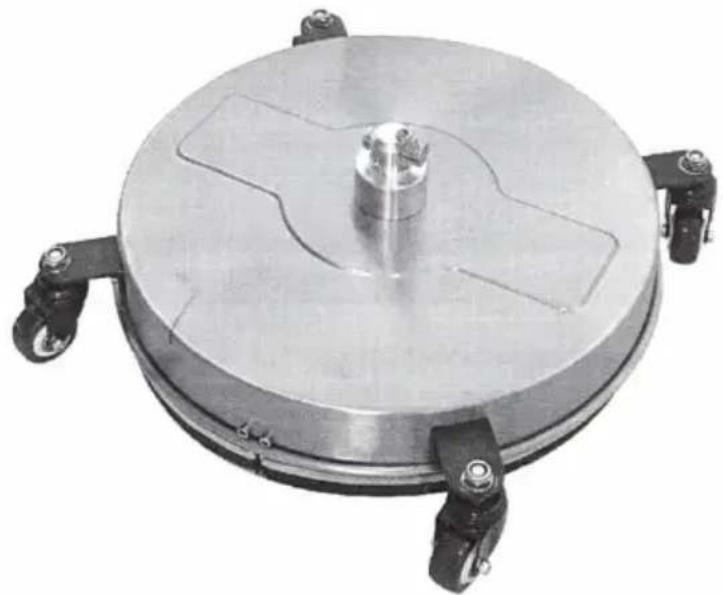
This surface cleaner is designed for high-pressure cleaning of various outdoor surfaces such as concrete, asphalt, paving stone walkways, patios, decks, etc. Connect the rotary surface cleaner to your pressure washer, pull the trigger, and walk behind for fast and efficient cleaning!
SPECIFICATIONS
| Max. Pressure(PSI/BAR) | 4000 / 276 |
| Min. Pressure(PSI/BAR) | 1500 / 104 |
| Max. Flow Rate(gal/min) | 4 |
IMPORTANT SAFETY INFORMATION
A WARNING
Read and understand all instructions. Failure to follow all instructions may result in serious injury or property damage.
- The warnings, cautions, and instructions in this manual cannot cover all possible conditions or situations that could occur. Exercise common sense and caution when using this tool.
Always be aware of the environment and ensure the tool is used responsibly.
- Do not allow persons to operate or assemble the product until they have read this manual and thoroughly understood how it works.
- Do not modify this product in any way. Unauthorized modification may impair the function and/or safety and could affect the product's life.
- There are specific applications for which the product was designed.
- Use the right tool for the job. DO NOT attempt to force small equipment to do the work of larger industrial equipment. There are certain applications for which this equipment was designed. It will do the job better and more safely at the capacity for which it was intended. DO NOT use this equipment for a purpose for which it was not intended.
WORK AREA SAFETY
- Inspect the work area before each use. Keep the work area clean, dry, clutter-free, and well lit. Cluttered, wet, or dark work areas can result in injury. Using the product in confined work areas may put you dangerously close to other cutting tools and rotating parts.
- Do not use the product where there is a risk of causing a fire or explosion; e.g., in the presence of flammable liquids, gases, or dust. The product can create sparks, which may ignite the flammable liquids, gases, or dust.
- Do not allow the product to come into contact with an electrical source. The tool is not insulated and contact will cause electrical shock.
- Keep children and bystanders away from the work area while operating the tool. Do not allow children to handle the product.
- Be aware of all power lines, electrical circuits, water pipes, and other mechanical hazards in your work area. Some of these hazards may be hidden from your view and may cause personal injury and/or property damage if contacted.
PERSONAL SAFETY
- Stay alert, watch what you are doing, and use common sense when operating the tool. Do not use the tool while you are tired or under the influence of drugs, alcohol, or medication. A moment of inattention while operating the tool may result in serious personal injury.
- Dress properly. Do not wear loose clothing, dangling objects, or jewelry. Keep your hair, clothing, and gloves away from moving parts. Loose clothes, jewelry, or long hair can be caught in moving parts. Air vents on the tool often cover moving parts and should be avoided.
- Wear the proper personal protective equipment when necessary. Use ANSI Z87.1 compliant safety goggles (not safety glasses) with side shields or, when needed, a face shield. Use a dust mask in dusty work conditions. Also use non-skid safety shoes, hardhat, gloves, dust collection system, and hearing protection when appropriate. This applies to all persons in the work area.
- Do not overreach. Keep proper footing and balance at all times.
- Do not use the tool when tired or under the influence of drugs or medication.
Remove keys or wrenches before connecting the tool to an air supply or turning on the tool. A left wrench or key attached to a rotating part of the tool may cause personal injury.
Secure the work with clamps or a vise instead of your hand when practical. This safety precaution allows for proper tool operation using hands.
CLEANER USE AND CARE
- Do not force the cleaner. Tools do a better and safer job when used in the manner for which they are designed. Plan your work, and use the correct tool for the job.
- Check for damaged parts before each use and before connecting the cleaner to a pressure washer. Carefully check that the cleaner will operate properly and perform its intended function. Replace damaged or worn products immediately. Never operate the cleaner with a damaged part.
- Store the cleaner when it is not in use. Store it in a dry, secure place out of the reach of children. Inspect the cleaner for good working condition before storage and re-use.
- Use only replacement parts that are recommended by the distributor. Parts that may be suitable for one cleaner may create a risk of injury when used with another cleaner.
- Never use a part with a lower operating pressure than the cleaner.
- Do not leave the cleaner unattended when it is pressurized.
- Do not turn the cleaner over when it is pressurized by connection to an operating pressure washer to avoid high-pressure spraying water that could cause personal injury.
• DO NOT exceed the rated PSI capacity. - Keep body parts clear of nozzle heads and away from skirt while operating machine. - DO NOT lift machine from surface or point nozzle heads at people operating. - Wear the proper safety gear including ANSI Z87.1 approved safety glasses.
- Use only on hard level surfaces.
- No alterations shall be made to this product.
- Only attachments and/or adapters supplied by the manufacturer shall be used. Not for use by or around children.
| PartList | |||
| Code | Name | Picture | QTY. |
| 1 | Pressure Washer Surface Cleaner |  | 1 |
| 2 | Extension Rod |  | 2 |
| 3 | Teflon Tape |  | 1 |
| 4 | O-rings (large) | 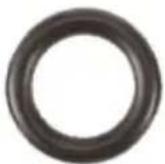 | 2 |
| 5 | O-rings (small) |  | 2 |
| 6 | Replacement Nozzles | 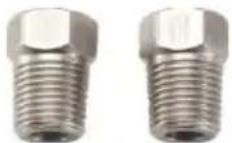 | 2 |
| 7 | Through-hole Needle |  | 1 |
- Pull back collar on quick-connect end of wand. 2. Push the surface cleaner into place.
- Push the collar forward, insert surface cleaner and release collar. Ensure the collar slides all the way forward. Tug on surface cleaner to make sure it is securely in place.
SURFACE PREPARATION
- Clear any loose debris from the area to be cleaned.
- Never attempt to clean surface with objects that protrude from the surface being cleaned. Striking any raised obstacle during operation will damage machine. If contact does occur and results in vibration when operating machine, STOP cleaning and check the spray bar.
START-UP
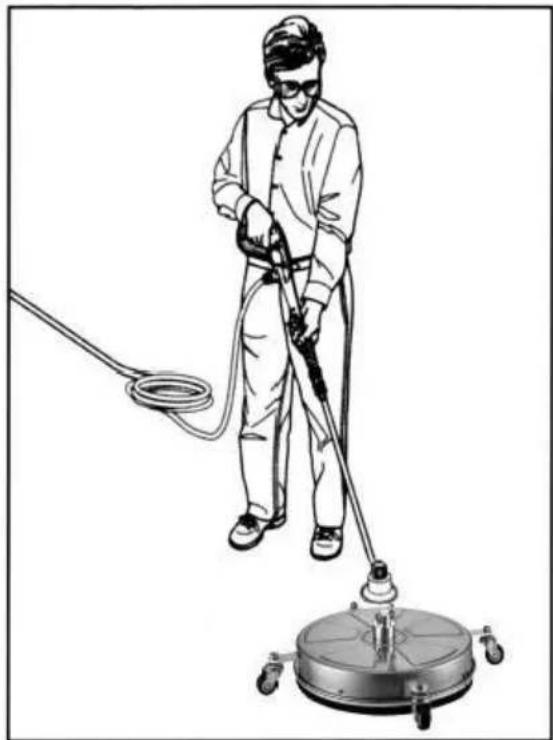
- Ensure all connections are secure.
- Unlock the trigger gun and squeeze the trigger while starting the Pressure Washer.
- Water will begin flowing from the nozzles of the Surface Cleaner. Ensure nozzles are not clogged and spray pattern is not erratic.
- Walk slowly behind the unit, cleaning as you go. If striping occurs, slow down the pace. Do not allow machine to remain stationary on soft surfaces such as wood.
SHUT-DOWN
- Turn the Pressure Washer off.
- Turn the water supply off.
- Squeeze the trigger gun to relieve water pressure.
- Disconnect the pressure washer handle and wipe down the unit. Store it in a dry environment.
AFTER EACH USE
Perform the following inspections after each use to clean the cleaner and ready it for the next use.
- Clean out any dirt or foreign material from under the housing and casters. If necessary, use a cloth or sponge to wash the surface clean
and rinse it with tap water.
- Check for loose parts and any damage.
NOZZLE CLEANING & REPLACEMENT
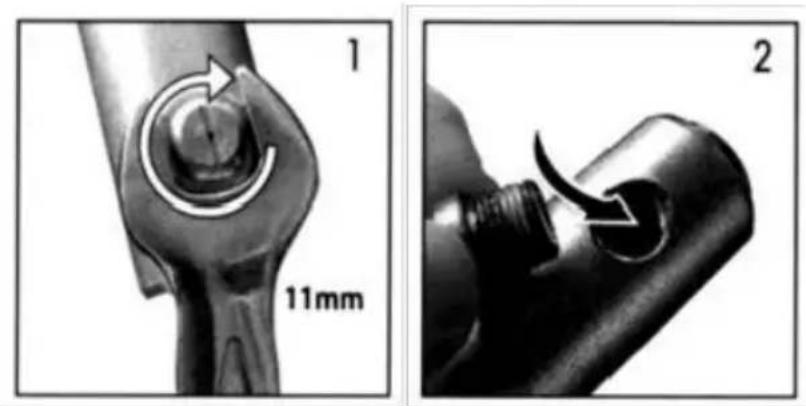
- Remove the nozzle with an appropriate wrench (11 mm).
- Rinse holes with fresh water to clean impurities.
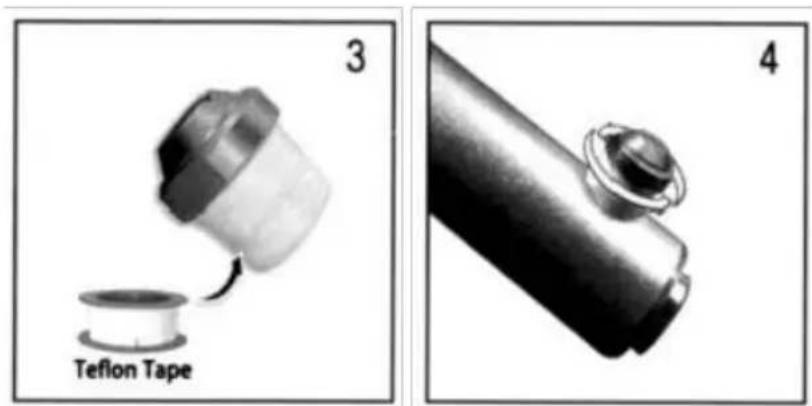
- Cover the nozzle thread with attached Teflon tape.
- Align the nozzle opening and reinstall the nozzles to the spray bar. Tighten it securely.
Note: If the nozzle is difficult to remove, please heat it with a hot blow dryer before removing.
TOP MAINTENANCE
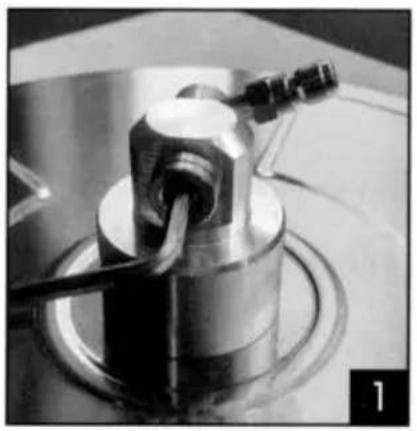
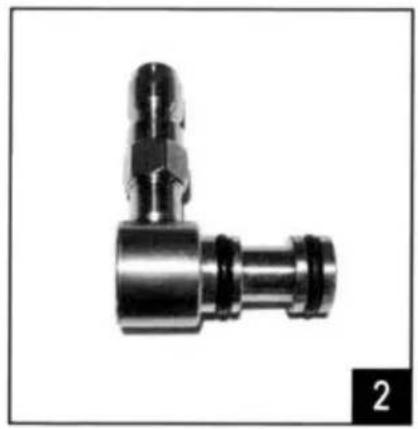
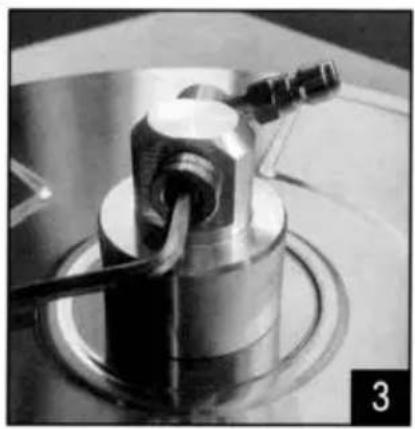
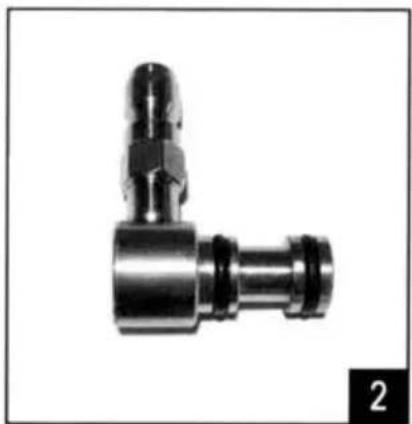
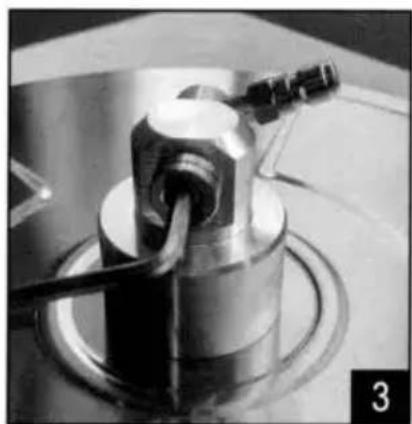
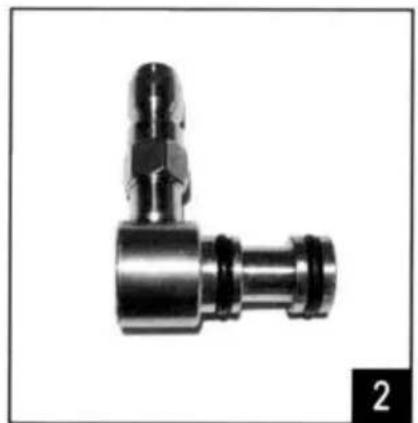
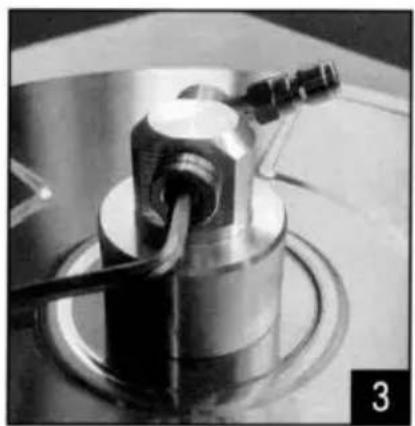
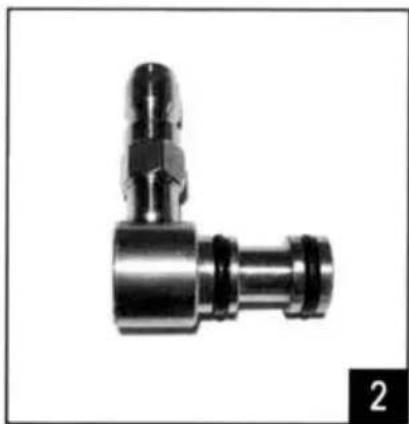
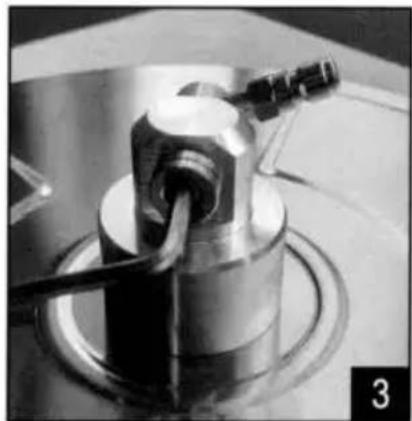
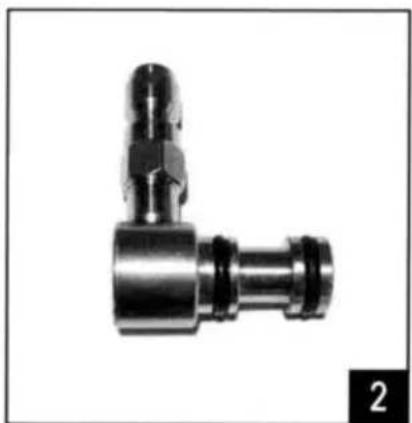
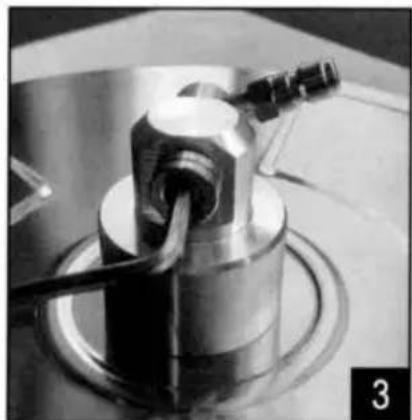
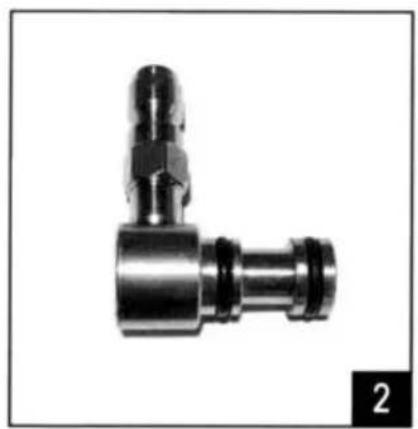
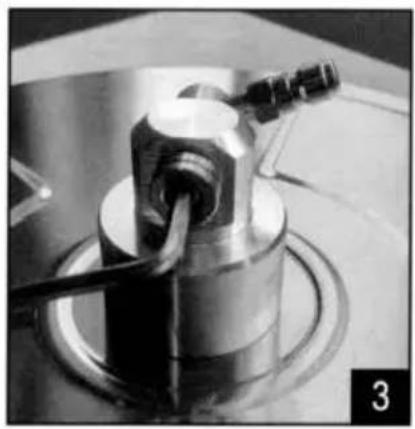
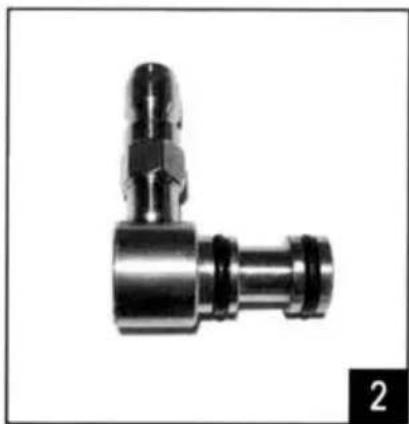
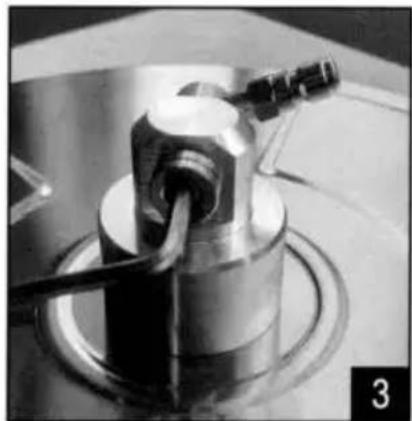
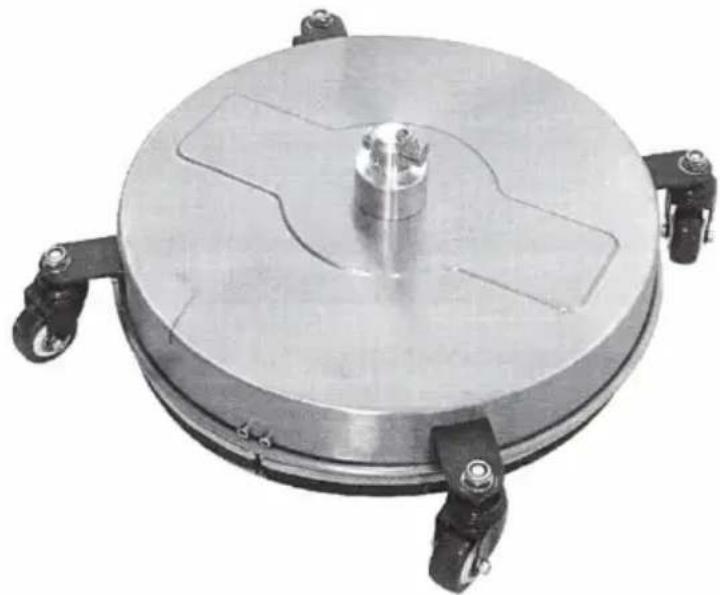
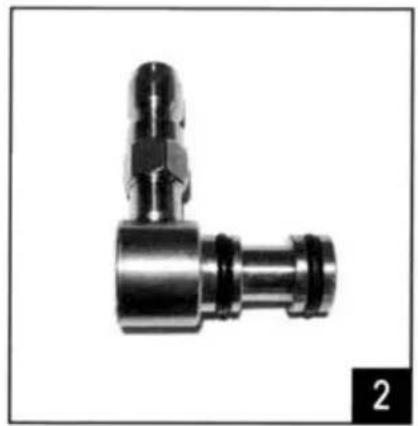
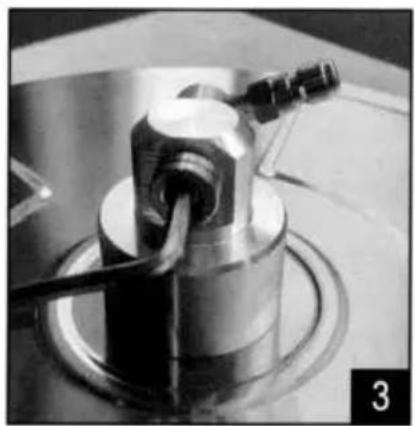
If the pivot connection leaks, please change the o-rings.
Please refer to the following steps:
- Remove the screw from the body by using a 5 mm hex wrench.
- Replace the original broken o-ring with new o-rings.
- Reinstall the screw by using a 5 mm hex wrench.
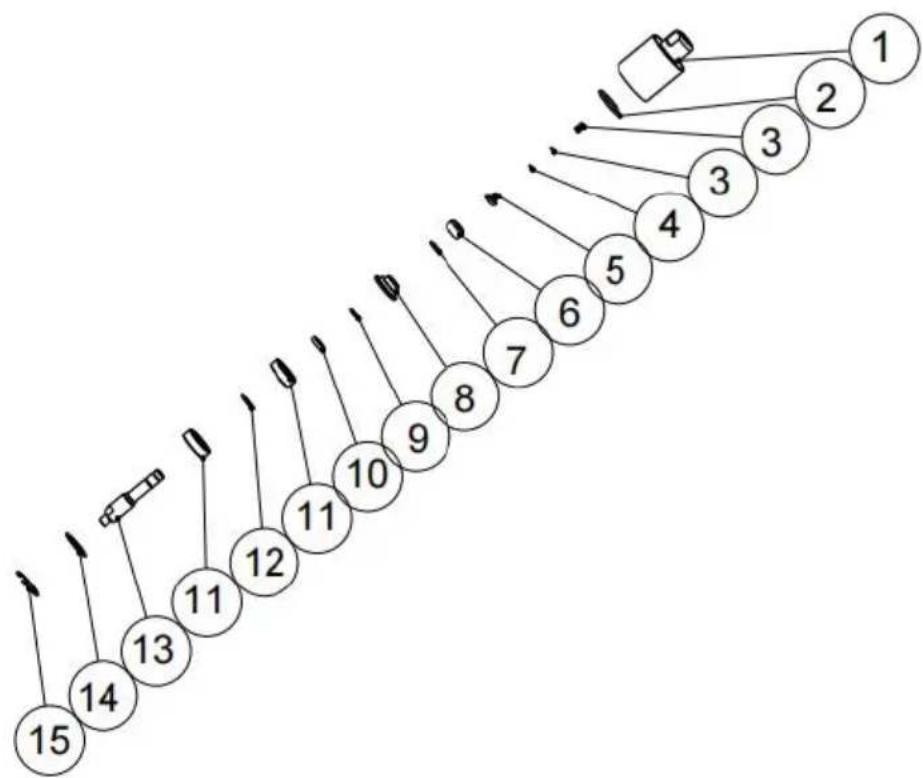
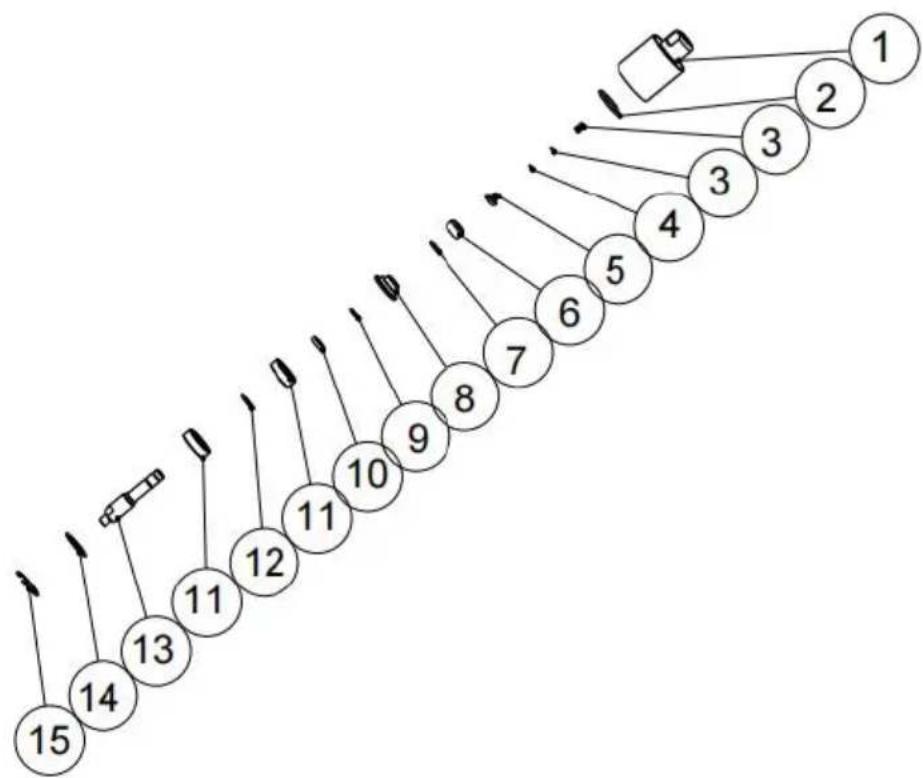
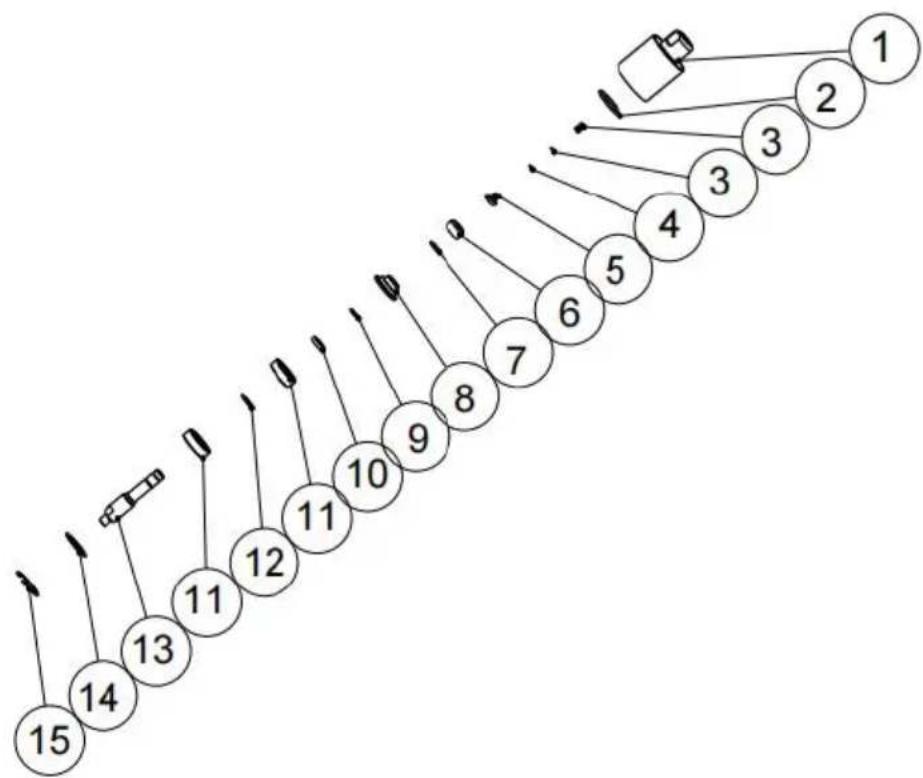
![graph TD A["1"] --> B["2"] B --> C["3"] C --> D["4"] D --> E["5"] E --> F["6"] F --> G["7"] G --> H["8"] H --> I["9"] I --> J["10"] J --> K["11"] K --> L["12"] L --> M["13"] M --> N["14"] N --> O["15"]](/content/2026/04/736151/images/61130e077dd8f4ebf6130e632c3e26312171f1bb005a2a923ed01fda104e265f.jpg)
| No. | Name | Qty | No. | Name | Qty |
| 1 | Shaft Housing | 1 | 9 | Circlip for shaft D | 1 |
| 2 | O - ring 40.94*2.6 | 1 | 10 | Spacing Collar | 1 |
| 3 | Compression Spring | 1 | 11 | Deep Groove Bal Bearing S6302RS | 2 |
| 4 | O - ring 5.28*1.78 | 2 | 12 | Washer | 1 |
| 5 | Flanged Drive Hub | 1 | 13 | Shaft | 1 |
| 6 | Shaft End Cap | 1 | 14 | Washer | 1 |
| 7 | O - ring14.2*2.4 | 1 | 15 | Circlip for hole | 1 |
| 8 | Bushing | 1 |
| TROUBLESHOOTING | ||
| PROBLEM | PROBABLE CAUSE | CORRECTIVE ACTION |
| Missing parts | Damaged package | Contact our Customer Serv for help. |
| Inadequate cleaning power | Not enough PSI from pressure washer | Ensure unit produces a minimum pressure washer 2,000 PSI. |
| Nozzle obstructed or worn | Clean or replace the nozz | |
| Spray bar will rotate | Defective,snap ring dislodged | Do not use! Contact our Customer Serv for help. |
| Unstable connection, the spray bar fell c | ||
| Seal malfunction, wat shooting from swivel | ||
| Excessive vibration of surface cleaner | Nozzle clogged | Clean or replace the nozz |
| Streaked cleaning pattern | Nozzle clogged | Clean or replace the nozz |
| Cleaning too fast | Slow down pace. | |
| Top leaks | The o-ring is broke | Please refer to instructions |

VEVOR
Affordable. Reliable. Home Improvement.
HIGH PRESSURE SURFACE CLEANER
MODEL: QD-XDP10
MODEL: QD-XDP10
HIGH MAINTENANCE
Affordable. Reliable. Home Improvement.
HIGH PRESSURE SURFACE CLEANER
MODEL: QD-XDP10
MODEL: QD-XDP10
![graph TD A["1"] --> B["2"] B --> C["3"] C --> D["4"] D --> E["5"] E --> F["6"] F --> G["7"] G --> H["8"] H --> I["9"] I --> J["10"] J --> K["11"] K --> L["12"] L --> M["13"] M --> N["14"] N --> O["15"]](/content/2026/04/736151/images/c088d6bddbdf5d6529a1236906f5d6c1cf1271dd1af5465b450d31437d547017.jpg)
Affordable. Reliable. Home Improvement.
SURFACE CLEANER WITH PRESSURE WASHER
MODEL: QD-XDP10
MODEL: QD-XDP10
Affordable. Reliable. Home Improvement.
MAINTENANCE UP
Affordable. Reliable. Home Improvement.
PRESSURE WASHER FOR SURFACE
CLEANING
MODEL: QD-XDP10
MODEL: QD-XDP10
![graph TD A["1"] --> B["2"] B --> C["3"] C --> D["4"] D --> E["5"] E --> F["6"] F --> G["7"] G --> H["8"] H --> I["9"] I --> J["10"] J --> K["11"] K --> L["12"] L --> M["13"] M --> N["14"] N --> O["15"]](/content/2026/04/736151/images/b2d48b71f0ea8481d453d32d85b7f470efa89aa608ccc7f5669ef7d349179c9a.jpg)
Affordable. Reliable. Home Improvement.
HIGH-PRESSURE CLEANER FOR
SURFACE CLEANERS
MODEL: QD-XDP10
MODEL: QD-XDP10
SPECIFIC OPERATION WARNINGS
If the spindle connection leaks, replace the O-rings.
![graph TD A["1"] --> B["2"] B --> C["3"] C --> D["4"] D --> E["5"] E --> F["6"] F --> G["7"] G --> H["8"] H --> I["9"] I --> J["10"] J --> K["11"] K --> L["12"] L --> M["13"] M --> N["14"] N --> O["15"]](/content/2026/04/736151/images/0f6f9cbd489f982b001106430908842d1253b1f99eb61b71d002cf82b417596f.jpg)
PRESSURE WASHER SURFACE CLEANER
MODEL: QD-XDP10
MODEL: QD-XDP10
![graph TD A["1"] --> B["2"] B --> C["3"] C --> D["4"] D --> E["5"] E --> F["6"] F --> G["7"] G --> H["8"] H --> I["9"] I --> J["10"] J --> K["11"] K --> L["12"] L --> M["13"] M --> N["14"] N --> O["15"]](/content/2026/04/736151/images/190e18e5516e9d369a6054c22e6c3354ccac5340624613249074325aad3bb9a2.jpg)
- MODEL: QD-XDP
- INTRODUCTION
- IMPORTANT SAFETY INFORMATION
- A WARNING
- WORK AREA SAFETY
- PERSONAL SAFETY
- CLEANER USE AND CARE
- SURFACE PREPARATION
- START-UP
- SHUT-DOWN
- AFTER EACH USE
- NOZZLE CLEANING & REPLACEMENT
- TOP MAINTENANCE
- VEVOR
- HIGH MAINTENANCE
- HIGH PRESSURE SURFACE CLEANER
- MAINTENANCE UP
- SPECIFIC OPERATION WARNINGS
Brand : Vevor
Model : QD-XDP10
Category : Pressure washer