HLXCQJ-A01 - Vacuum holder Vevor - Free user manual and instructions
Find the device manual for free HLXCQJ-A01 Vevor in PDF.

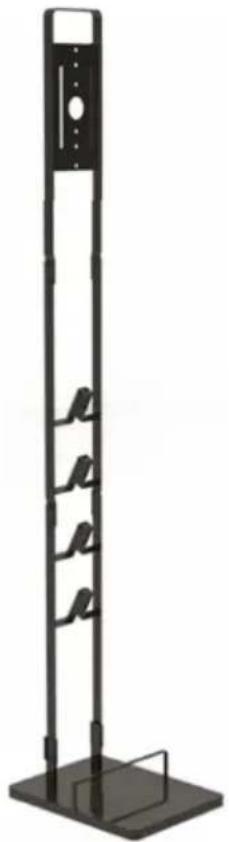
| Product Type | Vacuum cleaner stand (stand) |
| Brand | Vevor |
| Model | HLXCQJ-A01 |
| Dimensions (L x W x H) | 220 x 290 x 1270 mm |
| Number of hooks | 4 |
| Wheels | No |
| Material | Plastic-coated steel |
| Approximate weight | 1.2 kg |
| Maximum load capacity | Designed for standard cordless vacuum cleaner |
| Package contents | Base, lower bracket, center bracket, upper bracket, hex key, 4 3M pads, 12 M5x8 screws, 2 M5x20 screws, 2 nuts |
| Wall mounting | No, floor placement |
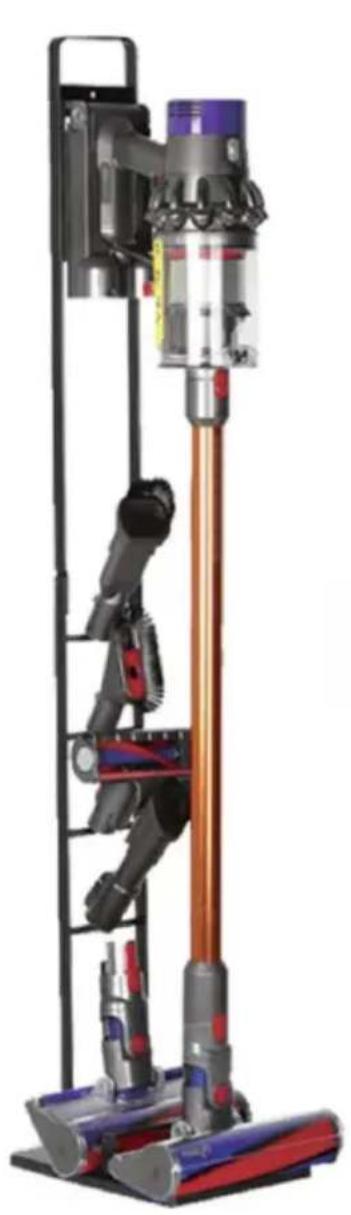
| Usage | Vacuum storage and charging |
| Maintenance | Clean with a soft cloth; periodically check screw tightness |
| Safety | Keep out of reach of children; install on a flat and stable surface |
| Repairability | Spare parts available from the manufacturer (screws, brackets) |
Frequently Asked Questions - HLXCQJ-A01 Vevor
User questions about HLXCQJ-A01 Vevor
0 question about this device. Answer the ones you know or ask your own.
Ask a new question about this device
Download the instructions for your Vacuum holder in PDF format for free! Find your manual HLXCQJ-A01 - Vevor and take your electronic device back in hand. On this page are published all the documents necessary for the use of your device. HLXCQJ-A01 by Vevor.
USER MANUAL HLXCQJ-A01 Vevor
Technical Support and E-Warranty Certificate www.vevor.com/support
VACUUM STAND
MODEL:HLXCQJ-A01
We continue to be committed to provide you tools with competitive price. "Save Half", "Half Price" or any other similar expressions used by us only represents an estimate of savings you might benefit from buying certain tools with us compared to the major top brands and does not necessarily mean to co all categories of tools offered by us. You are kindly reminded to verify carefully when you are placing an order with us if you are actually Saving Half in comparison with the top major brands.
Model:HLXCQJ-A01
NEED HELP? CONTACT US!
Have product questions? Need technical support? Please feel free to contact us:
Technical Support and E-Warranty Certificate www.vevor.com/support
This is the original instruction, please read all manual instructions carefully before operating. VEVOR reserves a clear interpretation of user manual. The appearance of the product shall be subject to product you received. Please forgive us that we won't inform you as there are any technology or software updates on our product.
SAFETY INSTRUCTIONS
1 Products shall be installed by adults;
2.Products are installed away from children and pets;
3. Please wear gloves to install the product to avoid hand injury;
4.Install the product as per this instruction to avoid personnel injury or product damage.
5. Please re-tighten the screws of each part regularly to avoid the screw loosening due to the long-term use of the product.
Parts list
| A:Base×1pc | B: lower bracket × | C: middle bracket×1pc |
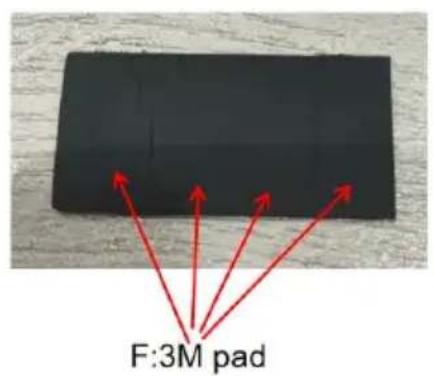
| D:upper bracket×1pc | E: hex wrench ×1p | F:3M pad*4pcs |
| G: M5*8 Screw ×12pc | H:M5*20 Screw ×2pc | I:Nut for Long Screw×2pcs |

J: M8-Wrench×1pc
After assembly, place the product on flat ground to avoid tilting; away from children and pets.
PARAMETER LIST
| Model | HLXCQJ-A01 |
| product size | L*W*H:220×290*1270mm |
| Total number of hooks | 4pcs |
| Rolling wheel | NO |
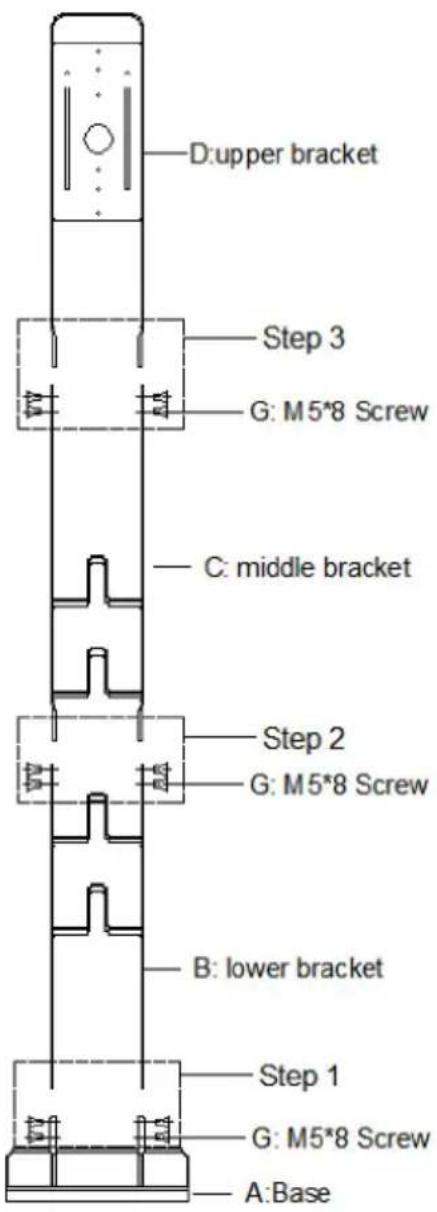
Installation Guide
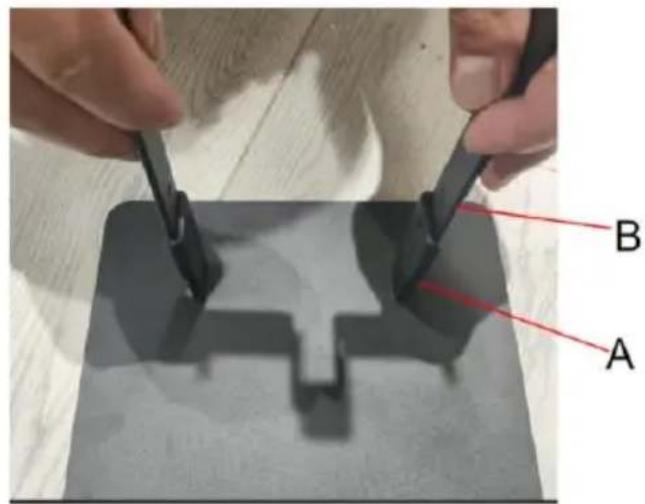
1.Install lower bracket B on base A
Note:that the hook of the lower bracket B is up and facing directly in the base.
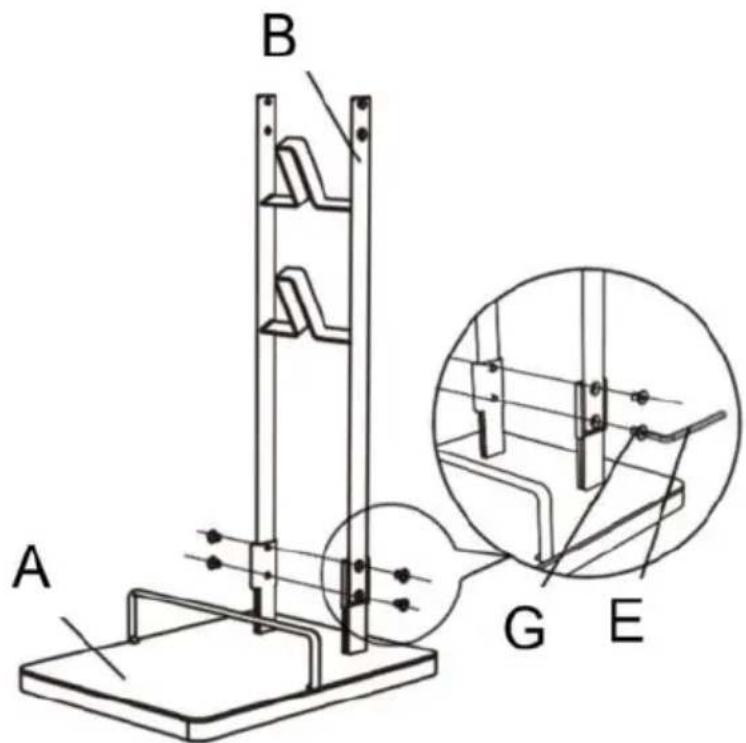
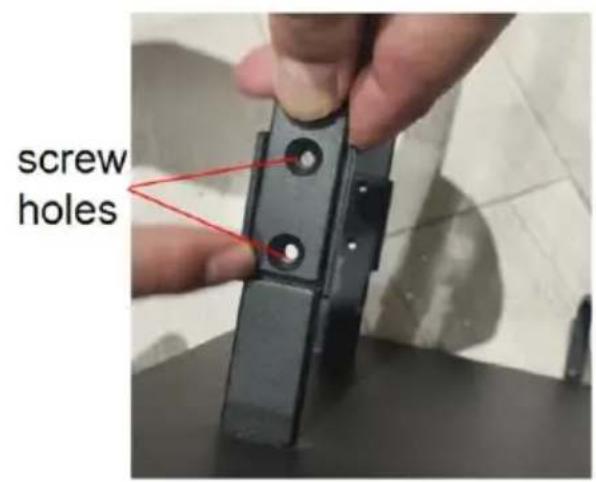
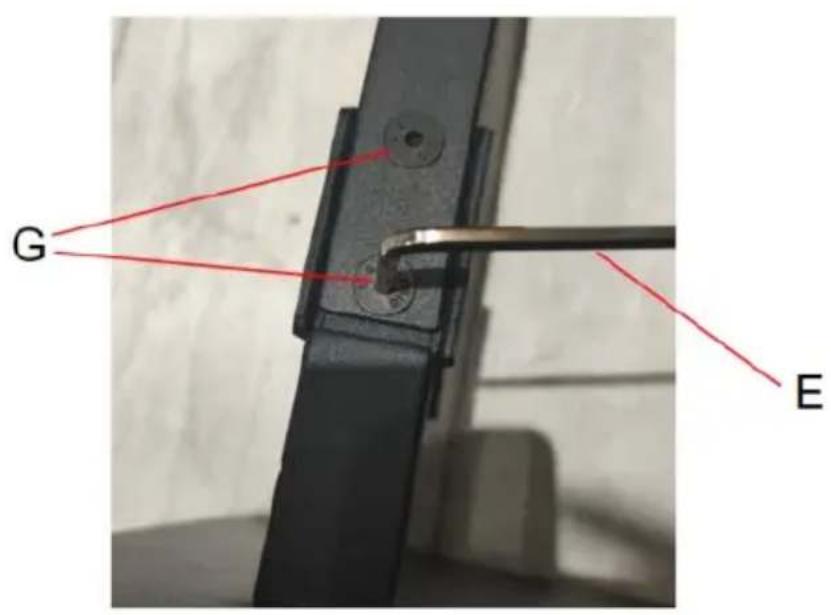
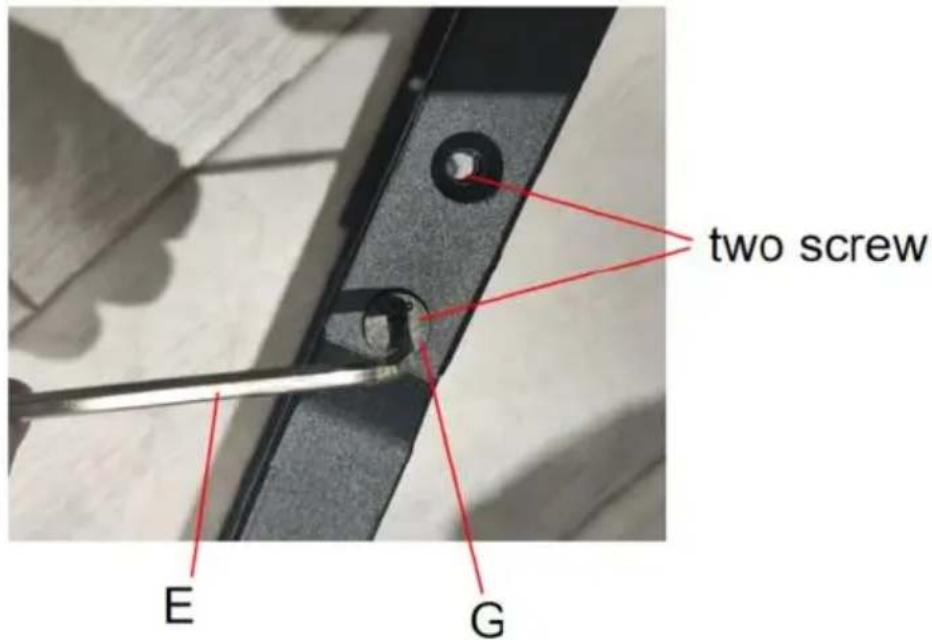
1.1.When the bracket B is put into the base A, the side wall of the is on the outside, and the screw holes on the left and right sides s aligned, and tighten the screw G by the hex wrench E.
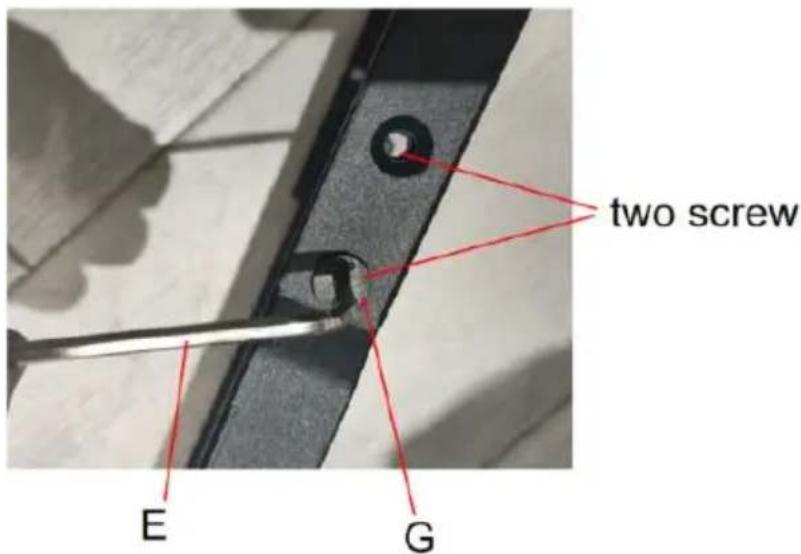
1.2.Tighten the screw G by a wrench E;two screws on each side. Note:We recommend tightening the screws in two installments. For the time, you do not need to fully tighten the screw;after installing the sc on both sides, completely erect the lower support, and then complete tighten the screws on both sides.
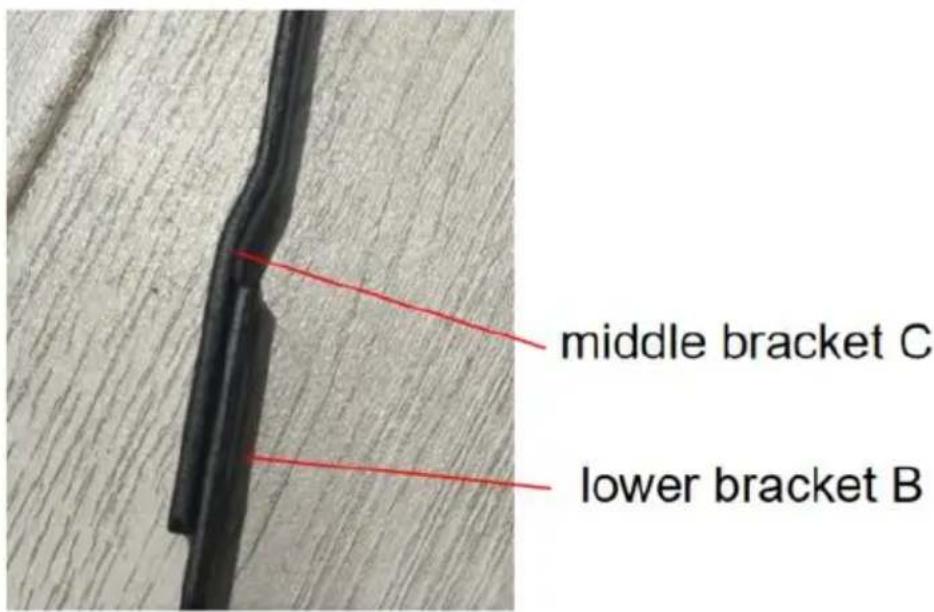
2.Install middle bracket C on lower bracket B.
2.1.When middle bracket C is installed in lower bracket B, the side lower bracket B needs to be installed outside.
2.2. After alignment of screw holes on both sides, tighten screw G usi hex wrench E;two screws on each side.
Note: We recommend tightening the screws in two installments. For the time, you do not need to fully tighten the screw; After installing the screw on both sides, completely erect the lower support, and then completely tighten the screws on both sides.
3.Install upper bracket D on middle bracket C.
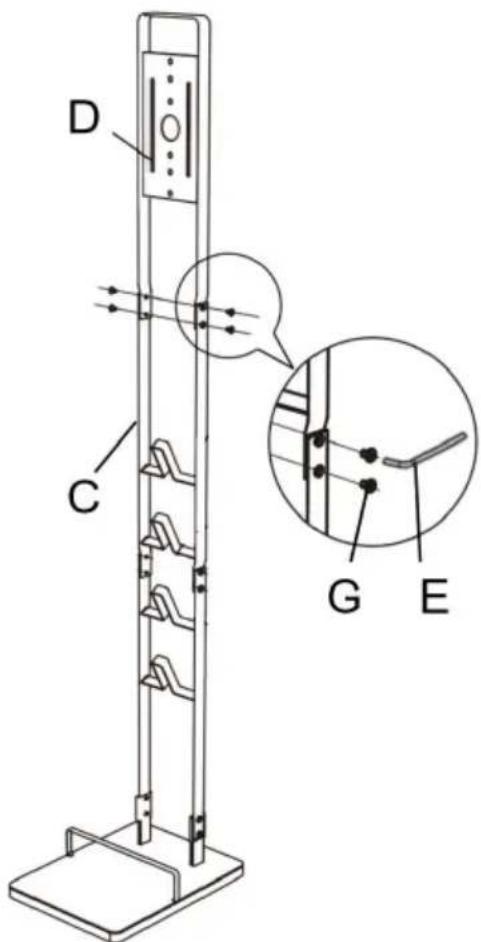
3.1.When upper bracket D is installed in middle bracket C, the side middle bracket C needs to be installed outside.
3.2. After alignment of screw holes on both sides, tighten screw G usi hex wrench E.Two screws on each side.
Note: We recommend tightening the screws in two installments. For the time, you do not need to fully tighten the screw, After installing the sc on both sides, completely erect the lower support, and then complete tighten the screws on both sides.
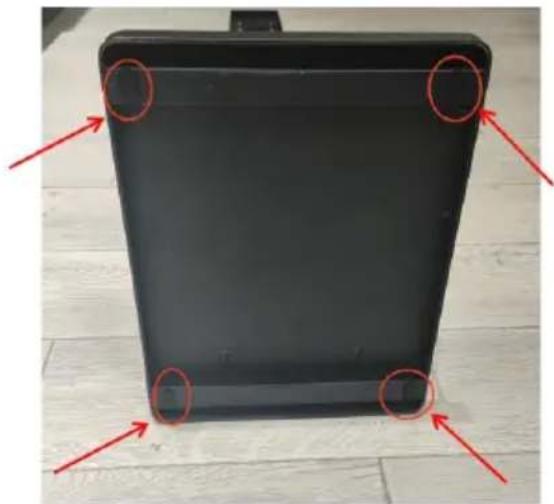
4.Remove 4 pads F and attach to the beam on the bottom of th
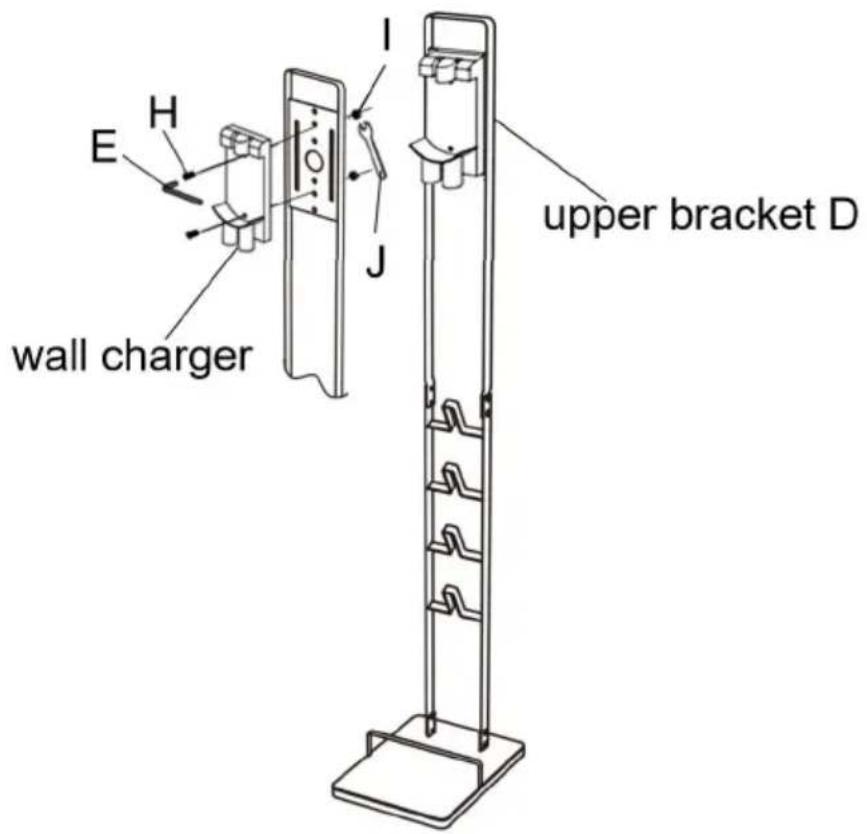
5.The wall charger is mounted on the upper bracket D through s H and nut I;Use the hex wrench E to fix the screw H, and ther the nut I with the wrench J to complete the installation;Each wal charger requires two screws and nuts.
Note:wall charger is not included in the package, and wall charger re an additional purchase.
C
VEVOR
TOUGH TOOLS, HALF PRICE
Technical Support and E-Warranty Certificate www.vevor.com/support
VEVOR®
TOUGH TOOLS, HALF PRICE
Assistance technique et certificate de garantie electronique www.vevor.com/support
SUPPORT SOUS VIDE
MODELE: HLXCQJ-A01
YH CONSULTING LIMITED. C/O YH Consulting Limited Bureau 147, Centurion House, London Road, Staines-upon-Thames, Surrey, TW18 4AX
E-CrossStu GmbH
Mainzer Landstr.69,
Installationshandbuch
YH CONSULTING LIMITED. C/O YH Consulting Limited Office 147, Centurion House, London Road, Staines-upon-Thames, Surrey, TW18 4AX
Importato in AUS: SIHAO PTY LTD. 1 ROKEVA STREETEASTWOOD NSW 2122 Australia
Importato negli USA: Sanven Technology Ltd. Suite 250, 9166 Anaheim Place, Rancho Cucamonga, CA 91730
YH CONSULTING LIMITED. C/O YH Consulting Limited Ufficio 147, Centurion House, London Road, Stainesupon-Thames, Surrey, TW18 4AX
E-CrossStu GmbH
Mainzer Landstr.69, 60329 FrancofortesulMeno.
VEVOR
TOUGH TOOLS, HALF PRICE
www.vevor.com/support
Road, Staines-upon-Thames, Surrey, TW18 4AX
E-CrossStu GmbH
Mainzer Landstr.69,
YH CONSULTING LIMITED. C/O YH Consulting Limited Biuro 147, Centurion House, London Road, Staines-upon-Thames, Surrey, TW18 4AX
E-CrossStu GmbH
Mainzer Landstr.69, 60329 Frankfurt nad Menem.
VEVOR
TOUGH TOOLS, HALF PRICE
HULP NODIG? NEEM CONTACT MET ONS OP!
YH CONSULTING LIMITED. C/O YH Consulting Limited
Kantoor 147, Centurion House, London Road, Staines-
upon-Thames, Surrey, TW18 4AX

garantiecertificaat www.vevor.com/support
VEVOR®
TOUGH TOOLS, HALF PRICE
YH CONSULTING LIMITED. C/O YH Consulting Limited Office 147, Centurion House, London Road, Staines-upon-Thames, Surrey, TW18 4AX