Aquabot Wave - Pool cleaning robot BWT - Free user manual and instructions
Find the device manual for free Aquabot Wave BWT in PDF.

User questions about Aquabot Wave BWT
0 question about this device. Answer the ones you know or ask your own.
Ask a new question about this device
Download the instructions for your Pool cleaning robot in PDF format for free! Find your manual Aquabot Wave - BWT and take your electronic device back in hand. On this page are published all the documents necessary for the use of your device. Aquabot Wave by BWT.
USER MANUAL Aquabot Wave BWT
Cordless Robotic Pool Cleaner
Designed and manufactured by Degri Inc.
Made in China
natural_image
Illustration of a mechanical device with a logo on the cover (no text or symbols visible)Aquabot WAVE
V2.0
DE
Aquabot WAVE
Kabelloser Roboter-Poolreiniger
Inhaltsverzeichnis
Warnung 4
Garantie 5
Einleitung 5
Kundendienst 5
Lieferumfang 6
Schnellstart 7
Anleitungen 9
natural_image
Illustration of a hand using a tool to adjust or install a mechanical component with labeled parts A and B (no text or symbols beyond labels)Lichtring
natural_image
Illustration of a robotic device with a control panel and directional arrow (no text or symbols)Autopark

natural_image
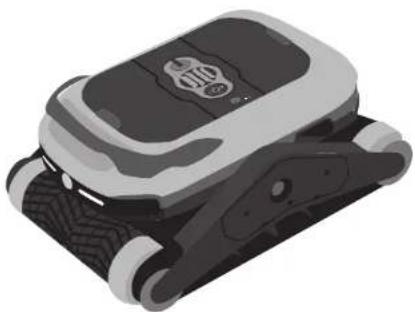
Front view of a white robotic car with a sensor or sensor icon above it, set against a patterned background (no text or symbols visible)natural_image
Simple diagram of a rectangular frame with a small square symbol at the top (no text or labels)natural_image
Illustration of a mechanical device with wheels and a handle, no visible text or symbolsnatural_image
Isometric illustration of a mechanical device with a cylindrical component and a base (no text or symbols)natural_image
Illustration of a robotic arm with a mechanical device and a glowing grid structure (no text or symbols)natural_image
Illustration of a mechanical device with internal components (no visible text or symbols)natural_image
Three-step illustration of a robotic device with hands and legs, showing progressive assembly (no text or symbols)natural_image
Three-panel illustration showing a mechanical device with a central housing and hands, no visible text or symbolsnatural_image
3D model of a mechanical component with a screwdriver inserted, showing no text or symbolsnatural_image
3D rendering of a mechanical component with a central circular feature and mounting holes (no text or symbols)natural_image
3D model of a mechanical component with internal features and mounting holes (no text or symbols)natural_image
Illustration of a hand touching a black plastic tray (no text or symbols)- Use a Phillips screwdriver to lock and reattach the inner cover.
natural_image
3D diagram of a mechanical component with a screwdriver inserted, showing no text or symbolsFehlerbehebung
This device contains licence-exempt transmitter(s)/receiver(s) that comply with Innovation, Science and Economic Development Canada's licence-exempt RSS(s). Operation is subject to the following two conditions:
This device may not cause interference.
This device must accept any interference, including interference that may cause undesired operation of the device.
The antenna(s) used for this transmitter must be installed to provide a separation distance of at least 20 cm from all persons and must not be collocated or operating in conjunction with any other antenna or transmitter, End-Users must be provided with transmitter operation conditions for satisfying RF exposure compliance.
- French:
Cordless Robotic Pool Cleaner
Table of Contents
Warning 20
Warranty 21
Introduction 21
Customer Service 21
In the Box 22
Quick Setup 23
Instructions 25
Cleaning Operations 26
Care and Maintenance 27
Troubleshooting 29
Product Specification 31
FCC Statement 32
Canada Statement 33
Caution 34
Warning
- For your safety, DO NOT do anything other than the routine cleaning and maintenance as described in this manual. This product must be serviced by a professional who is licensed and qualified in pool equipment repair as per local laws.
- USE ONLY the original and authorized power adapter and cord to charge.
- DO NOT use if the power cord is damaged. Before charging make sure that the connector and socket are dry and clean.
- The device must be powered via a residual-current device with a rated residual current of at most 30 mA.
- DO NOT attempt to charge the Aquabot WAVE when the robot is running. Make sure the power is OFF.
- DO NOT ENTER the pool while the robot is running in the pool.
- Improper installation and/or operation may void the warranty.
- DO NOT use an unauthorized extension cord.
- When it is charging, the robot should be kept in a cool place to avoid damage to internal electrical components caused by overheating.
- To ensure optimal battery life for the product during long-term storage, it is recommended to perform a minimum of one charge cycle per month, maintaining the battery charge level between 30% to 50%.
- Improper handling of the device can lead to severe injury or damage to the device. Only allow others to access the device after they have read and comprehended the entire manual or have been instructed about the intended use and the associated risks.
- Never let persons with reduced physical, sensory or mental capacities (such as children or drunk people) or a lack of experience and knowledge unsupervised near the device.
- Never allow children and persons with limited physical, sensory or mental capacities or persons lacking the respective experience and knowledge to operate the device.
- Do not let children clean or service the device.
- Children are not allowed to play with the device or with the power cable.
-
Do not operate the device when impaired (e.g. under the influence of drugs, alcohol or medication).
-
The robot contains a non-replaceable battery. Do not attempt to replace the battery yourself. Contact customer service for assistance if the battery needs to be replaced.
WARNING: Use only with DZ072ADL255250F battery charger.
Warranty
BEFORE INSTALLING AND USING THIS PRODUCT, PLEASE READ THE FOLLOWING GUIDELINES AND INSTRUCTIONS:
- The warranty duration for the battery and motors is two years from your purchase date.
- The warranty duration for the scrubbing brushes and debris filters is one year from your purchase date.
- This warranty is valid only for the original purchaser and does not apply to resale or transfer.
- Any damages or failures caused by misuse, unauthorized repair, disassembly, or moisture getting inside the charging contact may void the warranty.
- Purchasing order number or official record is required to claim the repair during the warranty period.
*Find the product's serial number at the bottom side of the robot. If service is required, please contact your original dealer. If your original dealer does not perform warranty services, please find the customer service contact info.
Introduction
THANK YOU FOR CHOOSING AQUABOT WAVE
Your Aquabot WAVE Cordless Robotic Pool Cleaner provides an innovative and eco-friendly solution for your pool. It is equipped with two ultrasonic sensors, three motors, and debris filters to ensure efficient cleaning and intelligent navigation around your pool. It has three cleaning modes, overall, floor and wall cleaning. You can also explore new cleaning experience by using the BWT Robotics app.
Customer Service
| Email: | Spain...... | sat@bwtath.es |
| France...... | service@bwtpoolproducts.com | |
| USA...... | service@bwtpool.us | |
| Germany...... | poolroboterserviceDE@bwtpool.de | |
| Austria...... | poolroboterservice@bwt.at | |
| Other countries... | service@bwtpoolproducts.com |
In the Box
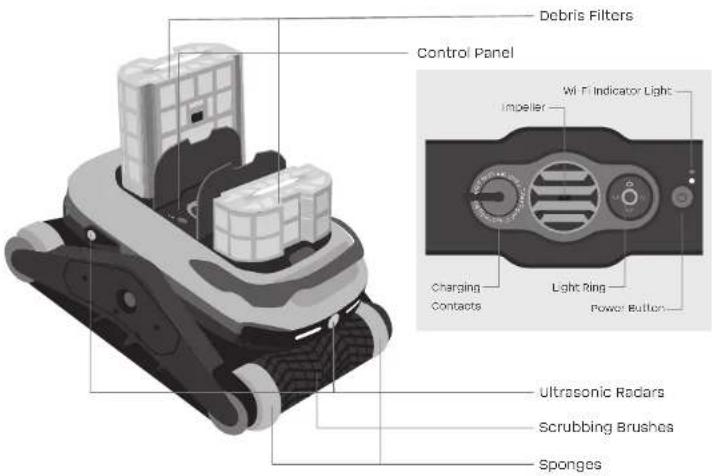
text_image
Debris Filters Control Panel Wi-Fi Indicator Light Impeller Charging Contacts Light Ring Power Button Ultrasonic Radars Scrubbing Brushes Sponges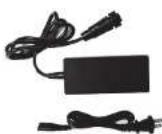
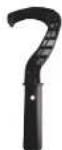
Charger Retrieval Hook Quick Start Guide
Note
The presence of water residuals or dampness in the product is a normal condition resulting from the quality testing process. Please rest assured that it is safe to use.
Quick Setup
Download the BWT Robotics App and Connect to Wi-Fi
Register or Log In
- Search for "BWT Robotics" on the Apple App Store or Google Play Store, download the app, and initiate the connection to unlock customized cleaning features.
- Register or log into your BWT Robotics account.


Android users IOS users
Reset Wi-Fi
- If the Wi-Fi indicator light is flashing or off, it indicates the robot is waiting to be paired.
- If the Wi-Fi indicator light is solid on, it indicates the robot is already connected. To reset Wi-Fi, press and hold the "○" button for at least 8 seconds until you see the Wi-Fi indicator starts flashing again.
Add Device
- Click "-" in the upper right corner of the homepage, and select your pool robot from the list.
- Make sure the Bluetooth and location services are turned on.
- Connect to the home/pool Wi-Fi network, and enter the Wi-Fi password.
- Enter the correct pool information and finish pairing.
Firmware Update
- A Wi-Fi connected robot will receive software update notice if a new version becomes available. To check your robot's software version, click Settings > Device Information > Update.
- It is recommended to enable "Auto Upgrade" for achieving optimal robot performance.
- The actual app page displayed may vary due to software version updates.


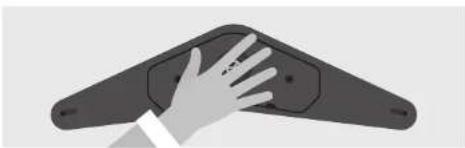
charging
- Before charging, please wipe away any water from the charging contacts. Charging the rechargeable battery in a wet or moist charging socket leads to corrosion of the contacts. Only connect the charger to the robot if the charging socket is completely dry.
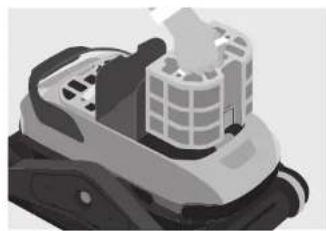
- Open the rubber cover of the robot, insert the charging adapter plug (A) into the charging contact (B).
- Please fully charge the robot before using it for the first time.
- If not in use for an extended period, it is recommended to store the robot in a cool and dry environment, above 0°C, to help preserve the battery capacity. It is recommended to store the robot with a full charge and recharge it every six months.

natural_image
Illustration of a hand using a tool to adjust or install a mechanical component with labeled parts A and B (no text or symbols beyond labels)Light Ring
Light Ring
| Solid on Flashing | ||
| Green | 50 ~ 100% or Fully Charged | Charging to 100% |
| Yellow | 25 ~ 50% | Charging to 50% |
| Red | 0 ~ 25% | Charging to 25% |
| Blue | Cleaning starts, and you can drop the robot into the water | |
Mode Explanation
| Mode Explanation | ||
| App control | Select your desired cleaning mode and duration, and unlock more features to customize your cleaning | |
| Floor mode | Runs the designated mode for 2 hours (default), and will autopark to the nearest wall when complete or when the battery level is below 10%. | |
| Wall mode | ||
| Overall mode | ||
Instructions
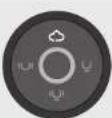
ON/OFF
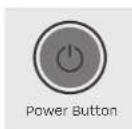
Turn on/off: press and hold " 🔊 " button for 2-3 seconds to turn on/off the robot.
| Briefly Press Press and Hold for 2~3s Press and Hold for 8s | ||
| Switch cleaning modes Turn on/off Factory reset | ||
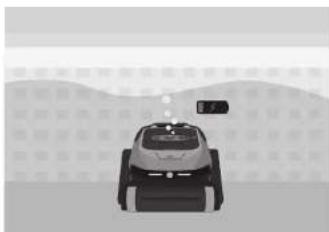
Start Cleaning
Press "() " button to switch between and select the cleaning mode. When the Light Ring turns blue, the cleaning starts, and you can place the robot into the water.
Factory Reset
- If the robot is not functioning properly or you need to switch Wi-Fi configurations, you can restore the robot to factory settings. Press and hold the (*) * button for at least 8 seconds until the Wi-Fi indicator light starts flashing.
- Please be aware that a factory reset will restore the robot to its original settings, and all personal data (including pool information, schedules, etc.) will be wiped out.
Cleaning Operations
start cleaning
- For first use, please soak the sponges on both sides of the scrubbing brush for at least 5 minutes.
- Select a cleaning mode (via the app or briefly press the power button).
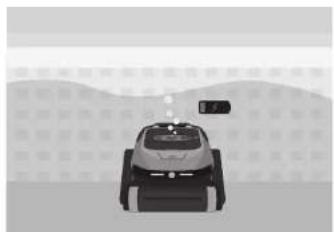
- Once the light ring turns blue, drop the robot into the pool within one minute. Ensure all the air escapes from the robot, and the device sinks to the pool floor.
natural_image
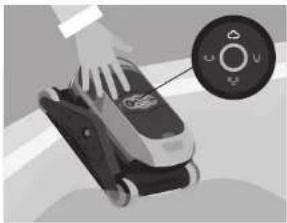
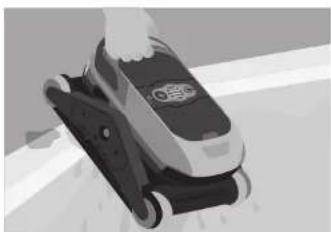
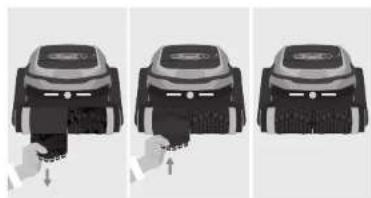
Illustration of a handheld device with a hand pointing to a circular control panel (no text or symbols visible)Autopark
natural_image
Illustration of a robotic car with a sensor or sensor unit, set against a hatched background (no text or symbols)- The robot will move to and park at the nearest edge when it completes the cleaning cycle or when the battery level goes below 10%.
natural_image
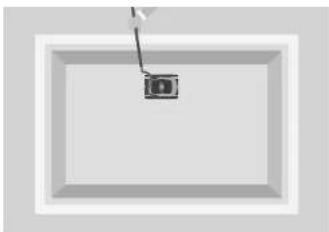
Simple diagram of a rectangular frame with a small square symbol at the top (no text or labels)- Use the retrieval hook to take out the robot.
natural_image
Illustration of a mechanical device with wheels and a handle, no visible text or symbols- Hold the robot vertically to drain the water out.
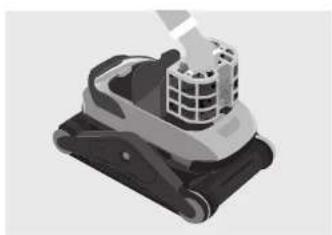
natural_image
Isometric illustration of a mechanical device with a grid-patterned top component (no text or symbols)- Open the covers and remove the filters from both sides of the robot.
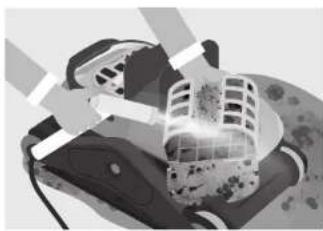
natural_image
Illustration of a robotic arm interacting with a building (no text or symbols visible)- Empty all debris from the filter. Then rinse the filter using a hose with clean water. When it's too dirty, clean the filter with soapy water and a soft bristle brush.
natural_image
Illustration of a mechanical device with a grid-patterned top and base (no text or symbols visible)- Install the filter in the robot and close the cover properly for your next cleaning. Put the robot in a dry place and let it dry properly. Do not put the robot under direct sunlight.
Care and Maintenance
Scrubbing Brushes (replace as needed)
- Unscrew the old scrubbing brushes from both sides of the robot.
- Attach the new brushes with the robot and ensure the direction of the scrubbing brushes facing the inverted V-shape.
- Wrap the new scrubbing brushes on the roller body by buckling all the buckles one by one.
Filters (replace as needed)
- Open the filter covers and remove the filters from both sides of the robot.
- Insert the new filters.
- Carefully close the filter covers.
- It is recommended to clean the filter basket after each cleaning cycle.
natural_image
Three-step illustration of a robotic device with hands operating the base panel (no text or symbols)
natural_image
Three-step illustration of a robotic car with a hand operating the engine, showing progressive assembly (no text or symbols)Instructions for Removing and Installing the Side Cover
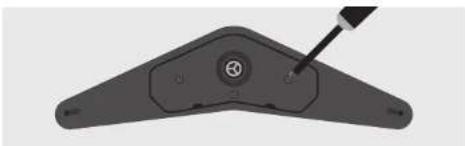
- Use a Phillips screwdriver to unscrew the three screws on the inner cover.

natural_image
3D rendering of a mechanical component with a screwdriver inserted, no visible text or symbols- Use a flathead screwdriver to remove the inner cover from the bottom.
natural_image
Top-down view of a mechanical component with a central circular feature and mounting holes (no text or symbols visible)- Remove any entangled garbage from inside the inner cover.
natural_image
3D rendering of a black mechanical component with internal circular features and mounting holes (no text or symbols)- Snap the side cover onto the outer cover using the snap on the top of the inner cover.
natural_image
Illustration of a hand touching a black plastic object with mounting holes (no text or symbols)- Use a Phillips screwdriver to lock and reattach the inner cover.

natural_image
3D rendering of a mechanical component with a screwdriver inserted (no text or symbols visible)Troubleshooting
| Problems Possible Reasons Workable Solutions | ||
| Unable to power on. | 1. Low battery.2. Battery temperature is too high or too low.3. The robot is defective. | 1. Charge the robot.2. Only use the robot within the range of 0-40 °C.3. Contact the BWT customer support team. |
| Unable to charge. | 1. The power outlet is malfunctioning or tripped.2. Poor contact.3. The battery temperature is too high or too low.4. You used a different charger.5. The adapter or the robot is defective. | 1. Make sure the plug is inserted into a working electrical outlet.2. Clean the charging contacts both on the robot and on the charging cord. Wipe away any water before charging.3. Only charge the robot within the range of 5-40 °C.4. Confirm that you are using the original charger.5. Contact the BWT customer support team. |
| Unable to connect to Wi-Fi. | 1. Weak or unstable Wi-Fi signal.2. Incorrect Wi-Fi password entered.3. Not using 2.4GHz Wi-Fi.4. The robot is already connected to a network. | 1. Ensure the Wi-Fi network is stable and has a strong signal.2. Enter the correct Wi-Fi password.3. Confirm that the robot is configured to use the 2.4GHz band for internet access.4. To reset: Turn on the robot, and press and hold the power button for 8 seconds until the Wi-Fi Indicator starts flashing again. |
| The robot is not sinking into the water. | 1. Dry sponges.2. The filter is full or clogged. | 1. Soak the sponges on both sides of the scrubbing brush for at least 5 minutes.2. Make sure the filter is clean.3. Fully submerge the robot into the water till no air bubbles come out. Then release it to allow it to sink down. |
| The robot does not move and stops working after some time. | 1. Low battery.2. The robot is stuck.3. Blocked impeller.4. Obstacle impeding the wheel movement. | 1. Check that the robot has enough power to perform the action.2. Use a hook to assist in moving the robot from where it got stuck.3. Check for any obstructions in the impeller.4. Verify that the bell and wheels can move frody. Clear any obstacles that may be impeding the movement of the wheels. |
| The robot is moving in circles. | 1. The filter is full or clogged.2. Blocked impeller. | 1. Empty the filter, and clean the filter properly.2. Check for any obstructions in the impeller. |
| The robot moves but does not clean the pool. | The filter is full or clogged. Empty the filter, and clean the filter properly. | |
| The robot gets stuck. | The robot got stuck on the drain because other pool equipment is currently in operation. | 1. Turn off the pool equipment while the robot is running.2. Use a hook to assist in moving the robot from its current position. |
| The robot fills over. The | Filter basket is full. | Make sure you emptied all the debris from the filter. |
| The robot doesn't reach all areas of the pool. | 1. Irregular pool shape2. The pump or filter system is running. | 1. Increase the cleaning time to ensure better coverage.2. Turn off the pump and filter system. |
| The robot doesn't climb up the wall. | 1. The filter is full or clogged.2. The brushes are worn out.3. There is algae built up. The wall surface is too slippery. | 1. Empty the filter, and clean the filter properly.2. Replace the defective scrubbing brush.3. Brush the algae from the wall. |
| The robot doesn't complete the full runtime specified in the app. | 1. Low battery2. The robot is blocked by objects or obstacles. | 1. Ensure the robot's battery has sufficient power to complete the specified cleaning time. Recharge if necessary.2. Check for any objects or obstacles that might be blocking the robot's path. Remove any impediments to allow smooth movement. |
| The robot is offline. | 1. The robot may be turned off.2. The battery may be cut of power.3. The robot is underwater. | 1. Make sure you turn on the robot.2. Ensure the battery has enough power. |
Product Specification
| Cleaning Mode | Overall, Floor, Wall & Waterline |
| App Control | BWT Robotics App |
| Battery Capacity | 9,300 mAh Lithium Ion |
| Charging Time | 3~4 hours |
| Max Water Depth | 4 m/13 ft |
| Power | 206 W |
| Charging Environment Temperature | 5 ~ 40 °C/41 ~ 104 °F |
| Storage Temperature | -10 ~ 40 °C/14 ~ 104 °F |
| Waterproof Level | IPXB |
| Charger Input | AC 100~240 V 50/60 HZ 1.5 A |
| Bluetooth/Wi-Fi | Yes |
| Temperature Sensor | Yes |
| Robot Dimension | 55 * 42 * 23.5 cm/22 * 16 * 9 inch |
| Robot Weight | 10.5 kg/23.2 pounds |
FCC Statement
This device complies with part 15 of the FCC Rules. Operation is subject to the following two conditions: (1) This device may not cause harmful interference, and (2) this device must accept any interference received, including interference that may cause undesired operation.
Any Changes or modifications not expressly approved by the party responsible for compliance could void the user's authority to operate the equipment.
This equipment has been tested and found to comply with the limits for a Class B digital device, pursuant to part 15 of the FCC Rules. These limits are designed to provide reasonable protection against harmful interference in a residential installation. This equipment generates uses and can radiate radio frequency energy and, if not installed and used in accordance with the instructions, may cause harmful interference to radio communications. However, there is no guarantee that interference will not occur in a particular installation. If this equipment does cause harmful interference to radio or television reception, which can be determined by turning the equipment off and on, the user is encouraged to try to correct the interference by one or more of the following measures:
- Reorient or relocate the receiving antenna.
- Increase the separation between the equipment and receiver.
- Connect the equipment into an outlet on a circuit different from that to which the receiver is connected.
- Consult the dealer or an experienced radio/TV technician for help.
Canada Statement
- English:
This device contains licence-exempt transmitter(s)/receiver(s) that comply with Innovation, Science and Economic Development Canada's licence-exempt RSS(s). Operation is subject to the following two conditions:
This device may not cause interference.
This device must accept any interference, including interference that may cause undesired operation of the device.
The antenna(s) used for this transmitter must be installed to provide a separation distance of at least 20 cm from all persons and must not be collocated or operating in conjunction with any other antenna or transmitter, End-Users must be provided with transmitter operation conditions for satisfying RF exposure compliance.
- French:
Read the manual and follow the instructions accordingly. In case of inappropriate use, BWT is not liable for losses or injuries.
- This device must be installed and operated as specified.
- This device must be installed to provide a separation distance of at least 20cm from all persons and must not be colocated or operating in conjunction with any other antenna or transmitter.
- Under Industry Canada/Europe/Australia regulations, this radio transmitter may only operate using an antenna of a type and maximum (or lesser) gain approved for the transmitter by Industry Canada/Europe/Australia.
- Any changes or modifications not expressly approved by the party responsible for compliance could void the user's authority to operate the device.
- When not in use, please store the device in a shaded area, away from direct sunshine or any heat source. (We recommend taking the device out of the water after each use).
- Always clean the debris filters after each use. Do not let the filter baskets dry out before cleaning.
- Don't run the device when it is not in the water.
-
If any parts of the robot's exterior are damaged, the broken areas may pose a risk of causing damage to your pool or pool liner. Please promptly contact the BWT after-sales team to replace any damaged components.
-
Use the device in the following water condition:
| Water temperature | 5 - 35 °C |
| pH level | 7.0 - 7.8 |
| Cl level | Max 4 ppm |
FR
Aquabot WAVE
France service@bwtpoolproducts.com
natural_image
Close-up of a hand using a tool to adjust a component with labeled parts A and B (no text or symbols beyond labels)Anneau lumineux
natural_image
Illustration of a handheld device with a hand pointing to a circular control panel (no text or symbols visible)Autoparking
natural_image
Front view of a futuristic robotic vehicle with a sensor or sensor icon above it (no visible text or symbols)natural_image
Simple diagram of a rectangular frame with a small square symbol at the top (no text or labels)natural_image
Illustration of a scooter with a hand holding the blade (no text or symbols visible)natural_image
Isometric illustration of a mechanical device with a central tower and base plate (no text or symbols)natural_image
Illustration of a robotic arm interacting with a building (no text or symbols visible)natural_image
Illustration of a mechanical device with a grid-patterned top component (no text or symbols visible)natural_image
Three-step illustration of a robotic device with labeled parts, showing progressive assembly from top to bottom (no text or symbols)natural_image
Three-panel illustration showing a robotic arm interacting with a vehicle, no text or symbols presentnatural_image
Close-up of a black triangular mechanical component with a screwdriver inserted, showing no text or symbols.natural_image
3D rendering of a mechanical component with a central circular feature and mounting holes (no text or symbols)natural_image
3D model of a black mechanical component with internal floral patterns and mounting holes (no text or symbols)natural_image
Illustration of a hand touching a black plastic tray (no text or symbols)natural_image
3D model of a mechanical component with a screwdriver inserted, showing no text or symbolsDépannage
This device contains licence-exempt transmitter(s)/receiver(s) that comply with Innovation, Science and Economic Development Canada's licence-exempt RSS(s). Operation is subject to the following two conditions:
This device may not cause interference.
This device must accept any interference, including interference that may cause undesired operation of the device.
The antenna(s) used for this transmitter must be installed to provide a separation distance of at least 20 cm from all persons and must not be collocated or operating in conjunction with any other antenna or transmitter, End-Users must be provided with transmitter operation conditions for satisfying RF exposure compliance.
- French:
text_image
SELECT REVIEW + Respond to Change + Start Check 3D Support
text_image
Select Food Barbore Type HostCarga
natural_image
Close-up of a hand using a tool to adjust a mechanical component with labeled parts A and B (no text or symbols beyond labels)Anillo de luces
natural_image
Illustration of a handheld device with a hand pointing to a circular control panel (no text or symbols visible)Autoparqueo

natural_image
Front view of a futuristic robotic vehicle with a sensor or sensor unit (no visible text or symbols)natural_image
Simple diagram of a rectangular frame with a small square symbol at the top (no text or labels)natural_image
Illustration of a mechanical device with a hand operating it (no visible text or symbols)natural_image
Isometric illustration of a mechanical device with a central tower and base plate (no text or symbols)natural_image
Illustration of a robotic arm interacting with a building (no text or symbols visible)natural_image
Illustration of a mechanical device with a grid-patterned top and base (no text or symbols visible)natural_image
Three-step illustration of a robotic device with hands interacting, showing front, side, and top views (no text or symbols)natural_image
Three-step illustration of a robotic car with a hand operating the engine, showing progressive assembly (no text or symbols)natural_image
Close-up of a black triangular mechanical component with a screwdriver inserted, showing no text or symbols.
natural_image
3D rendering of a black triangular mechanical component with mounting holes and a central circular feature (no text or symbols)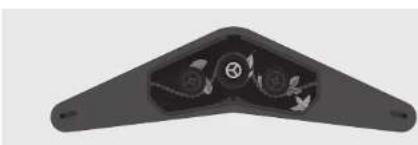
natural_image
3D rendering of a black mechanical component with internal circular features (no text or symbols visible)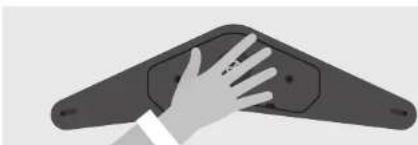
natural_image
Illustration of a hand touching a dark mechanical component (no text or symbols visible)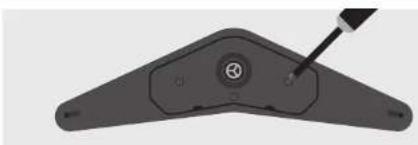
natural_image
Close-up of a mechanical component with a circular feature and a pointer, no visible text or symbolsThis device contains licence-exempt transmitter(s)/receiver(s) that comply with Innovation, Science and Economic Development Canada's licence-exempt RSS(s). Operation is subject to the following two conditions:
This device may not cause interference.
This device must accept any interference, including interference that may cause undesired operation of the device.
The antenna(s) used for this transmitter must be installed to provide a separation distance of at least 20 cm from all persons and must not be collocated or operating in conjunction with any other antenna or transmitter, End-Users must be provided with transmitter operation conditions for satisfying RF exposure compliance.