
DTDB-50L-U - Still Vevor - Free user manual and instructions
Find the device manual for free DTDB-50L-U Vevor in PDF.
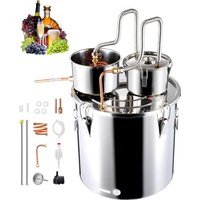


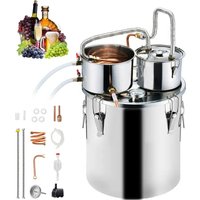
| Capacity and dimensions | 50-liter (13.2-gallon) boiler pot - dimensions Φ400×H400mm. Cooling bucket Φ200×H110mm. Filter barrel Φ180×H100mm. Maximum recommended fill: 70% of rated volume, approximately 35 liters. |
|---|---|
| Food-grade materials | Entire unit built from 201 food-grade stainless steel, durable and easy to clean. Copper spiral cooling coil and copper fittings for fast thermal conductivity. |
| Compatible heat sources | Works with gas stoves, coal stoves, and wood/firewood heat. Not compatible with induction cooktops. Outdoor use or well-ventilated areas strongly recommended to prevent alcohol vapor buildup. |
| Dual-use configuration | Usable in fermentation mode (beer, wine, cider) then distillation mode (whiskey, brandy, rum, vodka). Also suitable for distilled water, floral hydrosols, vinegar, and soy sauce. |
| Effective condensation | High-conductivity copper spiral coil. Cooling via cold water circulation through the condenser bucket. Two methods: tap water connection or recirculation with the included submersible pump (JYC-1100, 8W, 450 L/h, IPX8-rated). |
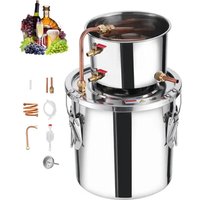
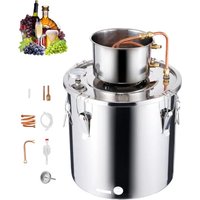
| Included accessories | Mechanical thermometer 0-150°C (32-302°F), bubble airlock, submersible pump 8W 110-120V 60Hz, food-grade silicone tubing, stainless steel fittings, copper pipes and filter lid. Complete 22-piece ready-to-use kit. |
| Safety | Never exceed 70% fill level. Always discard the first 100-200ml (heads/foreshots) per 20L of fermented mash to eliminate methanol. Check for leaks before each distillation run. Distilling outdoors is strongly preferred. |
Frequently Asked Questions - DTDB-50L-U Vevor
User questions about DTDB-50L-U Vevor
0 question about this device. Answer the ones you know or ask your own.
Ask a new question about this device
Download the instructions for your Still in PDF format for free! Find your manual DTDB-50L-U - Vevor and take your electronic device back in hand. On this page are published all the documents necessary for the use of your device. DTDB-50L-U by Vevor.
USER MANUAL DTDB-50L-U Vevor
Technical Support and E-Warranty Certificate www.vevor.com/support
ALCOHOL STILL
MODEL:
DTDB-10L-U, DTDB-10L-E, DTDB-10L-A, DTDB-20L-U,
DTDB-20L-E, DTDB-20L-A, DTDB-30L-U,
DTDB-30L-E, DTDB-30L-A, DTDB-50L-U,
DTDB-50L-E, DTDB-50L-A
We continue to be committed to provide you tools with competitive price. "Save Half", "Half Price" or any other similar expressions used by us only represents an estimate of savings you might benefit from buying certain tools with us compared to the major top brands and does not necessarily mean to cover all categories of tools offered by us. You are kindly reminded to verify carefully when you are placing an order with us if you are actually saving half in comparison with the top major brands.
MODEL:
DTDB-10L-U, DTDB-10L-E, DTDB-10L-A, DTDB-20L-U, DTDB-20L-E, DTDB-20L-A, DTDB-30L-U, DTDB-30L-E, DTDB-30L-A, DTDB-50L-U, DTDB-50L-E, DTDB-50L-A
B-20L-A, DTDB-30L-U, DTDB-30L-E, DTDB-30L-A, DTDB-50L-U, DTDB-50
Have product questions? Need technical support? Please feel free to contact us:
Technical Support and E-Warranty Certificate www.vevor.com/support
Have product questions? Need technical support? Please feel free to contact us:
Technical Support and E-Warranty Certificate www.vevor.com/support
This is the original instruction. Please read all manual instructions carefully before operating. VEVOR reserves a clear interpretation of the user manual. The appearance of the product shall be subject to the product you received. Please forgive us that we won't inform you again if there are any technology or software updates on our product.
Safety instructions of the submersible aquarium pump
The manipulation and utilization of our pump are very simple and convenient. The user just needs to pour a suitable height level of water, link the pump with the outlet water pipe, and then connect the pump with power supply in accordance with the mark on the label. Thus, the pump can run well.
Technical data
| Model | JYC- 1100 | |
| Rating voltage | 110 - 120V~ | 220 -240V~ |
| Rating Frequency | 60Hz | 50Hz |
| Rating power | 8W | 8W |
| protection type | IPX8 | IPX8 |
| Max. supply height | 110cm | 110cm |
| Max. conveying amou | 450L/h | 450L/h |
To reduce risk of electric shock
- Always unplug the pump from the electric outlet before cleaning and handling.
- Use with clean water only. Do not place it in other liquid. Never keep pump run dry.
- Option - The pump is supplied with a ground conductor and a grounding type attachment plug, and must be connected only to a ground outlet to reduce the risk of electric shock (Europe standard only).
- The use of liquid temperature cannot be higher than 35°C.
- Prevent the water from running into the electrical outlet down the cord.
- Do not lift, carry, or pull the pump by the power cord.
- Do not replace the pump cord. Stop using the pump if it sustains damage (option for pump with safe low voltage).
- Always use the transformer provided to run the water pump or consult with your electrician before another transformer is connected.
- Do not connect the transformer provided to other appliances.
- Always unplug the power transformer from the electrical outlet before cleaning and handling.
- Indoor use only. Place the transformer away from fire, moisture, and sunlight. (Option for pump with light)
- The supply cord cannot be replaced. If the cord is damaged, the appliance should be scrapped.
To clean the pump
- Unplug the pump from the electrical outlet. Use a small soft brush or underwater stream to remove debris.
To keep water clean
- Periodically change water to prevent water from becoming sticky and forming microorganisms.
Troubleshooting
If the pump fails to run, the following should be checked: check the breaker, or try a different outlet to make sure that the pump is getting electrical power. NOTE: Always disconnect the pump from the electrical outlet before checking.
- Check the pump discharge and tubing for kinks and obstructions. Buildup can be flushed out with a garden hose.
WARNING!!! The water pump must be fully soaked or it will be damaged.
Disposal information
This product is subject to the provisions of European Directive 2012/19/EC. The symbol showing a wheelie bin crossed through indicates that the product requires separate refuse collection in the European Union. This applies to the product and all accessories marked with this symbol. Products marked as such may not be discarded with normal domestic waste, but must be taken to a collection point for recycling electrical and electronic devices.
Compressor wine cooler 10L/20L/30L/50L
Model Number:
DTDB-10L-U, DTDB-10L-E, DTDB-10L-A, DTDB-20L-U, DTDB-20L-E, DTDB-20L-A, DTDB-30L-U, DTDB-30L-E, DTDB-30L-A, DTDB-50L-U, DTDB-50L-E, DTDB-50L-A
ALCOHOL STILL
Please read this manual carefully before using the product.
BOM
| Item | Part Name | QTY | Picture |
| 1 | Boiler Lid | 1PCS | |
| 2 | Boiler pot | 1PCS | |
| 3 | cooling bucket | 1PCS | |
| 4 | copper coil cooling pi | 1PCS | |
| 5 | Copper pipe | 1PCS | |
| 6 | Filter bucket lid | 1PCS | |
| 7 | Filter bucket | 1PCS | |
| 8 | silicone Tubes | 2PCS | |
| 9 | stainless steel connection pipe | 2PCS | |
| 10 | wine copper pipe | 1PCS | |
| 11 | Nut | 1PCS | |
| 12 | short silicone Tube | 1PCS | |
| 13 | copper Extension Tub | 1PCS | |
| 14 | Thermometer | 1PCS | |
| 15 | Brass Nut | 1PCS | |
| 16 | Bubble Airlock | 1PCS | |
| 17 | stopper | 1PCS | |
| 18 | silicone Gasket | 4PCS | |
| 19 | Silicone Washer | 2PCS | |
| 20 | Gasket | 2PCS | |
| 21 | Pump | 1PCS | |
| 22 | User Manual | 1PCS |
Product Introduction
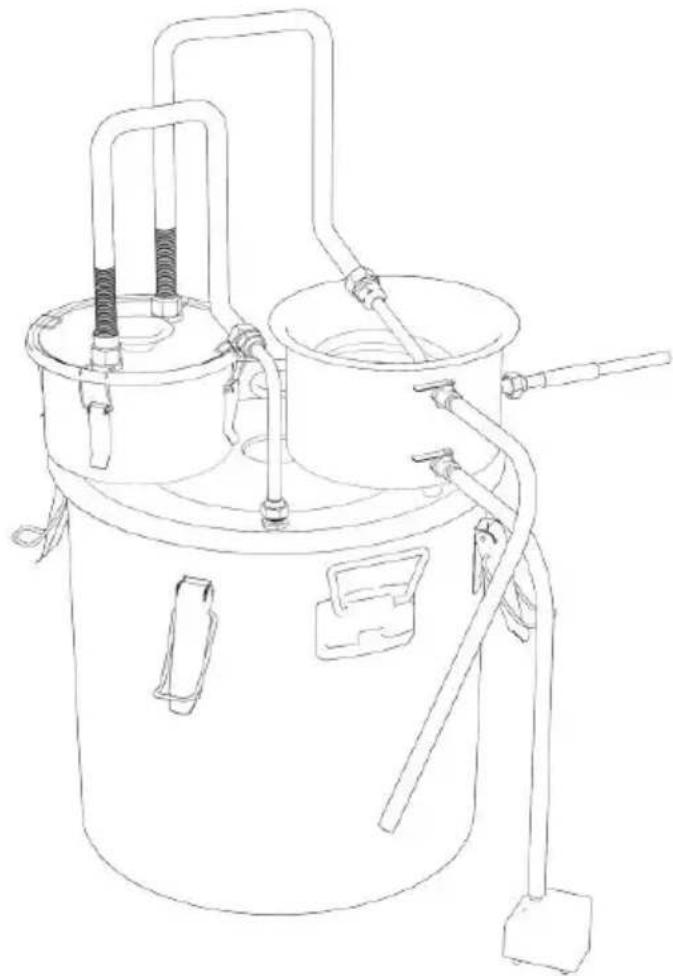
- Stainless steel fermenters concentrate steam by heating to boiling and then cooling. In addition, the entire alcohol distillation unit is made of food-grade stainless steel, which is durable and easy to clean.
Grade stainless steel, which is durable and easy to clean.
- Efficient condensation treatment: The alcohol distiller adopts a stainless steel spiral tube, which has fast thermal conductivity and ensures good cooling performance. At the same time, it has a large contact area with the condenser keg and provides a relatively low distillation temperature.
- Full set of accessories: The set comes with a thermometer (0-150°F) for easy real-time monitoring of alcohol temperature. Also includes a one-way vent valve and adds 2/3 water to it to help release air (out) when the grain is fermented. Our distillation kits also include a hydrometer kit for accurate measurement of wine strength.
- Multiple heating methods: This wine boiler is compatible with various stoves including gas stove, coal stove, and firewood. It's perfect for fermented liquors such as beer, brandy, whiskey, wine, and seasoning such as soy sauce and vinegar.
The following are the reference data; the yield is mainly determined by fermentation, distillate time, and fire power.
| volume | Model No | Dimension(mm) | ||
| wine barrel | cooling bucket | Filter barrel | ||
| 3 Gal 11.4L (±10%) | DTDB-10L-U | Φ250XH250 | Φ200XH110 | Φ180XH100 |
| DTDB-10L-E | Φ250XH250 | Φ200XH110 | Φ180XH100 | |
| DTDB-10L-A | Φ250XH250 | Φ200XH110 | Φ180XH100 | |
| 5 Gal 19L (±10%) | DTDB-20L-U | Φ300XH300 | Φ200XH110 | Φ180XH100 |
| DTDB-20L-E | Φ300XH300 | Φ200XH110 | Φ180XH100 | |
| DTDB-20L-A | Φ300XH300 | Φ200XH110 | Φ180XH100 | |
| 8 Gal 30L (±10%) | DTDB-30L-U | Φ350XH350 | Φ200XH110 | Φ180XH100 |
| DTDB-30L-E | Φ350XH350 | Φ200XH110 | Φ180XH100 | |
| DTDB-30L-A | Φ350XH350 | Φ200XH110 | Φ180XH100 | |
| 13 . 2 50L (±10%) | DTDB-50L-U | Φ400XH400 | Φ200XH110 | Φ180XH100 |
| DTDB-50L-E | Φ400XH400 | Φ200XH110 | Φ180XH100 | |
| DTDB-50L-A | Φ400XH400 | Φ200XH110 | Φ180XH100 | |

Warning: To reduce the risk of injury, the user must read the instructions manual carefully.
BEFORE YOU START
Please read all instructions carefully.
Retain instructions for future reference. Separate and count all parts and hardware.
Read through each step carefully and follow the proper order. We recommend that, where possible, all items are assembled near the area in which they will be placed in use, to avoid moving the product unnecessarily once assembled.
Always place the product on a flat, steady, and stable surface.
Keep all small parts and packaging materials for this product away from babies and children as they potentially pose a serious choking hazard.
OWNER'S MANUAL
ATTENTION! PLEASE READ THESE INSTRUCTIONS BEFORE USING THIS DEVICE
NOTICE:
If your package is missing parts or you are having issues with assembly, our customer service team will address any questions or concerns you may have. Please have this manual open and ready for reference.
SAFETY
To reduce the risk of fire or injury when using your distiller, follow the precautions:
- If the Water/Alcohol Distiller is to be used for making distilled alcohol beverages, it must be used only by adults of legal drinking age. No attempt to operate the distiller while under the influence of alcohol, etc.
- Consult federal and state laws and obtain any permits required for distilling alcohol.
Distilling outdoors is always preferred. - Never use the distiller over an open-flame heat source indoors. An electric heat source is preferred. - Never leave hot or boiling liquids on a heat source unattended. - Keep the distiller and any heating unit out of reach and away from children. - Use caution when removing the Boiler Lid while heating any liquid within the Boiler. - To avoid affecting the normal operation of the distiller, it is recommended not to exceed 70% of the rated volume during distillation. - Do not heat or boil liquids in the distiller if all openings are blocked. Steam and heat must be allowed to escape through the Condenser unit or one of the holes in the Boiler Lid for safe operation. Failure to do so may result in high pressure and explosion. - Prevent alcohol vapor from leaking from the distiller. Alcohol vapor is highly explosive. - Always check for, and address any leaks during the alcohol distilling process. - To prevent liquid/mash contents of the boiler pot from overflowing or being forced up into the condenser copper tube or into the bubble, always leave approximately 4" of airspace above the top of the contents of the boiler pot. - RISK OF METHANOL POISONING: Avoid consumption of Methanol (Methyl Alcohol)!
Methanol can cause blindness and be fatal. Carefully follow precautions and recipes for distilled beverages. Discard the first 4-7 oz (100-200 ml) of liquid as it comes out of the condenser distillate outlet, for each 5 gallons (20 L) of fermented "mash". These first ounces are often referred to as "heads" or "fore-shots". DO NOT CONSUME THEM.
PARTS & FEATURES
SETTING UP FOR DISTILLING
- Wash all parts with dish soap and hot water before assembling.
PARTS & FEATURES
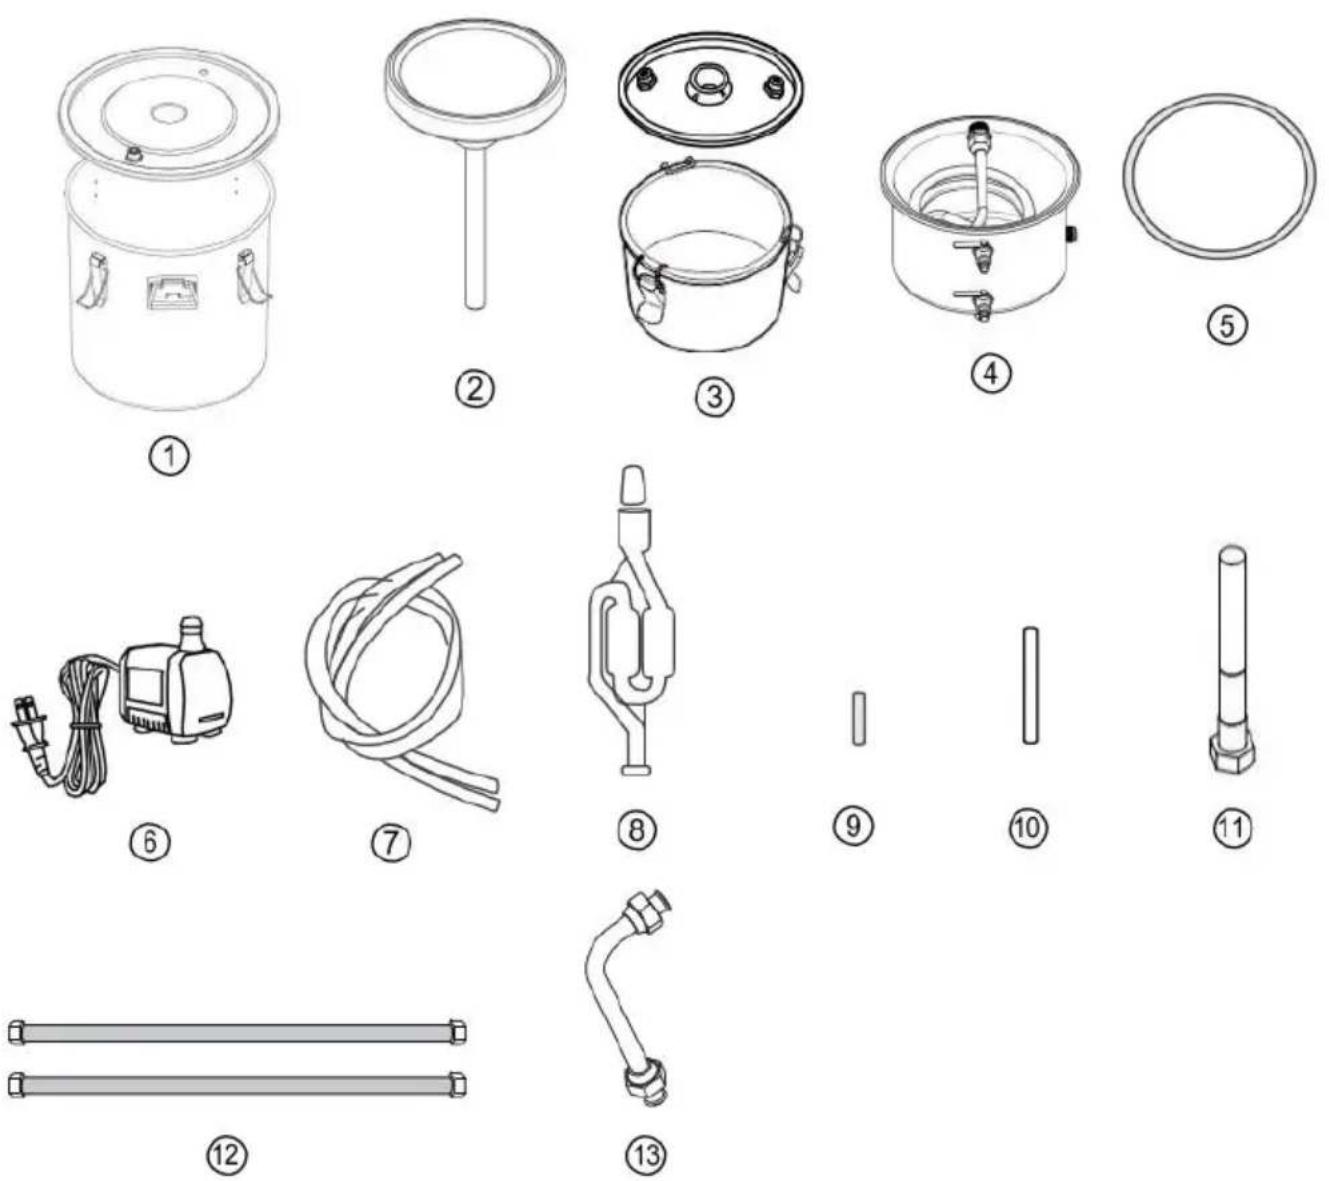
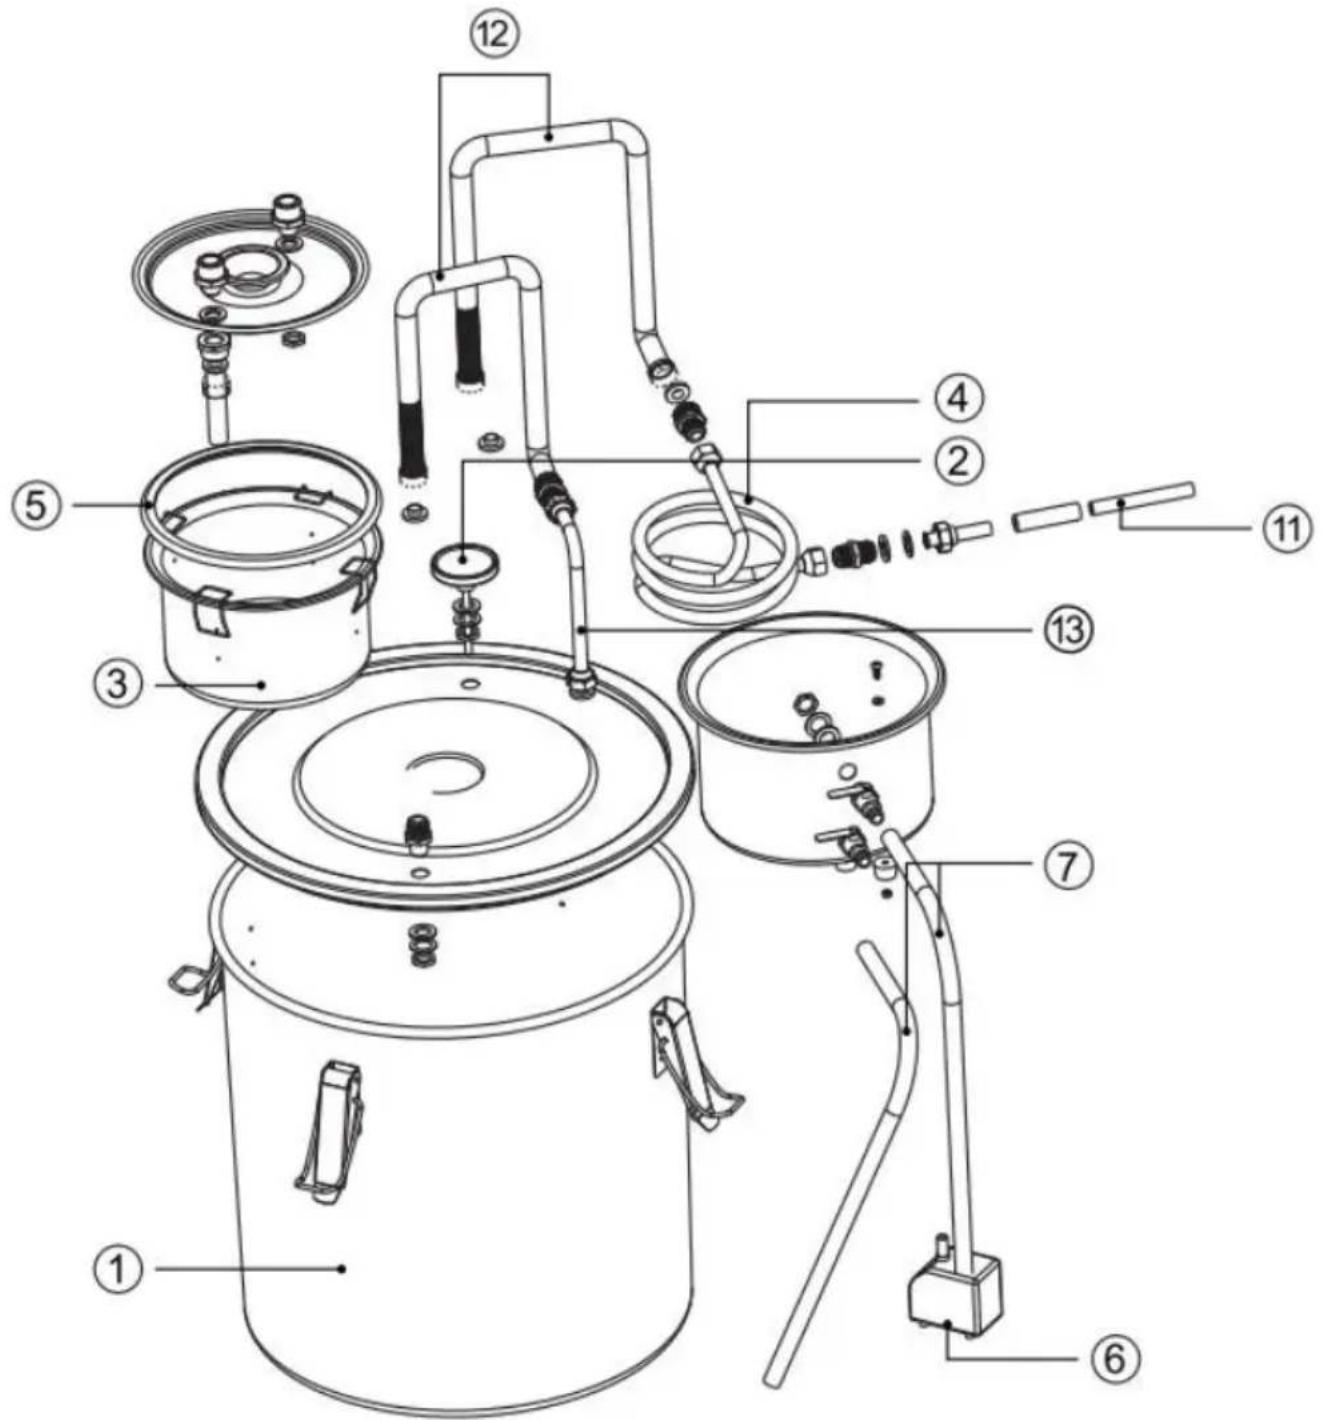
| ①Fermenter Pot | X1 | ⑧Exhaust valve | X1 |
| ②Mmetal thermometer | X1 | ⑨Extension silicone tube | X1 |
| ③Thumper keg | X1 | ⑩Extension copper pipe | X1 |
| ④copper coil cooling pipe | X1 | ⑪wine out | X1 |
| ⑤seal O-ring | X1 | ⑫stainless steel | X2 |
| ⑥pump | X1 | ⑬Copper pipe | X1 |
| ⑦water outlet/inlet | X1 |
Equipment Cleaning and Maintenance
The distiller needs to clean the inside of its pot, condenser, and other components before or after each use, and drain all impurities. After we have used the distilled water dispenser, we need to clean it
once in a while. Pay attention to cleaning the inner wall of its evaporator pot, the inner wall of the condenser, and the surface of the condenser to remove scale in the outlet pipe of the condenser. Avoid affecting its use. For some newly purchased stills, we need to clean them first and then run them for more than 2 hours to evaporate until the obtained distilled water meets the requirements. Remember not to cut off the water during use.
Note that when the distilled device is working, its surface temperature will be very high, so be careful not to touch it to prevent being scalded. Please wait until the temperature drops to normal temperature before cleaning.
USING YOUR WATER/ALCOHOL DISTILLER
Before making your first fermented and distilled beverages, or distilling water, perform the following:
- Wash all parts of your distiller with hot water and dish soap and dry completely.
- Perform a "vinegar run" described in the Distilling section.
- If distilling water only, perform a "water run" by distilling 1 gallon of clean water, which will be discarded.
- Your distiller can be used for the fermentation process, and then the distillation process.
- For fermenting, use the Fermenting configuration; for distilling, use the Distilling configuration.
- This product manual is not a complete guide to fermenting and distilling. In order to produce a satisfying and safe product suitable for adult consumption, please consult books, recipes, and how-to resources, videos online, in bookstores, and libraries.
- Caution: RISK OF METHANOL POISONING
- Avoid consumption of Methanol (Methyl Alcohol)! Methanol can cause blindness and be fatal.
- Carefully follow precautions in recipes for distilled beverages. Discard
the first 4-7 oz (100 - 200ml) of liquid as it comes out of the condenser. Distillate outlet, for each 5 gallons (20L) of fermented "mash" first ounces are often referred to as "heads" or "foreshots". DO NOT CONSUME THEM.
MAKING DISTILLED SPIRITS:
A 2-stage process: Fermenting & Distilling. STAGE 1: FERMENTATION
- Fermenting beverages into wine or beer is the first step to then produce brandy, whiskey, or other spirits.
- The next step is distilling the results of fermentation, resulting in concentrations of alcohol, and refinement of color and flavors. Distilling the result a second time further concentrates alcohol and clarity. Fermentation is the process of microorganisms, usually yeast, converting (metabolizing) sugars into carbon dioxide and alcohol. The carbon dioxide bubbles out of the beverage, leaving behind alcohol.
- Beer, ale, and wine are fermented beverages which are complete at this stage. They do not need to go through the second stage: distillation. A wide variety of foods can be fermented. Grains such as corn, barley, or rye, are used for many beverages, such as beer and whiskey. Fruits, sugars, rice, and molasses are most often used to make wine, brandy, rum, and other spirits. Potatoes are used to create vodka.
- You can use a separate large container for fermenting. The ferment process happens over several days or weeks. You may wish to keep the Distiller available for distilling only. Use clean glass, stainless steel, or food-safe ceramic or plastic containers. It's helpful to have 2 or more containers available.
SETTING UP FOR FERMENTING
- Wash all parts with dish soap and hot water before assembling.
Parts needed: Bubble Airlock, Boiler Lid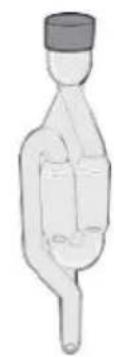
Stopper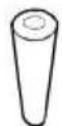
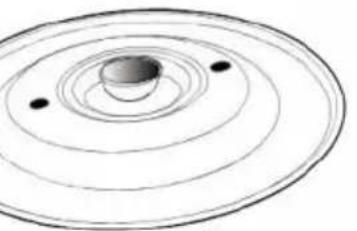
Thermometer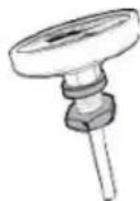
Silicone Sealing Ring Boiler Pot Please check the parts & features list before assembly.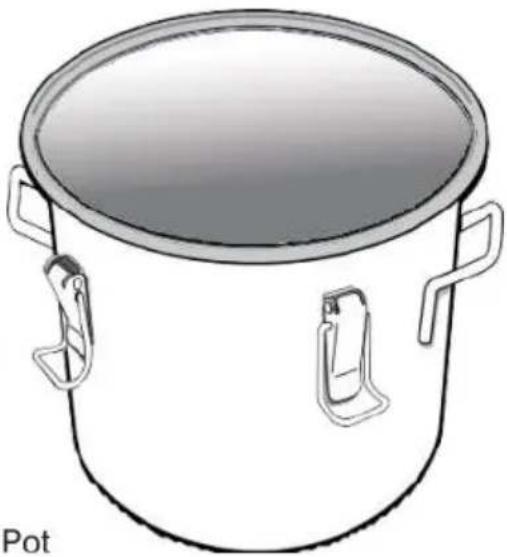
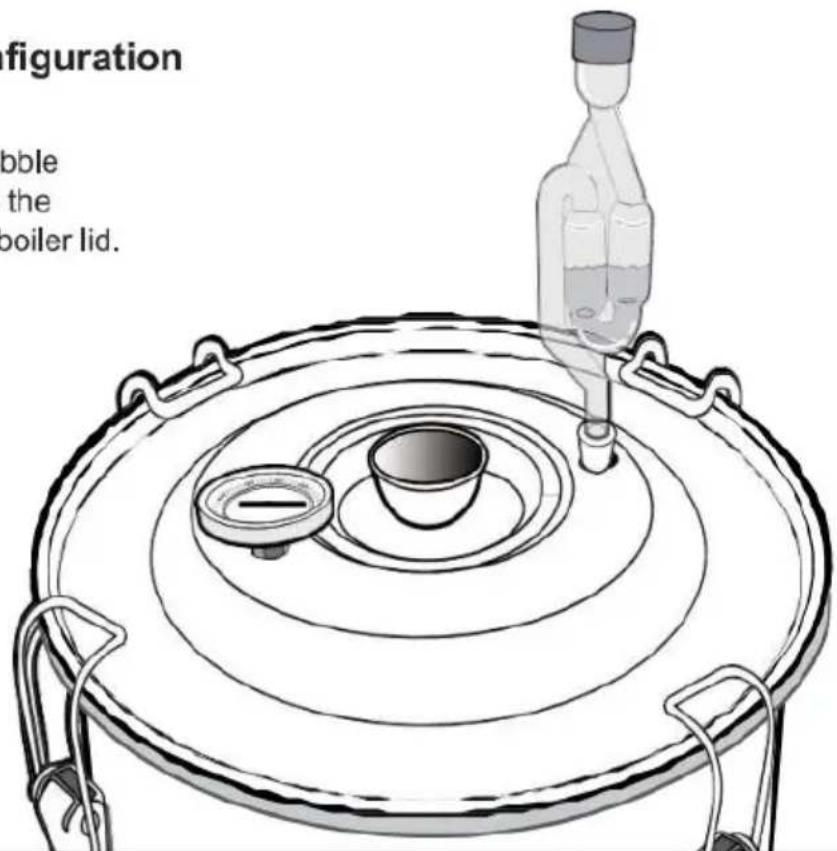
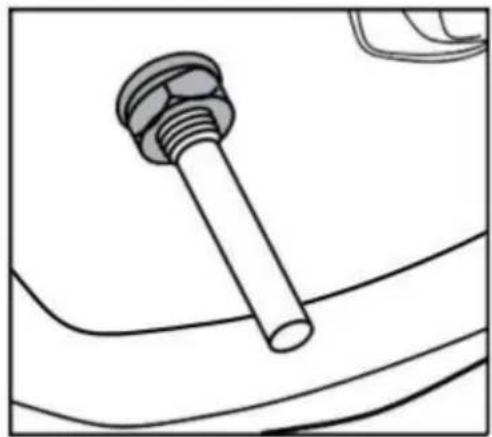
Attach Thermometer to Boiler Lid Step 1. Slide silicone washer and gasket onto thermometer stem. Slide thermometer into either hole in boiler lid.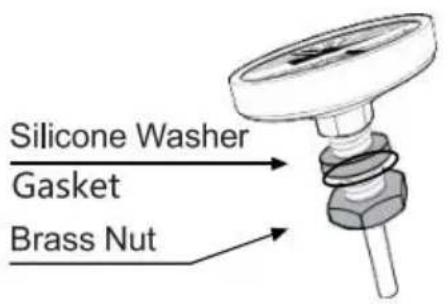
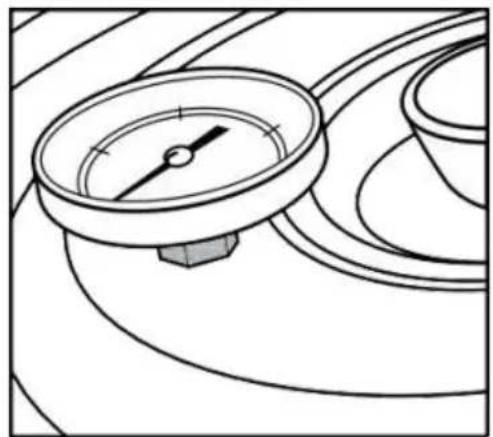
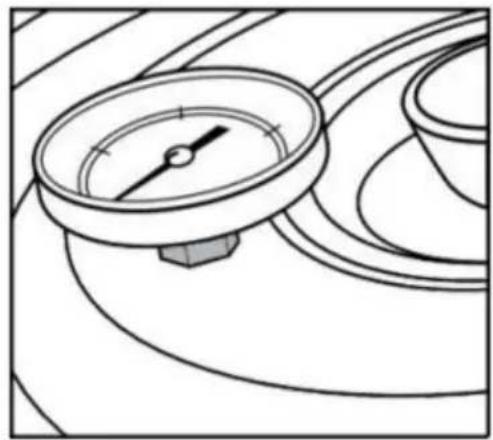
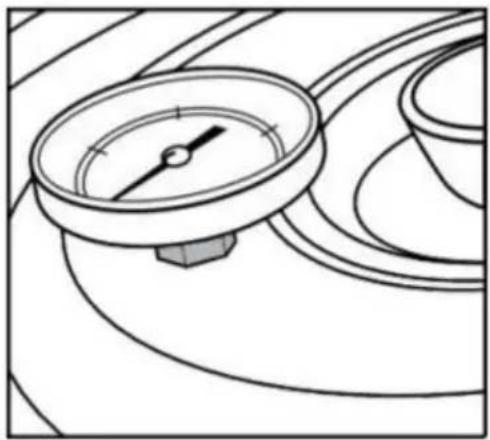
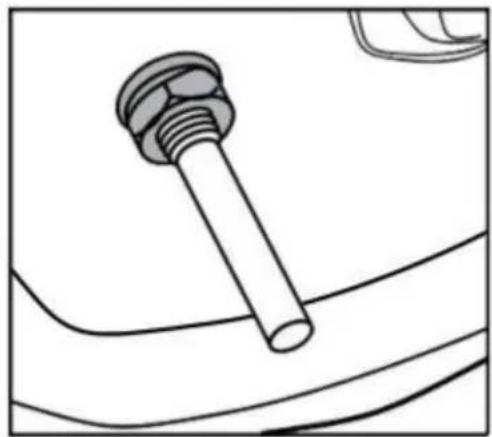
Step 2. Thread brass nut on thermometer stem under the boiler lid. Firmly tighten but avoid over-tightening.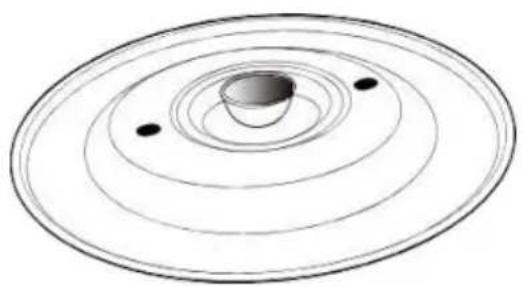

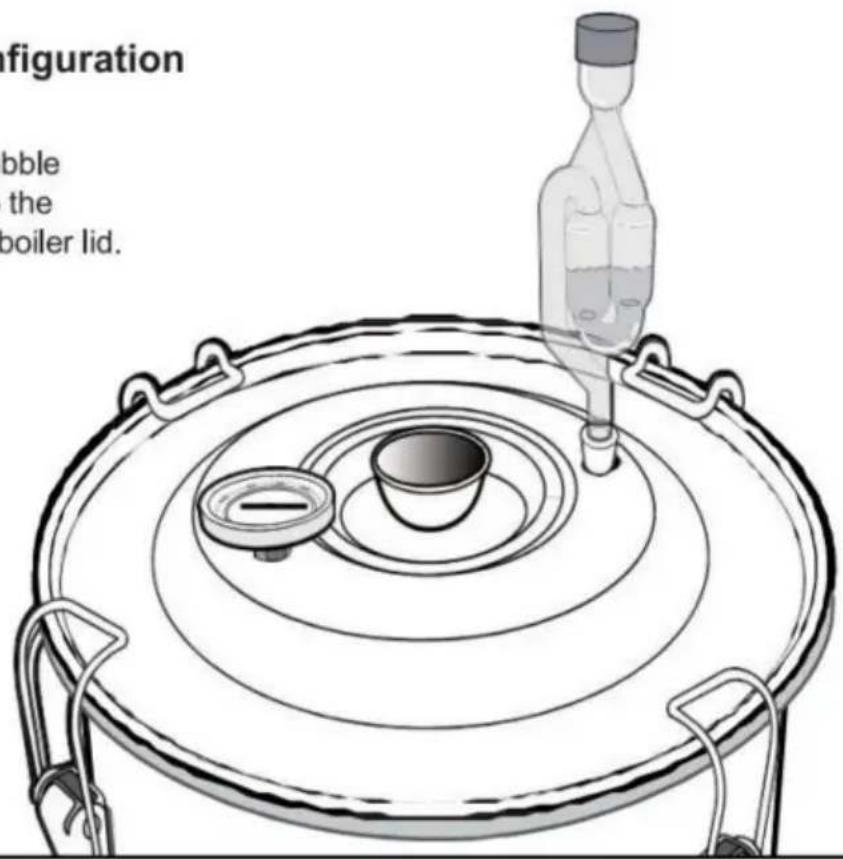
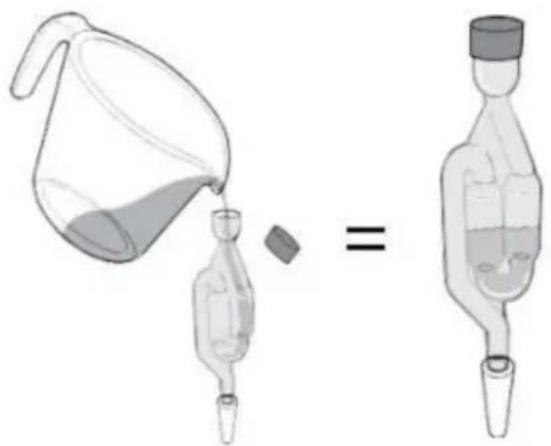
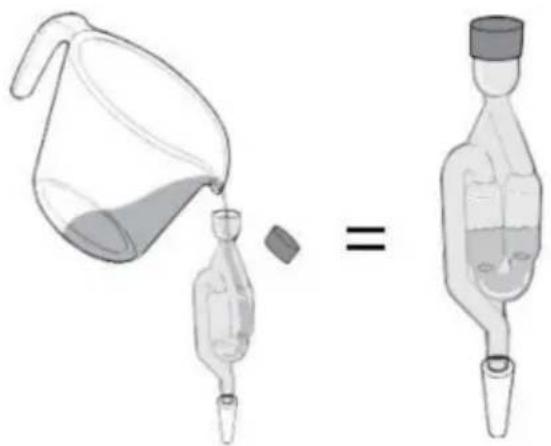
Preparing the Bubble Airlock
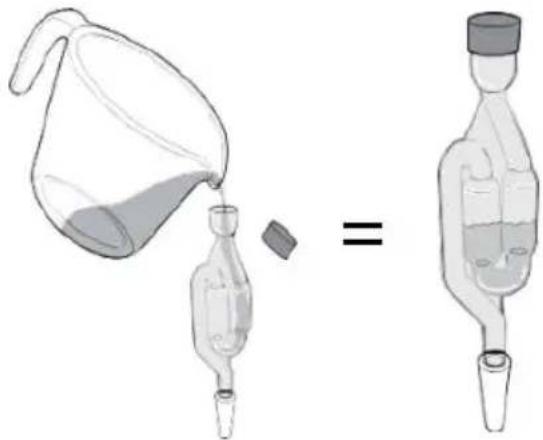
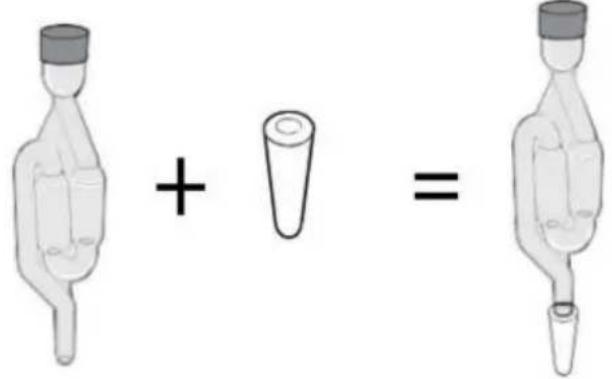
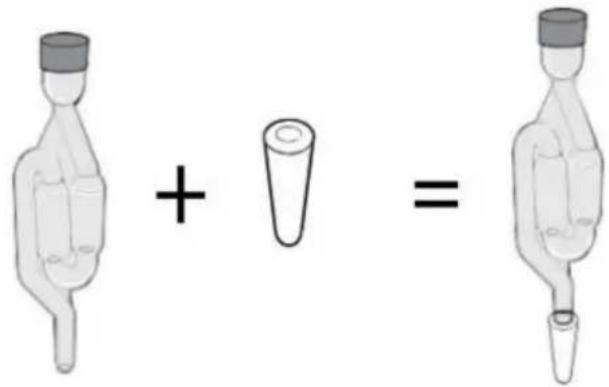
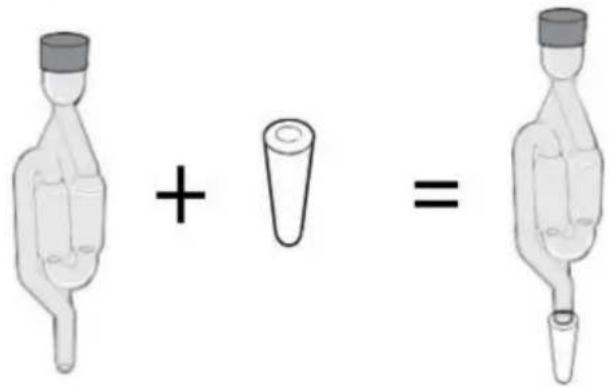
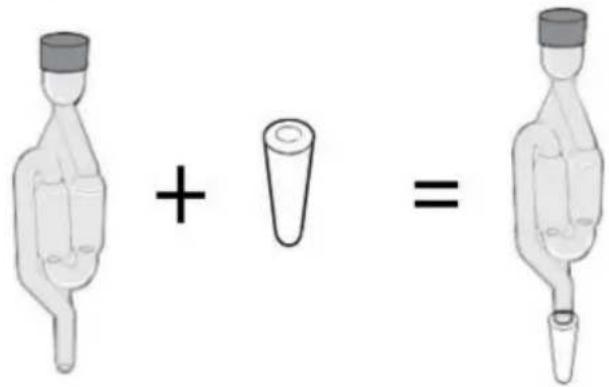
Step 1. Insert bottom end of Bubble Airlock into stopper.
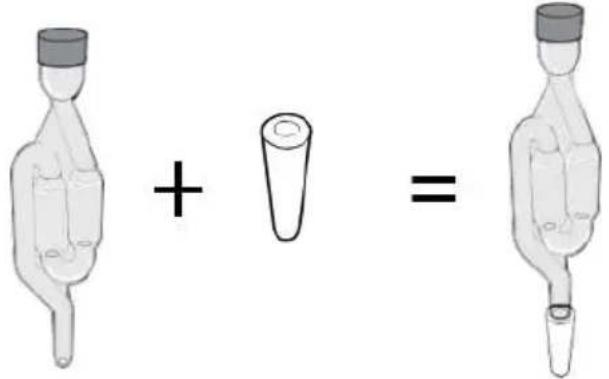
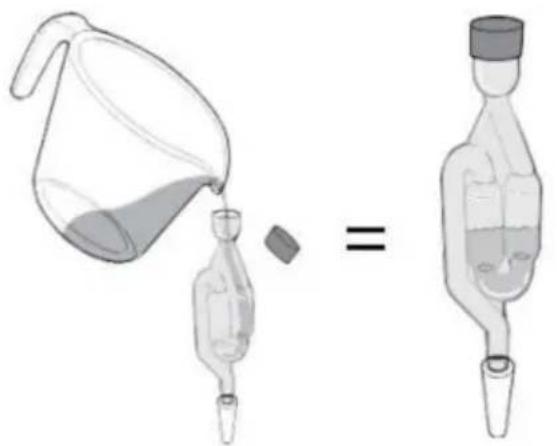
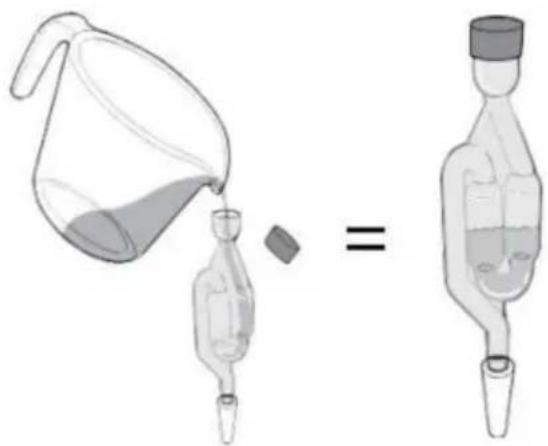
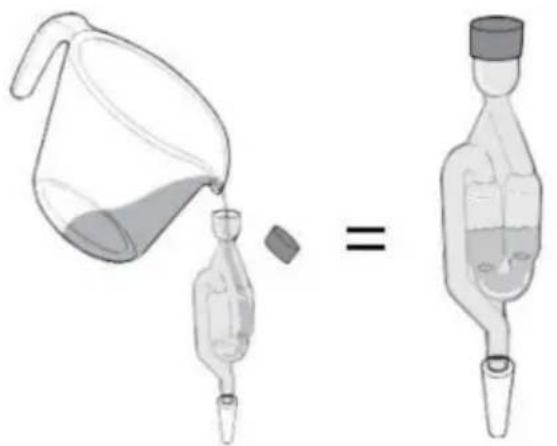
Step 2. Add a small amount of water or sanitizing solution to half fill the bubble airlock cavities.
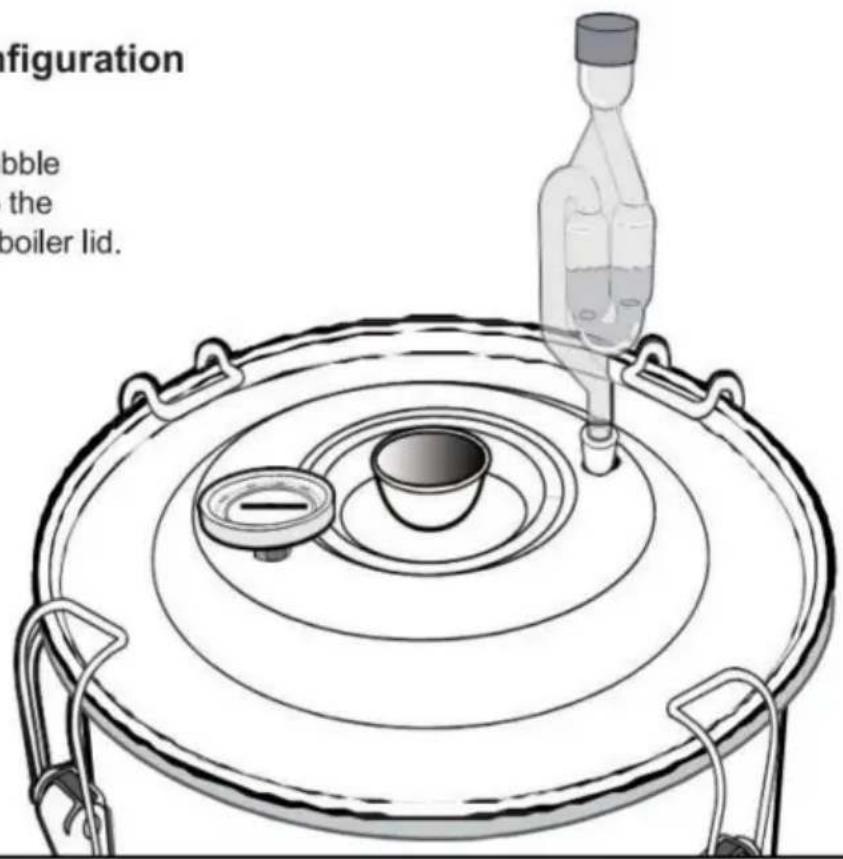
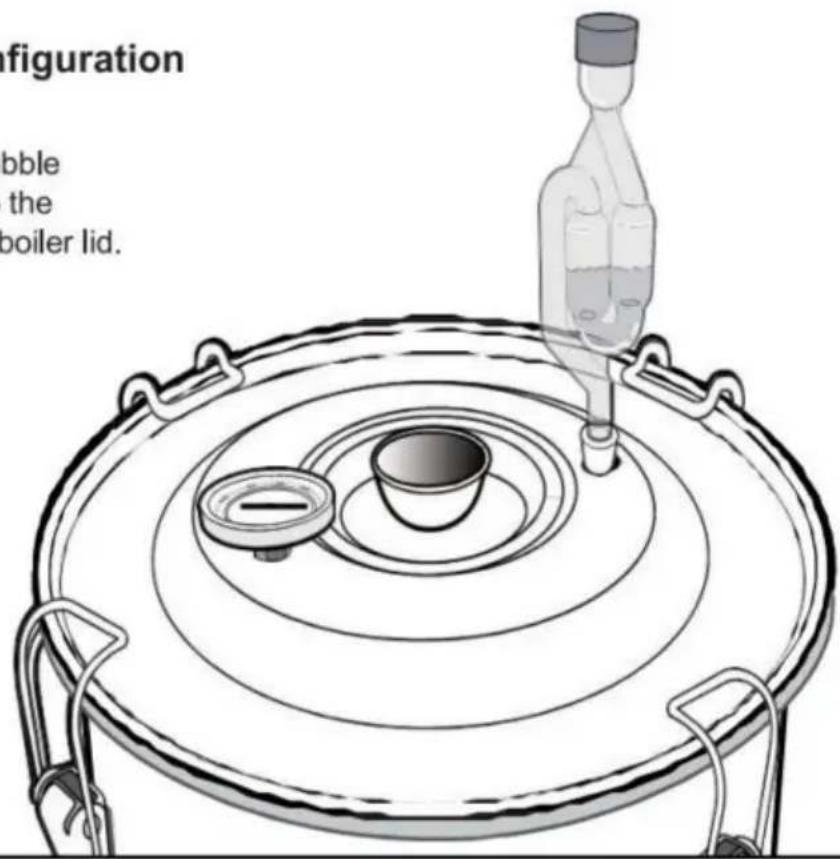
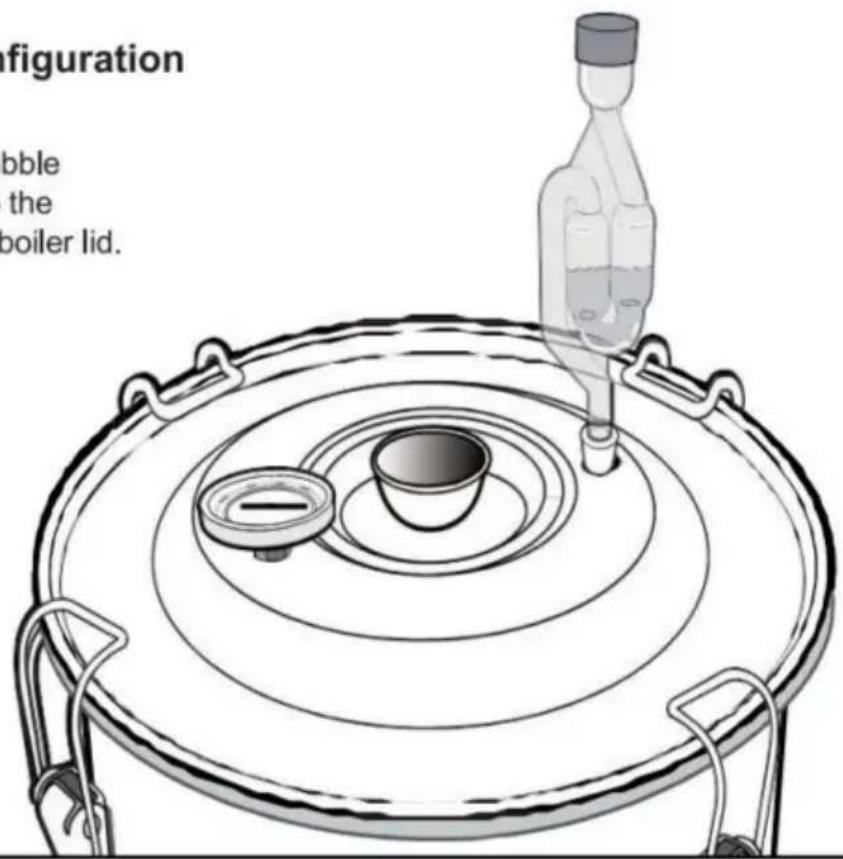
Fermenting Configuration
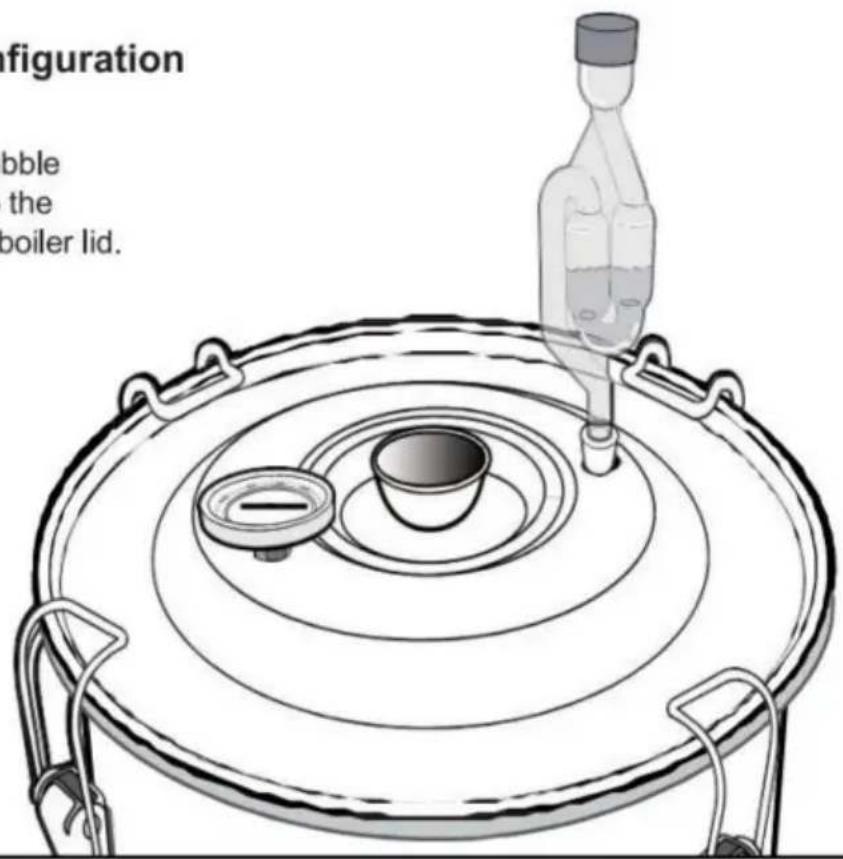
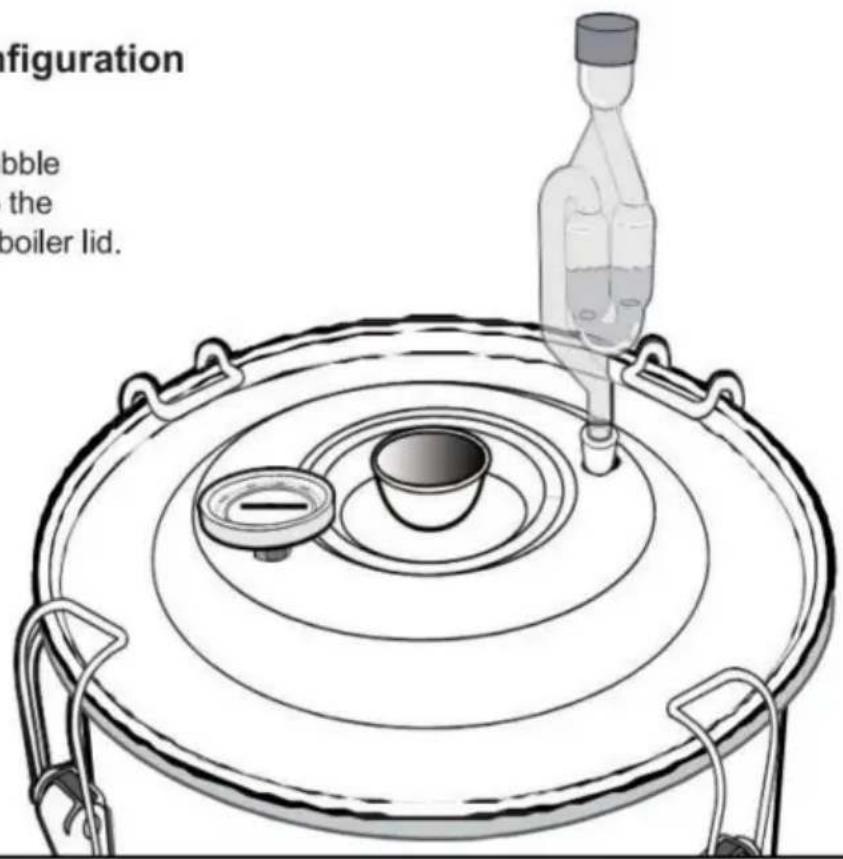
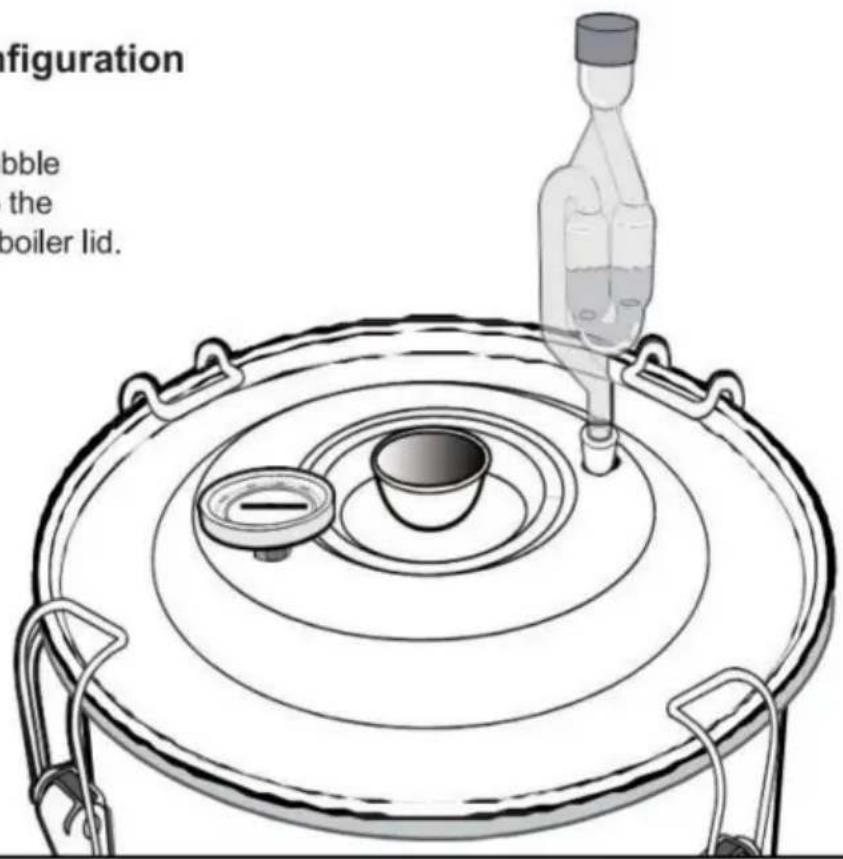
Step 3. Insert the Bubble Airlock & stopper into the available hole in the boiler lid.
STAGE 2: DISTILLING
Distillation of fermented beverages is the process of concentrating the alcoholic content by separating much of the alcohol from the fermented product. Slowly heating the fermented beverage in the distillation causes the alcohol to vaporize, rise into the copper coil, and then be cooled as it travels through the condenser. The alcohol in the fermented beverage turns to vapor at about 173°F, before the water content of the beverage turns to steam at 212°F. As the alcohol cools, it drips from the condenser distillate outlet.
This more pure form of alcohol dripping from the distillate outlet (after initial 4-7 oz) is ethanol.
Read the caution about methanol (see Distillation configuration).
SET UP WATER FLOW TO CONDENSER
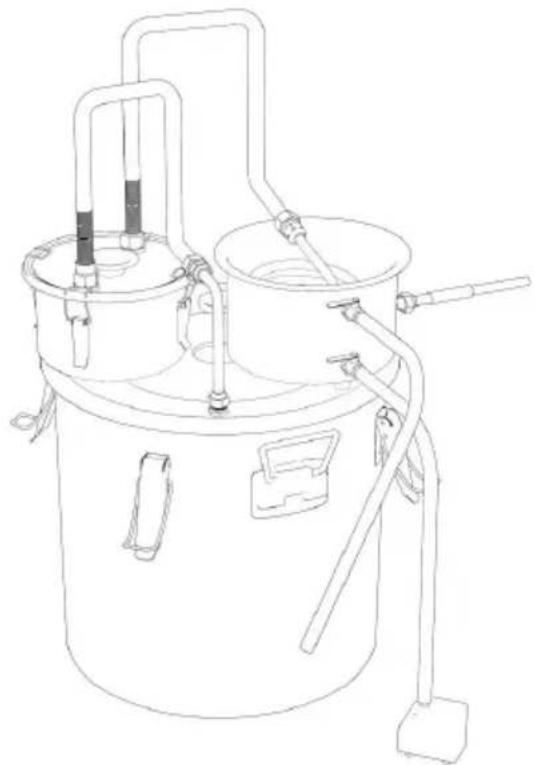
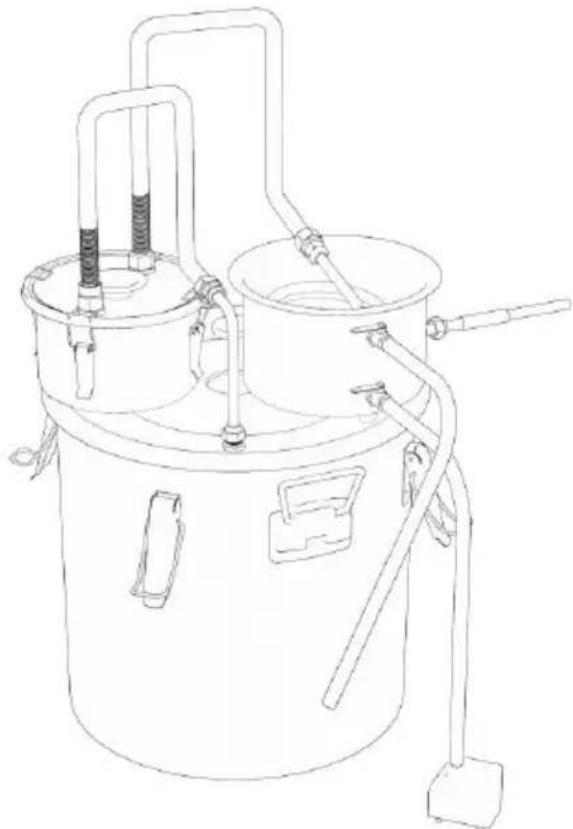
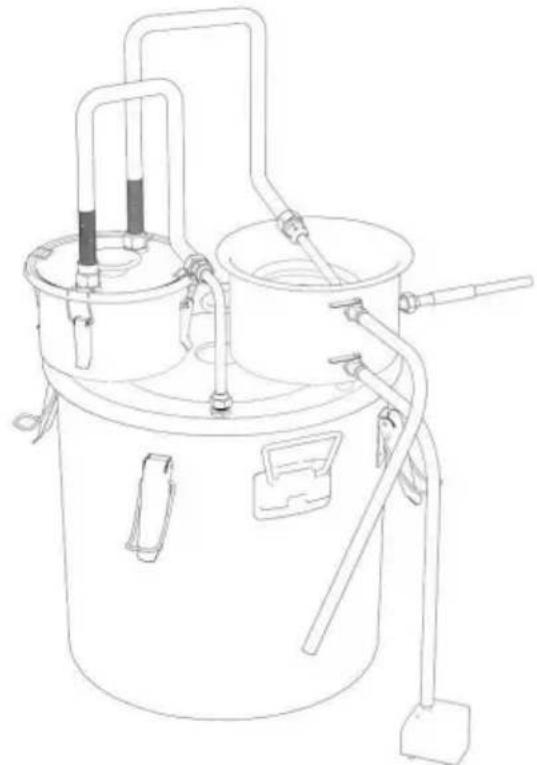
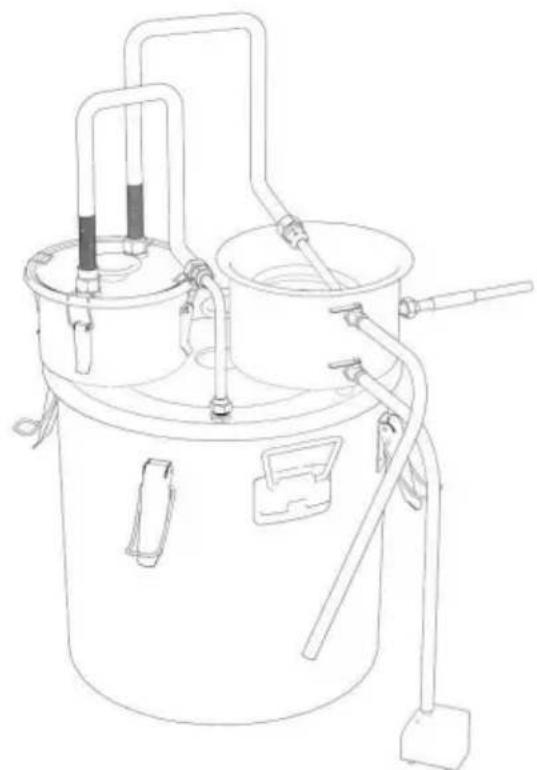
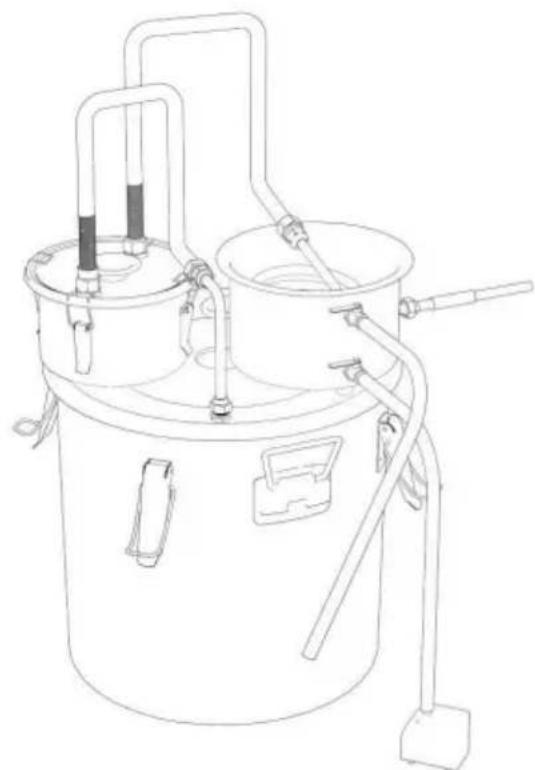
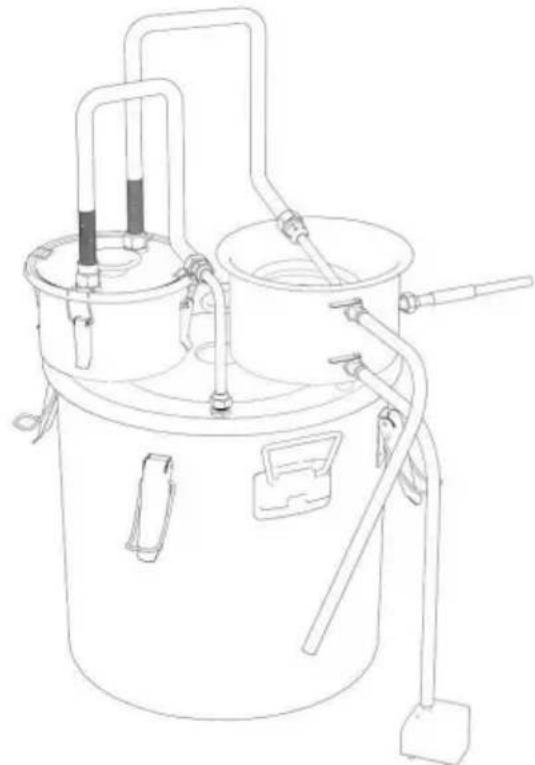
Provide a continuous source of cold water to the condenser pot. Cold water flowing into the condenser pot cools the distillate flow through the copper coil. There are two methods:
Method 1. Home faucet method:
Locate the loose end of the condenser's "water out" tube. Attach a hose connector (not included) to it.
Attach the hose connector to your home faucet.
Place the loose end of the "water out" tube to drain into the sink basin.
Distilling Configuration Method 1: Faucet cooling method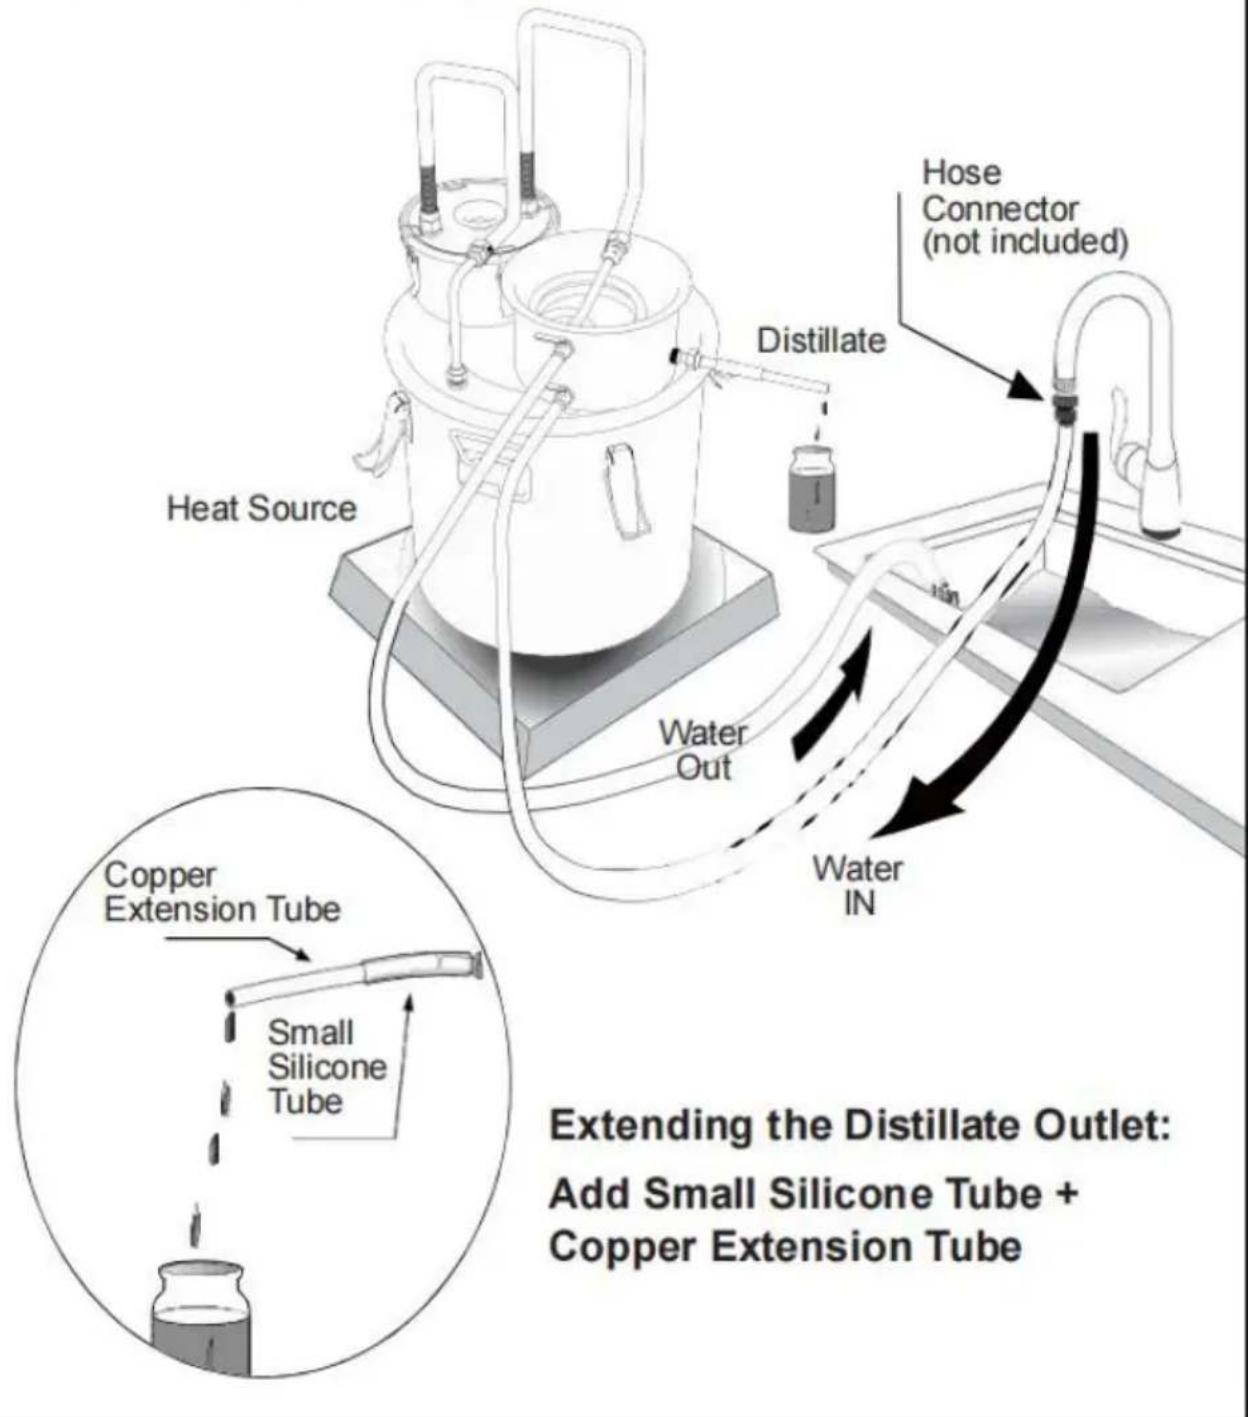
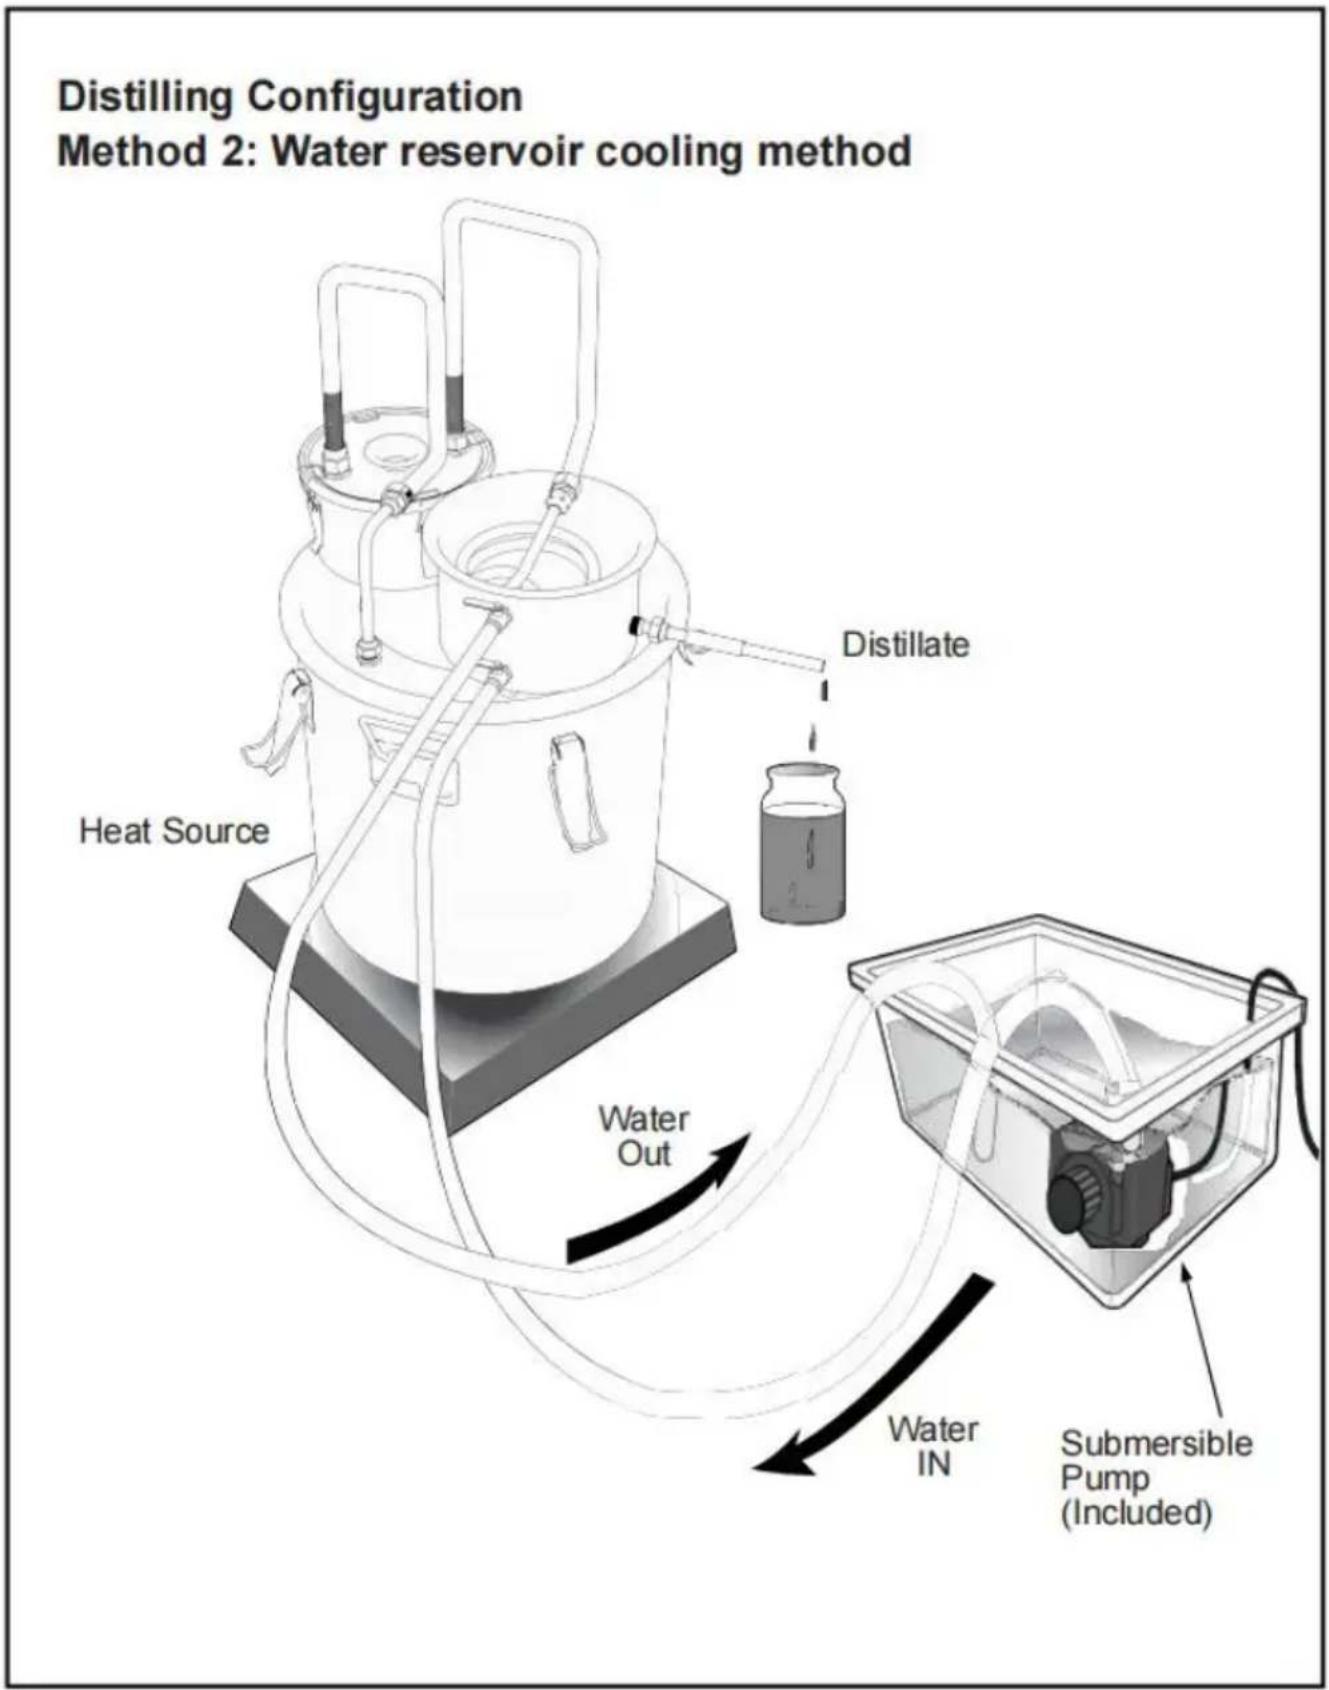
Method 2: Water reservoir method:
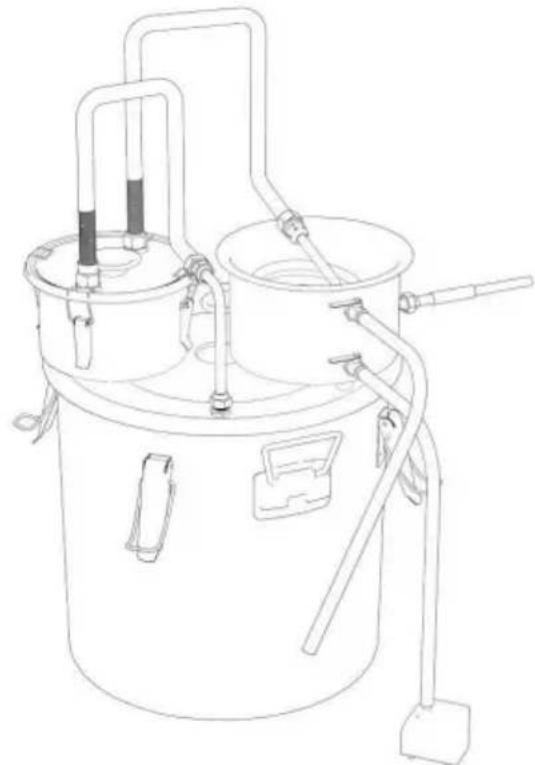
Recirculate cold water from a cold-water reservoir: Fill a large container with cold water.
Place a submersible pump (included) into the container.
Connect the pump to the "Water In" Tube, which is connected to the Condenser.
The Condenser's "Water Out" Tube will drain into the container.
BEFORE DISTILLING:
The Preliminary Runs: Vinegar Run (using the Distilling configuration)
The Vinegar Run cleans the parts of the distiller more thoroughly than water. Perform this before your first use of your Distiller.
Step 1: Combine 1/2 gallon white vinegar and 1/2 gallon tap water in the Boiler pot.
Step 2: Latch in place the Distiller Lid with the condenser and Thermometer attached.
Step 3: Start cold water flow to the condenser.
Step 4. Heat on medium to high heat until steaming, and liquid drips from the distillate outlet.
Step 5. Turn off the heat and allow to cool. Dispose of the distilled vinegar water mixture.
Step 6. Follow this by performing the "sacrificial run".
Sacrificial Run (Final cleaning run & christening of your still)
- The sacrificial run clears the distiller parts of anything which might affect the purity of flavors of your distilled beverages or distilled water. This is considered a "rite of passage".
- Follow instructions for making your first batch of a distilled beverage. Distill the first batch, but discard it and do not drink it.
Caution about the output of distilled beverages:
RISK OF METHANOL POISONING
Avoid consumption of methanol (methyl alcohol)! Methanol can cause blindness and be fatal.
Carefully follow precautions in recipes for distilled beverages. Discard the first 4-7 oz (100-200 ml) of liquid as it comes out of the condensate distillate outlet, for each 5 gallons (20 L) of fermented "mash". The first ounces are often referred to as "heads" or "foreshots". DO NOT CONSUME THEM.
How to use
Distill liquor
- Choose good common rice for steaming. Add the steamed rice in a ratio of 500 g grain, 1 kg water, and 5 g distilled yeast. Mix well and carry out liquid fermentation.
- Fermentation temperature: 20-25°C. Stir once a day. Ferment for 10-20 days.
- Fill the fermented grain into the matching filter bag and pour the liquid produced during the fermentation process directly into the barrel. Then place the bag containing the grain directly on the grate (to prevent gumming up the pot). After installation, start the distillation. Connect the pre-prepared submersible pump to the power supply for cooling water circulation when there is heat at the outlet.
Distill Hydrolat
- Choose the petals or other plants you like.
- Soak the petals in pure water for 3-5 cm for 8 hours (only for dried petals).
- Take out the petals and place them in a matching strainer bag. Place the filter bag with the petals on the grate, pour the soaked water into the bucket, install it, and start distilling.
Distill Brandy
- Crush grapes, and add ingredients such as pectinase, yeast, fermentation promoter, and tannin in proper order.
- Add white sugar the next day of fermentation, and generally remove peels and residues after fermentation for 7-10 days.
- Add bentonite into the separated wine for ageing and clarification.
- Put the separated peel and residue into a filter bag, put the bag on a grate, and add water at the bottom of the barrel. The distilled spirit is brandy.
Ferment wine.
- Crush grapes, and add sulfur regulating tablets to prevent microbial contamination.
- Add pectinase to decompose pectin and increase juice yield. 3. Add yeast, ferment for 7-10 days, and increase juice yield.
- Add bentonite for clarification after filtration, brew for about 1 month, and put the wine in a bottle.
- Store the wine in a cool place after bottling.
VEVOR
TOUGH TOOLS, HALF PRICE
Technical Support and E-Warranty Certificate www.vevor.com/support
VEVOR
TOUGH TOOLS, HALF PRICE
Technical support and e-warranty certificate www.vevor.com/support
ALCOHOLIC
MODEL:
DTDB-10L-U, DTDB-10L-E, DTDB-10L-A, DTDB-20L-U,
DTDB-20L-E, DTDB-20L-A, DTDB-30L-U,
DTDB-30L-E, DTDB-30L-A, DTDB-50L-U,
DTDB-50L-E, DTDB-50L-A
DTDB-10L-U, DTDB-10L-E, DTDB-10L-A, DTDB-20L-U, DTDB-20L-E, DTDB-20L-A, DTDB-30L-U, DTDB-30L-E, DTDB-30L-A, DTDB-50L-U, DTDB-50L-E, DTDB-50L-A
DTDB-10L-U, DTDB-10L-E, DTDB-10L-A, DTDB-20L-U, DTDB-20L-E, DTDB-20L-A, DTDB-30L-U, DTDB-30L-E, DTDB-30L-A, DTDB-50L-U, DTDB-50L-E, DTDB-50L-A
Step 1. Insert bottom end of Bubble Airlock into stopper.
Step 2. Add a small amount of water or sanitizing solution to half fill the bubble airlock cavities.
Fermenting Configuration
Step 3. Insert the Bubble Airlock & stopper into the available hole in the boiler lid.
STEP 2: DISTILLATION
BEFORE DISTILLATION:
RISK OF METHANOL POISONING
DTDB-10L-U, DTDB-10L-E, DTDB-10L-A, DTDB-20L-U,
DTDB-20L-E, DTDB-20L-A, DTDB-30L-U,
DTDB-30L-E, DTDB-30L-A, DTDB-50L-U,
DTDB-50L-E, DTDB-50L-A
DTDB-10L-U, DTDB-10L-E, DTDB-10L-A, DTDB-20L-U, DTDB-20L-E, DTDB-
20L-A, DTDB-30L-U, DTDB-30L-E, DTDB-30L-A, DTDB-50L-U, DTDB-50L-
E, DTDB-50L-A
DTDB-10L-U, DTDB-10L-E, DTDB-10L-A, DTDB-20L-U, DTDB-20L-E, DTDB-20L-A, DTDB-30L-U, DTDB-30L-E, DTDB-30L-A, DTDB-50L-U, DTDB-50L-E, DTDB-50L-A
ALKOHOL-DESTILLE
Parts needed: Bubble Airlock, Boiler Lid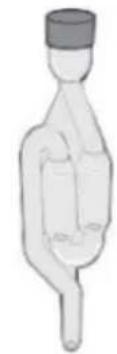
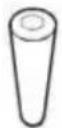
Stopper, Thermometer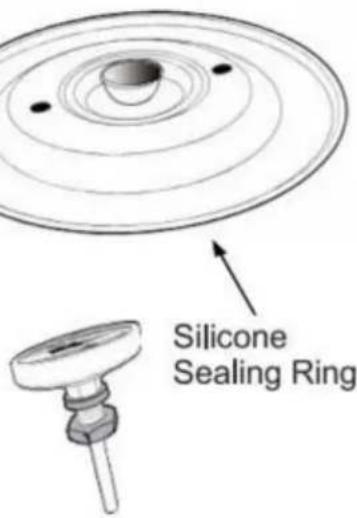
Please check the parts & features list before assembly.
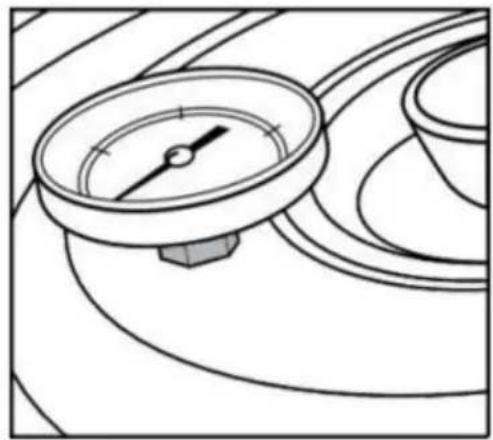
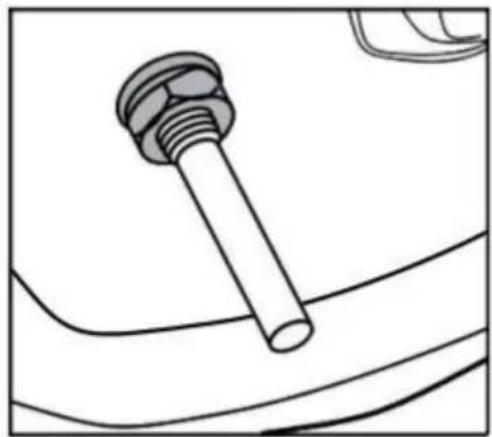
Attach Thermometer to Boiler Lid: Step 1. Slide silicone washer and gasket onto thermometer stem. Slide thermometer into either hole in boiler lid.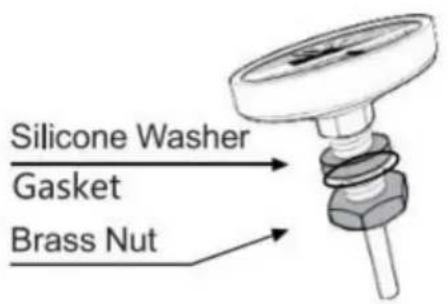
Step 2. Thread brass nut on thermometer stem under the boiler lid. Firmly tighten but avoid over-tightening.
Preparing the Bubble Airlock
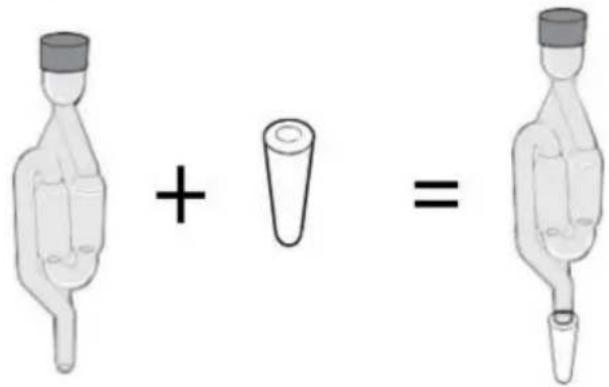
Step 1. Insert bottom end of Bubble Airlock into stopper.
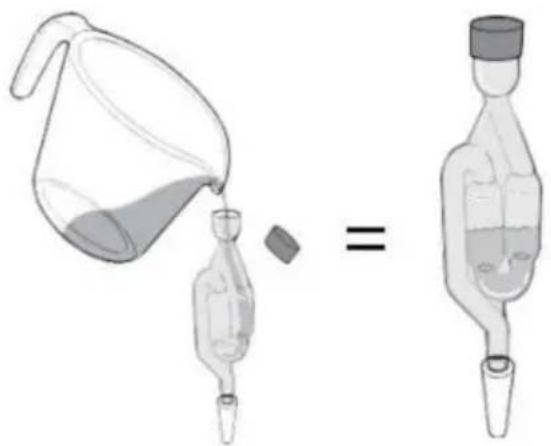
Step 2. Add a small amount of water or sanitizing solution to half fill the bubble airlock cavities.
Fermenting Configuration
Step 3. Insert the Bubble Airlock & stopper into the available hole in the boiler lid.
Step 2: DISTILLING
Models DTDB-10L-U, DTDB-10L-E, DTDB-10L-A, DTDB-20L-U,
Models DTDB-20L-E, DTDB-20L-A, DTDB-30L-U,
Models DTDB-30L-E, DTDB-30L-A, DTDB-50L-U,
Models DTDB-50L-E, DTDB-50L-A
Models DTDB-10L-U, DTDB-10L-E, DTDB-10L-A, DTDB-20L-U, DTDB-20L-E, DTD
Italian: B-20L-A, DTDB-30L-U, DTDB-30L-E, DTDB-30L-A, DTDB-50L-U, DTDB-50
LE, DTDB-50L-A
DTDB-10L-U, DTDB-10L-E, DTDB-10L-A, DTDB-20L-U, DTDB-20L-E, DTDB
-20L-A, DTDB-30L-U, DTDB-30L-E, DTDB-30L-A, DTDB-50L-U, DTDB-50L
E, DTDB-50L-A
ALCOOL Alambicco
Parts needed: Bubble Airlock, Boiler Lid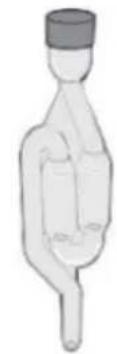
Stopper, Thermometer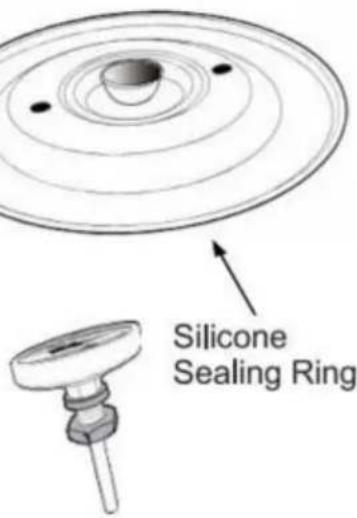
Please check the parts & features list before assembly.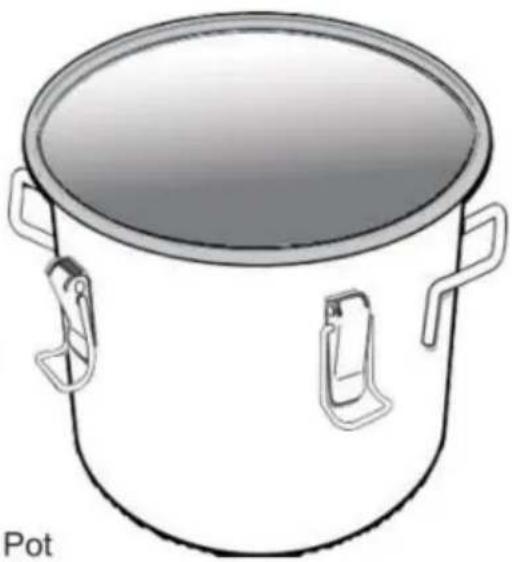
Attach Thermometer to Boiler Lid: Step 1. Slide silicone washer and gasket onto thermometer stem. Slide thermometer into either hole in boiler lid.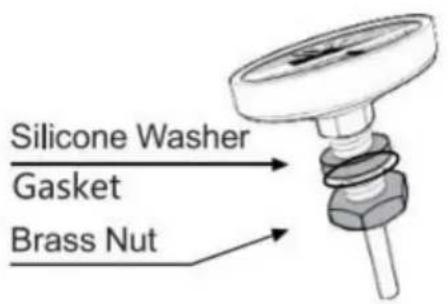
Step 2. Thread brass nut on thermometer stem under the boiler lid. Firmly tighten but avoid over-tightening.
Preparing the Bubble Airlock
Step 1. Insert bottom end of Bubble Airlock into stopper.
Step 2. Add a small amount of water or sanitizing solution to half fill the bubble airlock cavities.

Fermenting Configuration
Step 3. Insert the Bubble Airlock & stopper into the available hole in the boiler lid.
DTDB-10L-U, DTDB-10L-E, DTDB-10L-A, DTDB-20L-U,
DTDB-20L-E, DTDB-20L-A, DTDB-30L-U,
DTDB-30L-E, DTDB-30L-A, DTDB-50L-U,
DTDB-50L-E, DTDB-50L-A
DTDB-10L-U, DTDB-10L-E, DTDB-10L-A, DTDB-20L-U, DTDB-20L-E, DTD
B-20L-A, DTDB-30L-U, DTDB-30L-E, DTDB-30L-A, DTDB-50L-U, DTDB-50
LE, DTDB-50L-A
NEED HELP? CONTACT US!
DTDB-10L-U, DTDB-10L-E, DTDB-10L-A, DTDB-20L-U, DTDB-20L-E, DTDB-20L-A, DTDB-30L-U, DTDB-30L-E, DTDB-30L-A, DTDB-50L-U, DTDB-50LE, DTDB-50L-A
ALCOHOL EXPOSED
Step 1. Insert bottom end of Bubble Airlock into stopper.
Step 2. Add a small amount of water or sanitizing solution to half fill the bubble airlock cavities.
Fermenting Configuration
Step 3. Insert the Bubble Airlock & stopper into the available hole in the boiler lid.
STEP 2: DISTILLATION
DTDB-10L-U, DTDB-10L-E, DTDB-10L-A, DTDB-20L-U,
DTDB-20L-E, DTDB-20L-A, DTDB-30L-U,
DTDB-30L-E, DTDB-30L-A, DTDB-50L-U,
DTDB-50L-E, DTDB-50L-A
DTDB-10L-U, DTDB-10L-E, DTDB-10L-A, DTDB-20L-U, DTDB-20L-E, DTD
B-20L-A, DTDB-30L-U, DTDB-30L-E, DTDB-30L-A, DTDB-50L-U, DTDB-50
LE, DTDB-50L-A
NEED HELP? CONTACT US!
DTDB-10L-U, DTDB-10L-E, DTDB-10L-A, DTDB-20L-U, DTDB-20L-E, DTDB-20L-A, DTDB-30L-U, DTDB-30L-E, DTDB-30L-A, DTDB-50L-U, DTDB-50L-E, DTDB-50L-A
UNUSUAL ALCOHOL
PRODUCTION OF DISTILLED ALCOHOLS:
Step 1. Insert bottom end of Bubble Airlock into stopper.
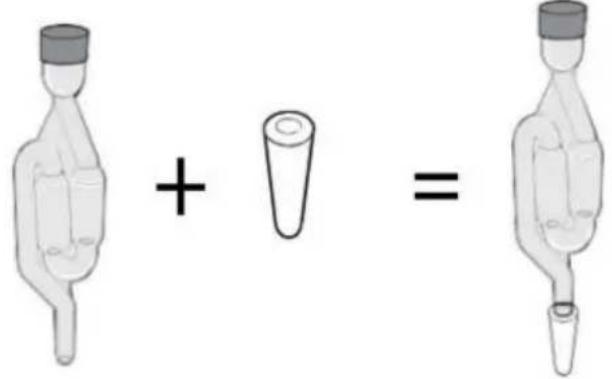
Step 2. Add a small amount of water or sanitizing solution to half fill the bubble airlock cavities.
Fermenting Configuration
Step 3. Insert the Bubble Airlock & stopper into the available hole in the boiler lid.
STEP 2: DISTILLATION
DTDB-10L-U, DTDB-10L-E, DTDB-10L-A, DTDB-20L-U,
DTDB-20L-E, DTDB-20L-A, DTDB-30L-U,
DTDB-30L-E, DTDB-30L-A, DTDB-50L-U,
DTDB-50L-E, DTDB-50L-A
DTDB-10L-U, DTDB-10L-E, DTDB-10L-A, DTDB-20L-U, DTDB-20L-E, DTDB-20L-A, DTDB-30L-U, DTDB-30L-E, DTDB-30L-A, DTDB-50L-U, DTDB-50L-E, DTDB-50L-A
NEED HELP? CONTACT US!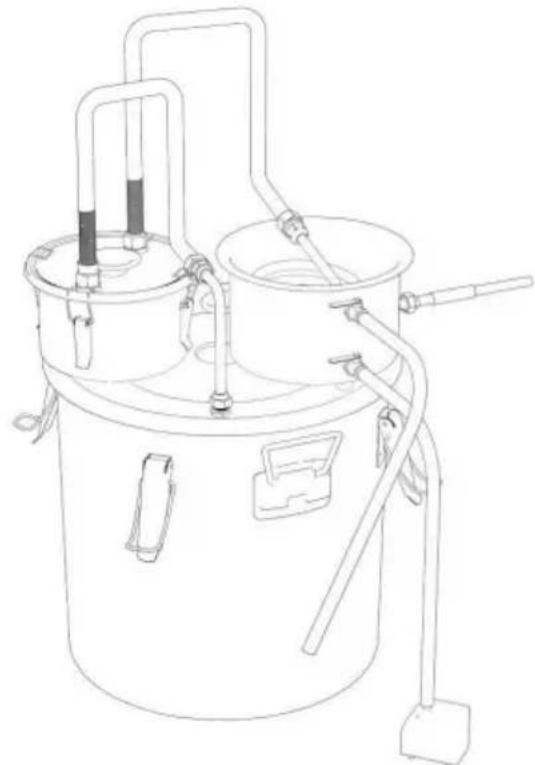
DTDB-10L-U, DTDB-10L-E, DTDB-10L-A, DTDB-20L-U, DTDB-20L-E, DTDB-20L-A, DTDB-30L-U, DTDB-30L-E, DTDB-30L-A, DTDB-50L-U, DTDB-50L-E, DTDB-50L-A
ALCOHOL STILL
Parts needed: Bubble Airlock, Boiler Lid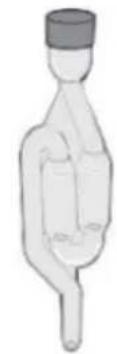
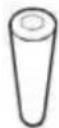
Stopper, Thermometer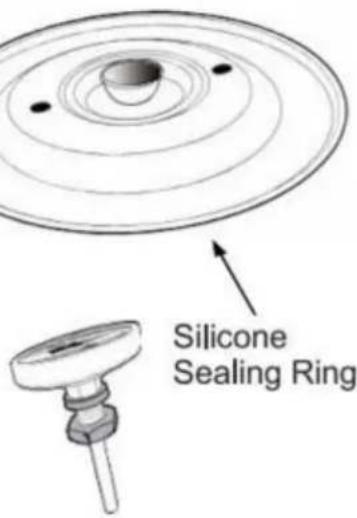
Please check the parts & features list before assembly.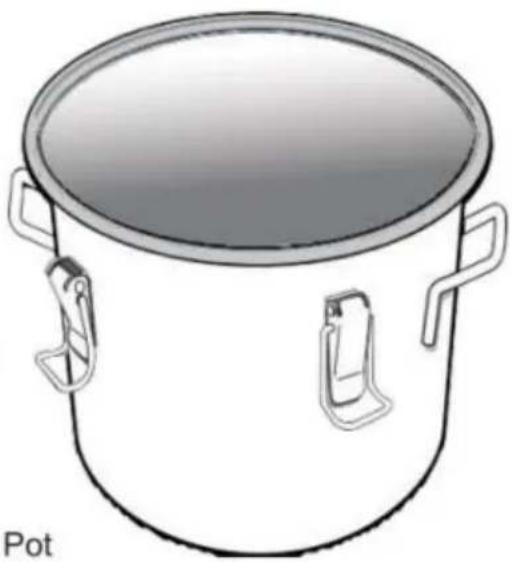
Attach Thermometer to Boiler Lid Step 1. Slide silicone washer and gasket onto thermometer stem. Slide thermometer into either hole in boiler lid.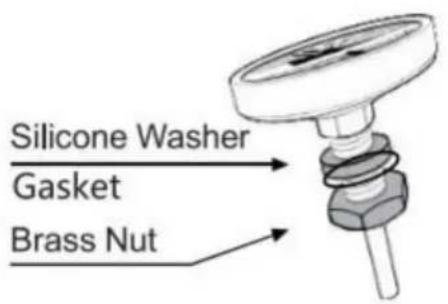
Step 2. Thread brass nut on thermometer stem under the boiler lid. Firmly tighten but avoid over-tightening.
Preparing the Bubble Airlock
Step 1. Insert bottom end of Bubble Airlock into stopper.
Step 2. Add a small amount of water or sanitizing solution to half fill the bubble airlock cavities.
Fermenting Configuration
Step 3. Insert the Bubble Airlock & stopper into the available hole in the boiler lid.
PHASE 2: DISTILLING
Method 2. Water reservoir method:
warranty certificate www.vevor.com/support
VEVOR®
TOUGH TOOLS, HALF PRICE
DTDB-10L-U,DTDB-10L-E,DTDB-10L-A,DTDB-20L-U,
DTDB-20L-E,DTDB-20L-A,DTDB-30L-U,
DTDB-30L-E,DTDB-30L-A,DTDB-50L-U,
DTDB-50L-E, DTDB-50L-A
DTDB-10L-U,DTDB-10L-E,DTDB-10L-A,DTDB-20L-U,DTDB-20L-E,DTB-20L-A,DTDB-30L-U,DTDB-30L-E,DTDB-30L-A,DTDB-50L-U,DTDB-50LE,DTDB-50L-A
NEED HELP? CONTACT US!
DTDB-10L-U,DTDB-10L-E,DTDB-10L-A,DTDB-20L-U,DTDB-20L-E,DTDB-20L-A,DTDB-30L-U,DTDB-30L-E,DTDB-30L-A,DTDB-50L-U,DTDB-50L-E,DTDB-50L-A
YOUR ALCOHOL
additional process. For
Parts needed Boiler Lid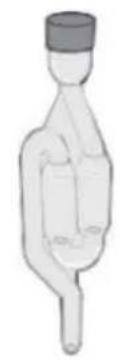
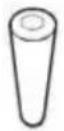
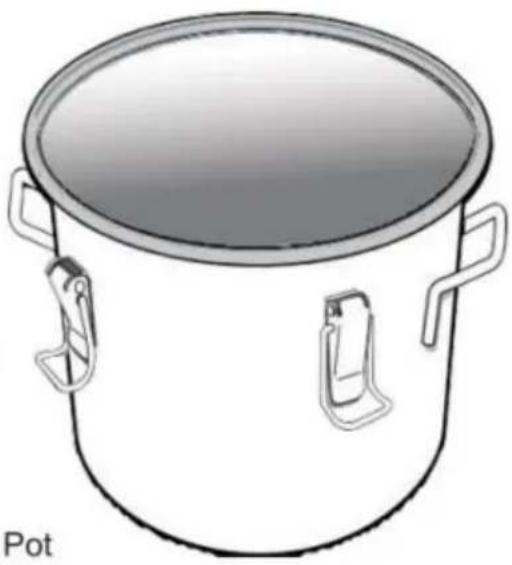
Silicone Sealing Ring Bubble Airlock Stopper Thermometer Boiler Pot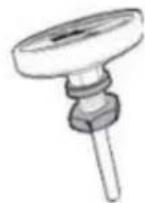
Please check the parts & features list before assembly.
Attach Thermometer to Boiler Lid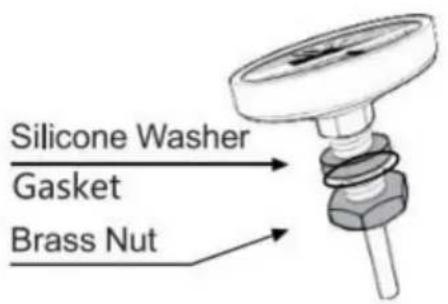

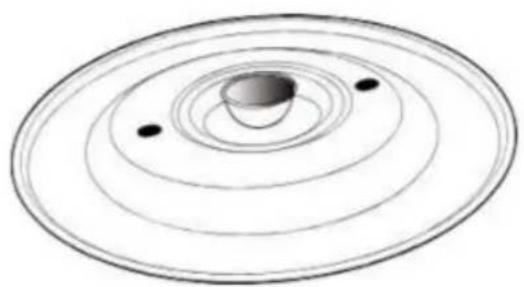
Step 1. Slide silicone washer and Gasket onto thermometer stem. Slide thermometer into either hole in boiler lid.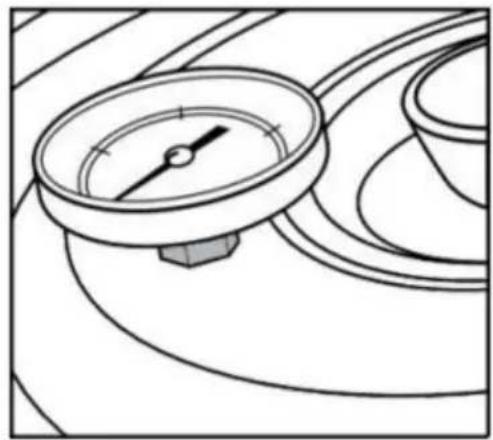
Step 2. Thread brass nut on thermometer stem under the boiler lid. Firmly tighten but avoid over-tightening.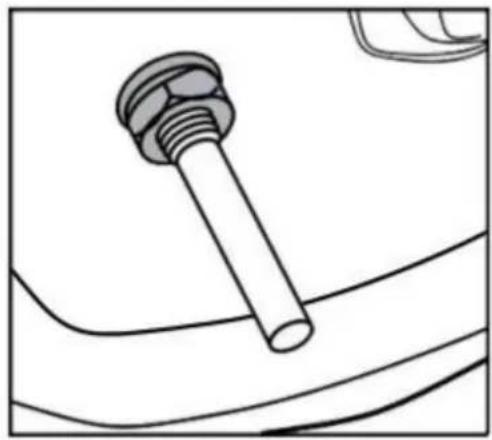
Preparing the Bubble Airlock
Step 1. Insert bottom end of Bubble Airlock into stopper.
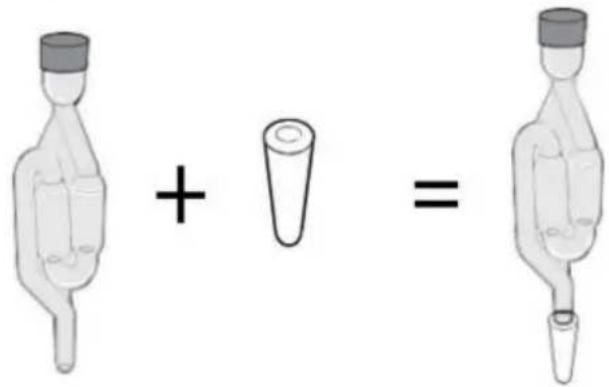
Step 2. Add a small amount of water or sanitizing solution to half fill the bubble airlock cavities.
Fermenting Configuration
Step 3. Insert the Bubble Airlock& stopper into the available hole in the boiler lid.
STEP 2: DISTILLATION
- ALCOHOL STILL
- MODEL
- TECHNICAL SUPPORT AND E-WARRANTY CERTIFICATE WWW.VEVOR.COM/SUPPORT
- SAFETY INSTRUCTIONS OF THE SUBMERSIBLE AQUARIUM PUMP
- TECHNICAL DATA
- TO REDUCE RISK OF ELECTRIC SHOCK
- TO CLEAN THE PUMP
- TO KEEP WATER CLEAN
- TROUBLESHOOTING
- DISPOSAL INFORMATION
- COMPRESSOR WINE COOLER 10L/20L/30L/50L
- MODEL NUMBER
- PRODUCT INTRODUCTION
- BEFORE YOU START
- OWNER'S MANUAL
- NOTICE
- SAFETY
- PARTS & FEATURES
- SETTING UP FOR DISTILLING
- EQUIPMENT CLEANING AND MAINTENANCE
- USING YOUR WATER/ALCOHOL DISTILLER
- MAKING DISTILLED SPIRITS
- SETTING UP FOR FERMENTING
- PREPARING THE BUBBLE AIRLOCK
- FERMENTING CONFIGURATION
- STAGE 2: DISTILLING
- SET UP WATER FLOW TO CONDENSER
- METHOD 1. HOME FAUCET METHOD
- METHOD 2: WATER RESERVOIR METHOD
- BEFORE DISTILLING
- THE PRELIMINARY RUNS: VINEGAR RUN (USING THE DISTILLING CONFIGURATION)
- SACRIFICIAL RUN (FINAL CLEANING RUN & CHRISTENING OF YOUR STILL)
- CAUTION ABOUT THE OUTPUT OF DISTILLED BEVERAGES
- HOW TO USE
- DISTILL LIQUOR
- DISTILL HYDROLAT
- DISTILL BRANDY
- FERMENT WINE
- VEVOR
- TOUGH TOOLS, HALF PRICE
- ALCOHOLIC
- STEP 2: DISTILLATION
- BEFORE DISTILLATION
- ALKOHOL-DESTILLE
- STEP 2: DISTILLING
- ALCOOL ALAMBICCO
- ALCOHOL EXPOSED
- UNUSUAL ALCOHOL
- PRODUCTION OF DISTILLED ALCOHOLS
- PHASE 2: DISTILLING
- METHOD 2. WATER RESERVOIR METHOD
- VEVOR®
- NEED HELP? CONTACT US
- YOUR ALCOHOL
Brand : Vevor
Model : DTDB-50L-U
Category : Still