JK-250A - Food Processor Vevor - Free user manual and instructions
Find the device manual for free JK-250A Vevor in PDF.


User questions about JK-250A Vevor
0 question about this device. Answer the ones you know or ask your own.
Ask a new question about this device
Download the instructions for your Food Processor in PDF format for free! Find your manual JK-250A - Vevor and take your electronic device back in hand. On this page are published all the documents necessary for the use of your device. JK-250A by Vevor.
USER MANUAL JK-250A Vevor
Technical Support and E-Warranty Certificate www.vevor.com/support
COMMERCIAL SLICER
MODEL:JK-220A, JK-250A, JK-300A
We continue to be committed to provide you tools with competitive price. "Save Half", "Half Price" or any other similar expressions used by us only rep estimate of savings you might benefit from buying certain tools with us compared top brands and does not necessarily mean to cover all categories of tools offer are kindly reminded to verify carefully when you are placing an order with us actually saving half in comparison with the top major brands.
VEVOR®
TOUGH TOOLS, HALF PRICE
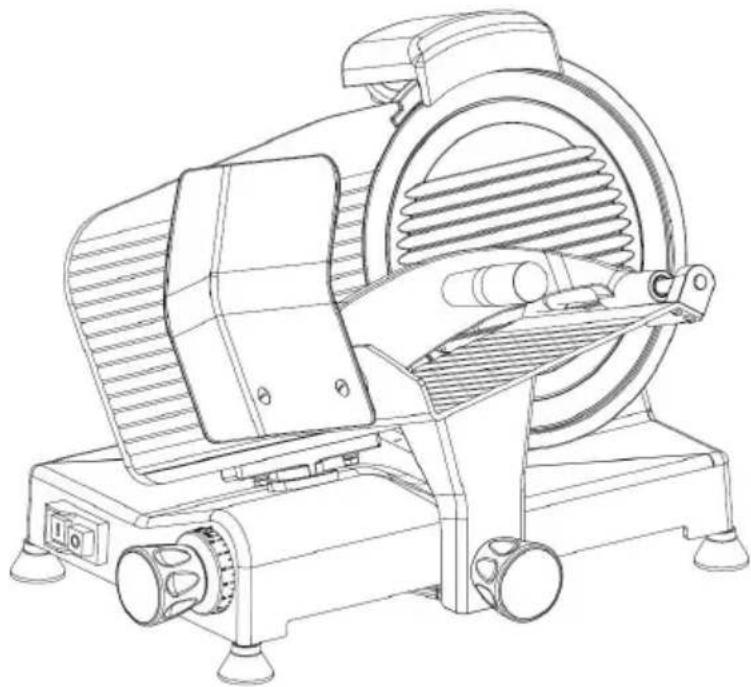
COMMERCIAL SLICER
MODEL:JK-220A, JK-250A, JK-300A
natural_image
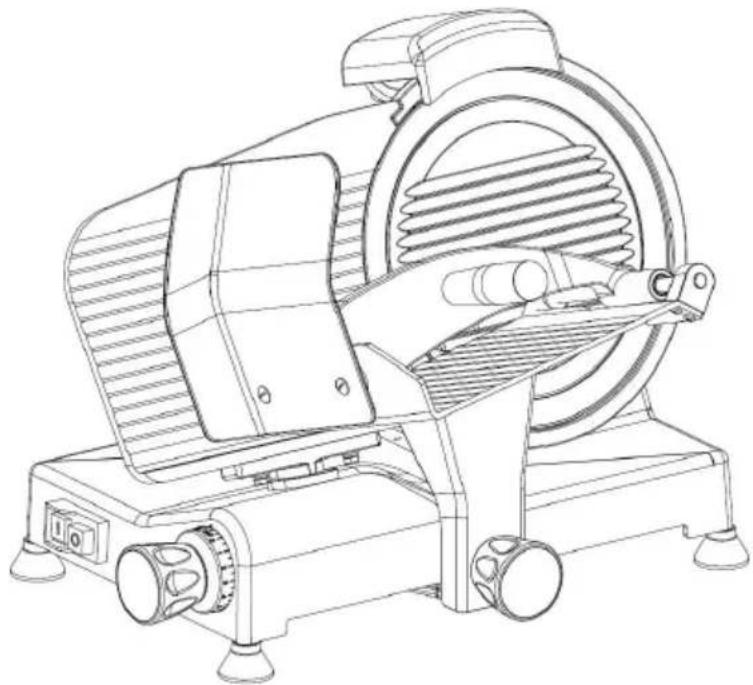
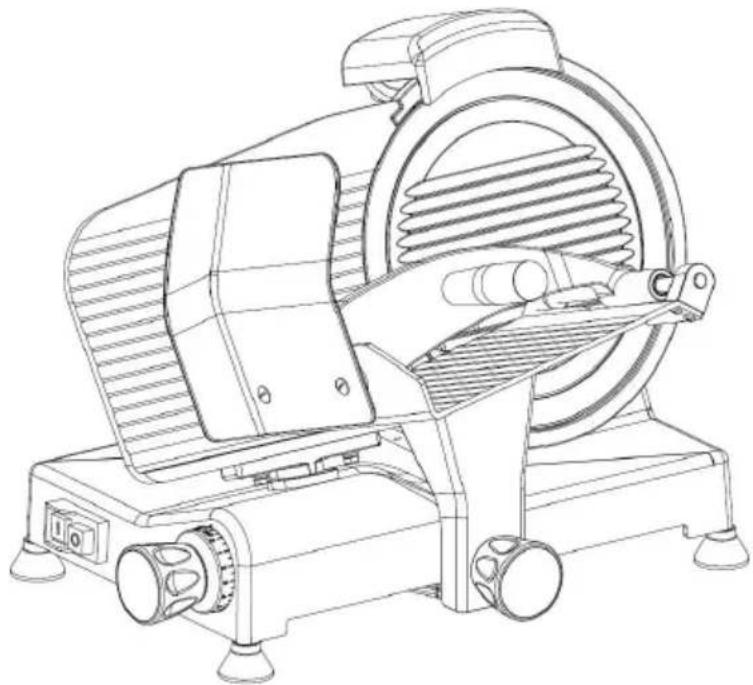
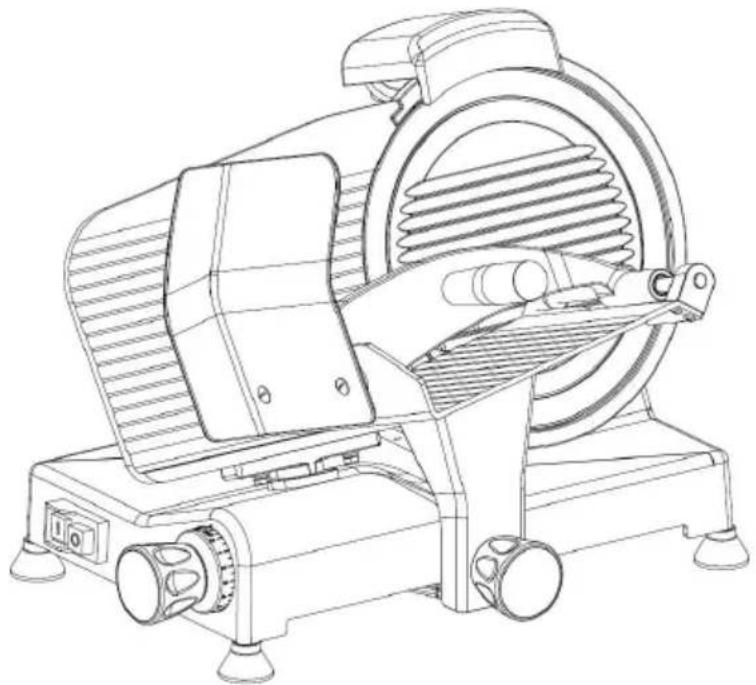
Line drawing of a standard 3D printing or cutting machine with no visible text or symbolsNEED HELP? CONTACT US!
Have product questions? Need technical support? Please feel fr contact us:
Technical Support and E-Warranty Certificate www.vevor.com/support
This is the original instruction, please read all manual instruction carefully before operating. VEVOR reserves a clear interpretation user manual. The appearance of the product shall be subject to product you received. Please forgive us that we won't inform you there are any technology or software updates on our product.
TABLE OF CONTENTS
- Important Safeguards....2-4
- Unpacking and Repacking......5
- Getting to Know Your Slicer....6
- Operating Your Meat Slicer....7-9
- Food Slicing Tips....10-11
- Disassemble Meat Slicer....12-13
- Cleaning Your Meat Slicer....14-15
- Blade Sharpening....16-17
- General Safety Practices....17-21
- Technical Specifications....22
IMPORTANT SAFEGUARDS
When using electrical appliances, basic safety precautions should always be followed, including the following:
-
CAREFULLY READ AND UNDERSTAND ALL INSTRUCTIONS BEFORE OPERATING.
-
CHECK FOR DAMAGED PARTS. Before using the meat slicer, check that all parts are operating properly and that they perform the intended functions. Check for alignment of moving parts, binding of moving part mounting and any other conditions that may affect the operation.
-
Unplug power cord from outlet when not in use, before putting on taking off parts and before cleaning. THE BLADE IS EXCEPTIONALLY SHARP; HANDLE VERY CAREFULLY
-
This appliance is NOT intended for use by people (including child with reduced physical, sensory or mental capabilities, or lack of exper and knowledge, unless they have been given supervision or instruction concerning use of the appliance by a person responsible for their saf Children should be supervised to ensure that they do not play with t appliance.
-
NEVER LEAVE THE MEAT SLICER UNATTENDED WHILE IT IS
RUNNING!
- Avoid contact with moving parts. NEVER PUT YOUR FINGERS NE THE BLADE WHILE IT IS IN OPERATION.
- Never put the unit near a hot burner, in an oven or in a dishwa SLICER IS NOT DISHWASHER SAFE.
- DO NOT operate the Meat Slicer or any other electrical equipment a damaged cord or plug or after the unit malfunctions. Call our customer service hotline at 417-821-4600 for troubleshooting and replacement pa
- This product is intended for indoor use only. DO NOT USE OUTDOORS.
- DO NOT let the power cord hang over the edge of a table or touch sharp edges or touch hot surfaces.
- DO NOT let the power cord become kinked, trapped under the s wind it around the slicer.
- When unplugging the machine, DO NOT pull on the cord. The p should always be removed by pulling the plug itself to prevent damage the cord.
- To reduce the risk of electric shock, this product has a polarized One prong is wider than the other. The plug is intended to fit in a outlet, and only one way. When the plug does not fit fully in the out reverse the plug. If it still does not fit, contact a qualified electrician the proper outlet. DO NOT ALTER THE PLUG IN ANY WAY.
- Place the appliance on a firm and stable surface. Ensure that the appliance is not placed near the edge of the worktop, where it can pushed off or fall.
- DO NOT operate your slicer in an appliance garage or under a cabinet. When storing in an appliance garage, always unplug the unit the electrical outlet. Not doing so could create a risk of fire, especial appliance touches the walls of the garage or the door touches the u closes.
- NEVER plug in or store the appliance in an area that may becc flooded.
- To protect against risk of electrical shock, DO NOT put the slice
water or other liquids.
-
DO NOT operate the meat slicer with wet hands or while standir wet floor. DO NOT use the meat slicer if it is wet or moist.
-
Use only accessories that are recommended by Paladin for use with your product. Accessories that may be suitable for one slicer may create risk of fire, electric shock or injury when used with another grinder.
DO NOT use attachments not recommended or sold by the manufacture
-
NEVER use abrasive cleaning agents or abrasive cloths when cleaning the unit.
-
Use the slicer to cut ONLY designated food. Do not try to slice food, bones, cardboard, plastic, etc.
-
DO NOT use appliance for anything other than its intended use.
-
The commercial-grade food slicer has a sharp blade. To avoid inj never hand-feed food to be sliced. Always use the unit when complete assembled with food carriage and food pusher.
-
ONLY touch the blade when the power is OFF and you are ren and cleaning it, according to the instructions. DO NOT touch the black when the power is on.
-
Follow instructions when lifting or moving the meat slicer. Whenever moving or lifting the slicer, carefully position your body to avoid conta the blade.
-
When the blade is moving, place hands on the recommended pu surface only.
-
After re-attaching the removable carriage, never use the slicer unless is fully upright and completely assembled.
-
To avoid accidental contact with the blade when the slicer is not or when lifting the slicer, always turn the Adjustable Thickness Knob so that the Adjustment Plate covers the edge of the blade.
-
DO NOT use while under influence of drugs or alcohol.
-
Please be advised that improper use of this product voids the w

WARNING! Before cleaning, assembling or disassembling the MEAT SLICER, check the plug and make sure PLUG IS REMOVED FROM THE OUTLET/POWER SOURCE!

SHARP BLADE
WARNING! HANDLE CAREFULLY!
KEEP FINGERS AWAY FROM BLADE. NEVER USE FINGERS TO FEED FOOD BY HAND. ALWAYS USE THE FOOD Carriage!
Always use the meat slicer completely assembled with food carriage and food pusher. Use protective cut-resistant gloves whenever handling the blade.
SAVE THESE INSTRUCTIONS
UNPACKING
IMPORTANT: To avoid injury when unpacking the unit, please follow instructions.
- Put the box on a large, sturdy flat surface.
- Remove the instruction book and other literature.
- Slide poly-foam packing up and off the unit. Lift slicer out of box place it on a sturdy, flat surface.
- Remove the protective bag.
- To lift and move the unit, bend your knees to avoid back injuries one hand on the bottom of the motor housing and the other one uncarriage of the meat slicer.
- Remove the orange blade guards from the cutting blade before turn the unit on.
- Please use extreme caution when handling the blade.
- Keep all plastic bags away from children.
Save all packaging materials in case you need to transport the mach again in the future.
REPACKING INSTRUCTIONS
- Put food slicer on a large, sturdy flat surface.
- Put food slicer into plastic bag.
- Position poly-foam inserts on each end of the food slicer.
- Put the packaged unit into the upright box.
- Replace top corrugated insert, instruction book and other literature.
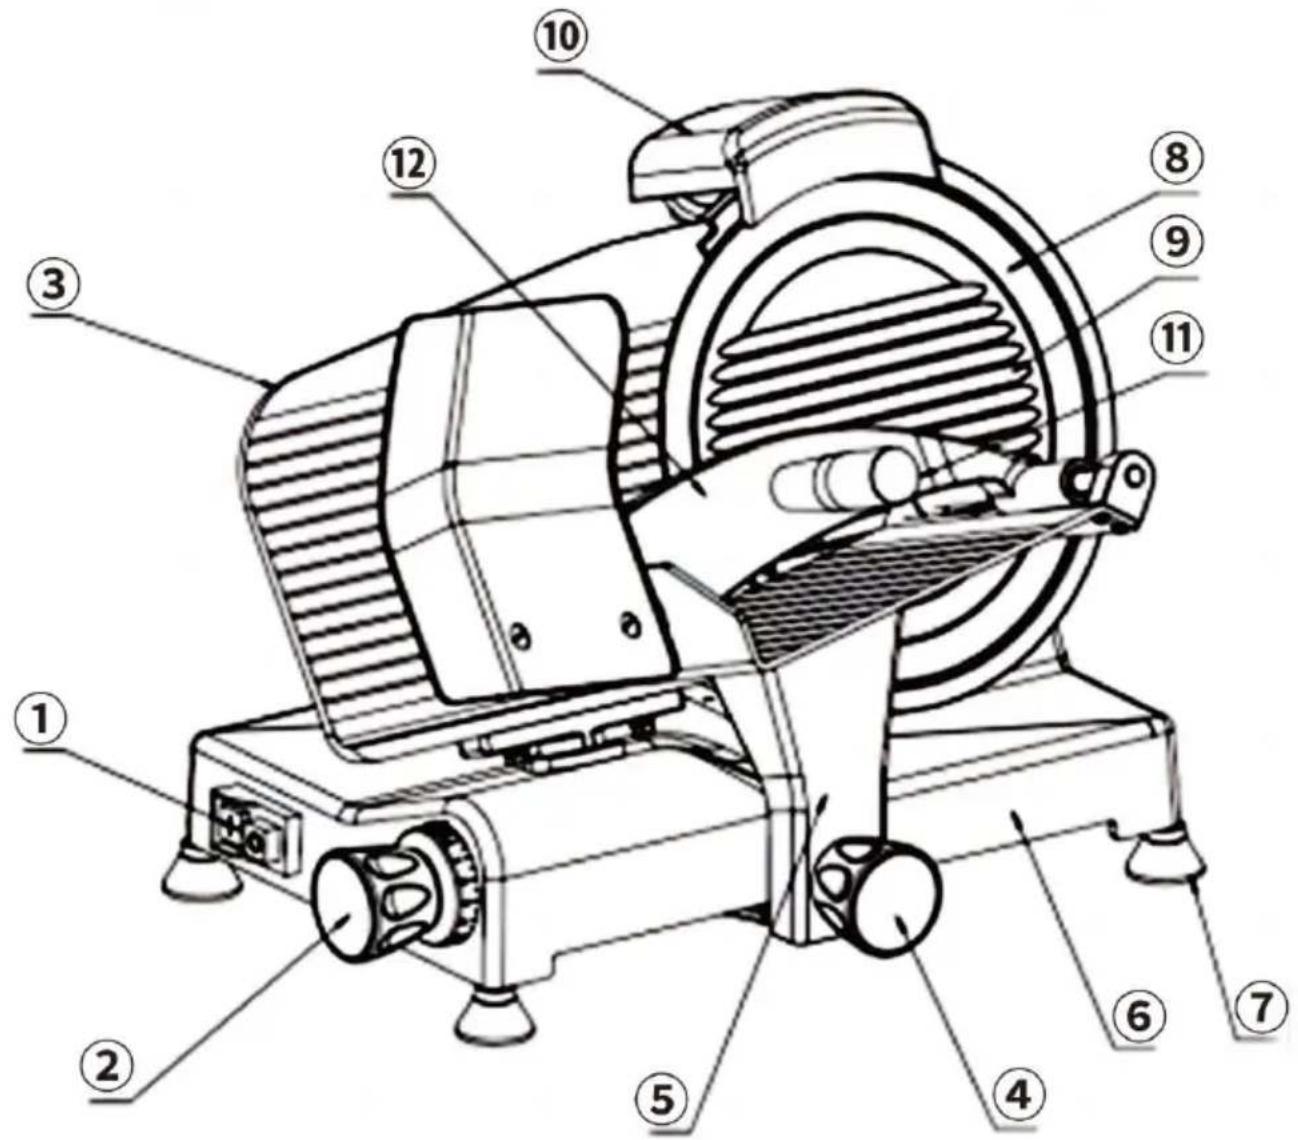
GETTING TO KNOW YOUR SLICER
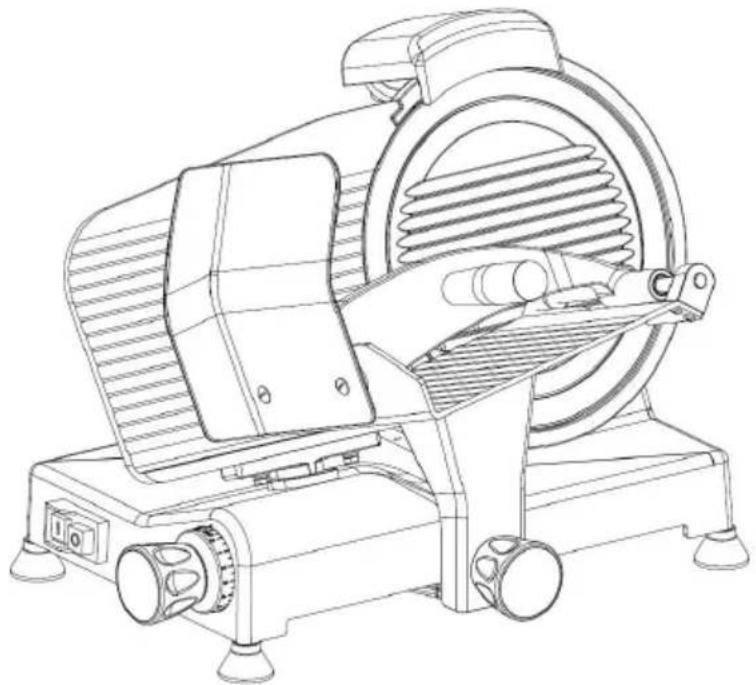
①. Safety On/Off (I/O) Button (Red & Green)
②. Thickness Adjustment Knob
③. Adjustment Plate
④. Carriage Removal Knob
⑤. Sliding Food Carriage
⑥. Housing
⑦. Non-Skid Feet
⑧. Blade
⑨. Blade Guard
⑩. Blade Sharpener (removable)
⑪. Food Pusher Handle
⑫. Food Pusher
text_image
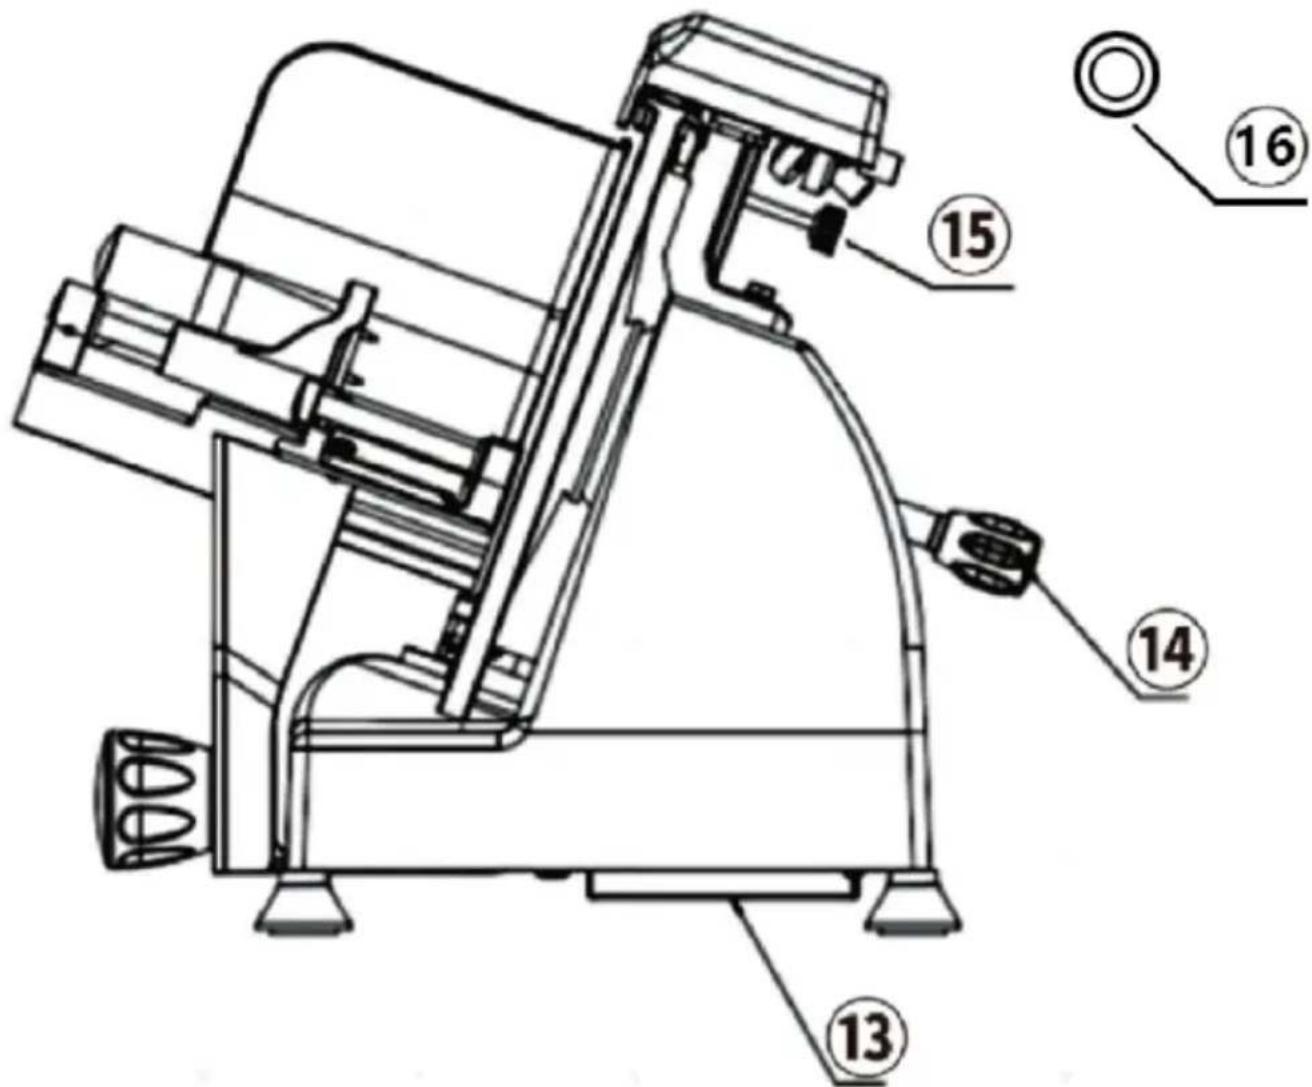
Technical diagram of a mechanical device with numbered parts for identification⑬. Bottom
⑭. Blade Guard Knob
⑮. Adjustment Plate Lock Knob (Needs to Adjust Together with ②)
⑯. Belt
text_image
Technical diagram of a mechanical device with numbered components labeled 13, 14, 15, and 16.Before using your commercial-grade meat slicer for the first time, was parts thoroughly, taking particular care to remove all grease and oil fi surface. Dry all parts thoroughly before reassembling. (REFER TO CLEANING & MAINTENANCE SECTION OF MANUAL).
Now that your slicer is fully assembled and ready to use, it is the slice your favorite meats, cheeses and vegetables! Be sure to rea
and fully understand the Important Safeguards and General Safety Practices in this manual before you start.
- Place the Meat Slicer on a flat, stable surface.
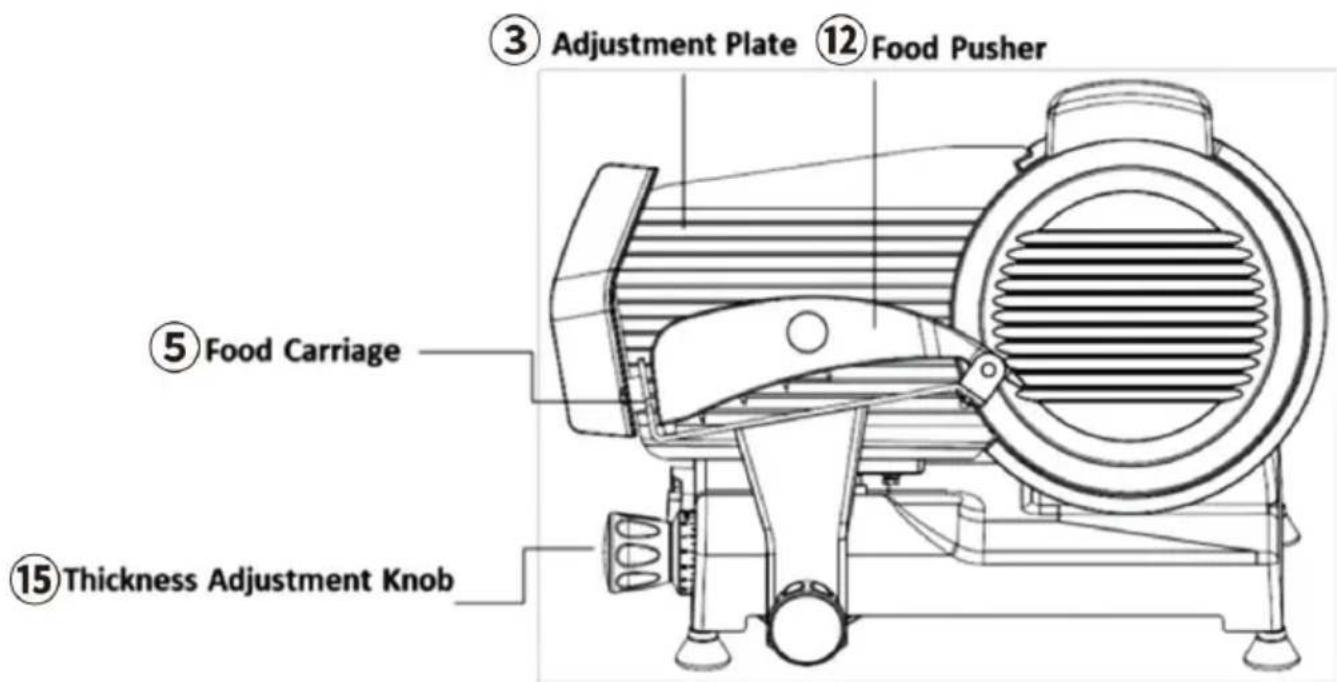
NOTE: Ensure to remove protective blade guards from the edge of the Blade (Part ⑧) before plugging slicer into outlet. These are used for shipping only. - Place food onto the Sliding Food Carriage (Part ⑤) between the Adjustment Plate (Part ③) and the Food Pusher (Part ⑫). To avoid injury, ALWAYS use the Food Pusher Handle (Part ⑪) to slice meat. (Ref: 1)
- Turn the Thickness Adjustment Knob (Part ②) to set the Adjustment Plate (Part ③) for the desired cutting thickness. Turn clockwise for the cuts, counter-clockwise for thicker slicing. (Refer to Fig. 1)
text_image
③ Adjustment Plate ⑫ Food Pusher ⑤ Food Carriage ⑮ Thickness Adjustment KnobFig. 1
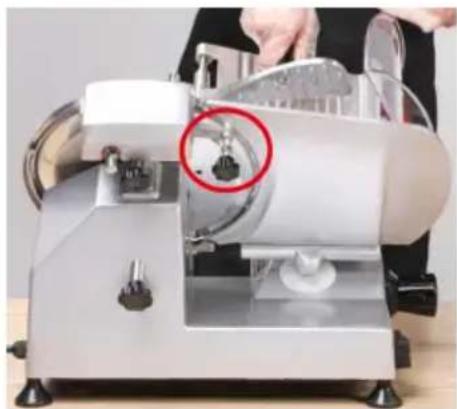
- Adjust the Plate Lock Knob (16) to the appropriate position to prevent the plate from shifting when pressing down on the meat. This ensures that you get evenly sliced meat.
NOTE: When adjusting the thickness Knob, you should also adjust the Plate Lock Knob simultaneously
natural_image
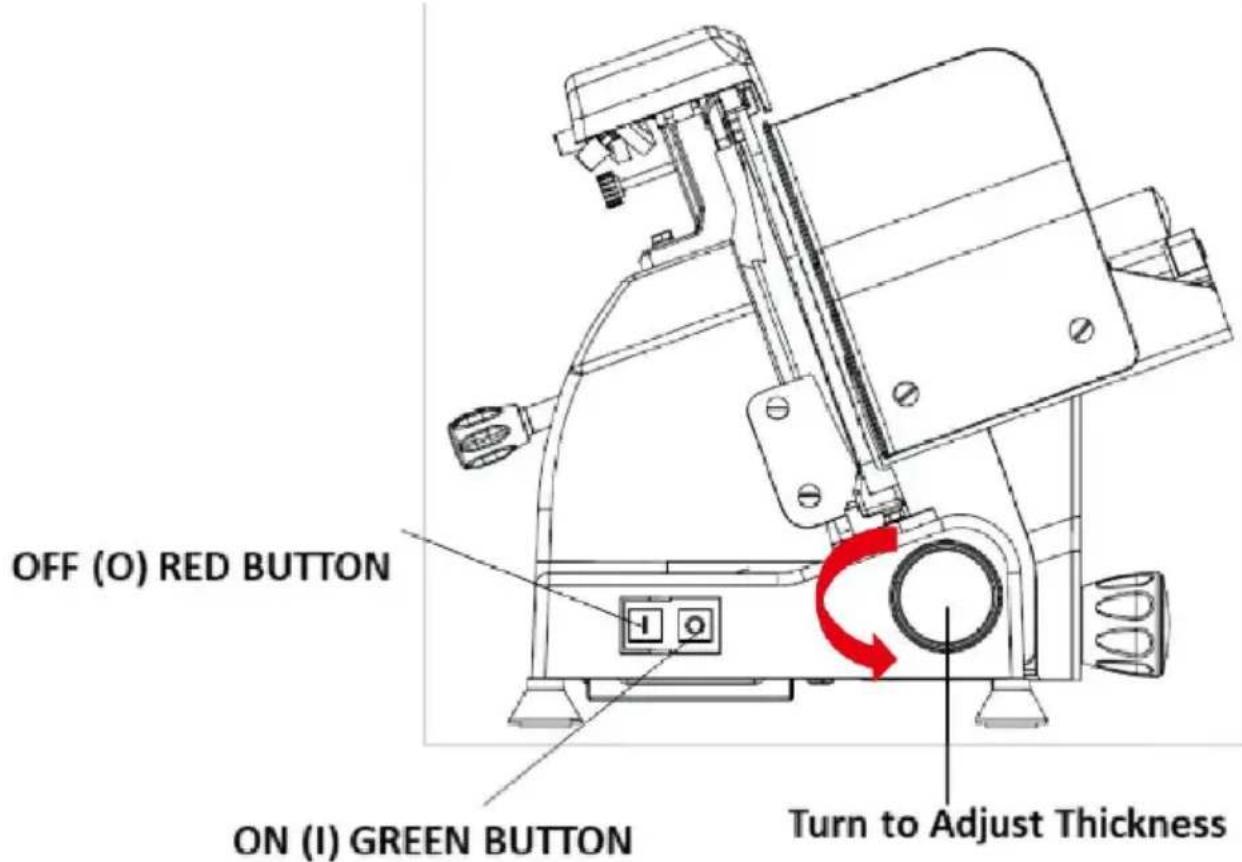
Close-up of a white industrial machine with a red circle highlighting a small component, no visible text or symbols.- To turn the meat slicer ON, push the Green "I" button. (Refer to
natural_image
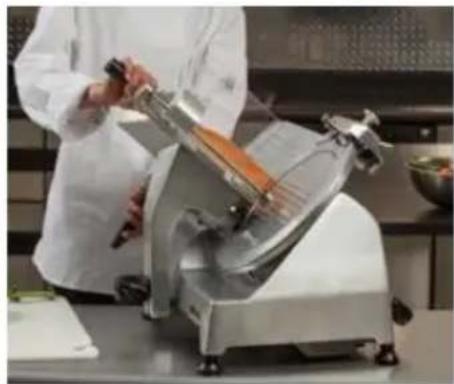
Person in white lab coat operating a large saucer in a kitchen (no visible text or symbols)- To turn the meat slicer OFF, push the Red "O" button. (Refer to
- When operating slicer, stand to the side of the slicer opposite the Refer to the photo shown at right to help position yourself.
- Place a tray or plate behind the Meat Slicer and below the Blade ⑧) to collect the sliced food as it exits the blade area.
-
Hold the Food Pusher Handle (Part ⑪) with your right hand. Kee hands protected behind the Food Pusher ⑤.
-
NEVER USE THIS SLICER WITHOUT THE FOOD PUSHER.
Important: Refer to "Food Slicing Tips" section, when slicing different types of food items.
- Using an even, steady motion, SLOWLY begin slicing. Apply light steady pressure with the Food Pusher Handle (Part ⑪) to move food toward the Adjustment Plate (③) while SLOWLY sliding Food Carriage (⑤) over the Blade (⑧). This will help ensure evenly slicing. Continue slide SLOWLY, back and forth, until you have sliced the desired amount of meat.
NOTE: The meat slicer only makes slices when moving the Food Ca
forward.
- When finished, turn the meat slicer "OFF" (0) by pushing the Re button. (Refer to Fig. 2)
- Always unplug meat slicer from power source when the Meat Slice not in use.
- For safety, always rotate the Thickness Adjustment Knob (Part ②) the "O" position after use to properly shield the sharp edge of Blade
text_image
OFF (O) RED BUTTON ON (I) GREEN BUTTON Turn to Adjust ThicknessFig. 2
Food Slicing Tips

WARNING
This Meat Slicer is not meant to cut through bones! Cutting bones will cause severe damage to Meat Slicer and void the
• Always debone meat before slicing
- Fruits (peaches, apples, avocados etc.) should be free of seeds. T exception is tomatoes.
- When slicing completely frozen, very hard meat, thawing it for 15 r beforehand will yield better results and reduce blade wear.
- If you have to cut a large meat (such as roast or slab bacon), you need to hand-cut the meat into smaller, more manageable pieces to
- Food with an uneven texture, like fish and thin steaks, are often d slice. Put in freezer for approximately 20 minutes to partially freeze by attempting to slice.
Cold cuts: Cold cuts keep longer and retain flavor if sliced as needed best results, chill to approximately: 40^ F- 48^ F( 4^ C\~ 8^ C). Remove any plastic or hard casings before slicing. Use a constant, gentle pressure even slicing.
Cheese: Our slicer handles hard cheeses effortlessly. However, when it comes to softer cheeses, you might find it a bit tricky. Here are a 1 make the process smoother:
Prevent Sticking: Soft cheeses can sometimes stick to the blade. To minimize this, try lightly coating the blade with oil before slicing.
Chill Before Slicing: If the cheese is too soft, place it in the freeze reaches around 40^ F- 48^ F( 4^ C\~ 8^ C). This will firm it up and make s easier.
IMPORTANT: If cheese is (sticking to) binding on the blade when slicing:
A) Re-chill cheese so it is colder (not frozen).
B) Use less tension on the Food Pusher Handle (Part ⑪) against the C) Use SLOWER slicing strokes.
Breads & Cakes: Freshly baked bread should be cooled to room temperature before serving.
Use day-old bread for extra thin slices for toast. Your slicer is ideal
types of breads, pound cake or fruit cake. Chill breads or cakes to 40^ F - 48^ F( 4^ C\~ 8^ C) for easier slicing and to avoid tearing or crumb
Hot Roasts: Beef, Pork, Lamb, Turkey, Ham: When slicing warm boneless roasts, remove from oven and let it set for 20-30 minutes (temp) before slicing. They will retain more natural juices and slice ev without crumbling. If necessary, hand-cut the meats to fit on the carri
CLEANING YOUR MEAT SLICER

WARNING
Before cleaning, assembling or disassembling the MEAT SLICER sure the power is OFF and the plug is REMOVED from the o source!

WARNING
Use Extreme Caution when handling or cleaning the blade, a extremely sharp! We highly recommend wearing cut-resistant glow when removing, cleaning and re-installing the blade.
To Disassemble Slicer:
- The slicer should be cleaned after every use as perishable food s could accumulate on the slicer or behind cutting Blade (Part ⑧).
- Do not use steel wool or abrasives to clean any part of Meat Sl
- Rotate the Thickness Adjustment Knob (Part ②) to the "O" positio
-
To remove the Sliding Food Carriage (Part⑤) and Food Pusher A (⑫), unscrew the Carriage Knob (④) underneath the Sliding Food
Carriage (⑤) counterclockwise and lift the food tray in a slight upward out motion. -
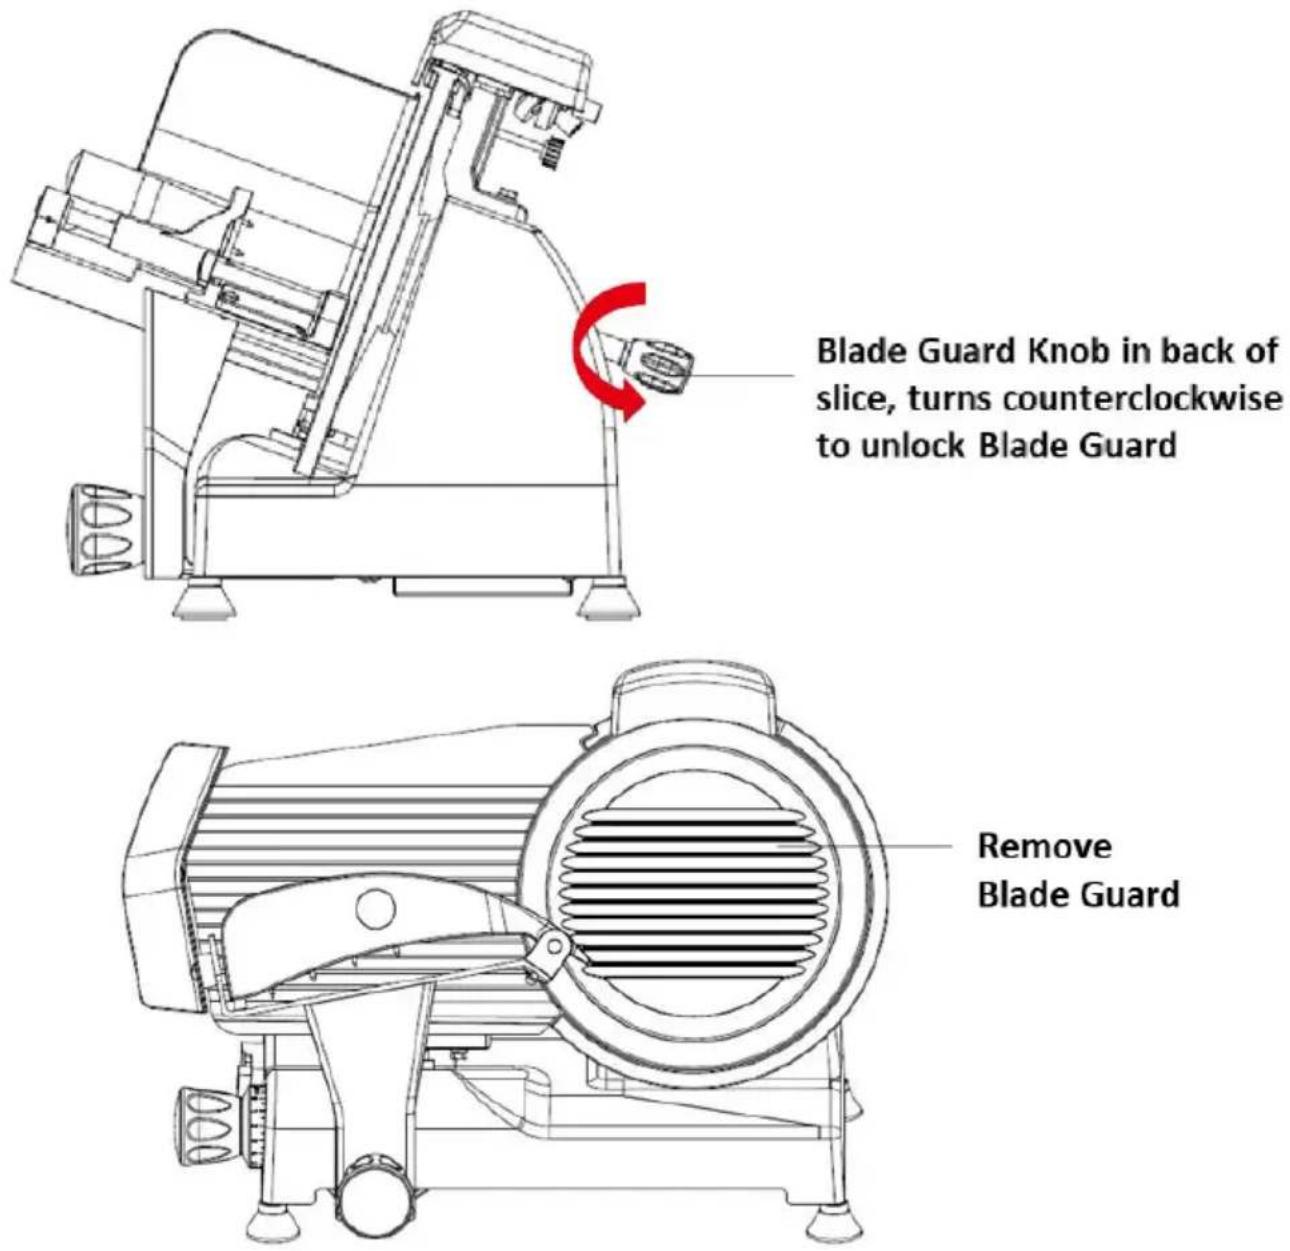
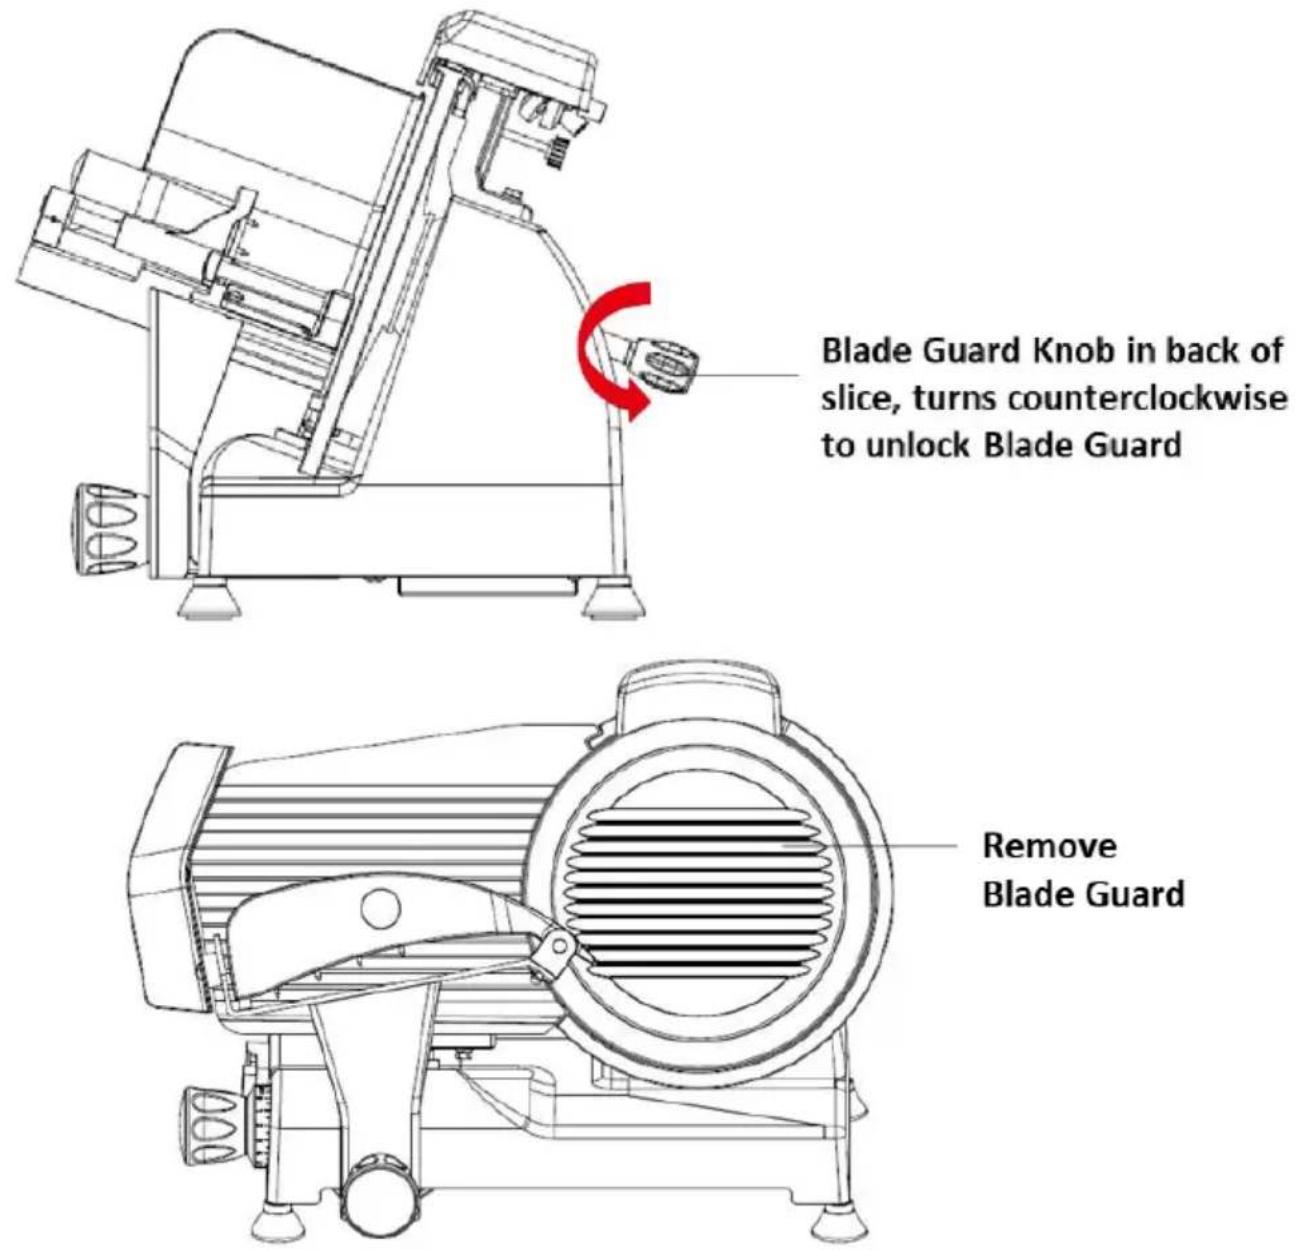
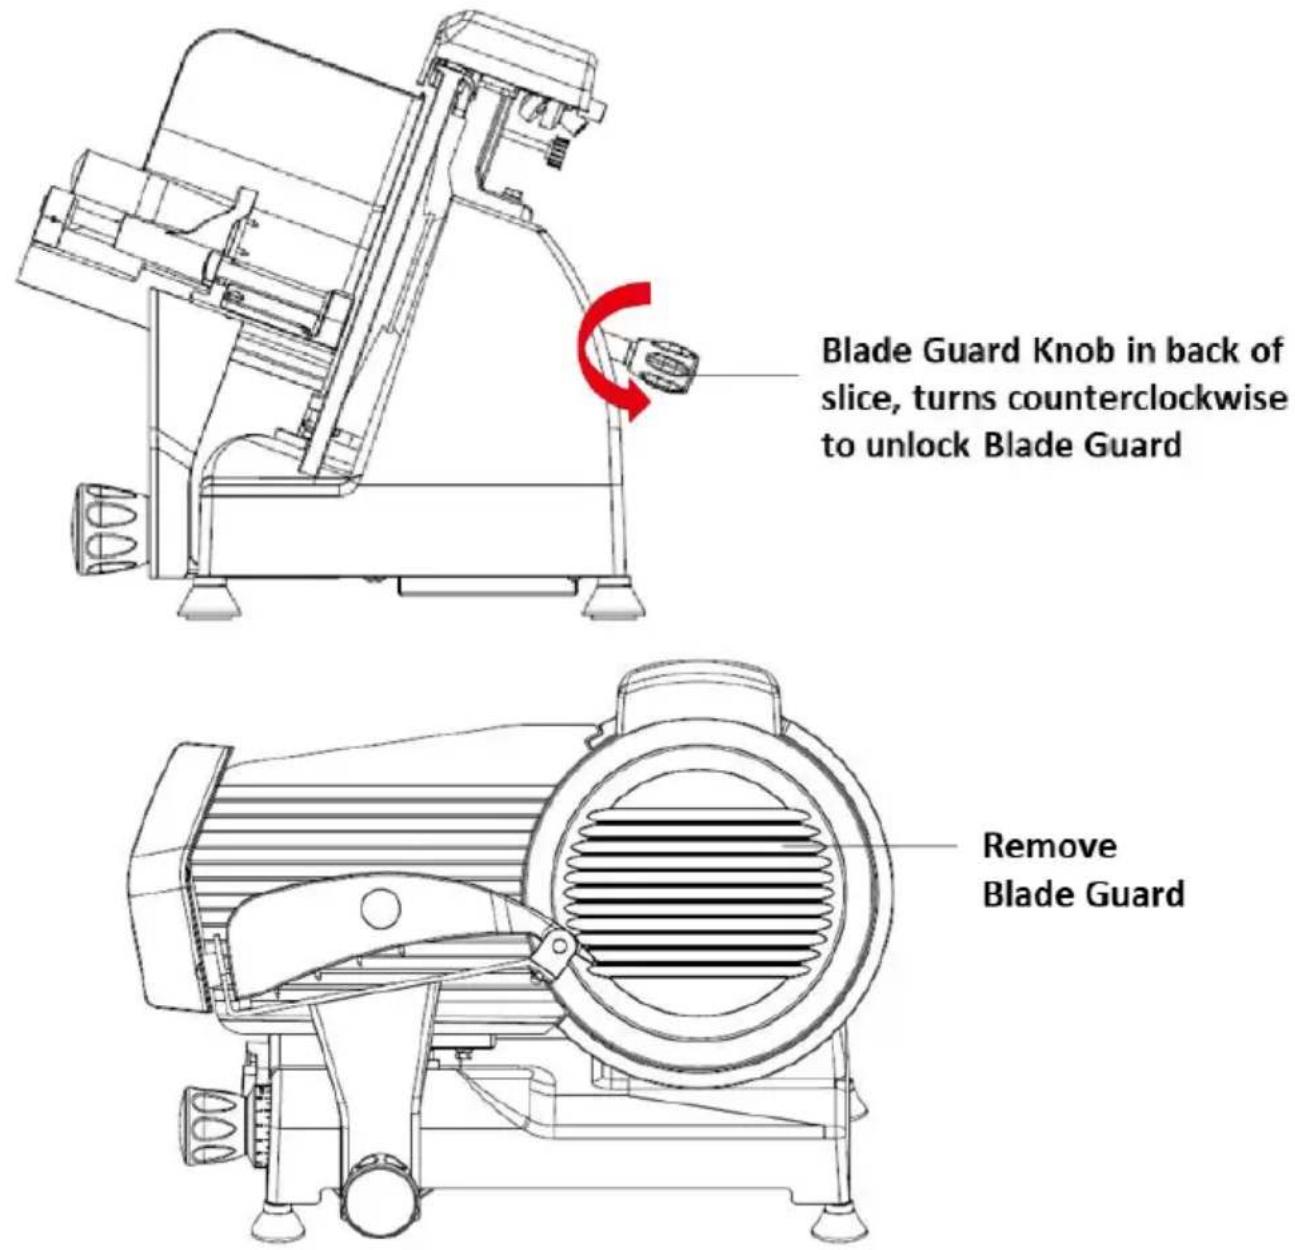
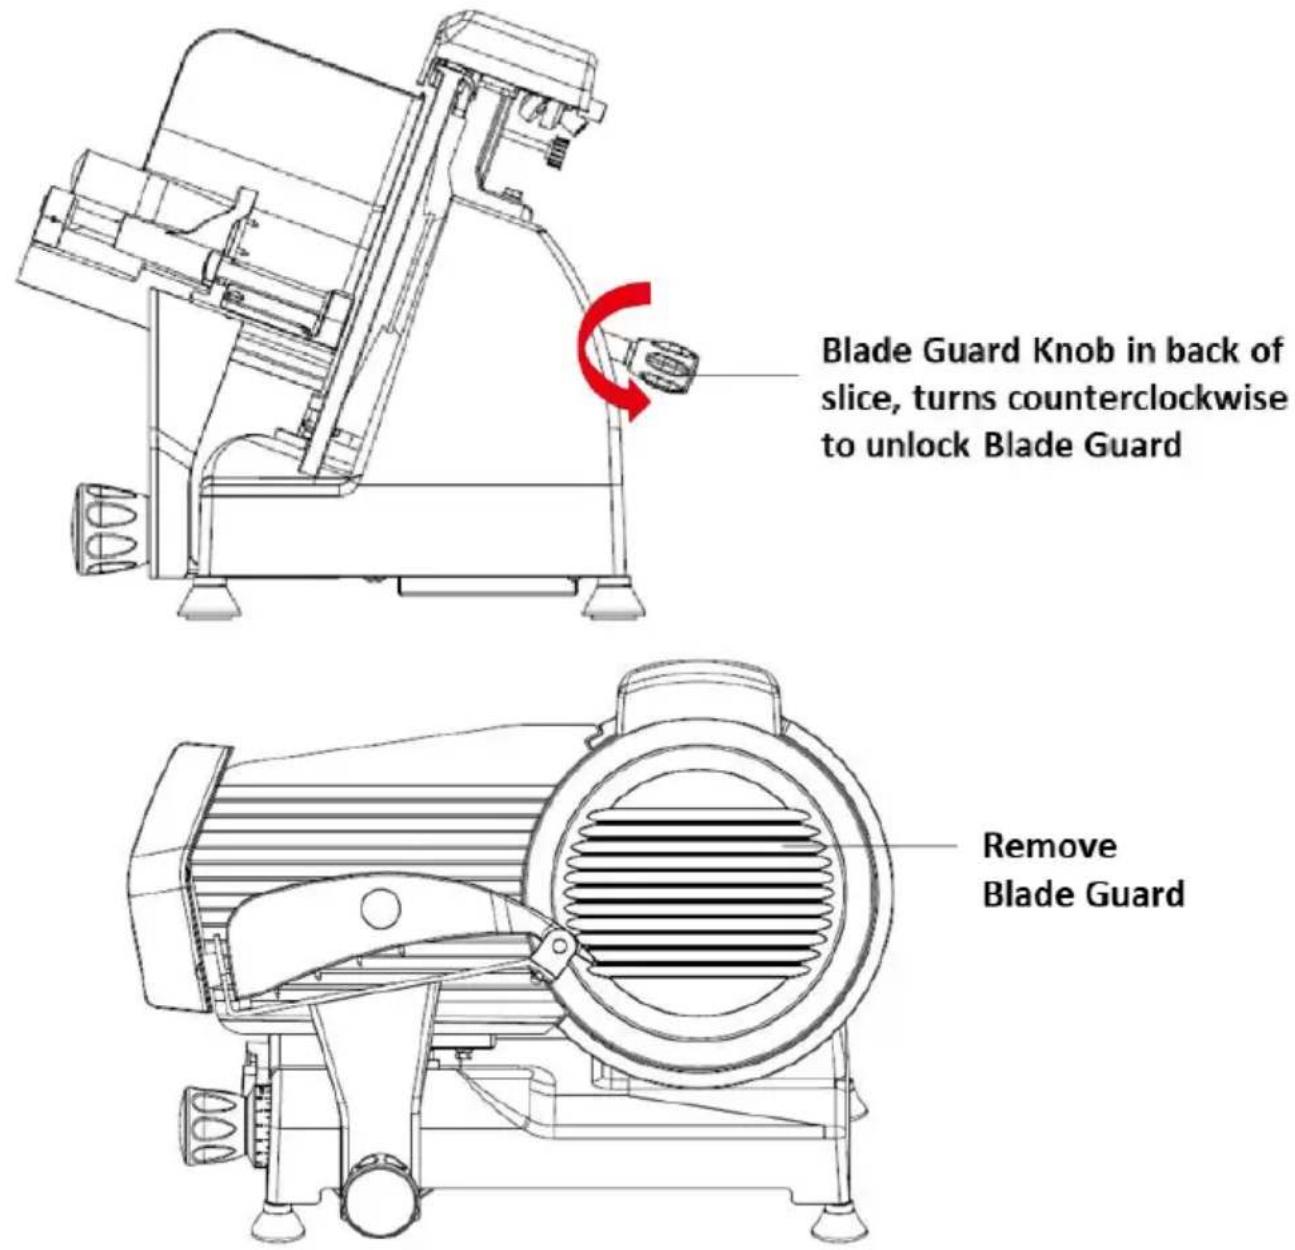
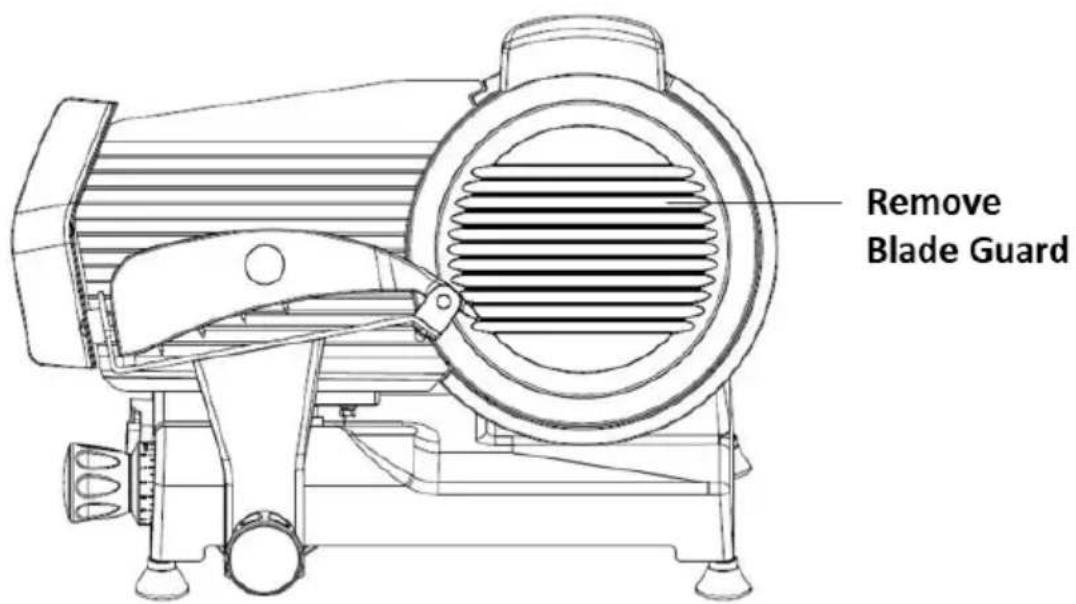
With one hand flat on Blade Guard (Part⑨), turn the black Blade Knob (⑭, located on the back of the slicer behind blade) countercloc until the Blade Guard (⑨) is released. (Refer to Fig. 3)
- Remove the three Phillips head screws that hold Blade (Part ⑧). to Fig. 3) The Blade is now released from shaft and can be removed gently pulling outward. USE EXTREME CAUTION: We highly
recommend wearing cut-resistant gloves when removing, cleaning and re-installing the blade.
To Cleaning Slicer:
text_image
Blade Guard Knob in back of slice, turns counterclockwise to unlock Blade Guard Remove Blade GuardFig. 3
- Clean the blade with a moist sponge or cloth. Wipe away from the (Part ⑧). NEVER wipe toward the Blade.
- NEVER clean the Blade (Part ⑧) underwater. Handling sharp objects under water is extremely dangerous.
- The Blade (Part ⑧) Blade Guard (Part⑨), Food Pusher (Part⑫) and Food Carriage (Part⑤) can all be hand washed in hot soapy water. Because these parts come in contact with food, they should be sanitary properly. Allow sanitized parts to air dry.
- Never immerse the Motor Assembly of the Meat Slicer in water or liquid.
- Clean the outer surface of the Meat Slicer Body/Motor with a dam and mild detergent.
IMPORTANT: DO NOT WASH ANY PART OF THIS SLICER IN DISHWASHER
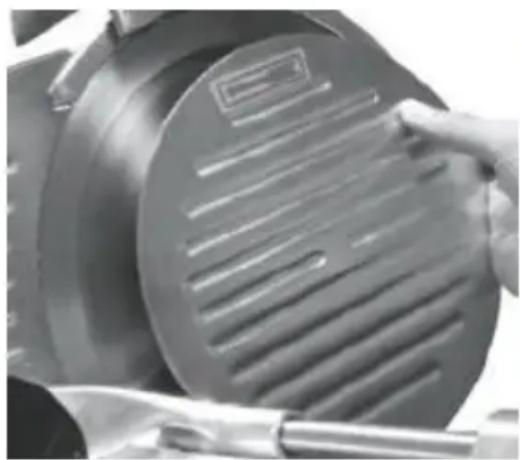
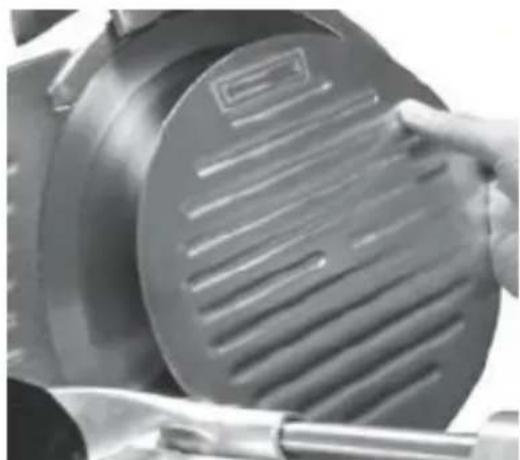
- Loosen the blade cover locking knob to release the blade guard
natural_image
Close-up of a white laboratory instrument with black components and a red curved arrow indicating rotation (no text or symbols)- Release the blade cover
natural_image
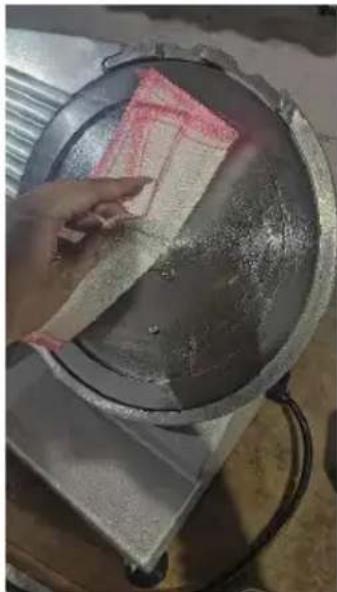
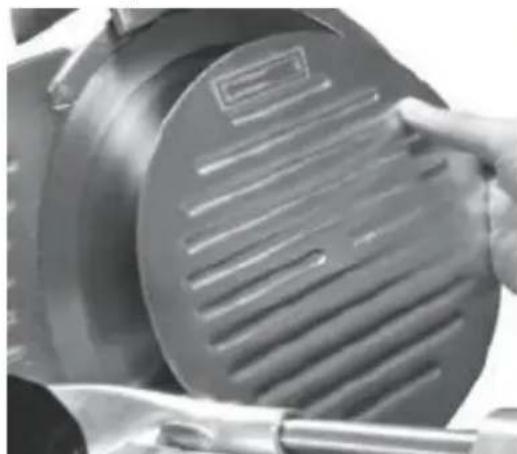
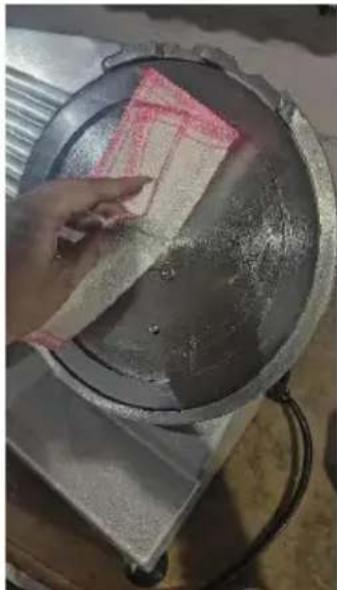
Close-up of a hand holding a circular metal component with slatted edges, next to a tool (no visible text or symbols)- Wipe the blade clean with a rag
natural_image
Hand placing a red paper airplane on a metal tray, placed inside a large cylindrical container (no visible text or symbols)Soak a clean cloth in a mild detergent and warm water. Care and rinse the top and bottom (underside) of the blade by wipir center of the blade outward.
To Re-assemble Slicer:
USE EXTREME CAUTION: We highly recommend wearing cut-resistant gloves when removing, cleaning and re-installing the blade.
- Be sure the Thickness Adjustment Knob (Part ②) is always in the position.
- Screw the Blade (Part ⑧) back into place.
- Line up Blade Guard (Part⑨) over the blade hole. Hold in place lines of the Blade Guard face, match the lines of Adjustment Plate (horizontal). While holding the Blade Guard in place, turn the Blade O Knob (Part ⑭) clockwise until the Blade Guard screws into place. As Blade Guard Knob tightens, the Blade Guard will become nearly flush blade.
Storage:
Make sure Blade is securely tightened and locked.
- Rotate the Thickness Adjustment Knob (Part ②) always in the "O"
position.
- ALWAYS align Adjustment Plate (Part ③) with Blade (⑧) to protect the Blade when the slicer is stored.
- Store in a dry, warm area with low humidity.
Adjusting the Sliding Food Carriage:
- The carriage should slide freely along the carriage rod when slicing
- Should these parts not slide smoothly, adjustments can be made.
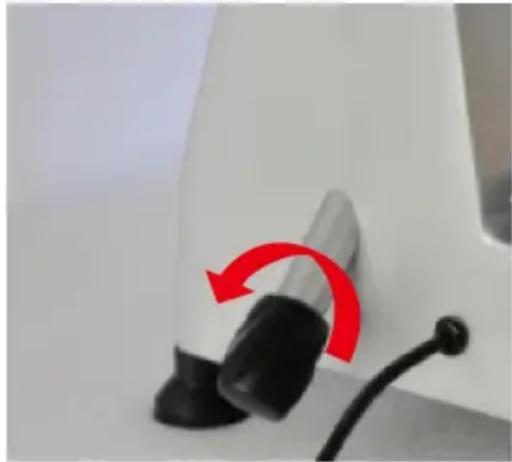
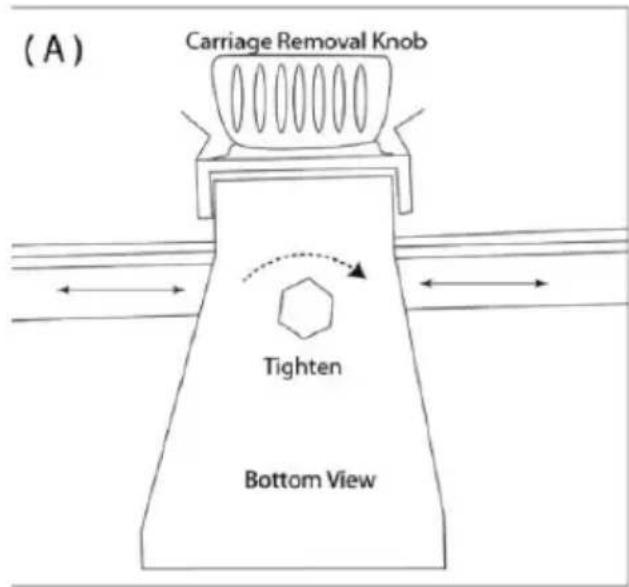
- At the bottom of the carriage support, you will find a plastic screw the screw clockwise to tighten carriage (Below: A). This will help stabilize the carriage. Turn the screw counterclockwise to loosen carriage (Below: B). This will help the carriage slide more easily.
text_image
(A) Carriage Removal Knob Tighten Bottom View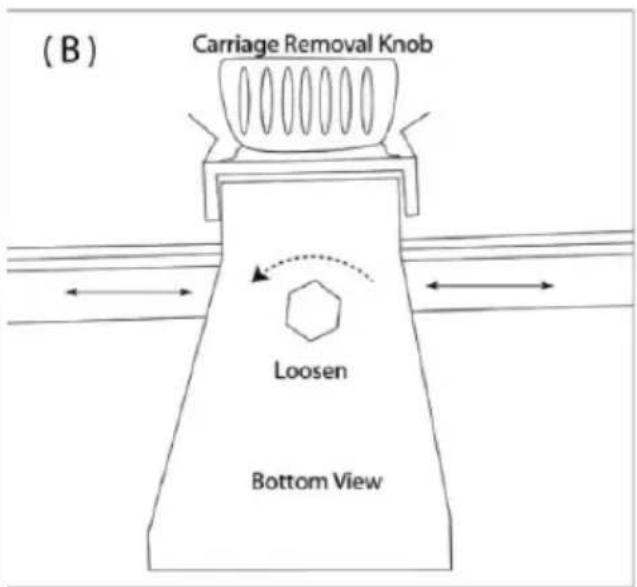
text_image
(B) Carriage Removal Knob Loosen Bottom ViewBlade Sharpening
- This operation should be undertaken if the cutting blade becomes should be noted that the blade is made from hardened material and normal use should only need sharpening once a year.
- Unplug the unit.
- Ensure that the slice thickness knob is in the 'o' position.
- CAREFULLY clean the part of the blade to be sharpened.
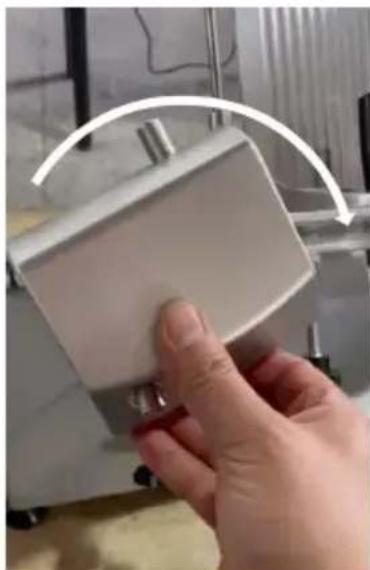
- Unlock the sharpening device using the safety locking screw. Lift the sharpening assembly and rotate it 180^ so that both grinding wheels
the correct position. Lower the sharpening device and lock in position.
-
Plug in the machine and switch on.
-
Using the button at the rear of the sharpening unit, push the stor against the rotating blade for approximately 30 seconds
-
After sharpening, it is important to remove the grinding wheel from blade by letting go of the push button on the front of the sharpening. Run the slicer for 2-3 seconds after letting go of this button.
-
Return the sharpening device to its original position by unlocking the safety screw and rotating by 180^
-
Loosen the knob
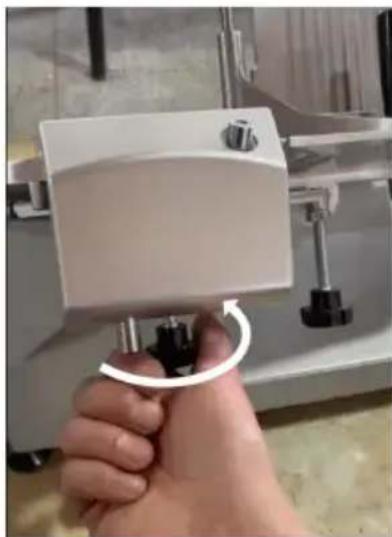
natural_image
Hand holding a white mechanical device with black buttons and a curved arrow indicating rotation (no text or symbols visible)- Rotate 180^ clockwise
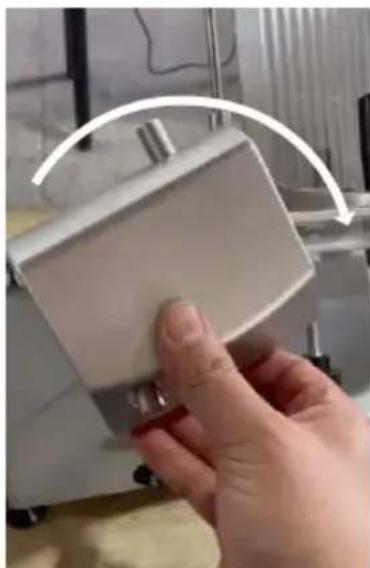
natural_image
Hand holding a white rectangular object with a curved arrow overlay (no text or symbols visible)- Press the button below to sharpen the backside of the blade.
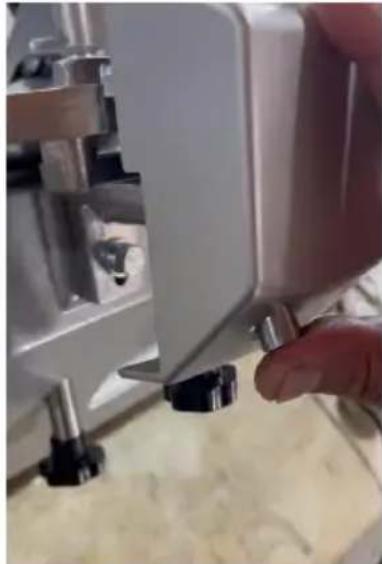
natural_image
Close-up of a hand operating a sewing machine needle to press or install a black mechanical component (no visible text or symbols)- Press the button above to sharpen the front side of the blade
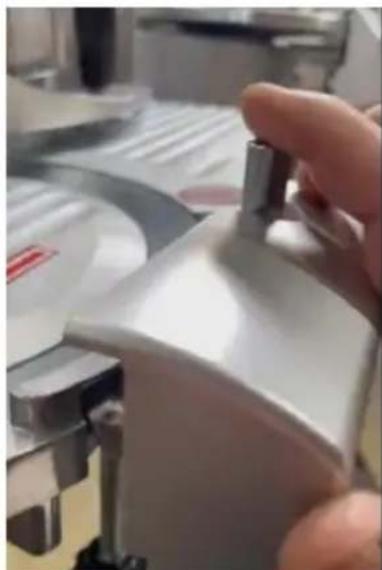
natural_image
Close-up of a hand operating a metallic mechanical component, no visible text or symbolsNote: First, sharpen the backside of the blade to make it sharp, and sharpen the front side to remove any burrs. It's important to follow the order to avoid damaging the blade.
GENERAL SAFETY PRACTICES
The following safety instructions are addressed to both the operator of machine as well as the person in charge of maintenance. The user operates the machine only after being well acquainted with the safety procedures described in the present manual. READ THIS MANUAL WATTENTION.
IMPORTANT
Any change in the protection systems and safety devices du operation will create serious risks to the operator physical int
Basic Operating Procedures
Dangers
- Some areas of the device have parts that are connected or have connected to high voltage. When touched, these parts may cause several electrical shocks or be lethal.
- Follow each operation step in order and ensure everything is runnir correctly before proceeding to the next step.
Advice
- In case of power shortage, immediately switch the machine off.
- Use ONLY recommended lubricants, oils or greases.
- Do not shake the product. This may damage the internal electrical structure. Handle the slicer gently when moving it to another location.
- Do NOT allow water, dirt or dust to come into contact with mecha and electrical components of the machine.
• DO NOT change the standard characteristics of the machine. - DO NOT remove, tear off or maculate any safety or identification last stuck on the machine. If any labels have been removed or are no legible, contact Paladin Equipment via the “Contact Us” form at www.paladinequipment.com for replacement.
Safety Procedures and Notes
IMPORTANT
Carefully read ALL INSTRUCTIONS of this manual before turni machine ON. Be sure to understand all the information containe manual. If you have questions, contact Paladin Equipment via “Contact Us” form at www.paladinequipment.com
Danger
- An electric cable or wire with damaged jacket or bad insulation might cause electrical shocks or electrical leak. Before use, check the condition of all wires and cables. Do not use the machine if cables or wires damaged.
Advice
- Be sure to thoroughly understand all the functions, operating procedure and information contained in this manual before operating the machine. - Before using any switches, buttons, levers, etc., be sure it is the one for the action you wish to perform. When in doubt, consult this
Precautions
- The electric cable has to be compatible with the power required by machine. - Cables touching the floor or near the machine need to be protected against short circuits.
Routine Inspection
Advice
- When checking the tension of the belts or chains, DO NOT insert fingers between the belts and the pulleys and nor between the chain the gears.
Precautions
- Check the motor and sliding or turning parts of the machine in case abnormal noises. - Check the tension of the belts and chains. If either shows signs of wearing, do not use the machine. Have the part replaced professional with a Paladin-approved belt or chain. - Check protections and safety devices to make sure they are working properly.
Operation
Warnings
- Do not use the machine with long hair that could touch any part machine. This might lead to a serious accident. Tie your hair up well cover it with a hat or scarf.
- Only trained or skilled personnel shall operate this machine.
- Do not touch the rotating blade with your hand during operation.
- Never operate the machine without the food pusher and food carria. Operating without these safety parts could cause serious injury.
After Finishing Work
Precautions
- Always TURN THE MACHINE OFF before cleaning by removing the from the socket.
- Never clean the machine unless it has come to a complete stop.
- Put all the components back to their functional positions before turn the machine ON again.
- Clean up liquids with a paper towel or sanitized towel.
- Do NOT insert your fingers in between belts and pulleys nor chain gears.
Maintenance
Danger
- Do not perform any maintenance on the machine while the power. Be sure to turn off the slicer and pull the plug out of the socket be performing any maintenance.
IMPORTANT
Always remove the plug from the socket in any emergency s
Warning
- Electrical or mechanical maintenance must be performed by qualified personnel.
Train new users on proper food slicer safety features and operation by they use machine. Make sure slicer has been fully inspected for proper installation & checked for damaged or missing parts before using machine to prevent serious injury or damage to the machine.
TECHNICAL SPECIFICATIONS
| MODEL | Voltage (V) | Rated Frequency (Hz) | Power (W) | Slice Thickness (mm) | Blade Diameter (mm) | Region |
| JK-220 A | 110-120 | 60 | 200 | 0.2-12 | 220 | US |
| JK-250 A | 110-120 | 60 | 240 | 0.2-12 | 250 | |
| JK-300 A | 110-120 | 60 | 320 | 0.2-15 | 300 | |
| JK-220 A | 220-240 | 50-60 | 200 | 0.2-12 | 220 | EU |
| JK-250 A | 220-240 | 50-60 | 240 | 0.2-12 | 250 | |
| JK-300 A | 220-240 | 50-60 | 320 | 0.2-15 | 300 |
VEVOR®
TOUGH TOOLS, HALF PRICE
Technical Support and E-Warranty Certificate
www.vevor.com/support
VEVOR®
TOUGH TOOLS, HALF PRICE
We continue to be committed to provide you tools with competitive price. "Save Half", "Half Price" or any other similar expressions used by us only rep estimate of savings you might benefit from buying certain tools with us compared top brands and does not necessarily mean to cover all categories of tools offer are kindly reminded to verify carefully when you are placing an order with us actually saving half in comparison with the top major brands.
VEVOR®
TOUGH TOOLS, HALF PRICE
COMMERCIAL SLICER
MODÈLE : JK-220A, JK-250A, JK-300A
natural_image
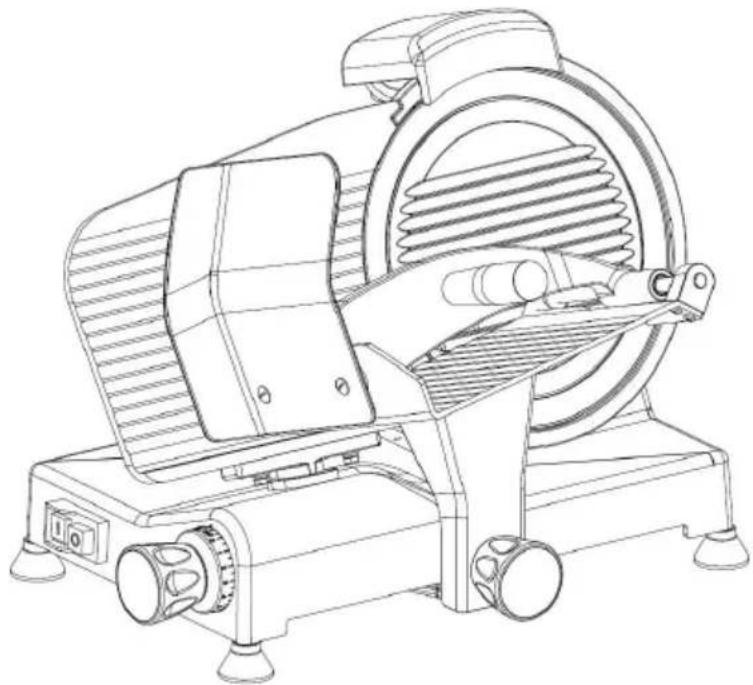
Line drawing of a standard 3D printing or cutting machine with no visible text or symbolsNEED HELP? CONTACT US!
Have product questions? Need technical support? Please feel from contact us:
Technical Support and E-Warranty Certificate www.vevor.com/support
This is the original instruction, please read all manual instruction carefully before operating. VEVOR reserves a clear interpretation user manual. The appearance of the product shall be subject to product you received. Please forgive us that we won't inform you there are any technology or software updates on our product.
TABLE DES MATIÈRES
WARNING! Before cleaning, assembling or disassembling the MEAT SLICER, check the plug and make sure PLUG IS REMOVED FROM THE OUTLET/POWER SOURCE!

WARNING! HANDLE CAREFULLY! KEEP FINGERS AWAY FROM BLADE. NEVER USE FINGERS TO FEED FOOD BY HAND. ALWAYS USE THE FOOD Carriage! Always use the meat slicer completely assembled with food carriage and food pusher. Use protective cut-resistant gloves whenever handling the blade.
CONSERVEZ CES INSTRUCTIONS
DÉBALLAGE
text_image
Technical diagram of a solar power<|im_start|> Puerto Rico solar mill with numbered components for identification.text_image
Technical diagram of a mechanical device with numbered components labeled 13, 14, 15, and 16.UTILISATION DE VOTRE TRANCHEUSE À VIANDE
text_image
③ Adjustment Plate ⑫ Food Pusher ⑤ Food Carriage ⑮ Thickness Adjustment KnobFig. 1
natural_image
Close-up of a white microwave oven with a hand operating it, showing internal components and a red circle highlighting a small object (no text or symbols visible)natural_image
Person in white lab coat operating a large automated food processing machine (no visible text or symbols)text_image
OFF (O) RED BUTTON ON (I) GREEN BUTTON Turn to Adjust ThicknessFig. 2

Blade Guard Knob in back of slice, turns counterclockwise to unlock Blade Guard
Fig. 3
natural_image
Close-up of a white laboratory instrument with black components and a red curved arrow indicating rotation (no text or symbols)natural_image
Close-up of a hand holding a circular mechanical component with ribbed texture (no visible text or symbols)natural_image
Hand placing a red-and-white paper sample onto a metallic circular object (no text or symbols visible)text_image
(A) Carriage Removal Knob Tighten Bottom View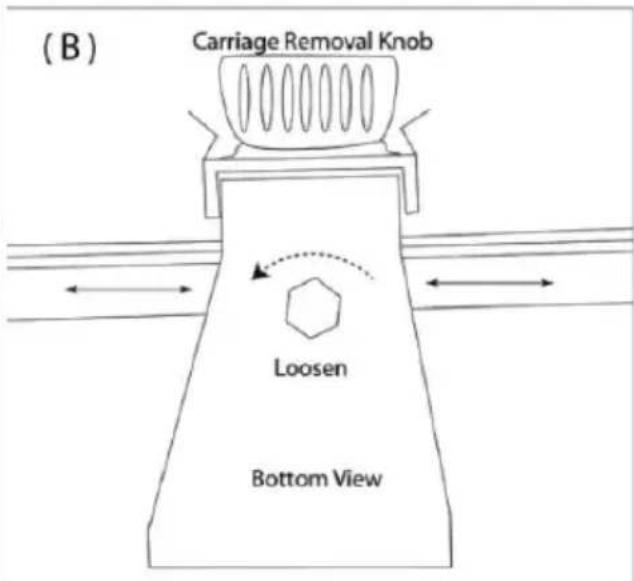
text_image
(B) Carriage Removal Knob Loosen Bottom ViewAffûtage des lames
natural_image
Hand holding a white appliance with black buttons and a curved arrow, no visible text or symbolsnatural_image
Hand holding a white rectangular object with a curved arrow overlay (no text or symbols visible)natural_image
Close-up of a hand operating a sewing machine with black buttons (no visible text or symbols)natural_image
Close-up of a hand operating a mechanical clamp or tool on a workbench, with no visible text or symbols.Inspection de routine
Conseil
www.vevor.com/support
VEVOR®
TOUGH TOOLS, HALF PRICE
We continue to be committed to provide you tools with competitive price. "Save Half", "Half Price" or any other similar expressions used by us only rep estimate of savings you might benefit from buying certain tools with us compared top brands and does not necessarily mean to cover all categories of tools offered are kindly reminded to verify carefully when you are placing an order with us actually saving half in comparison with the top major brands.
VEVOR®
TOUGH TOOLS, HALF PRICE
COMMERCIAL SLICER
MODELL: JK-220A, JK-250A, JK-300A
natural_image
Line drawing of a standard 3D printing or cutting machine with no visible text or symbolsNEED HELP? CONTACT US!
Have product questions? Need technical support? Please feel from contact us:
Technical Support and E-Warranty Certificate www.vevor.com/support
This is the original instruction, please read all manual instruction carefully before operating. VEVOR reserves a clear interpretation user manual. The appearance of the product shall be subject to product you received. Please forgive us that we won't inform you there are any technology or software updates on our product.
INHALTSVERZEICHNIS
- W i c h t i g e
WARNING! Before cleaning, assembling or disassembling the MEAT SLICER, check the plug and make sure PLUG IS REMOVED FROM THE OUTLET/POWER SOURCE!

text_image
SHARP BLADEWARNING! HANDLE CAREFULLY! KEEP FINGERS AWAY FROM BLADE. NEVER USE FINGERS TO FEED FOOD BY HAND. ALWAYS USE THE FOOD Carriage! Always use the meat slicer completely assembled with food carriage and food pusher. Use protective cut-resistant gloves whenever handling the blade.
text_image
Technical diagram of a mechanical device with numbered parts for identificationtext_image
Technical diagram of a mechanical device with numbered components labeled 13, 14, 15, and 16.text_image
③ Adjustment Plate ⑫ Food Pusher ⑤ Food Carriage ⑮ Thickness Adjustment KnobAbb. 1
natural_image
Close-up of a white microwave oven with a hand operating it, showing internal components and a red circle highlighting a small object (no text or symbols visible)natural_image
Person in white lab coat operating a large automated food processing machine (no visible text or symbols)text_image
OFF (O) RED BUTTON ON (I) GREEN BUTTON Turn to Adjust ThicknessAbb. 2
Blade Guard Knob in back of slice, turns counterclockwise to unlock Blade Guard
Abb. 3
natural_image
Close-up of a white laboratory instrument with black components and a red curved arrow indicating rotation (no text or symbols)natural_image
Close-up of a hand holding a circular mechanical component with slats, no visible text or symbolsnatural_image
Hand placing a pink paper sample into a metal bowl on a metal tray (no text or symbols visible)text_image
(A) Carriage Removal Knob Tighten Bottom View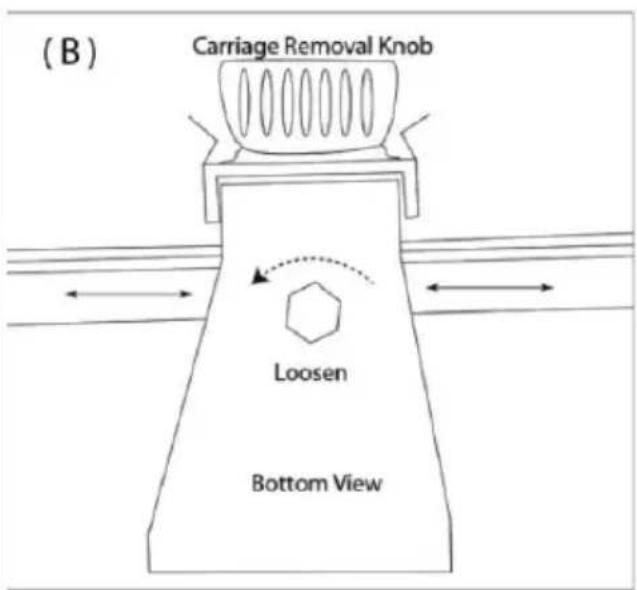
text_image
(B) Carriage Removal Knob Loosen Bottom ViewKlingenschärfen
natural_image
Hand holding a white rectangular device with black connectors, possibly a medical or laboratory setup (no visible text or symbols)natural_image
Hand holding a white rectangular object with a curved arrow indicating rotation or motion (no text or symbols visible)natural_image
Close-up of a hand operating a sewing machine needle with black adjustment knobs (no visible text or symbols)natural_image
Close-up of a hand operating a curved mechanical component, possibly a tool or device (no visible text or symbols)www.vevor.com/support
VEVOR®
TOUGH TOOLS, HALF PRICE
We continue to be committed to provide you tools with competitive price. "Save Half", "Half Price" or any other similar expressions used by us only rep estimate of savings you might benefit from buying certain tools with us compared top brands and does not necessarily mean to cover all categories of tools offered are kindly reminded to verify carefully when you are placing an order with us actually saving half in comparison with the top major brands.
VEVOR®
TOUGH TOOLS, HALF PRICE
COMMERCIAL SLICER
MODELLO: JK-220A, JK-250A, JK-300A
natural_image
Line drawing of a standard 3D printing or cutting machine with no visible text or symbolsNEED HELP? CONTACT US!
Have product questions? Need technical support? Please feel from contact us:
Technical Support and E-Warranty Certificate www.vevor.com/support
This is the original instruction, please read all manual instruction carefully before operating. VEVOR reserves a clear interpretation user manual. The appearance of the product shall be subject to product you received. Please forgive us that we won't inform you there are any technology or software updates on our product.
SOMMARIO
WARNING! Before cleaning, assembling or disassembling the MEAT SLICER, check the plug and make sure PLUG IS REMOVED FROM THE OUTLET/POWER SOURCE!

SHARP BLADE
WARNING! HANDLE CAREFULLY!
KEEP FINGERS AWAY FROM BLADE. NEVER USE FINGERS TO FEED FOOD BY HAND. ALWAYS USE THE FOOD Carriage! Always use the meat slicer completely assembled with food carriage and food pusher. Use protective cut-resistant gloves whenever handling the blade.
CONSERVARE QUESTE ISTRUZIONI
DISIMBALLAGGIO
text_image
Technical diagram of a solar power<|im_start|> Puerto Rico solar mill with numbered components for identification.text_image
Technical diagram of a mechanical device with numbered components labeled 13, 14, 15, and 16.text_image
③ Adjustment Plate ⑫ Food Pusher ⑤ Food Carriage ⑮ Thickness Adjustment KnobFigura 1
natural_image
Person operating a white industrial sewing machine with a red circle highlighting a component (no visible text or symbols)natural_image
Person in white lab coat operating a large saucer or slicing meat in a kitchen (no visible text or symbols)text_image
OFF (O) RED BUTTON ON (I) GREEN BUTTON Turn to Adjust ThicknessFigura 2
Blade Guard Knob in back of slice, turns counterclockwise to unlock Blade Guard
Figura 3
natural_image
Close-up of a white laboratory instrument with black components and a red curved arrow indicating rotation (no text or symbols)natural_image
Close-up of a hand holding a circular mechanical component with ribbed texture (no visible text or symbols)natural_image
Hand placing a pink paper on a metal plate inside a circular container (no text or symbols visible)text_image
(A) Carriage Removal Knob Tighten Bottom View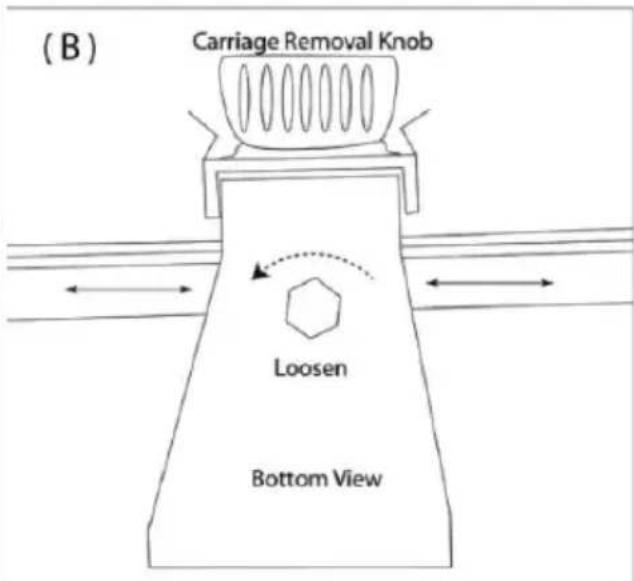
text_image
(B) Carriage Removal Knob Loosen Bottom Viewnatural_image
Hand holding a white rectangular object with a curved arrow indicating rotation or motion (no text or symbols visible)natural_image
Close-up of a hand operating a sewing machine needle with black adjustment knobs (no visible text or symbols)natural_image
Close-up of a hand operating a mechanical component with a metallic clip (no visible text or symbols)www.vevor.com/support
VEVOR®
TOUGH TOOLS, HALF PRICE
We continue to be committed to provide you tools with competitive price. "Save Half", "Half Price" or any other similar expressions used by us only rep estimate of savings you might benefit from buying certain tools with us compared top brands and does not necessarily mean to cover all categories of tools offered are kindly reminded to verify carefully when you are placing an order with us actually saving half in comparison with the top major brands.
VEVOR®
TOUGH TOOLS, HALF PRICE
COMMERCIAL SLICER
MODELO: JK-220A, JK-250A, JK-300A
natural_image
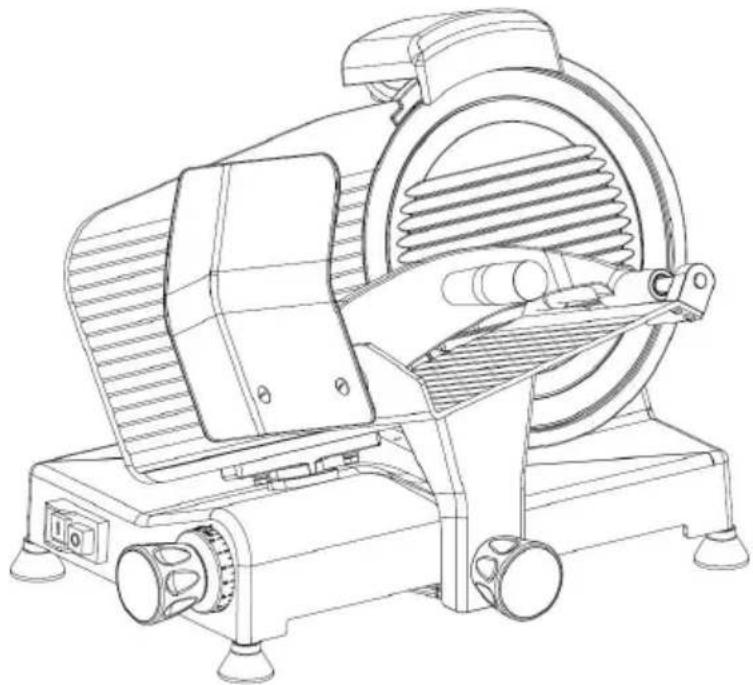
Line drawing of a standard 3D printing or cutting machine with no visible text or symbolsNEED HELP? CONTACT US!
Have product questions? Need technical support? Please feel from contact us:
Technical Support and E-Warranty Certificate www.vevor.com/support
This is the original instruction, please read all manual instruction carefully before operating. VEVOR reserves a clear interpretation user manual. The appearance of the product shall be subject to product you received. Please forgive us that we won't inform you there are any technology or software updates on our product.
TABLA DE CONTENIDO
| WARNING! Before cleaning, assembling or disassembling the MEAT SLICER, check the plug and make sure PLUG IS REMOVED FROM THE OUTLET/POWER SOURCE! |
| SHARP BLADE | WARNING! HANDLE CAREFULLY!KEEP FINGERS AWAY FROM BLADE. NEVER USE FINGERS TO FEEDFOOD BY HAND. ALWAYS USE THE FOOD Carriage!Always use the meat slicer completely assembled with food carriageand food pusher. Use protective cut-resistant gloveswhenever handling the blade. |
text_image
Technical diagram of a mechanical device with numbered parts for identificationtext_image
Technical diagram of a mechanical device with numbered components labeled 13, 14, 15, and 16.text_image
③ Adjustment Plate ⑫ Food Pusher ⑤ Food Carriage ⑮ Thickness Adjustment KnobFigura 1
natural_image
Close-up of a white microwave oven with a hand operating it, showing internal components and a red circle highlighting a small object (no text or symbols visible)natural_image
Person in white lab coat operating a large food processing machine in a kitchen setting (no visible text or symbols)text_image
OFF (O) RED BUTTON ON (I) GREEN BUTTON Turn to Adjust ThicknessFigura 2
Blade Guard Knob in back of slice, turns counterclockwise to unlock Blade Guard
Figura 3
natural_image
Close-up of a white mechanical device with black components and a red curved arrow indicating rotation (no text or symbols visible)natural_image
Close-up of a hand holding a circular mechanical component with slatted surface (no visible text or symbols)natural_image
Hand placing a pink paper sample into a metal bowl on a metal tray (no text or symbols visible)text_image
(A) Carriage Removal Knob Tighten Bottom View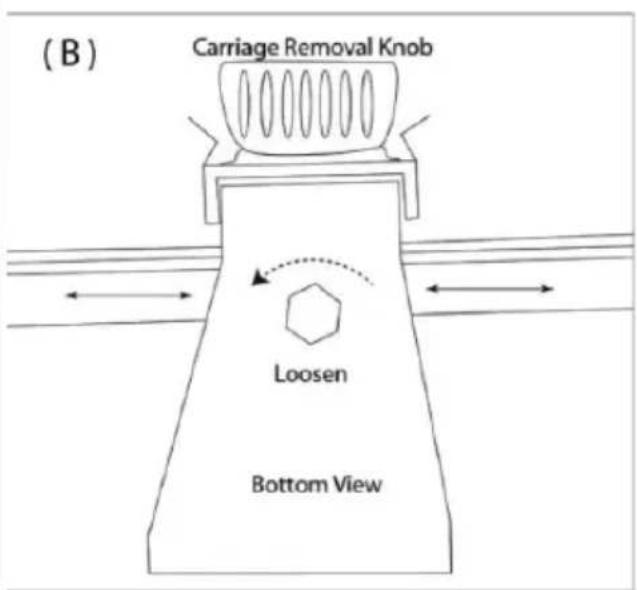
text_image
(B) Carriage Removal Knob Loosen Bottom Viewnatural_image
Hand holding a white appliance with black buttons and a curved arrow, in a kitchen setting (no visible text or symbols)natural_image
Hand holding a white rectangular object with a curved arrow indicating rotation or motion (no text or symbols visible)natural_image
Close-up of a hand operating a sewing machine needle with black adjustment knobs (no visible text or symbols)natural_image
Close-up of a hand operating a mechanical component with a metallic clip (no visible text or symbols)www.vevor.com/support
VEVOR®
TOUGH TOOLS, HALF PRICE
We continue to be committed to provide you tools with competitive price. "Save Half", "Half Price" or any other similar expressions used by us only rep estimate of savings you might benefit from buying certain tools with us compared top brands and does not necessarily mean to cover all categories of tools offered are kindly reminded to verify carefully when you are placing an order with us actually saving half in comparison with the top major brands.
VEVOR®
TOUGH TOOLS, HALF PRICE
COMMERCIAL SLICER
MODELE: JK-220A, JK-250A, JK-300A
natural_image
Line drawing of a standard 3D printing or cutting machine with no visible text or symbolsNEED HELP? CONTACT US!
Have product questions? Need technical support? Please feel from contact us:
Technical Support and E-Warranty Certificate www.vevor.com/support
This is the original instruction, please read all manual instruction carefully before operating. VEVOR reserves a clear interpretation user manual. The appearance of the product shall be subject to product you received. Please forgive us that we won't inform you there are any technology or software updates on our product.
SPIS TREŚCI
WARNING! Before cleaning, assembling or disassembling the MEAT SLICER, check the plug and make sure PLUG IS REMOVED FROM THE OUTLET/POWER SOURCE!

SHARP BLADE
WARNING! HANDLE CAREFULLY!
KEEP FINGERS AWAY FROM BLADE. NEVER USE FINGERS TO FEED FOOD BY HAND. ALWAYS USE THE FOOD Carriage! Always use the meat slicer completely assembled with food carriage and food pusher. Use protective cut-resistant gloves whenever handling the blade.
ZACHOWAJ TE INSTRUKCJE
ROZPAKOWYWANIE
text_image
Technical diagram of a mechanical device with numbered parts for identificationtext_image
Technical diagram of a mechanical device with numbered components labeled 13, 14, 15, and 16.OBSŁUGA KRAJALNICY DO MIEŻA
text_image
③ Adjustment Plate ⑫ Food Pusher ⑤ Food Carriage ⑮ Thickness Adjustment KnobRys. 1
natural_image
Close-up of a white microwave oven with a hand operating it, showing internal components and a red circle highlighting a small object (no text or symbols visible)natural_image
Person in white lab coat operating a large automated food processing machine (no visible text or symbols)text_image
OFF (O) RED BUTTON ON (I) GREEN BUTTON Turn to Adjust ThicknessRys. 2
Blade Guard Knob in back of slice, turns counterclockwise to unlock Blade Guard
Rys. 3
natural_image
Close-up of a white mechanical device with black components and a red curved arrow indicating rotation (no text or symbols)natural_image
Close-up of a hand holding a circular mechanical component with slats, no visible text or symbolsnatural_image
Hand placing a pink rectangular object onto a metallic plate inside a circular container (no text or symbols visible)text_image
(A) Carriage Removal Knob Tighten Bottom View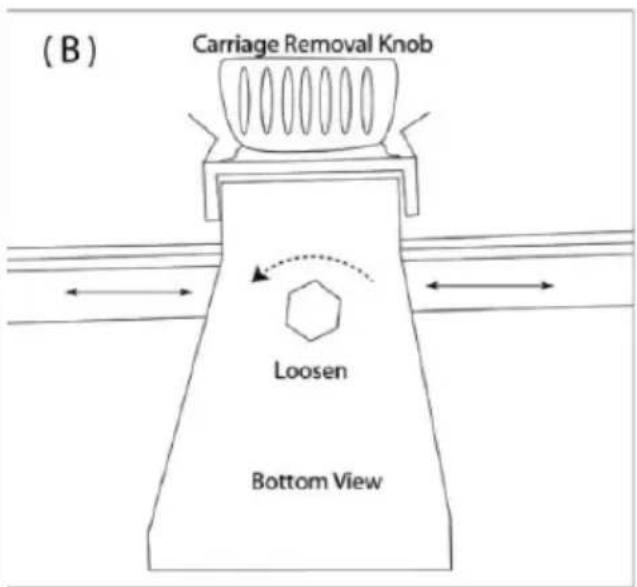
text_image
(B) Carriage Removal Knob Loosen Bottom ViewOstrzenie ostrzy
natural_image
Hand holding a white rectangular device with black buttons, mounted on a stand (no visible text or symbols)natural_image
Hand holding a white mechanical component with a curved arrow indicating rotation (no text or symbols visible)natural_image
Close-up of a hand operating a sewing machine needle, no visible text or symbolsnatural_image
Close-up of a hand operating a metallic mechanical component on a lab bench (no visible text or symbols)www.vevor.com/support
VEVOR®
TOUGH TOOLS, HALF PRICE
Technische ondersteuning en e-garantiecertificaat www.vevor.com/support
COMMERCIËLE SNIJMACHINE
MODEL: JK-220A, JK-250A, JK-300A
We continue to be committed to provide you tools with competitive price. "Save Half", "Half Price" or any other similar expressions used by us only rep estimate of savings you might benefit from buying certain tools with us compared top brands and does not necessarily mean to cover all categories of tools offered are kindly reminded to verify carefully when you are placing an order with us actually saving half in comparison with the top major brands.
VEVOR®
TOUGH TOOLS, HALF PRICE
COMMERCIAL SLICER
MODEL: JK-220A, JK-250A, JK-300A
natural_image
Line drawing of a standard 3D printing or cutting machine with no visible text or symbolsNEED HELP? CONTACT US!
Have product questions? Need technical support? Please feel from contact us:
Technical Support and E-Warranty Certificate www.vevor.com/support
This is the original instruction, please read all manual instruction carefully before operating. VEVOR reserves a clear interpretation user manual. The appearance of the product shall be subject to product you received. Please forgive us that we won't inform you there are any technology or software updates on our product.
INHOUDSOPGAVE
WARNING! Before cleaning, assembling or disassembling the MEAT SLICER, check the plug and make sure PLUG IS REMOVED FROM THE OUTLET/POWER SOURCE!

WARNING! HANDLE CAREFULLY! KEEP FINGERS AWAY FROM BLADE. NEVER USE FINGERS TO FEED FOOD BY HAND. ALWAYS USE THE FOOD Carriage! Always use the meat slicer completely assembled with food carriage and food pusher. Use protective cut-resistant gloves whenever handling the blade.
BEWAAR DEZE INSTRUCTIES
UITPAKKEN
text_image
Technical diagram of a solar power<|im_start|> Puerto Rico solar mill with numbered components for identification.text_image
Technical diagram of a mechanical device with numbered components labeled 13, 14, 15, and 16.HET BEDIENEN VAN UW VLEESSNIJMACHINE
text_image
③ Adjustment Plate ⑫ Food Pusher ⑤ Food Carriage ⑮ Thickness Adjustment KnobAfbeelding 1
natural_image
Close-up of a white microwave oven with a hand operating it, showing internal components and a red circle highlighting a small object (no text or symbols visible)natural_image
Person in white lab coat operating a large automated food processing machine (no visible text or symbols)text_image
OFF (O) RED BUTTON ON (I) GREEN BUTTON Turn to Adjust ThicknessAfbeelding 2
Blade Guard Knob in back of slice, turns counterclockwise to unlock Blade Guard
Afbeelding 3
natural_image
Close-up of a white laboratory instrument with black components and a red curved arrow indicating rotation (no text or symbols)- Maak de mesafdekking los
natural_image
Close-up of a hand holding a circular mechanical component with ribbed texture (no visible text or symbols)natural_image
Hand placing a pink paper sample into a metal bowl on a metal tray (no text or symbols visible)text_image
(A) Carriage Removal Knob Tighten Bottom View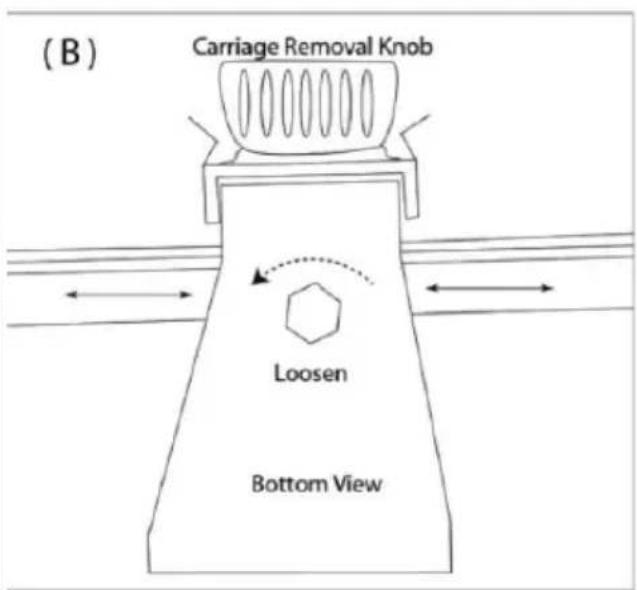
text_image
(B) Carriage Removal Knob Loosen Bottom ViewMessen slijpen
natural_image
Hand holding a white mechanical device with black adjustment knobs, no visible text or symbolsnatural_image
Hand holding a white rectangular object with a curved arrow overlay, no visible text or symbolsnatural_image
Close-up of a hand operating a sewing machine with black buttons (no visible text or symbols)natural_image
Close-up of a hand operating a curved mechanical component with a clamping tool (no visible text or symbols)www.vevor.com/support
VEVOR®
TOUGH TOOLS, HALF PRICE
We continue to be committed to provide you tools with competitive price. "Save Half", "Half Price" or any other similar expressions used by us only rep estimate of savings you might benefit from buying certain tools with us compared top brands and does not necessarily mean to cover all categories of tools offered are kindly reminded to verify carefully when you are placing an order with us actually saving half in comparison with the top major brands.
VEVOR®
TOUGH TOOLS, HALF PRICE
COMMERCIAL SLICER
MODELL: JK-220A, JK-250A, JK-300A
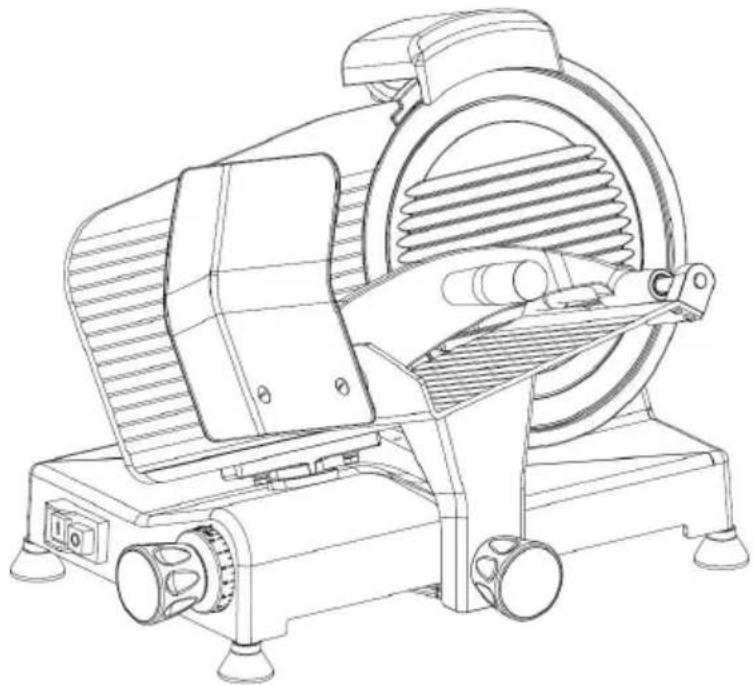
natural_image
Line drawing of a standard 3D printing or cutting machine with no visible text or symbolsNEED HELP? CONTACT US!
Have product questions? Need technical support? Please feel from contact us:
Technical Support and E-Warranty Certificate www.vevor.com/support
This is the original instruction, please read all manual instruction carefully before operating. VEVOR reserves a clear interpretation user manual. The appearance of the product shall be subject to product you received. Please forgive us that we won't inform you there are any technology or software updates on our product.
INNEHÅLLSFÖRTECKNING
 | WARNING! Before cleaning, assembling or disassembling the MEAT SLICER, check the plug and make sure PLUG IS REMOVED FROM THE OUTLET/POWER SOURCE! |
 SHARPLADE SHARPLADE | WARNING! HANDLE CAREFULLY! KEEP FINGERS AWAY FROM BLADE. NEVER USE FINGERS TO FEED FOOD BY HAND. ALWAYS USE THE FOOD Carriage! Always use the meat slicer completely assembled with food carriage and food pusher. Use protective cut-resistant gloves whenever handling the blade. |
SPARA DESSA INSTRUKTIONER
UPPACKNING
text_image
Technical diagram of a mechanical device with numbered parts for identificationtext_image
Technical diagram of a mechanical device with numbered components labeled 13, 14, 15, and 16.text_image
③ Adjustment Plate ⑫ Food Pusher ⑤ Food Carriage ⑮ Thickness Adjustment KnobBild 1
natural_image
Close-up of a white microwave oven with a hand operating it, showing internal components and a red circle highlighting a small object (no text or symbols visible)natural_image
Person in white lab coat operating a large kitchen grater (no visible text or symbols)text_image
OFF (O) RED BUTTON ON (I) GREEN BUTTON Turn to Adjust ThicknessBild 2
natural_image
Technical line drawing of a mechanical device with a red curved arrow indicating rotation or motion (no text or symbols present)Blade Guard Knob in back of slice, turns counterclockwise to unlock Blade Guard
text_image
Remove Blade GuardBild 3
natural_image
Close-up of a white mechanical device with black components and a red curved arrow indicating rotation (no text or symbols)- Lossa bladskyddet
natural_image
Close-up of a hand holding a circular mechanical component with slats, no visible text or symbols- Torka av bladet med en trasa
natural_image
Hand placing a red paper airplane into a metal pan with visible dust and spray (no text or symbols)text_image
(A) Carriage Removal Knob Tighten Bottom View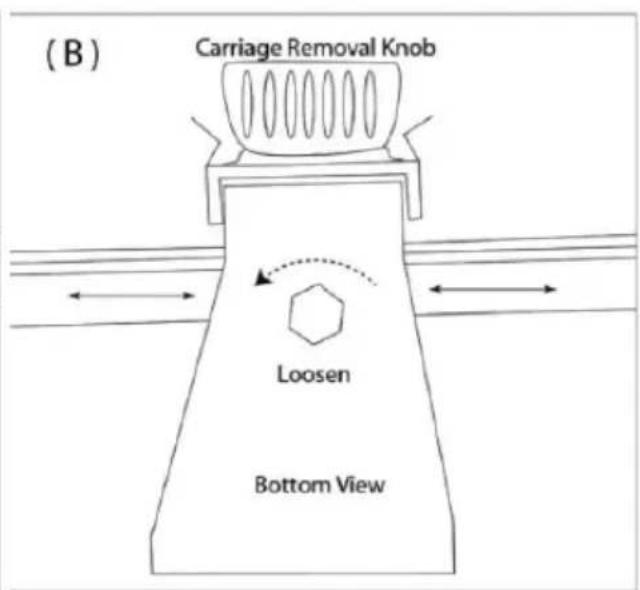
text_image
(B) Carriage Removal Knob Loosen Bottom ViewKnivslipning
natural_image
Hand holding a white rectangular device with black connectors, no visible text or symbols- Rotera 180° medurs
natural_image
Hand holding a white mechanical component with a curved arrow indicating rotation (no text or symbols visible)natural_image
Close-up of a hand operating a sewing machine needle with black adjustment knobs (no visible text or symbols)natural_image
Close-up of a hand operating a curved mechanical component, possibly a tool or device (no visible text or symbols)www.vevor.com/support