JH-120Y - Air Conditioning Vevor - Free user manual and instructions
Find the device manual for free JH-120Y Vevor in PDF.

| Brand | Vevor |
| Model | JH-120Y |
| Product Type | Portable Evaporative Air Cooler |
| Voltage (EU) | 220-240 V ~ 50 Hz |
| Voltage (North America) | 120 V ~ 60 Hz |
| Power | 60 W |
| Use Area | EU (220-240 V) / NA (120 V) |
| Main Functions | Cooling, humidification, ventilation |
| Fan Speeds | 3 (Low, Medium, High) |
| Wind Modes | Normal, Natural, Sleep |
| Oscillation | Yes, left-right |
| Timer | 1 to 12 hours |
| Water Tank | With Max/Min level indicator |
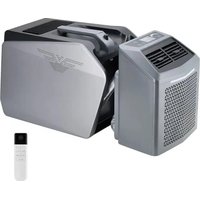
| Ice Packs Included | 2 refrigerant gel packs |
| Water Pump | Removable installation for water circulation |
| Air Filter | Washable, regular cleaning recommended |
| Humid Curtain (pad) | Washable, replace if worn |
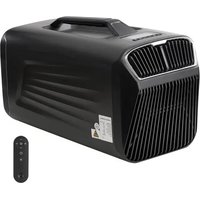
| Controls | Electronic touch panel and remote control |
| Safety | Auto shut-off if tank empty (Cool function) |
| Certifications | CE, FCC |
| Maintenance | Clean filter, humid curtain and tank regularly |
| Included Accessories | Remote control, ice packs, water pump (disassembled) |
| Country of Manufacture | China (Shanghai) |
Frequently Asked Questions - JH-120Y Vevor
User questions about JH-120Y Vevor
0 question about this device. Answer the ones you know or ask your own.
Ask a new question about this device
Download the instructions for your Air Conditioning in PDF format for free! Find your manual JH-120Y - Vevor and take your electronic device back in hand. On this page are published all the documents necessary for the use of your device. JH-120Y by Vevor.
USER MANUAL JH-120Y Vevor
Technical Support and E-Warranty Certificate www.vevor.com/support
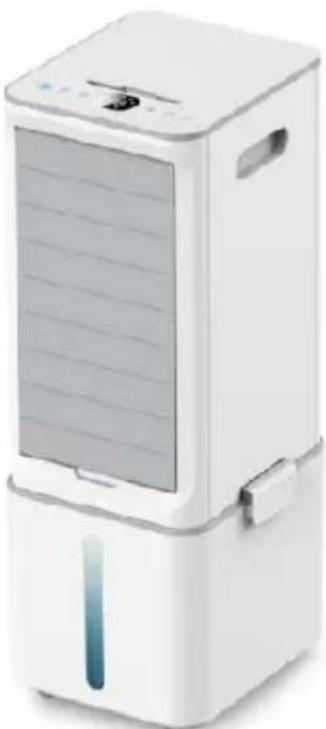
PORTABLE EVAPORATIVE COOLER
MODEL: JH-120Y
We continue to be committed to provide you tools with competitive price. "Save Half", "Half Price" or any other similar expressions used by us only represents an estimate of savings you might benefit from buying certain tools with us compared to the major top brands and does not necessarily mean to co all categories of tools offered by us. You are kindly reminded to verify carefully when you are placing an order with us if you are actually Saving Half in comparison with the top major brands.
MODEL: JH-120Y
NEED HELP? CONTACT US!
Have product questions? Need technical support? Please feel free to contact us:
Technical Support and E-Warranty Certificate www.vevor.com/support
This is the original instruction, please read all manual instructions carefully before operating. VEVOR reserves a clear interpretation of user manual. The appearance of the product shall be subject to product you received. Please forgive us that we won't inform you as there are any technology or software updates on our product.
IMPORTANT SAFEGUARDS

WARNING: Read and understand this entire manual before
operating or servicing this product. Failure to follow these warnings and instructions can cause personal injury or damage to valuable property. Avoid children using the product. And this product is not a toy. Do not children to play.
CORRECT DISPOSAL
This product is subject to the provision of european Directive 2012/19. The symbol showing a wheelie bin crossed through indicates that the product requires separate refuse collection in the European Union. This applies to the product and all accessories marked with this symbol. Products marked as such may not be discarded with normal domestic waste, but must be taken to a collection point for recycling electrical and electronic devices.
FCC Information:
CAUTION: Changes or modifications not expressly approved by the pa responsible for compliance could void the user's authority to operate t equipment!
This device complies with Part 15 of the FCC Rules. Operation is such the following two conditions:
1) This product may cause harmful interference.
2) This product must accept any interference received, including interference that may cause undesired operation.
WARNING: Changes or modifications to this product not expressly
approved by the party.responsible for compliance could void the user's authority to operate the product.
Note: This product has been tested and found to comply with the lin a Class B digital device pursuant to Part 15 of the FCC Rules, The are designed to provide reasonable protection against harmful interferer in a residential installation.
This product generates, uses and can radiate radio frequency energy, if not installed and used in accordance with the instructions, may cause harmful interference to radio communications. However, there is no guarantee that interference will not occur in a particular installation. If product does cause harmful interference to radio or television
reception, which can be determined by turning the product off and on, user is encouraged to try to correct the interference by one or more following measures.
Reorient or relocate the receiving antenna.
- Increase the distance between the product and receiver.
- Connect the product to an outlet on a circuit different from that the receiver is connected.
- Consult the dealer or an experienced radio/TV technician forassis
SETUP precautions
- Do not let the wind inlet be too close to the wall, curtain and so will block the air flow and affect the wind effect.
- Using it the first time, please check if your voltage is accord with nameplate for air cooler.
- Before use, please check if the power cord and plug are breakage let the power plug twisted and turned in order to avoid poor contact.
- If the power cord is damaged, it must be replaced by the manufacturer.
service agent or similarly qualified persons in order to a hazard.
- Do not cover the outlet and keep the air fan away from the socket.
must choose the socket which it is up to more than 10A current and use the same socket with other machine. - When air cooler is working, absolutely forbid hand or foreign body inserting the network ( specially pay attention to children).
- This appliance can be used by children aged from 8 years and all persons with reduced physical, sensory or mental capabilities or lack of experience and knowledge if they have been given supervision or instruction concerning use of the appliance in a safe way and unders the hazards involved. Children shall not play with the appliance. Clear and user maintenance shall not be made by children without supervisi
- Please turn off the power before pulling out the plug. Do not pull power cord and do pull the power plug in order to avoid short-circuit electric shock.
- Do not pull the power plug by wet hand in order to avoid the ris shock.
- Please pull the plug away from the socket when you do not use
- Please do not put the working air cooler on the declining position smooth position.
- Please do not work air cooler when it is outdoors, or around bath shower, or pool).
- At anytime, the display of water level of water tank must be less "Max". While the display of water level of water tank must be more "Min." when air cooler is with cooling (humidifying) function.
- After water tank is injected fair water, please not lean (or bump) a when remove air cooler.
-
Please do not put anything on air cooler.
-
Mustn't cover the outlet and inlet of air cooler.
TECHNICAL PARAMETER
| Model Number | Voltage/Frequency | Power | Area |
| JH-120Y | AC120V/60Hz | 60W | NA |
| JH-120Y | AC220-240V/50Hz | 60W | EU |
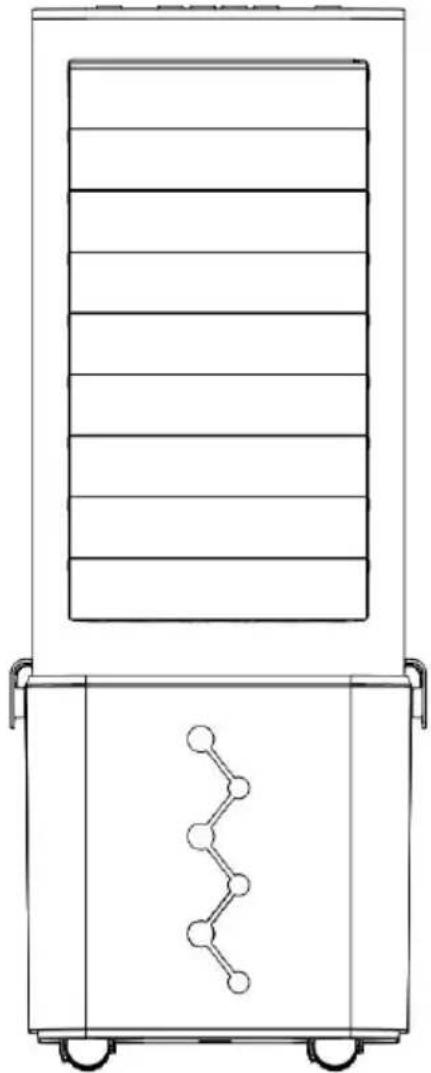
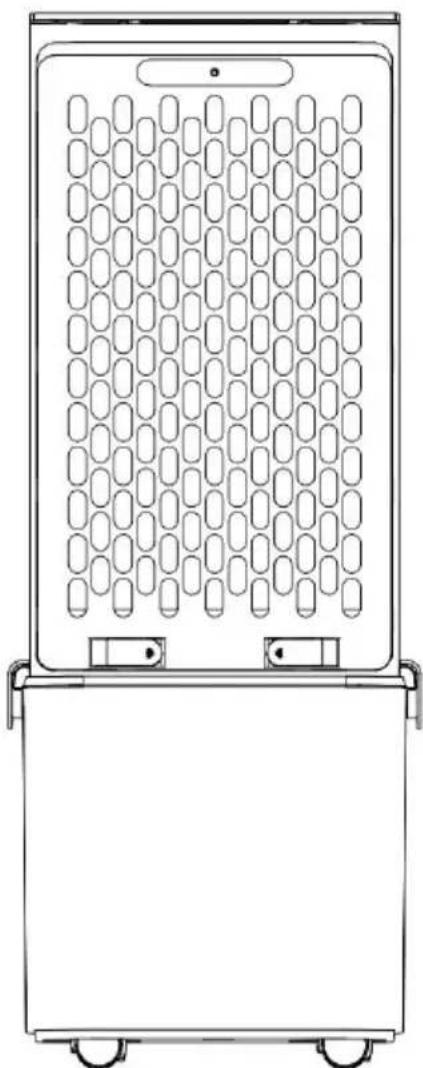
PrDUCT DIAGRAM
- Product overall appearance
2. Electronic touch function control panel
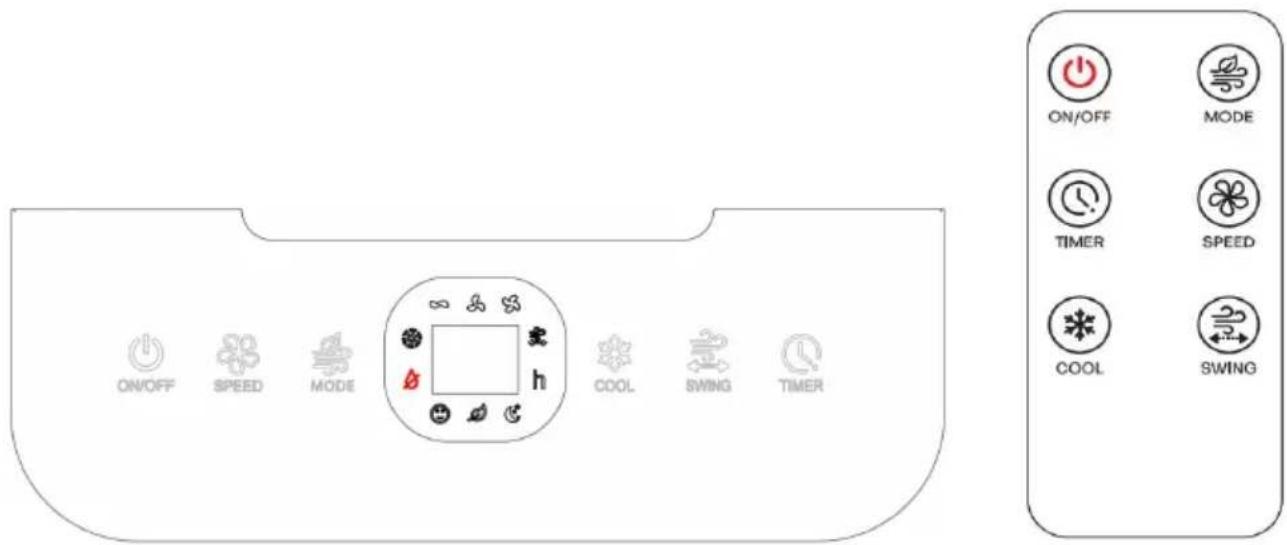
Control panel Remote control
The remote control key and the control panel key function is identical icon and the operation method are identical
3. ON/OFF (Speed) button
-
After plug the power cord, the buzzer responds a sound, Power light indicator light is on. Other icon buttons When touched, the icon lights briefly and then automatically turns off.
-
Touch this icon button of “ ”, air cooler is working with low speed The icon “ ” lights up, And work in normal “ ” wind mode and amt temperature display.
-
Touch this icon button of “ ”. air cooler is working with medium s The icon “ ” lights up.
-
Touch this icon button of “ ”. air cooler is working with high speed icon “ ” lights up.
-
Touch this icon button of “ ”, The air cooler can be cycled between speed-medium speed-high speed.
4.Cool button
- Touch this icon button of “ ”, the wind will be cooled if you have ice box, The cold air indicator icon “ ”lights up.

Warning: When the water level of the water tank is too low c
is no water, the cold air function is prohibited.
NEVER activate this function without water in the tank.
5. Swing button
- Touch this icon button of “ ”, the blades will be left and right swi The swing indicator icon “ ” lights up.
6. Timer button
- Touch this icon button of “ ”, set the time by pressing the timer I to select a desired timing level, the range is between 1-12 hours, the middle digital display has the corresponding digital display,The
corresponding indicator icon” lights up.
7. Mode button
- Touch this icon button of “ ”, you can choose your desired wind in
as per the following sequence: Normal -Natural -Sleep
Warning: During the refrigeration process of the upper water cooling fan, it is forbidden to lift the handle to move the product, which may cause it to enter the electrical components, damage the product or cause dangerous situations
Installation GUIDELINE
Water Pump, water pump knob installation diagram
- Take out the water pump knob and water pump hand screw from accessories, put the water pump knob on the corresponding installation column of the water tank as shown in Figure 1 below, and then put hand screw through the knob and tighten the screw clockwise.
- The hand-screw locking effect is shown in Figure 2 below.
- Then snap the water pump into the corresponding slot of the water as shown in Figure 3 below, and pay attention to the direction.
4.Finally, as shown in Figure 4 below, rotate the water pump knob to the water pump, and then the installation can be completed.
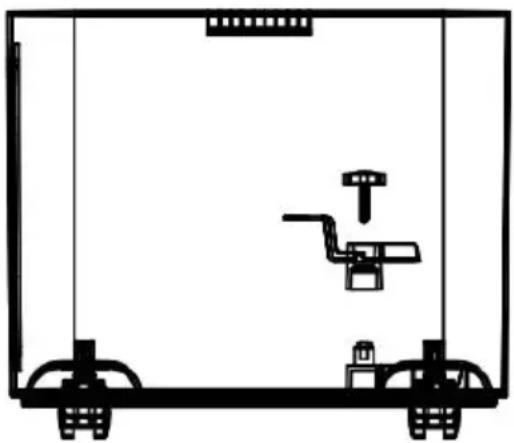
Figure 1
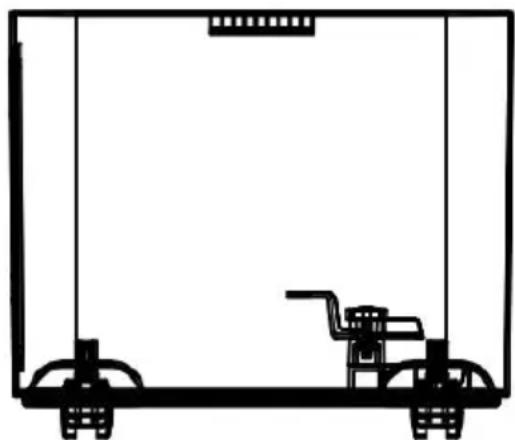
Figure 2
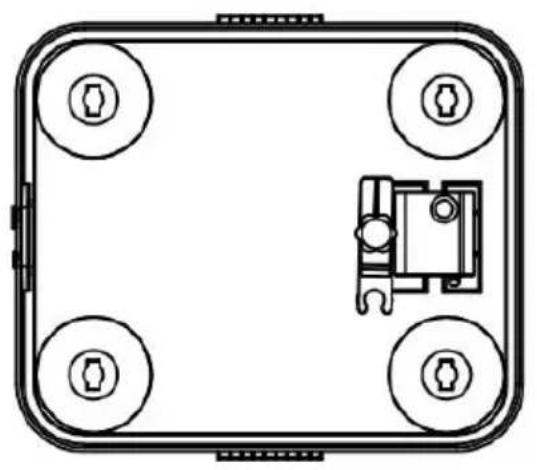
Figure 3
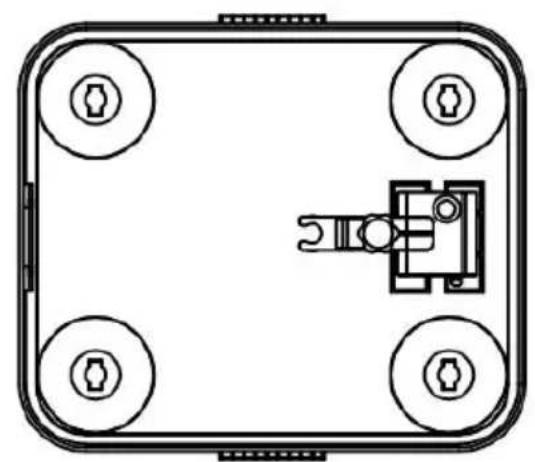
Figure 4
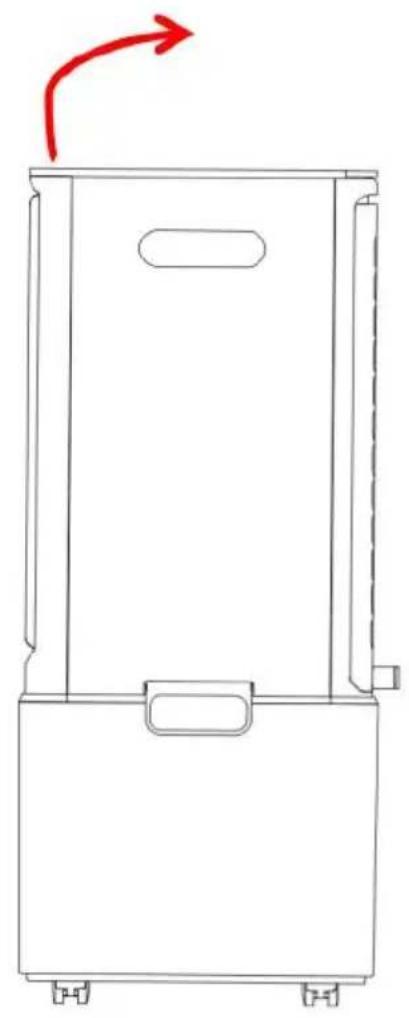
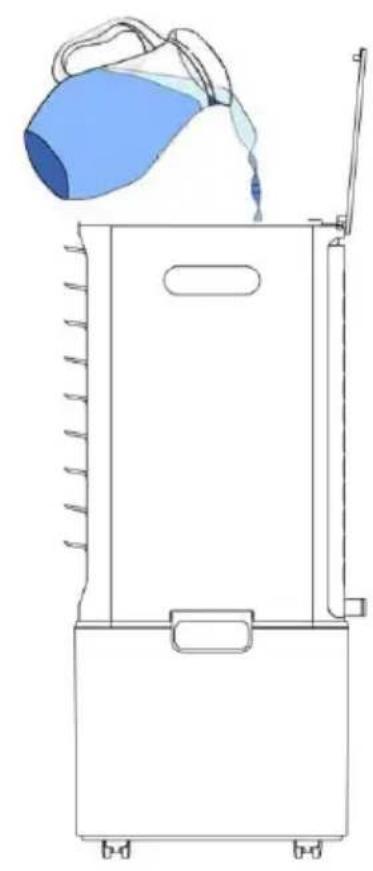
How to inject water in the water tank (see picture below)
-
First lift up the 2 side buckles on the water tank behind the cooler, and then remove the whole body from the water tank. Can take the water tank separately and add water to the water or use a container to add water to the water tank, and then in after adding water.
-
Add water from the upper water tank and open the cover of upper water tank; add water directly from the upper water tank; careful not to add water too fast in the process of adding water not to slow down the water, causing the water to overflow the external electrical components of the upper water tank, resulting dangerous situation. Please note the display of water level when injecting water.
-
The water level of water tank must be less than "max." when injected water.
-
The water level of water tank must be more than "min." when air cool with cooling and humidify.
-
The frozen ice boxes (or ices) are put into water tank when the ice is to get the cooler wind.
Warning: The water level of water tank is less than "MAX"after ice I (or ices) is put water tank.

How to use ice boxes
Ice box can store cool and slowly absorb the air cooling from water ice boxes can make the temperature of water in the water tank less of the surrounding. So Air cooler with frozen ice boxes can blow the wind.
- Put ice boxes in fridge. After ice boxes are frozen successfully, take boxes out the fridge.
- Remove the gusset plate of the water tank and remove the body, the frozen ice box into the water tank.
- Open the flip plate of the upper water tank and put the ice crystal directly into the upper water tank.
- One piece air cooler is with two pieces ice boxes in order that the can make them continuously.
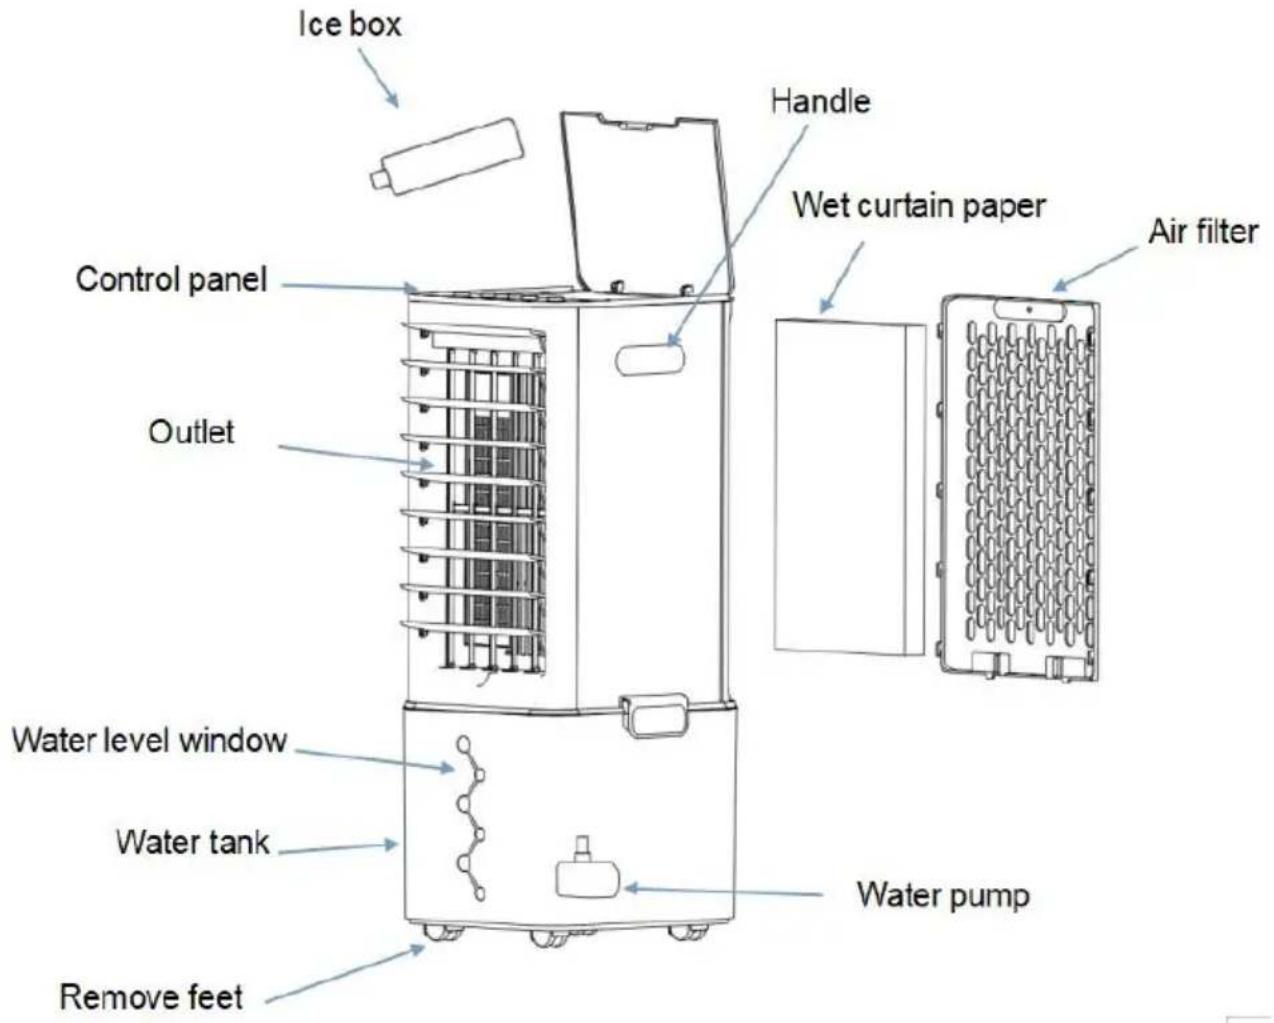
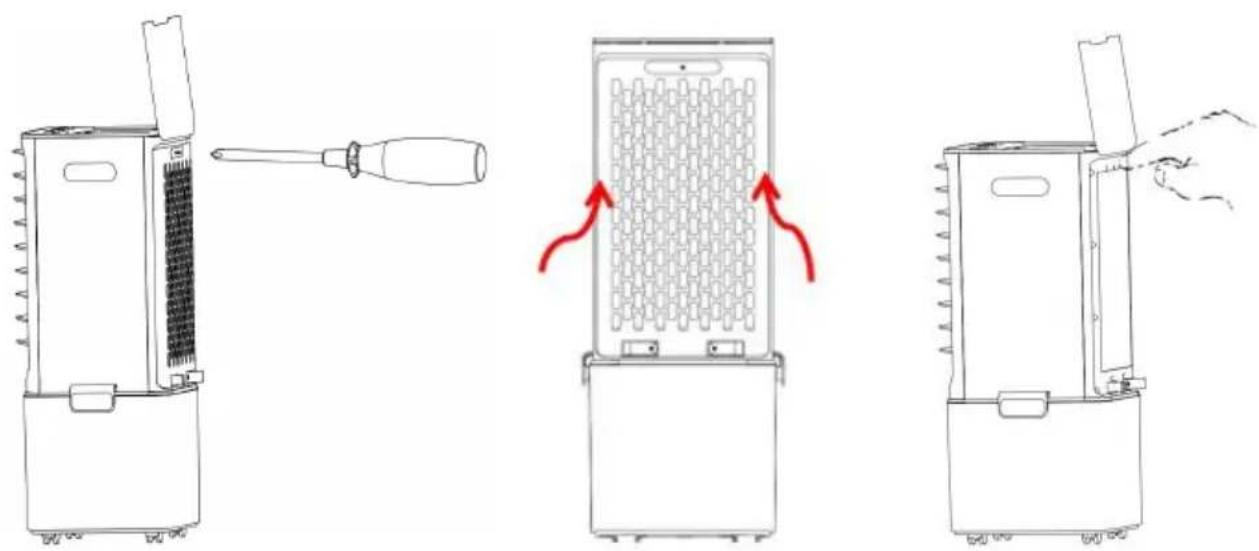
Figure 1 Figure 2 Figure 3
-
How to take out the water curtain and water tank :
-
Use a screwdriver to unscrew the fixing screw of the air inlet filte
- Slide the filter up from the body, remove the buckle and take out inlet filter.
-
Two fingers are buckled from the upper part of the wet curtain, at take out the wet curtain downwards and backwards.
-
Clean air filter:
Pull off the plug, and pull the holder of air filter by hand while thetook apart .and then clean air filter by neutral cleaner and soft brushthen clean it by clean fair water , later take the air filter back air c
Clean the wet curtain paper:
Pull off the plug, and take the air filter off, and take the wet curtainair out air cooler. And clean the wet curtain paper by fair water after cl with cleaner and soft brush, later put back air cooler.
Important:
In order to avoid leak, wet curtain paper must be installed smoothly.
- Clean water tank:
Pull off the plug, and take the water tank out while wipe off much of the water tank by towel with little cleaner, and then clean water tank water, and later put back air cooler.
- Clean the housing :
Wipe off the housing by neutral cleaner and soft cloth.
Important:
When clean the air cooler, the client must pull off the plug and cut power while any part of control panel cannot be into water.

Manufacturer: Shanghaiuxinmuyeyouxianggsi
Address: Shuangchenglu 803nong11hao1602A-1609shi, baoshanqu, shanghai 200000 CN.
Imported to AUS: SIHAO PTY LTD. 1 ROKEVA STREETEASTWOOD NSW 2122 Australia
Imported to USA: Sanven Technology Ltd. Suite 250, 9166 Anaheim Place, Rancho Cucamonga, CA 91730

YH CONSULTING LIMITED.
C/O YH Consulting Limited Office 147,
Centurion House, London Road,
Staines-upon-Thames, Surrey, TW18 4AX
E-CrossStu GmbH
Mainzer Landstr.69,
60329 Frankfurt am Main.
VEVOR
TOUGH TOOLS, HALF PRICE
Technical Support and E-Warranty Certificate www.vevor.com/support
VEVOR®
TOUGH TOOLS, HALF PRICE
Assistance technique et certificat de garantie electronique www.vevor.com/support
REFROIDISSEUR À ÉVAPORATION PORTABLE
MODELE:JH-120Y
DIAGRAMME DU PRODUIT
A/S YH Consulting Limited Bureau 147,
Centurion House, London Road,
Staines-upon-Thames, Surrey, TW18 4AX
E-CrossStu GmbH
Mainzer Landstr.69,
C/O YH Consulting Limited Office 147,
Centurion House, London Road,
Staines-upon-Thames, Surrey, TW18 4AX

E-CrossStu GmbH
Mainzer Landstr.69,
60329 Frankfurt am Main.
VEVOR
TOUGH TOOLS, HALF PRICE
Importato in AUS: SIHAO PTY LTD. 1 ROKEVA STREETEASTWOOD
Nuovo Galles del Sud 2122 Australia
C/O YH Consulting Limited Ufficio 147,
Centurion House, London Road,
Staines-upon-Thames, Surrey, TW18 4AX

E-CrossStu GmbH
Mainzer Landstr.69,
60329 FrancofortesulMeno.
VEVOR
TOUGH TOOLS, HALF PRICE
DIAGRAMA DEL PRODUCTO
Centurion House, London Road,
Staines-upon-Thames, Surrey, TW18 4AX
E-CrossStu GmbH
Mainzer Landstr.69,
C/O YH Consulting Limited Biuro 147,
Centurion House, London Road,
Staines-upon-Thames, Surrey, TW18 4AX
E-CrossStu GmbH
Mainzer Landstr.69,
60329 Frankfurt nad Menem.
VEVOR
TOUGH TOOLS, HALF PRICE
HULP NODIG? NEEM CONTACT MET ONS OP!
C/O YH Consulting Limited Kantoor 147, Centurion House, London Road, Staines-upon-Thames, Surrey, TW18 4AX

garantiecertificaat www.vevor.com/support
VEVOR®
TOUGH TOOLS, HALF PRICE
RIKTLINJER for installation
C/O YH Consulting Limited Office 147,
Centurion House, London Road,
Staines-upon-Thames, Surrey, TW18 4AX

E-CrossStu GmbH
Mainzer Landstr.69,
60329 Frankfurt am Main.
VEVOR
TOUGH TOOLS, HALF PRICE