Comfortcam 99512 - Action camera TREBS - Free user manual and instructions
Find the device manual for free Comfortcam 99512 TREBS in PDF.


User questions about Comfortcam 99512 TREBS
0 question about this device. Answer the ones you know or ask your own.
Ask a new question about this device
Download the instructions for your Action camera in PDF format for free! Find your manual Comfortcam 99512 - TREBS and take your electronic device back in hand. On this page are published all the documents necessary for the use of your device. Comfortcam 99512 by TREBS.
USER MANUAL Comfortcam 99512 TREBS
natural_image
Black and white photo of a camera lens mounted on a base (no visible text or symbols)Handleiding adventure video camera
text_image
Technical diagram of a device with numbered parts for identification and assembly reference.text_image
Exploded diagram of electronic components with numbered parts and labeled parts, including cable, motor, resistor, and open book.natural_image
Diagram of a hand holding a device with directional arrows indicating movement or force (no text or symbols present)Declaration of Conformity:
We, Trebs BV, declare under our sole responsibility that this product is in conformity with the essential requirements and other relevant requirements of the R&TTE Directive (1999/5/EC).
The product is compliant with the following standards and/or other normative documents:
EN55022: 2006 + A1: 2007
EN61000-3-2: 2006 + A 2:2009
EN 61000-3-3: 2008
EN55024: 1998 + A2:2003
Trebs BV.
The Netherlands
Website: www.trebs.nl
email: info@trebs.nl
CE
FR) Sommaire
text_image
Diagram illustrating the assembly of a device with numbered parts including cable, connector, and open book.text_image
Technical diagram of a device with numbered parts for identification and assembly reference.Declaration of Conformity:
We, Trebs BV, declare under our sole responsibility that this product is in conformity with the essential requirements and other relevant requirements of the R&TTE Directive (1999/5/EC).
The product is compliant with the following standards and/or other normative documents:
EN55022: 2006 + A1: 2007
EN61000-3-2: 2006 + A 2:2009
EN 61000-3-3: 2008
EN55024: 1998 + A2:2003
Trebs BV.
The Netherlands
Website: www.trebs.nl
email: info@trebs.nl
CE
Inhalt
text_image
Technical diagram of a device with numbered parts for identification and assembly reference.text_image
Technical diagram showing exploded view of mechanical components with numbered parts and labeled partsKamerahalterung
natural_image
Two-panel line drawing showing a hand holding a tool and another person working on a table with tools (no text or symbols)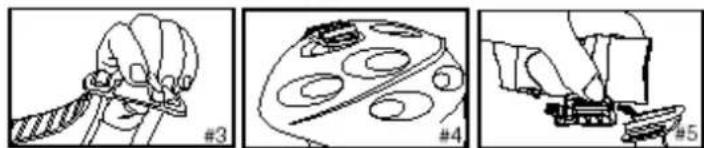
text_image
#3 #4 #5Declaration of Conformity:
We, Trebs BV, declare under our sole responsibility that this product is in conformity with the essential requirements and other relevant requirements of the R&TTE Directive (1999/5/EC). The product is compliant with the following standards and/or other normative documents:
EN55022: 2006 + A1: 2007
EN61000-3-2: 2006 + A 2:2009
EN 61000-3-3: 2008
EN55024: 1998 + A2:2003
Trebs BV.
The Netherlands
Website: www.trebs.nl
email: info@trebs.nl
CE
Contents
Camera Precaution......
Technical Specification......
Camera Description......
Camera Mounting Description......
Battery Installation......
Turning On/Off the Camera......
Taking Video Footage......
Menu Settings......
* 720P/VGA Shifting
* Deleting video footage ....
* Time setting set the Year/Month/Date/Hour/Minute......
Playing back video footage on TV......
Connecting to PC
PC CAM......
Troubleshooting......
GB) Camera Precaution
Notice the following guidelines when using your camera
* You should avoid dropping the camera.
* For your safety, do not press the buttons on the camera during sports activities.
* Do not place the camera in a damp or dusty location for extended periods of time.
* Do not leave the camera in places exposed to extremely high temperatures, such as under direct sunlight for extended periods of time. This may affect the camera housing and internal components.
* Clean the lens with a blower (a small device with a rubber bulb attached to one end that you pump to produce a stream of air out the other end), or wipe it with a soft cloth in a spiraling motion to remove fingerprints or dust.
* We recommend using Alkaline batteries in temperatures between 0°C to 40°C.
* Turn off the camera before removing the batteries and the memory card.
The card and the data may be damaged if the memory card is inserted or removed while the camera is still on.
* Remove the batteries and memory card before storing the camera for long periods of time, then keep it in a well-ventilated place to prevent mould.
Technical Specification
* Sensor resolution 1.3 Mega pixels CMOS
* SD Memory Card slot support up to 32 GB (1 GB included)
* Movie storage:
720P 1280 x 7200 pixels (30 FPS)
VGA 640 x 480 pixels (30 FPS)
* Movie format AVI
* USB
* Battery 2 x AA alkaline batteries
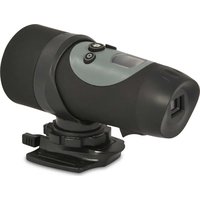
Camera Description
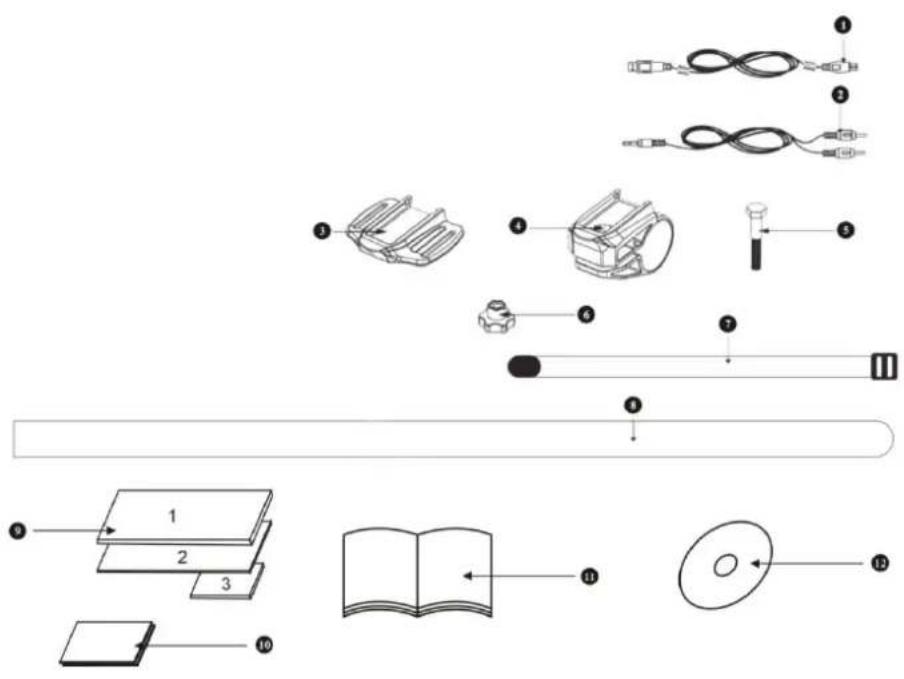
In this set also a car mouth is included which is not showed in below drawing.
Camera Accessories:
- USB cable
- AV cable
- Helmet grip
- Handlebar grip
- bolt
- Screw cap
- Short Velcro strap
- Rubber strap
- rubber pad
- Velcro
11.User manual - Driver Disk
text_image
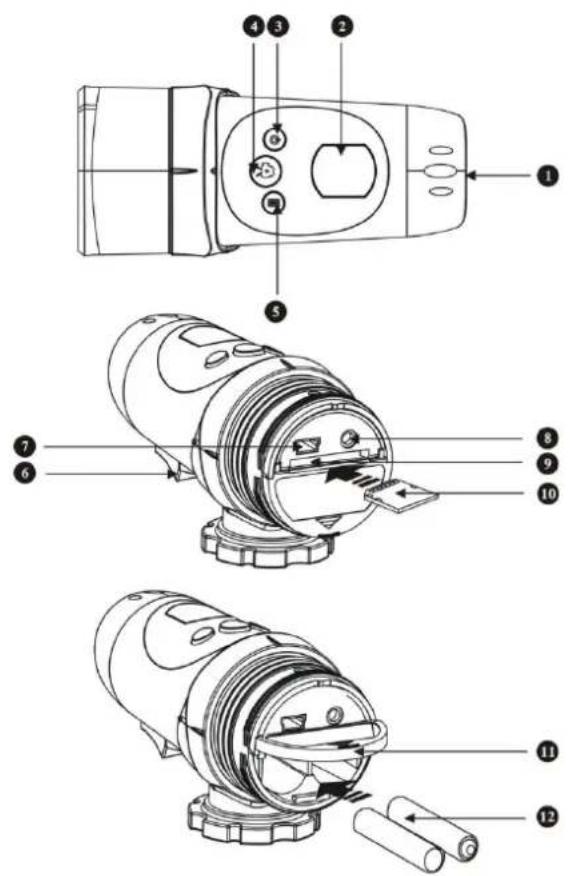
Exploded diagram of electronic components with numbered parts and labeled parts, including cable, switch, lens, and open book.Camera Interface
- Lens
- LCD display
- Power button
- Shutter button
- Menu button
- Microphone
- USB port
- AV port
- SD card slot
- SD card (not included)
- Battery door
- Batteries (not included)
text_image
Technical diagram of a device with numbered parts, showing exploded and assembled views of the device.Camera Mounting Description
The camera can be mounted in a number of ways
Using the straps provided. Please follow the
methods of mounting as suggested below:
Fixing the position of the camera
a) Turn it anti-clockwise to screw the camera tight and fix it into position.
b) Turn it clockwise to unscrew the camera.
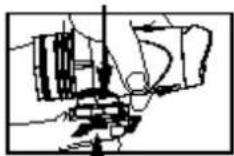
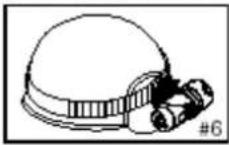
Mounting the camera onto the helmet using the silicon rubber strap
1+2. Thread the silicon rubber strap through the helmet grip.
- Mount the helmet grip to the helmet using the silicon rubber strap.
4+5. Slide the camera into the helmet grip. Turn it anti-clockwise
- Adjust the angle of the camera making sure it's tight.
To avoid damaging the camera, the mount lock at the base must be loosened before twisting the camera.
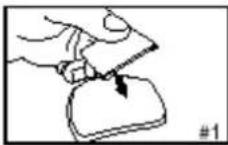
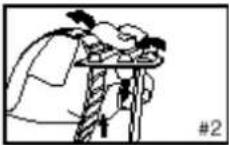
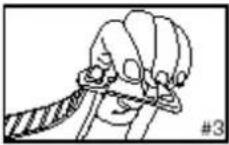
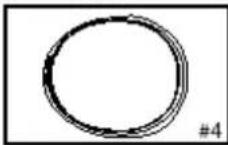
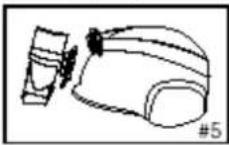
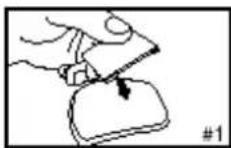
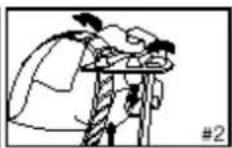
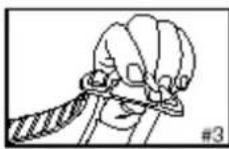
Mounting the camera using the Velcro strap:
1+2. Place the helmet grip on the helmet, and thread the Velcro strap through the helmet grip.
-
Secure the Velcro strap by fastening it through the helmet vents.
-
Slide the camera into the helmet grip, and adjust the angle of the camera making sure it's tight.
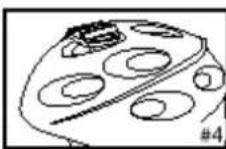
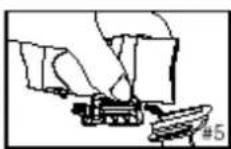
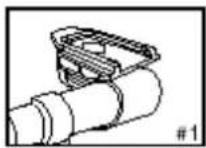
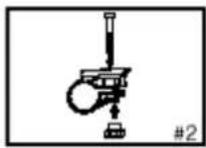
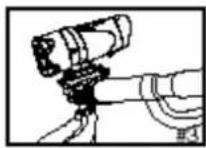
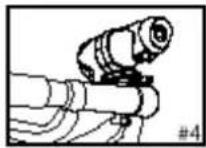
Mounting the camera using the handlebar grip:
- Place the handlebar grip on the handlebar.
- Add the screw and nut to hold the handlebar grip securely.
-
Slide the camera into the handlebar grip and make sure the handlebar grip is locked with the camera.
-
Adjust the angle of the camera.
Mount camera with car holder:
Mount the camera with a suction cup on the windscreen of the car.
Battery Installation
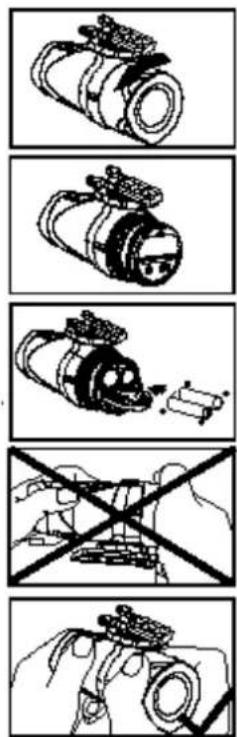
- Unscrew the cover at the end of the unit.
-
Place your finger on the 'lip', which is on the bottom half of the rear of the unit, and open the battery slot door.
-
Insert 2 × AAalkaline batteries into the battery slot according to the polarity direction as shown.
-
Close the battery slot door and screw on the end of unit cove
Important: When the battery is low, the low battery icon will appear on the LCD display.
Always upload video footage to your PC prior to replacing batteries to avoid memory loss
Note:
a) Do not mix old and new batteries together. Replace both batteries at the same time.
b) Remove the batteries if the camera is not going to be used for long periods of time. This will save battery life.
c) Do not mix alkaline, standard (carbon-zinc) or rechargeable batteries (nickel-cadmium). Only batteries of the same or equivalent type as recommended are to be used together.
d) Non-rechargeable batteries are not to be recharged.
Turning the Camera On
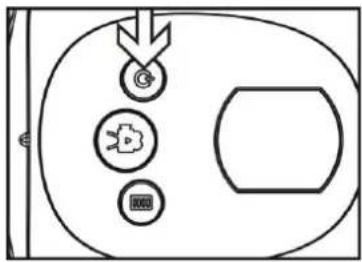
Press and hold the power ⏻ button, The LCD display will light up (one beeping sounds). It enters video mode, The time displayed on screen is the remaining time for taking video, the first two numbers display hours, the last two numbers display minutes.
Turning the Camera Off
Press and hold the power button for 2 seconds, The LCD display OFF (you will hear beeping sounds), and then the LCD display will turn off after 1 second.
flowchart
graph TD
    A["Start"] --> B{Decision Point}
    B -->|Yes| C["Process Step"]
    B -->|No| D["Feedback Loop"]
    C --> E["End"]
Taking Video Footage
- Aim at the subject you want to shoot.
- Press the 'Shutter button' to start recording.
The LCD will display the time has been recorded.
The first two digits are minutes; the last two digits are seconds. - Press the Shutter button' again to stop recording, after which the video remaining time will be shown
(The remaining time is an estimate only).
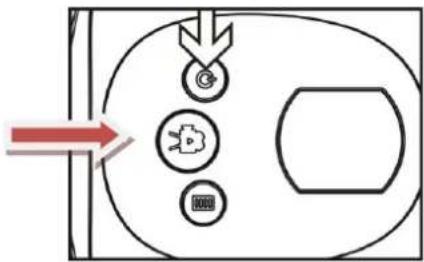
flowchart
graph TD
    A["Start"] --> B{Process Step}
    B --> C["Step 1"]
    B --> D["Step 2"]
    B --> E["Step 3"]
Remark: The system will stop taking video if the built in memory or external memory is full, the LCD screen will display "Full".
Menu Setting
720P/VGA icon Shifting (Video resolution setting)
Press and hold the Menu button for 2 seconds, When the 720P icon 1280 x 720 flickers
(at the top of the LCD display), press the Shutter button once to shift to VGA 640 x 480, then press the menu button to confirm.
To shift from VGA to 720P, press the menu button for 2 seconds, when VGA icon flickers, press the Shutter button once to shift to 720P, then press the menu button to confirm.
Note:
- Default resolution is 1280 x 720 (720P ).
Deleting video footage
Press the Menu button for 2 seconds to enter into setting, the 720P icon flicks, press the
shutter button, it come out VGA setting, then press again the shutter button to enter into the secondary menu, the letter "D" (mean delete) exist on the LCD screen, the first item display "NO", means delete no file, press the shutter button again, the second item display "ONE", press the menu button to delete the last recorded video footage. Press again the shutter button, the third item display "ALL", press again the menu button to delete all the video footage. To quit the menu and return to video mode, press again the shutter button.
Time Setting
Press the Menu for about 2 seconds to enter setting, the 720P icon flicks, press the
shutter button repeatedly after it exists VGA“, “NO”, “ONE”, when the icon “ALL” appear, long press the menu button to enter time setting,
Set the Year
- the small ico "Y" flicker, meantime, The 3rd digit of Year flicker, Press the 'shutter' button to adjust number(20X1-20X9), then press the menu button to confirm, after which the last digit of the year flick, press the 'shutter' button to adjust the number(201X-209X), then press the menu button to confirm.
Set the Month
- After setting the year, the small icon "M" flicks on LCD, meantime the second digit of Month flick, press the 'shutter' button to adjust number (1-12), then press the menu button to confirm.
Set the Date
- After setting the Month, the small icon "D" flicks on LCD, meantime the second digit of date flick, press the 'shutter' button to adjust number (01-31), then press the menu button to confirm.
Set the Hour
- After setting the Date, the small icon "H" flicker, meantime, The first digit of hour flicker, press the 'shutter' button to adjust number(01-24), then press the menu button to confirm
Set the minute
- After setting the hour, the small icon "M" flicker, meantime, The first digit of minute flicker, press the 'shutter' button to adjust number(01-59), then press the menu button to confirm When time setting finishes, press the menu button to return to video mode.
Remark: If you want to skip the year, months, or other settings, press the menu to enter into next setting: e.g. when set the year, if there is no need setting the third digit, press the menu button once, then it will skip to next setting the forth digit of year.
Playing back video footage on TV
-
Connect the Action Cam to TV by using the AV cable.
-
Turn the TV and Action Cam on.
-
"AU" appears on the Action Cam LCD. TV is under the playback status, press the menu button on camera you could select next video footage, and press the "shutter" button to begin to playback the video, press the "shutter" button to pause playback, to continuous video playing press the "shutter" button again.
During video playing, short press the menu button will stop the playing. Then long press the menu button it will delete the current video footage. When there is no files in camera memory, TV will display "NO IMAGE"
Connecting to PC
-
Turn the Action Cam on.
-
Connect the Action Cam to a PC via the USB cable.
3."PC" appears on the Action Cam LCD screen, open "My computer", check a new disk on your computer, open the new disk you will see the video footages.
(Remark: If there is no external memory card, PC will display the built in Memory disk, if there is SD/MMC card, PC will display SD/MMC card storage disk).
PC CAM
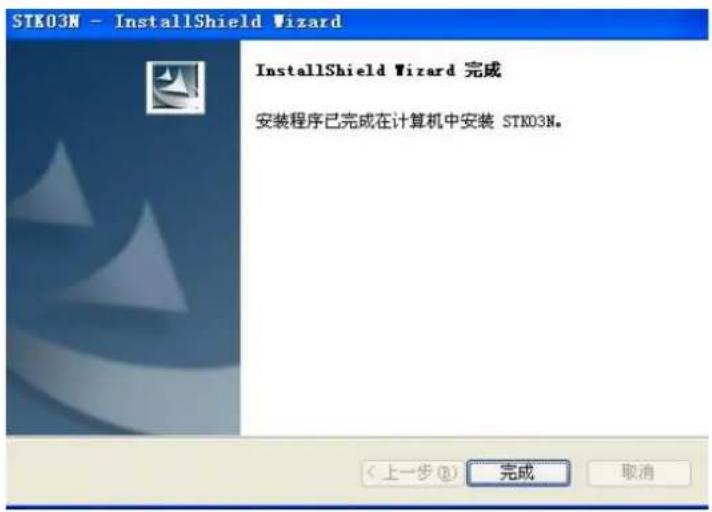
Long press the "Menu" button on camera first, then connect the camera to computer via USB cable, the camera LCD will display "PC", open the "My computer", double click the
Standard Camera
camera icon, you could use it as PC camera.
Remark: When the voltage below 2.4V, low battery icon will displayed, you should prepare to change the battery, when it run out of battery, the camera will continuous beeping, after three seconds, the camera will shut off automatically.
When system inspect that there is a SD card, SD icon will display on LCD screen.
Additional remark: If use high capacity SD card or there are many files in storage, pls wait a while after shift to the delete menu, it may take a longer time than usual to delete the files.
When deleting all the files, the letter "ALL" on the LCD will stop flickering, after it finishes deleting, it flickers again on LCD.
Troubleshooting
There's no display
-Are the batteries properly installed?
-Do the batteries need replacing?
After the Action Cam is connected to my PC, it cannot find the new drive in the 'My Computer' folder
-Make sure each end of the Action Cam USB cable is properly and firmly connected.
-Make sure your USB port is working properly. Try connecting another USB device into the port. If the other device does not work, the USB port may have a malfunction.
I can't capture the video footage
-Make sure there is enough space on the internal memory of Action Cam or the SD card; the display will tell you how much time left for video recording.
-Make sure the SD card is not locked if you have inserted the SD card. It can't take video
footage if the SD card is locked.
The remaining time is not accurate
-The remaining time is not always accurate, it is an estimate.
-The remaining time depends not only on the time recorded, but on the color density of the video footage. Under conditions with high contrast, such as outdoors, the actual time available will be less than under low-contrast conditions, such as indoors.
I can't play the video footage on my television
-Make sure each end of the AV cable is properly and firmly connected to Action Cam and your television.
-Make sure the Action Cam is turned on.
- Some captured video footage cannot be found when SD card is inserted the video footage may be stored on the internal memory. Connect the Action Cam to your PC without an SD card, and it will show the files in the internal memory.
Tips:
The camera is high speed video camera, to help you to get high quality video image, pls notice:
●High speed branded SD/MMC card is recommended.
- Please format the SD card before taking video, follow the steps :
- Insert SD card
- Turn on the camera
- Press the shutter button for about 5 seconds, LCD display "FOA", wait a moment it returns to video mode, the card is formatted successfully.
Declaration of Conformity:
We, Trebs BV, declare under our sole responsibility that this product is in conformity with the essential requirements and other relevant requirements of the R&TTE Directive (1999/5/EC). The product is compliant with the following standards and/or other normative documents:
EN55022: 2006 + A1: 2007
EN61000-3-2: 2006 + A 2:2009
EN 61000-3-3: 2008
EN55024: 1998 + A2:2003
Trebs BV.
The Netherlands
Website: www.trebs.nl email: info@trebs.nl