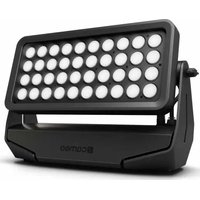
ZENIT W600 D - Lighting Cameo - Free user manual and instructions
Find the device manual for free ZENIT W600 D Cameo in PDF.


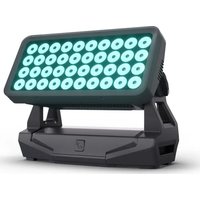
| Product type | LED wash light for outdoor use |
| Brand | Cameo |
| Model | ZENIT W600 D (CLZW600-D) |
| Category | Professional lighting |
| Power supply voltage | 100-240 V AC, 50/60 Hz |
| Power consumption | 565 W |
| LED type | 40 x 18 W CREE RGBW |
| Color temperature | 5600 K (daylight) |
| Beam angle | 21° (field 42°) |
| Luminous flux (without diffuser) | 40,795 lm |
| Luminous intensity at 1 m | 190,000 lx (without diffuser) |
| Protection rating | IP65 |
| Dimensions (L x H x D, without omega) | 463 x 161 x 291 mm |
| Weight | 12.4 kg |
| DMX modes | 1, 2, 3, 4, 6 channels |
| DMX functions | Dimmer, Fine dimmer, Strobe, Dimmer curves, Dimmer reaction, PWM frequency |
| Standalone functions | Master/Slave, Static, Strobe, various settings |
| DMX connectors | XLR 5-pin IP65 (IN/OUT) |
| Power connectors | IP65 special connector (IN/OUT, max 9 A) |
| Cooling | 3 IP65 fans |
| Ambient temperature | -15 °C to +45 °C |
| Housing material | Metal, black color |
| Included accessories | 2 mounting omega brackets, 1 m power cord (CEE 7/7) |
| Maintenance | Clean with a dry cloth, dust ventilation openings regularly |
| Safety | Do not look directly at the light source, maintain a minimum distance of 0.5 m from flammable materials, do not open the housing |
Frequently Asked Questions - ZENIT W600 D Cameo
User questions about ZENIT W600 D Cameo
0 question about this device. Answer the ones you know or ask your own.
Ask a new question about this device
Download the instructions for your Lighting in PDF format for free! Find your manual ZENIT W600 D - Cameo and take your electronic device back in hand. On this page are published all the documents necessary for the use of your device. ZENIT W600 D by Cameo.
USER MANUAL ZENIT W600 D Cameo
natural_image
Black Cameroon LED array with circular light fixtures, no visible text or symbols on the device bodyZENIT® W600 D
LED OUTDOOR WASHLIGHT
CLZW600-D
ENGLISH
PREVENTIVE MEASURES 3-4
INTRODUCTION 4
CONNECTIONS, OPERATING AND DISPLAY ELEMENTS 5-6
OPERATION 6-10
OPTIONAL ACCESSORIES 11
DMX TECHNOLOGY 12
TECHNICAL DATA 13
MANUFACTURER'S DECLARATIONS 13-14
DMX CONTROL 75-76
DEUTSCH
We have designed this product to operate reliably over many years. Please read this User's Manual carefully, so that you can begin making optimum use of your Cameo Light product quickly. Learn more about Cameo Light on our website WWW.CAMEOLIGHT.COM.
PREVENTIVE MEASURES
- Please read these instructions carefully.
- Keep all information and instructions in a safe place.
- Follow the instructions.
- Observe all safety warnings. Never remove safety warnings or other information from the equipment.
- Use the equipment only in the intended manner and for the intended purpose.
- Use only sufficiently stable and compatible stands and/or mounts (for fixed installations). Make certain that wall mounts are properly installed and secured. Make certain that the equipment is installed securely and cannot fall down.
- During installation, observ e the applicable safety regulations for your country.
- Never install and operate the equipment near radiators, heat registers, ovens or other sources of heat. Make certain that the equipment is always installed so that is cooled sufficiently and cannot overheat.
-
Never place sources of ignition, e.g., burning candles, on the equipment.
-
Ventilation slits must not be blocked.
-
Keep a minimum distance of 20 cm around and above the device.
-
Do not use this equipment in the immediate vicinity of water (does not apply to special outdoor equipment - in this case, observe the special instructions noted below. Do not expose this equipment to flammable materials, fluids or gases. Avoid direct sunlight!
-
Make certain that dripping or splashed water cannot enter the equipment. Do not place containers filled with liquids, such as vases or drinking vessels, on the equipment.
-
Make certain that objects cannot fall into the device.
-
Use this equipment only with the accessories recommended and intended by the manufacturer.
-
Do not open or modify this equipment.
-
After connecting the equipment, check all cables in order to prevent damage or accidents, e.g., due to tripping hazards.
-
During transport, make certain that the equipment cannot fall down and possibly cause property damage and personal injuries.
-
If your equipment is no longer functioning properly, if fluids or objects have gotten inside the equipment or if it has been damaged in another way, switch it off immediately and unplug it from the mains outlet (if it is a powered device). This equipment may only be repaired by authorized, qualified personnel.
-
Clean the equipment using a dry cloth.
-
Comply with all applicable disposal laws in your country. During disposal of packaging, please separate plastic and paper/cardboard.
-
Plastic bags must be kept out of reach of children.
-
Please note that changes or modifications not expressly approved by the party responsible for compliance could void the user's authority to operate the equipment.
FOR EQUIPMENT THAT CONNECTS TO THE POWER MAINS:
- CAUTION: If the power cord of the device is equipped with an earthing contact, then it must be connected to an outlet with a protective ground. Never deactivate the protective ground of a power cord.
- If the equipment has been exposed to strong fluctuations in temperature (for example, after transport), do not switch it on immediately. Moisture and condensation could damage the equipment. Do not switch on the equipment until it has reached room temperature.
- Before connecting the equipment to the power outlet, first verify that the mains voltage and frequency match the values specified on the equipment. If the equipment has a voltage selection switch, connect the equipment to the power outlet only if the equipment values and the mains power values match. If the included power cord or power adapter does not fit in your wall outlet, contact your electrician.
- Do not step on the power cord. Make certain that the power cable does not become kinked, especially at the mains outlet and/or power adapter and the equipment connector.
- When connecting the equipment, make certain that the power cord or power adapter is always freely accessible. Always disconnect the equipment from the power supply if the equipment is not in use or if you want to clean the equipment. Always unplug the power cord and power adapter from the power outlet at the plug or adapter and not by pulling on the cord. Never touch the power cord and power adapter with wet hands.
- Whenever possible, avoid switching the equipment on and off in quick succession because otherwise this can shorten the useful life of the equipment.
- IMPORTANT INFORMATION: Replace fuses only with fuses of the same type and rating. If a fuse blows repeatedly, please contact an authorised service centre.
- To disconnect the equipment from the power mains completely, unplug the power cord or power adapter from the power outlet.
- If your device is equipped with a Volex power connector, the mating Volex equipment connector must be unlocked before it can be removed. However, this also means that the equipment can slide and fall down if the power cable is pulled, which can lead to personal injuries and/or other damage. For this reason, always be careful when laying cables.
- Unplug the power cord and power adapter from the power outlet if there is a risk of a lightning strike or before extended periods of disuse.
- The device must only be installed in a voltage-free condition (disconnect the mains plug from the mains).
- Dust and other debris inside the unit may cause damage. The unit should be regularly serviced or cleaned (no guarantee) depending on ambient conditions (dust etc., nicotine, fog) by qualified personnel to prevent overheating and malfunction.
- Please keep a distance of at least 0.5 m to any combustible materials.
- Power cables to power multiple devices must have a cross-section of at least 1.5 mm 2 . Within the EU, the cables must correspond to H05VV-F, or similar. Suitable cables are offered by Adam Hall. With these cables, you can connect multiple devices via the power OUT connection
to the power IN connection of an additional device. Make sure that the total current consumption of all connected devices does not exceed the specified value on all connected devices (label on the device). Make sure to keep power cable connections as short as possible.
CAUTION:
To reduce the risk of electric shock, do not remove cover (or back). There are no user serviceable parts inside. Maintenance and repairs should be exclusively carried out by qualified service personnel.
The warning triangle with lightning symbol indicates dangerous uninsulated voltage inside the unit, which may cause an electrical shock.

The warning triangle with exclamation mark indicates important operating and maintenance instructions.

Warning! This symbol indicates a hot surface. Certain parts of the housing can become hot during operation. After use, wait for a cool-down period of at least 10 minutes before handling or transporting the device.

Warning! This device is designed for use below 2000 metres in altitude.

Warning! This product is not intended for use in tropical climates.
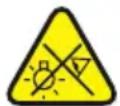
Caution! Intense LED light source! Risk of eye damage. Do not look into the light source.
CAUTION! IMPORTANT INFORMATION ABOUT LIGHTING PRODUCTS!
- The product has been developed for professional use in the field of event technology and is not suitable as household lighting.
- Do not stare, even temporarily, directly into the light beam.
- Do not look at the beam directly with optical instruments such as magnifiers.
- Stroboscope effects may cause epileptic seizures in sensitive people! People with epilepsy should definitely avoid places where strobes are used.
INTRODUCTION
ZENIT W600 D OUTDOOR LED WASHLIGHT
CLZW600-D
CONTROL FUNCTIONS:
1-channel, 2-channel, 3-channel, 4-channel, 6-channel DMX control
Master / slave mode
Standalone operation
W-DMX™
FEATURES:
DMX-512. 40 x 18 W high-power CREE daylight LEDs. W-DMXTM. Stroboscope. 16-bit dimmer. 4 dimmer curves. LED PWM frequency can be set. Fast access feature. IP65-class protection. 5-pin DMX connections. Plastic feet. 2x Omega mounting brackets included. Operating voltage
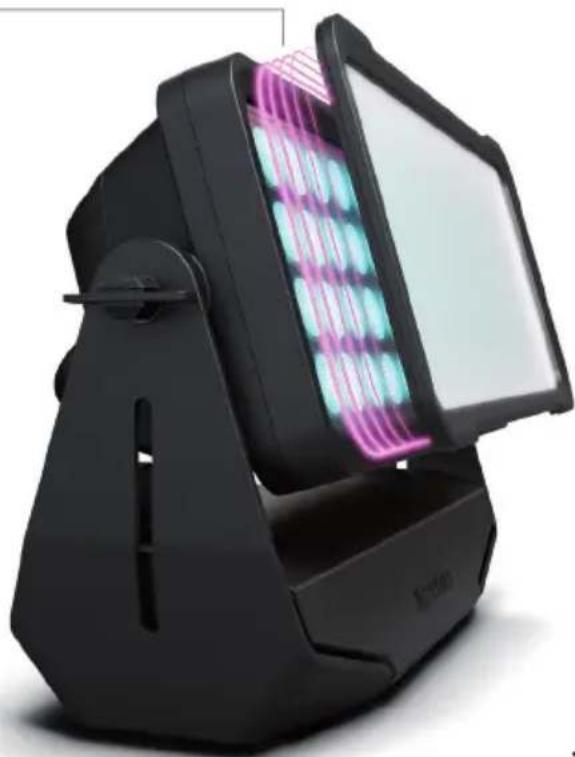
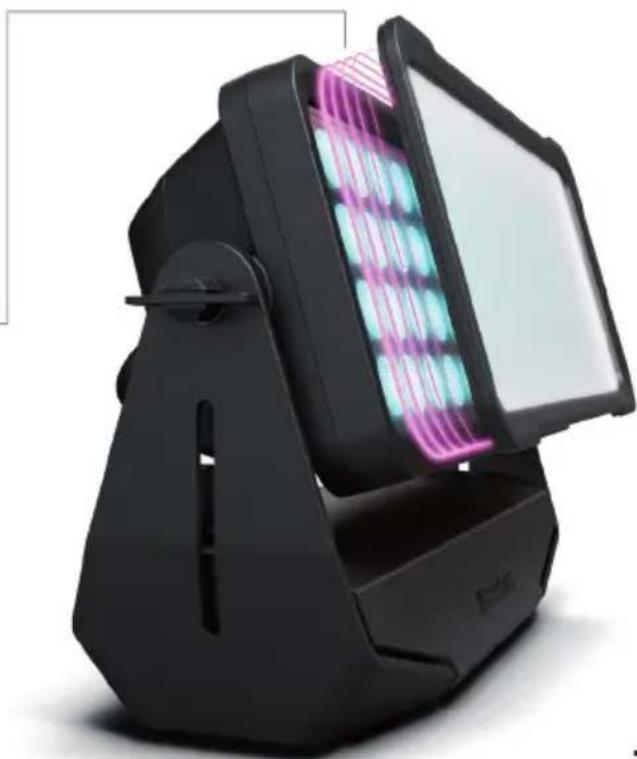
100–240 V AC. Power consumption 565W. 25°, 45°, 60° x 10°, 100° diffusers and flap optionally available.
The spotlight features the RDM standard (Remote Device Management). Remote device management allows the user to view status and configuration of RDM terminals via an RDM-capable controller.
CONNECTIONS, OPERATING AND DISPLAY ELEMENTS
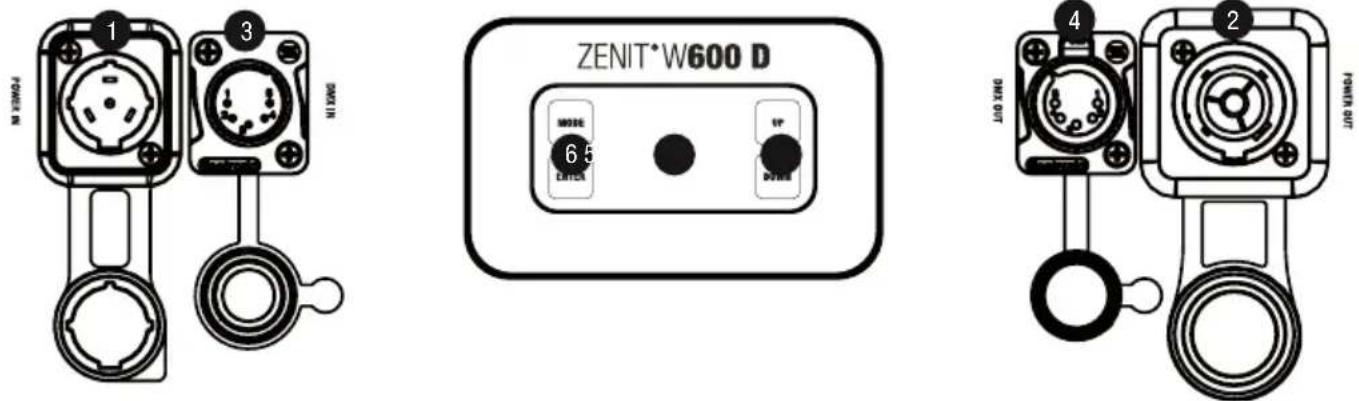
1 POWER IN
IP65 power input socket with rubber sealing cap. Operating voltage 100 – 240 V AC / 50 – 60Hz. Connection via supplied power cable (when not in use, always close with rubber sealing cap).
2 POWER OUT
IP65 power output socket with rubber sealing cap. Facilitates power supply to other CAMEO spotlights. Ensure that the total current consumption of all connected devices does not exceed the value specified on the device in amperes (A) (when not in use, always close with the rubber sealing cap).
3 DMX IN
Male IP65 5-pin XLR socket for connecting a DMX control device (e.g. DMX console; when not in use, always close with the rubber sealing cap).
4 DMX OUT
Female IP65 5-pin XLR socket for sending DMX control signal (when not in use, always close with the rubber sealing cap).
5 OLED DISPLAY
Displays the current operating mode and other system settings.
6 TOUCH-SENSITIVE CONTROLS
MODE
Press MODE to access the system settings selection menu. Press repeatedly to return to the main display.
ENTER
Press ENTER to access the menu levels to make value changes, and to access the sub-menus. Confirm changes by pressing ENTER.
UP and DOWN
Select individual menu items in the selection menu (DMX address, operating mode etc.) and in the sub-menus. Allow changes to be made to a menu item setting such as the DMX address as required.
PRESSURE EQUALISATION ELEMENT
The pressure equalisation element to prevent condensation inside the housing is in the device base, behind the cable feed for the LED unit. In order to ensure its proper function, the element must be protected from contamination.
HOUSING FAN
The 3 housing fans and the heat sink are on the back of the LED unit. Ensure air circulation by not covering the device, and cleaning it regularly.
TIPS: In order to provide protection from spraying water, in accordance with protection class IP65, special IP65-rated XLR connectors must be used correctly with the DMX input and output sockets, or they must be closed using the rubber sealing caps. When connected correctly, or when sealed correctly with the rubber sealing caps, the POWER IN and POWER OUT sockets are protected from spraying water, as in accordance with IP65.
PLEASE NOTE:
- As soon as the spotlight is correctly connected to the power supply, the following will be displayed in succession: "Welcome to Cameo", the model name and the software version. After this process, the lamp is ready for operation and starts in the previously enabled mode.
- If one of the DMX operating modes is activated and there is no DMX signal to the DMX input, the currently programmed DMX address is displayed and the characters on the display will begin to flash.
- After approximately 1 minute of inactivity, the display will automatically show the currently active operating mode.
- Fast Access Feature: In order to simplify the menu guide, the device has an intelligent menu structure that allows direct access to previously selected menu items and sub-menu items. 1. Press MODE and ENTER simultaneously for direct access to the last-edited sub-menu item, where you can make changes instantly as required (DMX starting address and all modes). 2 Press MODE for direct access to the last-selected and last-edited menu item. Press ENTER repeatedly to access the sub-menu items in order to change individual settings (DMX starting address and all modes).
- Before changing device settings, ensure that the control panel is dry and dust free, in order not to impair its functionality.
- The display can be rotated through 180irc by pressing UP when the main display is visible.
OPERATION
MAIN DISPLAY
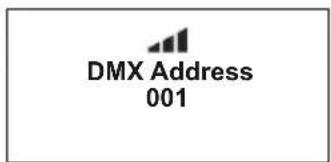
After the power-up process, the lamp is ready for operation and starts in the previously activated mode. The main display appears with the following information: current mode (in the example DMX mode) and W-DMX TM status.
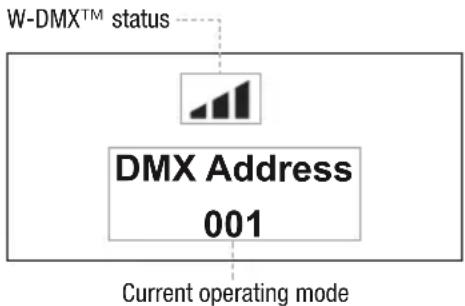
flowchart
graph TD
    A["W-DMX™ status"] --> B["DMX Address 001"]
    B --> C["Current operating mode"]
W-DMX™
- To pair with W-DMX TM -compatible transmitters, enable W-DMX TM in the device settings (Settings -> Wireless Setting -> W-DMX On Off -> On) and reset the W-DMX TM module (Receive Reset -> Yes). Start the pairing process as described in the operating instructions of the W-DMX TM transmitter. Pairing is then completed automatically.
2 Pair a group of W-DMX™ devices to create a DMX universe with them. First unpair all devices that are to make up the group (Settings -> Wireless Setting -> Receive Reset). Then select a CLZW600 with a DMX controller via DMX cable and select "Transmit" in the settings (Settings -> Wireless Setting -> Operating Mode -> Transmit). Select "Receive" in the settings of the W-DMX™ device that you want to control via W-DMX™ (Settings -> Wireless Setting -> Operating Mode -> Receive), and pair it by selecting "Link" in the settings of the DMX cable controlled CLZW600, then confirm your selection (Settings -> Wireless Setting -> Link -> Link). Pairing is then completed automatically.
3 It is also possible to create a connected group of W-DMX™ devices via W-DMX™, and operate them in master/slave mode. First unpair all devices that are to make up the group (Settings -> Wireless Setting -> Receive Reset). In the settings (Settings -> Wireless Setting -> Operating Mode) of the master unit select "Transmit", and in the settings of the slave units select "Receive". On the master unit select "Link" (Settings -> Wireless Setting -> Link -> Link) and confirm your selection by pressing ENTER. Pairing of the devices is then completed automatically. Select standalone mode in the master unit and use this to control the slave units (same model).
W-DMX™ STATUS
 |  |  | 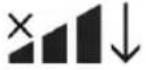 |  | 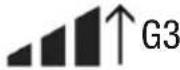 | 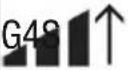 |
| W-DMXTM deactivated | W-DMXTM activated as receiver, not paired | W-DMXTM activated as receiver and device paired, transmitter deactivated or out of range | W-DMXTM activated and device paired, no DMX signal | W-DMXTM activated as receiver and device paired, DMX signal is present | W-DMXTM and transmission mode G3 activatedUpward arrow = sendingDownward ar-row = receivingArrow flashing = pairingFlashing stops = paired | W-DMXTM and transmission mode G4S activatedUpward arrow = sendingDownward ar-row = receivingArrow flashing = pairingFlashing stops = paired |
SET DMX START ADDRESS (DMX ADDRESS)
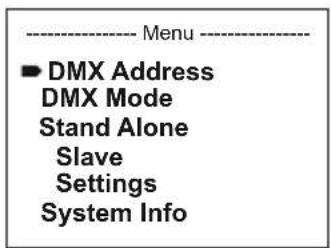
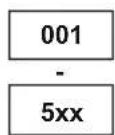
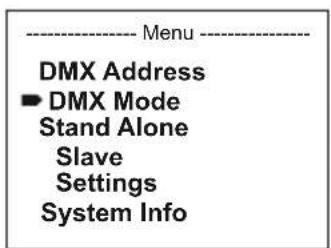
Press MODE to access the device settings selection menu (--- Menu ---). Using the UP and DOWN controls, select the menu item "DMX address" (observe arrow) and confirm with ENTER. The display will show a three-digit number field and you can use the UP and DOWN controls to configure the desired DMX start address. Confirm the entry with ENTER and press MODE to return to the main display (in the example, "DMX address 001").
SET DMX MODE (DMX Mode)
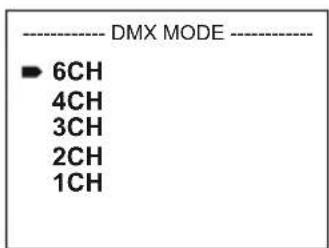
Press MODE to access the device settings selection menu (--- Menu ---). Use UP and DOWN to select the menu item "DMX Mode" (observe arrow) and confirm with ENTER. In the sub-menu you can use UP and DOWN to choose between the DMX modes "1CH", "2CH", "3CH", "4CH" and "6CH". Confirm your selection with ENTER. DMX tables with the channel assignments can be found in these instructions under DMX CONTROL.
CONFIGURING STANDALONE MODE
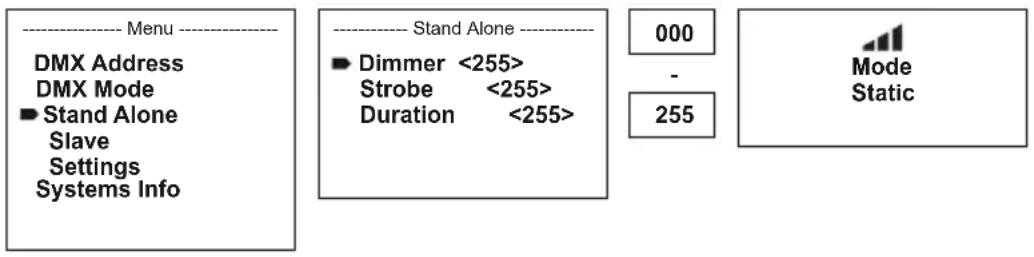
Press MODE to access the device settings selection menu (--- Menu ---). Use UP and DOWN to select the menu item "Stand Alone" (observe arrow) and confirm with ENTER. Now use UP and DOWN to select the menu item you wish to edit (observe arrow) and confirm with ENTER. The display will now show a three-digit number field, and you can use UP and DOWN to configure the desired value between 000 and 255. Confirm by pressing ENTER. Press MODE twice to return to the main display (Static Mode).
SET SLAVE MODE
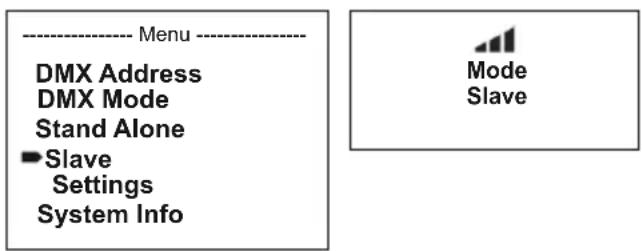
Press MODE to access the device settings selection menu (--- Menu ---). Use UP and DOWN to select the menu item "Slave" (observe arrow) and confirm with ENTER. Connect the slave and master units (same model) using a DMX cable and enable standalone mode on the master unit. The slave unit will now follow the master unit. If there is no control signal, the display characters will flash. Flashing stops as soon as a control signal is present.
SYSTEM SETTINGS (settings)
Press MODE to access the device settings selection menu (--- Menu ---). Using the UP and DOWN controls, select the menu item "Settings" (observe arrow) and confirm with ENTER.
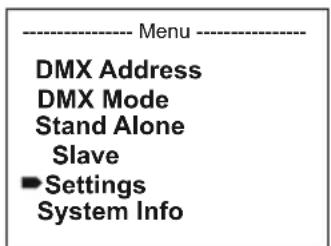
This will take you to the sub-menu for configuring the following sub-menu items (select using UP and DOWN, confirm with ENTER):
| Settings | ||||
| Wireless Setting = W | -DMX | settings (wireless DMX) | W-DMX on/off On = | W-DMX enabled |
| Off = W-DMX disabled | ||||
| Operating Mode Rece | Receive = W-DMX module as receiver | |||
| Transmit = W-DMX module as transmitter | ||||
| Transmitting Mode G | 3 = G3 transmission standard | |||
| G4S = G4S transmission standard | ||||
| Link Link = pair with | W-DMX devices. W-DMX must be activated on all devices and the pairing must be picked up by a transmitter (Receive Reset). | |||
| Unlink = unpair all devices | ||||
| Receive Reset No = | Do not retain transmitter pairing | |||
| Yes = Retain transmitter pairing | ||||
| Display Reverse = Flip display On Rotate display | by 180° (e.g. for overhead installation) | |||
| Off No display rotation | ||||
| Display Backlight = Display lighting On on permanently | ||||
| Off Deactivation after is retained | ||||
| DMX Fail = operating status when DMX signal fault occurs | Hold Last command is retained | |||
| Blackout Activates blackout | ||||
| Full On Spotlight changes to full on | ||||
| Stand Alone Spotlight changes to standalone mode | ||||
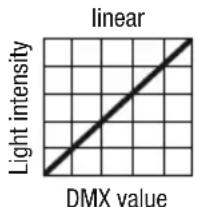
| Dimmer Curve | = | dimmer curve | Linear | Light intensity increases linearly with DMX value |
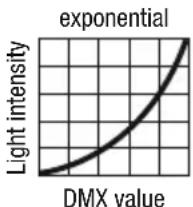
| Exponential | Light intensity can be finely adjusted at lower DMX values and broadly adjusted at higher DMX values. | |||
| Logarithmic Light intensity can be broadly adjusted at lower DMX values and finely adjusted at higher DMX values. | ||||
| S-Curve Light intensity can be finely adjusted at lower and higher DMX values and broadly adjusted at medium DMX values. | ||||
| Dimmer Response | = | dimmer sensitivity | LED | Lamp responds abruptly to changes in DMX value |
| Halogen Lamp behaves like a halogen spotlight with soft brightness changes | ||||
| Autolock | = | Automatic locking of the controls | On Automatic locking of the controls after approximately 1 minute of inactivity. After attempted input the display shows: “Locked!” To unlock: press and hold UP and DOWN simultaneously for approx. 5 seconds | |
| Off Automatic locking of the controls is disabled | ||||
| LED Frequency | = | LED PWM frequency | 800 Hz / 1200 Hz / 2000 Hz / 3600 Hz / 12 kHz / 25 kHz | Set the LED PWM frequency |
| Fan | = | adjust fan control | Auto | Automatic adjustment of the fan performance |
| Max. Intensity | Maximum fan capacity for maximum brightness | |||
| Low Noise | Extra-quiet fan with reduced brightness | |||
| Factory Reset | = | reset to factory setting | Reset Now! | Reset to factory settings: ENTER -> "Reset Now!" -> ENTER. Press MODE to stop. |
Dimmer curves
line
| DMX value | Light intensity | | --------- | --------------- | | 0 | 0 | | 1 | 0.5 | | 2 | 1 | | 3 | 2 | | 4 | 4 | | 5 | 6 | | 6 | 8 | | 7 | 10 | | 8 | 12 | | 9 | 14 | | 10 | 16 | | 11 | 18 | | 12 | 20 | | 13 | 22 | | 14 | 24 | | 15 | 26 | | 16 | 28 | | 17 | 30 | | 18 | 32 | | 19 | 34 | | 20 | 36 | | 21 | 38 | | 22 | 40 | | 23 | 42 | | 24 | 44 | | 25 | 46 | | 26 | 48 | | 27 | 50 | | 28 | 52 | | 29 | 54 | | 30 | 56 | | 31 | 58 | | 32 | 60 | | 33 | 62 | | 34 | 64 | | 35 | 66 | | 36 | 68 | | 37 | 70 | | 38 | 72 | | 39 | 74 | | 40 | 76 | | 41 | 78 | | 42 | 80 | | 43 | 82 | | 44 | 84 | | 45 | 86 | | 46 | 88 | | 47 | 90 | | 48 | 92 | | 49 | 94 | | 50 | 96 | | 51 | 98 | | 52 | 100 | | 53 | 102 | | 54 | 104 | | 55 | 106 | | 56 | 108 | | 57 | 110 | | 58 | 112 | | 59 | 114 | | 60 | 116 | | 61 | 118 | | 62 | 120 | | 63 | 122 | | 64 | 124 | | 65 | 126 | | 66 | 128 | | 67 | 130 | | 68 | 132 | | 69 | 134 | | 70 | 136 | | 71 | 138 | | 72 | 140 | | 73 | 142 | | 74 | 144 | | 75 | 146 | | 76 | 148 | | 77 | 150 | | 78 | 152 | | 79 | 154 | | 80 | 156 | | 81 | 158 | | 82 | 160 | | 83 | 162 | | 84 | 164 | | 85 | 166 | | 86 | 168 | | 87 | 170 | | 88 | 172 | | 89 | 174 | | 90 | 176 | | 91 | 178 | | 92 | 180 | | 93 | 182 | | 94 | 184 | | 95 | 186 | | 96 | 188 | | 97 | 190 | | 98 | 192 | | 99 | 194 | | 100 | - |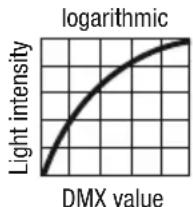
line
| DMX value | Light intensity | | --------- | --------------- | | 0 | 0 | | 1 | 0.5 | | 2 | 1 | | 3 | 1.5 | | 4 | 2 | | 5 | 2.5 | | 6 | 3 | | 7 | 3.5 | | 8 | 4 | | 9 | 4.5 | | 10 | 5 | | 11 | 5.5 | | 12 | 6 | | 13 | 6.5 | | 14 | 7 | | 15 | 7.5 | | 16 | 8 | | 17 | 8.5 | | 18 | 9 | | 19 | 9.5 | | 20 | 10 |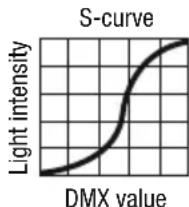
line
| DMX value | Light intensity | | --------- | --------------- | | 0 | 0 | | 1 | 0.5 | | 2 | 1 | | 3 | 1.5 | | 4 | 2 | | 5 | 2.5 | | 6 | 3 | | 7 | 3.5 | | 8 | 4 | | 9 | 4.5 | | 10 | 5 | | 11 | 5.5 | | 12 | 6 | | 13 | 6.5 | | 14 | 7 | | 15 | 7.5 | | 16 | 8 | | 17 | 8.5 | | 18 | 9 | | 19 | 9.5 | | 20 | 10 |SYSTEM INFORMATION (System Info)
Press MODE to access the device settings selection menu (--- Menu ---). Using the arrow keys, select the menu item "System Info" (observe arrow) and confirm with ENTER.
| ---- Menu ---- |
| DMX Address |
| DMX Mode |
| Stand Alone |
| Slave |
| Settings |
| ► System Info |
Use the UP and DOWN controls to select the desired sub-menu item, and press ENTER to display the corresponding information.
| System Info | ||||
| Firmware = Displays device | firmware | Main CPU Vx.xx | ||
| Led driver Vx.xx | ||||
| Temperature = Displays temperature of LED unit | LED xx °C / xx °F | |||
| Unit °C (= display in degrees Celsius) | ||||
| Operation Hours = Displays operating time xx:xx h Displays total operating time in hours and minutes | ||||
MANUAL LOCKING FUNCTION
In addition to the ability to automatically protect the spotlight from accidental and unauthorised operation (see "Settings" - "Auto-lock"), the controls can also be locked manually. Press and hold the UP and DOWN controls simultaneously for approximately 5 seconds. If an attempt is made to change settings, "Locked!" will appear in the display, and changing the spotlight's settings via the controls is no longer possible. After approx. 1 minute, the current operating mode is displayed again. To unlock, press and hold the UP and DOWN controls simultaneously for approximately 5 seconds. The display will show the previously displayed information.
SET-UP AND INSTALLATION
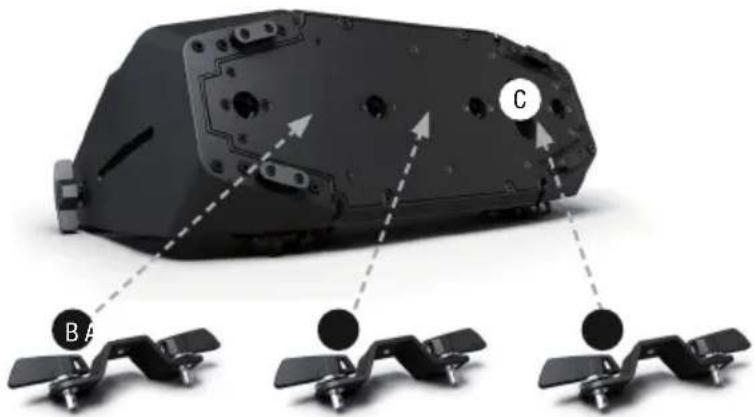
Thanks to its integrated plastic feet, the spotlight can be positioned in a suitable location on a level surface. Mounting to a traverse is possible using an Omega bracket which is attached at the centre of the device base (A) or else by means of two Omega bracket, which are mounted at the outer attachment positions (B). Two Omega brackets are included, suitable traverse clamps are optionally available. Ensure
firm connections and secure the spotlight at the specified position (C) using a suitable safety cable.
Setting of the beam direction of the LED unit occurs independent of the device base, with the assistance of the wing nuts on the side. Important: Overhead installation requires extensive experience, including the ability to calculate the threshold limits for load capacity, a knowledge of the installation material to be used and the ability to carry out regular security checks on all installation materials and the spotlight itself.
If you do not possess the appropriate qualifications, do not attempt to carry out the installation yourself: draw on the help of a professional company.
natural_image
3D diagram of a device casing with labeled components (A, B, C) and three separate views of the base (no text or symbols beyond labels)OPTIONAL ACCESSORIES
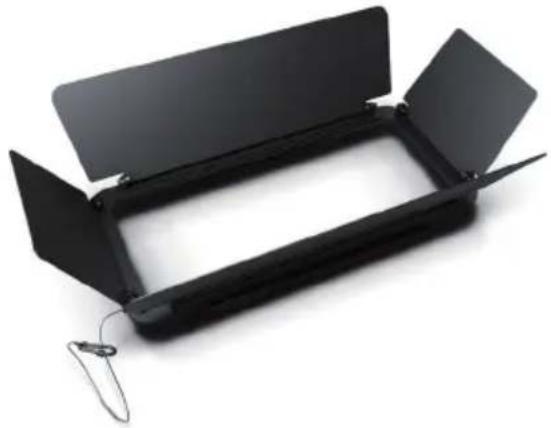
CLZW6004B
Flap – tool-free mounting thanks to threaded locking bolts, safety cable included
natural_image
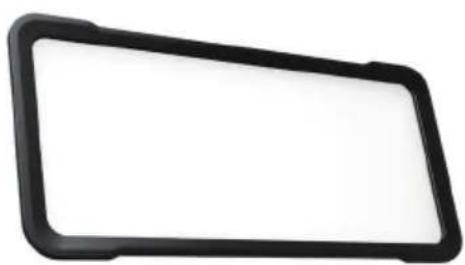
Black rectangular electronic device with open lid and ear clip, isolated on white background (no text or symbols)CLZW600SMLSD40
45° diffuser
Tool-free mounting thanks to SNAPMAG® technology
natural_image
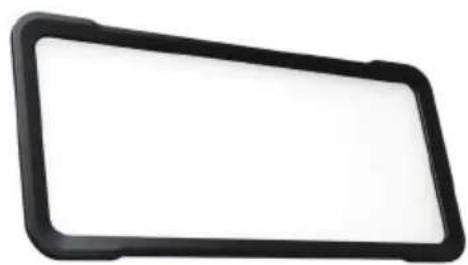
Black rectangular frame with rounded corners on white background (no text or symbols)CLZW600SMLSD6010
60irc × 10irc diffuser
Tool-free mounting thanks to SNAPMAG® technology
natural_image
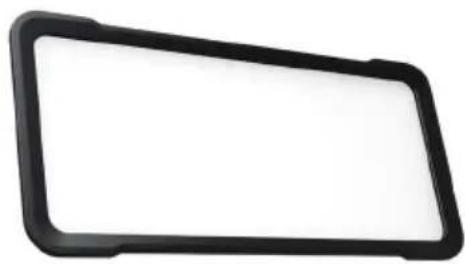
Black rectangular frame with rounded corners on white background (no text or symbols)CLZW600SMLSD20
25° diffuser
Tool-free mounting thanks to SNAPMAG® technology
natural_image
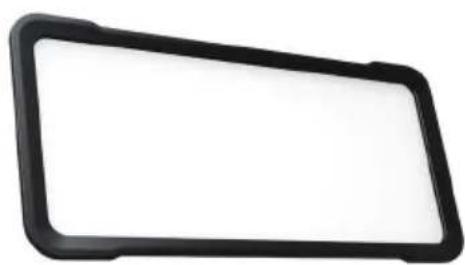
Black rectangular frame with rounded corners on white background (no text or symbols)CLZW600SMLSD100
100° diffuser
Tool-free mounting thanks to SNAPMAG® technology
natural_image
Black rectangular frame with rounded corners on white background (no text or symbols)
natural_image
Black and white photo of a handheld electronic device with a grid of glowing pink beads, no visible text or symbols.DMX TECHNOLOGY
DMX-512
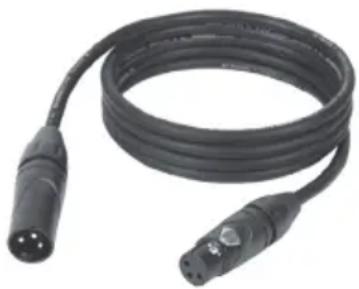
DMX (Digital Multiplex) is the designation for a universal transmission protocol for communications between corresponding devices and controllers. A DMX controller sends DMX data to the connected DMX device(s). The DMX data is always transmitted as a serial data stream that is forwarded from one connected device to the next via the "DMX IN" and "DMX OUT" connectors (XLR plug-type connectors) that are found on every DMX-capable device, provided the maximum number of devices does not exceed 32 units. The last device in the chain needs to be equipped with a terminator (terminating resistor).
natural_image
Coiled black cable with two connectors, no visible text or symbolsDMX CONNECTION
DMX is the common "language" via which a very wide range of types and models of equipment from various manufacturers can be connected with one another and controlled via a central controller, provided that all of the devices and the controller are DMX compatible. For optimum data transmission, it is necessary to keep the connecting cables between the individual devices as short as possible. The order in which the devices are integrated in the DMX network has no influence on the addresses. Thus the device with the DMX address 1 can be located at any position in the (serial) DMX chain: at the beginning, at the end or somewhere in the middle. If the DMX address 1 is assigned to a device, the controller "knows" that it should send all data allocated to address 1 to this device regardless of its position in the DMX network.
SERIAL CONNECTION OF MULTIPLE LIGHTS
- Connect the male XLR connector (3-pin or 5-pin) of the DMX cable to the DMX output (female XLR socket) of the first DMX device (e.g. DMX-Controller).
- Connect the female 3-pin XLR connector of the DMX cable connected to the first projector to the DMX input (male 3-pin socket) of the next DMX device. In the same way, connect the DMX output of this device to the DMX input of the next device and repeat until all devices have been connected. Please note that as a rule, DMX devices are connected in series and connections cannot be shared without active splitters. The maximum number of DMX devices in a DMX chain should not exceed 32 units.
The Adam Hall 3 STAR, 4 STAR, and 5 STAR product ranges include an extensive selection of suitable cables.
DMX CABLES
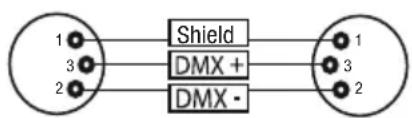
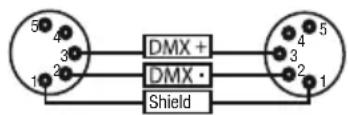
When fabricating your own cables, always observe the illustrations on this page. Never connect the shielding of the cable to the ground contact of the plug, and always make certain that the shielding does not come into contact with the housing of the XLR plug. If the shielding is connected to the ground, this can lead to short-circuiting and system malfunctions.
Pin Assignment
DMX cable with 3-pin XLR connectors: DMX cable with 5-pin XLR connectors (pin 4 and 5 are not used):
DMX TERMINATORS (TERMINATING RESISTORS)
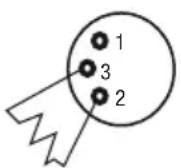
To prevent system errors, the last device in a DMX chain needs to be equipped with a terminating resistor (120 ohm, 1/4 Watt).
3-pin XLR connector with a terminating resistor: K3DMXT3
5-pin XLR connector with a terminating resistor: K3DMXT5
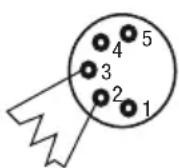
Pin Assignment
3-pin XLR connector: 5-pin XLR connector:
DMX ADAPTER
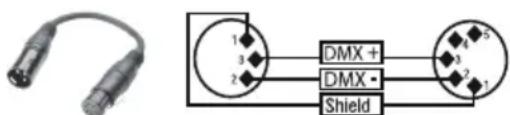
The combination of DMX devices with 3-pin connectors and DMX devices with 5-pin connectors in a DMX chain is possible with suitable adapters.
Pin Assignment
DMX Adapter 5-pin XLR male to 3-pin XLR female: K3DGF0020
Pins 4 and 5 are not used.
Pin Assignment
DMX Adapter 3-pin XLR male to 5-pin XLR female: K3DHM0020
Pins 4 and 5 are not used.

TECHNICAL DATA
Model name: CLZW600-D
| Product Type: LED wash light | |
| Type: Outdoor spotlight | |
| Colour spectrum LED: Daylight 5600K | |
| No. of LEDs: 40 | |
| LED type: 18 W CREE | |
| LED PWM frequency 800 Hz, 1200 Hz, 2000 Hz, 3600 Hz, 12 kHz, 25 kHz (adjustable) | |
| Dispersion: 21° (42° field) | |
| DMX input: 5-pin XLR male, IP65 | |
| DMX output: 5-pin female XLR, IP65 | |
| DMX modes: 1-channel, 2-channel, 3-channel, 4-channel, 6-channel | |
| DMX functions: dimmer, dimmer fine, strobe, strobe duration, dimmer curves, dimmer response, LED PWM frequency | |
| Standalone functions: | master/slave mode, stroboscope, dimmer response, dimmer curves, display lock function, LED PWM frequency |
| Control: | DMX512, W-DMXTM transceiver (transmit/receive), RDM enabled |
| Controls: | mode, enter, up, down |
| Display elements: | OLED display |
| Operating voltage: | 100 – 240 V AC / 50 – 60 Hz. |
| Power consumption: | 565 W |
| Illuminance (@ 1m, without diffuser): | 190,000 lx |
| Luminous flux (RGBW): | 40,795 lm (without diffuser) |
| Power supply connection: | Input: special IP65 socketOutput: special IP65 socket (max. 9 A) |
| Ambient temperature (for operation): | -15°C - +45°C |
| Housing material: | Metal |
| Housing colour: | Black |
| Housing cooling: | 3x IP65 fans |
| Protection class: | IP65 |
| Dimensions (B x H x D, not incl. Omega bracket): | 463 x 161 x 291 mm. |
| Weight: | 12.4 kg |
| Additional features: | 1 m power cable with CEE 7/7 mains plug and special IP65 power connector included. Floor stand integrated. 2x Omega mounting brackets included. 25°, 45°, 60° x 10°, 100° diffusers and flap optionally available. |
MANUFACTURER'S DECLARATIONS
MANUFACTURER'S WARRANTY & LIMITATIONS OF LIABILITY
You can find our current warranty conditions and limitations of liability at: https://cdn-shop.adamhall.com/media/pdf/Manufacturers-Declarations-CAMEO_DE_EN_ES_FR.pdf. To request warranty service for a product, please contact Adam Hall GmbH, Adam-Hall-Str. 1, 61267 Neu Anspach / Email: Info@adamhall.com / +49 (0)6081 / 9419-0.

CORRECT DISPOSAL OF THIS PRODUCT
(valid in the European Union and other European countries with a differentiated waste collection system)
This symbol on the product, or on its documents indicates that the device may not be treated as household waste. This is to avoid environmental damage or personal injury due to uncontrolled waste disposal. Please dispose of this product separately from other waste and have it recycled to promote sustainable economic activity. Household users should contact either the retailer where they purchased this product, or their local government office, for details on where and how they can recycle this item in an environmentally friendly manner. Business users should contact their supplier and check the terms and conditions of the purchase contract. This product should not be mixed with other commercial waste for disposal.
FCC STATEMENT
This device complies with Part 15 of the FCC Rules. Operation is subject to the following two conditions:
(1) This device may not cause harmful interference, and
(2) This device must accept any interference received, including interference that may cause undesired operation
CE Compliance
Adam Hall GmbH states that this product meets the following guidelines (where applicable):
R&TTE (1999/5/EC) or RED (2014/53/EU) from June 2017
Low voltage directive (2014/35/EU)
EMV directive (2014/30/EU)
RoHS (2011/65/EU)
The complete declaration of conformity can be found at www.adamhall.com.
Furthermore, you may also direct your enquiry to info@adamhall.com.
NOTE: This equipment has been tested and found to comply with the limits for a Class B digital device, pursuant to Part 15 of the FCC Rules. These limits are designed to provide reasonable protection against harmful interference in a residential installation. This equipment generates, uses and can radiate radio frequency energy and, if not installed and used in accordance with the instructions, may cause harmful interference to radio communications. However, there is no guarantee that interference will not occur in a particular installation. If this equipment does cause harmful interference to radio or television reception, which can be determined by turning the equipment off and on, the user is encouraged to try to correct the interference by one or more of the following measures:
- Reorient or relocate the receiving antenna.
- Increase the separation between the equipment and receiver.
- Connect the equipment into an outlet on a circuit different from that to which the receiver is connected.
- Consult the dealer or an experienced radio/TV technician for help.
DEUTSCH
natural_image
3D diagram of a mechanical component with labeled parts (A, B, C) and three small electronic components below, showing alignment or dislocation (no text or symbols beyond labels)OPTIONALES ZUBEHÖR
CLZW6004B
natural_image
Black rectangular electronic device with open lid and metal clasp, no visible text or symbolsCLZW600SMLSD40
45° Streuscheibe
natural_image
Black rectangular frame with rounded corners on white background (no text or symbols)CLZW600SMLSD6010
natural_image
Black rectangular frame with rounded corners on white background (no text or symbols)CLZW600SMLSD20
25° Streuscheibe
natural_image
Black rectangular frame with rounded corners on white background (no text or symbols)CLZW600SMLSD100
100° Streuscheibe
natural_image
Black rectangular frame with rounded corners on white background (no text or symbols)
natural_image
Black and white photo of a handheld electronic device with a grid of glowing pink and cyan modules (no visible text or symbols)DMX TECHNIK
DMX-512
natural_image
Coiled black cable with two connectors, no visible text or symbolsDMX-VERBINDUNG:
DMX-Adapter 5-Pol XLR male auf 3-Pol XLR female: K3DGF0020
natural_image
3D diagram of a device with labeled components (A, B, C) and three small electronic devices below, showing internal wiring or connections without any readable text or symbols.ACCESSOIRES DISPONIBLES EN OPTION
CLZW6004B
natural_image
Black plastic electrical enclosure with open doors and a small wire loop attached (no text or symbols visible)CLZW600SMLSD40
Diffuseur 45°
natural_image
Black rectangular frame with rounded corners on white background (no text or symbols)CLZW600SMLSD6010
Diffuseur 60° x 10°
natural_image
Black rectangular frame with rounded corners on white background (no text or symbols)CLZW600SMLSD20
Diffuseur 25°
natural_image
Black rectangular frame with rounded corners on white background (no text or symbols)CLZW600SMLSD100
Diffuseur 100°
natural_image
Black rectangular frame with rounded corners on white background (no text or symbols)
natural_image
Black and white photo of a handheld electronic device with a grid of glowing pink and cyan modules (no visible text or symbols)TECHNIQUE DMX
DMX-512
natural_image
Coiled black cable with two connectors, no visible text or symbolsPROTOCOLE DMX
(Valid in the European Union and other European countries with waste separation)
natural_image
3D diagram of a mechanical component with labeled parts (A, B, C) and three small mechanical arms below, showing alignment or disassembly (no text or symbols beyond labels)natural_image
Black metal folding device with open lid and circular base, no visible text or symbolsCLZW600SMLSD40
Difusor de 45°
natural_image
Black rectangular frame with rounded corners on white background (no text or symbols)CLZW600SMLSD100
Difusor de 100°
natural_image
Black rectangular frame with rounded corners on white background (no text or symbols)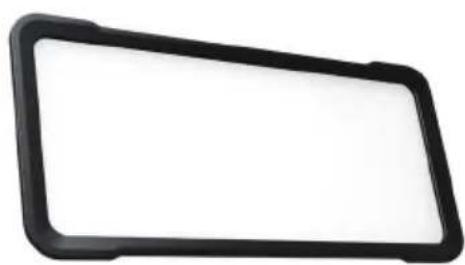
natural_image
Black rectangular frame with rounded corners on white background (no text or symbols)CLZW600SMLSD6010
Difusor de 60° x 10°
natural_image
Black rectangular frame with rounded corners on white background (no text or symbols)
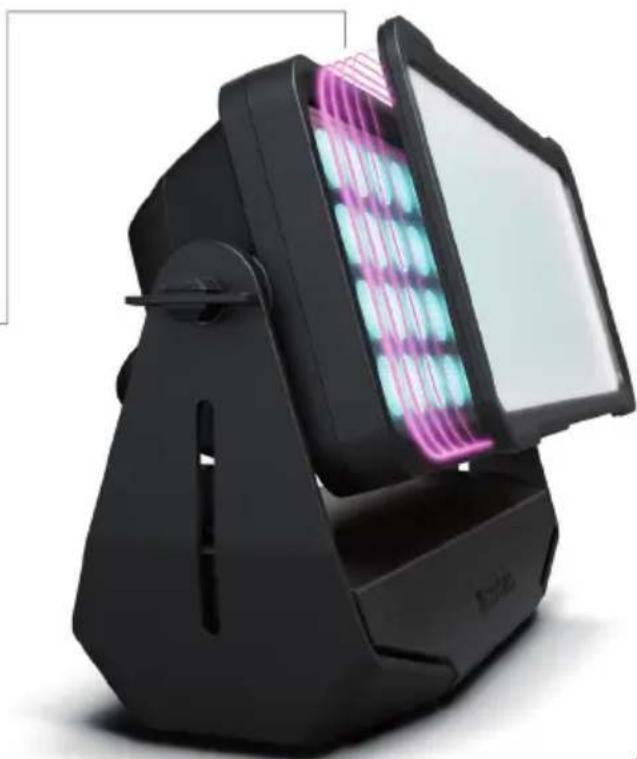
natural_image
Black and white photo of a handheld electronic device with a grid of colored modules, no visible text or symbols.TECNOLOGÍA DMX
DMX512
natural_image
Coiled black cable with two connectors and a connector pin (no text or symbols visible)CONEXIONADO DMX
natural_image
3D diagram of a device casing with labeled components (A, B, C) and three small electronic devices below, showing internal structure and alignment arrows (no text or symbols beyond labels)OPCJONALNE AKCESORIA
CLZW6004B
natural_image
Black plastic folding device with open lid and metal clasp, no visible text or symbolsCLZW600SMLSD40
Dyfuzor 45°
natural_image
Black rectangular frame with rounded corners on white background (no text or symbols)CLZW600SMLSD100
Dyfuzor 100°
natural_image
Black rectangular frame with rounded corners on white background (no text or symbols)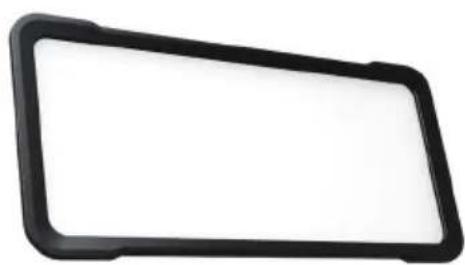
natural_image
Black rectangular frame with rounded corners on white background (no text or symbols)CLZW600SMLSD6010
Dyfuzor 60° x 10°
natural_image
Black rectangular frame with rounded corners on white background (no text or symbols)
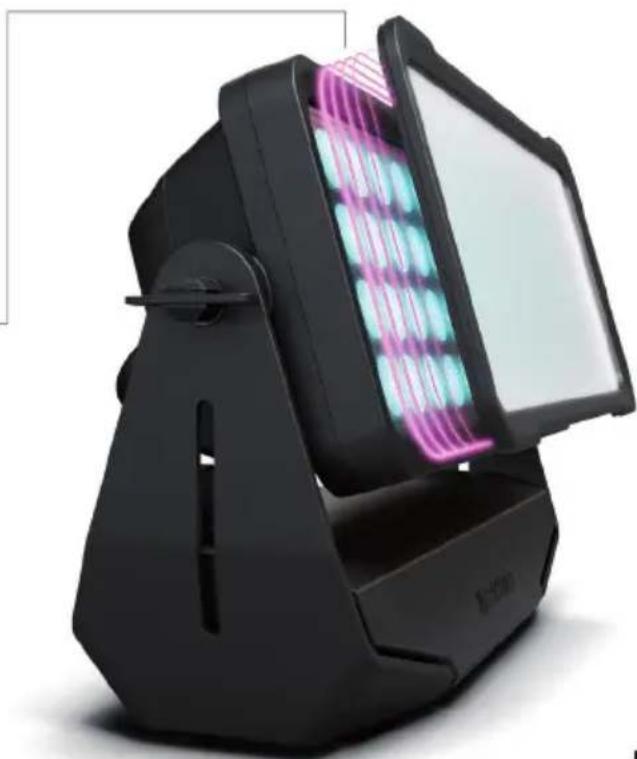
natural_image
Black and white photo of a handheld electronic device with a grid of glowing pink and cyan modules (no visible text or symbols)TECHNIKA DMX
DMX-512
natural_image
Coiled black cable with two connectors, no visible text or symbolsZŁĄCZE DMX:
natural_image
3D diagram of a mechanical component with labeled parts (A, B, C) and three small electronic components below, showing alignment or disassembly (no text or symbols beyond labels)ACCESSORI OPZIONALI
CLZW6004B
natural_image
Black rectangular electronic device with open lid and metal clasp, no visible text or symbolsCLZW600SMLSD40
Diffusore da 45°
natural_image
Black rectangular frame with rounded corners on white background (no text or symbols)CLZW600SMLSD100
Diffusore da 100°
natural_image
Black rectangular frame with rounded corners on white background (no text or symbols)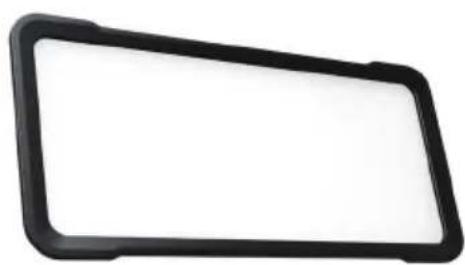
natural_image
Black rectangular frame with rounded corners on white background (no text or symbols)CLZW600SMLSD6010
Diffusore 60° x 10°
natural_image
Black rectangular frame with rounded corners on white background (no text or symbols)
natural_image
Black and white photo of a handheld electronic device with a grid of colored modules, no visible text or symbols.TECNOLOGIA DMX
DMX512
natural_image
Coiled black cable with two connectors and a connector pin (no text or symbols visible)COLLEGAMENTO DMX:

- ZENIT® W600 D
- ENGLISH
- DEUTSCH
- PREVENTIVE MEASURES
- FOR EQUIPMENT THAT CONNECTS TO THE POWER MAINS:
- CAUTION:
- CAUTION! IMPORTANT INFORMATION ABOUT LIGHTING PRODUCTS!
- INTRODUCTION
- ZENIT W600 D OUTDOOR LED WASHLIGHT
- CONTROL FUNCTIONS:
- FEATURES:
- CONNECTIONS, OPERATING AND DISPLAY ELEMENTS
- POWER IN
- POWER OUT
- DMX IN
- DMX OUT
- OLED DISPLAY
- TOUCH-SENSITIVE CONTROLS
- MODE
- ENTER
- UP and DOWN
- PRESSURE EQUALISATION ELEMENT
- HOUSING FAN
- PLEASE NOTE:
- OPERATION
- MAIN DISPLAY
- W-DMX™
- SET DMX START ADDRESS (DMX ADDRESS)
- SET DMX MODE (DMX Mode)
- CONFIGURING STANDALONE MODE
- SET SLAVE MODE
- SYSTEM SETTINGS (settings)
- SYSTEM INFORMATION (System Info)
- MANUAL LOCKING FUNCTION
- SET-UP AND INSTALLATION
- OPTIONAL ACCESSORIES
- CLZW6004B
- CLZW600SMLSD40
- CLZW600SMLSD6010
- CLZW600SMLSD20
- CLZW600SMLSD100
- DMX TECHNOLOGY
- DMX-512
- DMX CONNECTION
- SERIAL CONNECTION OF MULTIPLE LIGHTS
- DMX CABLES
- Pin Assignment
- DMX TERMINATORS (TERMINATING RESISTORS)
- DMX ADAPTER
- TECHNICAL DATA
- MANUFACTURER'S DECLARATIONS
- MANUFACTURER'S WARRANTY & LIMITATIONS OF LIABILITY
- CORRECT DISPOSAL OF THIS PRODUCT
- FCC STATEMENT
- CE Compliance
- OPTIONALES ZUBEHÖR
- DMX TECHNIK
- DMX-VERBINDUNG:
- ACCESSOIRES DISPONIBLES EN OPTION
- TECHNIQUE DMX
- PROTOCOLE DMX
- TECNOLOGÍA DMX
- DMX512
- CONEXIONADO DMX
- OPCJONALNE AKCESORIA
- TECHNIKA DMX
- ZŁĄCZE DMX:
- ACCESSORI OPZIONALI
- TECNOLOGIA DMX
- COLLEGAMENTO DMX:
Brand : Cameo
Model : ZENIT W600 D
Category : Lighting