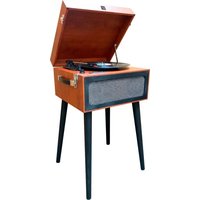
DL-P35 - Turntable DUAL - Free user manual and instructions
Find the device manual for free DL-P35 DUAL in PDF.


| Product type | Turntable with built-in speakers |
| Brand | Dual |
| Model | DL-P35 |
| Dimensions (approx.) | Width 42 cm, Depth 35 cm, Height 15 cm (with feet) |
| Weight | Approximately 5 kg |
| Platter material | Plastic with non-slip coating |
| Speeds | 33 1/3, 45, 78 RPM |
| Drive type | Belt |
| Cartridge | Ceramic |
| Automatic stop | Yes (AUTO-STOP can be disabled) |
| Built-in speakers | Yes, stereo (2 x 0.8 W) |
| Bluetooth connectivity | Yes (version not specified) |
| USB/SD ports | Yes, for playback and recording |
| Auxiliary input | 3.5 mm jack |
| Audio output | RCA (line) |
| Headphone output | 3.5 mm jack |
| Power supply | DC 5 V, 1 A power adapter (100-240 V AC) |
| Power consumption | 5 W max |
| Included accessories | Power adapter, 45 RPM adapter, user manual |
| Maintenance and cleaning | Clean the stylus with a soft brush dipped in alcohol; clean records with an antistatic cloth |
| Stylus replacement | Every 250 hours approximately |
| Warranty | 2 years |
| Customer service | 0 811 382 272 (France) |
| Country of origin | France (Dual Electronics brand) |
Frequently Asked Questions - DL-P35 DUAL
User questions about DL-P35 DUAL
0 question about this device. Answer the ones you know or ask your own.
Ask a new question about this device
Download the instructions for your Turntable in PDF format for free! Find your manual DL-P35 - DUAL and take your electronic device back in hand. On this page are published all the documents necessary for the use of your device. DL-P35 by DUAL.
USER MANUAL DL-P35 DUAL
natural_image
Vintage wooden portable cassette liver with open lid and black legs (no visible text or symbols)MODE D'EMPLOI
natural_image
Close-up of a hand pressing down on a mechanical component (no visible text or symbols)natural_image
Close-up of gloved hands holding a small electronic component (no visible text or symbols)natural_image
Close-up of hands using pliers to cut a piece of paper (no visible text or symbols)natural_image
Close-up of hands performing a sewing or sewing process on a fabric or metal component (no visible text or symbols)natural_image
Close-up of hands assembling or adjusting a mechanical component (no visible text or symbols)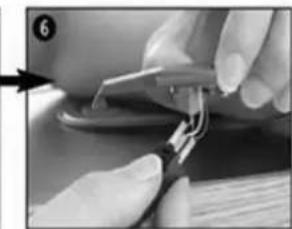
natural_image
Close-up of hands using a tool to adjust or install a small mechanical component (no visible text or symbols)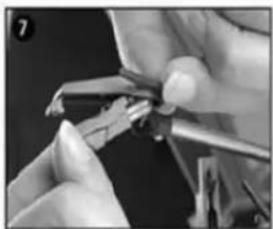
natural_image
Close-up of hands using a tool to cut or apply a small mechanical component (no visible text or symbols)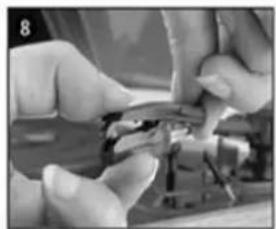
natural_image
Close-up of hands assembling or adjusting a mechanical component (no visible text or symbols)natural_image
Close-up of hands using a tool to adjust or install a mechanical component, showing step ⑨ and ⑥ (no text or symbols visible)NOTES :
CONDITIONS DE GARANTIE
UTILISATION DU PRODUIT :
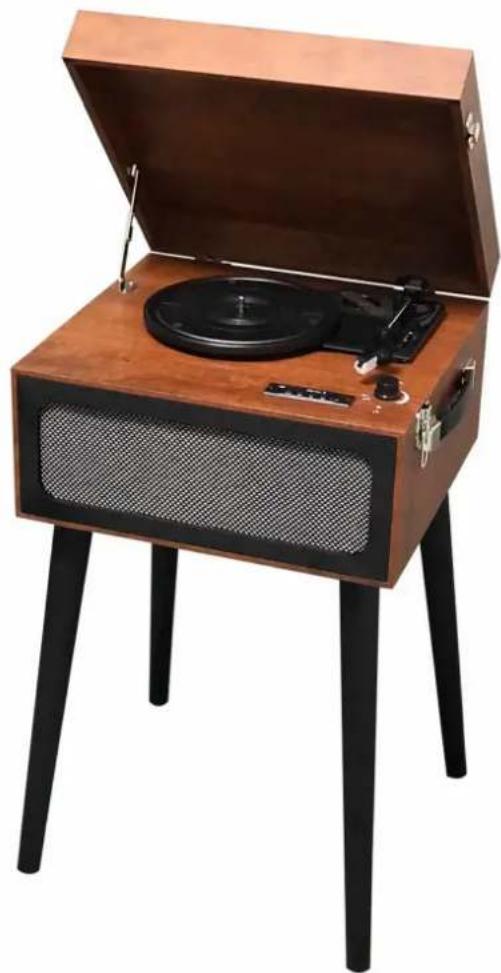
Antique turntable combine with stands DL-P35-001
natural_image
Vintage wooden radio with open lid and black legs, featuring a CD and small electronic device (no visible text or symbols)USER MANUAL Please read this manual carefully before using, and keep it for future reference.
EN
Read these safety instructions before using your device and store them for possible future reference.
- If the cord is damaged, have it repaired by the manufacturer, its service or a similarly qualified
- person in order to avoid any hazard.
● The cord should always be readily accessible. - The device is not intended for use by persons (including children) with reduced physical, sensory or mental capacity. Persons who have not read the manual, unless they have received explanations by a person responsible for their safety and supervision should not use this unit. Children should be monitored to ensure that they do not play with the device.
● The device should always be readily accessible.
● The device should not be exposed to dripping or splashing water.
- No objects filled with liquids such as vases shall be placed on the device.
● Always leave a minimum distance of 10 cm around the unit to ensure sufficient ventilation.
- Open flame sources, such as candles, should not be placed on top of the device.
● The device is intended for use only in a temperate climate.
- At full volume, prolonged listening to the portable audio device may damage the user's hearing
● and cause hearing troubles (temporary or permanent deafness, hearing drone, tinnitus,
- hyperacusis).
- So we recommend not to listen to the portable audio device at high audio volume and no more
● than one hour per day at medium audio volume.
SWITCH OFF IN RESTRICTED AREAS
Switch the mobile device off where the use of mobile devices is not allowed or where there is a risk of causing interference or danger, for example on board an aircraft, near medical equipment, fuel, chemicals or blasting sites.
INTERFERENCE
All wireless devices are susceptible to interference which may affect their performance.
AUTHORISED PERSONNEL
Only qualified people are authorized to install or repair this product
ACCESSORIES
Only use chargers and other accessories which are compatible with this equipment. Do not connect incompatible products.
KEEP THE EQUIPMENT DRY
This equipment is not water proof. Keep it dry.
CHILDREN
Keep your device in a safe place, out of the reach of young children. The device contains small parts that may present a choking hazard.
Declaration of conformity EU:
Dual Electronics, hereby declares that this equipment, conforms to the essential requirements and other relevant provisions of Directive 2014/35/EU. The declaration of Conformity can be viewed at the following address:
http://www.mms-support.net/OTA/ECD_DUAL_DL-P35-001.pdf
FUNCTIONS:
EN
● 3-speed (33 1 / 3, 45 and 78 RPM)
● Built-in stereo speakers for great sound
● High quality ceramic cartridge produces detailed sound
- Belt driven turntable mechanism
● DC power adapter, 45 RPM adapter included
● AUTO-STOP tone arm
- RCA audio out
- Bluetooth Receive function
- USB/SD playing & recording
- Aux in jack
- Headphone jack
DESCRIPTION
- Turntable Platter
- 45 RPM adaptor
- Tone arm
- Tone arm lift
- Speed selection
- Auto-stop switch
- Cartridge
- Power switch/ Volume control
- Headphone jack
- DC power jack
- RCA line out (R&L)
- AUX IN jack
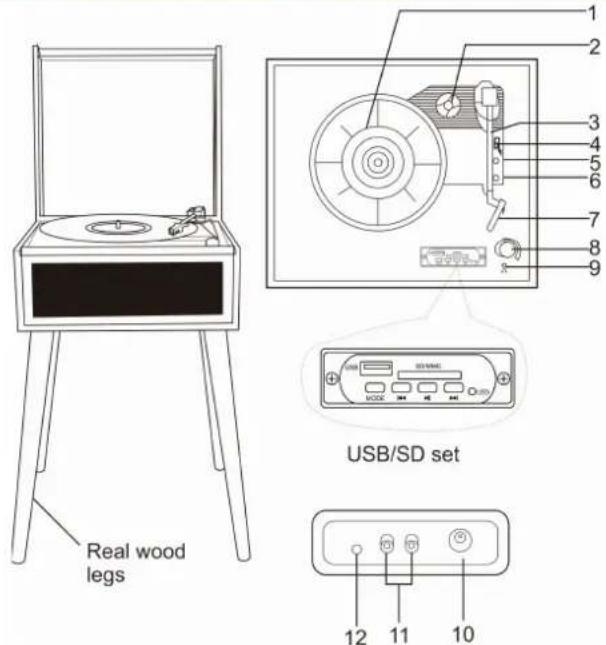
ATTACHING LEGS
The turntable comes with its own legs so it can stand alone. Alternatively, the legs can be removed and it can sit on an existing table or shelf. To attach the legs to the turntable, screw each individual leg to the metal plate on the rear of the unit.
INITIAL SET-UP
MAINS CONNECTION
Ensure that the mains voltage of your home corresponds to the operating voltage of the unit. Your unit is ready to be connected to a mains voltage of 5V DC adaptor.
AMPLIFIER CONNECTION (if required)
Whilst you can listen to your new turntable using the built-in speakers you may wish to connect it to your existing Hi Fi system. Connect the audio plugs to the Line input on your mixer or amplifier using an RCA cable (not supplied)
● Red plug into R/H channel input.
● White plug into L/H channel input.
- Place the record of your choice on the turntable. If required, do not forget to place the adaptor on the record spindle.
- Choose the desired playing speed using the speed selection switch between 33.3, 45 and 78rpm.
● Turn on the Rotary Power Switch, note that this also controls volume. Release the tone arm lock. - Raise the arm with your hand lightly. Place the stylus vertically over the first track of the record, the turntable will start turning automatically.
- Put down the stylus slowly on to the record to play.
- When a record comes to the end and the tone arm is returned to the tone arm rest, the turntable will stop automatically.
- Lift up the tone arm and put it on the rest when finished.
- Replace the protective cap on the stylus and close the tone arm lock.
- Turn off power at mains.
Note: If your record stops before the last track finishes, set the AUTO STOP switch to OFF. Your record will now play to the end, but you will have to stop the turntable rotation manually.
Auto Stop
- When a record finishes playing, it can be controlled by the auto-stop
- ON/OFF switch.
- Lift up the tone arm and put it on the rest when finished.
- Replace the protective cap on the stylus and close the tone arm lock.
- Turn off the power at the mains.
BLUETOOTH AND USB/SD SET-UP
This function part allows user play music from inserted USB flash drive or SD card or Bluetooth or Aux in function. Insert USB/SD when playing old vinyl, just long press MODE (about 3 seconds) then it starts to record with GREEN flash light.
- Press key to stop recording.
- Press to play the previous track.
- Press to play the next track.
- Briefly press MODE to select between USB, SD, BT and recording files on USB stick/SD card.
- Press briefly to play or pause the music. Press and hold to delete the music stored by the external source. In recording mode, press to stop recording.
(Lift up the tone arm and put it on the rest) then BT function is ready for pairing.
Open your Bluetooth equipment, search "DL-P35-001" to connect
Connected if there was a remind sound,
Select skip+ or skip-, play/pause key on music APP, you can choose favorite songs.
To active the phono and stop Bluetooth, just remove the tonearm to turntable area.
REPLACING THE STYLUS:
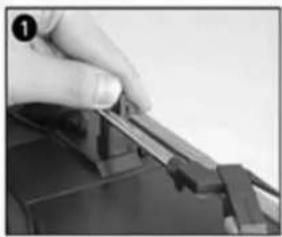
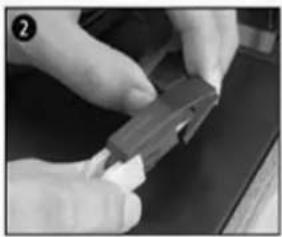
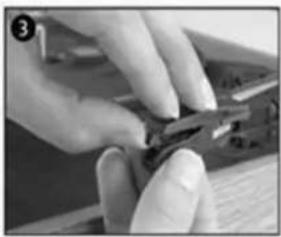
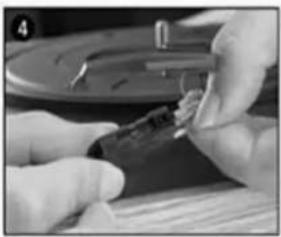
-Refer to the figures 1-8
natural_image
Close-up of a hand pressing down on a mechanical component (no visible text or symbols)push the arm lock to release the tone-arm.
natural_image
Close-up of hands holding a small electronic component (no visible text or symbols)take off cap of the cartridge to expose the needle out.
natural_image
Close-up of hands holding a small object, possibly a tool or device, with no visible text or symbols.separate the cartridge from the socket lightly.
natural_image
Close-up of hands performing a sewing or sewing process on fabric (no visible text or symbols)take off the audio-line from the cartridges completely.
natural_image
Close-up of hands assembling or adjusting a mechanical component (no visible text or symbols)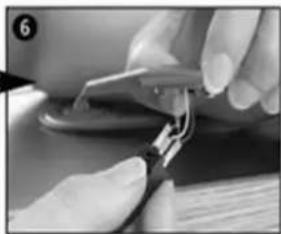
natural_image
Close-up of hands using a tool to adjust or install a small electronic component (no visible text or symbols)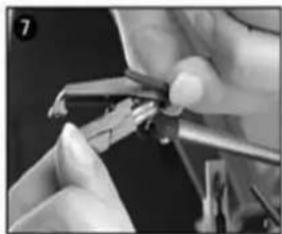
natural_image
Close-up of hands using a tool to adjust or install a small mechanical component (no visible text or symbols)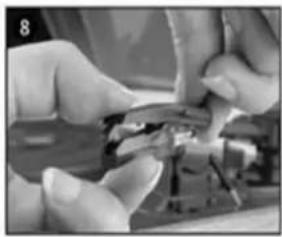
natural_image
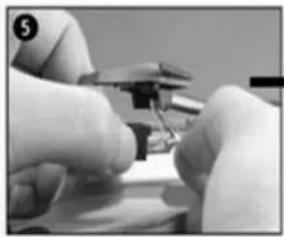
Close-up of hands assembling or repairing a small electronic component (no visible text or symbols)to fit a new one just in opposite deals. insert the audio-line accordingly, and install the cartridge to the socket lightly.
NOTE: Please exercise extreme care whilst performing this operation so as to avoid the tone arm and audio line wires from any damage.
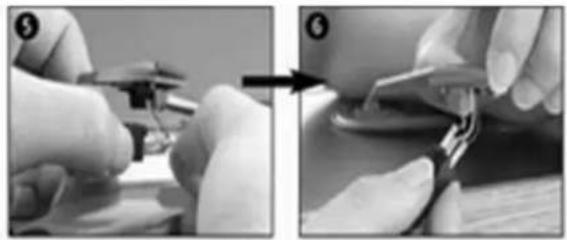
INSTALLING A NEW STYLUS CARTRIDGE:
-Refer to the figures 5 & 6
NOTES:
We advise you to clean your records with an anti-static cloth to gain maximum enjoyment from them and to make them last. We would also point out that for the same reason your stylus should be replaced periodically (approximately every 250 hours.
Dust the stylus from time to time using a very soft brush dipped in alcohol (brushing from back to front of the cartridge)
WHEN TRANSPORTING YOUR RECORD PLAYER DO NOT FORGET TO:
- Replace the protective cap on the stylus.
- Put the rest clip into the pick-up arm.
natural_image
Two-step black-and-white photo showing hands using a tool to adjust or install a component, with no visible text or symbols.TECHNICAL SHEET
Rated voltage: DC 5V 1A
Puissance sound power: 0.8Wx2
Max power consumption: 5W
Accessories included: adaptor, user manual, 45 rpm adapter
Adaptor: INPUT: AC 100-240 \~50/60Hz 0.5A
OUTPUT: DC 5V 1A
Max RF power output: -17.95dB
Frequency range: 2402MHz\~2480MHz
CE
The European directive 2012/19/EU on Waste Electrical and Electronic Equipment (WEEE), requires that old household electrical appliances must not be disposed of in the normal unsorted municipal waste stream. Old appliances must be collected separately in order to optimize the recovery and recycling of the materials they contain, and reduce the impact on
human health and the environment.
The crossed out "wheeled bin" symbol on the product reminds you of your obligation, that
when you dispose of the appliance, it must be separately collected. To avoid possible hearing damage, do not listen at high audio volume for long periods of time.

Warranty conditions OPERATING MANAGEMENT:
Your product is guaranteed 2 years.
To request support, contact the customer service at 0 811 382 272.
You will then be asked the defective part and the original invoice stating the product regulation. We may ask you for photos of your appliance.
FAILURE TO PACKING:
If it appeared, after unpacking the product or device, a vice preventing the use of the product in its expected configuration, contact the customer service within 72 hours worked.
DISCLAIMER OF WARRANTY
DISCLAIMER OF WARRANTY RELATED TO THE ORIGIN OF DAMAGES
The guarantee does not apply in case of accidental physical damage, it does not cover such damage and failures that resulted:
- improper installation (of a bad installation) or a misuse or poor maintenance of the product.
- improper use of the material or not complying with the instructions in the user manual.
●lightning, flood, fire, power surge, shock, poor ventilation, a fall, discoloration due to the action of light, burning, humidity, excessive heating without humidifier, or irregular ground or insects. - repairs made and / or working on the hardware and / or opening of it by an unauthorized person by the manufacturer.
●maintenance, repair or replacement of parts due to normal usury or failure to maintain. - modification of the construction and original features of the guaranteed product.
● corrosion, oxidation, a bad connection nor an external power supply problem.
EXCLUSION OF WARRANTIES RELATING TO THE NATURE OF DAMAGES (INDIRECTS DAMAGES)
The guarantee covers only the right to repair or replace the guaranteed product. Consequently, the indirect damage resulting from the failure or damage not covered by warranty, including:
- Commissioning costs, adjusting, cleaning;
- Damage of any kind resulting from the unavailability of the product guaranteed during the period between deterioration and failure and repair or the replacement of the product guaranteed.
OTHER EXCLUSIONS
- Damage and faults under specific exclusions in the warranty manufacture guaranteed product, as mentioned in the product instructions for use;
●The aesthetic damage;
●The products guarantee that the customer is not able to return or those who returned without their accessories
DUAL ELECTRONICS 79/81 ANCIENNE ROUTE NATIONALE 7 - 69570 DARDILLY - FRANCE

GE
natural_image
Vintage wooden radio with open lid and black legs, featuring a vinyl record and speaker (no visible text or symbols)BEDIENUNGSANLEITUNG
natural_image
Close-up of a hand holding a small object, possibly a tool or component (no visible text or symbols)natural_image
Close-up of hands holding a small electronic component (no visible text or symbols)natural_image
Close-up of hands holding a small object, possibly a tool or device, with no visible text or symbols.natural_image
Close-up of hands performing a sewing or sewing process on fabric (no visible text or symbols)natural_image
Close-up of hands assembling or adjusting a small electronic component (no visible text or symbols)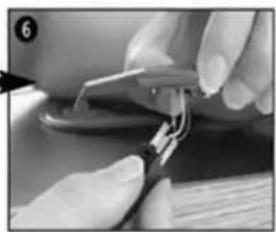
natural_image
Close-up of hands using a tool to adjust or install a small electronic component (no visible text or symbols)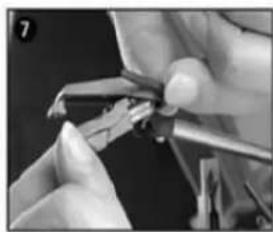
natural_image
Close-up of hands using a tool to adjust or install a mechanical component (no visible text or symbols)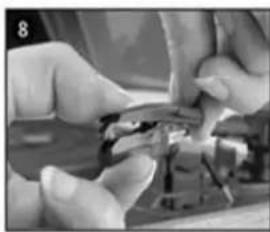
natural_image
Close-up of hands assembling or adjusting a mechanical component (no visible text or symbols)natural_image
Two-step black-and-white photo showing hands using a tool to cut or apply a small object, with no visible text or symbols.natural_image
Vintage wooden portable radio with open lid and black legs, no visible text or symbolsGEBRUIKERSHANDLEIDING
natural_image
Close-up of a hand pressing down on a mechanical component (no visible text or symbols)natural_image
Close-up of gloved hands holding a small mechanical component (no visible text or symbols)natural_image
Close-up of hands using pliers to cut a metal part (no visible text or symbols)natural_image
Close-up of hands performing a sewing or sewing process on a dark fabric (no visible text or symbols)natural_image
Close-up of hands assembling or adjusting a small mechanical component (no visible text or symbols)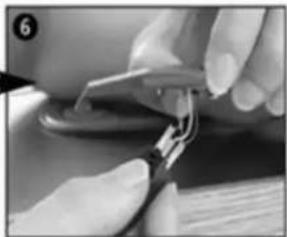
natural_image
Close-up of hands using a tool to adjust or install a small electronic component (no visible text or symbols)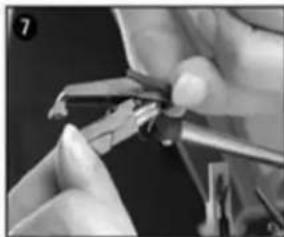
natural_image
Close-up of hands using a tool to adjust or install a small component (no visible text or symbols)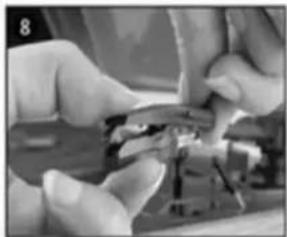
natural_image
Close-up of hands assembling or repairing a small electronic component (no visible text or symbols)natural_image
Two-panel black-and-white photo showing hands using a tool to adjust or install a component, with no visible text or symbols.natural_image
Vintage wooden portable radio with open lid and black legs, no visible text or symbolsMANUALE UTENTE
natural_image
Close-up of a hand pressing down on a mechanical component (no visible text or symbols)natural_image
Close-up of hands holding a small electronic component (no visible text or symbols)natural_image
Close-up of hands using a tool to cut or apply material (no visible text or symbols)natural_image
Close-up of hands assembling or adjusting a dark object with a tool (no visible text or symbols)natural_image
Close-up of hands using a pliers to adjust or install a component (no visible text or symbols)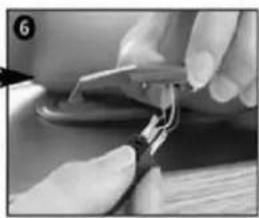
natural_image
Close-up of hands using a tool to adjust a key (no visible text or symbols)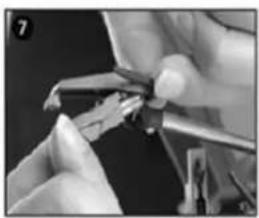
natural_image
Close-up of hands using a tool to adjust or install a small mechanical component (no visible text or symbols)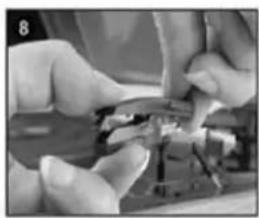
natural_image
Close-up of hands assembling electronic components (no visible text or symbols)natural_image
Two-step black-and-white photo showing hands assembling or adjusting a small mechanical component, with no visible text or symbols.natural_image
Vintage wooden portable radio with open lid and black legs, featuring a circular vent and small earplate (no visible text or symbols)MANUAL DEL USUARIO
natural_image
Close-up of a hand pressing down on a mechanical component (no visible text or symbols)natural_image
Close-up of gloved hands holding a small electronic component (no visible text or symbols)natural_image
Close-up of hands using pliers to cut a piece of metal (no visible text or symbols)natural_image
Close-up of hands performing a sewing or sewing process on fabric (no visible text or symbols)natural_image
Close-up of hands using a tool to adjust or install a component (no visible text or symbols)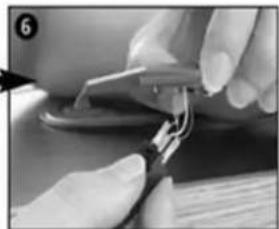
natural_image
Close-up of hands using a tool to adjust or install a small electronic component (no visible text or symbols)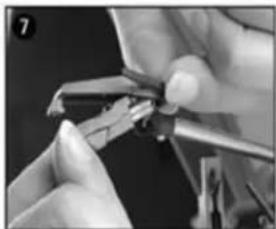
natural_image
Close-up of hands using a tool to adjust or install a small mechanical component (no visible text or symbols)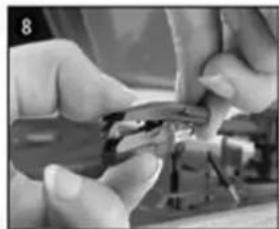
natural_image
Close-up of hands assembling or adjusting a small mechanical component (no visible text or symbols)natural_image
Close-up of gloved hands assembling or adjusting a mechanical component (no visible text or symbols)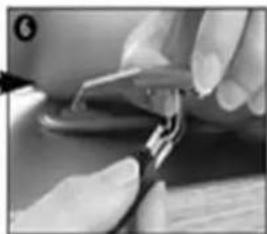
natural_image
Close-up of hands using a tool to adjust or install a small electronic component (no visible text or symbols)- MODE D'EMPLOI
- NOTES :
- CONDITIONS DE GARANTIE
- UTILISATION DU PRODUIT :
- SWITCH OFF IN RESTRICTED AREAS
- INTERFERENCE
- AUTHORISED PERSONNEL
- ACCESSORIES
- KEEP THE EQUIPMENT DRY
- CHILDREN
- Declaration of conformity EU:
- FUNCTIONS:
- DESCRIPTION
- ATTACHING LEGS
- INITIAL SET-UP
- MAINS CONNECTION
- AMPLIFIER CONNECTION (if required)
- Auto Stop
- BLUETOOTH AND USB/SD SET-UP
- REPLACING THE STYLUS:
- INSTALLING A NEW STYLUS CARTRIDGE:
- NOTES:
- TECHNICAL SHEET
- CE
- Warranty conditions OPERATING MANAGEMENT:
- FAILURE TO PACKING:
- DISCLAIMER OF WARRANTY
- DISCLAIMER OF WARRANTY RELATED TO THE ORIGIN OF DAMAGES
- EXCLUSION OF WARRANTIES RELATING TO THE NATURE OF DAMAGES (INDIRECTS DAMAGES)
- OTHER EXCLUSIONS
- BEDIENUNGSANLEITUNG
- GEBRUIKERSHANDLEIDING
Brand : DUAL
Model : DL-P35
Category : Turntable