Smart Infrared Panel Heater 540 348054 - Heating PRINCESS - Free user manual and instructions
Find the device manual for free Smart Infrared Panel Heater 540 348054 PRINCESS in PDF.

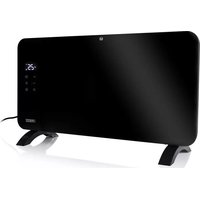
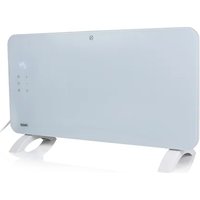
| Product type | Smart infrared heating panel |
| Brand | Princess |
| Model | Smart Infrared Panel Heater 540 348054 |
| Power | 540 W |
| Voltage / Frequency | 220-240 V~, 50/60 Hz |
| Wireless technology | Wi-Fi (2.4 GHz) |
| Max radio frequency power | 20.5 dBm |
| Adjustable temperature range | 0 °C to 37 °C |
| Timer | Programmable, automatic shut-off |
| Display | Touch screen with backlight |
| Control | Integrated touch controls and Princess Home app |
| Installation | Wall mounting (4 points) or on provided feet |
| Safety distance | 1 m minimum from flammable materials |
| Overheat protection | Do not cover, automatic shut-off in case of overheating |
| Cleaning | Damp cloth, no abrasive products |
| Spare parts and support | Available at www.princesshome.eu |
| Compliance | Directive 2014/53/EU (radio equipment) |
| Recommended use | Well-insulated rooms, occasional use |
Frequently Asked Questions - Smart Infrared Panel Heater 540 348054 PRINCESS
User questions about Smart Infrared Panel Heater 540 348054 PRINCESS
0 question about this device. Answer the ones you know or ask your own.
Ask a new question about this device
Download the instructions for your Heating in PDF format for free! Find your manual Smart Infrared Panel Heater 540 348054 - PRINCESS and take your electronic device back in hand. On this page are published all the documents necessary for the use of your device. Smart Infrared Panel Heater 540 348054 by PRINCESS.
USER MANUAL Smart Infrared Panel Heater 540 348054 PRINCESS
ENL Instruction manual
natural_image
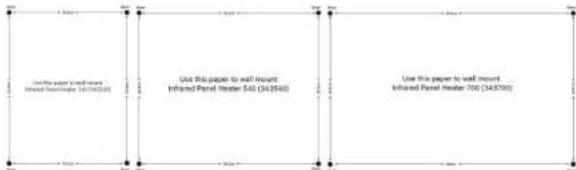
Three white rectangular panels with black markings, arranged in a row (no visible text or symbols)Smart Infrared Panel Heater 350 | 540 | 700
01.348035.01.001 | 01.348054.01.001 | 01.348070.01.001
PARTS DESCRIPTION / ONDERDELENBESCHRIJVING / DESCRIPTION DES PIÈCES / TEILEBESCHREIBUNG / DESCRIPCIÓN DE LAS PIEZAS / DESCRIÇÃO DOS COMPONENTES / DESCRIZIONE DELLE PARTI / BESKRIVNING AV DELAR / OPIS CZĘŚCI / POPIS SOUČÁSTÍ / POPIS SÚČASTÍ / BESKRIVELSE AF BESTANDDELE / OSIEN KUVAUKSET / BESKRIVELSE AV DELER
SAFETY
- By ignoring the safety instructions the manufacturer cannot be held responsible for the damage.
- If the supply cord is damaged, it must be replaced by the manufacturer, its service agent or similarly qualified persons in order to avoid a hazard.
- Never move the appliance by pulling the cord and make sure the cord cannot become entangled.
- The appliance must be placed on a stable, level surface.
- The user must not leave the device unattended while it is connected to the supply.
- This appliance is only to be used for household purposes and only for the purpose it is made for.
- This appliance can be used by children aged from 8 years and above and persons with reduced physical, sensory or mental capabilities or lack of experience and knowledge if they have been given supervision or instructions concerning use of the appliance in a safe way and understand the hazards involved.
• Children shall not play with the appliance.
- Cleaning and user maintenance shall not be made by children without supervision.
• Children of less than 3 years should be kept away unless continuously supervised.
- Children aged from 3 years and less than 8 years shall only switch on/off the appliance provided that it has been placed or installed in its intended normal operating position and they have been given supervision or instruction concerning use of the appliance in a safe way and understand the hazards involved.
• Children aged from 3 years and less than 8 years shall not plug in, regulate and clean the appliance or perform user maintenance
- To protect yourself against an electric shock, do not immerse the cord, plug or appliance in the water or any other liquid.
- WARNING: Some parts of this product can become very hot and cause burns. Particular attention has to be given where children and vulnerable people are present.
- Do not use this heater in the immediate surroundings of a bath, a shower or a swimming pool.
Instruction manual
- Joists, beams and rafters shall not be cut or notched to install the appliance.
- Please do not install the appliance close to curtains and other combustible materials. This could cause a fire.
- The appliance shall, under no circumstances, be covered with insulating material or similar material.
- The heater must not be located immediately below a socket-outlet.
- Do not use this heater if it has been dropped.
- WARNING: The heater must not be used if the glass panels are damaged.
- Use this heater on a horizontal and stable surface, or fix it to the wall, as applicable.
- WARNING: Do not use this heater in small rooms when they are occupied by persons not capable of leaving the room on their own, unless constant supervision is provided.
- WARNING: To reduce the risk of fire, keep textiles, curtain, or any other flammable material a minimum distance of 1m from the air outlet.
- The heater needs to be installed so that the switches and other controls cannot be touched by a person in the bath or shower.
- WARNING: In order to avoid overheating, do not cover the heater.

This product complies with conformity requirements of the applicable European regulations or directives.
Waste electrical products should not be disposed of with household waste. Please recycle where facilities exist. Check with your local Authority or local store for recycling advice.
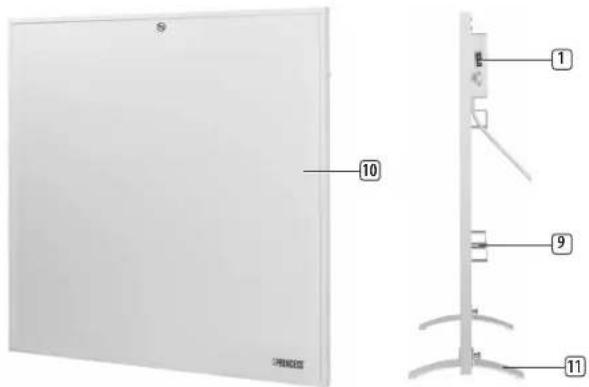
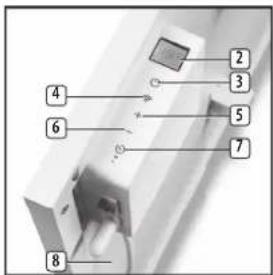
PARTS DESCRIPTION
- On / Off switch
- Display
- On/off button
- WiFi button
-
- button
-
- button
- Timer button
- Heating indicator
- Wall bracket
- Heater
- Feet
INSTALLATION
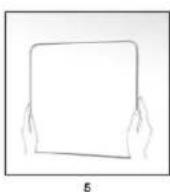
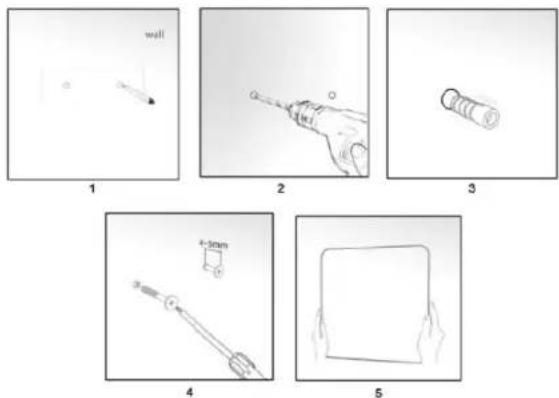
Wall mounting
- Please note that the product must be installed at least 15 cm from the floor and 50 cm from the ceiling.
- The heater must be mounted at 4 points, ensure there is a 300mm clearance on all sides of the heater.
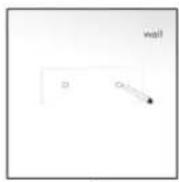
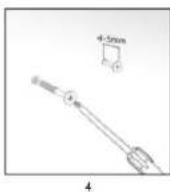
- Measure the distance between the centre of each bracket both horizontally and vertically to ensure drilling holes in the correct place. Mark the positions of the 4 holes to be drilled on the wall (1), use the supplied wall mount drawings for correct measures.
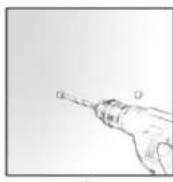
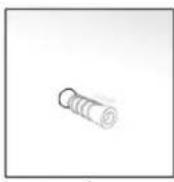
- Drill the holes in the wall (2), then insert the plastic expanded plugs (3) and screw the 4 supplied screws into the plastic expanded plugs (4).
- Attached the panel heater onto the screws and move the heater to the left so that the screws drop into the securing slots (5).
Instruction manual
Foot assembly
- If the heater is not mounted on the wall, the supplied feet must be fitted to the unit.
- To fix the feet, remove the bottom screws from the heater housing.
- Place the feet and secure them by putting the screws back into the housing.
• Take care to ensure that the feet are located correctly on the bottom end of the heater.

natural_image
Close-up of a white architectural corner joint with a small metallic fixture (no text or symbols visible)BEFORE THE FIRST USE
- Put the power cable into the socket. (Note: Make sure the voltage which is indicated on the device matches the local voltage before connecting the device. Voltage 220V-240V 50-60Hz).
- When the device is turned on for the first time, a slight odour will occur. This is normal, ensure adequate ventilation. This smell is only temporary and will soon fade.
- During heating up and cooling down there may be some noises caused by the heater casing expanding and contracting, this is normal and does not indicate any fault.
TOUCH BUTTON/DISPLAY FUNCTIONS
USE
- Push the on/off switch on the side of the heater to turn the heater completely on or off.
Touch button functions
- Press the on/off touch button to turn the heater on, pressing it again will set the device into stand-by mode.
- Wi-Fi button, when device is on or in stand-by mode:
- Press and hold for 6 seconds to put the heating into paring mode (will beep 3 times).
– Follow the instructions on your phone.
- Press 'temperature up (+)' or 'temperature down (-)' buttons to regulate the temperature you desired. The temperature can be set between 0°C and 37°C. Holding the + or - button will increase or decrease target temperature continuously.
- Timer button; when the device is on, press the timer button, the time starts blinking "00:00".
- Use the + and - buttons to set the hours.
- No button press for 5 seconds stops the time blinking.
- Setting time to 00:00 does not enable timer.
- Press timer button again -> time starts blinking and allows the user to change timer duration.
– The remaining time is visible at the display.
– After the set time has expired the device will power off.
- Long-press while timer is running cancels the timer mode.
- Indicator lamp;
- On when heating element is on.
- Off when heating element is off.
Display
- When the red on/off switch is off, the display screen is also off.
- When power is on (on/off switch is on), and the machine is in stand-by mode, the display screen is off, only when the device is already connected to Wi-Fi, the display screen is off with only the Wi-Fi icon visible.
- Pressing the on/off touch button when the power is on will show the Wi-Fi icon + current temperature + time (if set on the phone) on the display screen with back ground light on.
• After 10 seconds without pressing one of the touch buttons, the back ground light will go off. On screen you will still see: Wi-Fi icon + current temperature + time (if set on the phone)
USING THE HEATER WITH PRINCESS HOME APP

- The heater can be used manually with its built-in controls or you can use a smart phone or smart speaker to control it. Before you begin, ensure the Princess Home app is downloaded. The Princess Home app is available on Android and iOS.
- Download the correct version of the Princess Home app via our website princesshome.eu/nl-nl/princess-home-app or use QR:

IOS

Google Play
Pair your heater to Princess Home app
• Make sure your heater is powered.
- Open the Princess Home app.
- Select your country code, enter the cell phone number and tap "Get" to get a message containing the verification code.
- Enter the verification code in the message and tap "Log in" to log in to the App.
- Click "Add Device" to add a new device.
- Select the device you wanted to connect.
- Follow the instructions on the app to connect the heater.
How to set local time
- It is not possible to set time on the machine itself, it has to be set in the app. Go to "My climate devices", choose the infrared heater, then "Timezone". On "Timezone" choose the right time zone, then the machine will sync the same time as set on the phone.
Instruction manual
Technical Specification
| Details 348035 348054 348070 | ||
| Voltage 220-240V~ 220-240V~ 220-240V~ | ||
| Frequency 50/60Hz 50/60Hz 50/60Hz | ||
| Power 350W 540W 700W |
Wireless technology: Wi-Fi
Operating frequency: 2.4 GHz
Max. radio-frequency power: 20.5 dBm
CLEANING AND MAINTENANCE
- Before cleaning, unplug the appliance and wait for the appliance to cool down.
- Clean the appliance with a damp cloth. Never use harsh and abrasive cleaners, scouring pad or steel wool, which damages the device.
DECLARATION OF CONFORMITY
• Hereby, Smartwares Europe declares that the radio equipment type 348035 / 348054 / 348070 are in compliance with Directive 2014/53/EU
• The full text of the EU declaration of conformity is available at the following internet address: www.princesshome.eu/doc
ENVIRONMENT

This appliance should not be put into the domestic garbage at the end of its durability, but must be offered at a central point for the recycling of electric and electronic domestic appliances. This symbol on the appliance, instruction manual and packaging puts your attention to this important issue. The materials used in this appliance can be recycled. By recycling of used domestic appliances you contribute an important push to the protection of our environment. Ask your local authorities for information regarding the point of recollection.
Support
You can find all available information and spare parts at www.princesshome.eu!
VEILIGHEID
natural_image
Close-up of a white metal bracket with a small mark on the left side (no text or symbols visible)IOS

Google Play
natural_image
Close-up of a white architectural corner panel with a small metallic fixture (no text or symbols visible)AVANT LA PREMIÈRE UTILISATION
IOS

Google Play
DÉCLARATION DE CONFORMITÉ
natural_image
Partial view of a white architectural corner detail with a small mark and shadow (no text or symbols visible)DE
IOS

Google Play
natural_image
Close-up of a white metal bracket with a small mark on the left side (no text or symbols visible)IOS

Google Play
natural_image
Partial view of a white architectural corner detail with visible structural elements (no text or symbols)IOS

Google Play
natural_image
Three-panel sketch showing a wall, hand, and cylindrical object with no visible text or symbols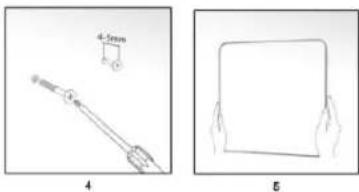
natural_image
Two technical diagrams showing a tool and a square object with hands, labeled 4 and 5 (no text or symbols on the objects themselves)T
natural_image
Close-up of a white architectural corner joint with a small metallic fixture (no text or symbols visible)PRIMA DEL PRIMO UTILIZZO
IOS

Google Play
natural_image
Close-up of a white architectural corner joint detail (no text or symbols visible)FÖRE FÖRSTA ANVÄNDNING
IOS

Google Play
natural_image
Close-up of a white metal bracket with a small metallic bolt and mounting bracket (no text or symbols visible)PRZED PIERWSZYM UŻYCIEM
IOS

Google Play
natural_image
Partial view of a white architectural corner panel corner with no visible text or symbolsPŘED PRVNÍM POUŽITÍM
IOS

Google Play
- Vyvítajte do steny (2) otvory. Následne do nich vložte hmoždinky (3). Do hmoždiniek (4) naskrutkujte 4 pribalené skrutky.
- Osadte panelový ohrievač na skrutky a posuňte ho smerom doľava, čím skrutky zapadnú do zaist’ovacích otvorov (5).
Montáž nožičky
natural_image
Close-up of a white metal bracket with a small metallic clip, against a plain background (no text or symbols visible)PRED PRVÝM POUŽITÍM
IOS

Google Play
Spárovanie ohrievača s aplikáciou Princess Home
natural_image
Close-up of a white metal bracket with a small metallic detail (no text or symbols visible)F∅R APPARATET BRUGES F∅RSTE GANG
IOS

Google Play
natural_image
Partial view of a white architectural corner panel corner with no visible text or symbolsENNEN ENSIMMÄISTÄ KÄYTTÖÄ
IOS

Google Play
natural_image
Partial view of a white architectural corner panel corner with no visible text or symbolsF∅R F∅RSTE GANGS BRUK
IOS

Google Play
Pare varmeovnen med Princess Home-appen
This product is only suitable for well insulated spaces or occasional use.
Operating frequency: 2400MHz\~2483.5MHz
Max. radio-frequency power: 18 dBm

© Copyright 2022