USER MANUAL Conga Rockstar RS70 Pet Flex CECOTEC
Aspirador vertical / Upright vacuum cleaner
cecòtec
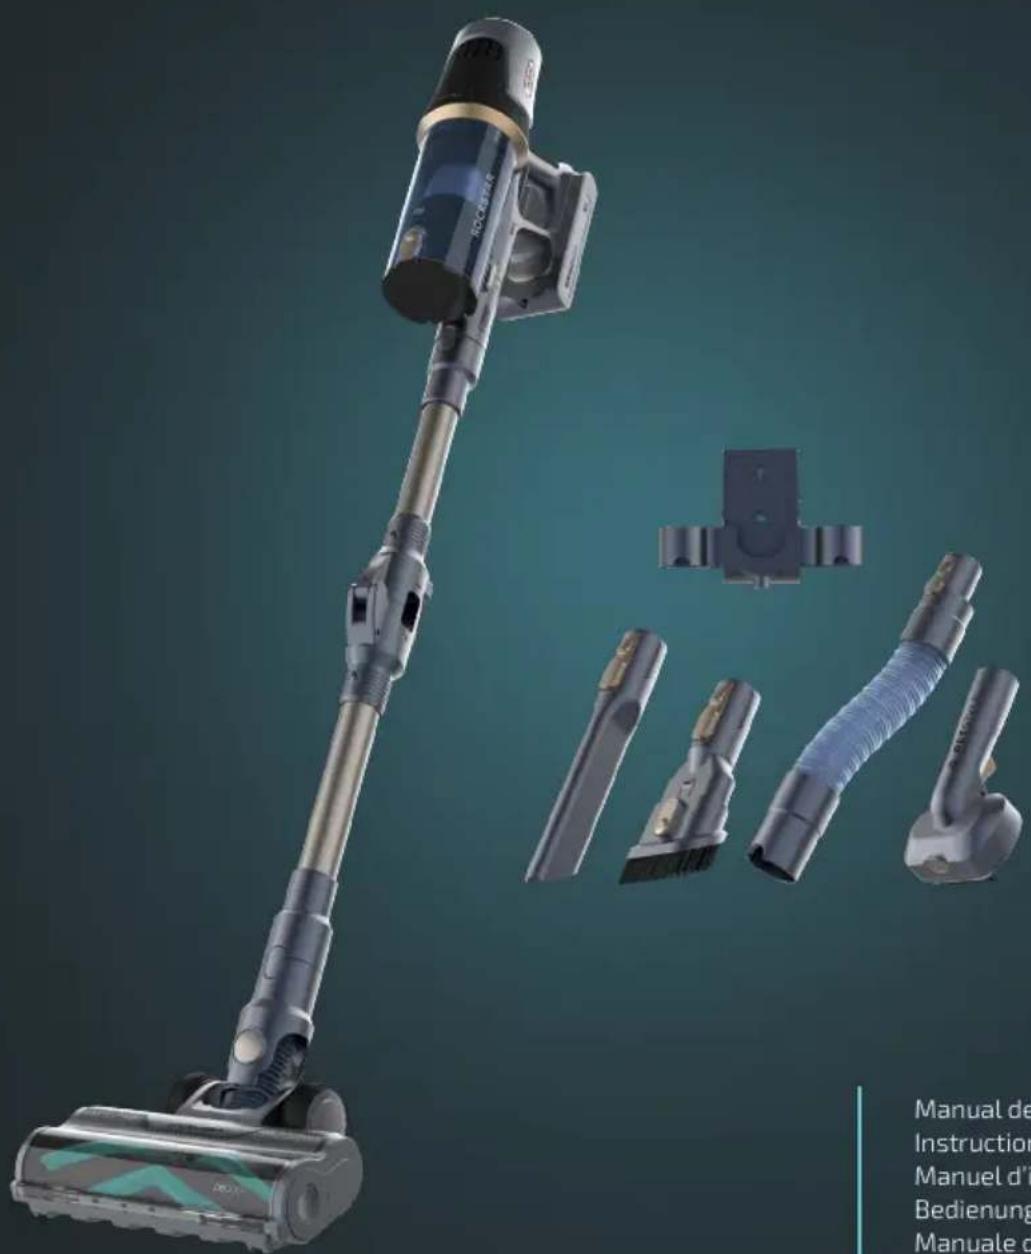
- Parts and components 14
- Before use 15
- Installation 15
- Operation 16
- Cleaning and maintenance 18
- Troubleshooting 19
- Copyright 20
- Simplified EU Declaration of Conformity 20
SOMMAIRE
EN • The coding in this manual is generic and applies to all code variants of the appliance.
- Main body with dust container
- Suction tube
- Extensible tube
- Battery
- Charger
- Wall bracket
- Wall plugs and screws
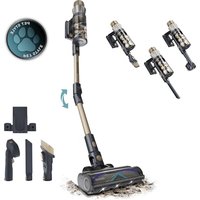
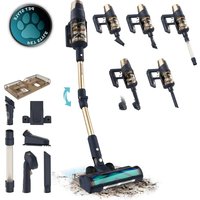
- Grooming brush base with pet brush head
- Pet bristle brush head
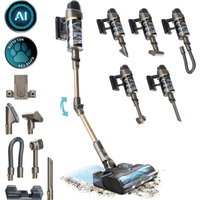
- Motorised brush head
- Crevice tool
- 2-in-1 upholstery brush
Fig. 2
- Dust container emptying button
- Dust container bottom
- Dust container release button
- Charging port
- Battery release button
- Power button
- Cyclonic assembly
- Dust container
- Main body
- Display
- Speed control button
- Battery
Fig. 3
Display
- Speed level indicator light
- ECO mode
- MEDIUM mode
- TURBO mode
- AUTO mode
- Battery status indicator light
- Speed control button
- Filter cleaning warning indicator
- Blocked motorised brush warning indicator
NOTE:
The graphics in this manual are schematic representations and may not exactly match the product.
2. BEFORE USE
- This appliance comes in a packaging designed to protect it during transport. Take the appliance out of its box and remove all packaging materials. You can keep the original box and other packaging materials in a safe place to prevent damage to the appliance if you need to transport it in the future. If you wish to dispose of the original packaging, make sure all items are recycled properly.
- Check that all parts and components are included and in good condition. If any of them are missing or damaged, please contact Cecotec's Official Technical Support Service immediately.
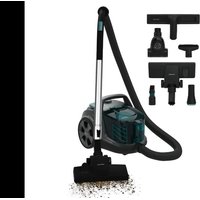
Box content
- Upright vacuum cleaner
- Flexible hose
- Removable battery
- Wall-bracket with charging function
- 2-in-1 furniture accessory
- Crevice tool
- Extensible tube
- Pet brush
- Do not remove the product's serial number in order to keep proper traceability if technical assistance is required.
3. INSTALLATION
Battery installation
Fig. 4
- Insert the battery into the main body.
- Make sure the battery release button is in the locked position.
ENGLISH
Attaching the suction tube and motorised brush head
Fig. 5.
- Insert the suction tube into the suction inlet.
- Make sure the suction tube release button is in the locked position.
- Connect the motorised brush head to the suction tube.
- Make sure the motorised brush head release button is in the locked position.
Attaching accessories
- Accessories can be connected directly to the suction inlet. Fig. 6.
- Alternatively, accessories can also be attached directly to the suction tube for use. Fig. 7
Pet grooming accessory assembly
Fig. 8
- Insert the extensible tube into the suction inlet.
- Make sure the suction tube release button is in the locked position.
- Connect the grooming brush base with pet brush head to the extensible tube.
- The bristle brush head can also be used to replace the pet brush head.
4. OPERATION
Power On/Off
- To switch on the vacuum cleaner, press the power button. The appliance will start in ECO mode (low power).
- To change the power level, press the speed control button. The vacuum cleaner will cycle between modes: ECO, MED, TURBO and AUTO.
- High power (TURBO mode) provides greater suction but reduces runtime.
- In AUTO mode, the power automatically adjusts according to the amount of dust detected.
- To switch off the vacuum cleaner, press the power button again.
Fig. 9
- Power button
- Speed control button
Charging
Fig. 10
Note: Only use the charger supplied with the vacuum cleaner for charging.
To charge the battery:
- Insert the charger connector into the battery charging port.
- The battery status indicator lights on both the display and battery will flash during charging.
Note: The battery status indicator lights will flash sequentially (from first to third).
-
After approximately 4.5 hours, the battery status indicator lights on the display will show 100% and all battery indicator lights will remain steadily lit, indicating that the vacuum cleaner is fully charged.
-
The battery status indicator lights on both the display and battery will turn off 5 minutes after full charge.
Note: The battery can be removed from the main body and charged separately.
Fig. 10 key:
- Battery status indicator light on the display
- Battery status indicator light on the battery
During vacuum cleaner operation, the battery status indicator lights on the display will decrease from 100% to 0%, and the battery indicators will reduce from three lights to one. After several minutes, the last light will flash, the battery light will turn off, and the vacuum cleaner will shut down.
Note:
- It is recommended to recharge the vacuum cleaner before the battery is completely depleted.
- It is recommended to fully charge the vacuum cleaner before storage.
Battery replacement
Fig. 11
- Press the battery release button.
- Remove the battery from the main body.
- To install a new battery, insert it into the main body in the correct orientation.
- Push the battery until the battery release button clicks into the locked position.
ENGLISH
Wall bracket usage
Fig. 12
- Select a suitable wall location, preferably near a power socket. The height should allow the vacuum cleaner to hang with the suction tube and motorised brush head attached.
- Use two wall plugs and screws to secure the wall bracket to the wall.
- The bracket is designed to secure the central part of the vacuum cleaner's battery.
- The vacuum cleaner can be charged while hanging on the wall bracket, once the charger is properly connected.
- Small accessories can also be stored by inserting them into the holes located on both sides of the wall bracket.
5. CLEANING AND MAINTENANCE
Dust container
- Press the suction tube release button and remove both the tube and floor brush from the unit.
- Press the dust container release button to empty the dust container. Fig. 13
- Close the dust container bottom and ensure the bottom release button is in the locked position.
Filters and cyclonic assembly
- Press the dust container release button.
- Hold the dust container end.
- Pull upwards (vertically) to separate the dust container assembly from the main body. Fig. 14
- Remove the foam filter from the dust container. Fig. 15
- Remove the HEPA filter from the main body. Fig. 16
-
Clean the foam filter and HEPA filter with a brush or wash them under running water (max. 40 °C).
-
After washing, allow them to dry for at least 24 hours or until completely dry before reinstalling.
-
Hold the cyclonic assembly and remove it from the dust container. Fig. 17
-
Clean dust around the stainless steel mesh with the brush.
-
Reinstall the cyclonic assembly into the dust container after cleaning.
-
Replace the foam filter and HEPA filter in sequence.
-
Attach the dust container onto the main body.
Note: First align the upper front with the locking mechanism (LOCK), then press down the container end until it clicks into place. Fig. 18
- Make sure the dust container release button is in the locked position.
CAUTION: Do not forget the foam filter and HEPA filter. Make sure they are properly installed before using the vacuum cleaner.
Motorised brush roller
- Take the motorised floor brush and turn it to one side.
- Press one side of the roller with one finger and use two fingers to remove the roller. Fig. 19
- Clean dust and hair from around the floor brush roller.
- After cleaning, insert the roller into the floor brush cavity. Fig. 20
- Align the roller cavity with the floor brush base guides.
- Push the roller until it sits in the correct position.
Resetting the filter cleaning warning indicator
- After 10 hours of vacuum cleaner use, the filter cleaning reminder on the display will light up. Fig. 21
- After cleaning the HEPA filter, press and hold the speed control button for 3 seconds to reset the reminder. Fig. 22
Resetting the blocked brush warning indicator
- When the motorised brush roller is blocked, the blocked brush warning indicator on the display flashes. Fig. 23
- After cleaning the motorised brush roller, press the power button to turn off the vacuum cleaner.
- Press the power button again. The vacuum cleaner will start, and the blocked brush warning indicator will reset.
6. TROUBLESHOOTING
If the following conditions occur during use, the user can check and resolve them without assistance:
| Problem Possible cause | Possible solution | |
| The upright vacuum cleaner does not turn on. | No battery. Charge the battery. | |
| The battery is not inserted. Install the battery. | |
ENGLISH
| Internal damage. Contact Cecotec's Official Technical Support Service. |
| Unusual noise. Dust container full, blocked air inlet. | Clean the dust container. |
| Low suction. Dust container full or blocked. | Clean the dust container. |
| Low power. Charge the vacuum cleaner. |
| Blocked air inlet. Clean the air inlet. |
| The vacuum cleaner does not charge. | Adapter not connected to power supply. | Connect the adapter to the power supply. |
| Adapter not connected to the charging port. | Connect the adapter to the charging port. |
| Broken adapter or wrong adapter used. | Replace the adapter. |
| Internal vacuum cleaner damage. | Contact Cecotec's Official Technical Support Service. |
| The floor brush roller does not work. | Brush roller blocked. Clean the floor brush roller. |
| Dust leakage. Broken filter. Replace the filter. | |
| Missing filter. Install the filter. |
7. COPYRIGHT
The intellectual property rights over the texts in this manual belong to CECOTEC INNOVACIONES, S.L. All rights reserved. The contents of this publication may not, in whole or in part, be reproduced, stored in a retrieval system, transmitted, or distributed by any means (electronic, mechanical, photocopying, recording or similar) without the prior authorization of CECOTEC INNOVACIONES, S.L.
CE Cecotec Innovaciones hereby declares that this appliance complies with the essential requirements and other relevant provisions of the regulations applicable in the European Union. This appliance has been designed, manufactured and tested in compliance with required safety and quality
standards. The full text of the EU Declaration of Conformity can be found on the following website: https://cecotec.es/es/information/declaration-of-conformity
FRANÇAIS
1. PIÈCES ET COMPOSANTS
Image 1
Utiliser le support mural
Img. 12