
THINPAR-LED-RING - Lighting IBIZA SOUND - Free user manual and instructions
Find the device manual for free THINPAR-LED-RING IBIZA SOUND in PDF.

| Product type | Extra slim LED projector |
| Brand | Ibiza Sound |
| Model | THINPAR-LED-RING |
| Light source | 7 x 6W + 48 x 0.5W 5050 LEDs |
| Beam angle | 45° |
| Power consumption | 42 W |
| Power supply | 110-240 V ~ 50/60 Hz |
| Electrical class | Class I (requires grounded outlet) |
| Dimensions | 185 x 185 x 80 mm |
| Weight | 0.84 kg |
| DMX channels | 6 or 10 channels (selectable) |
| DMX address | 001 to 512 |
| Control | DMX, infrared remote control, local control panel |
| Operating modes | Fixed color, jump, fade, sound control (2 modes), strobe, auto |
| Minimum safety distance | 0.5 m (illuminated object and surfaces) |
| Usage | Indoor only, decorative use |
| Max. ambient temperature | 40 °C |
| Ventilation | Min. distance 50 cm from obstacles |
| Maintenance | Clean with a clean dry cloth, disconnect before |
| Repairability | LEDs not replaceable; fuse replaceable (identical) |
| Disposal | Do not dispose of in household waste, recycle at a waste collection point |
| Package contents | 1 PAR, 1 remote control, 1 power cord, 1 instruction manual, 1 bracket |
Frequently Asked Questions - THINPAR-LED-RING IBIZA SOUND
User questions about THINPAR-LED-RING IBIZA SOUND
0 question about this device. Answer the ones you know or ask your own.
Ask a new question about this device
Download the instructions for your Lighting in PDF format for free! Find your manual THINPAR-LED-RING - IBIZA SOUND and take your electronic device back in hand. On this page are published all the documents necessary for the use of your device. THINPAR-LED-RING by IBIZA SOUND.
USER MANUAL THINPAR-LED-RING IBIZA SOUND
EXTRA-FLAT PAR CAN
7x6W + 48x0.5W 5050 SMD LEDs
PROJECTEUR PAR EXTRA-PLAT
7x6W + 48x0.5W 5050 SMD LEDs
Ref.: THINPAR-LED-RING
Code: 16-2039
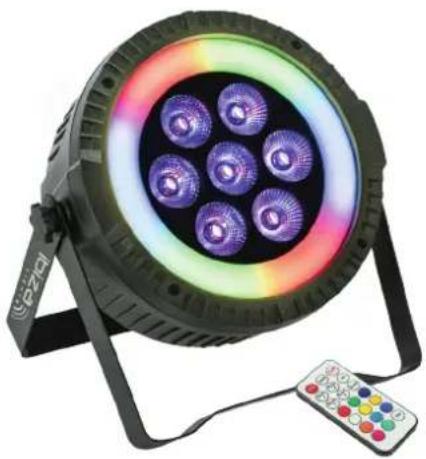
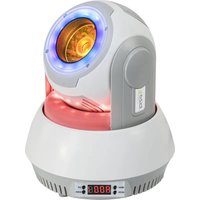
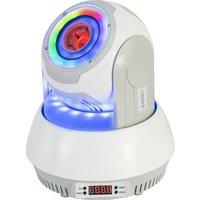
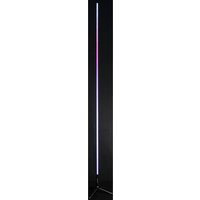
natural_image
Circular LED array light fixture with multiple purple and blue lenses mounted on a stand, next to a remote control unit (no text or symbols visible)MANUAL
UNPACKING INSTRUCTIONS
Immediately upon receiving a fixture, carefully unpack the carton, check the contents to ensure that all parts are present and have been received in good condition. Notify the freight company immediately and retain packing material for inspection if any parts appear to be damaged from shipping or the carton itself shows signs of mishandling. Keep the carton and all packing materials. In the event that a fixture must be returned to the factory, it is important that the fixture be returned in the original factory box and packing.
CONTENTS OF THE CARTON
• 1 pc. THINPAR
• 1 pc remote control
• 1 pc. user manual
- 1 pc. power cable
- 1 pc. handle
EXPLANATION OF SYMBOLS ON THE SILKSCREEN

The triangle containing a lightning symbol is used to indicate whenever your health is at risk (due to electrocution, for example).

An exclamation mark in a triangle indicates particular risks in handling or operating the appliance.

The unit complies with CE standards

For indoor use only

Minimum distance between the appliance and other objects
CAUTION DO NOT OPEN THE HOUSING SHOCK HAZARD
Please read this manual carefully before operating this product.
SAFETY RECOMMENDATIONS
- Please read these instructions carefully, they include important information about the installation, usage and maintenance of this product.
- Please keep this User Guide for future reference. If you sell the unit to another user, be sure that he also receives this instruction booklet.
- Always make sure that you are connecting to the proper voltage, and that the line voltage you are connecting to is not higher than that stated on the bottom of the fixture.
- The appliance is part of class I and must exclusively connected to an earthed mains outlet.
• This product is intended for indoor use only!
- To prevent risk of fire or shock, do not expose fixture to rain or moisture. Make sure there are no flammable materials close to the unit during operation.
- The unit must be installed in a location with adequate ventilation, at least 20in (50cm) from adjacent surfaces. Be sure that no ventilation slots are blocked.
- The minimum distance luminaire from that part of the luminaire or lamp to the lighted object is 0.5m.
• Maximum ambient temperature (T _a ) is 104° F (40°C). Do not operate the fixture at temperatures higher than this.
- In the event of a serious operating problem, stop using the unit immediately. Never try to repair the unit by yourself. Repairs carried out by unskilled people can lead to damage or malfunction. Please contact the nearest authorized technical assistance center. Always use the same type of spare parts.
• Make sure the power cord is never crimped or damaged.
- Never disconnect the power cord by pulling or tugging on the cord.
- Avoid direct eye exposure to the light source while it is on as sensitive persons may suffer an epileptic shock (especially meant for epileptics)!
- The product is for decorative purposes only and not suitable as a household room illumination.
- If the external flexible cable or cord of this luminaire is damaged, it shall be exclusively replaced by the manufacturer or his service agent or a similar qualified person in order to avoid a hazard.
- The light source of this luminaire is not replaceable. When it reaches the end of its life time, the whole unit must be discarded..
DISCONNECT DEVICE
Where the MAINS plug or an appliance coupler is used as the disconnect device, the disconnect device shall remain readily operable.
FUSE REPLACEMENT
Locate and remove the unit's power cord. Once the cord has been removed located the fuse holder located inside the power socket. Insert a flat-head screw driver into the power socket and gently pry out the fuse holder. Remove the bad fuse and replace with a new one.
Warning: If after replacing the fuse you continue to blow fuses, STOP using the unit. Contact customer support for further instructions. Continuing to use the unit may cause serious damage.
INSTALLATION
The unit should be mounted via its screw holes on the bracket. Always ensure that the unit is firmly fixed to avoid vibration and slipping while operating. Always ensure that the structure to which you are attaching the unit is secure and is able to support a weight of 10 times of the unit's weight.
Never stand directly below the device when mounting, removing or servicing the fixture.
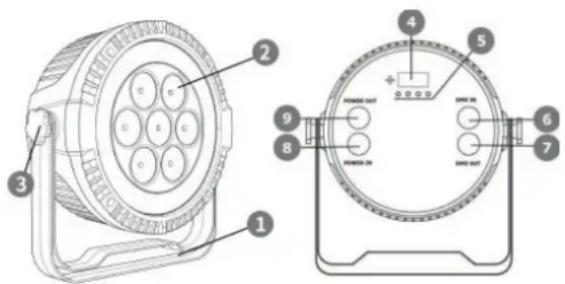
BUTTONS & CONNECTORS
| No. Designation No. Designation | ||
| 1 Mounting Bracket 6 DMX Input (3-pole) | ||
| 2 LEDs 7 DMX Output (3-pole) | ||
| 3 Adjustment Screw 8 Power Input | ||
| 4 Display 9 Power Output | ||
| 5 Operating Buttons | ||
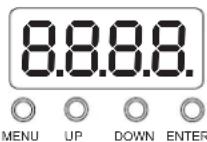
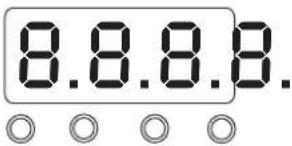
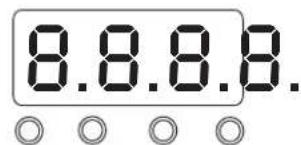
LED DISPLAY
The LED display has 4 buttons: MENU / UP / DOWN / ENTER
MENU STRUCTURE
| No. Display | |||
| 1 d001 Address code (001-512) | |||
| 2 Chnd 6 / 10 channel selection | |||
| 3 Auxx | Au01-Au08 : colour selectionAu09: JumpAu10: GradientSou1: Sound controlled mode 1Sou2: Sound controlled mode 2 | ||
| 4 St00 | St00 no flashSt01-St16 strobe effect from slow to fast | ||
| 5 SP00 | SP01-SP16 Auto speed from slow to fast | ||
| 6 R220 | Red color selection (000-255) | Press "Confirm" key to switch | |
| G220 | Green color selection (000-255) | ||
| B220 Blue color selection (000-255) | ||
| W220 White color selection (000-255) | ||
| 7 Iron/Irof Remote control on/off | ||
DMX CHANNEL CHART PLEASE REFER TO THE END OF THE MANUAL
REMOTE CONTROL
| ON: Remote on Srobe: Strobe. Up/Down : change speed | |
| Off: Remote off Auto1 : Auto 1 | |
| Auto2: Auto 2 Up: Increase | |
| Down: Decrease Soun1: Sound control 1 | |
| Soun2: Sound control 2 R: Red | |
| G: Green B: Blue | |
| W: White 1: Color mix 1 | |
| 2: Color mix 2 3: Color mix 3 | |
| 4: Color mix 4 | 5: Color mix 5 |
| 6: Color mix 6 | 7: Color mix 7 |
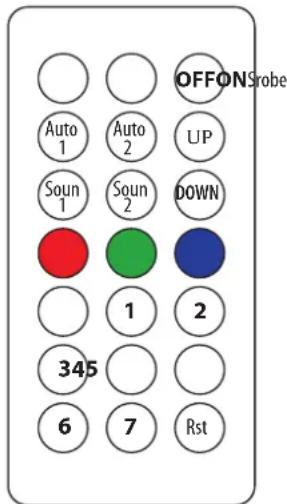
RST: Reset
Note: A DMX controller has priority over the remote control and the menu. Unplug the DMX cable and set the Remote Control to ON if you want to control the unit via the remote. Set the Remote Control to off, if you want to control the unit via the menu.
RECOMMENDATIONS FOR BATTERIES

This symbol indicates that used batteries should not be disposed of with household waste but deposited in separate collection points for recycling.
ATTENTION
- Danger of explosion if battery is incorrectly placed. Only replace by the same or equivalent type.
- Keep new and old batteries out of the reach of children.
- If the battery compartment doesn't close properly, stop using the product and keep it out of the reach of children.
WARNING
The supplied remote control contains a button cell. In case of ingestion, it might cause serious internal burns within only 2 hours that might lead to death.
If you are in doubt whether the batteries have been swallowed or introduced into any other part of the body, contact immediately a doctor.
CARE
Before cleaning the unit, disconnect it if from the mains. Do not use aggressive cleaning agents. Use a clean cloth to wipe any dust or dirt from the product. We are not liable for damage arising from incorrect handling, improper use or wear and tear. We reserve the right to make technical modifications.
SPECIFICATIONS
Power supply....110-240V\~50/60Hz
Consumption....42W
Beam angle....45°
Light source 7 x 6W + 48 x 0.5W 5050 LEDs
Dimensions 185 x 185 x 80 mm
Weight....0.84kg
Correct Disposal of this product

This marking indicates that this product should not be disposed with other household wastes throughout the EU. To prevent possible harm to the environment or human health from uncontrolled waste disposal, recycle it responsibly to promote the sustainable reuse of material resources. To return your used device, please use the return and collection systems or contact the retailer where the product was purchased. They can take this product for environmental
safe recycling.
PROJECTEUR PAR EXTRA-PLAT - 7 X 6W + 48 X 0.5W 5050 LEDS NOTICE D'UTILISATION
DÉBALLAGE
DISPOSITIF DE COUPURE
REPLACEMENT DU FUSIBLE
No. Description No. Description
AFFICHEUR A LED
MENUENTOR
DOWN

LED DISPLAY
MENUENTER
DOWN
[Non-Text]
LED DISPLAY
MENUENTOR
DOWN
LED ZASLON
MENUENTER
DOWN
LED zaslon ima 4 gumbe: MENU / UP / DOWN / ENTER
MENI STRUKTURA
| No. Display | |||
| 1 d001 | Naslovna koda (001-512) | ||
| 2 Chnd | Izbira kanala 6/10 | ||
| 3 Auxx | Au01-Au08: Izbira barveAu09: JumpAu10: GradientSou1: Način z nadzorom zvoka 1Sou2: Način z nadzorom zvoka 2 | ||
| 4 St00 | St00 brez stroboSt01-St16 strobo učinek od počasnega do hitrega | ||
| 5 SP00 | SP01-SP16 Samodejna hitrost od počasne do hitre | ||
| 6 | R220G220B220W220 | Izbira rdeče barve (000-255)Izbira zelene barve (000-255)Izbira modre barve (000-255)Izbira bele barve (000-255) | (za preklop pritisnite tipko "Potrdi") |
| 7 Iron/Irof | VKLOP / IZKLOP daljinskega upravljalnika | ||
DMX KANAL SLIKA POGLEJTE NA KONCU PRIROČNIKA
Opomba: Krmilnik DMX ima prednost pred daljinskim upravljalnikom in menijem. Odklopite kabel DMX in nas-
tavite daljinski upravljalnik na ON, će želite upravljati enoto prek daljinskega upravljalnika. Če želite upravlja- ti enoto prek menija, izklopite daljinski upravljalnik.
DALJINSKI UPRAVLJALNIK
ON: Daljinsko vklopljeno Srobe: Strobe. Gor / Dol: spremenite hitrost
OFF: daljinski izklop Auto1: Auto 1
Auto2: Auto 2 UP: Povečajte
DISPLAY DE LED
Channel Value Function
| 1 R dimmer | R dimmer, linear dimmer, from dark to bright |
| 2 G dimmer | G dimmer, linear dimmer, from dark to bright |
| 3 B dimmer | B dimmer, linear dimmer, from dark to bright |
| 4 W dimmer | W dimmer, linear dimmer, from dark to bright |
| 5 Light strip | control Light strip effect: selection |
| 6 Light strip | speed Light strip speed: from slow to fast |
10 CHANNEL DMX TABLE
Channel Value Function
| 1 Total dimmer | Total dimmer, linear dimmer, from dark to bright | |
| 2 R dimmer | R dimmer, linear dimmer, from dark to bright | |
| 3 G dimmer | G dimmer, linear dimmer, from dark to bright | |
| 4 B dimmer | B dimmer, linear dimmer, from dark to bright | |
| 5 W dimmer | R dimmer, linear dimmer, from dark to bright | |
| 6 Total strobe | Total strobe, from slow to fast | |
| 7 Function selection | 0-4: DMX channel control5-49: Jump50-99: Gradual100-149: Pulse change150-200: Sound control 1201-255: Sound control 2 | |
| 8 Function speed | Function speed, from slow to fast | |
| 9 Light strip control | Light strip effect selection | |
| 10 | Light strip speed | 0-255: speed from slow to fast |

View the item on our website

Any problems or questions?
Contact us on facebook
Imported from China by LOTRONIC S.A.
Avenue Zénobe Gramme 9
B-1480 Saintes

www.ibiza-light.com

- MANUAL
- UNPACKING INSTRUCTIONS
- CONTENTS OF THE CARTON
- EXPLANATION OF SYMBOLS ON THE SILKSCREEN
- CAUTION DO NOT OPEN THE HOUSING SHOCK HAZARD
- SAFETY RECOMMENDATIONS
- DISCONNECT DEVICE
- FUSE REPLACEMENT
- INSTALLATION
- LED DISPLAY
- DMX CHANNEL CHART PLEASE REFER TO THE END OF THE MANUAL
- REMOTE CONTROL
- RECOMMENDATIONS FOR BATTERIES
- ATTENTION
- WARNING
- CARE
- SPECIFICATIONS
- Correct Disposal of this product
- PROJECTEUR PAR EXTRA-PLAT - 7 X 6W + 48 X 0.5W 5050 LEDS NOTICE D'UTILISATION
- DÉBALLAGE
- DISPOSITIF DE COUPURE
- REPLACEMENT DU FUSIBLE
- AFFICHEUR A LED
- LED ZASLON
- DALJINSKI UPRAVLJALNIK
- DISPLAY DE LED
- CHANNEL DMX TABLE
Brand : IBIZA SOUND
Model : THINPAR-LED-RING
Category : Lighting