MyPure SLIM V-MF - Water filter BRITA - Free user manual and instructions
Find the device manual for free MyPure SLIM V-MF BRITA in PDF.

| Product type | Under-sink water filter |
| Brand | BRITA |
| Model | MyPure SLIM V-MF |
| System dimensions (W/D/H) | 72 mm / 69 mm / 330 mm |
| Cartridge dimensions (W/D/H) | 68 mm / 68 mm / 311 mm |
| Weight dry / wet | 0.5 kg / 1 kg |
| Operating water pressure | 2 to 6.9 bar |
| Inlet water temperature | 4 °C to 30 °C |
| Max flow rate | 3 l/min |
| Filtration capacity | Up to 8000 L or 12 months |
| Chlorine reduction (NSF 42) | ≥ 50% (Class I) |
| Metal reduction (lead) | > 90% (DIN EN 14898) |
| Pesticide reduction | Yes |
| Reduction of pharmaceutical residues | > 90% (NSF 401) |
| Bacteria reduction | 99.999% (ASTM F838) |
| Microorganism reduction | 99.95% |
| Benzene reduction | ≥ 90% (NSF 53) |
| Asbestos reduction | > 99.9% (NSF 53) |
| Installation position | Vertical or horizontal |
| Water inlet connection | G 3/8" |
| Water outlet connection | G 3/8" |
| Maintenance | External cleaning with a soft, damp cloth |
| Cartridge replacement | Every 12 months or 8000 L |
| Warranty | 2 years statutory |
| System lifespan | 10 years (excluding cartridge) |
| Spare parts available | Filter cartridges, hoses, seals, adapters |
Frequently Asked Questions - MyPure SLIM V-MF BRITA
User questions about MyPure SLIM V-MF BRITA
0 question about this device. Answer the ones you know or ask your own.
Ask a new question about this device
Download the instructions for your Water filter in PDF format for free! Find your manual MyPure SLIM V-MF - BRITA and take your electronic device back in hand. On this page are published all the documents necessary for the use of your device. MyPure SLIM V-MF by BRITA.
USER MANUAL MyPure SLIM V-MF BRITA
Instructions for use
Mode d'emploi
Gebrauchsanleitung
I. Thank you for choosing BRITA quality for cleaner, fresher tasting water!
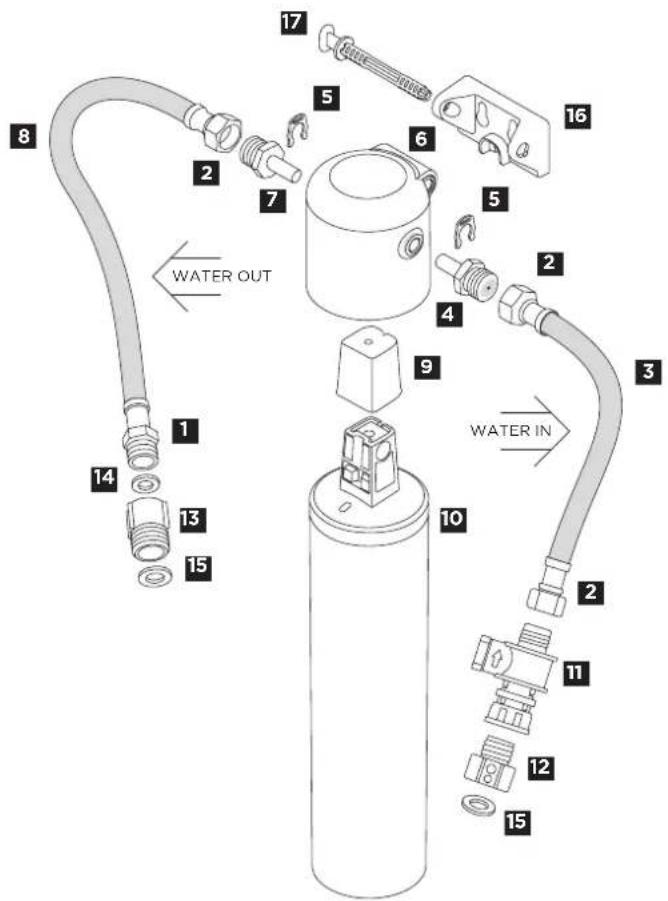
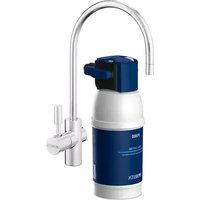
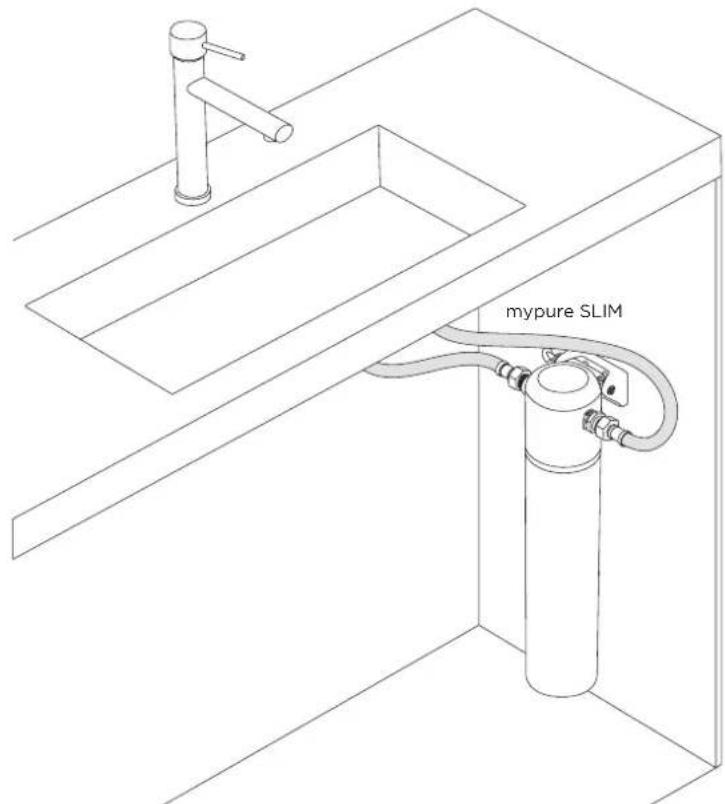
The mypure SLIM V-MF system:
1 Attachment 3/8" external thread
2 Attachment nut 3/8"
3 "Water in" hose
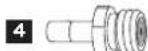
4 Thread insert with flow restrictor
5 Fixing clip
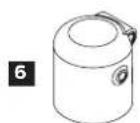
6 Filter head
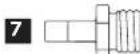
7 Thread insert
8 "Water out" hose
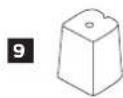
9 Dust cap
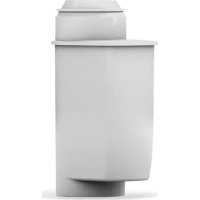
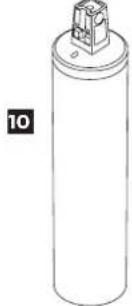
10 Filter cartridge
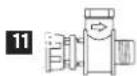
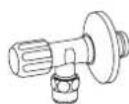
Backflow preventer
12 Optional adapter to cold water supply (G1/2 OT-G3/8 IT)
13 Optional adapter to kitchen tap supply (G1/2 IT - G3/8 OT)
14 Optional flat gasket 3/8"
15 Optional flat gasket 1/2"
16 Wall mount
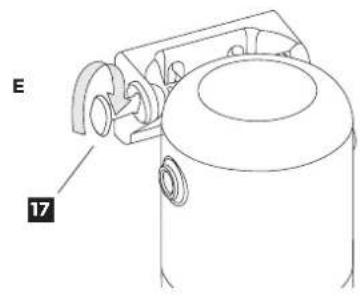
17 Securing pin for wall mount
II. Quality from the very start
To ensure that you get the best results from your BRITA mypure SLIM, please follow the instructions carefully. If there is copper piping underneath the sink needing adapting, we advise you to consult a service technician for installation.
Preparation
This device can only be attached to taps with flexible connection tubes in sizes of 3/8'' or 1/2'' . For 1/2'' please use the supplied adapters.
Over 50 years of experience is a guarantee of quality
For over 50 years, BRITA has stood for constant innovation and the highest quality of water filter solutions. To reach high quality requirements at BRITA, there are stringent internal and external quality controls.
Lifetime of the mypure SLIM V-MF water filter depends on local water quality. The filter cartridge can filter up to 8000 L/12 months.
Terms of warranty
The mypure SLIM filter system is subject to statutory guarantee of 2 years. A warranty claim is only valid if all instructions in this handbook are followed and observed.
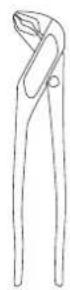
Tools needed
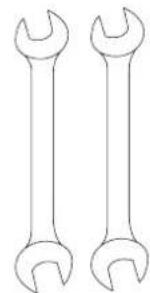
Wrench 2× 19mm
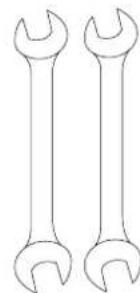
Optional tools needed 1 / 2 " adapters
Wrench 22 and 26 mm
Cloth
BucketPipe
III. Contents of the mypure SLIM Kit
To ensure you get the best results from your BRITA mypure SLIM water filter kit, please follow these instructions carefully.
Your mypure SLIM water filter kit includes the following:
3 "Water in" hose
4 Thread insert with flow restrictor
5 Fixing clip
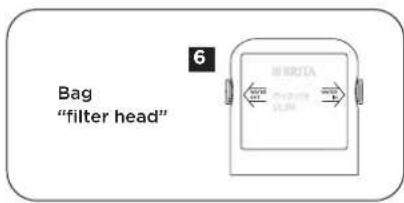
6 Filter head
7 Thread insert
8 "Water out" hose
9 Dust Cap
10 Filter cartridge
Backflow preventor
12 Optional adapter to cold water supply (G1/2 OT - G3/8 IT)
13 Optional adapter to kitchen tap supply (G1/2 IT - G3/8 OT)
14 Optional flat gasket 3/8"
15 Optional flat gasket 1/2"
16 Wall mount


Bag "WATER IN"


Bag "WATER OUT"
IV. Installation
Step 1: Attaching the hoses
We recommend that you first arrange all parts you need in front of you. You will need a 3/8" or 1/2 supply which is also connected to your kitchen tap.
Recommended for installation of the wall mount: two screws (e.g. 5 mm in size) and two wall plugs (if necessary). Please use appropriate screws and wall plugs for the type of wall.
Please follow the diagram below and the steps in the right order.
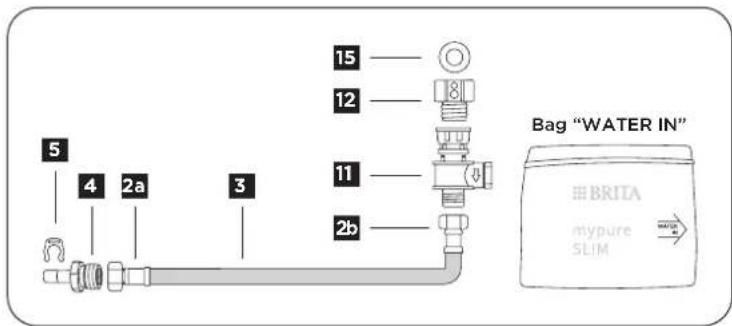
A. Connect the water supply line (see bag "WATER IN")
a) Turn off the cold water supply.
b) Put "water in" hose (3) in place.
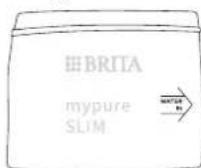
c) Now connect one end of the hose (2a) to the filter head (6) inlet using the thread insert 3 / 8 including flow restrictor to plug-in (4) and add the fixing clip (5). This is labelled "WATER IN" and marked with an arrow. Make sure the thread insert is pressed to the limit and the fixing ring is seated correctly!
d) Now connect the other end of the hose (2b) to the back flow preventer (11) and the cold water supply. If you cannot connect the end of the back flow preventer (11) use the adapter (12) supplied with related gasket (15).
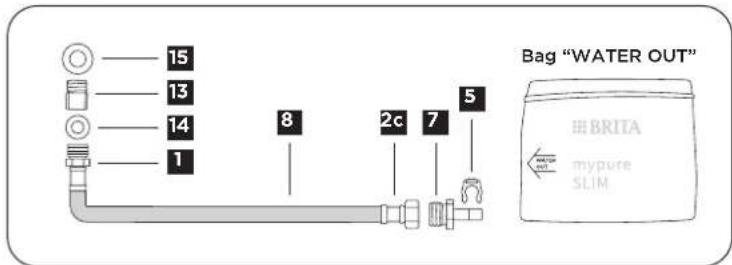
B. Connect the tap supply line (see bag "WATER OUT")
a) Put hose (8) in place
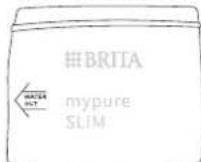
b) Now connect the correct end of the hose (2c) to the filter head (6) inlet using the thread insert 3/8 to plug-in (7) and add the fixing clip (5). This is labelled "WATER OUT" and marked with an arrow. Make sure the thread insert is pressed to the limit and the fixing ring is seated correctly!
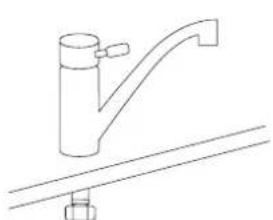
c) Now connect the other end of the hose (1) to the hose which is already attached to the kitchen tap for cold water. If you cannot connect the end of the hose (2c) use the adapter (13) supplied with related gaskets (14 and 15).
Cold water supply
* UK: see page 10
The max. tightening torque for the G3/8" connections must not exceed 10 Nm!
Before use make sure that gaskets are placed correctly and all parts are fitted and connections are dry.
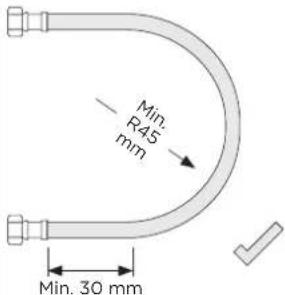
All water lines should be mounted as follows to ensure correct functionality:
Bends immediately behind the crimped connection of the hose have a major impact on life cycle. It is recommended to bend the hose no more than 30~mm behind the pressing sleeve. The specified minimum permissible bending radius R refers to hose parts after 30~mm . The minimum bending radius should be R45 mm.
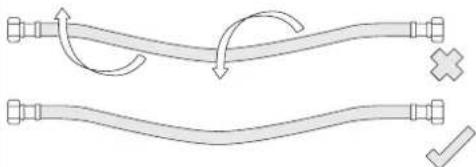
Also make sure that the hose does not twist on itself during assembly. Torsional loading can also reduce the life cycle.
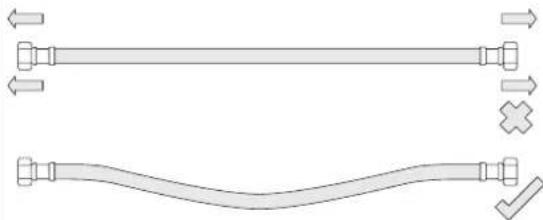
Make sure that the hose is not subject to unnecessary strain during assembly. For example avoid stretching the hose if it is too short.
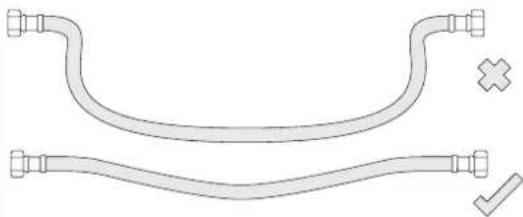
Avoid severe and/or unnecessary bends in the hose, as these can cause kinking and shorten the life cycle of the hose.
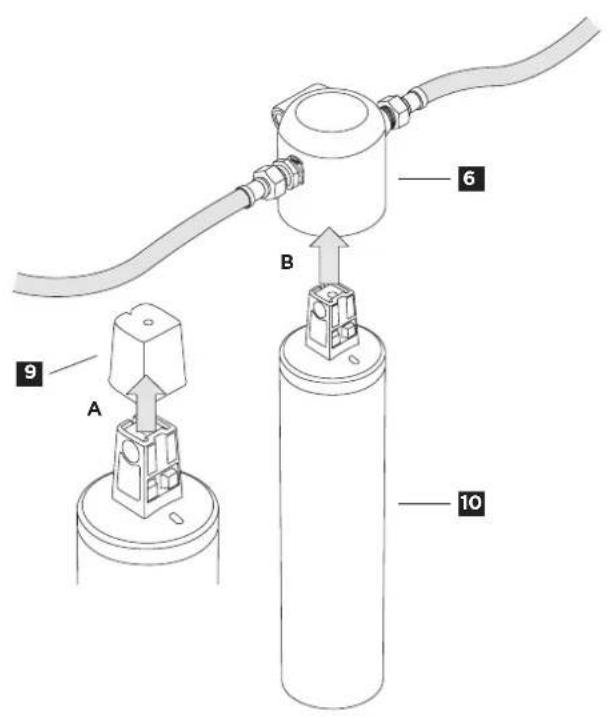
Step 2: Inserting the filter cartridge
A. Remove the dust cap (9).
B. Insert the filter cartridge (10) into the filter head (6) until it snaps in with a click.
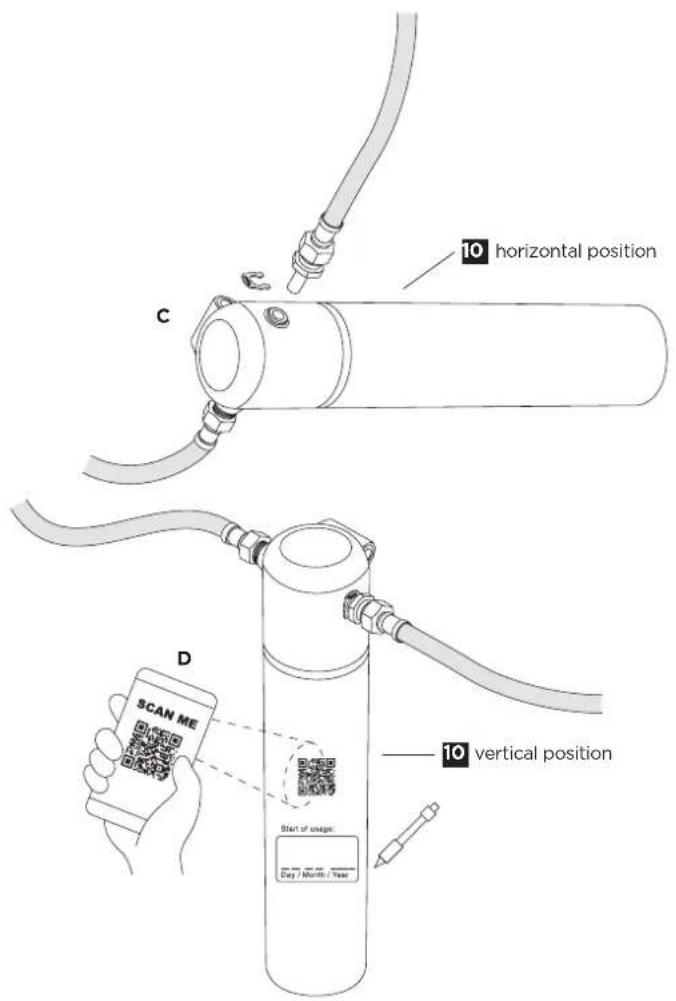
C. Position the filter cartridge (10) in a vertical or horizontal position.
D. Note date of installation on filter cartridge label or set exchange date in BRITA app using the QR-code.
Step 3 (optional): Space-saving wall mount to install the cartridge under the sink

During assembly, note the installation dimensions, bending radius of the hoses and dimensions of the accessories. The system can be operated vertically and horizontally. When using the wall mount, install vertically only!
A. Attach the wall mount (16) in place using two matching screws and use two wall plugs, if necessary, depending on the type of wall (not in scope of supply).
B. Pull out securing pin (17) out of wall mount (16).
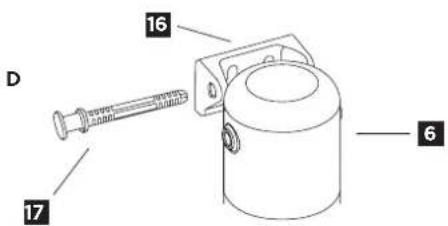
C. Locate the filter head (6) in the wall mount (16).
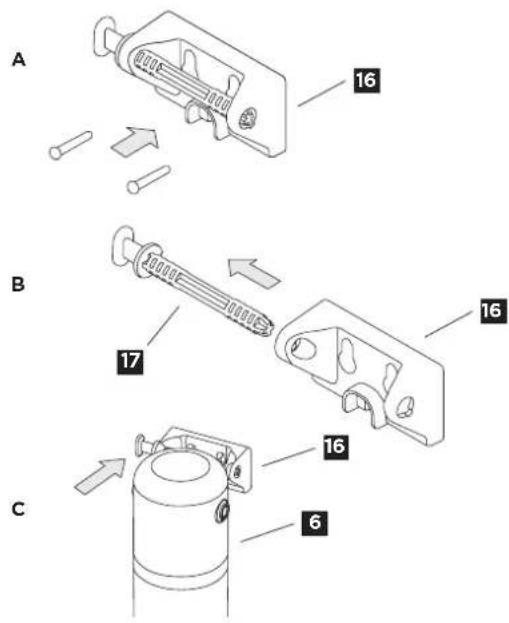
D. Insert securing pin (17) into filter head (6) using the prepared holes on the left or the right side of the wall mount (16). Turn the handle of the securing pin (17) into vertical position to secure the filter head in place.
E. Turn securing pin (17) one quarter clockwise to adjust it.
Step 4: Commissioning
Before use, make sure that you have followed all the steps correctly and all the parts are fitted. Place a cloth and bucket under the cartridge to catch any leakages.
A. Turn on the cold water supply and check the system carefully for any leaks.
B. Open the valve on your tap and let the water run for 1-2 minutes (minimum 5 litres).
V. Replacing, resetting and maintenance
Replacing the filter cartridge
The filter cartridge must be replaced after 8,000 litres usage or latest 12 months after first use.
a) Turn off the cold water supply.
b) Remove the exhausted filter cartridge (10) from the filter head (6).
c) Attach the new filter cartridge (see chapter IV step 2).
d) Turn on cold water supply.

Before use, make sure that you have followed all the steps correctly and all the parts are fitted. Place a suitable container under the cartridge to catch any leakages.
A. Turn on the cold water supply and check the system carefully for any leaks.
B. Open the valve on your tap and allow the water to run for 1-2 minutes (minimum 5 litres).
While changing the filter some water can run out. To prepare this have a cloth and bucket nearby. It is recommended to turn off water supply and allow cold water run through completely by opening the valve of the tap briefly before changing the filter cartridge.
Maintenance
Regularly check the filter system for leaks and the hoses for kinks. Damaged hoses must be replaced.
Product is engineered for a lifetime of 10 years under regular usage conditions.
Prior to exchanging the filter system, read the technical data and the operating and safety information.
Regularly clean the outside of the filter system with a soft, damp cloth.
Do not use any abrasive chemicals, cleaning solutions or astringent cleaning agents.
Optimum use
- BRITA recommends the filter system not be decommissioned for a long period. If the BRITA mypure SLIM filter system is not used for several days (2-3 days), we recommend the filter system to be flushed with the flushing volume X indicated in the table below. After stagnation periods of over 4 weeks, the filter should be flushed with flushing volume Y or else replaced. Please also note the maximum usage period of the filter cartridge is 12 months.
Flushing volume X after 2-3 days stagnation 5 Litres
Flushing volume Y after 4 weeks stagnation 15 Litres
- The filter system must not be opened or dismantled during operation. The filter system is designed for a service life of 10 years counted from the date of installation. Hoses have to be replaced 5 years after the installation.
VI. Troubleshooting
A. No water flow
Cause: Water intake closed.
Troubleshooting: Open the water intake at the upstream shut-off valve and check hoses for kinks.
B. No or low water flow in spite of open water intake
Cause: Mains pressure too low.
Troubleshooting: Check mains pressure. If the fault continues, check the filter system and filter cartridge and replace if necessary. Check hoses for kinks.
C. Leak
Cause: Screw connections not fitted correctly.
Troubleshooting: Check mains pressure. Fixing all screw connections in accordance with chapter IV. Check if thread inserts are tightened to the limit and fixation clips are seated correctly according to chapter IV. Check gaskets are undamaged and inserted correctly.
VII. Technical Data
Filter cartridge
| Operating pressure 2 bar to max. 6.9 bar | ||
| Water intake temperature 4°C to 30°C | ||
| Ambient temperature 4°C to 40°C | ||
| Water temperature 4°C to 30°C | ||
| Flow Rate Max. 3 L/Min. | ||
| Working flow range and associated pressure loss 30-180 L/h / 0.2-1.6 bar | ||
| Weight (dry/wet) 0.5 kg / 1.0 kg | ||
| Rated filter capacity 8000 L | ||
| Chlorine reduction NSF 42 Class I (≥ 50%) | ||
| Particle retention NSF 42 | Class I (≥ 0.5 μm) | |
| Chlorine reduction DIN EN 14898 | Class I (≥ 90%) | |
| Benzene reduction NSF 53 | ≥ 90% | |
| Bacteria reduction ASTM F838 | 99.999% | |
| Cysts reduction | 99.95% | |
| Metals reduction (e.g. lead) DIN EN 14898 | > 90% | |
| Reduction of medical residues, pesticides and hormones (e.g. naproxen, lindane, estrone) NSF 401 | > 90% | |
| Herbicides NSF 53 | > 84.2% | |
| Asbestos reduction NSF 53 | > 99.9% | |
| Dimensions (Width/Depth/Height) | Filter system (filter head with filter cartridge) | 72 mm/69 mm/330 mm |
| Filter cartridge | 68 mm/68 mm/311 mm | |
| Installed dimensions (vertical installation with wall mounting) | 85 mm/82 mm/330 mm | |
| Operating position | Horizontal and vertical | |
| Water inlet connection | G3/8" | |
| Water outlet connection | G3/8" | |
The innovative BRITA mypure SLIM filtration technology
| 3-step filtration | |
| Taste and odour impairing substances (e.g. chlorine) | ✓ |
| Metals (e.g. lead) | ✓ |
| Pesticides | ✓ |
| Medical residues | ✓ |
| Herbicides | ✓ |
| Sediments and particles | ✓ |
| Bacteria reduction ASTM F838 | ✓ |
| Benzene reduction NSF 53 | ✓ |
| Pharmaceuticals | ✓ |
| Hormones | ✓ |
| Cysts reduction | ✓ |
| Asbestos | ✓ |
| Limescale | ✘ |
VIII. Important notes
- BRITA filtered water is intended for human consumption only. It's a perishable food and so should be consumed within one day.
- Do not install the BRITA mypure SLIM on a water supply line with a water pressure exceeding 6.9 bar. If the inlet water pressure exceeds 6.9 bar a pressure reducer must be installed (included and pre-assembled).
- Do not install the BRITA mypure SLIM on a water supply line with a water pressure lower than 2.0 bar. If the inlet water pressure is lower than 2.0 bar, a constant water flow cannot be guaranteed.
- The water temperature for the filtered water mode should be between 4 - 30^
Nominal flow: 3.0 L / minute.
The device is intended for domestic use only.
BRITA mypure SLIM is designed for use only with municipally treated tap water (note: this water is constantly controlled and according to legal regulations safe to drink) or with water from private supplies which has been tested as safe to drink. If an instruction is received from the authorities that water must be boiled, the BRITA filtered water also must be boiled. When the instruction to boil water is no longer in force, a new water filter cartridge must be inserted.
For certain groups of people (e.g. those with impaired immunity and for babies), it is generally recommended that tap water should be boiled; this also applies to BRITA filtered water.
Correctly dispose BRITA mypure SLIM
At the end of the lifetime of the BRITA mypure SLIM please remember that it must be disposed of according to the local applicable regulations and statutory requirements. Please dispose the filter cartridge in normal domestic waste or reach out to your customer service to send it back to BRITA.
Sustainability is important to us
To prolong the life of our products we are happy to offer selected spare parts. Please contact your customer service or local distributor for information on availability.
Exclusion of liability
Please understand that BRITA cannot accept any liability on their part if you do not follow the given usage instructions.
m = 311

Passo 1: Ligar as tubagens
UK BRITA Water Filter Systems Ltd. BRITA House, 9 Granville Way, Bicester, Oxfordshire, OX26 4JT, UK BRITACare:0344 7424800
FRBRIITA France S.A.R.L.52 Boulevard de l'Yerres 91030 EVRY Cedex France N*AZUR*:0810 73 154 *Prix d'un appel local (Lun-Ven de 10h a 13h)