
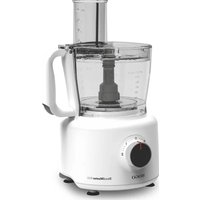
SS-14520 - Food processor Sogo - Free user manual and instructions
Find the device manual for free SS-14520 Sogo in PDF.

| Brand | Sogo |
| Model | SS-14520 |
| Product Type | Food Processor |
| Power Supply | AC 220-240 V, 50/60 Hz, 1000 W |
| Power | 1000 W |
| Bowl Capacity | 5 L (approx.) |
| Speeds | 6 speeds + stop position (O) |
| Included Accessories | Dough hook, flat beater, whisk, mixing bowl, spatula, cap |
| Main Functions | Kneading, mixing, whisking |
| Body Material | Plastic (estimated) |
| Dimensions (L x W x H) | 35 x 25 x 30 cm (estimated) |
| Weight | 5 kg (estimated) |
| Cord Length | About 1 m (estimated) |
| Control Type | Rotary speed knob |
| Safety | Locking of tilting head, unlock button |
| Maintenance and Cleaning | Unplug before cleaning; wipe the motor unit with a damp cloth; wash accessories with soapy water; do not immerse the motor unit |
| Spare Parts and Repairability | After-sales service: www.sogosat.com, sogosat@sogosat.com, 0034 902 222 161 |
| General Information | CE compliant (directives 2014/35/EU, 2014/30/EU, 2011/65/EU, 2009/125/EC); made in P.R.C.; imported by Sanysan Appliances S.L. |
Frequently Asked Questions - SS-14520 Sogo
User questions about SS-14520 Sogo
0 question about this device. Answer the ones you know or ask your own.
Ask a new question about this device
Download the instructions for your Food processor in PDF format for free! Find your manual SS-14520 - Sogo and take your electronic device back in hand. On this page are published all the documents necessary for the use of your device. SS-14520 by Sogo.
USER MANUAL SS-14520 Sogo
natural_image
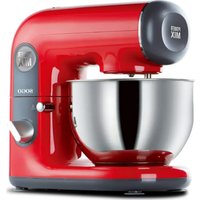
White SOGO kitchen mixer with stainless steel bowl and control panel (no visible text or symbols)POWERFUL 3 IN 1 STANDMIXER AMASADORA, MEZCLADORA Y BATIDORA IMPASTATRICE, MISCELATORE E FRULLATORE PÉTRISSEUR, MIXER ET MÉLANGEUR AMASSADEIRA, MISTURADOR E LIQUIDIFICADOR KNETER, MISCHE UND SCHLÄGER
Caution: please read and preserve these important instructions
natural_image
Line drawing of a kitchen mixer with a circular button labeled 'Push' and a separate view of the device (no text or symbols beyond labels)natural_image
Line drawing of a kitchen mixer with an arrow indicating motion (no text or symbols)natural_image
Line drawing of a kitchen mixer with directional arrows indicating motion (no text or symbols)natural_image
Line drawing of a kitchen mixer with a rotating bowl and handle (no text or symbols)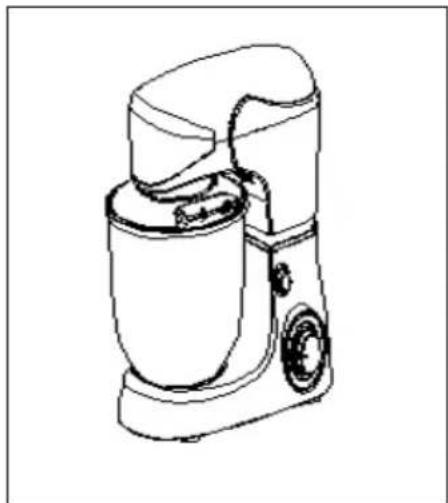
natural_image
Line drawing of a kitchen mixer device (no text or symbols)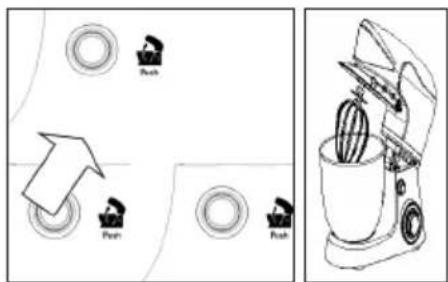
natural_image
Line drawings of a kitchen mixer with a bowl and fan, showing motion changes (no text or symbols)IMPORTANT SAFETY PRECAUTION:
When using electrical appliance, basic precautions should always be followed including the following:
- Read all instructions.
- To protect against risk of electrical shock do not put the appliance unit cord or plug in water or other liquid.
- Close supervision is necessary when a appliance is used by or near children.
- Unplug the appliance when not in use, changing accessory and before cleaning.
- Avoid contacting moving parts.
- If the supply cord is damaged, it must be replaced by manufacturer or its service agent or a similarly qualified person in order to avoid a hazard.
- The use of attachments not recommended or sold by the manufacturer may cause fire, electrical shock or injury.
- Do not use outdoors.
- Do let cord to hang over edge of table or counter.
- Keep hands and utensils away from moving blades or discs while processing food to reduce risk of severe injury to person or damage to the food mixer.
- Be certain is securely locked in place before operating the appliance.
- Do not attempt to defeat the lid interlock mechanism.
• Always operate blender with cap is placed. -
When blending not liquid, remove center piece of two-piece cap.
-
Turn off the machine before replace attachment.
- Use the product and assembly the accessory as mentioned on user manual only.
- Switch off the appliance before changing accessories or approaching parts which move in use.
- This appliance is not intended for use by children or other persons without assistance or supervision if their physical, sensory or mental capabilities prevent them from using it safely. Children should be supervised to ensure that they do not play with the appliance.
• Children should be supervised to ensure that they do not play with the appliance. - This appliance shall not be used by children. Keep the appliance and its cord out of reach of children.
- Appliances can be used by persons with reduced physical, sensory or mental capabilities or lack of experience and knowledge if they have been given supervision or instruction concerning use of the appliance in a safe way and if they understand the hazards involved. Children shall not play with the appliance.
Always disconnect the appliance from the supply if it is left unattended and before assembling, disassembling or cleaning.
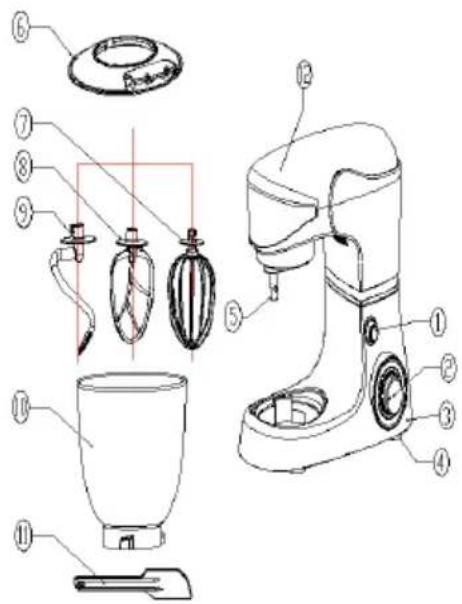
1 Release button
2 Speed control knob
3 Motor house
4 Foot pad
5 Motor spindle
6 Bowl cover
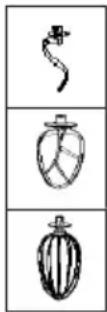
7 Whisk
8 Flat beater
9 Kneading hook
10 Mixing bowl
11 Spatula
12 Top cap
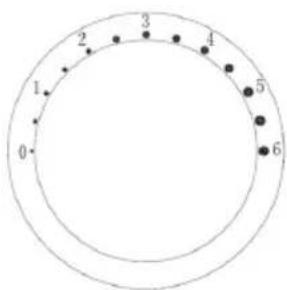
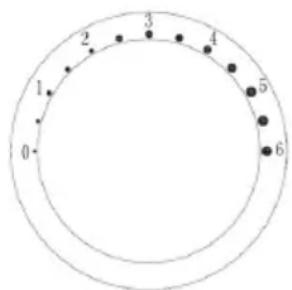
CONTROL PANEL SPEED SETTING
0 ----Stop
Setting1-6----Operating speed
Setting1----Minimum speed—slow
Setting6----Maximum speed—fast
radar
| Point | Value | |---|---| | 0 | 1 | | 1 | 2 | | 2 | 3 | | 3 | 4 | | 4 | 5 | | 5 | 6 | | 6 | 0 |Setting Speed
| ACCESSORIES PICTURE SPEED | SETTING | TIME CAPACITY | ||
| Kneeding Hook 1-2 | 30sec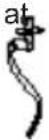 | speed1 and 3-5min at speed3 | 1000 g flour and 600 ml water | |
| Flat beater 2-4 5-7min | 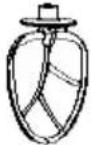 | |||
Whisk 5-6 5-7min At leas 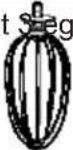 | gs | |||
OPERATING POSITIONS
Warning!
Operate the appliance only when the accessory/tool is attached according to this table and is in the operating position.
| ITEM POSITION ACCESSORY | ||
| 1 | 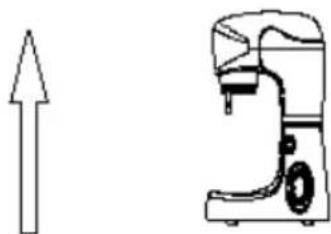 | 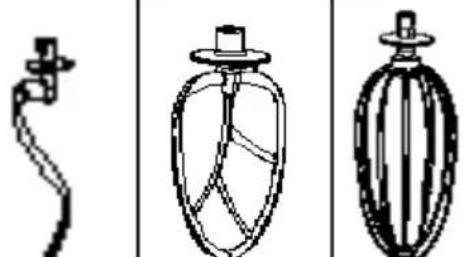 |
| 2 | 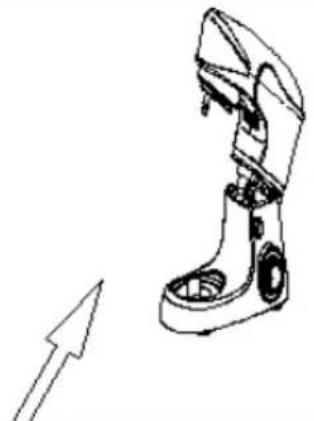 | Set up Kneading Hook, Flat beater,Wisk, according to your desire. |
Risk of injury from the rotating tools!
While the appliance is operating, keep fingers clear of the mixing bowl.
Do not change tools until the appliance is at a standstill and have been unplugged.
When switch off, the drive continues running briefly.
HOW TO USE KNEADING HOOK, FLAT BEATER, WHISK
natural_image
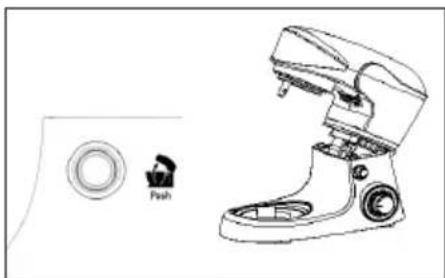
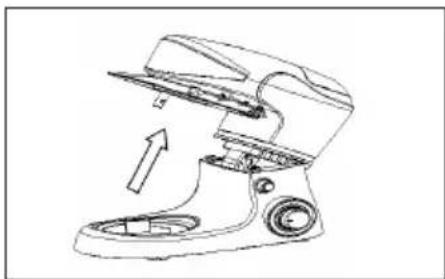
Line drawing of a kitchen mixer with a circular button labeled 'Push' and a separate view of the motor (no text or symbols beyond basic labels)Turn the arm release button (1) clockwise. at the same time lift the swivel arm(12) with hand so that it locks into place with a click. The swivel arm(12) tilts up.
natural_image
Line drawing of a kitchen mixer with an arrow indicating motion (no text or symbols)Fit the bowl cover (6) onto the swivel arm(12) and turn it slightly clockwise, so that it locks into position securely.
natural_image
Line drawing of a kitchen mixer with directional arrows indicating motion (no text or symbols)-
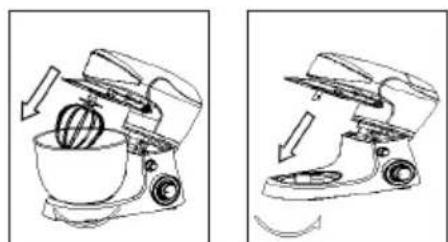
Place the food into the mixing bowl(10).
-
Fit the mixing bowl(10) in the recess on the motor house(3).
-
Turn the mixing bowl(10) slightly clockwise, so it locks into position.
natural_image
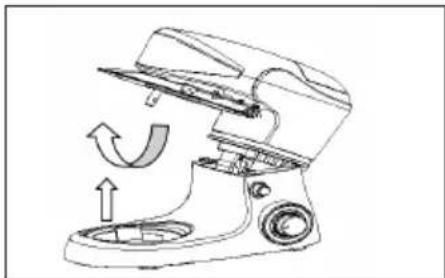
Line drawing of a kitchen mixer with a rotating bowl and handle (no text or symbols)-
Put the splashguard to swivel Arm(12), as shown picture and ensure it fix well.
-
Fit the required accessory (8 with 7, 6 or 9) onto the motor spindle (5) on the underside of the swivel arm(12).
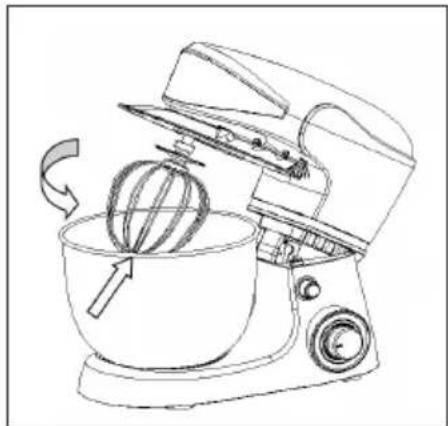
-
A. The kneading hook (9) is used for heavy dough, minced meat or other demanding kneading jobs.
B. The flat beater (8) is used to mix lighter types of dough.
C. The whisk (7) is used for whisking cream, egg whites, etc.
- Turn the accessory, so the pins on the spindle are aligned with the depressions on the accessory top edge. Press the accessory against the swivel arm and turn it anti-clockwise at the same time until the pins engage and the accessory locks into positionsecurely. The accessory must not be loose nor should you be able to pull it free.

natural_image
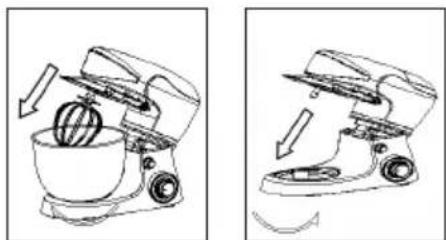
Line drawing of a kitchen mixer device (no text or symbols)- Lower the swivel arm(12) so that it locks into place with a click. The lid must fit tightly with the mixing bowl(10), otherwise it is fitted incorrectly.
The appliance is now ready for use.
-
Plug the power cord into main power outlet and switches it ON. Turn Speed control knob(2) to speed1(or any speed setting) indicator light on the control panel will now be illuminated.
-
Select the speed you want using. Speed button 1 is the slowest and speed button 6 is the fastest speed.
Recommended speeds, time and capacity are shown in the table above.
- If you need to scrape inside the mixing bowl, wait until the accessory has stopped completely.
Use the spatula, never your fingers.

-
Switch off the appliance by turn knob to O when you have finished mixing. Switch off the appliance and unplug it before you change the accessories, or before you take the appliance apart or when not in use.
-
Turn the swivel arm release button (1) clockwise. at the same time lift the swivel arm with hand so that it locks into place with a click. The swivel arm(12) tilts up.

natural_image
Two line drawings of a kitchen mixer with a bowl and handle, shown from different angles (no text or symbols)-
Detach the accessory by turning it clockwise.
-
Remove mixing bowl with prepared food anti-clockwise.
IMPORTANT!
The temperature of water which will be added into dough at 40+/-5 °Cdegree when preparing for dough is on progress
CLEANING
When cleaning the appliance, you should pay attention to the following points:
- Remove plug from the mains socket, and allow the appliance to cool down before cleaning it.
- Do not immerse the motor section of the appliance in water and make sure no water enters the appliance.
- Clean the motor section by wiping it with a damp cloth. A little detergent can be added if the appliance is heavily soiled.
- Do not use scouring pads, steel wool or any form of strong solvents or abrasive cleaning agents to clean the appliance, as they may damage the outside surfaces of the appliance.
• Take the appliance apart and clean all of the accessories separately. - Be careful not to touch the blades or sharp parts during use and cleaning.
• IMPORTANT! Allow to dry fully after cleaning before using again. Do not use the appliance if damp.
• After washing and drying, immediately place attachment into the protective sleeve for storage.
APPLICATION EXAMPLES
Beating of egg-white
8 egg-white in the BOWL with the WHISK at speed 6.
Beating of cream
600g cream with the FLAT BEATER in the BOWL at speed 4.
Kneading of dough
700g flour
200g chopped almonds
15g salt
28g butter
28g sugar
app.500g water(Temperature 40+/-5°C.)
AC 220-240V 50/60Hz 1000W
MESURE DE SÉCURITÉ IMPORTANTE:
PANNEAU DE CONTRÔLE DE RÉGLAGE DE LA VITESSE
0 ----Stop
Setting1-6----Operating speed
Setting1----Minimum speed—slow
Setting6----Maximum speed—fast
radar
| Point | Value | |---|---| | 1 | 0 | | 2 | 1 | | 3 | 2 | | 4 | 3 | | 5 | 4 | | 6 | 5 |natural_image
Line drawing of a kitchen mixer with a circular button labeled 'Push' and a separate view of the motor (no text or symbols beyond basic labels)natural_image
Line drawing of a kitchen mixer with an arrow indicating motion (no text or symbols)natural_image
Line drawing of a kitchen mixer with directional arrows indicating motion (no text or symbols)natural_image
Line drawing of a kitchen mixer with a rotating bowl and handle (no text or symbols)natural_image
Line drawing of a kitchen mixer (no text or symbols)natural_image
Line drawings of a kitchen mixer with a bowl and fan, shown from two different angles (no text or symbols)Setting1-6----Operating speed
Setting1----Minimum speed—slow
Setting6----Maximum speed—fast

radar
| Point | Value | |---|---| | 0 | 1 | | 1 | 2 | | 2 | 3 | | 3 | 4 | | 4 | 5 | | 5 | 6 | | 6 | 0 |natural_image
Line drawing of a kitchen mixer with a circular button labeled 'Push' and a separate view of the motor (no text or symbols beyond basic labels)natural_image
Line drawing of a kitchen mixer with an arrow indicating motion (no text or symbols)natural_image
Line drawing of a kitchen mixer with directional arrows indicating motion (no text or symbols)natural_image
Line drawing of a kitchen mixer with a rotating bowl and handle (no text or symbols)
natural_image
Line drawing of a kitchen mixer device (no text or symbols)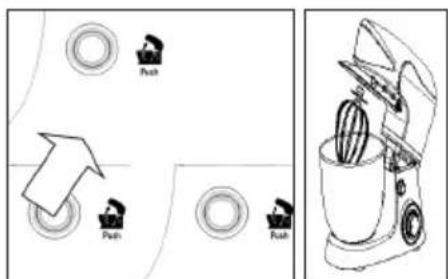
natural_image
Two technical line drawings of a kitchen mixer, showing the mixing bowl and fan (no text or symbols)natural_image
Line drawing of a kitchen mixer with a circular button labeled 'Push' and a separate view of the motor (no text or symbols beyond basic labels)natural_image
Line drawing of a kitchen mixer with an arrow indicating motion (no text or symbols)natural_image
Line drawing of a kitchen mixer with directional arrows indicating motion (no text or symbols)natural_image
Line drawing of a kitchen mixer with a rotating bowl and handle (no text or symbols)natural_image
Line drawing of a kitchen mixer device (no text or symbols)natural_image
Line drawings of a kitchen mixer with a bowl and fan, shown from two different angles (no text or symbols)natural_image
Line drawing of a kitchen mixer with a circular button labeled 'Push' and a separate view (no text or symbols beyond the label)natural_image
Line drawing of a kitchen mixer with an arrow indicating motion (no text or symbols)natural_image
Line drawing of a kitchen mixer with directional arrows indicating motion (no text or symbols)natural_image
Line drawing of a kitchen mixer with rotating handle and mixing bowl (no text or symbols)natural_image
Line drawing of a kitchen mixer device (no text or symbols)natural_image
Line drawings of a kitchen mixer with a bowl and fan, showing the blade and handle (no text or symbols)DECLARATION OF CONFORMITY
This device complies with Low Voltage Directive 2014/35/EC, Electromagnetic Compatibility Directive 2014/30/EU, Directive 2011/65/EU on the restriction of the use of certain hazardous substances in electrical and electronic equipment and Directive 2009/125/EC on the eco-design requirements applicable to energy-related products.
DÉCLARATION DE CONFORMITÉ
This symbol means that in case you wish to dispose of the product once its working life has ended, take it to an authorised waste agent for the selective collection of waste electrical and electronic equipment (WEEE).
Imported by:
Sanysan Appliances S.L, NIF: B98753056, C/ Barcas 2, 2
46002 Valencia, Spain
Product made in P.R.C. – Designed by SOGO based on the European Quality Standards
Customer Service: www.sogosat.com /
sogosat@sogosat.com / 0034 902 222 161

- IMPORTANT SAFETY PRECAUTION:
- CONTROL PANEL SPEED SETTING
- OPERATING POSITIONS
- Warning!
- Risk of injury from the rotating tools!
- HOW TO USE KNEADING HOOK, FLAT BEATER, WHISK
- IMPORTANT!
- CLEANING
- APPLICATION EXAMPLES
- Beating of egg-white
- Beating of cream
- Kneading of dough
- MESURE DE SÉCURITÉ IMPORTANTE:
- PANNEAU DE CONTRÔLE DE RÉGLAGE DE LA VITESSE
- DECLARATION OF CONFORMITY
- DÉCLARATION DE CONFORMITÉ
- Imported by:
Brand : Sogo
Model : SS-14520
Category : Food processor