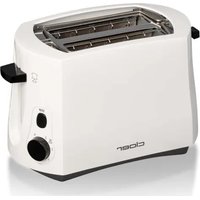
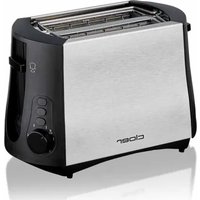
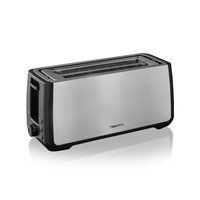
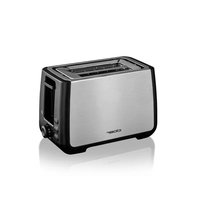
3531 - Toaster Cloer - Free user manual and instructions
Find the device manual for free 3531 Cloer in PDF.

User questions about 3531 Cloer
0 question about this device. Answer the ones you know or ask your own.
Ask a new question about this device
Download the instructions for your Toaster in PDF format for free! Find your manual 3531 - Cloer and take your electronic device back in hand. On this page are published all the documents necessary for the use of your device. 3531 by Cloer.
USER MANUAL 3531 Cloer
Basic safety instructions
-
The device is intended for use in household and similar applications, for example:
-
in kitchens for employees in shops, offices and other commercial areas;
-
in agricultural properties;
-
by clients in hotels, motels and other domestic establishments;
-
bed and breakfast.
-
Repairs to the Cloer device must only be performed by specialists which were authorised by Cloer or by the Cloer customer service. Improper repairs may result in significant dangers for the users. Furthermore, this will void any warranty claims.
-
Only operate the device using normal household power sockets. Check if the mains voltage specified on the type plate corresponds to your power supply network.
-
If the connection cable is damaged, it must be replaced by a specialist authorised by Cloer or by the Cloer customer service in order to avoid hazards.
-
Pull out the power cord from the wall outlet
-
in case of a malfunction,
-
if the device will not be used for a longer period of time,
before cleaning.
-
Only pull the plug, do not pull on the supply cable..
-
Do not stretch the supply cable too tight as otherwise the device is likely to tip over.
-
Do not stretch the supply cable over sharp edges. Do not use the supply cable for carrying and protect it from heat (hotplate/open flame).
-
This device can be used by children age 8 and up and older and persons with reduced physical, sensory or mental aptitude, or lack of experience and knowledge, if they have been given supervision or instructions concerning the safe use of the device and have understood the hazards involved.
Children may not play with the device.
-
Cleaning and user maintenance shall not be carried out by children unless they are older than 8 and supervised.
-
Keep the device and its connecting cable away from children younger than 8.
-
Do not use the device outdoors.
Protect your device against humidity (splash water/rain).
-
Let the device cool down before cleaning or stowing away.
-
This device should not be operated by an external timer or separate remote control system.
-
The bread may burn, therefore do not use the toaster near or below combustible material, such as curtains.
-
Remove the bread crumbs in the toaster at regular intervals, by pulling out and emptying the crumb collector.
-
Do not immerse the device in water.
-
Please refer to the cleaning instructions on the following pages.
-
Please use the re-elevation device of the toast lift with small toast slices (lift the toast lift until the stop). The risk of burning at the hot housing is lowered thereby.
Setting up and connecting/Before using the first time
- Read these instructions carefully before using the device for the first time.
- Remove all packaging parts and, if applicable, stickers, do not remove the identification plate.
- Put the toaster on a dry, anti-grip and even base.
The first operation can cause a slight development of smell. - This is why we recommend to operate the device in a well-aired room at the beginning without toasting material three times at the highest level.
Safety instructions for operation
The device meets the requirements of the applicable E directives.
The device is intended for in use only.
- Never leave your toaster unattended if it is in operation.
- Do not allow the mains cable to hang down loosely e.g. on corners or edges.
- Never insert your fingers in the slots.
ATTENTION! The heating wires inside are electrically active during operation! Do not reach into the toaster or insert any objects, especially any metal (fork, spoon) into it. Risk of electric shock when touching it!
If a piece of bread becomes stuck in the toaster, the device switches automatically off.
- Unplug the power cord and remove the stuck toasting product after the inside of the device has cooled down.
- The toaster cannot be switched off automatically if the toast lever is clamped.
- Ensure that the toast lever moves freely.
- Please note that your toaster has a heavy upwards heat emission.
- Therefore, never place the device under a cabinet, curtains or in the vicinity of easily combustible objects made of paper, fabric or the like.
- Do not cover up the slots.
- Never use the toaster without the crumb collector.
- This toaster is not intended for toasting bread such as crispbread, rusk, etc.
- Ensure that the cable never comes into contact with hot areas.
- Dry bread tans faster than fresh bread. The browning control adjustment is used for the individual setting of the toasting degree.
- Use a low toasting degree when toasting only one slice of bread.
Use the reheating function when you are toasting old toast or bread.
- Never use the toaster lying on its side
Start-up and operating instructions
- Plug the power cord into wall socket.
- Place slices of toast or bread into the toast slots.
- Do not use slices that are too large or too thick.
Maximum size: 12cm× 12cm - The slice of toast must not get stuck in the shaft.
- Set the required toasting degree.
- You can use the Toast-Check-Function to check the Toasting degree during tasting.
- Try the toasting setting at first as the degree of toasting depends on the toast bread and its humidity.
- Press the toast lever down until it clicks into place. Your toaster is in operation.
Note: If the toaster is not plugged into the wall outlet, the bread lever does not click into place as it is electro-magnetically retained.
The toasting process can be interrupted at any time by pressing the ( ) stop button.
- Should a slice of bread become stuck in the toaster, the device switches off automatically.
After the device has cooled down, disconnect the power cord and carefully remove the slice of bread without touching the heating elements.
Note: Please always insert each slice of toast in the middle of the bread slots. - When toasting single slices of toast they should always be positioned in the middle of the bread slots to allow the slice of toast being consistently toasted from all sides.
Defrost button
With the defrost button, you can toast still frozen bread.
- Insert the slice of bread into the slot, press the ON/OFF switch down and confirm the defrost button.
- The toasting time takes longer, since the bread needs to be defrosted first before it can be toasted.
It is not necessary to change the toasting degree.
Integrated warming rack
- The warming rack makes previous day buns oven-fresh and crispy again.
- Fold out the warming rack by means of the small lever and toast both sides of the buns.
- Turn the regulator to the sign between the toasting degree 2 and 3.
- Finally fold in the warming rack again.
Cleaning
- Before cleaning, unplug the power cord and let the device cool down.
- Clean the device with a damp cloth, but never under running water.
- Do not use any aggressive cleaning agents.
- Do not touch the heating elements with sharp or pointed objects (e.g. knife, fork or similar).
- Crumbs fall down into the crumb collector.
- Pull out the crumb collector, clean it and finally insert it again. Before pulling out the crump collector, let the toaster cool down completely.
Environmentally friendly disposal
We use only environmentally friendly packaging for the transport of our devices. Please recycle cardboard/paper and plastic packaging appropriately.
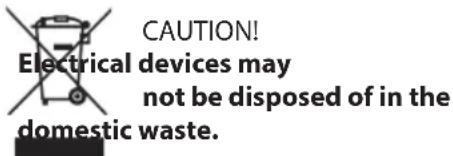
Electrical devices contain valuable raw materials. When a device is worn-out, please take it to a recognised recycling facility. Please consult the local or municipal administrations for information about disposal options.
Customer service
In the event that your Cloer device becomes defective, please contact your Cloer dealer or Cloer customer service department. Cloer electrical appliances comply with current EC guidelines and safety regulations.
Conditions of warranty in Germany
Cloer grants you, the private end user, a limited manufacturer's warranty. Assuming careful handling and compliance with the operating instructions and safety notices, we commit ourselves to repair a defective device free of charge, if it is a material fault or a fault of the manufacturer.
The repair will be effected by repairing or replacing the defective components. Any parts replaced will become the property of Cloer. All further claims, without regard to the type, especially claims for damage, are excluded.
This warranty does not affect any rights of the customer with respect to the sale of goods in accordance with the applicable national laws.
The warranty period is of 2 years from the first-time purchase by an end consumer for the first time.
The warranty period will not be extended or begin a new or in any other way be affected by the subsequent sale, repair or replacement of the product.
This warranty is passed on to you by your retail dealer. In order to assert a warranty claim, please contact your dealer directly.
If you have questions about your product, please contact the Cloer importer in your country. The address and telephone number can be found on our website at http://cloer.com or you can send an e-mail to
service-uk@cloer.de
As proof of warranty entitlement, you must submit the original sales receipt with the date of sale and the dealer's address. Without the sales receipt, the repair will be carried out at your expense without consultation.
The warranty does not cover damages resulting from
- improper use,
natural wear and tear,
external influences (e.g. damage from transport, shocks, jolts, heat, acids, etc.), - Lack of decalcification*
- or unsuitable accessories.
The warranty will be void if the device
is used commercially,
- is opened or modified without authorisation
- or if unauthorised repairs are attempted.
Also, the warranty does not apply to consumable materials.
- Kettles / coffee maker / tea maker
under drift! Ikke grips
Stamp and signature of dealer