
PA820 - Digital Personal Assistant Unitech - Free user manual and instructions
Find the device manual for free PA820 Unitech in PDF.


| Product Type | Rugged Personal Digital Assistant |
| Brand | Unitech |
| Model | PA820 |
| Dimensions (L x W x H) | 163.8 x 87.4 x 36.7 mm |
| Weight (with battery) | 452 g |
| Operating System | Windows Embedded Handheld 6.5 |
| Processor | TI AM3715 1 GHz |
| RAM / Flash Memory | 512 MB RAM / 512 MB Flash |
| Display | 3.5-inch capacitive TFT, 480 x 640 pixels, sunlight readable |
| Barcode Scanner | 1D Laser Engine |
| Camera | 5 megapixel autofocus with LED flash |
| Wi-Fi Connectivity | 802.11 a/b/g/n |
| Bluetooth | v2.1 + EDR |
| Mobile Network | UMTS/HSPA+ quad-band (850/900/1900/2100 MHz), GSM dual-band (850/1900 MHz) |
| GPS | Integrated |
| Main Power Supply | Lithium-ion battery 3.7 V: 2200 mAh or 4000 mAh |
| Backup Battery | Coin cell battery, 2 hours backup time |
| Ruggedness | IP66, 1.8 m drop on concrete, MIL-STD-810G certified |
| Operating Temperature | -20 °C to 60 °C |
| Storage Temperature | -30 °C to 70 °C |
| Keyboard | 20 alphanumeric keys + function keys, scanner, power |
| Memory Expansion | MicroSD (SDHC) up to 32 GB |
| Maintenance and Cleaning | Use a soft dry cloth; do not use harsh chemicals |
| Safety | Do not disassemble, puncture or expose battery to high temperatures; follow recycling instructions |
| Spare Parts and Repairability | Battery, USB cable, power adapter, hand strap available; battery user-replaceable |
Frequently Asked Questions - PA820 Unitech
User questions about PA820 Unitech
0 question about this device. Answer the ones you know or ask your own.
Ask a new question about this device
Download the instructions for your Digital Personal Assistant in PDF format for free! Find your manual PA820 - Unitech and take your electronic device back in hand. On this page are published all the documents necessary for the use of your device. PA820 by Unitech.
USER MANUAL PA820 Unitech
Ultra Rugged Industrial PDA
- PA820 -
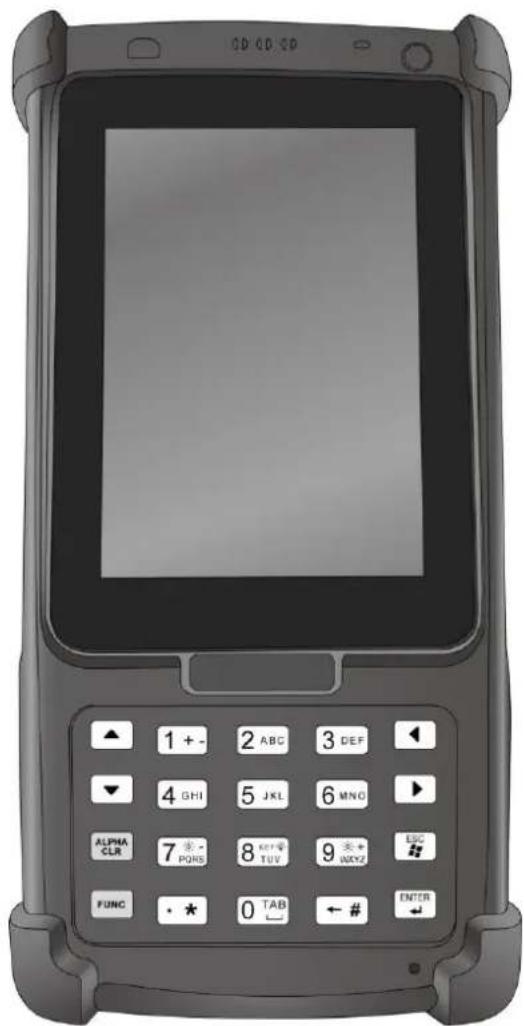
Quick Reference Guide
401132G Version 1.0
Table of Contents
English 1
Deutsch 15
Espanol 29
Francais 43
中文(简体)……57
中文(繁體)....71
日本語 85
영어 99
Chapter 1
Getting Started
Introducing the PA820
Thank you for purchasing the PA820 Rugged Handheld Computer.
The Unitech PA820 is a rugged handheld computer designed to empower your mobile workforce in today's aggressive business environment. As productivity and efficiency define the benchmark for success, the PA820 provides field-based workers with a host of data collection tools and a comprehensive wireless communication platform, all in a compact, durable and ergonomic form factor.
Unitech, a global provider of automatic identification and data capture technologies, is pleased to announce availability of the PA820 rugged industrial PDA. This PDA is super-durable and powerful, it includes with multiple connectivity and a wide range of functionality. Featuring waterproof capability and MIL-STD-810G certification, unitech PA820 is ready to survive in any kinds of environments.
Versatile Capabilities
The PA820 has a capacitive LCD with 480 x 640 pixel resolution and measures 3.5 inches diagonally. The LCD has an adjustable backlight which is designed to reduce reflections that allows users can easily stay focus on the screen even in all lighting conditions. It comes with a fast and powerful 1 GHz TI processor. Running with Windows Embedded Handheld 6.5 operating system, PA820 combines with industry-leading 1D laser scan engine and user-friendly alphanumeric keyboard, it allows users can speed up data entry and capture barcodes easily in real-time that improves staff productivity and reduces operating costs.
Cutting-edge wireless technology
On the wireless side, the PA820 comes with integrated 802.11 a/b/g/n WiFi as well as Bluetooth 2.1 + EDR. It was programmed with great multiple wireless to support 3.75G radio technology with quad-band UMTS/HSPA+ (850/900/1900/2100MHz) and dual-band GSM (850/1900 MHz) that delivers high flexibility for field services workers to get connected anywhere. Supplemented with a 5 megapixel camera and comprehensive GPS logging functionality are further proof that PA820 is a cutting-edge device for a variety of applications.
Toughness and Reliability
The PA820 is built to enable high performance and reliability in the challenging environments. PA820 is rugged enough to drop from the 1.8 meters onto concrete. In addition, it has IP66 certification, completely sealing durable housing against dust and moisture to withstand high pressure water jets. Not only that, but this device meets sturdy MIL-STD-810G military standard, boasting shock resistance, anti-vibration and together with a wide operating temperature range of -20^ to 60^ .
Aside from all of its benefits, PA820 is compact enough to hold in one hand. With great ergonomic design, it creates unmatched data collection performance and high reliability to any applications such as military, logistics, field service and harsh environment.
Specifications
| Features | |
| Windows Embedded Handheld 6.5 operating system | |
| Ultra-Rugged Construction: IP66 rated, 1.8M drop and MIL-STD-810G certified | |
| Compact design: only 452g | |
| Large 3.5 -inch color TFT multi-touch sunlight-readable display | |
| Built in 1D scanner and 5 Megapixel camera | |
| Latest Bluetooth v2.1, GPS, and WiFi 802.11 a/b/g/n | |
| Wide Temperature Range: Operating: -20°C~ +60°C/ Storage: -30°C~ +70°C | |
| System Features | |
| CPU | TI AM3715 1GHz |
| Memory | 512MB Mobile DDR RAM512MB NAND Flash |
| OS | Windows Embedded Handheld 6.5 Professional and Classic |
| Languages support | English, Simp. Chinese, Traditional Chinese, Japanese, Spanish, German, French |
| Display | |
| Capacitive touch pannel | |
| 3.5" Color 480 x 640 sunlight readable LCD | |
| Camera / Photos / Video | |
| 5.0 megapixel autofocus camera with Flash support SW MPEG decoder / encode | |
| Symbologies | |
| 1D Barcode EngineUPC-A/E, EAN-8/13, Codabar, Code 39, Code 39 full ASCI, Code 93,Code 32, Interleaved & Std. 2 of 5, EAN 128, Code 11, Delta, MSI/Plessey, Code 128, Toshiba | |
| Audio | |
| 1W Speaker | |
| 3.5mm headset jack | |
| Receiver | |
| Keypad | |
| 20 Numeric and functionable keys, 2 Scanner keys, 1 Power key | |
| Regulatory Approvals | |
| CE, FCC, BSMI, VCCI, CCC, RoHS compliance | |
| Expansion Slot | |
| microSD | microSD slot with SDHC Support (up to 32GB) |
| Communication | |
| USB | USB 2.0 Client and Host |
| WLAN | IEEE 802.11 a/b/g/n |
| Bluetooth | Bluetooth 2.1 + EDR |
| WWAN | 3.75G RadioUMTS / HSPA+, 3GPP release 6 / 7USA:Dual Band UMTS/HSPA+ (850, 1900 MHz), Dual-Band GSM (850/1900 MHz)EU:Dual Band UMTS/HSPA+ (900/2100 MHz), |
| Power Source | |
| Main Battery | 8.14 Watt-Hour 3.7V @2200 mAh14.8 Watt- Hour 3.7V @4000 mAh |
| Backup Battery | Li-Coin battery Supports 2 hours backup |
| Enclosure | |
| Weight | 452g with Battery |
| Dimension | 163.8x87.4x36.7 (mm) |
| Environmental | |
| Operating temperature | -4°F to 140°F (-20°C to 60°C) |
| Storage temperature | -22°F to 158°F (-30°C to 70°C) |
| Charging Temperature | 32°F to 104°F (0°C to 40°C) |
| Relative Humidity | 5% ~ 95% (non-condensing) |
| Drop Specification | 1.8 meter MIL-STD 810G,Method 516.6, Procedure IV |
| Sealing | IP66 |
| Vibration and Shock test | MIL-STD-810G, Method 514.6, Procedure IMIL-STD-810G,Method 514.6,Procedure II,Category 5 |
| Software | |
| Microsoft Visual Studio 2005/2008 | |
| Mobile SIP(VoIP) | |
| Auto Installer | |
| Notification | |
| LEDs, Vibrator | |
| Mobile Device Management Software and Service | |
| MoboLink® | |
| Device Management;Application Management;Event Triggers | |
| Accessories | |
| Single Slot USB Client/Host/Ethernet Cradle | |
| Handstrap | |
| 2200 and 4000 mAH standard Battery | |
| USB Communication with holder Cable | |
| Power adaptor with universal plugs | |
PA820 Product Introduction & Accessory Kit
 | 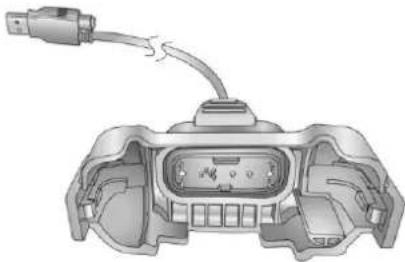 |
| PA820 Terminal | USB Cable |
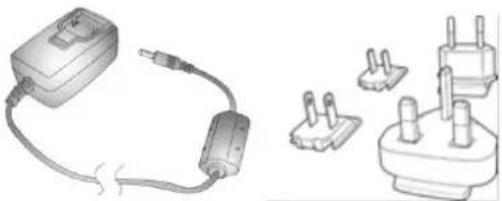 | 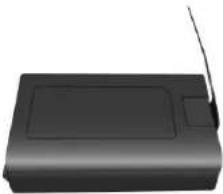 |
| Power Adaptor Plugs | Battery |
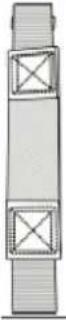 | |
| Hand Strap |
Tour of the PA820
The following sections describe the main components and features of the PA820.
PA820 Front and Right View
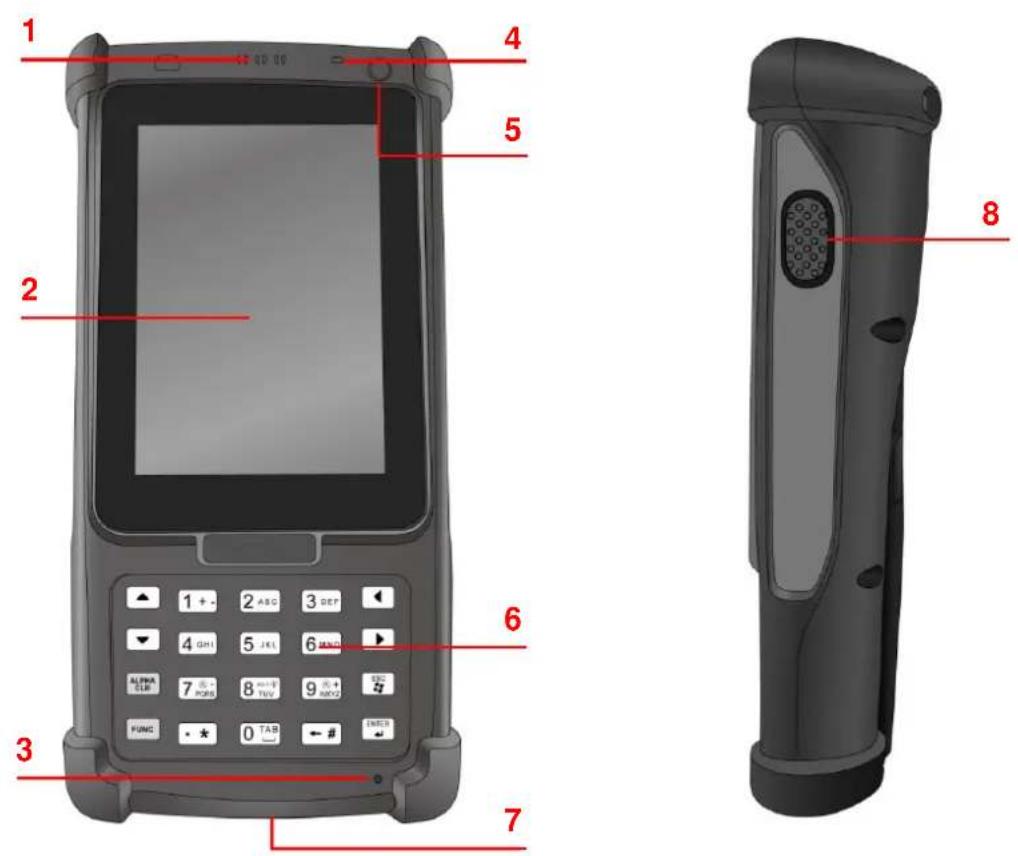
| 1 | LED indicators | 5 | Power button |
| 2 | LCD touch screen | 6 | Keypad |
| 3 | Microphone | 7 | Universal connector |
| 4 | Receiver | 8 | Scanner trigger button |
PA820 Rear and Left View
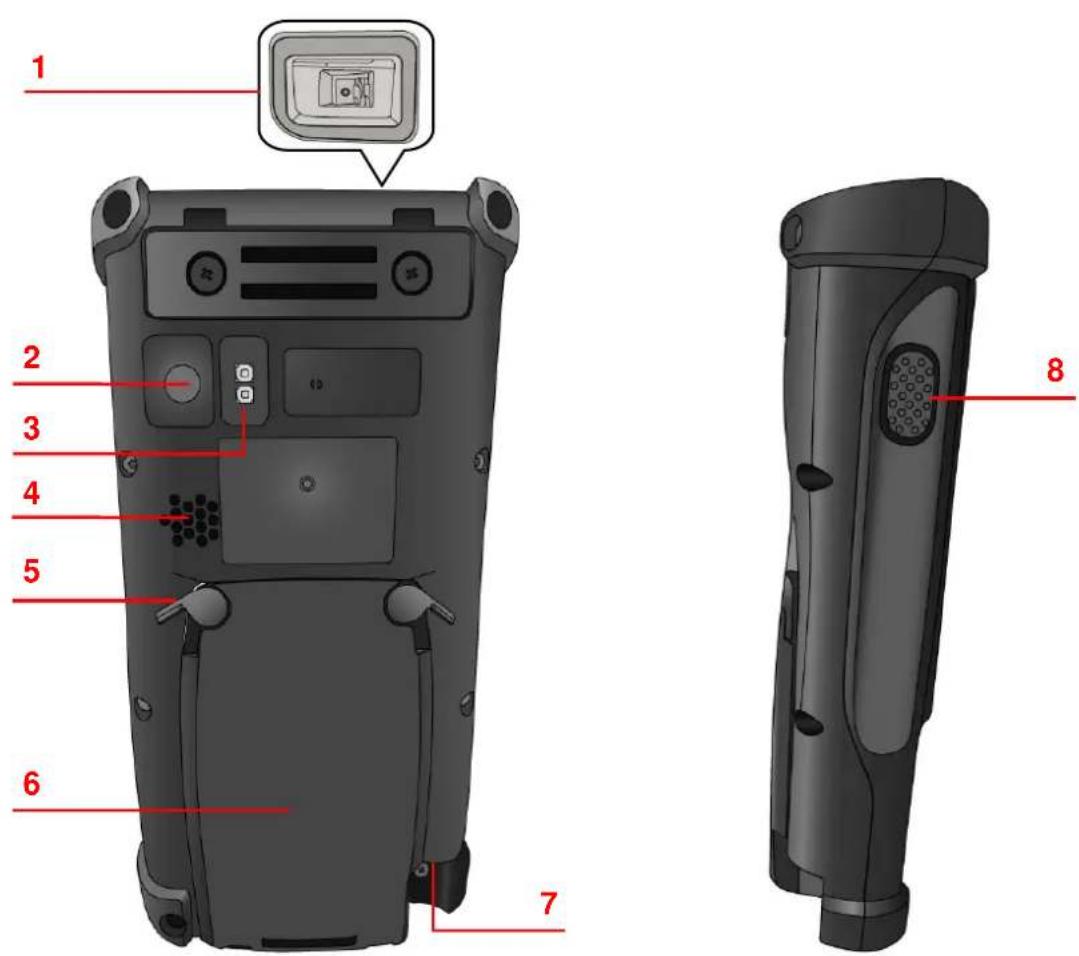
| 1 | Barcode scanner window | 5 | Battery compartment tab |
| 2 | 5M/AF camera | 6 | Battery compartment |
| 3 | LED flash light | 7 | Earphone jack |
| 4 | Speaker | 8 | Scanner trigger button |
Turning ON the PA820 for the First Time
After you have initially charged your device for about 16 hours, the device is ready to be used. You can now start up your device. You can then calibrate the display, and set up the system time zone, date and time.
Power-On Button
Turn ON your device by pressing the power button on the top-right corner.
Installing the Battery
WARNING! There is a risk of fire and burns if the battery pack is handled improperly. DO NOT disassemble, crush, puncture, short external contacts, or dispose the battery pack in fire or water. DO NOT attempt to open or service the battery pack. Dispose of used batteries according to local recycling guidelines in your area.
A backup battery cell is embedded into your device to prevent data loss when the main battery pack is removed or completely discharged. This backup battery will keep the data and system setting for up to 2 hours if the main battery is removed.
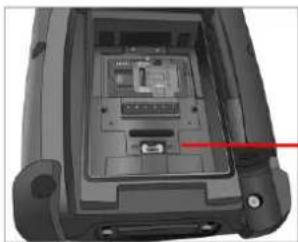
NOTE: To enable the backup battery cell to provide backup power supply, charge your device with the main battery pack for at least 16 hours.
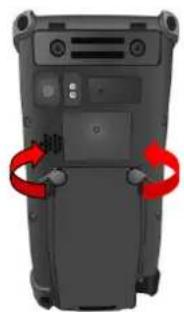
NOTE: To power on the device properly, make sure to replace the battery compartment cover after installing the battery.
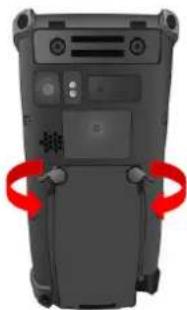
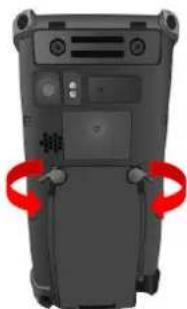
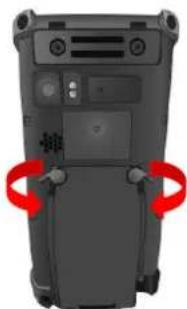
- Open the battery compartment cover by sliding the tabs on both sides in the direction of the arrows shown and lift the cover up.
natural_image
Back view of a gray electronic device with red circular arrows indicating rotation or adjustment (no text or symbols visible)Battery Compartment Tab
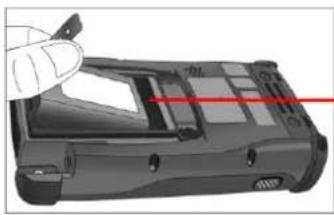
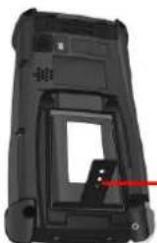
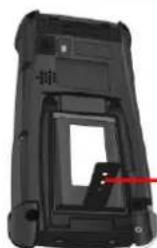
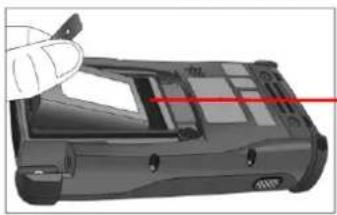
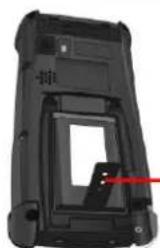
- Push up the backup battery switch to the "ON position by using a stylus to turn on the backup battery.
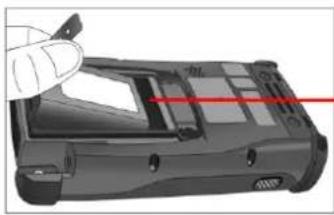
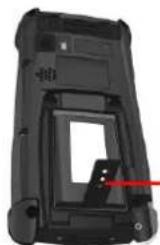
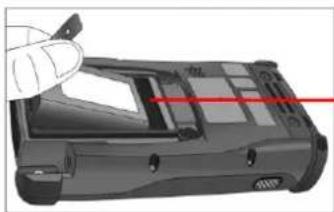
- Slide and position the battery pack, making sure the battery contacts are aligned with the contacts in the compartment.
- Use your thumb to snap the battery in place.
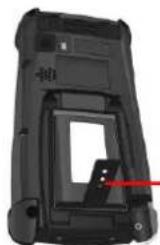
- Replace the battery compartment cover by pushing down on the tabs and sliding them back into place as shown.
natural_image
Interior view of a device showing internal components and a red arrow pointing to a specific area (no text or symbols visible)Backup Battery Switch
natural_image
Illustration of a handheld electronic device with a red laser beam, no text or symbols presentBattery Compartment Contacts
Plastic Tab

natural_image
Back view of a gray electronic device with red directional arrows indicating rotation or movement (no text or symbols visible)NOTE: Make sure the battery compartment cover is securely closed, or you may be unable to turn ON the terminal.
Charging the Battery
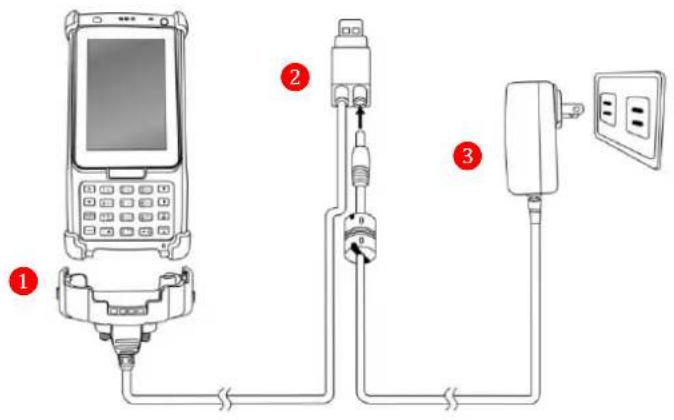
Before using the terminal for the first time, you need to charge it for about 16 hours. After that, you can charge the terminal for 4 hours to recharge the battery to full capacity. Charge the terminal using the USB charging cable or the docking station.
CAUTION: Turn ON the backup battery switch before charging the battery. Data you entered may not be properly stored until the built-in backup battery has been adequately charged.
CAUTION! Operating the terminal for the first time without the AC adapter, and without fully charging the backup battery may result in loss of data stored in RAM memory. When the main battery is removed, the backup battery retains RAM data in memory for 2 hours. Please fully charge the backup battery to avoid data loss in RAM memory.
- Press and hold the release button on both sides of the USB charging cable and connect it to the PA820 (1).
- Plug the AC adapter cable into the power jack of the USB charging cable (2). Plug the AC adapter cord into an electrical outlet (3).
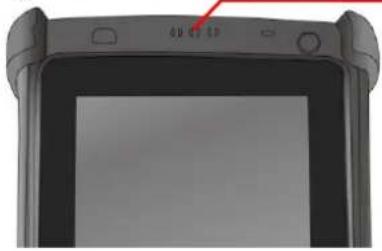
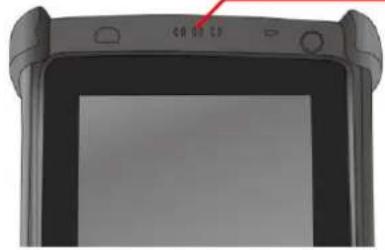
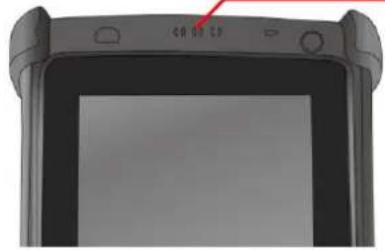
Checking the LED status
natural_image
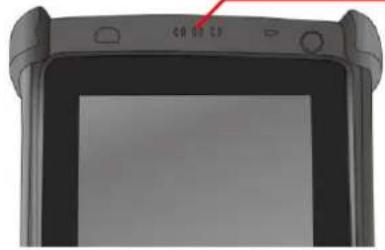
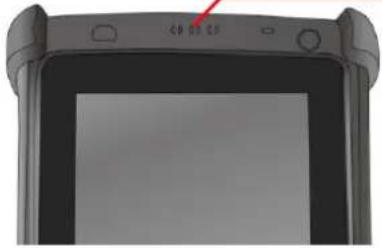
Close-up of a black electronic device with a display screen and control buttons (no visible text or symbols)Terminal LED indicators from left to right:
-- GPRS Communication
-- Scan
-- Power
| LED | Status | Description | |
| Terminal | GPRS | Flashing Yellow | GPRS module is enabled. |
| Scan | Solid Green | Successful reading | |
| Power | Solid Orange | Being charged | |
| Solid Green | Fully charged |
Checking the Battery Status
If the battery level becomes low in the course of normal use, a status icon appears on the device screen indicating low or very low battery status. In both cases, perform an ActiveSync / Windows Mobile Cente operation to back up your data, and then recharge your device as soon as possible.
CAUTION! Once the device is shut down, you should recharge the device within 48 hours. Otherwise you will lose all data including files stored in the RAM memory.
Keypads and Function Buttons
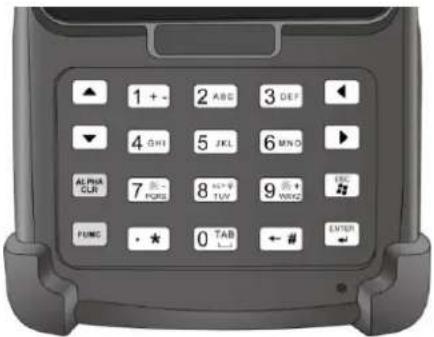
Numeric Keypad
| Key | Description | Key | Description |
| Enter key | Backspace key | ||
| Tab key | Function key | ||
| Alpha key, toggle between numeric and alphabetic entry modes | Windows/Escape key | ||
| Alphanumeric keys | Left cursor key | ||
| Right cursor key | Up cursor key | ||
| Down cursor key |
When the PA820 turns on, the numeric mode is on by default. When you toggle to alpha mode, the CAPS mode is off by default. Use the Alpha key to toggle to CAPS.
Using Function keys
If you press the FUNC key once, it will appear a blue symbol F in the status bar at the top of the screen. Then you can refer to the following table to execute the desired function or input.
Function key definition
| Key | Description | Key | Description |
 | Decrease screen backlight brightness |  | Return to Start menu |
 | Keypad backlight toggling |  | input symbol * |
 | Increase screen backlight brightness |  | input symbol # |
 | TAB key |
The following table indicates how to quickly execute useful functions using numeric keypad combination. Press and hold the FWHC key, and then press the corresponding key to execute the desired function.
Numeric Keypad Combination
| Key | Description | Key | Description |
 | Keypad backlight toggling | 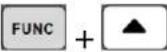 | Screen backlight toggling |
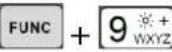 | Device information | 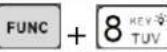 | Power management |
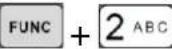 | Softkey 2 | 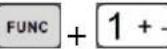 | Softkey 1 |
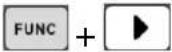 | Increase screen backlight brightness | 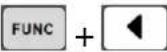 | Decrease screen backlight brightness |
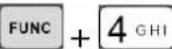 | END TALK | 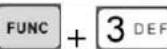 | TALK |
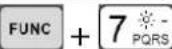 | Scanner setting | 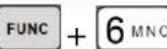 | Task manager execution |
Using Alpha keys
| Key | Alpha Off | Alpha On | |
| CAPS Off | CAPS On | ||
| 0 | Space, @, , “, 0 | Space, @,, “, 0 | |
| 1 | +, -, \, %, 1 | +, -, \, %, 1 | |
| 2 ABC | a, b, c, 2 | A, B, C, 2 | |
| 3 DEF | d, e, f, 3 | D, E, F, 3 | |
| 4 GHI | g, h, i, 4 | G, H, I, 4 | |
| 5 JKL | j, k, l, 5 | J, K, L, 5 | |
| 6 MNO | m, n, o, 6 | M, N, O, 6 | |
| 7 PQRS | p, q, r, 7 | P, Q, R, 7 | |
| 8 KEY TUV | t, u, v, 8 | T, U, V, 8 | |
| 9 WXYZ | w, x, y, z, 9 | W, X, Y, Z, 9 | |
| ← # | , ; ! . / | , ; ! . / | |
Kapitel 1
Erste Schritte
natural_image
3D model of a handheld device with a central display and red annotation line labeled '8' (no text or symbols on the device itself)natural_image
Back view of a gray electronic device with red directional arrows indicating rotation or movement (no text or symbols visible)natural_image
Interior view of a device showing internal components and a red arrow pointing to a specific area (no text or symbols visible)natural_image
Illustration of a handheld device with a red laser line and a hand pointing to it (no text or symbols visible)natural_image
Top-down view of a black electronic device with red circular arrows indicating rotation or adjustment points (no text or symbols visible)natural_image
Close-up of a black electronic device with a screen and control buttons (no visible text or symbols)natural_image
3D model of a handheld device with a circular sensor and red measurement line labeled '8' (no text or symbols on the device itself)natural_image
Back view of a black electronic device with red circular arrows indicating rotation or adjustment (no text or symbols visible)natural_image
Interior view of a device showing internal components and a red arrow pointing to a specific area (no text or symbols visible)natural_image
Illustration of a handheld electronic device with a red laser beam, no text or symbols presentnatural_image
Back view of a black electronic device with red directional arrows indicating rotation or movement (no text or symbols visible)natural_image
Close-up of a black electronic device with a screen and adjustment knobs (no visible text or symbols)natural_image
3D model of a handheld device with a circular sensor and red measurement line labeled '8' (no text or symbols on the device itself)natural_image
Back view of a gray electronic device with red circular arrows indicating rotation or adjustment (no text or symbols visible)natural_image
Interior view of a device showing internal components and a red arrow pointing to a specific area (no text or symbols visible)natural_image
Illustration of a handheld electronic device with a red laser beam, no text or symbols presentnatural_image
Back view of a device with red directional arrows indicating rotation or movement (no text or symbols visible)natural_image
Close-up of a dark electronic device with a red indicator light and control buttons (no readable text or symbols)natural_image
Back view of a black electronic device with red circular arrows indicating rotation or adjustment (no text or symbols visible)电池仓锁门
natural_image
Interior view of a device showing internal components and a red highlight line (no text or symbols visible)备用电池开关
natural_image
Illustration of a handheld electronic device with a red laser beam, no text or symbols present电池仓触头
塑料调整片
natural_image
Back view of a black electronic device with red directional arrows indicating rotation or movement (no text or symbols visible)检查 LED 的状态
natural_image
Close-up of a black electronic device with a screen and control buttons (no visible text or symbols)从左至右的终端 LED 指示器为:
-- GPRS 通讯
-- 扫描
-- 电源
natural_image
Back view of a black electronic device with red circular arrows indicating rotation or adjustment (no text or symbols visible)電池室卡門
natural_image
Interior view of a device showing internal components with a red arrow pointing to a component (no visible text or symbols)備份電池 開關
natural_image
Illustration of a handheld electronic device with a red laser beam, no text or symbols present電池匣 接點
- 請用拇指將電池推入定位。
塑膠調整片
natural_image
Back view of a black electronic device with red directional arrows indicating rotation or movement (no text or symbols visible)檢查 LED 狀態
natural_image
Close-up of a tablet device with control buttons and a red arrow pointing to the screen (no visible text or symbols)LED 指示燈由左至右的說明如下:
-- GPRS 通訊
--掃描
-- 電源鍵
natural_image
3D model of a handheld device with a circular connector and red measurement line labeled '8' (no text or symbols on the device itself)natural_image
Back view of a black electronic device with red circular arrows indicating rotation or adjustment (no text or symbols visible)スライドタブ
natural_image
Interior view of a device showing internal components with a red arrow pointing to a component (no visible text or symbols)予備電池の スイッチ
natural_image
Diagram of a handheld device with red laser lines, no visible text or symbols電力用接点
プラスチック
タブ
natural_image
Back view of a black electronic device with red directional arrows indicating rotation or movement (no text or symbols visible)LED ステータスの確認
natural_image
Close-up of a black electronic device with a screen and control buttons (no visible text or symbols)ターミナル LED インジケータ
(左から右へ):
-- GPRS 通信
-- スキャン
-- 電源
natural_image
3D model of a handheld device with a central display and red measurement line labeled '8' (no text or symbols on the device itself)natural_image
Back view of a gray electronic device with red circular arrows indicating rotation or adjustment points (no text or symbols visible)배터리 구획 탐
natural_image
Interior view of a device showing internal components with a red arrow pointing to a component (no visible text or symbols)백업 배터리 스위치
natural_image
Illustration of a handheld electronic device with a red laser line indicating light path (no text or symbols)배터리 단자 집촉면
플라스틱 탐
natural_image
Back view of a black electronic device with red directional arrows indicating rotation or movement (no text or symbols visible)LED 상태 확인 방법
natural_image
Close-up of a black electronic device with a screen and control buttons (no visible text or symbols)- Ultra Rugged Industrial PDA
- Quick Reference Guide
- Table of Contents
- Chapter 1
- Getting Started
- Introducing the PA820
- Versatile Capabilities
- Cutting-edge wireless technology
- Toughness and Reliability
- Tour of the PA820
- Turning ON the PA820 for the First Time
- Power-On Button
- Installing the Battery
- Charging the Battery
- Checking the Battery Status
- Keypads and Function Buttons
- Using Function keys
- Kapitel 1
- Erste Schritte
- 检查 LED 的状态
- LED 상태 확인 방법
Brand : Unitech
Model : PA820
Category : Digital Personal Assistant