
SS-7655 - Coffee machine Sogo - Free user manual and instructions
Find the device manual for free SS-7655 Sogo in PDF.
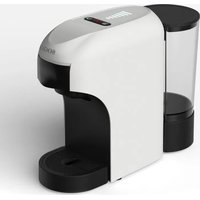


| Product type | Capsule and ground coffee machine |
| Brand | Sogo |
| Model | SS-7655 |
| Power supply | AC 220-240V, 50-60Hz |
| Power | 1400 W |
| Standby consumption | < 0.5 W |
| Off-mode consumption | < 0.3 W |
| Time before automatic standby | 9 minutes |
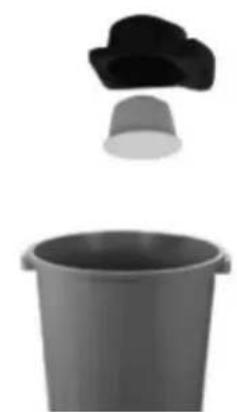
| Compatible capsule types | Nespresso®, Dolce Gusto®, pods, ground coffee |
| Main functions | Preparation of hot or cold coffee, volume selection, automatic shut-off |
| Supplied parts | Removable water tank, drip tray, coffee ground container, Nespresso® and Dolce Gusto® capsule holders, ground coffee adapter |
| Maintenance and cleaning | Clean with a damp cloth; removable parts washable with soapy water (except dishwasher); regular descaling recommended |
| Safety precautions | Do not immerse; use on a flat surface; do not open during use; unplug before cleaning |
| After-sales service | www.sogosat.com - sogosat@sogosat.com - 0034 902 222 161 |
| Manufacturer | SOGO |
| Country of manufacture | China |
Frequently Asked Questions - SS-7655 Sogo
User questions about SS-7655 Sogo
0 question about this device. Answer the ones you know or ask your own.
Ask a new question about this device
Download the instructions for your Coffee machine in PDF format for free! Find your manual SS-7655 - Sogo and take your electronic device back in hand. On this page are published all the documents necessary for the use of your device. SS-7655 by Sogo.
USER MANUAL SS-7655 Sogo
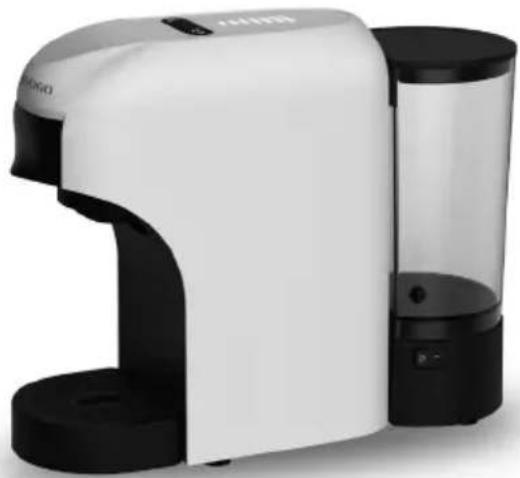

Download your manual
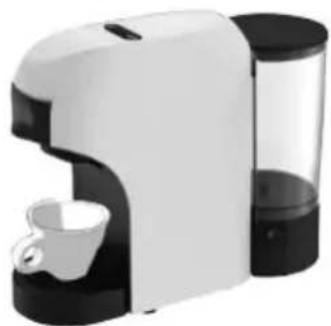
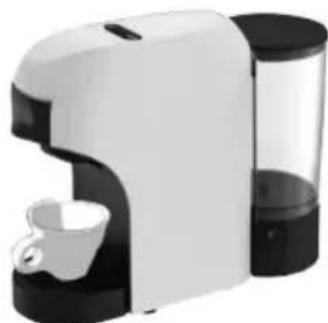
ESPRESSO COFFEE MAKER 4 in 1
MACHINE A CAFE ESPRESSO 4 en 1
CAFFETTIERA ESPRESSO 4 in 1
ESPRESSO KÁVOVAR 4 v 1
ESPRESSO-KAFFE-MAGER 4 i 1
APARAT ZA PRIPRAVO KAVE ESPRESSO 4 v 1
APARAT ZA ESPRESSO KAVU 4u1
ESPRESSO COFFEE MAKER 4 w 1
Declaration of conformity, Responsibility of Electronic products disposal, Importers Details and After-sales service on the last pages.
5. INSTRUCTIONS FOR USE
START-UP
STANDBY MODE
6. HOW TO PREPARE AN ESPRESSO COFFEE
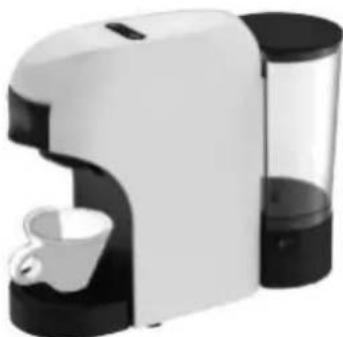
• Always read the instruction book carefully before using. - This manual can be downloaded from our web page www.sogo.es - Keep these instructions for future reference.

Safety instructions for the user
GENERAL PRECAUTIONS
General precautions during the use of electrical equipment
- Do not use the appliance for any other purpose than described in this manual.
- Do not use or store the appliance outdoors. • Always place the appliance on a flat and even surface.
- This product is intended for indoor, non-industrial, non-commercial and only for household use. Do not use the item outdoors or for any other purpose. Misuse or improper handling may cause problems in the appliance and cause injury to the user.
- The unit must be used only for the intended purposes. No liability is accepted for damages arising from improper use or wrong handling.
- Ensure that the voltage indicated on the nameplate matches the mains voltage before plugging in the appliance.
- Always remove the plug from the power socket when the appliance is not in use. Do not leave the appliance unattended when switched on.
- Close supervision is necessary when any appliance is being used by or near children.
- Before cleaning or storing your appliance, always unplug the appliance from the power supply and let it cool down.
- The device is not completely disconnected from the power source, even after it has been turned off. To disconnect it completely, disconnect it from the mains plug.
- The appliances are not intended to be operated by means of an external timer or separate remote-control system.
- This appliance is intended to be used in household and similar applications such as – staff kitchen areas in shops, offices and other working environments;
- farm houses; – by clients in hotels, motels and other residential type environments;
- bed and breakfast type environments

Restrictions on use to avoid personal injury
- Do not let the appliance operate unattended.
- Do not place or operate this appliance near water sources.
- Do not place or operate the appliance and its power cord on or near hot surfaces (e.g., stove plates) or open flames.
- Do not leave the power cord hanging from sharp edges and keep away from hot objects and flames. Do not wind the cord around the appliance and do not bend it.
- Never use accessories that are not recommended by the manufacturer.
- The use of accessories not recommended or sold by the appliance manufacturer may result in fire, electric shock or injury to persons.
- When you want to remove the plug from the wall contact, please do this at the plug itself and not by pulling on the cable or the appliance itself.
- To avoid electric shock, make sure your hands are dry before plugging or unplugging.
- Do not use the device with wet hands, on damp floors or when the atmosphere is humid, there is a risk of electric shock.
- While using the appliance, make sure that the power cord must not be caught or crushed.
- Do not let the motor unit, cord or plug get wet to protect against risk of electric shock.
- Be careful, while handling electrical appliances, as the surface of the heating element is subject to residual heat after use. Any misuse may cause potential injury to the user and may damage the appliance.
- Do not touch the outer surface of the appliance as it can get very hot during operation. Instead, use the handle or mitts.
- Never immerse the appliance or the plug in water or any other liquid. In the event of the appliance falling in water, disconnect immediately from the mains supply and take it to an authorized service agent for repair before reusing.
- Do not use the appliance if it has fallen on the floor, if there are visible signs of damage or if it has a leak.
- Do not use the appliance if the cable or plug is damaged. In case of the cord being damaged, it must be replaced only by the manufacturer, its service agent or similarly qualified persons in order to avoid hazard.
- In case of appliance malfunction, or if it has been damaged in any manner, return the appliance to the nearest authorized service facility for examination, repair or adjustment.
- In case of hardware problems, do not attempt to repair the product yourself. Repairs should only be carried out by qualified technicians.

Restrictions on use when used with children and elders
- The appliance is not to be used by persons (including children) with reduced physical, sensory or mental capabilities, or lack of experience and knowledge, unless they have been given supervision or instruction.
- Children should be supervised to ensure that they do not play with the appliance. • Children shall not play with the appliance.
- This appliance can be used by children aged from 8 years and above and persons with reduced physical, sensory or mental capabilities or lack of experience and knowledge if they have been given supervision or instruction concerning use of the appliance in a safe way and understand the hazards involved.
- Cleaning and user maintenance shall not be made by children unless they are older than 8 and supervised.
- Keep the appliance and its cord out of reach of children less than 8 years.

Instructions to follow when using the appliance
- The appliance has been incorporated with a grounded plug. Please ensure the wall outlet in your house is well earthed.
- Be careful not to get burned by the steam.
- Do not touch the hot surface of the appliance (such as the steam wand and the brewing filter) while in use. Use handles or knobs.
- Do not let the coffee maker operate without water.
- Do not remove the metal funnel when the appliance is brewing coffee or when steam and hot water escape from the metal funnel. Ensure to release the pressure in the water tank before removing the metal funnel.
- Relieve pressure through the steam wand before removing the tank cover or metal funnel.
- WARNING: The filling aperture must not be opened during use. • WARNING: Potential injury from misuse.
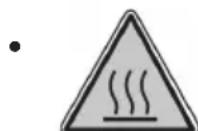
WARNING: High risk of burns! Do not touch the hot parts of the coffee maker.
- The coffee maker shall not be placed in a closed cabinet.
- Do not touch or move the coffee maker while in use.
- Never use the coffee maker in an environment of high temperature, high magnetic field, or humidity. Do not place the coffee maker on a hot surface, beside a fire, or near another electrical appliance, such as
on top of a refrigerator, to avoid damage.
- When the appliance prompts trouble, never operate the appliance. Do not place foreign objects into the brewer.
- Never use detergent or hot water for cleaning the brewing component, to avoid the running component lacking lubricant oil and the component becoming distorted due to high temperature.
- To avoid a circuit overload when using this product, do not operate another high-wattage product on the same electrical circuit.
- A short power supply cord is provided with this product. An extension cord is not recommended for use with this product, but if one must be used:
- The marked electrical rating of the cord must be at least as great as that of the product.
- Arrange the extension cord so that it does not hang where it can be tripped over or pulled unintentionally.
CLEANING AND MAINTENANCE
Kindly refer to the cleaning and maintenance section for details on how to clean surfaces which come in contact with food.
3. TECHNICAL SPECIFICATIONS
| Voltage Frequency Power | ||
| AC 220-240V 50-60Hz 1400W | ||
Power consumption in off mode: <0.3 W
Power consumption in standby mode: < 0.5 W
Time after which the product goes into off mode: 9 min.
4. PARTS DESCRIPTION
- Volume light
- Start/Stop Button
- Hot /cold mode Button
- Volume selector Button
- Locking handle
- Drip grid (removable)
- Drip tray (removable)
- Water tank cover
- Water tank
- Power cord
- Switch on/off
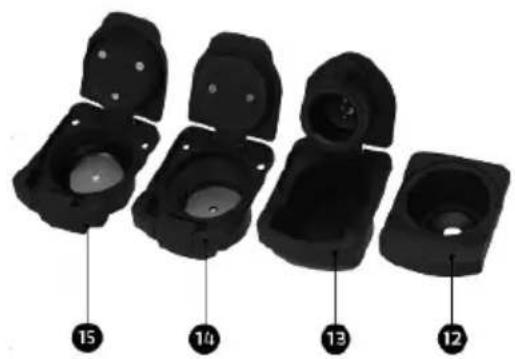
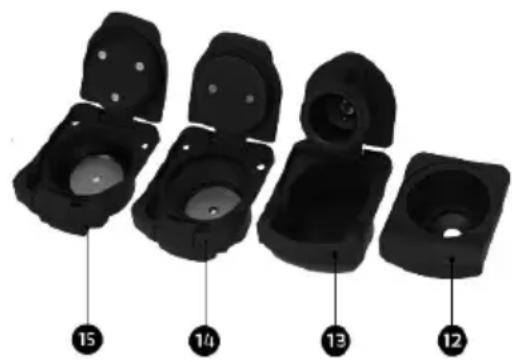
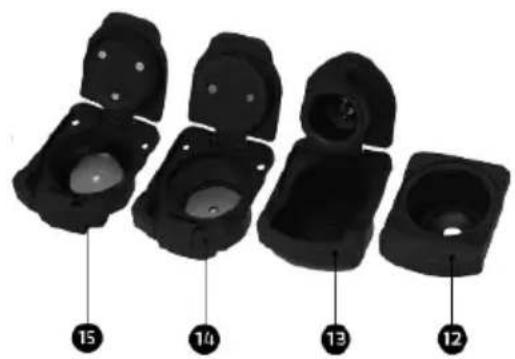
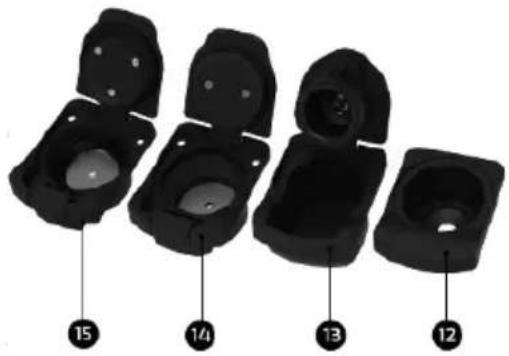
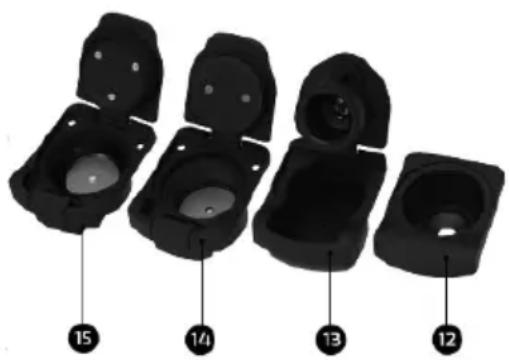
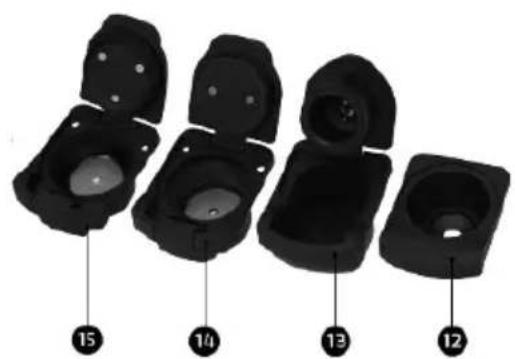
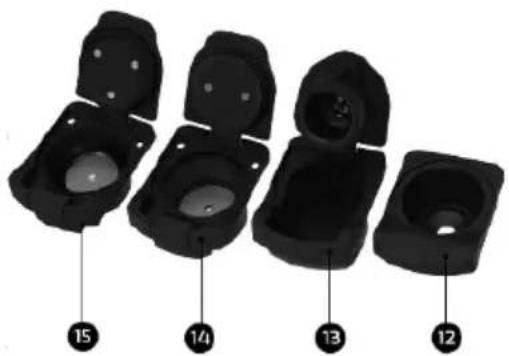
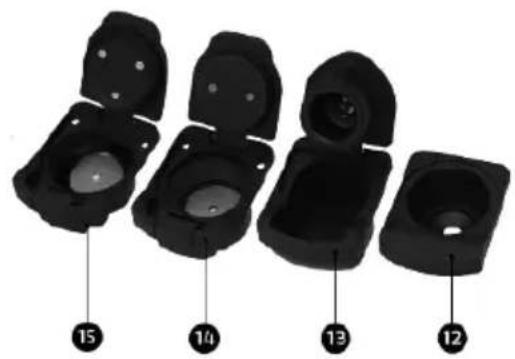
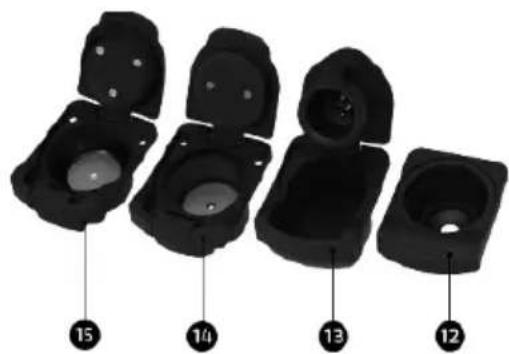
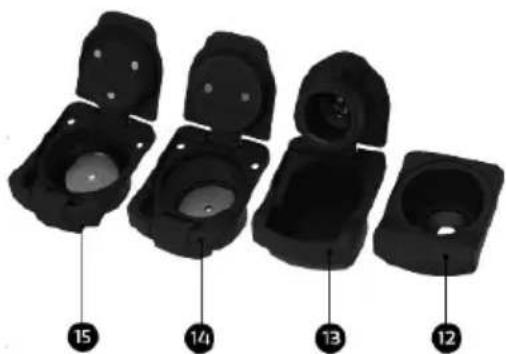
- Dolce Gusto®* capsule holder
- Nespresso®* capsule holder
- Coffee ground holder
- E.S.E Pod holder
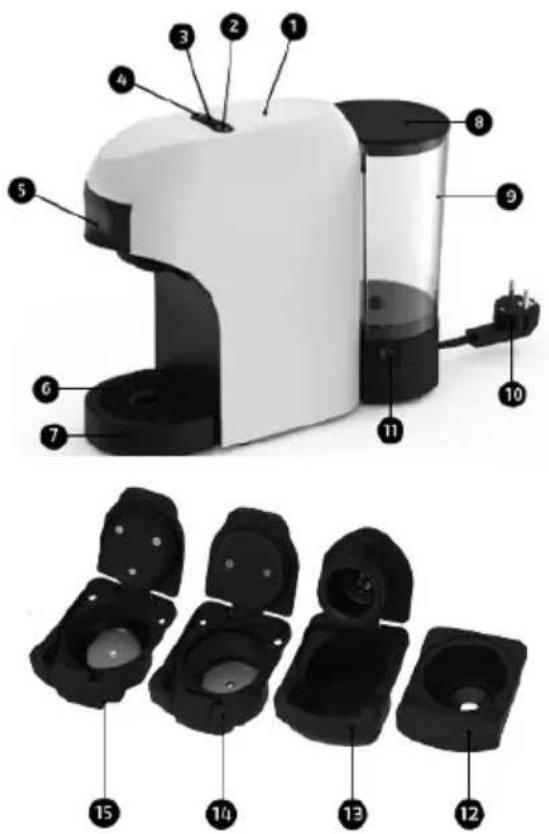
5. INSTRUCTIONS FOR USE
STARTING UP
Before using for the first time
Caution: Improper handling of electrical equipment is dangerous and can be lethal. Please pay attention to the safety precautions in this manual, in particular the following:
• Danger of scalding: beware of hot water! - Do not operate the machine with an empty water tank or water is less than MINIMUM level. - Do not open the locking handle when the machine is brewing. • Always pull the power plug out before cleaning the machine. - Only use the machine in a dry room. - Thoroughly rinse out the water tank with fresh water before using for the first time. Clean the Capsule coffee machine using a damp cloth only.
Tip:
Keep the packaging for transporting the machine (e.g. for removals, servicing, etc.).
Note:
You may find a little water remaining in the machine. In order to ensure that this machine works perfectly, it was tested with water before leaving the factory.
How to use
Starting the machine:
- Place the coffee machine on a flat and stable surface, far from water and heat sources. Do not connect the machine to the mains supply.
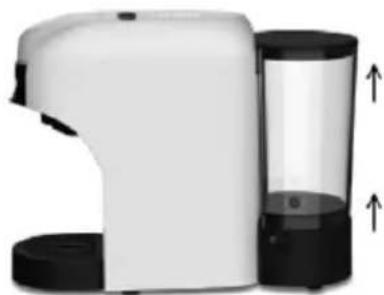
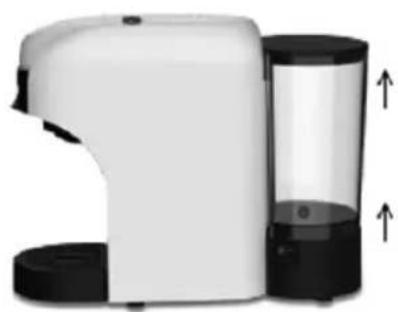
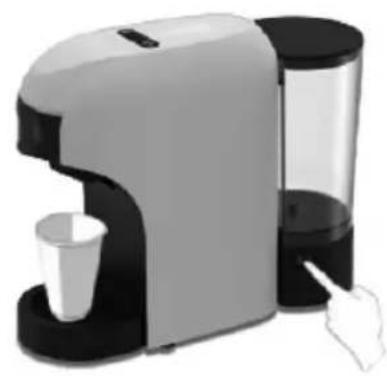
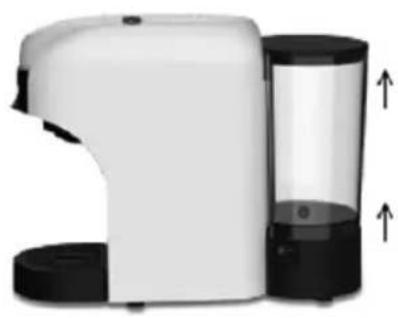
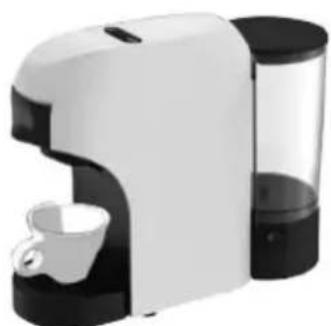
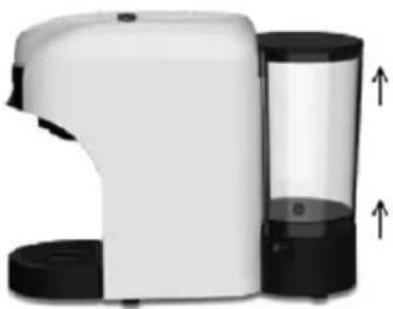
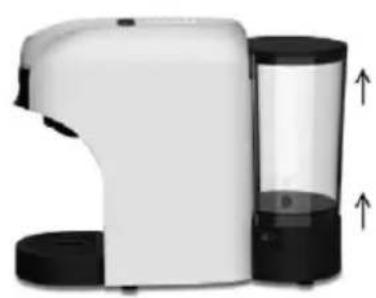
- Lift and remove the water tank cover, then the water tank itself (as picture 1).
- Rinse off the tank.
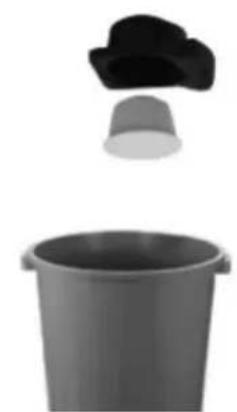
- Fill the water tank up to the MAX level indicated (as picture 2), using only fresh drinking water. Place the tank back to its position, then close by using the tank cover.
Note: Hot water and other liquids can damage the tank and the machine. Do not operate the machine without water: make sure that there is enough water in the tank.
- Plug in the power cord into the power outlet.
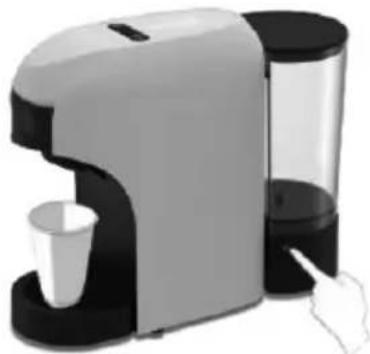
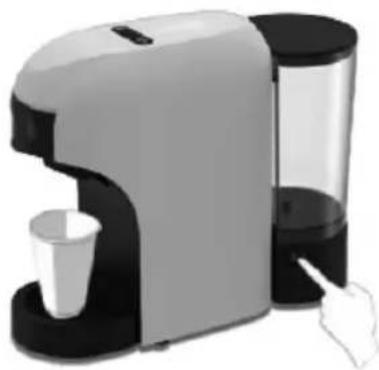
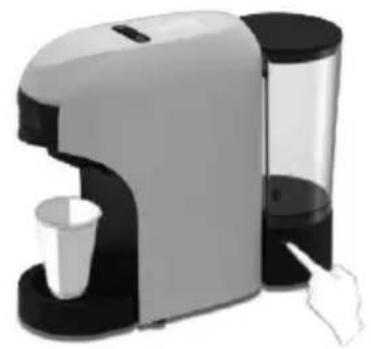
- Press ON-OFF button to turn the coffee machine on (as picture 3).
- By pressing any button, the coffee machine starts the water heating cycle (as shown in picture 4). The "Hot mode button" starts blinking with a light red color. (Heating-up takes about 30 seconds.) The brewing buttons start blinking in white.
- The machine will be ready for use when the "Hot mode button" lights up with a steady red light and the "start button" lights up with a steady white light.
- For the first time, run the coffee machine with a full water tank, without using any coffee powder or coffee capsule.
![graph TD A["Heather with lid"] --> B["Blinker with liquid"] B --> C["Heater with lid open"] C --> D["Heater with lid closed"] D --> E["Heater with lid closed again"] E --> F["Heater with lid closed after blinking"] F --> G["Heater with lid closed after blinking"] G --> H["Heater with lid closed afte…](/content/2026/04/722224/images/a27f63d91ce1feca633d60097e1dfa14107f711ef44930afdcfb501e51ec6498.jpg)
STAND-BY MODE
To ensure energy conservation, this coffee machine automatically enters stand-by mode after 9 minutes of not being used. The machine can be reactivated by pressing any button.
COFFEE DISPENSING
Make sure that the brewing buttons light up with a steady white light. Do not insert fingers or any object into the capsule holder. Only compatible capsules must be introduced into the capsule holders. Single-dose capsules are prepared to dispense a single coffee/one time. Do not use the capsules more than once. Inserting two or more capsules at a time can cause the machine to malfunction. For coffee powder, please use the measuring spoon to measure the quantity to add into the ground coffee adaptor. Maximum quantity is about 8g.
Note: Please make sure that there is no remaining coffee powder on the inner edge of the adaptor.
Having remaining coffee powder may prevent the lid from closing properly and can cause malfunction in the machine.
Note: If the power supply is interrupted during the coffee supply cycle, restore the power supply and restart the coffee supply procedure.
If during the coffee brewing cycle the water tank lacks water, please press the brewing button to stop the machine, then fill the water tank up to the Max level indicated and press the brewing buttons again.
Coffee preparation by using various adapters and filters
Tips: The machine has different adaptors for different capsules, as detailed below
- Adaptor for NESPRESSO®, STARBUCKS® by NESPRESSO®, LAVAZZA & L'OR® capsules
- For NESCAFÉ DOLCE GUSTO® capsules
- For ground coffee, tea, infusions
- Coffee pods
6. HOW TO PREPARE AN ESPRESSO COFFEE
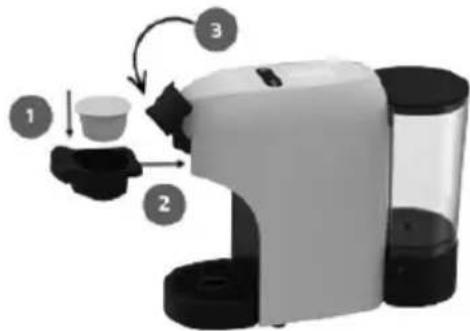
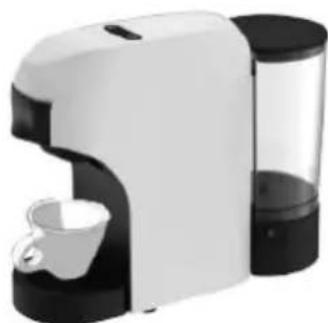
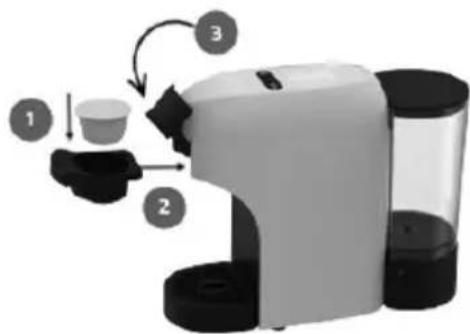
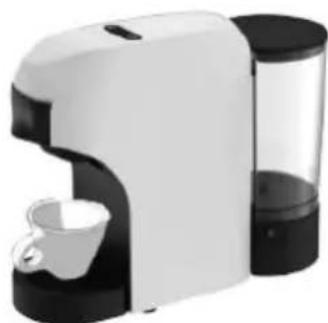
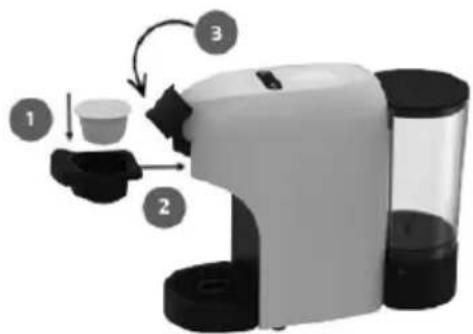
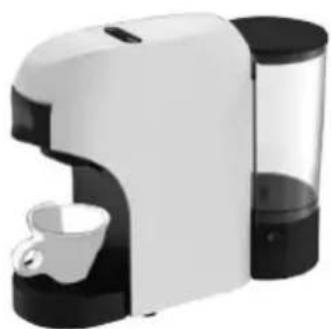
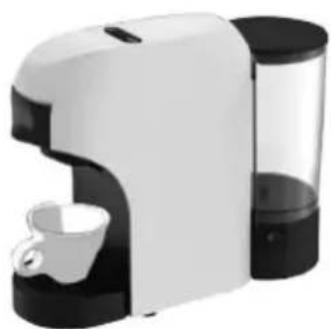
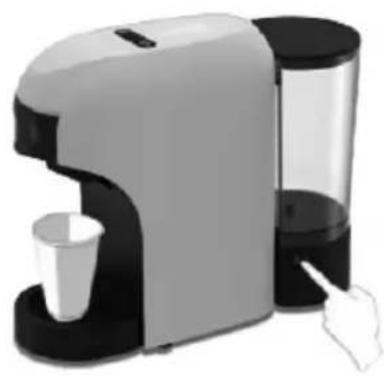
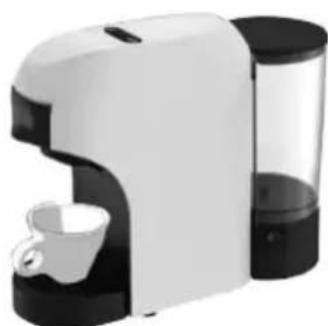
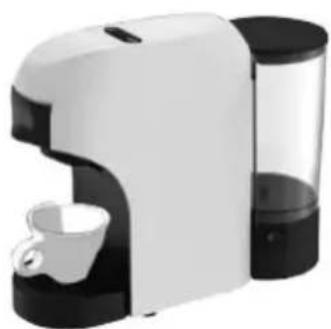
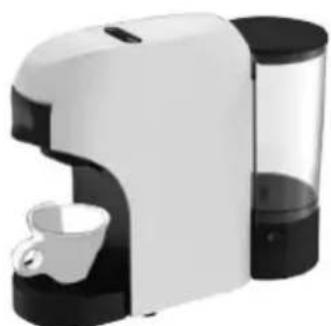
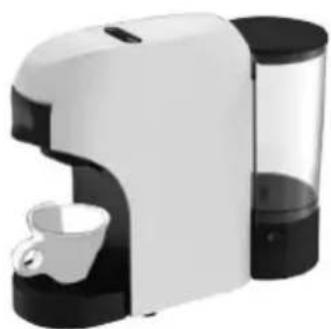
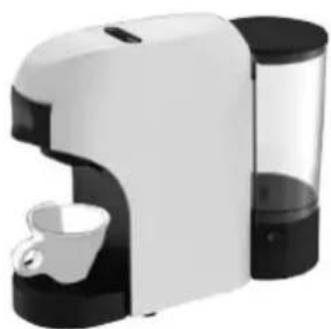
1) Place the cup under the coffee dispenser for a classic espresso. 2) Please note that you can remove the drip tray to use cups of different sizes for a long coffee.

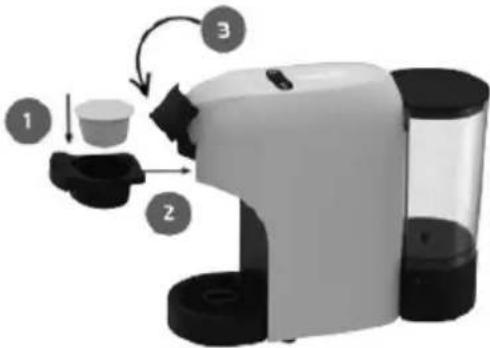
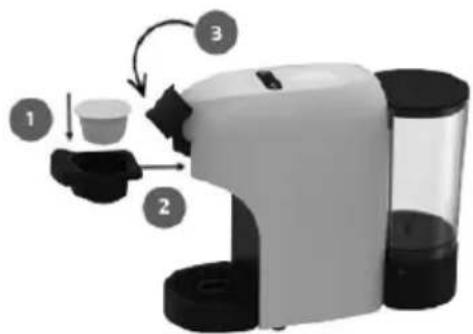
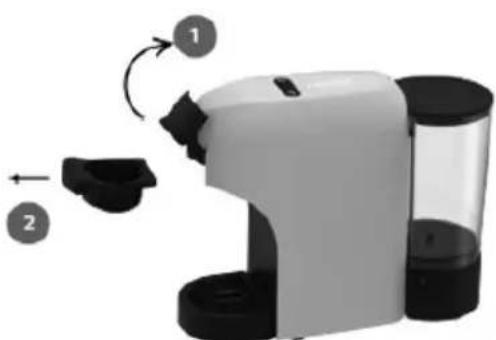
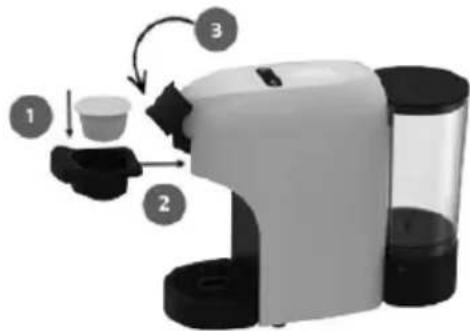
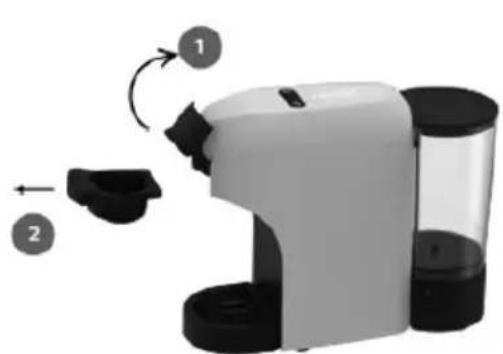
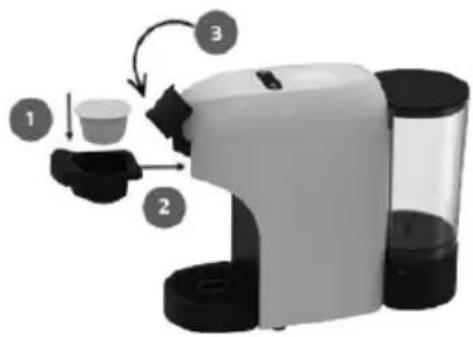
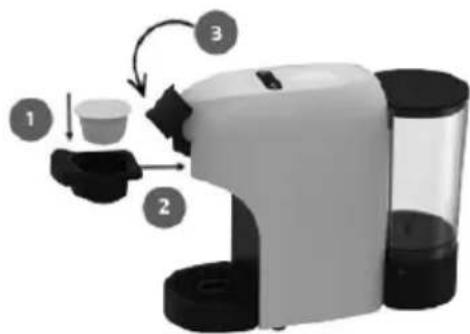
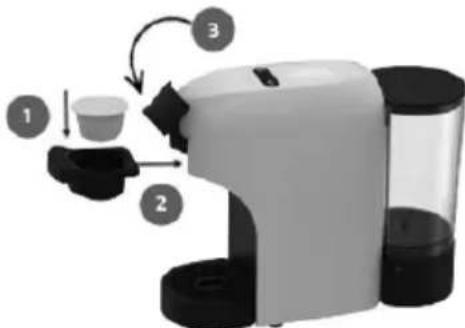
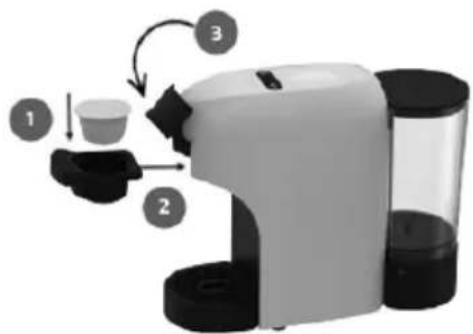
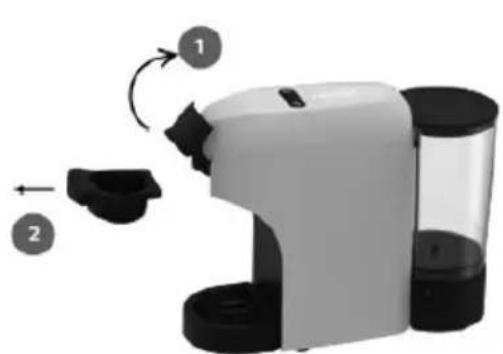
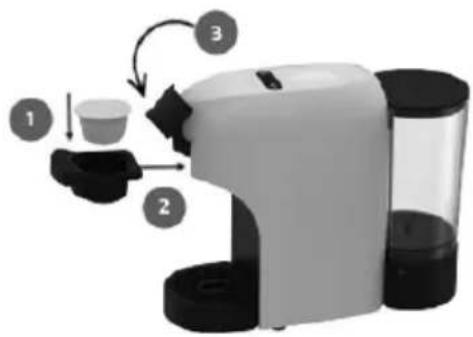
4) Open the locking handle and place the capsule holder in its position.
3) Grab the Nespresso capsule holder.
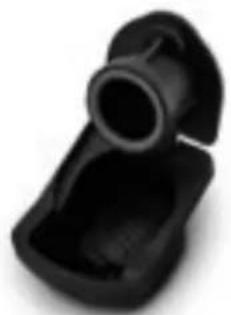
5) Insert the capsule in the capsule holder.
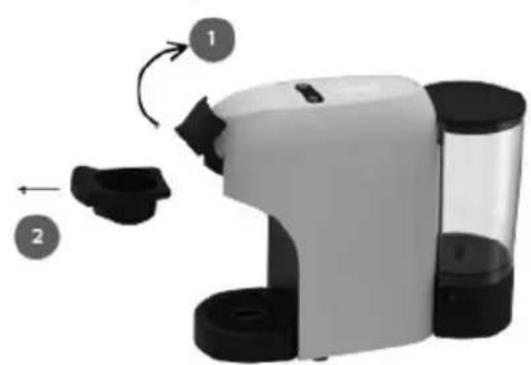
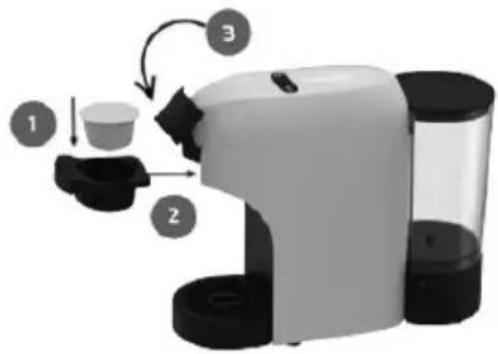
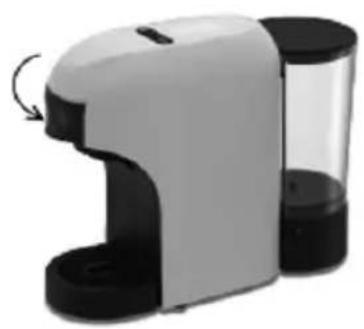
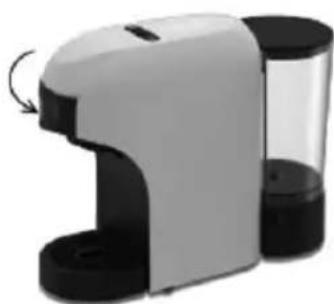
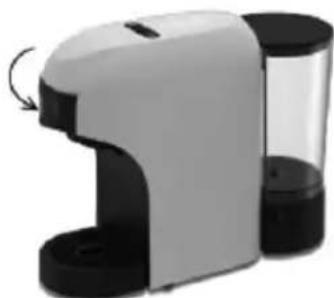
6) Close the locking handle. 7) Place the cup under the coffee dispenser for a classic espresso.
8) The indicator light starts blinking while the machine is heating up for approximately 50 seconds. Afterwards, the indicator lights become steady white, and this is the time when the machine is ready to be used. To select coffee quantity, use the volume selector button or set the volume display in accordance with the number of bars visible on the coffee machine. You can select the quantity by selecting the number of bars as per your choice. Press the brewing button; coffee preparation starts and coffee starts flowing through the capsule adaptor. Once coffee stops flowing from the adaptor, it means the coffee preparation has been done. Extraction can be stopped at any time manually by pressing the brewing button.
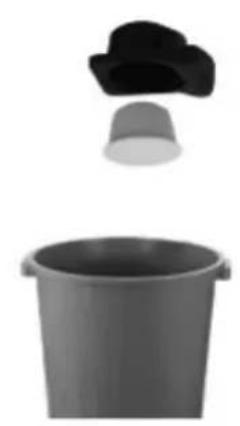
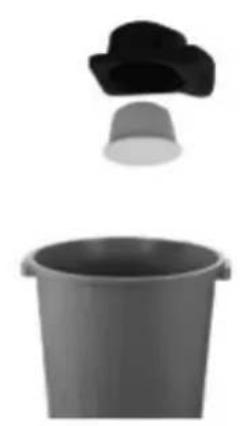
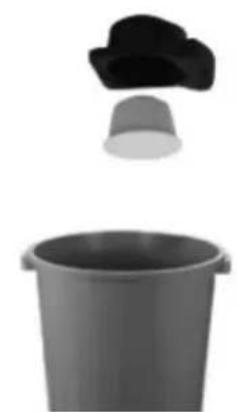
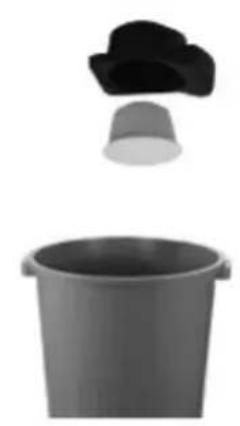
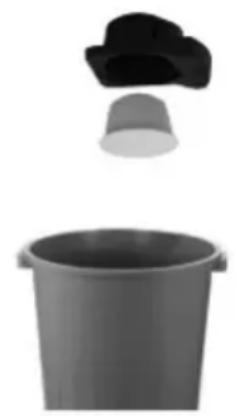
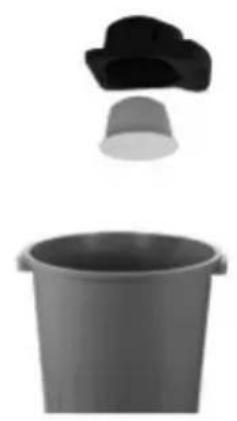
9) When the machine stops brewing, open the locking handle, pull out the capsule adaptor, and remove the used capsule. Dispose of the capsule properly.
10) Rinse both sides of the capsule holder with water and dry. Insert the capsule holder into the machine. Enjoy your beverage.
![graph LR A["heating-up"] --> B["blinking"] B --> C["heating completed"]](/content/2026/04/722224/images/03c7d51b17d2a0b7e34b0ffcb4d91c3e80fda66fd5e9122388ebfdf532c6d318.jpg)
How to Prepare Dulce Gusto Coffee?
Following the same procedure as detailed above, we can prepare Dulce Gusto coffee as well. Note: To prepare Dulce Gusto coffee, you need to select the Dulce Gusto capsule adaptor. Use only original Dulce Gusto coffee capsules.
How to Prepare Coffee with the Help of Coffee Pods?
Following the same procedure as detailed above, we can prepare coffee from coffee pods as well. Note: To prepare coffee from coffee pods, you need to select the corresponding adaptor.
How to Prepare Coffee with Coffee Powder?
Following the same procedure as detailed above, we can prepare coffee using coffee powder as well. Note: To prepare coffee from coffee powder, you need to select the coffee powder adaptor. Make sure to insert the correct measurement of coffee into the holder. Use the coffee measurement spoon to measure the correct amount of coffee powder. For the adaptor of this coffee machine, the correct amount is 8 grams.
HOT / COLD MODE:
This coffee maker allows you to prepare and enjoy both hot and cold coffee. With the help of the Hot / Cold mode button, you can switch at any time and prepare the coffee as per your requirement. Please note that Hot coffee mode is the default mode of coffee preparation, and if you need to change to Cold mode, please follow the process mentioned below.
COLD MODE
- Press the Hot / Cold mode button to choose the Hot or Cold mode.
Or, when the coffee maker is switched off, you can directly press the Hot / Cold mode button for 3 seconds and it will enter Cold mode.
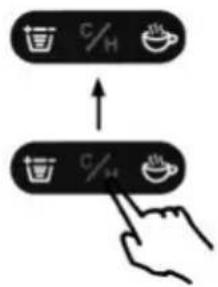
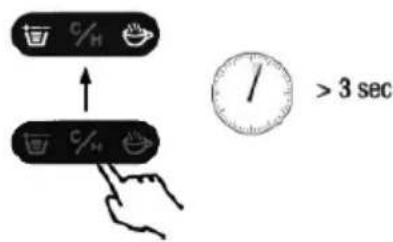
Note: Please note that in Cold mode, the machine does not heat up and uses room temperature water or cold water, whichever you use.
When transitioning from hot water mode to cold water mode, cold water does not come out immediately, because the inside of the machine is hot and it slowly cools down to room temperature. So, it is possible that the next 1 or 2 coffee extractions may be hot or warm, as the coffee maker takes some time to cool down. Please wait until the coffee machine cools down, and for better results, use cold water.
Decalcification / Maintenance
Drinking water varies according to region. The lime particles in hard drinking water are deposited as residues in the machine and can block the piping and cause damage to it. To prevent this, make sure to decalcify the machine at the very least after making 300 to 400 cups of coffee, or in any case if the output falls significantly, after one or two months. Decalcification must be done correctly to prevent damage. So, it is essential to follow these instructions.
DESCALING
- Remove and empty the water tank.
- Refill the tank with a descaling solution and water as specified on the package of the descaling product. Refill the tank.
- Power the machine on and place a suitable container under the spout.
- Press the brewing buttons and then supply two cups (approx. 150ml each) of water.
- Allow the descaling solution to work for about 15-20 minutes.
- Switch on the machine by pressing the brewing buttons, then proceed as described in the steps.
- Repeat the steps described in the point until the water tank is completely empty.
- Remove the tank and rinse it with fresh drinking water. Fill it completely.
- Switch the machine on by pressing the brewing buttons. Place a suitable container under the dispenser. Press the brewing buttons, then supply the full content of the tank.
- When the water finishes, refill the tank and repeat the process again.
This is the time when the descaling process finishes.
7. MAINTENANCE AND CLEANING
Do not forget to remove the plug from the socket before cleaning the appliance.
Wipe the outside with a soft dry cloth when the coffee machine is wet; never use metal polish. The removable items should be washed in hot soapy water. Rinse them before fixing. Detach the metal funnel by turning it anticlockwise, get rid of coffee residue inside, then you can clean it with cleanser, but at last you must rinse with clear water. Never use a dishwasher to clean any parts from the machine. Put the coffee maker in a dry and not very hot place.
ENERGY SAVING MODE
The machine enters energy saving mode automatically once the machine is idle for 9 minutes. To bring the machine back to working condition, press any button and the appliance will start to warm up with blinking lights.
- TROUBLESHOOTING
| PROBLEM CAUSE SOLUTION | ||
| No coffee is brewed The water tank is empty Fill the water in water tank | ||
| The coffee is not hot enough | 1. Cold coffee mugs2. Scale build up in the machine3. Cold machine | 1. Preheat coffee mugs2. Descale3. Brew hot water prior to brew coffee |
| Water on the table | 1. Water tank is leaking2. Drip tray is full of water | 1. Check if water tank has been placed properly2. Empty the drip tray |
| Locking handle doesn’t close The adaptor is not placed well | Push the adaptor into correct position | |
NESPRESSO®, NESCAFÉ® DOLCE GUSTO®, STARBUCKS® by NESPRESSO®, LAVAZZA®, L'OR® are registered trademarks/brands of their rightful owners. We or our products do not have any affiliation or association with, or any endorsement from, the owners of these trademarks/brands.

IMPORTANT:
![graph LR A["heating-up"] --> B["Heating completed"] C["blinking"] --> B](/content/2026/04/722224/images/f114dbdb7e5d2973ee71684b2bd79a4dc0bc9f6e8013ce6b4dc1ea7b28884e65.jpg)
STAND-BY MODE
![graph LR A["heating-up"] --> B["blinking"] B --> C["heating completed"]](/content/2026/04/722224/images/b9126dad684ebad13c3426c593e05053d0767ba1e95edbed183a93dd3de16cf4.jpg)
STAND-BY MODE

![graph LR A["heating-up"] --> B["heating completed"] C["blinking"] --> B style A fill:#f9f,stroke:#333 style B fill:#bbf,stroke:#333](/content/2026/04/722224/images/a4aeae8e92570eaee3c2086ad977ffc03355630701c876226d91faddc7425c6f.jpg)
STAND-BY MODE
5) Insert the capsule into the capsule holder.
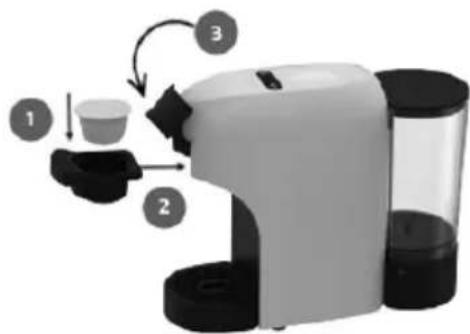
6) Close the locking handle. 7) Place the cup under the coffee dispenser to get a classic espresso.
![graph LR A["blinking"] --> B["heating-up"] B --> C["Heating completed"]](/content/2026/04/722224/images/7e6d19bfb16d28f251cb556de3010bb0fc2aefff8c64dff2af3227a69a1e8d83.jpg)
STAND-BY MODE
6) Close the locking handle. 7) Place the cup under the coffee dispenser for a classic espresso.
How to prepare Dulce Gusto coffee?
- Insert the capsule into the capsule holder.
How to prepare Dulce Gusto coffee?
Note: Please keep in mind that in cold mode, the machine does not heat up and uses room temperature/cold water, whichever you use.
![graph LR A["heating-up"] --> B["Heating completed"] C["blinking"] --> B](/content/2026/04/722224/images/7e7fa002d962606058e85524c3f797a31b441bb1c86f6636d67e8cb56461df1c.jpg)
STANDBY MODE
5) Insert the capsule into the capsule holder.
DECLARATION OF CONFORMITY
DECLARATION OF CONFORMITY
This device complies with EU Low Voltage Directive 2014/35/EC.
Electromagnetic Compatibility Directive 2014/30/EU. Directive 2015/863/EU on the restriction of the use of certain hazardous substances in electrical.
Directive 2009/125/EC on the eco-design requirements applicable to energy-related products.

This symbol on the product or on the packaging indicates that this product can't be disposed as normal rubbish or household waste. All the electrical, electronic equipment's and battery-operated units must recycle in proper manner and according to the local municipal laws. You can recycle them by taking them to government authorized disposal centres or specialized bins which you can find in any nearby big super markets, electronics or electro domestics products stores or malls who have these types of facilities available.
Designed by: SOGO based on European quality standards Imported by: Sanysan Appliances S.L, NIF: B98753056, C/ Barcas 2, 2, 46002 Valencia, Spain Product manufactured in CHINA. After-sales service: www.sogosat.com sogosat@sogosat.com / 0034 902 222 161

- INSTRUCTIONS FOR USE
- START-UP
- STANDBY MODE
- HOW TO PREPARE AN ESPRESSO COFFEE
- SAFETY INSTRUCTIONS FOR THE USER
- GENERAL PRECAUTIONS
- GENERAL PRECAUTIONS DURING THE USE OF ELECTRICAL EQUIPMENT
- RESTRICTIONS ON USE TO AVOID PERSONAL INJURY
- RESTRICTIONS ON USE WHEN USED WITH CHILDREN AND ELDERS
- INSTRUCTIONS TO FOLLOW WHEN USING THE APPLIANCE
- WARNING: HIGH RISK OF BURNS! DO NOT TOUCH THE HOT PARTS OF THE COFFEE MAKER
- CLEANING AND MAINTENANCE
- TECHNICAL SPECIFICATIONS
- PARTS DESCRIPTION
- STARTING UP
- TIP
- NOTE
- HOW TO USE
- STAND-BY MODE
- COFFEE DISPENSING
- HOW TO PREPARE DULCE GUSTO COFFEE
- HOW TO PREPARE COFFEE WITH THE HELP OF COFFEE PODS
- HOW TO PREPARE COFFEE WITH COFFEE POWDER
- HOT / COLD MODE
- COLD MODE
- DECALCIFICATION / MAINTENANCE
- DESCALING
- MAINTENANCE AND CLEANING
- ENERGY SAVING MODE
- IMPORTANT
- DECLARATION OF CONFORMITY
Brand : Sogo
Model : SS-7655
Category : Coffee machine