
SS-3525 - Lawn mower Sogo - Free user manual and instructions
Find the device manual for free SS-3525 Sogo in PDF.

| Brand | Sogo |
| Model | SS-3525 |
| Product type | Hair clipper |
| Power supply | Mains 220-240 V ~ 50 Hz |
| Power consumption | 12 W |
| Intended use | Domestic, dry hair cutting |
| Blades | T10 carbon steel, self-sharpening, permanently lubricated |
| Cutting lengths | 3 mm, 6 mm, 10 mm, 13 mm (with combs) |
| Progressive adjustment | Taper lever for continuous variation without comb |
| Included accessories | 4 combs (3/6/10/13 mm), 1 styling comb, scissors, cleaning brush, blade oil, blade guard |
| Maintenance | Clean blades with brush after each use, oil regularly, wipe body with a damp cloth |
| Continuous use duration | 10 minutes maximum |
| Safety | Do not use in water or shower, unplug after use, supervise children |
| Approximate dimensions | Length 16 cm, width 4 cm, height 3 cm (without cord) |
| Approximate weight | 200 g |
| Repairability | Adjustable and replaceable blades, user maintenance possible |
| After-sales service | www.sogosat.com - sogosat@sogosat.com - +34 902 222 161 |
| Compliance | Directives 2014/35/EU, 2014/30/EU, 2011/65/EU, 2009/125/EC |
Frequently Asked Questions - SS-3525 Sogo
User questions about SS-3525 Sogo
0 question about this device. Answer the ones you know or ask your own.
Ask a new question about this device
Download the instructions for your Lawn mower in PDF format for free! Find your manual SS-3525 - Sogo and take your electronic device back in hand. On this page are published all the documents necessary for the use of your device. SS-3525 by Sogo.
USER MANUAL SS-3525 Sogo
natural_image
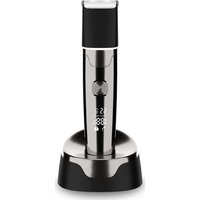
Black SOGO TECHCLIPPER hair cutting tool (no text or symbols visible on the device body)
Set Cortapelo Profesional Professional Hair Clipper Set Tondeuse à Cheveux Professionnelle Máquina de Cortar Cabelo Professionelle Haarschneidemaschine Tagliacapelli professionale
Caution: please read and preserve these important instructions
natural_image
Close-up of a mechanical component with multiple spoked elements (no visible text or symbols)
natural_image
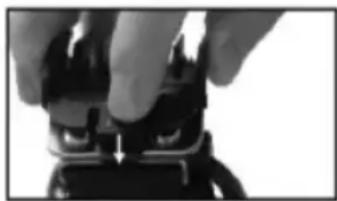
Close-up of a hairpin securing a textured object with arrows indicating force (no text or symbols visible)natural_image
Close-up of a mechanical component with two circular arrows indicating rotation (no text or symbols)COLOCACIÓN DE GUIAS
natural_image
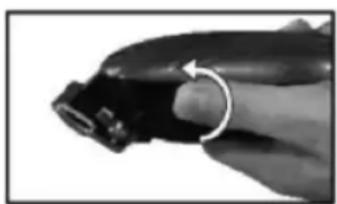
Close-up of hands adjusting a black object with a downward arrow (no visible text or symbols)natural_image
Close-up of a hand holding a black object with a circular arrow indicating rotation (no text or symbols visible)Picture 1
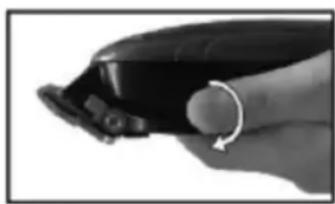
natural_image
Close-up of a hand holding a black handheld device with a circular arrow indicating rotation (no text or symbols visible)Picture 2
This instruction manual can also be downloaded from our web page www.sogo.es
- When using your hair clipper kit, basic precautions should always be observed, including the following.
-
Before plugging in the clipper, make sure your outlet voltage and circuit frequency correspond to the voltage stated on the rating label, and the household power outlet socket is properly earthed.
-
Make sure the clipper; cord and plug do not come in contact with water or any other liquid. Ensure your hands are completely dry before handling the supply cord plug and the hair clipper.
-
Do not place or store the clipper where it can fall or be knocked into a sink or tub. Do not place in or drop into water or any other liquid.
-
Do not use the clipper while bathing or in the shower.
-
Do not knot, squash or tug the power cord, protect it from sharp edges and heat. Do not wrap it around the appliance, and never pull or lift the product by the power cord, carry or unplug the clipper by pulling on the supply cord.
-
Do not use if the power supply cord is damaged. If the cord is damaged, it must be replaced by the manufacturer, its service agent or similarly qualified persons in order to avoid a hazard.
-
Unplug from electrical outlet immediately after use. Do not clean the clipper while it is still
connected to mains power. Do not place the clipper on any surface while it is switched ON. Do not use the clipper if it has been dropped on the ground or into water.
-
Only use clipper with accessories sold together with product.
-
Never drop or insert any object into any opening of this clipper.
-
Check the clipper and all its parts carefully and regularly. Do not use this clipper with damaged or broken parts and clipper guide. The clipper is intended for home use only, and only uses it as described in this manual.
-
The clipper is not intended for use by persons (including children) with reduced physical, sensory or mental capabilities, or lack of experience and knowledge, unless they have been given supervision or instruction concerning use of the product by a person responsible for their safety.
-
Supervise children to ensure they do not play with the clipper. Closely supervision is necessary when any appliance is used by, on or near children.
-
Do not use on people who are asleep.
-
Children under 8 is not allowed to use this product, or the person with physiological disorder or mental disease or lack of experience shall be supervised to operate this products, and shall be informed of relevant dangers.
-
Children shall not play with products.
-
Children shall not clean and repair this product without supervision.
CAUTION
Do not use the hair clipper continuously for more than 10 minutes.
The hair clipper is fitted with high quality T10 carbon steel blade that is permanently lubricated. To ensure long-term performance of your clipper, clean the blades and unit regularly. Always keep the blade guard on the clipper trimming blade when not in use.
After Each Use
- Ensure that the clipper is switched OFF and disconnected from mains power.
- Clean the hair from blade with the cleaning brush provided. Do not use water to clean.
• To clean the clipper, wipe with a damp cloth and dry immediately. - Do not use liquid cleaners on the blades or harsh or corrosive chemicals on the clipper. To prevent damage to the blade, do not apply pressure or hard objects to the clipper blades.
WELCOME
• Thanks for buying our Hair Clipper.
Read all instructions of the manual thoroughly before use, even if you are familiar with this type of product. The safety precautions enclosed herein reduce the risk of fire, electric shock and injury when correctly adhered to. Keep the manual in a safe place for future reference. If applicable, pass the instructions on to the next owner of the appliance.
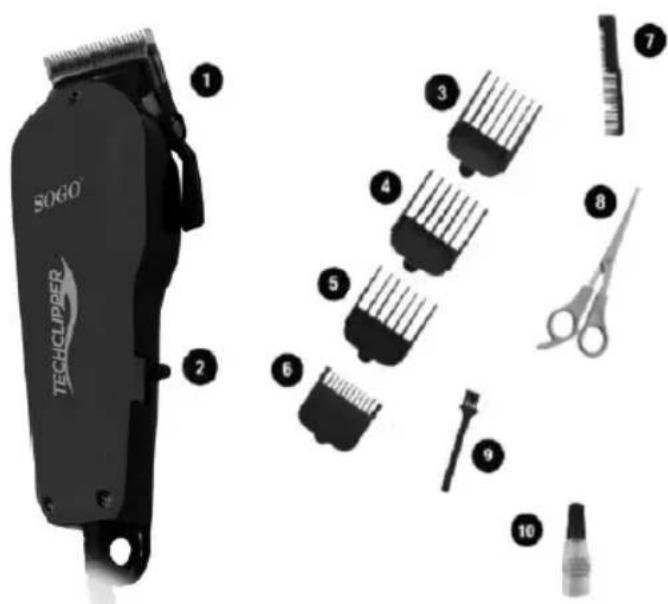
HAIR CLIPPER PARTS
- Clipper
2 Taper Lever - 16mm Trimming Guide
- 13mm Trimming Guide
- 10mm Trimming Guide
- 6mm Trimming Guide
- 3mm Trimming Guide
- 1 Styling Combs
- Scissors
- Cleaning Brush
- Blade Oil
Also included blade guard & instruction manual.
BEFORE USING YOUR HAIR CLIPPPER
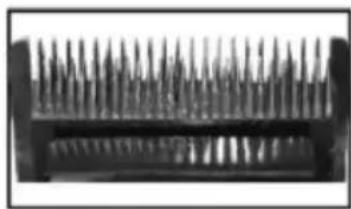
- Your clipper was carefully examined to make sure the blades were oiled and aligned before leaving our factory.
The blade position is showed with the picture below. If the blades are out of alignment they can be easily adjusted.
- To align the blades, use a screwdriver to loosen the 2 screws retaining the fixed blade. Ensure to adjust the taper lever to the lowest position and align the blades so that the cutting edges are parallel to one another. Then tighten the 2 screws.
To keep your clipper in good working condition, make sure the blades are oiled as shown in the picture below. Simply spread 1-2 drops of the supplied lubricating oil on the four positions shown.
natural_image
Close-up of a mechanical component with multiple spoked pins (no visible text or symbols)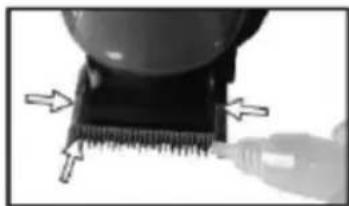
natural_image
Close-up of a hand using a tool to adjust a textured surface with arrows indicating direction (no text or symbols visible)- To adjust the clipper for good performance, switch the clipper ON and use a screw driver, or a thin coin, to turn the power screw on the opposite side of ON/OFF switch in clockwise direction until you hear a loud clattering noise, refer to below photo. Then slowly turn the power screw anticlockwise until the noise stops. Switch the dipper ON and OFF a few times to ensure the clattering has stopped. If it continues when the clipper is switched ON, turn the screw a little further anticlockwise. This is the optimal setting for the hair dipper blades.

natural_image
Close-up of a mechanical component with two circular arrows indicating rotation (no text or symbols)TO ATTACH TRIMMING GUIDES
- The hair clipper comes with nine clipper guides, which are marked with a number.
Clipper Guide No. 1 leaves a 3mm hair length. Clipper Guide No. 2 leaves a 6mm hair length. Clipper Guide No. 3 leaves a 10mm hair length. Clipper Guide No. 4 leaves a 13mm hair length.
How to use the clipper
To attach a clipper guide, hold it with its teeth upward and slide it onto and along the clipper blades, then press down gently until it clicks into place, refer to below photo. Pull the comb upward and away from the clipper blade to remove the guide.
natural_image
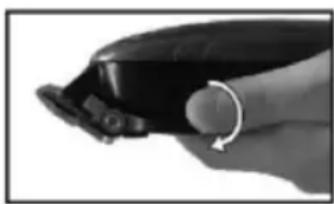
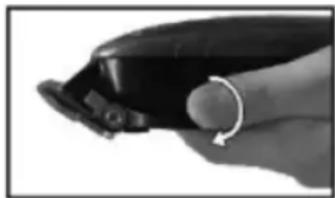
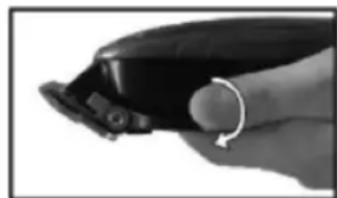
Close-up of hands pressing a button on a device (no visible text or symbols)The hair clipper has a taper lever located at the left side of the clipper, near the blade. The lever adds versatility to your clipper by allowing you to gradually change the closeness of your cut without need for a clipper guide and also to improve the effectiveness of the trimming guide attachments. When the level is in the uppermost position (Picture 1), the blades will give you the closest cut and leave the hair very short. Pushing the lever downward gradually increases the cutting length. In the lowest position (Picture 2), the lever will cut the hair approximately the same length as the NO 1 clipper guide.
natural_image
Close-up of a hand holding a black electronic device with a circular arrow indicating rotation (no text or symbols visible)Picture 1
natural_image
Close-up of a hand holding a black handheld device with a circular arrow indicating rotation (no text or symbols visible)Picture 2
BEFORE CUTTING HAIR
- Inspect the clipper and make sure there is no excessive oil on the cutting blades prior to use. Any excessive oil should be wiped off to prevent it from getting on your skin.
- Place a cape or cleaning cloth around the neck of the person whose hair is being trimmed or cut.
- Seat the persons whose head is approximately at your shoulders.
- Ensure the hair is dry. Hair clippers perform best with dry hair, making it easier to see how much hair is being cut.
- Comb the hair as it is normally styled.
- Comb out all knots and tangles. Select an appropriate length trimming guide to match the desired length of hair to remain after the cut. There are 3mm, 6mm, 10mm y 13mm trimming guide to choose.
USEFUL INFORMATION
At regular intervals the blade set should be removed and cleaned.
With a screwdriver remove the 2 screws retaining the fixed blade. Re-fit the blade after cleaning as described below:
Brush out any hair stuck between the blades with a soft cleaning brush. Do not use water or any other chemical to remove the lubricating grease from the blades. It is not necessary to remove the top moving blade for cleaning. Before fully tightening the 2 screws, adjust the taper lever to the lowest position and align the blades so that the cutting edges are parallel to one another. Tighten the 2 screws.
Note: If the blades are not correctly aligned, the cutting efficiency will be impaired.
When not in use, unplug the clipper and store it out of reach of children in a safe dry place. Never wrap the cord around the clipper as it will cause the cord to wear prematurely and break.
TECHNICAL SPECIFICATION:
Model No: SS-3525
Voltage / Frequency: 220 -240V \~ 50Hz
Power Consumption: 12W
MESURES DE SÉCURITÉ IMPORTANTES
natural_image
Close-up of a mechanical component with multiple spoked blades (no visible text or symbols)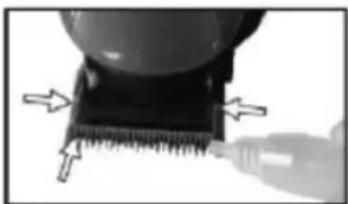
natural_image
Close-up of a mechanical component with arrows indicating force or movement (no visible text or symbols)natural_image
Close-up of a car wheel with two circular arrows indicating clockwise motion (no text or symbols)POUR FIXER LES GUIDES DE FRAISAGE
natural_image
Close-up of a hand pressing down on a black mechanical component (no visible text or symbols)natural_image
Close-up of a hand holding a black object with a circular arrow indicating rotation (no text or symbols visible)Picture 1
natural_image
Close-up of a hand holding a black handheld device with a circular arrow indicating rotation (no text or symbols visible)Picture 2
AVANT LA COUPE DE CHEVEUX
MANUAL DE INSTRUÇÕES
natural_image
Close-up of a mechanical component with evenly spaced protrusions (no visible text or symbols)natural_image
Close-up of a mechanical component with arrows indicating force or movement (no visible text or symbols)natural_image
Close-up of a curved mechanical component with two numbered arrows indicating rotation (no text or symbols)A FIXE GUIAS APARADOR
natural_image
Close-up of hands operating a mechanical device with a handle (no visible text or symbols)natural_image
Close-up of a hand holding a black electronic device with a circular arrow indicating rotation (no text or symbols visible)Picture 1
natural_image
Close-up of a hand holding a black plastic clip with a circular arrow indicating rotation (no text or symbols visible)Picture 2
natural_image
Close-up of a mechanical component with evenly spaced protrusions (no visible text or symbols)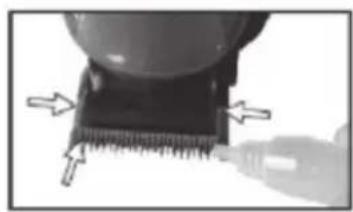
natural_image
Close-up of a hairpin with serrated texture and directional arrows indicating measurement or application (no text or symbols)natural_image
Close-up of a curved mechanical component with numbered callouts (1, 2) and a circular arrow indicating rotation or motion (no readable text or symbols)DIE TRIMMINGFÜHRER ANLEGEN
natural_image
Close-up of hands holding a small electronic device with a downward arrow indicating a component (no visible text or symbols)natural_image
Close-up of a mechanical component with evenly spaced protrusions (no visible text or symbols)
natural_image
Close-up of a hairpin with serrated texture and directional arrows indicating measurement or application (no text or symbols)natural_image
Close-up of a mechanical component with two circular arrows labeled 1 and 2, no readable text or symbols beyond labelsPER FISSARE LE GUIDE DI TAGLIO
natural_image
Close-up of hands adjusting a mechanical component with a downward arrow (no visible text or symbols)DECLARATION OF CONFORMITY
This device complies with Low Voltage Directive 2014/35/EC, Electromagnetic Compatibility Directive 2014/30/EU, Directive 2011/65/EU on the restriction of the use of certain hazardous substances in electrical and electronic equipment and Directive 2009/125/EC on the eco-design requirements applicable to energy-related products.
DÉCLARATION DE CONFORMITÉ
This symbol means that in case you wish to dispose of the product once its working life has ended, take it to an authorised waste agent for the selective collection of waste electrical and electronic equipment (WEEE).

Imported by:
Sanysan Appliances S.L, NIF: B98753056, C/ Barcas 2, 2
46002 Valencia, Spain
Product made in P.R.C. – Designed by SOGO based on the European Quality Standards
Customer Service: www.sogosat.com / sogosat@sogosat.com / 0034 902 222 161


- COLOCACIÓN DE GUIAS
- CAUTION
- After Each Use
- WELCOME
- HAIR CLIPPER PARTS
- BEFORE USING YOUR HAIR CLIPPPER
- TO ATTACH TRIMMING GUIDES
- How to use the clipper
- BEFORE CUTTING HAIR
- USEFUL INFORMATION
- TECHNICAL SPECIFICATION:
- MESURES DE SÉCURITÉ IMPORTANTES
- POUR FIXER LES GUIDES DE FRAISAGE
- AVANT LA COUPE DE CHEVEUX
- MANUAL DE INSTRUÇÕES
- A FIXE GUIAS APARADOR
- DIE TRIMMINGFÜHRER ANLEGEN
- PER FISSARE LE GUIDE DI TAGLIO
- DECLARATION OF CONFORMITY
- DÉCLARATION DE CONFORMITÉ
- Imported by:
Brand : Sogo
Model : SS-3525
Category : Lawn mower