
SS-21710 - Air purifier Sogo - Free user manual and instructions
Find the device manual for free SS-21710 Sogo in PDF.

User questions about SS-21710 Sogo
0 question about this device. Answer the ones you know or ask your own.
Ask a new question about this device
Download the instructions for your Air purifier in PDF format for free! Find your manual SS-21710 - Sogo and take your electronic device back in hand. On this page are published all the documents necessary for the use of your device. SS-21710 by Sogo.
USER MANUAL SS-21710 Sogo
natural_image
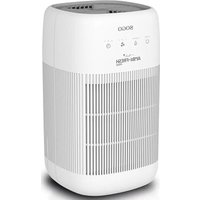
White SOGO AMBI-FRESH air purifier with visible fan and grille (no text or symbols on body)
PURIFICADOR DE AIRE
AIR PURIFIER
PURIFICATEUR D'AIR
PURIFICADOR DE AR
LUFTREINIGER
PURIFICATORE D'ARIA
Caution: please read and preserve these important instructions
natural_image
Diagram of a mechanical component with rotating arrows indicating motion, accompanied by an inset showing a curved line with directional arrows (no text or symbols present)natural_image
Diagram of a device with internal structure and airflow direction arrows, showing no text or symbolsnatural_image
Diagram of a cylindrical device with internal mesh structure and blue directional arrows indicating flow or movement (no text or symbols)natural_image
Diagram showing a plug inserted into an outlet and a hand touching a red circular button (no text or symbols)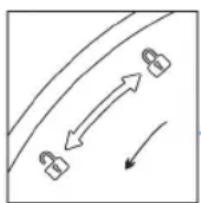
natural_image
Simple line diagram showing two padlock icons moving along a curved path with directional arrows (no text or symbols)(b)

natural_image
Diagram of a cylindrical device with internal components and a blue arrow indicating rotation (no text or symbols)(g)

natural_image
Diagram showing a plug inserted into a socket and a hand with a red circular icon (no text or symbols)(h)
natural_image
Illustration of two cylindrical containers connected by a coiled tube, no text or symbols present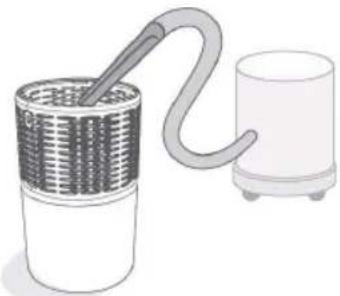
natural_image
Illustration of a coiled tube connected to a cylindrical container (no text or symbols)7. Almacenamiento
This instruction manual can also be downloaded from our web page www.sogo.es
1. IMPORTANT SAFETY INFORMATION
- Read this user manual carefully before you use the appliance and save it for future reference.
- Do not let water or any other liquid or flammable detergent enter the appliance to avoid electric shock and/or a fire hazard.
- Do not clean the appliance with water or any other liquid or a (flammable) detergent to avoid electric shock and/or a fire hazard.
- Check if the voltage indicated on the appliance corresponds to the local mains voltage before you connect the appliance.
- If the mains cord is damaged, you must have it replaced by distributor, or a service centre authorised by distributor or similarly qualified persons in order to avoid a hazard.
- Do not use the appliance if the plug, the mains cord or the appliance itself is damaged.
- This appliance is not intended for use by persons (including children) with reduced physical, sensory or mental capabilities, or lack of experience and knowledge, unless they have been given supervision or instruction concerning use of the appliance by a person responsible for their safety.
- Children should be supervised to ensure that they do not play with the appliance.
-
Do not block the air inlet and outlet, e.g. by placing items on the air outlet or in front of the air inlet.
-
To reduce the risk of fire or electric shock, DO NOT use the appliance with any solid-state speed control device.
- This appliance is not a substitute for proper ventilation, regular vacuum cleaning or use of an extractor hood or fan while cooking.
- If the wall socket used to power the appliance has poor connections, the plug of the appliance becomes hot. Make sure you plug the appliance into a properly connected wall socket.
• Always place and use the appliance on a dry, stable, level and horizontal surface. - Leave at least 40cm free space behind and on both sides of the appliance and leave at least 40cm free space above the appliance.
- Do not place anything on top of the appliance and do not sit on the appliance.
- Do not place the appliance directly below an air conditioner to prevent condensation from dripping onto the appliance.
- Make sure all filters are properly installed before you switch on the appliance.
- Only use the original filters specially intended for this appliance. Do not use any other filters.
- Avoid knocking against the appliance (the air inlet and outlet in particular) with hard objects.
• Always lift or move the appliance by the handle at the back of the appliance. - Do not insert your fingers or objects into the air outlet.
-
Do not use this appliance when you have used indoor smoke-type insect repellents or in places with oily
-
residues, burning incense or chemical fumes.
- Do not use the appliance near gas appliances, heating devices or fireplaces.
• Always unplug the appliance after use and before you clean it. - Do not use the appliance in a room with major temperature changes, as this may cause condensation inside the appliance.
- The appliance is only intended for household use under normal operating conditions.
- Do not use the appliance in wet surroundings or in surroundings with high ambient temperatures, such as the bathroom, toilet or kitchen.
- The appliance does not remove carbon monoxide (CO) or radon (Rn). It cannot be used as a safety device in case of accidents with combustion processes and hazardous chemicals.
- To prevent is interference, should be kept at least 2 meters distance between the product and the use of radio waves electrical.
Technical Specification:
220 - 240V\~ 50/60Hz, 23W
2. Product Structure
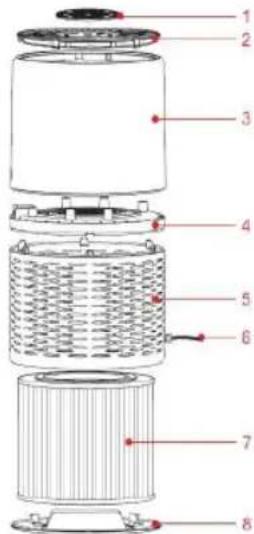
- Control panel
- Outlet cover
- Upper body
- Decorative ring
- Lower body
- Power cord
- Combination filter
- Base cover
3. Before first use
Placing the filters
The appliance comes with all filters fitted inside, but you have to remove the packaging of the filters before you can use the appliance. Remove all filters, unpack them and place them back into the appliance as described below.
Note: Make sure you insert the filters in the correct position.
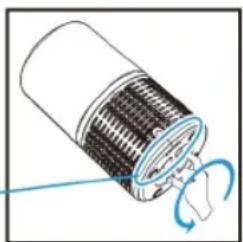
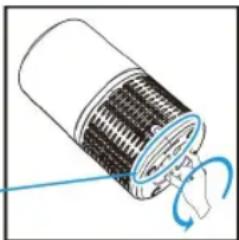
- Put the appliance upside down on a soft cloth to avoid scratching, to open the base cover, you need to corresponding the LOCK position, turn the base cover counterclockwise from LOCK to OPEN position, then the lock released.
natural_image
Diagram of a cylindrical device with internal components and a magnified inset showing directional arrows (no text or symbols)-
Remove the base cover and take out the combination filters.
-
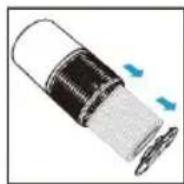
Remove the packaging material from the filter.
natural_image
Diagram of a cylindrical device with internal mesh structure and external mesh component, showing fluid flow direction (no text or symbols)- Put the filter back into the appliance.
Note: Make sure that the side with the tag is pointing towards you.
natural_image
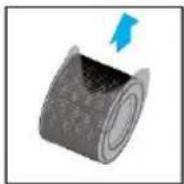
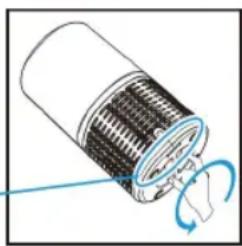
Diagram of a cylindrical device with internal mesh structure and blue directional arrows indicating flow or movement (no text or symbols)- Turn the base cover clockwise from OPEN position to LOCK position, you will hear a "click" sound, the base cover is fastened.
- Using the appliance
4.1 About the control panel

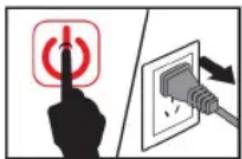
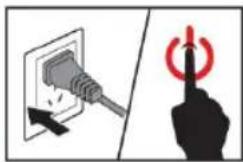
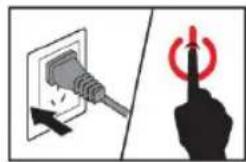
1. Plug and turn on the machine
All lights will be ON for 1 second and you hear a beep, all lights then stay OFF.

natural_image
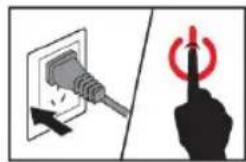
Illustration showing a plug inserted into an outlet and a hand touching a red circular button (no text or symbols)- Press the power button to switch on the appliance.
Press ⏻ button, AQ light turns on and Speed at level 1 (Low).
3). Fan speed adjustment
The fan speed light indicates at which fan speed the appliance is operating.
Press Speed button ✝ to adjust fan speed level, there are three levers
I\~III refers to Low, Medium, High level.
4). Auto mode
At Auto mode, the fan speed will be automatically adjusted according to AQI level as below:
| AQ Color Blur Green | Orange Red | |||
| Speed mode Sleep I (Low) II (Medium) III (High) | ||||
| AQ level Very good Good Unhealthy Hazardous | ||||
5). Sleep mode
- Press ☺ to turn Sleep Mode on and Sleep indicator turn brightness.
All indicators will be at half brightness, air purifier will work in the lowest fan.
-
All indicators will be at half brightness while sleep mode is on. And the indicators will be light up while change to Speed mode or other mode.
-
AQ light indicator will display the color according to the air quality.
Note: The operation will not work in Standby Mode.
6). Light
Press ⚡ button, all indicators turn off.
When air purifier in the Mode that all indicators turn off, press any other button to light up and keep it.(except Power button)
Note: In the Mode that all indicators turn off, tap Power button to turn off.
7). Setting timer
-
Press ⏻ to turn on or off the timer, and to cycle through timer options (2 hours, 4 hours, or 8 hours).
-
The air purifier will automatically power off once the timer is finished.
Note: Pressing ⏻ or unplugging the air purifier will cancel the timer.
8). Filter replacement light
When indicator lights, it means that you should check the filter if it need to be cleaned or replaced.
Note: The filter's lifetime is based to your house air quality and using time.
Using the appliance in a humid environment will reduce the lifetime of the filter.
9). Memory Function
The air purifier has the setting memory while the users turn it off, including fan speed. It will return to the last setting while the users turn it on again.
5. Filter Replacement
-
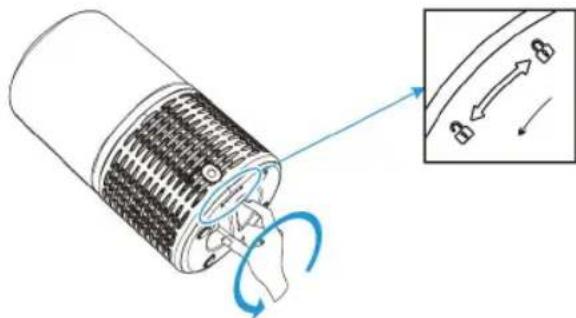
Switch off the appliance and unplug it. (a)
-
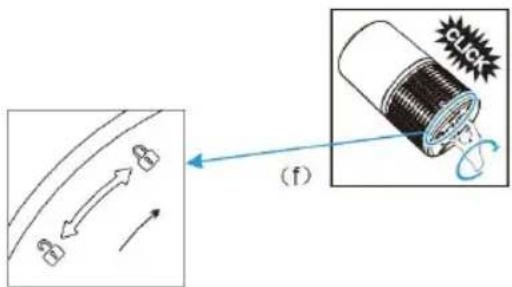
Put the appliance upside down on a soft cloth to avoid scratching, to open the base cover, you need to corresponding the LOCK position, turn the base cover counterclockwise from LOCK to OPEN position, then the lock released. (b)
(a)

natural_image
Simple line drawing of three lock icons with curved arrows indicating motion (no text or symbols)(b)
natural_image
Diagram of a cylindrical device with internal components and a blue arrow indicating rotation (no text or symbols)-
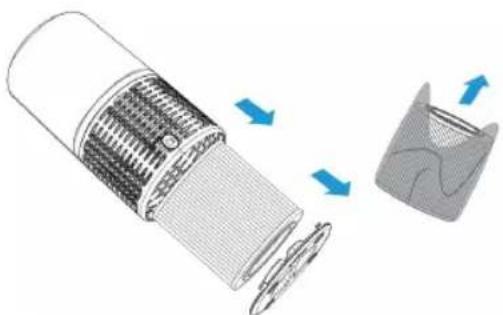
To remove the base cover and combination filter, grab filter tag and pull it towards you. (c)
-
Remove the packaging material of the new combination filter. (d)
-
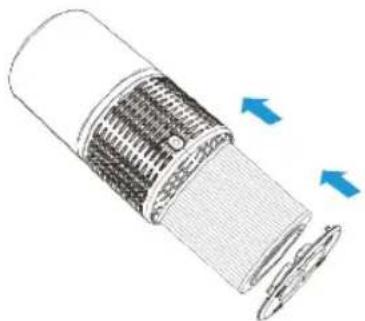
Put the new filter back into the appliance. (e) Note: For HEPA filter Make sure that the side with the tag is pointing towards you.
-
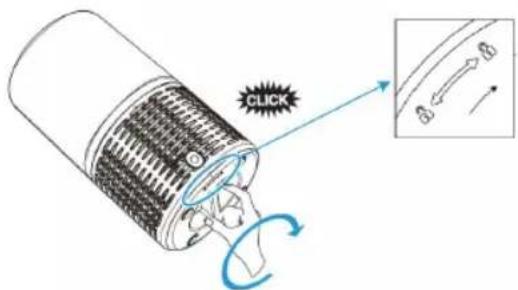
Turn the base cover clockwise from OPEN position to LOCK position, you will hear a "click" sound, the base cover is fastened. (f)
-
Put the plug in the wall socket and switch on the appliance again. (g)
-
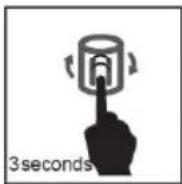
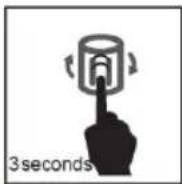
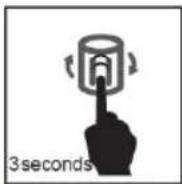
Reset Filter's lifetime. Even you replace the filters, when you switch on the appliance, the filter icon still light, you need to reset the filter's lifetime, so that the appliance can cycle to calculate the filters' working time. Press 📋 and hold the button for 3 seconds, the filter light turn off, the reset is finished. (h)
(c)
(d)
(e)
(g)
natural_image
Diagram showing a plug inserted into a socket and a hand touching a button with red circular activation (no text or symbols)(h)

Filter replacement force mode
Suppose you use the appliance under air pollution environment, you can replace the filter even the filter icon does not light, the filter replacing method is same, please see chapter: Filter replacement.
To force reset the filter's lifetime:
At the standby model(NOT press the power button), press and hold button for 3 seconds, the icon light on, press and hold button for 3 seconds again, the filter light turn off, then the reset is finished.
6. Keep Filter Clean:
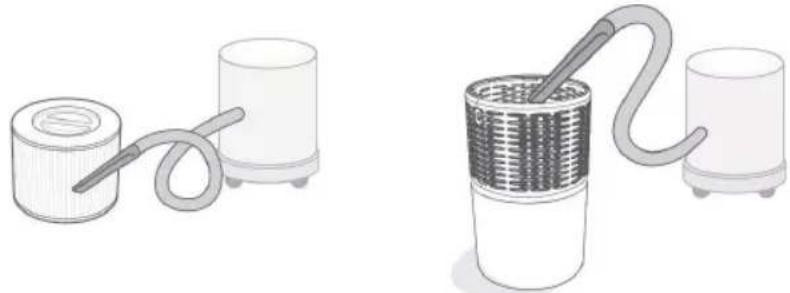
In order to keep your purifier working with more efficiency and life-time, clean the filter (pre-filter side only) every 2 weeks with the Instruction Below:
1). Clean out any dust, hair, or furs remain on the pre-filter by using the vacuum hose.
2). Clean out any dust, hair, or furs remain on the bottom cover by using the vacuum hose.
3). DO NOT wash the filter with any water or liquid.
natural_image
Two illustrations of cylindrical containers with coiled tubing, one with a coiled tube and the other with a coiled tube (no text or symbols)7. Storage
Unplug the power cord, then wipe the machine clean, put the appliance in the packing bag, then put it in a dry place away.
8. Environment
Do not throw away the appliance with the normal household waste at the end of its life, but hand it in at an official collection point for recycling. By doing this, you help to preserve the environment.
9. Troubleshooting
This chapter summarises the most common problems you could encounter with the appliance. If you are unable to solve the problem with the information below, contact the Consumer Care Centre in your country.
| Problem Cause Solution | ||
| Air purifier does not power on | Unit is not plugged into an electrical outlet | Connect the plug to a powered electrical outlet |
| Outlet is not working properly Try plugging the air purifier into a different outlet | ||
| Power button has not been pressed after plugging in the air purifier | Press once to turn on the air purifier | |
| Power cord is damaged Immediately discontinue use and contact Customer Support | ||
| Air purifier is defective or malfunctioning | ||
| Air purifier does not respond to button controls | Air purifier is not plugged into an outlet Connect the plug to a powered electrical outlet | |
| Air purifier is defective or malfunctioning Immediately discontinue use and contact Customer Support | ||
| Air purifier makes an unusual noise while operating | Air filters are dirty Replace the air filter as instructed in the Filter Replacement section | |
| Filter does not fit properly Properly place filter(s) as noted in the Before first use and Filter Replacement sections | ||
| Foreign object inside the unit Immediately discontinue use and contact Customer Support. DO NOT attempt to open the air purifier | ||
| Significantly reduced airflow | Filter packaging has not been removed Remove filter from packaging before use | |
| Fan speed is low Press to adjust fan speed | ||
| Air filters need to be replaced Replace the air filters as instructed in the Filter Replacement section | ||
| Not enough clearance on all sides of the purifier | Ensure there is at least 38 cm (15 inches) of clearance on all sides of the purifier | |
| Poor air purification quality | Air filters need to be replaced Replace the air filters as instructed in the Filter Replacement section | |
| Room is too large for the air purifier's applicable area | Ensure the room is smaller than (280 ft ^2 ) | |
| Air inlet or outlet is blocked | Remove objects blocking air inlet or outlet | |
| Filters not properly placed in housing | Properly place filters as noted in the Before first use and Filter Replacement sections | |
| Filter reset button is still illuminated after replacing the air filters | The air purifier has been reset incorrectly | See the Filter Replacement section on how to properly reset the unit |
| Air purifier turns on, then suddenly turns off | Air purifier is defective or malfunctioning Immediately discontinue use and contact Customer Support. DO NOT attempt to open the air purifier for self-servicing | |
| Air purifier beeps repeatedly after being powered on or plugged in | ||
natural_image
Diagram of a cylindrical device with internal components and a magnified inset showing directional arrows (no text or symbols)natural_image
Diagram of a device with mesh structure and internal flow arrows, showing no text or symbolsnatural_image
Diagram of a cylindrical device with internal mesh structure and blue directional arrows indicating flow or movement (no text or symbols)natural_image
Diagram showing a plug inserted into an outlet and a hand touching a red circular button (no text or symbols)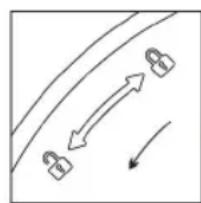
natural_image
Simple line drawing of a curved path with two lock icons and directional arrows (no text or symbols)(b)
natural_image
Diagram of a cylindrical device with internal structure and rotating arrows indicating motion (no text or symbols)(g)

natural_image
Diagram showing a plug inserted into a socket and a hand with a red circular icon (no text or symbols)(h)

natural_image
Illustration of a cylindrical device connected to a cylindrical container with a coiled tube (no text or symbols)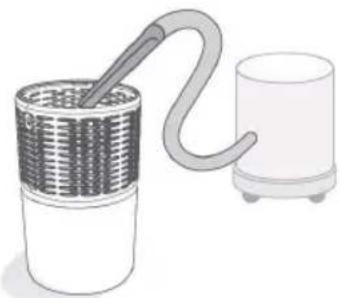
natural_image
Illustration of a coiled tube connected to a cylindrical container (no text or symbols)7. Stockage
natural_image
Diagram of a mechanical component with internal gear and rotation arrows, showing motion direction (no text or symbols)natural_image
Diagram of a device with internal structure and airflow direction arrows, showing no text or symbolsnatural_image
Diagram of a cylindrical device with internal mesh structure and blue directional arrows indicating flow or movement (no text or symbols)natural_image
Diagram showing a plug inserted into an outlet and a hand touching a red circular button (no text or symbols)natural_image
Simple line diagram showing two padlock icons moving along a curved path with directional arrows (no text or symbols)(b)

natural_image
Diagram of a cylindrical device with internal components and a blue arrow indicating rotation (no text or symbols)(g)
natural_image
Diagram showing a plug inserted into a socket and a hand with a red circular button indicating press function (no text or symbols)(h)
natural_image
Illustration of two cylindrical containers connected by a coiled tube, no text or symbols present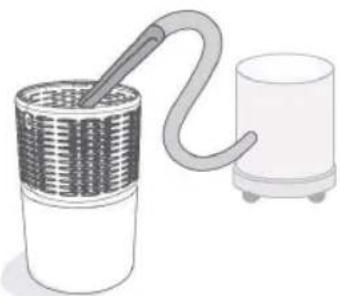
natural_image
Illustration of a coiled tube being inserted into a cylindrical container, next to a smaller cylindrical device (no text or symbols)7. Armazenamento
natural_image
Diagram of a cylindrical device with internal components and a magnified inset showing directional arrows (no text or symbols)natural_image
Diagram of a cylindrical device with internal mesh structure and external mesh component, showing blue directional arrows (no text or symbols)natural_image
Diagram of a cylindrical device with internal mesh structure and blue directional arrows indicating flow or movement (no text or symbols)natural_image
Diagram showing a plug inserted into an outlet and a hand touching a red circular button (no text or symbols)natural_image
Diagram of a cylindrical device with internal components and a blue arrow indicating rotation (no text or symbols)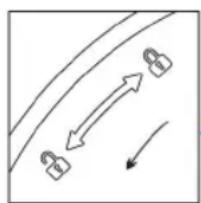
natural_image
Simple line drawing of a curved path with two lock icons and directional arrows (no text or symbols)(g)

natural_image
Diagram showing a plug inserted into a socket and a hand with a red circular icon touching the button (no text or symbols)(h)

natural_image
Illustration of two cylindrical containers connected by a coiled tube, resembling a washing machine or pump (no text or symbols present)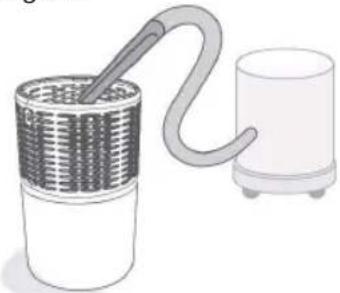
natural_image
Illustration of a coiled tube being inserted into a container and connected to a cylindrical device (no text or symbols)7. Lagerung
natural_image
Diagram of a device with mesh structure and directional arrows indicating flow or movement (no text or symbols)natural_image
Diagram of a cylindrical device with internal mesh structure and blue directional arrows indicating flow or movement (no text or symbols)natural_image
Diagram showing a plug inserted into an outlet and a hand touching a red circular button (no text or symbols)natural_image
Simple line diagram showing two padlock icons moving along a curved path with directional arrows (no text or symbols)(b)
natural_image
Diagram of a cylindrical device with internal components and a rotating arrow indicating rotation (no text or symbols)(g)
natural_image
Diagram showing a plug inserted into a socket and a hand touching a button with a red circular icon (no text or symbols)(h)
natural_image
Illustration of two cylindrical containers connected by a coiled tube, no text or symbols present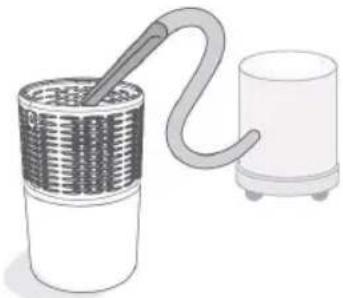
natural_image
Illustration of a coiled tube being inserted into a cylindrical container (no text or symbols)7. Conservazione
DECLARATION OF CONFORMITY
This device complies with Low Voltage Directive 2014/35/EC, Electromagnetic Compatibility Directive 2014/30/EU, Directive 2015/863/EU on the restriction of the use of certain hazardous substances in electrical and electronic equipment and Directive 2009/125/EC on the eco-design requirements applicable to energy-related products.
DÉCLARATION DE CONFORMITÉ
This symbol means that in case you wish to dispose of the product once its working life has ended, take it to an authorised waste agent for the selective collection of waste electrical and electronic equipment (WEEE).

Imported by:
Sanysan Appliances S.L, NIF: B98753056, C/ Barcas 2, 2
46002 Valencia, Spain Product made in P.R.C. – Designed by SOGO based on the European Quality Standards
Customer Service: www.sogosat.com / sogosat@sogosat.com / 0034 902 222 161

- Almacenamiento
- IMPORTANT SAFETY INFORMATION
- Product Structure
- Before first use
- Placing the filters
- Plug and turn on the machine
- 3). Fan speed adjustment
- 4). Auto mode
- 5). Sleep mode
- 6). Light
- 7). Setting timer
- 8). Filter replacement light
- 9). Memory Function
- Filter Replacement
- Filter replacement force mode
- To force reset the filter's lifetime:
- Keep Filter Clean:
- Storage
- Environment
- Troubleshooting
- Stockage
- Armazenamento
- Lagerung
- Conservazione
- DECLARATION OF CONFORMITY
- DÉCLARATION DE CONFORMITÉ
- Imported by:
Brand : Sogo
Model : SS-21710
Category : Air purifier