
Zeo Mini - Robot vacuum ROBOROCK - Free user manual and instructions
Find the device manual for free Zeo Mini ROBOROCK in PDF.

| Product type | Washer-dryer |
| Brand | Roborock |
| Model | Zeo Mini (WD01004RR0Z) |
| Dimensions (W × D × H) | 428 × 489 × 512 mm |
| Net weight | 23 kg |
| Gross weight | 27.5 kg |
| Maximum power | 900 W |
| Drying power | 420 W |
| Rated voltage | 230 V~ / 50 Hz |
| Washing capacity | 1.0 kg |
| Drying capacity | 0.5 kg |
| Rated volume | 8.5 L |
| Water pressure | 0.1 MPa - 1.0 MPa |
| Waterproof rating | IPX4 |
| Connectivity | WiFi 802.11b/g/n (2.4 GHz), Roborock app |
| Main functions | Wash, dry, wash+dry, 8 programs, automatic dosing, UVC sterilization, delayed start, child lock, remote control |
| Wash programs | Daily, Quick, Underwear, Bra, Baby care, Hot wash, Spin, App program, Drum clean |
| Maintenance and cleaning | High-temperature drum cleaning, regular draining, filter cleaning |
| Safety | Door lock, child lock, leak protection, auto shut-off, fault memory |
| Spare parts and repairability | Spare parts available for 10 years after end of commercialization, contact support@roborock-eu.com |
Frequently Asked Questions - Zeo Mini ROBOROCK
User questions about Zeo Mini ROBOROCK
0 question about this device. Answer the ones you know or ask your own.
Ask a new question about this device
Download the instructions for your Robot vacuum in PDF format for free! Find your manual Zeo Mini - ROBOROCK and take your electronic device back in hand. On this page are published all the documents necessary for the use of your device. Zeo Mini by ROBOROCK.
USER MANUAL Zeo Mini ROBOROCK
Read this user manual carefully before using this product and store it properly for future reference.

roborock
English 002
Français 028
Deutsch 049
Italiano 070
Español 091
Contents
003 Safety Instructions
006 Instructions for Use
009 Product Overview
010 Installation Requirements
011 Installation
014 Connecting to the App
014 How to Use Detergent
015 Control Panel
018 Features
019 Program Table
020 Maintenance
022 Specifications
023 Common Issues
025 Troubleshooting
027 Circuit Diagram
Safety Instructions
Please read the following safety instructions carefully, and install and use the machine as instructed.
- Roborock's retailers assume responsibility only for losses resulting from installation performed by authorized retailers' technicians, excluding losses arising from incorrect installation by other people.
- Roborock and its retailers disclaim all liability for indirect, incidental, or consequential damages resulting from the use, misuse, or inability to use this product. This disclaimer does not affect any statutory rights that may not be disclaimed under applicable law.
- Only use the product in accordance with the User Manual. Any loss or damage caused by improper use will be borne by the user.
- This product is not intended for use by persons (including children) with reduced physical, sensory or mental capabilities, or lack of experience and knowledge, unless they have been given supervision or instruction concerning use of the product by a person responsible for their safety (CB).
- Children should be supervised to ensure that they do not play with the appliance.
- If the product is placed on objects that might shake or otherwise move, it must be secured to prevent damage caused by falling.
- This product can be used by children aged from 8 years and above and persons with reduced physical, sensory or mental capabilities or lack of experience and knowledge if they have been given supervision or instruction concerning use of the product in a safe way and understand the hazards involved. Children shall not play with the product. Cleaning and user maintenance shall not be made by children without supervision (EU).
- Children of less than 3 years should be kept away unless continuously supervised (EU).
- The removed packaging materials should be disposed of in time to keep out of reach of children or prevent children from swallowing them.
- Do not place any heavy objects, exothermic appliances and objects that may leak on the machine, or it may be damaged.
- Do not operate the machine when flammable gases (such as coal gas) leak.
- The room must be well ventilated to avoid the gases flowing from the machine from igniting other substances in the room, including open flames.
- To avoid the danger arising from resetting the thermal circuit breaker by accident, do not power on the machine during reset.
- Do not pile up combustibles and sundries (such as cotton waste) around the machine.
- When you pull out the detergent drawer to add detergent, please be careful not to bump into or get scratched by its hard corners.
- If the machine is transported in an environment where the temperature is below 0^ in winter, put it at room temperature for 3 hours before turning it on.
- Whenever the machine is to be transported, reinstall its transit screws to prevent damage to it during transportation.
- When lifting the machine, always lift it from the bottom. Do not lift the open washing machine door or the detergent drawer.
- Please do not touch any hot parts of the machine during or at the end of the drying process, or burns may occur.
- Do not change the power cord without permission, or accidents may happen.
- If the machine makes any abnormal noise or emits a burnt smell, please stop using it immediately and unplug it.
- The tumble dryer is not to be used if industrial chemicals have been used for cleaning.
- Lint must not to be allowed to accumulate around the tumble dryer.
- Do not dry unwashed items in the tumble dryer.
- Items that have been soiled with substances such as cooking oil, acetone, alcohol, petrol, kerosene, spot removers, turpentine, waxes and wax removers should be washed in hot water with an extra amount of detergent before being dried in the tumble dryer.
- Items such as foam rubber (latex foam), shower caps, waterproof textiles, rubber backed articles and clothes or pillows fitted with foam rubber pads should not be dried in the tumble dryer.
- Fabric softeners, or similar products, should be used as specified by the fabric softener instructions.
- Remove all objects from pockets such as lighters and matches.
- The appliance must not be installed behind a lockable door, a sliding door or a door with a hinge on the opposite side to that of the tumble dryer, in such a way that a full opening of the tumble dryer door is restricted.
- This appliance is intended to be used in household and similar applications such as:
- staff kitchen areas in shops, offices and other working environments; - farm houses;
– by clients in hotels, motels and other residential type environments;
- bed and breakfast type environments;
- areas for communal use in blocks of flats or in launderettes.
Safety Instructions
WARNING
- If the supply cord is damaged, it must be replaced by the manufacturer, its service agent or similarly qualified persons in order to avoid a hazard.
- The new hose-sets supplied with the appliance are to be used and that old hose-sets should not be reused.
- Never stop a tumble dryer before the end of the drying cycle unless all items are quickly removed and spread out so that the heat is dissipated.
- The appliance must not be supplied through an external switching device, such as a timer, or connected to a circuit that is regularly switched on and off by a utility.
- Most spare parts of your appliance are available for a minimum of 10 years after placing the last appliance on the market. If you have any questions, please contact our customer service at: Email: support@roborock-eu.com
Official website: www.roborock.com
Address: Roborock Germany GmbH, Peter Müller-Straße 16/16a, 40468 Düsseldorf
Warning! Risk of electric shock.
Never try to repair an appliance which is defective or presumed to be defective. You may put your own and future users' lives in danger. Only authorised specialists are allowed to carry out this repair work. Improper repair will void the warranty and subsequent damages can't be recognised!
EU Declaration of Conformity
Hereby, Nanjing Roborock Innovation Technology Co., Ltd. declares that the radio equipment type WD01004RR0Z is in compliance with Directive 2014/53/EU. The full text of the EU declaration of conformity is available at the following internet address: https://global.roborock.com/pages/compliance
WiFi Specification
| Service Protocol Frequency Range Max. Output Power | ||
| WiFi 802.1 | 1b/g/n 2400-2483.5 MHz | ≤ 20dBm |
WEEE Information
Correct Disposal of this product. This marking indicates that this product should not be disposed with other household wastes throughout the EU. To prevent possible harm to the environment or human health from uncontrolled waste disposal, recycle it responsibly to promote the sustainable reuse of material resources. To return your used device, please use the return and collection systems or contact the retailer where the product was purchased. They can take this product for environmental safe recycling.
International Symbols Explanation
- PROTECTIVE EARTH (Protective Ground) symbol [symbol IEC 60417-5019 (2009-02)]
Safety Instructions
⚠ Warning Hazardous or unsafe acts that may cause personal injury or property damage.
natural_image
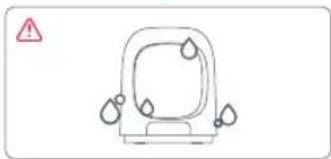
Simple line drawing of a car with water droplets and a warning symbol (no text or labels)Keep the machine away from rain or severe humidity.
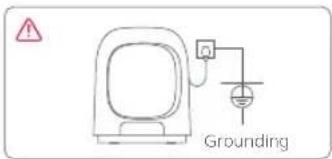
Make sure to plug the machine into a 230V\~/50Hz outlet, which should be correctly and reliably grounded. If it is not grounded, there is a risk of electric shock. No extension cord is allowed.
natural_image
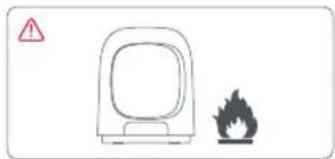
Simple line drawing of a device with a warning symbol (no text or labels)Keep lit cigarettes, candles, or other fire sources, as well as volatile inflammables away from the machine.
natural_image
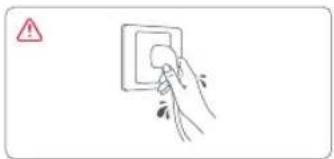
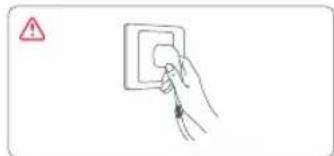
Hand placing a circular component into a wall socket (no text or symbols visible)Always power off the machine before cleaning or performing maintenance. Never plug or unplug the machine with wet hands.
natural_image
Simple line drawing of a device with a hand pointing to it, no text or symbols presentDo not spray water or any other liquids onto the machine.

Do not wipe the body and parts of the machine with flammable, explosive, or soluble chemicals, or put such chemicals into the machine.
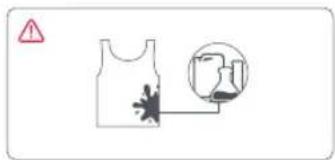
Do not wash or dry clothes stained with gasoline, alcohol, petroleum, benzene, thinner, or any other chemicals.
natural_image
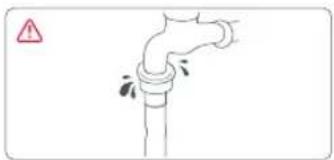
Simple line drawing of a pipe with a warning symbol (no text or labels)Always use a new water inlet hose to connect to the faucet. If the inlet hose is damaged or leaky, replace it promptly.
natural_image
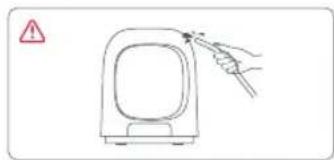
Simple line drawing of a hand inserting a socket into an electrical outlet (no text or symbols)To avoid danger, the damaged power cord of the machine must be replaced by a professional sent by the service department of the manufacturer.
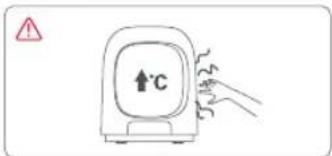
When the machine is running, the door or other parts may get hot. To avoid burns, do not touch any part of the machine that is heating up.
natural_image
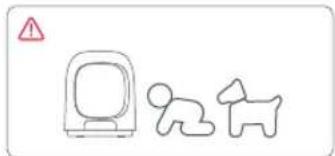
Simple line drawing of a computer monitor and a dog silhouette with a warning triangle (no text or symbols)Be sure to keep young children and pets away from the machine while it is running.
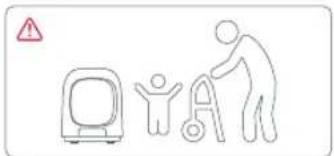
Do not allow children or the elderly and the vulnerable to use the machine without supervision.
Instructions for Use
First Use
- The machine is subject to water-based tests before leaving the factory. It is normal that a small amount of water remains in the drum, gasket, and on the door viewing window.
- Before using the washing machine for the first time, make sure it is correctly installed and run a drum clean cycle with clean water.
- There may be smells given off by rubber parts at first, but they will gradually disappear after the machine is used a few more times.
Notes on Washing
- Please check the clothing care labels carefully before washing, and wash the clothes as instructed.
- For silk and other fabrics that require a special detergent, make sure to turn off the Auto Dosing and manually add the detergent into the drum.
- Wash clothes that are prone to fading or shedding separately from other garments.
- It is recommended to wash underwear, bras, silk, and other similar items separately using a dedicated program.
- Turning the soiled side of any dirty clothing out before placing it in the drum will improve the washing performance.
- If clothing is severely stained, applying a small amount of detergent directly on the stains as a form of pretreatment can result in a better cleaning outcome.
- Please wash garments made of high-end fabric separately.
• Garments with ties should be knotted before washing. -
Garments with hooks, zippers, or buttons should be fastened before washing.
-
The machine may not work properly during the spin cycle if washing single, heavy towels or other highly absorbent items due to uneven weight distribution. It is recommended to add more items to the cycle.
- It is recommended to open the door for ventilation after washing every time to prevent the drum from growing mold or giving off odors.
Notes on Drying
- Please check the clothing care labels carefully before drying, and dry the clothes as instructed.
- It is recommended not to dry too many clothes in one load, or they may not be fully dried. The recommended optimal drying capacity is no more than half the capacity of the drum.
- During drying, the remaining time displayed is estimated time, which may slightly vary with the weight of the clothes and the Dry program due to smart adjustment.
- The drying effect is subject to various factors, such as the selected Wash+Dry/Dry program as well as the material and amount of clothes.
- While the clothes are drying, do not "pause" the cycle and open the door, or it may affect the drying results.
• Clothes may stretch or shrink to varying degrees after drying depending on their materials. - For bras with removable pads, please remove the pads before drying to prevent poor drying results.
- If a garment's material is not suitable for drying, please do not use the drying function or it may cause damage.
• After drying ends, the door cannot be opened immediately until it has cooled to a temperature that is safe to touch.
Instructions for Use
- During or after the drying process, any metal accessories on clothes inside the drum may become hot. Be careful to avoid burns.
- Do not use the drying function for specially crafted garments or garments made of special materials. These include printed, rubber, and leather items.
Fabric Care Chart
The following symbols provide garment care direction. The clothing care labels include symbols for drying, bleaching, ironing, or dry cleaning when necessary. The use of symbols ensures consistency among garment manufacturers of domestic and imported items. Follow care label directions to maximize garment life and reduce laundering problems.
Washing
 | 95°C boil wash. |
 | 60°C coloured wash. |
 | 60°C coloured wash. ("Easy care" coloured wash) |
 | 40°C coloured wash. |
 | 40°C mild wash. |
 | 40°C very mild wash. |
 | 30°C fine wash. |
 | 30°C fine wash. |
 | 30°C very mild fine wash. |
 | Hand wash. |
 | Not Machine Washable |
 | Do not wash. |
Note: The numbers in the wash tub specify the maximum washing temperatures in degrees Celsius which must not be exceeded.
Drying
| Tumble drying/Drying at a temperature of 80°C with a normal drying process. | |
| Tumble drying/Drying at a temperature of 60°C with a mild drying process. |
Instructions for Use
| Do not tumble dry. | |
| Line drying. | |
| Drip line drying. | |
| Flat drying. | |
| Drip flat drying. | |
| Line drying in the shade. | |
| Drip line drying in the shade. | |
| Flat drying in the shade. | |
| Drip flat drying in the shade. |
Notes:
• The dots indicate the drying level of the dryer.
• The lines indicate the type and place of the drying.
Bleaching
| Any bleach allowed. | |
| Only oxygen bleach allowed. | |
| Do not bleach. |
Ironing
| Iron at maximum sole plate temperature of 200°C. | |
| Iron at maximum sole plate temperature of 150°C. |
| Iron at maximum sole plate temperature of 110°C. Caution when using steam irons (work without steam). | |
| Do not iron. |
Note: The dots indicate the temperature ranges for ironing (regulator, steam, travel irons and ironing machines).
Professional Care
| P | Professional dry-cleaning in perchloroethylene and/or hydrocarbons (heavy benzines) with normal process. |
| P | Professional dry-cleaning in perchloroethylene and/or hydrocarbons (heavy benzines) with gentle process. |
| F | Professional dry-cleaning in hydrocarbons (heavy benzines) with normal process. |
| F | Professional dry-cleaning in hydrocarbons (heavy benzines) with gentle process. |
| ☒ | Do not dry-clean. |
| W | Professional wet-cleaning. |
| W | Mild professional wet-cleaning. |
| W | Very mild professional wet-cleaning. |
| ☒ | Do not wet-clean. |
Notes:
• The letters in a circle indicate the solvents (P, F) used in dry cleaning or wet cleaning (W).
- Generally, the line under the symbol indicates a milder treatment (e.g. gentle cycle for easy care items). The double line indicates care levels with particularly gentle treatment.
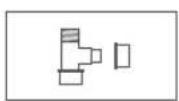
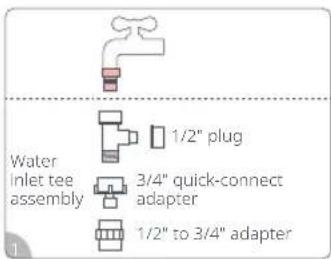
Product Overview
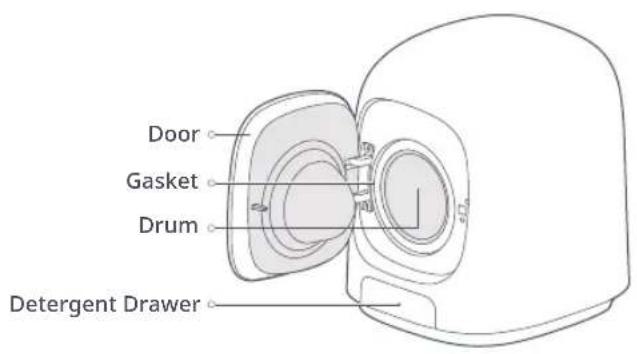
List of accessories
User Manual ×1
1/2" water inlet pipe ×
3/4it quickket connector
1/2" to 3/4" connector ×2
adapter ×1
Drain Hose ×1
Drainage Tee ×1 Transit Screw Cover ×2
Transit Screw
Wrench ×1
Foot Adjustme Wrench ×1
Check all accessories in the above figure. If the machine is damaged or the accessories are missing during transportation, please contact the dealer.
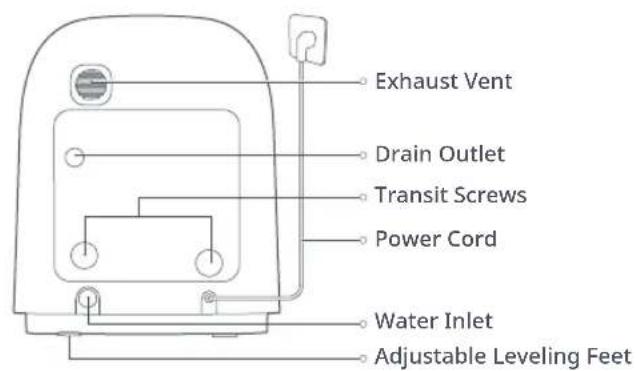
Installation Requirements
Installation Environment
- Place the machine on a flat, firm, non-slippery surface, not a base or a shelf that is unsteady or not strong enough to support the machine.
- Do not place directly on a washing machine top cover with insufficient fixed strength or support strength.
- If placing the washing machine on the ground, be sure to waterproof it to avoid the risk of it getting soaked by water.
- Keep the washing machine in a well-ventilated place away from direct sunlight and freezing weather.
- The working environment temperature should be 0^ - 40^ .
- Keep the washing machine away from heat sources such as charcoal fires or gas stoves.
Power Supply
- Connect the washing machine to a power supply (230V-/50Hz) which should be correctly and reliably grounded.
- Make sure the power cord is not pinched by any objects.
Water Supply
- The washing machine requires a water pressure of 0.1MPa to 1.0MPa. Water pressure lower than 0.1MPa may cause abnormal water inflow. In this case, the washing machine may not work properly and will display the prompt [E1].
- Place the washing machine as close to the faucet as possible; Check the inlet valve and all connections of the faucet for leakage.
- Do not connect the washing machine to a hot water source.
Installation
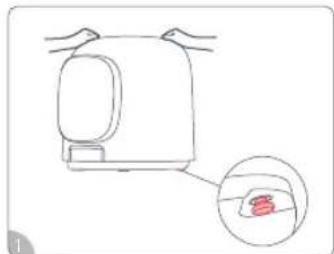
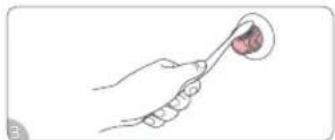
① Removing Transit Screws
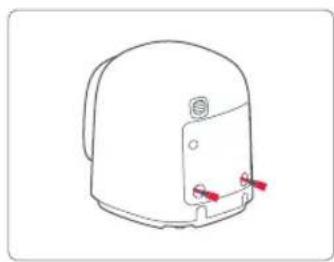
natural_image
Line drawing of a mechanical component with red connectors (no text or symbols)Remove the two transit screws before use.
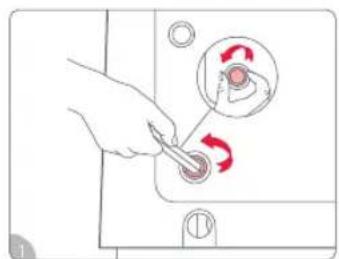
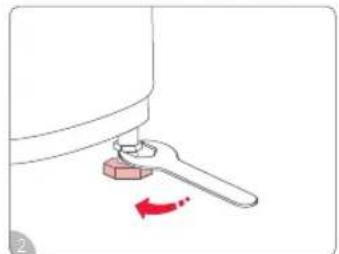
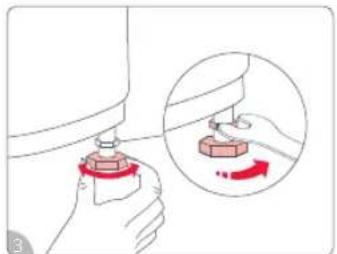
natural_image
Hand using a tool to switch a button with red arrows indicating rotation (no text or symbols present)Unscrew the two transit screws by turning them left using a transit screw wrench.
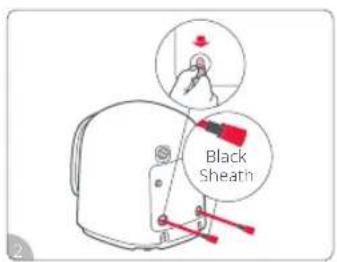
Pull out the screws and make sure to also remove the black sheaths on the screws. Properly store the screws and sheaths for use during transportation.
natural_image
Simple line drawing of a door with a knob and circular components, no text or symbols presentCover the transit screw holes with transit screw covers.
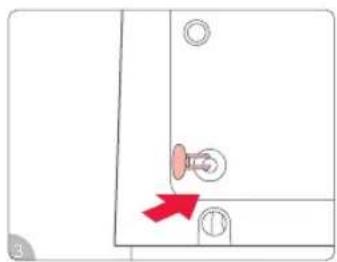
② Adjusting Leveling Feet (Do not remove the feet)
natural_image
Line drawing of a kitchen appliance with a magnified inset showing a red object inside (no text or symbols)Hold both sides of the washing machine. If it wobbles, adjust the right rear leveling foot.
natural_image
Simple line drawing of a mechanical component with a red arrow indicating rotation (no text or symbols)Loosen the leveling foot bolts by turning to the left with a wrench.
natural_image
Illustration of a hand holding a mechanical component with an inset showing a close-up of a hand holding a small object (no text or symbols present)Rotate the feet, and after adjusting them to the desired height, tighten the foot screws to keep all four feet level.
natural_image
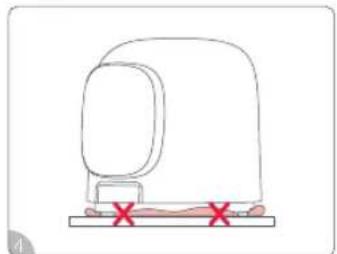
Simple line drawing of a medical device with red X marks indicating a location or point (no text or symbols)Do not block the gap between the feet and the surface on which they are placed.
Installation
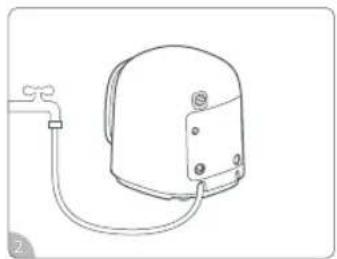
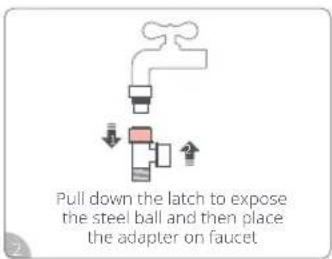
③ Connecting Water Inlet Hose
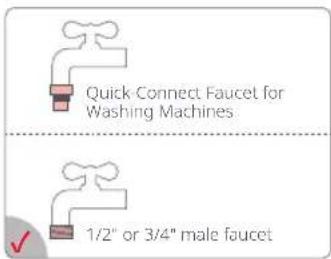
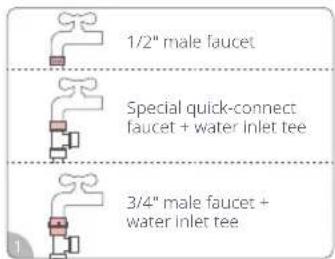
- Choose the appropriate faucet 2. Connect one washing machine
natural_image
Line drawing of a mechanical device with a pipe and base, no text or symbols presentDepending on the actual situation, connect one end of the water inlet hose to the faucet (choose one out of three faucets) and the other end to the washing machine's water inlet and tighten.
- Connect two washing machines
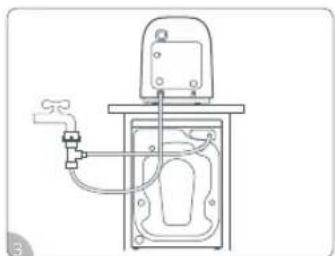
natural_image
Technical line drawing of a mechanical device with pipes and a valve (no text or symbols)
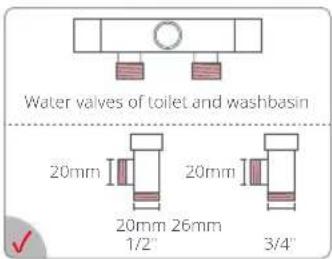
Connect and assemble the water inlet tee according to the adapted faucet and the type of water inlet pipe interface.
After assembling, connect one end of the water inlet tee to the faucet and the other two ends to the two washing machines' water inlet hoses, and tighten.
Connect the water inlet hose to the washing machine, connect the 3/4" inlet end of the water inlet hose with the water inlet, and tighten.
Note: Check all connections for leaks (Never forget to install the sealing rubber ring at the component connection points).
Installation
4 Connecting Drain Hose
- Connect the drain hose to the washing machine
Remove the drain plug and firmly insert the bent end of the drain hose into the washing machine's drain outlet.
- Position the drain hose

natural_image
Line drawing of a portable device with a handle and red X mark (no text or symbols)Make sure the drain hose allows for unimpeded drainage. Do not squeeze or bend it.
- Connect two washing machines
Depending on the actual situation, respectively connect the drain hoses of the two washing machines to the upper and lower drain outlets, and tighten them.
If needed, use an extension hose with a length of less than 1.5m and an orifice diameter of more than 16 mm.
Notes:
- Ensure all connections are securely installed.
- Ensure the drain hose is securely inserted. Do not immerse the hose end in water, or siphoning may occur.
• Make sure all installations are done in strict accordance with the requirements, otherwise the washing machine may not work properly due to poor drainage.
Connecting to the App
- Scan the QR code to download and install the "Roborock app".
- Open the app and tap "Add Device" or "+" to add an appliance.
- Follow the instructions in the app to complete the connection.
- The appliance is connected to the network when the WiFi (WiFi) lamp is always on.
Note: Tap and hold the "Rinse" button for 3 seconds until the WiFi lamp flashes slowly. The WiFi will reset and the machine will be restored to factory settings.

How to Use Detergent
Auto Dosing
- Do not add detergent above the MAX line and remember to lock the sealing caps after.
- Add detergent before operating the machine. When there is not enough detergent in the detergent drawer, the Low indicator on the control panel will light up as a reminder to add more detergent. If you ignore this reminder, the clothes will be washed with clean water when the remaining detergent is used up.
- Auto Dosing can be enabled or disabled on the control panel or in the app.
Manual Dispense Mode
- If you choose to add detergent manually, be sure to turn off Auto Dosing, or the clothes may not be fully rinsed.
- If you use washing powder/disinfectant or other washing supplies, put them into the drum directly before washing and turn off Auto Dosing.
- If using detergents for special items such as silk, please put them into the drum as instructed and turn off Auto Dosing.
Notes
- It is recommended to use low-sudsing detergent for front-load washers.
- Do not pull the detergent drawer out while the machine is running, or the dispense feature may not work properly or water may overflow.
- When the machine is not used for a long time and the detergent becomes lumpy or sticky, dilute it with a small amount of warm water to prevent clogging.
- To avoid abnormal dispensing, do not put any washing supplies other than laundry detergent in the detergent drawer.
- When using particularly thick laundry detergent, dilute it according to the actual situation before adding it into the machine.
Control Panel
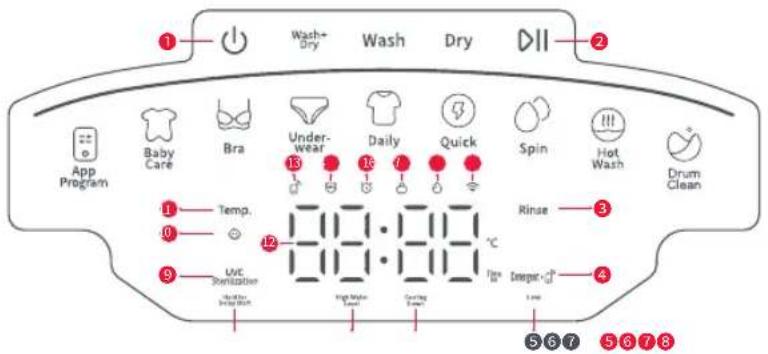
① Power ⏻ :
Tap to turn the machine on, and tap and hold for 2 seconds to turn the machine off. The machine will automatically shut down if left inactive for 10 minutes.
② Start/Pause DII:
Tap to start/pause a program. Tap during running to unlock the door and add clothes mid-cycle. When the water level or temperature is too high to open the door, the Door Lock Lamp will stay on, with a beep as well as "Locl-" and the remaining time displayed alternately on the screen.
③ Rinse:
After selecting a program, tap to select a desired number of rinses from 1/2/3/4/5. Some programs may have fixed rinse time(s).
④ Detergent/Remote Control:
Tap to enable/disable the dispense of detergent or turn on/off auto dosing in the app. Tap and hold for three seconds to activate the remote control.
⑤ Low:
When it stays on, it indicates that the detergent is about to run out, and it will turn off after a sufficient amount of detergent has been added.
⑥ Cooling Down:
If the drum temperature or water temperature is too high, the indicator will light up, the door will lock, and the fan/machine will continue to run. Once it has cooled down to a safe temperature, the indicator will turn off and the door will unlock.
⑦ High Water Level:
If the water level inside the drum is too high, the indicator will light up and the door will lock. After the washing machine continues to run until the water level declines to a safe level, the indicator will turn off and the door will unlock.
Control Panel
⑧ Hold for Delay Start:
After selecting a program, tap and hold "UVC Sterilization" for 3 seconds to enter Delay Start. Then, tap "UVC Sterilization" to increase the time after which the program will start by 30 minutes on the display (max 24 hours). Tap "Start/Pause" to confirm the Delay Start, and the program will start when the schedule time counts down to zero. Then the time displayed will be switched to the estimated time of the selected program.
⑨ UVC Sterilization:
Tap to turn the UVC Sterilization feature on or off; the UVC indicator light will remain on or off accordingly. UVC sterilization is not available for all programs.
⑩ Hold for Child Lock:
When the machine is running, tap and hold Temp. for 3 seconds to enable/disable the child lock. If the lamp stays on, it indicates that the feature is enabled, and all buttons except Power and Temp. buttons are disabled; when it is off, it indicates that the feature is disabled.
⑪ Temp.:
After selecting a program, tap to select the desired water temperature from -- (room temperature)/20°C/30°C/40°C/60°C/90°C. Some programs may have fixed water temperature for clothing material protection.
⑫ Display Screen:
Displays various program statuses, including remaining time, scheduled time, error codes, water temperature, number of rinses, etc.
13 Remote Control Lamp ☐:
When this icon lights up, remote control is on; when the icon is off, remote control is off.
14 UVC Lamp ;
When the light stays on, it indicates that the UVC Sterilization feature is on. If it is off, it indicates that this feature is turned off.
15 Delay Start Lamp 🔊 :
When it stays on, it indicates that the wait time is being set; when it flashes, it indicates that the time is counting down; and when it is off, it indicates that there is no delay start or the program is running.
16 Door Lock Lamp :
When it stays on, it indicates that the door is locked; when it flashes, it indicates that the door cannot be opened at the moment; and when it is off, it indicates that the door is unlocked.
17 Detergent Lamp:
When it stays on, it indicates that the detergent Auto Dosing is enabled and there is enough detergent; and when it is off, it indicates that the detergent Auto Dosing is disabled.
18 WiFi Lamp
When it stays on, it indicates that the machine is connected to the network and can be remotely controlled with the app; when it slowly flashes, it indicates that the machine is waiting for network connection; when it quickly flashes, it indicates that the machine is connecting to the network; and when it is off, it indicates disconnection.
Control Panel
Modes
- Wash+Dry: Wash then dry clothing.
- Wash: Wash only.
- Dry: Dry only.
| Program Description (More programs are available in the app) | |
| Daily | Suitable for daily laundry consisting of a mix of tight-fitting clothing, such as tank tops, short-sleeve shirts, long-sleeve shirts, etc. |
| Quick Suitable for small stains and foam-free thin clothing items or new clothes. | |
| Underwear | Suitable for same-day washing of underwear with ordinary stains that are made of heat-resistant materials.Severely stained underwear can be pre-treated by applying a small amount of detergent directly to the soiled area before washing. |
| Bra | Suitable for both lightweight bras and padded bras (including bras either with or without underwires). |
| Baby Care Daily washing of infants' and children's clothing. | |
| Hot Wash | Suitable for periodic, high-heat sterilization of severely stained clothes made of heat-resistant materials. |
| Spin Spin dry separately to remove water from clothes. | |
| App Program | Use the Roborock app to add special laundry programs to your "App Program" list for quick access on the control panel where "Heavy Duty" is already a default. |
| Drum Clean | Rinses the drum at high temperature with special detergent (as needed). Note: Do not add clothes. |
| Notes | For high-end fabrics like silk, Lycra, or bamboo fiber, choose "Silk" program in the app. |
| Hot wash: A high-temperature laundry program. If used too frequently, it will affect the clothing's lifespan. | |
| For underwear stained with blood or other bodily fluids, it is recommended to wash it the same day without piling up laundry. When washing, turn the stained side outward for better cleaning results. | |
Control Panel
Operating Procedures

flowchart
graph LR
    A["Select Mode Select Program"] --> B["App Program"]
    B --> C["Baby Care"]
    C --> D["Bra"]
    D --> E["Underwear"]
    E --> F["Daily"]
    F --> G["Quick"]
    G --> H["Spin"]
    H --> I["Hot Wash"]
    I --> J["Drum Clean"]
    K["Parameter Settings (This step can be skipped)"] --> L["Temp: 211.111°C, Rinse: 211.111°C, Stamped: -0.5°C"]
    L --> M["Start Washing"]
Notes:
- Program parameter settings such as "Delay Start" and "Temp." can only be adjusted after a program is selected.
- When the machine is running, touch any program icon on the screen and the drum lamp will automatically turn on.
Features
Mid-Cycle Loading
Tap Start/Pause to add more clothing during a cycle. If the "High Water Level" or "Cooling Down" indicator is lit, this function will be temporarily unavailable and the washing machine will continue its cycle until it is safe to unlock - at which point this function can then be activated.
Power Outage Memory
If there is a power outage when the machine is running, the machine will resume the current cycle after the power comes back on. During a power outage, please do not force the door open.
Door Lock/Unlock
After the Wash program is started, the door is automatically locked, and the door lock lamp is always on. After the program is paused/ended, the door is automatically unlocked with the door lock lamp off when the door opening conditions are met. Unlocking is unavailable when the water level or temperature is high during running.
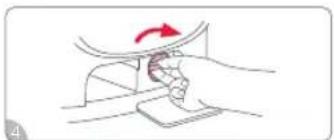
tilt the machine back about 45 degrees
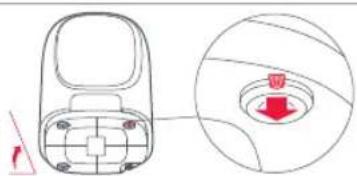
natural_image
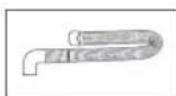
Diagram of a remote control device with a circular inset showing a red button (no text or symbols)Emergency Door Opening
In case of an emergency, tilt the machine back about 45 degrees, pull down the orange emergency belt at the bottom of the machine about 10 mm, and open the door. After opening the door, the belt will be back in place automatically.
Note: The emergency belt must not be used during a regular wash cycle. Before opening the door, please make sure all the water is drained out and be careful not to get burned.
Program Table
| Name | Weight ≤ (kg) | Soak (Duration) | Temp. (°C) Rinse (times) | Spin (r/min) | Delay Start | Auto Dosing | UVC Sterilization | ||||||||||||||||||||||||||
| Wash | 0 5 | 0 15 | 20 | Room Temperature | 20 30 | 40 60 | 90 01 | 2 3 4 5 | No spin | 400 6 | 00 800 | 1000 | Desargent | ||||||||||||||||||||
| Daily | 1 | ● | √ | √ | √ | √ | √ | ● | / / | / | √ | ● | √ | √ | √ | / / | / | / | ● | √ | ● | ● | |||||||||||
| Quick | 0.3 | ● | √ | √ | √ | ● | √ | √ | / / | / | ● | √ | √ | / / | / | / | / | ● | √ | ● | ● | ||||||||||||
| Underwear | 0.8 | ● | √ | √ | √ | / | / | ● | √ | / | √ | ● | √ | √ | / / | / | / | ● | √ | ● | ● | ||||||||||||
| Bra | 0.5 | ● | √ | √ | √ | √ | √ | ● | √ | √ | / | √ | ● | √ | √ | / / | / | / | ● | √ | ● | ● | |||||||||||
| Baby Care | 0.8 | ● | √ | √ | √ | / | / | √ | ● | √ | / | / | ● | √ | √ | / / | / | ● | √ | ● | ● | ||||||||||||
| Hot Wash | 0.8 | ● | √ | √ | √ | / | / | / | ● | √ | / | √ | ● | √ | √ | / / | / | / | ● | √ | ● | ● | |||||||||||
| Spin | 1 | / / | / / | / / | / / | / / | / / | / / | / / | / / | / / | / / | / / | / / | / | ● | √ | / | ● | ||||||||||||||
| App Program | 1 | ● | √ | √ | √ | / | / | √ | ● | √ | / | √ | ● | √ | √ | / / | / | / | ● | √ | ● | ● | |||||||||||
| Drum Clean | 0 | / / | / / | / / | / / | / / | ● | √ | ● | √ | √ | √ | √ | / / | / | / | / | √ | / | ● | |||||||||||||
| Wash+Dry | Daily | 0.5 | ● | √ | √ | √ | √ | √ | ● | √ | / | √ | ● | √ | √ | √ | / / | / | / | ● | √ | ● | ● | ||||||||||
| Quick | 0.3 | ● | √ | √ | √ | ● | √ | √ | / / | / | ● | √ | √ | / / | / | / | / | / | ● | √ | ● | ● | |||||||||||
| Underwear | 0.5 | ● | √ | √ | √ | / | / | ● | √ | √ | / | √ | ● | √ | √ | / / | / | / | ● | √ | ● | ● | |||||||||||
| Bra | 0.5 | ● | √ | √ | √ | √ | √ | ● | √ | √ | / | √ | ● | √ | √ | / / | / | / | ● | √ | ● | ● | |||||||||||
| Baby Care | 0.5 | ● | √ | √ | √ | / | / | √ | ● | √ | / | / | ● | √ | √ | / / | / | / | ● | √ | ● | ● | |||||||||||
| Hot Wash | 0.5 | ● | √ | √ | √ | / | / | / | ● | √ | / | √ | ● | √ | √ | / / | / | / | ● | √ | ● | ● | |||||||||||
| Spin | 0.5 | / / | / / | / / | / / | / / | / / | / / | / / | / / | / / | / / | / / | / / | / / | / ● | √ | / | ● | ||||||||||||||
| App Program | 0.5 | ● | √ | √ | √ | / | / | √ | ● | √ | / | √ | ● | √ | √ | / / | / | / | ● | √ | ● | ● | |||||||||||
| Drum Clean | 0 | / / | / / | / / | / / | / / | ● | √ | ● | √ | √ | √ | √ | / / | / / | / √ | / | ● | |||||||||||||||
| Dry | Daily | 0.5 | / / | / / | / / | / / | / / | / / | / / | / / | / / | / / | / / | / / | / / | / / | / √ | / | |||||||||||||||
| Quick | 0.3 | / / | / / | / / | / / | / / | / / | / / | / / | / / | / / | / / | / / | / / | / / | / √ | / | ||||||||||||||||
| Underwear | 0.5 | / / | / / | / / | / / | / / | / / | / / | / / | / / | / / | / / | / / | / / | / / | / √ | / | ||||||||||||||||
| Bra | 0.5 | / / | / / | / / | / / | / / | / / | / / | / / | / / | / / | / / | / / | / / | / / | / √ | / | ||||||||||||||||
| Baby Care | 0.5 | / / | / / | / / | / / | / / | / / | / / | / / | / / | / / | / / | / / | / / | / / | / √ | / | ||||||||||||||||
| Hot Wash | 0.5 | / / | / / | / / | / / | / / | / / | / / | / / | / / | / / | / / | / / | / / | / / | / √ | / | ||||||||||||||||
| App Program | 0.5 | / / | / / | / / | / / | / / | / / | / / | / / | / / | / / | / / | / / | / / | / / | / √ | / | ||||||||||||||||
| Drum Clean | 0 | / / | / / | / / | / / | / / | / / | / / | / / | / / | / / | / / | / / | / / | / √ | / / | |||||||||||||||||
- means "default", √ means "available", / means "not available".
* The parameters for each program may vary slightly due to the continuous software development and upgrades.
Maintenance
Body and Gasket (Clean after each use)
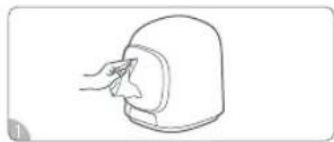
natural_image
Line drawing of a hand cleaning a small object with a cloth (no text or symbols)detergent that contains no corrosive materials.
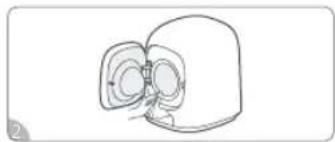
natural_image
Simple line drawing of a mechanical component with no text or symbolsWipe the gasket with a soft cloth, and remove the foreign objects (if any) from the groove.
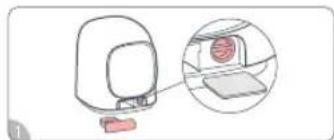
Detergent Drawer (Clean as needed)
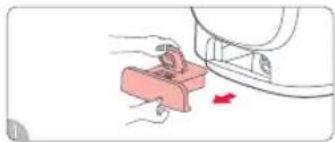
natural_image
Illustration of a hand pressing a pink block with a red arrow indicating motion (no text or symbols)Pull out the detergent drawer. Wipe the bottle by with water and the door of the residual water, wipe the drawer dry, and reinstall it.

natural_image
Line drawing of a mechanical device with a handle and base (no text or symbols)By solid walls of water, the ground off the residual water, wipe the drawer dry, and reinstall it.
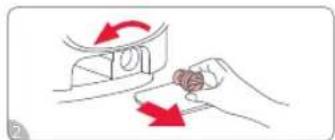
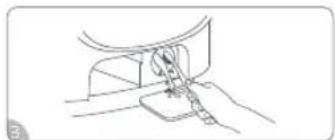
Drain Pump Filter (Clean monthly)
natural_image
Diagram of a computer monitor with an inset showing a screen and a separate view of the screen (no text or symbols present)Remove the detergent drawer and place a shallow container under the drain pump filter to catch any excess water.
natural_image
Illustration of a hand turning a small object with red arrows indicating rotation (no text or symbols)Rotate anticlockwise to take the filter element out, and clean the waste on it.
natural_image
Line drawing of a sewing machine needle stitching a fabric (no text or symbols)Check for and remove any foreign objects from the drain pump.
natural_image
Illustration of a hand holding a curved object with a red arrow indicating rotation (no text or symbols)Put the filter element back into the drain pump and tighten it, and reinstall the detergent drawer.
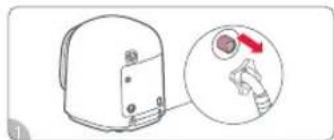
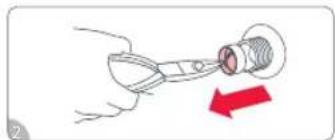
Water Inlet Valve Filter (Clean monthly)
natural_image
Diagram of a device with a magnified inset showing a hand holding a small object, no text or symbols present.Turn off the tap and unscrew the water inlet hose.
natural_image
Illustration of a hand holding a pen-like tool with a red arrow indicating direction (no text or symbols)Take the inlet valve filter out with needle-nose pliers and rinse it.
natural_image
Illustration of a hand holding a spoon with a small object inside, no text or symbols presentClean the threaded part of the inlet valve with a brush.

natural_image
Diagram of a rope being twisted with red arrows indicating rotational motion (no text or symbols)Reconnect the water inlet hose to the tap and turn on the tap to check for leakage.
Maintenance
Instructions for Maintenance
• Always unplug the machine before cleaning.
- The disassembled parts must be reinstalled in place, inspected, and tested before use.
- If there is any possibility of hot water coming out of the drain pump, allow it to cool before opening to prevent scalding.
- It is recommended to clean the inlet valve filter every month, or when the error "E1" appears on the display.
- If Auto Dosing does not work properly, please check and clean the connection between the detergent drawer and the machine.
- Regular cleaning is needed to avoid unnecessary service and prolong the product's life.
Freezing Handling
If the machine is frozen in a place below 0^ C, please handle as follows.
-
Wrap the tap with a warm towel to help defrost, and soak the removed water inlet hose in warm water.
-
Pour warm water into the drum, close the door and let it inactive for 10 minutes, and then reconnect the water inlet hose to the tap to ensure normal use.
Notes concerning the energy and water consumption of the washing machine
- The most efficient programs in terms of energy consumption are generally those that perform at lower temperatures and longer durations.
- Program time as well as energy and water consumption depend on various factors, such as weight and type of the laundry, chosen functions, characteristics of the water etc.
- For only slightly or normally soiled laundry, decrease the temperature of the program, as the device uses less energy this way.
- Use the maximum spin speed available if the laundry will be dried afterwards, as the remaining moisture content will be lower, which in turn saves energy during the later drying process. Note, that noise and remaining moisture content are influenced by the spinning speed: the higher the spinning speed in the spinning phase, the higher the noise and the lower the remaining moisture content.
- Load the household washer-dryer up to the maximum capacity of each program to reduce the energy and water consumption.
Specifications
Basic Parameters
| Name Washer Dryer | |
| Model WD01004RR0Z | |
| Max Power 900W | |
| Drying Power 420W | |
| Rated Voltage 230V- | |
| Rated Frequency | 50Hz |
| Rated Capacity | 1.0kg |
| Drying Capacity 0.5kg | |
| Rated Volume | 8.5L |
| Operating Water Pressure | 0.1MPa-1.0MPa |
| Waterproof Grade | IPX4 |
| Net Weight | 23kg |
| Gross Weight | 27.5kg |
| Dimensions* 428(W)×489(D)×512mm(H) | |
* Product Dimensions: The distance from the rear panel of the machine to its front door (including the door).
Indicative information
| Cycles | Capacity (kg) | Program time (h:min) | Energy Consumption (kWh/cycle) | Water Consumption (Litres/cycle) | Maximum Temperature (°C) | Remaining Moisture Content (%) | Spinning Speed (RPM) |
| 20°C 1 0:4 | 2 0.019 14.6 20 82.9 | 960 | |||||
| Quick Cold 0.1 | 0:23 0.011 6.9 20 15 | 1.4 960 | |||||
| Baby Care 0.2 | 1:09 0.178 16.0 52 11 | 5.2 960 | |||||
| App Program 0.4 | 4 1:31 0.174 11.2 51 | 119.2 960 | |||||
| Gentle 0.2 0 | 42 0.052 10.7 28 88 | 2 960 |
* The values given for programmes are indicative only.
* To start a 20°C cycle, turn the machine on, tap "Wash" to select the mode, tap "Daily" to choose the program, set the water temperature to 20°C, and then tap "Start/Pause".
Low Power Modes
| Off-mode (W) | ≤ 0.50 | Standby mode (W) | ≤ 0.50 |
| Delay start (W) | ≤ 4.00 | Networked Standby (W) | ≤ 2.00 |
Common Issues
| Issues Solutions | |
| Residual water in the drum before the first use | The machine has been tested for water filling before leaving the factory. Therefore, it is normal that water remains on the drum. |
| Hot air is coming out from the exhaust vent at the rear of machine | It is normal that the machine exchanges air with the outside environment.Avoid blocking the exhaust vent at the rear of the machine.Avoid placing moisture-sensitive items near the exhaust vent. |
| Smells | Smells given off by rubber parts at first will gradually disappear during use.Clean the gasket regularly.Run the "Drum Clean" program regularly to keep it clean. |
| Water stains on the door | It is normal that a small amount of water remains on the gasket and door as the machine has been tested for water filling before leaving the factory.Water stains on the door due to splash during laundry can be cleaned as needed. |
| Buttons don't work | The selected laundry mode does not support the program.The Child Lock function is enabled, which is indicated by the Child Lock Lamp that stays on. Tap and hold the "Temp." button to disable Child Lock. |
| No water refill | This indicates low water pressure, which may be caused by forgetting to turn on the faucet or a clogged inlet valve filter. It is recommended to turn on the faucet or clean the filter as instructed. |
| No spinning | The drum is off-center because a single piece of clothing or a small number of heavy clothes are in it. It is recommended to add more clothes. |
| Refilling and draining at the same time | Water may be drained when restart.Check if there is siphoning caused by the blocked drain hose or sewer. |
| Unable to see the water during washing | As the front-load machine is designed to save water, the water levels for some programs are below the door viewing window. |
| Too many or too few suds | If there are too many suds, check the type of detergent. Only "low-sudsing" detergent is suitable for the front-load washer.If there are too few suds, there may be insufficient detergent in the detergent drawer. Please check and replenish it in time.If there are too few suds, the water level may be low in the laundry mode. It is recommended to observe the level during rinsing. |
Common Issues
| Issues Solutions | |
| Difference between the displayed time and the actual running time | Excessive suds need to be eliminated.The drum is off-center, causing the running time to vary.The water pressure is low and the clothes absorb too much water, extending the water refilling time.The displayed time is an estimated time. The machine will intelligently adjust the time to the texture of the clothes and the selected program for the best result. |
| The control panel is partially hot | It is normal for electronic components to become slightly hot. |
| The upper cover of the machine is hot or the door is hot | During or at the end of drying, it is normal that these parts are hot. |
| Strange noise or excessive vibration of the body | Check if all the transit screws are removed.Check if the machine hits something.Check if the 4 feet of the machine are at the same level.Check if the clothes in the drum are placed evenly.Check if the clothes in the drum have metal parts like zippers that collide with the drum and make noises. |
| Strange noise from the drain pump | Check if the filter element of the drain pump is blocked by dander. If so, clean it in time. |
| The door cannot be opened | During program running, the door is locked, which is indicated by the Door Lock Lamp that stays on.When the water level or temperature is too high to open the door, the "High Water Level" or "Cooling Down" lamp will light up, with a beep as well as "Locl-" and the remaining time will be displayed alternately on the screen.Child Lock is enabled. |
Troubleshooting
If you fail to fix the problem, please turn off the power and water, and contact our after-sales customer service.
| Error Code | Problem Possible | Cause Solution | |
| Unb Spin error | The transit screws are not removed.The feet of the machine are not on the same level.A piece of clothing or heavy clothing is washed and dried.Several or large clothes get tangled.There is a dry or spin error. | Remove all the transit screws.Adjust the feet of the machine to the same level.Increase or decrease the load size.Rearrange the clothes and then restart the machine. | |
| E1 Refill error | The tap is turned off or there is a water outage.Water inlet valve filter is clogged.Water inlet hose is frozen. | Turn the tap on to see if the water supply is normal.Check and clean the inlet valve filter.Cover the water inlet hose with a warm towel to help defrost.After troubleshooting, press the Start/Pause button to continue the program. | |
| E2 Drain error | The drain hose opening is clogged by foreign objects.The drain valve is clogged by debris.The drain hose opening is at a high position. | Remove the red rubber plug from the drain outlet.Remove foreign objects from the drain hose opening.Open the drain pump filter and remove the debris.Move the drain hose to a lower position.After troubleshooting, press the Start/Pause button to continue the program. | |
| E3 Door lock error | The door is not properly closed.Clothes may be caught in the door. | Close the door again.Rearrange the clothes.After troubleshooting, press the Start/Pause button to continue the program. | |
| E4 Water level error | There is something wrong with the water level sensor.The water inlet valve is damaged. | Press and hold the Power button to power off the machine, run 1-2 cycles of Wash Mode - Spin program, then restart the program. | |
| E5 Inverter error | Inverter error. | Unplug for 30 seconds, plug back in, and run the program again. | |
| E6 | Water heater malfunction | Heater is loose or damaged. | Power off the washing machine and restart. If the issue persists, please contact customer service. |
| E7 | Abnormal temperature inside the drum | Temperature sensor malfunction. | Power off the washing machine and restart. If the issue persists, please contact customer service. |
| E10 | Communication error | Inverter communication error. | Unplug for 30 seconds, plug back in, and run the program again. |
Troubleshooting
| Error Code | Problem Possible | Cause Solution | |
| E11 | Temperature error | Air inlet temperature sensor error. | Power off the washing machine and restart. If the issue persists, please contact customer service. |
| E14 | Temperature error | Drying module sensor error. | Power off the washing machine and restart. If the issue persists, please contact customer service. |
| E15 | Drying heater malfunction | Heater is loose or damaged. | Power off the washing machine and restart. If the issue persists, please contact customer service. |
| E16 | Abnormal fan speed | Abnormal circulation fan speed. | Power off the washing machine and restart. If the issue persists, please contact customer service. |
| E17 | Drying temperature protection | Drying temperature protection due to factors such as power grid voltage fluctuations. | Press and hold the Power button to power off the washing machine, then select a single drying mode to continue.If this does not solve the problem, press and hold the Power button to power off the washing machine, remove clothes, run 1-2 cycles of Wash Mode - Drum Cleaning, then select a single drying mode to continue.During the drying process, make sure the faucet is turned on and the water supply is normal.If this does not solve the problem, contact customer service. |
| E18 | Abnormal fan speed | Abnormal regenerative fan speed. | Power off the washing machine and restart. If the issue persists, please contact customer service. |
| Laundry detergent "Low" light is on | Reminder that laundry detergent is low. | Add laundry detergent up to the MAX level line. If the light continues to flash, contact customer service. |
Circuit Diagram
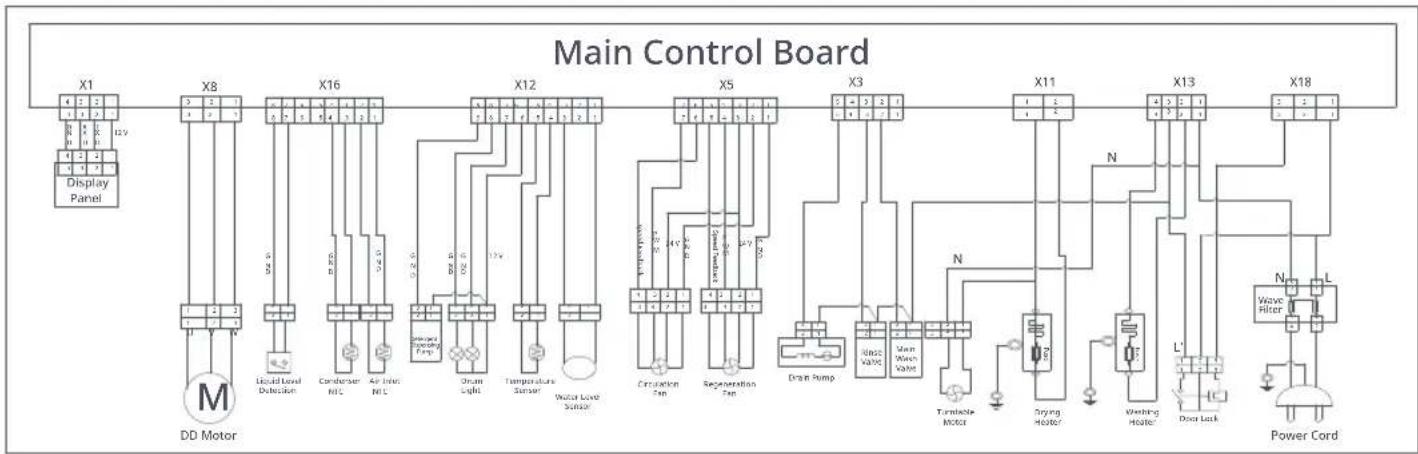
flowchart
graph TD
    subgraph_Main_Control_Board["Main Control Board"]
        X1["Display Panel"] --> X8["DC Motor"]
        X8 --> X16["Condenser NLC"]
        X16 --> X12["Temperature Sensor"]
        X12 --> X5["Refrigeration Pan"]
        X5 --> X3["Drain Pump"]
        X3 --> X11["Main Motor"]
        X11 --> X13["Power Cord"]
        X13 --> X18["Power Cord"]
        X8 --> M["DD Motor"]
        X8 --> V["Liquid Level Detection"]
        X8 --> W["Air Inlet NLC"]
        X8 --> D["Drain Light"]
        X8 --> E["Drain Pump"]
        X8 --> F["Drain Pump"]
        X8 --> G["Drain Pump"]
        X8 --> H["Drain Pump"]
        X8 --> I["Drain Pump"]
        X8 --> J["Drain Pump"]
        X8 --> K["Drain Pump"]
        X8 --> L["Drain Pump"]
        X8 --> M
        X8 --> V
        X8 --> W
        X8 --> E
        X8 --> E
        X8 --> F
        X8 --> F
        X8 --> G
        X8 --> G
        X8 --> H
        X8 --> H
        X8 --> I
        X8 --> I
        X8 --> J
        X8 --> J
        X8 --> K
        X8 --> K
    end
Français
Roborock Zeo Mini
natural_image
Simple line drawing of a car with water droplets and a warning symbol (no text or labels)natural_image
Simple line drawing of a device with a warning symbol (no text or labels)natural_image
Hand placing a circular component into a wall socket (no text or symbols visible)natural_image
Simple line drawing of a device with a hand holding a screwdriver (no text or symbols)natural_image
Simple line drawing of a pipe with a warning symbol (no text or labels)natural_image
Simple line drawing of a hand inserting a socket into an electrical outlet (no text or symbols)natural_image
Line drawing of a mechanical component with red connectors (no text or symbols)natural_image
Hand turning a button with red arrows, showing mechanical components and rotation (no text or symbols)natural_image
Simple line drawing of a door with a knob and a red arrow pointing to the handle (no text or symbols)natural_image
Simple line drawing of a kitchen utensil with a handle and a red arrow indicating rotation (no text or symbols)natural_image
Illustration of a hand holding a small mechanical component with a magnified inset showing a close-up of a red arrow (no text or symbols)natural_image
Simple line drawing of a device with red X marks on a base (no text or symbols)natural_image
Line drawing of a mechanical device with a pipe and base, no text or symbols presentnatural_image
Technical line drawing of a mechanical device with pipes and a valve (no text or symbols)
natural_image
Simple line drawing of a helmet with a handle and mounting bracket (no text or symbols)natural_image
Diagram of a remote control device with a circular dial and a red indicator knob (no text or symbols)natural_image
Simple line drawing of a car with water droplets and a warning symbol (no text or labels)natural_image
Simple line drawing of a device with a warning symbol (no text or labels)natural_image
Hand placing a circular component into a wall socket (no text or symbols visible)natural_image
Simple line drawing of a device with a hand pointing to the top part (no text or symbols)natural_image
Simple line drawing of a pipe with a warning symbol (no text or labels)natural_image
Hand placing a component into an electrical socket (no text or symbols visible)natural_image
Simple line drawing of a person with a wheelchair and a child, next to a computer monitor (no text or symbols)natural_image
Line drawing of a mechanical component with a base and two red clamps (no text or symbols)natural_image
Hand using a tool to switch a button on a device (no text or symbols visible)natural_image
Simple line drawing of a door handle with a red arrow pointing to the lock (no text or symbols)natural_image
Line drawing of a kitchen appliance with a magnified inset showing a red object inside (no text or symbols)natural_image
Simple line drawing of a mechanical component with a red arrow indicating rotation (no text or symbols)natural_image
Illustration of a hand holding a mechanical component with an inset showing a close-up of a hand holding a small object (no text or symbols present)natural_image
Simple line drawing of a device with a red X mark on a base (no text or symbols)natural_image
Line drawing of a mechanical component with a pipe and base, no text or symbols presentnatural_image
Technical line drawing of a mechanical device with tubing and a valve (no text or symbols)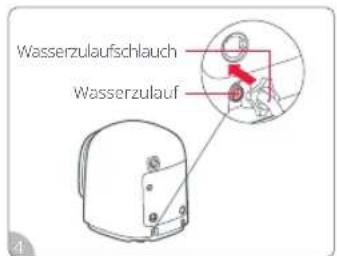
natural_image
Line drawing of a portable device with a handle and a red X mark, no text or symbols presentnatural_image
Illustration of a sewing machine with red arrows indicating direction (no text or symbols)natural_image
Technical line drawing of a remote control panel with a red indicator knob (no text or symbols)Notöffnung der Tür
natural_image
Simple line drawing of a car with water droplets and a warning symbol (no text or labels)natural_image
Simple line drawing of a device with a warning symbol (no text or labels)natural_image
Hand placing a circular component into a square socket (no text or symbols visible)natural_image
Simple line drawing of a device with a hand pointing to the screen (no text or symbols)natural_image
Simple line drawing of a pipe with a warning symbol (no text or labels)natural_image
Hand inserting a socket into an electrical outlet (no text or symbols visible)natural_image
Line drawing of a mechanical component with red arrows indicating force or movement (no text or symbols)natural_image
Hand using a tool to switch a button on a machine (no text or symbols visible)natural_image
Simple line drawing of a door handle with a red arrow pointing to the lock (no text or symbols)natural_image
Simple line drawing of a device with an inset showing a red object inside (no text or symbols)natural_image
Simple line drawing of a mechanical component with a red arrow indicating rotation (no text or symbols)natural_image
Illustration of a hand holding a mechanical component with an inset showing a close-up of a component being inserted (no text or symbols present)natural_image
Simple line drawing of a device with a red X mark on a base (no text or symbols)natural_image
Line drawing of a mechanical device with a pipe and base, no text or symbols presentnatural_image
Technical line drawing of a mechanical device with tubing and a valve (no text or symbols)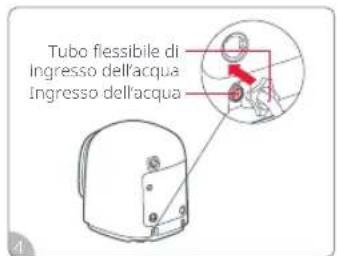
natural_image
Line drawing of a portable device with a handle and a red X mark, no text or symbols presentnatural_image
Illustration of a sewing machine with red arrows indicating force or movement (no text or symbols)Dosaggio automatico
① Accensione: ⏻
natural_image
Diagram of a remote control device with a circular inset showing a red button (no text or symbols)https://global.roborock.com/pages/compliance
natural_image
Simple line drawing of a car with water droplets and a warning symbol (no text or labels)natural_image
Simple line drawing of a device with a warning symbol (no text or labels)natural_image
Hand placing a circular component into a wall socket (no text or symbols visible)natural_image
Simple line drawing of a device with a hand pointing to the top part (no text or symbols)natural_image
Simple line drawing of a pipe with a warning symbol (no text or labels)natural_image
Hand placing a component into an electrical socket (no text or symbols visible)natural_image
Simple line drawing of a person with a wheelchair and a child, next to a computer monitor (no text or symbols)
2 conector de 1/2 in a 3/4 in
natural_image
Line drawing of a mechanical component with a base and mounting holes (no text or symbols)natural_image
Hand using a tool to switch a button on a machine (no text or symbols visible)natural_image
Pure diagram of a door handle with a red arrow pointing to the lock (no text or symbols)natural_image
Simple line drawing of a computer monitor with an inset showing a red object inside (no text or symbols)natural_image
Simple line drawing of a mechanical component with a red arrow indicating rotation (no text or symbols)natural_image
Illustration of a hand holding a mechanical component with an inset showing a hand holding a small object (no text or symbols present)natural_image
Simple line drawing of a device with a red X mark on a base (no text or symbols)natural_image
Line drawing of a mechanical component with a pipe and base, no text or symbols presentnatural_image
Technical line drawing of a mechanical device with pipes and a valve (no text or symbols)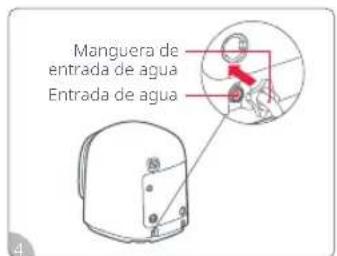
natural_image
Line drawing of a helmet with a handle and red X mark (no text or symbols)natural_image
Illustration of a sewing machine with red arrows indicating fabric or sewing process (no text or symbols)① Encendido 🔊:
natural_image
Diagram of a computer mouse with a circular inset showing a red button (no text or symbols)Manufacturer: Nanjing Roborock Innovation Technology Co., Ltd.
Address of Manufacturer: Room 808, Building 3, No.21, Fenghui Avenue,
Yuhuatai District, Nanjing City, P.R. China
For more product information, visit our website: www.roborock.com
For after-sales support, email our after-sales service team:
Europe Support: support@roborock-eu.com

- Contents
- Safety Instructions
- WARNING
- EU Declaration of Conformity
- WEEE Information
- International Symbols Explanation
- Instructions for Use
- First Use
- Notes on Washing
- Notes on Drying
- Fabric Care Chart
- Notes:
- Bleaching
- Ironing
- Professional Care
- Installation Requirements
- Installation Environment
- Power Supply
- Water Supply
- Installation
- ③ Connecting Water Inlet Hose
- Connecting Drain Hose
- Connecting to the App
- How to Use Detergent
- Auto Dosing
- Manual Dispense Mode
- Notes
- Control Panel
- ① Power ⏻ :
- ② Start/Pause DII:
- ③ Rinse:
- ④ Detergent/Remote Control:
- ⑤ Low:
- ⑥ Cooling Down:
- ⑦ High Water Level:
- ⑧ Hold for Delay Start:
- ⑨ UVC Sterilization:
- ⑩ Hold for Child Lock:
- ⑪ Temp.:
- ⑫ Display Screen:
- Remote Control Lamp ☐:
- UVC Lamp ;
- Delay Start Lamp 🔊 :
- Door Lock Lamp :
- Detergent Lamp:
- WiFi Lamp
- Modes
- Operating Procedures
- Features
- Mid-Cycle Loading
- Power Outage Memory
- Door Lock/Unlock
- Emergency Door Opening
- Maintenance
- Instructions for Maintenance
- Freezing Handling
- Notes concerning the energy and water consumption of the washing machine
- Specifications
- Français
- Roborock Zeo Mini
- Notöffnung der Tür
- Dosaggio automatico
- ① Accensione: ⏻
- ① Encendido 🔊:
Brand : ROBOROCK
Model : Zeo Mini
Category : Robot vacuum