
GO 2600 4K - Video camera Trevi - Free user manual and instructions
Find the device manual for free GO 2600 4K Trevi in PDF.

| Product Type | Video Camera |
| Brand | Trevi |
| Model | GO 2600 4K |
| Dimensions | 66 × 46.3 × 35 mm |
| Weight | 116 g (with battery) |
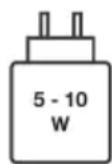
| Power | 5 V, 2 A (USB Type-C port) |
| Battery Capacity | 3.7 V, 1000 mAh (built-in, non-user-replaceable) |
| Video Recording Battery Life | Approximately 120 minutes |
| Charging Time | Approximately 3 hours |
| Main Screen | 2.0-inch IPS touchscreen |
| Front Screen | 1.3-inch IPS |
| Lens | 140° wide angle |
| Maximum Video Resolution | 4K (3840 × 2160) at 30 fps |
| Other Video Resolutions | 2.7K at 30 fps, 1080p at 60/30 fps, 720p at 120/60/30 fps |
| Video Format | MP4 |
| Maximum Photo Resolution | 20 MP |
| Memory Support | Micro SDHC Class 10 card up to 128 GB |
| Connectivity | Wi-Fi 2.4 GHz, USB 2.0 |
| Special Features | Time-lapse, slow motion, loop recording, dashcam mode, front/rear screen, XDV app |
| Maximum Waterproof Depth | 21 meters |
| Maintenance and Cleaning | Soft cloth slightly damp, avoid solvents and abrasives |
| Safety | Do not immerse if the side door is not properly closed (red indicator not visible) |
Frequently Asked Questions - GO 2600 4K Trevi
User questions about GO 2600 4K Trevi
0 question about this device. Answer the ones you know or ask your own.
Ask a new question about this device
Download the instructions for your Video camera in PDF format for free! Find your manual GO 2600 4K - Trevi and take your electronic device back in hand. On this page are published all the documents necessary for the use of your device. GO 2600 4K by Trevi.
USER MANUAL GO 2600 4K Trevi
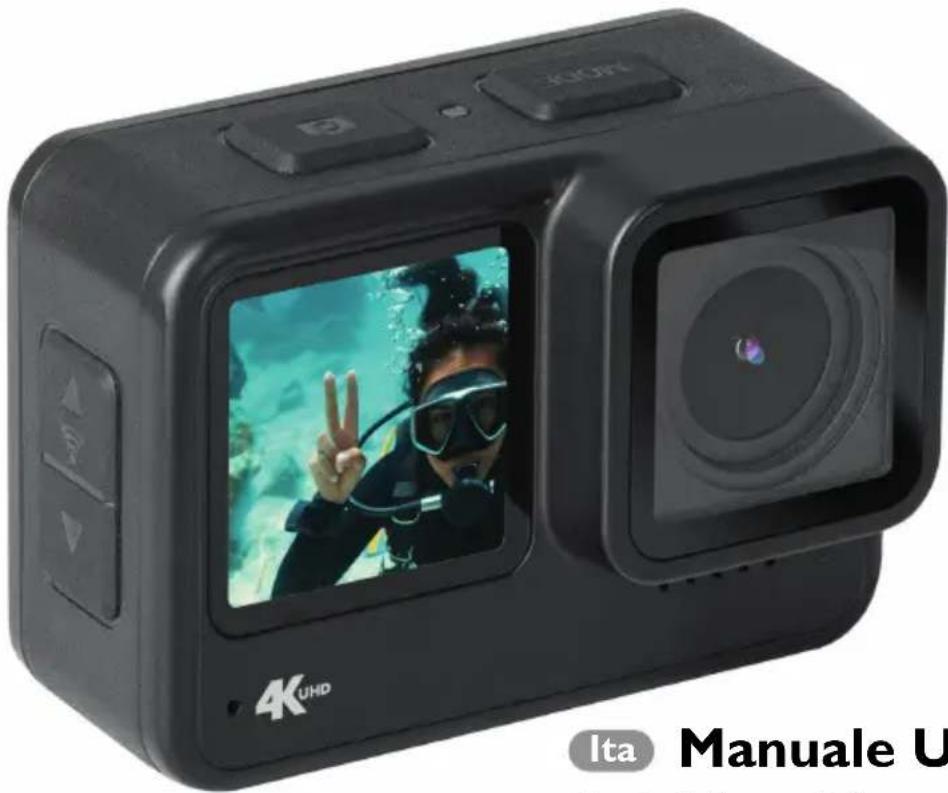
GO SPORT ACTION CAMERA 4K WIFI
natural_image
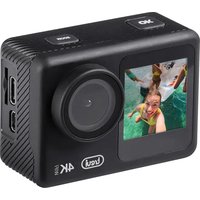
Black 4K UHD camera with a scuba driver inside, displayed in a photo frame (no visible text or symbols on device body)Ita Manuale Utente
Eng User Manual
Android

Thank you for purchasing our camera! With high-performance components, the device can record high-resolution videos with excellent image quality. The camera has a unique and ultra-portable design that can be used in various situations, making your daily life comfortable, safe and colorful. Please read this manual carefully and keep it for future reference.
This manual has been prepared based on the latest information available.
The screens and illustrations in this manual are intended to provide information about digital cameras in a more detailed and direct manner. There may be differences between the screens and illustrations in this manual and the actual state of the digital camera due to technological progress and differences between production batches. In such cases, the actual functions of the camera should be given priority.
SAFETY MEASURES
• The permissible immersion depth is 21 meters.
- After each use in salt water, rinse in fresh water and then dry. Failure to follow these instructions may cause corrosion of metal parts and degradation of seals, and may also cause damage to the casing.
- If, while charging, the device becomes hot, smokes or produces an unpleasant odor, unplug it immediately from the power outlet to avoid a potential fire hazard.
- Ensure that the camera is kept out of the reach of children while charging.
- Store the device in a cool, dry and dust-free place.
TF CARD (MICRO SD CARD)
- The camera supports high-speed TF (Micro SD) cards with a high capacity of up to 128GB. For optimal performance, use memory cards of at least class 10.
- Please format the card before using it for the first time or after using it in another device.
- Be sure to turn off the device before inserting or removing the card from the camera.
- Remember that the card is a sensitive electronic device: protect it from moisture, twisting, dropping, crushing and strong electromagnetic fields.
- You may lose data stored on the card if the device runs out of power during recording.
WARNINGS AND NOTES ON USE
- If you use the camera as a recording device, always follow the relevant local regulations. Illegal use of the product will result in legal consequences. In some countries, the use of recording devices (or, in particular, publishing recordings on the Internet) may be illegal. We suggest that you familiarize yourself with the regulations in force.
- The product must be used with an appropriate level of lighting. Do not point the camera directly at the sun or other strong light sources, as this may damage the optical system of the device.
- This product is a precision electronic device that cannot be exposed to strong vibrations and shocks. It cannot be used near strong magnetic or electric fields.
• No objects filled with liquid, such as vases, should be placed on the device.
• If liquids penetrate inside the device, take the device to the nearest authorized TREVI service center.
• No naked flame sources, such as lighted candles, should be placed on the appliance.
• Instruct children and people with little knowledge of the product in its correct use. - Keep the following user manual.
CARE AND MAINTENANCE
For cleaning, we recommend using a soft, slightly damp cloth. Avoid solvents or abrasive substances.
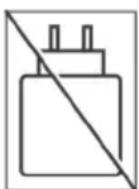
Charger not included
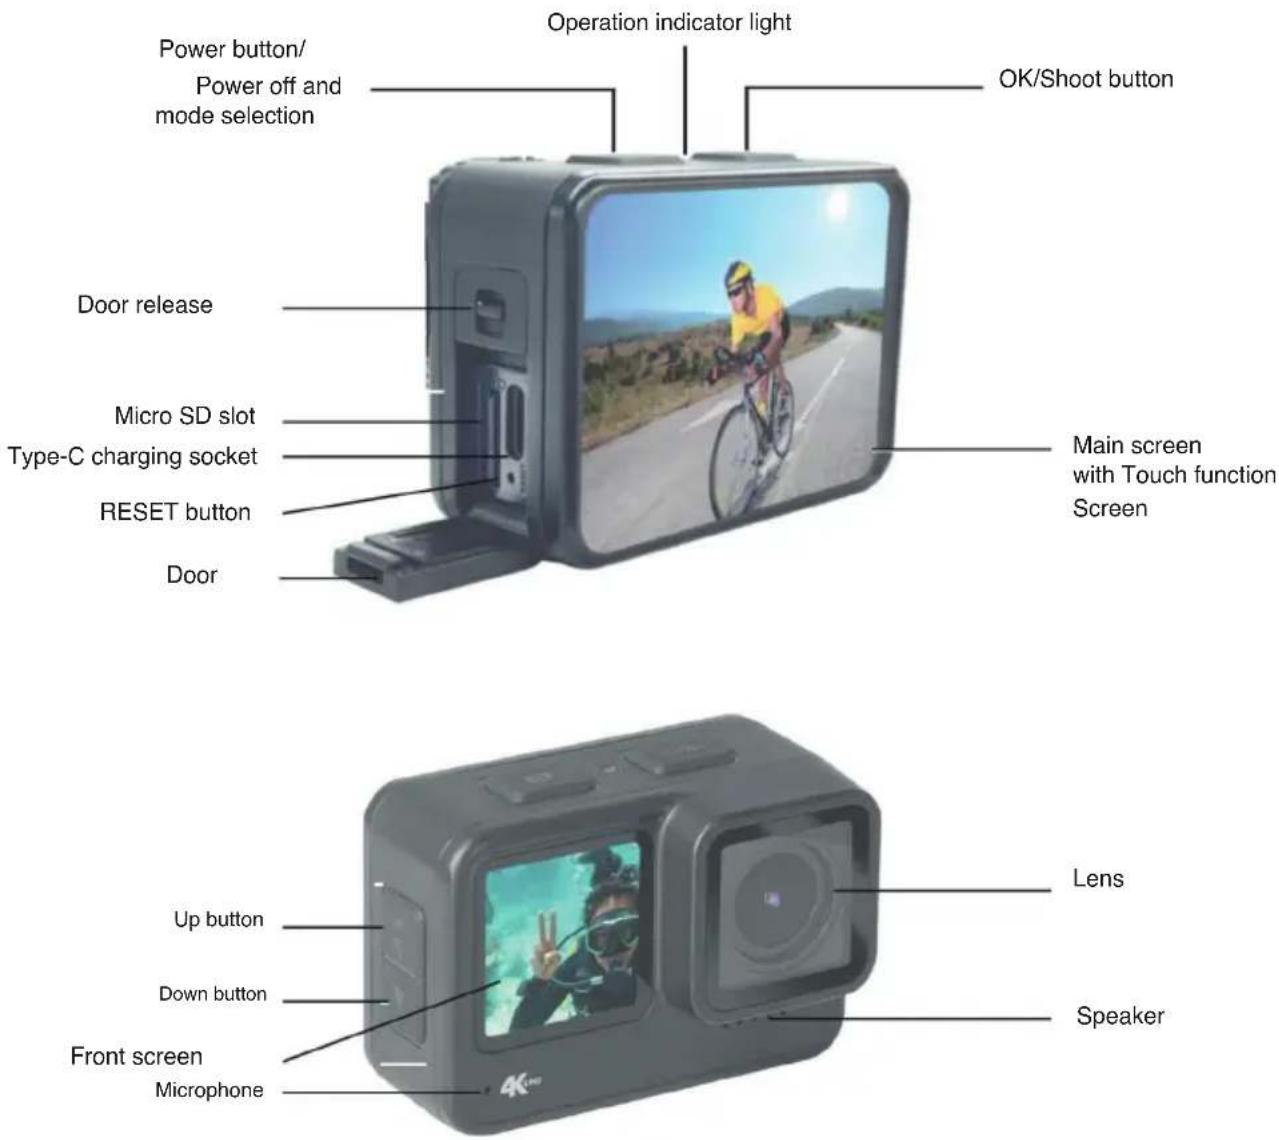
DESCRIPTION OF CONTROLS AND ACCESSORIES
IMPORTANT
The good construction of this appliance guarantees its perfect functioning for a long time. However, if any inconvenience should arise, it is advisable to consult the nearest authorized TREVI Service Center.
TREVI pursues a policy of continuous research and development. Therefore, the products may have characteristics different from those described.

CAUTION: It is essential to securely attach the camera cover before submerging the camera in water. Failure to do so may result in water leakage that could damage or render the camera inoperable. Water may damage both the camera and the battery, which could cause an explosion or fire. The warranty does not cover water damage resulting from user error.
PROPERLY CLOSING THE SIDE DOOR
The side door opening latch has a special red paint that serves as an indicator for proper closure.
When closing, if the red paint is visible, it means the door is not closed properly. Open the door again and close it until you hear a click (the red paint should not be visible).
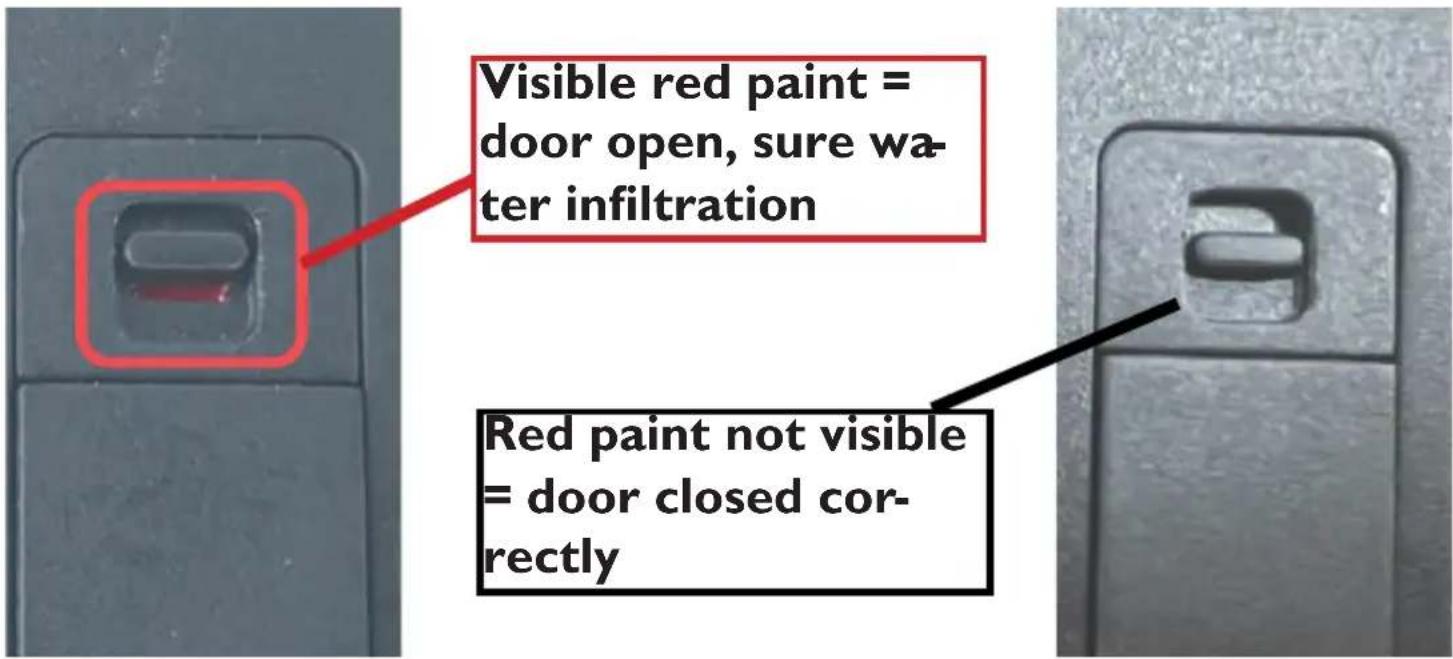
If the door is not closed properly, water will certainly infiltrate, resulting in product failure. In this case, the warranty will be voided.
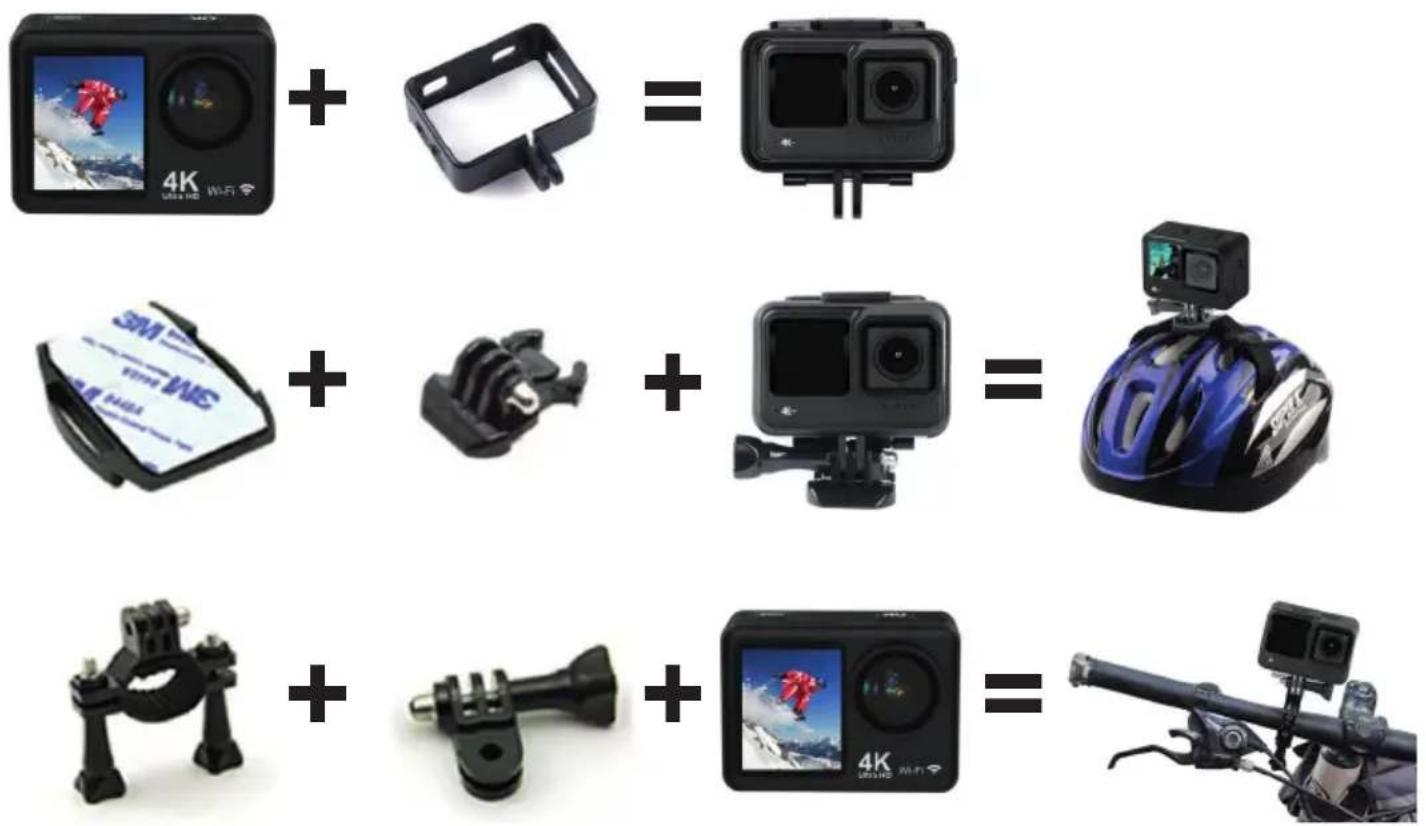
CAMERA MOUNTING TIPS
Attach the camera to helmets, components and equipment using the appropriate accessories.
INSTRUCTIONS FOR USE
I. INSERT THE MICRO SD CARD INTO THE SLOT
Make sure to insert the card with the top side facing the camera lens.
The bottom of the card with the electrical contacts must face the back of the camera.
Note: Please choose a branded high-speed Micro SD card and format it on the computer before use. Neutral cards are not guaranteed to work normally.
2. CHARGING THE BATTERY
The battery is built into the camera and cannot be replaced by the user.
- The battery can be charged by connecting the device to any USB port on the computer or a charger via USB/Type-C cable. During charging, the operation light will flash red, when charging is complete the indicator light will be solid red.
• The camera can also be charged in the car using a USB charger (not supplied).
• The camera can also be used for recording while charging.
3. POWER ON/OFF
- Press and hold the MODE button to turn the camera on or off.
- The screen will turn off automatically, according to the MENU settings. To turn the screen back on, press the OK button.
4. MODE SWITCHING
You can switch between modes: Video/ Photo/ Playback/ Settings menu by pressing the MODE button.
The current mode is displayed by the icons in the upper left corner of the screen.
In Playback mode, use the "UP" and "DOWN" buttons to select the file you want to view and press the "OK" button to start or stop playback.
You can also control the camera directly via the touch screen on the main display.
5. LED INDICATORS
Normal operation: Blue LED.
Charging: Red LED flashing during charging, solid red light when charging is complete.
6.1 Recording a Video
Select the Video mode, the icon will appear

I. Press the "OK" button to start recording. A red flashing icon will appear on the screen, along with the elapsed video recording time.
2. Press the "OK" button again to stop recording completely.
Pressing the icon 📋 on the Touch Screen display accesses the list of Video settings:
Video resolution: to choose the video resolution
Recording with audio: to activate audio recording during filming
Lapse video: activates the time lapse function, creates a video by recording a frame at each set time interval.
Loop: activates the loop recording mode, dividing the current recording into files of a certain time length.
When the available memory runs out, the old files in chronological order will be overwritten and deleted.
Slow Motion: to select the resolution of the slow motion function.
By pressing the touch screen in the lower center of the display, you can directly set the various video modes:VIDEO, LOOP, LAPSE, SLOW MOTION.
6.2 Slow Motion Function
Select the Slow Motion mode:
I. Press the "OK" button to start recording the video, at the same time the blue light will flash;
- Press the "OK" button again to stop the video, the blue light will also stop flashing.
6.3 Time lapse Function
I. Enter the settings menu, activate this function and return to video mode;
- The icon ⬇ will be displayed on the screen, press the "OK" button to start recording the video, at the same time the blue light will flash, press the "OK" button again to stop the video, the blue light will also stop flashing.
7. TAKING A PHOTO
Select the Photo mode, the icon will appear:
I. Press the "OK" button to take a photo.
Pressing the icon 📋 in the Touch Screen display accesses the list of Photo settings:
Photo resolution: to choose the video resolution
Timer: to set a delay time of the shot with respect to the moment in which the button is pressed.
Auto: to set the intervalometer, the camera will continuously take photos at the set time interval.
Burst: to set the number of continuous shots that will be saved at each press of the button.
View recorded videos or photos
Select the Playback mode, the icon ▶ will appear:
I. Press the Up/Down button to select files, press the OK button to play videos or photos or touch the left/right arrow on the touch screen to select files.
8. GENERAL CAMERA SETTINGS
Select the general settings mode, a menu will appear on the display, press the icon, there will be various items to scroll through and select via touch screen:
Exposure: to adjust the exposure correction.
White balance: to select the white balance according to the environmental conditions.
Image rotation: rotates the video image.
Driving mode: in-car shooting mode (Dash Cam), connect the camera via USB cable to a keyless power socket. When the car is turned on, the camera will turn on and start recording video, when the car is turned off, the camera will stop recording and turn off.
Frequency: to select the operating frequency of the artificial light.
Indicator LED: activates/deactivates the operation indicator LED.
Screen saver: turns off the display after a certain period of inactivity.
Auto Shutdown: automatically turns off the camera after a certain period of inactivity.
Time watermark: records date and time on videos and photos.
Language: to select the menu language.
Date and time: to adjust the date and time.
Format: to format the memory card.
Factory Reset: To restore the initial factory settings.
Firmware version: The software version of the camera.
9. STORAGE OF FILES ON PC
Use a USB cable to export the files to a computer and play them, or take out the Micro SD card and access the image data via a card reader.
Connecting to PC
Connect the camera to the PC and turn on the camera, the screen will display 3 modes:
- USB mode, selecting this mode, the PC will see the camera as an external memory.
- PC camera, the PC will see the camera as a webcam.
- Charging mode, no connection with the PC, only charging the battery.
Select the desired mode on the touch screen.
10. SWITCHING THE FRONT AND REAR SCREEN
The rear screen and the front screen can be switched to video and photo modes:
- Long press the Down button, the rear screen will turn off and the front screen will be activated.
• Long press the Down button to wake up the rear screen and turn off the front screen.
II. INSTALLATION AND USE OF WI-FI
The camera can connect via Wi-Fi to an iOS or Android tablet or smartphone.
To establish a connection, proceed as follows:
I. Install the "XDV" application on your smartphone or tablet. You can find it on the Google Play store (for devices using Android) or on the APP Store (for iOS devices), or use the following QR Code:
iOS

Android

- Turn on the camera and press the "UP" button to start the Wi-Fi function, all the WiFi information will appear on the display;
- Activate the Wi-Fi network on your smartphone or tablet. Search for the network generated by the camera and connect to it. Enter the access password (default password 12345678); confirm, if requested, the connection on the smartphone.
- After establishing a Wi-Fi connection between the camera and a smartphone/Tablet open the "XDV" app, here you can change the camera settings and have a live preview of the recorded image. You can also download the files of the Camcorder to your smartphone/Tablet, or delete or share the files.
For more information on the XDV app visit the website of the app manufacturer.
To deactivate the Wi-Fi function press the "UP" button again.
WARNING FOR CORRECT USE OF THE RECHARGEABLE BATTERY
- Recharge the battery at a temperature between 5^ C and 35^ C.
- Do not extend charging beyond the indicated times to avoid the risk of overheating and explosion.
- Charging the battery beyond the indicated times or a prolonged period of inactivity may reduce its life.
- The rechargeable battery is subject to wear and its capacity gradually decreases.
- Avoid keeping the battery charging all night.
INFORMATION ON THE REMOVAL AND DISPOSAL OF BATTERIES
Whatever the type of exhausted battery, it must not be thrown into household waste, fire or water. Every type of exhausted battery must be recycled or disposed of at the appropriate dedicated collection centers.
To remove the battery, contact a specialized center with qualified personnel.
TECHNICAL SPECIFICATIONS
Display:
Lens: 140° Wide angle lens
Video recording resolution: ____
Video format: MP4
Photo resolution:
Maximum supported memory: ....
Wi-Fi frequency:
Wi-Fi power:
Wi-Fi function:
Connections:
Power supply:
Battery capacity:
Battery life: In video recording about ....
Charging time about:
Dimensions:
Weight: 116 gr with battery
2.0" IPS Touch screen + 1.3" IPS
30FPS 4K - 30FPS 2.7K
60FPS 1080p - 30FPS 1080p
120FPS 720p - 60FPS 720p - 30FPS 720p
20M/16M/12M/8M/5M/2M
Micro SDHC class 10 128GB
2.4GHz
1.5mW
Image transmission, remote control,
setting, synchronization and album sharing
USB 2.0
5V, 2A
3.7V 1000mAh
120 minutes
3 hours
66 × 46.3 × 35 mm

Precautions for correct disposal of the product.
The symbol shown on the equipment indicates that waste must be disposed of in “separate collection” and so the product must not be disposed of together with urban waste.
The user must take the product to special “separate waste collection centres” provided by local government, or deliver it to the retailer against the purchase of a new product.
Separate collection of waste and subsequent treatment, recycling and disposal operations promotes the production of equipment with recycled materials and limits negative effects on the environment and on health caused by improper handling of waste.
Illegal disposal of the product leads to the enforcement of administrative penalties.
Android

Android

Android

Android

SIMPLIFIED EU DECLARATION OF CONFORMITY
Hereby TREVI Spa declares that the radio equipment type GO 2600 4K is in compliance with directive 2014/53/EU.
The full text of the EU declaration of conformity is available at the following internet address https://www.trevi.it/dms/zidi/TREVI/DOCGO26004K.pdf

Strada Consolare Rimini-San Marino, 62, 47924 Rimini (RN) Italy Tel. 0541/756420 - Fax 0541/756430 - www.trevi.it - e-mail: info@trevi.it
- GO SPORT ACTION CAMERA 4K WIFI
- SAFETY MEASURES
- TF CARD (MICRO SD CARD)
- WARNINGS AND NOTES ON USE
- CARE AND MAINTENANCE
- DESCRIPTION OF CONTROLS AND ACCESSORIES
- IMPORTANT
- PROPERLY CLOSING THE SIDE DOOR
- CAMERA MOUNTING TIPS
- INSTRUCTIONS FOR USE
- INSERT THE MICRO SD CARD INTO THE SLOT
- CHARGING THE BATTERY
- POWER ON/OFF
- MODE SWITCHING
- LED INDICATORS
- Recording a Video
- Slow Motion Function
- Time lapse Function
- TAKING A PHOTO
- View recorded videos or photos
- GENERAL CAMERA SETTINGS
- STORAGE OF FILES ON PC
- Connecting to PC
- SWITCHING THE FRONT AND REAR SCREEN
- INSTALLATION AND USE OF WI-FI
- WARNING FOR CORRECT USE OF THE RECHARGEABLE BATTERY
- INFORMATION ON THE REMOVAL AND DISPOSAL OF BATTERIES
- TECHNICAL SPECIFICATIONS
- Precautions for correct disposal of the product.
- SIMPLIFIED EU DECLARATION OF CONFORMITY
Brand : Trevi
Model : GO 2600 4K
Category : Video camera