SM90 Full Smith - Weight bench TUNTURI - Free user manual and instructions
Find the device manual for free SM90 Full Smith TUNTURI in PDF.

User questions about SM90 Full Smith TUNTURI
0 question about this device. Answer the ones you know or ask your own.
Ask a new question about this device
Download the instructions for your Weight bench in PDF format for free! Find your manual SM90 Full Smith - TUNTURI and take your electronic device back in hand. On this page are published all the documents necessary for the use of your device. SM90 Full Smith by TUNTURI.
USER MANUAL SM90 Full Smith TUNTURI
GB Assembly manual 21-24

Download Free Tunturi Training App

Attention, Achtung, Attention, Attentie, Attenzione, Atencion, Giv akt, Huomio
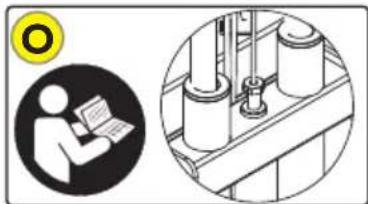
- Please read this assembly manual carefully prior to assembling this product.
- Lesen Sie sich vor der Montage des Produkts these Montageanleitung sorgfaltig durch.
- Veuillez lore attentivement le present manuel d'assemblage avant de monter ce produit.
- Lees deze montagehandleiding zorgvuldig voordat u dit product in elkaar gaat zetten.
- Leggere attentamente quello manuale di montaggio prima di montare il prodotto.
- Antes de montar este producto, lea atentamente estemanual de montaje.
- Läs den HAR monteringshandboken noggrant fore användning av den HARprodukten.
- Lue tāmā asennusohje huolellisesti ennen tāmān tuotteen asennusta.
A
B
| Qty: 2 | |||||
| Qty: 2 | Qty: 2 | ||||
| Qty: 4 | Qty: 2 | Qty: 2 | |||
| Qty: 2 | Qty: 2 | ||||
| Qty: 4 | Qty: 2 | Qth: 2 | Qty: 27 | ||
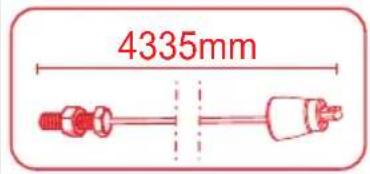
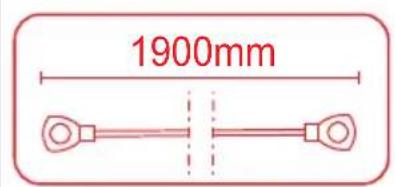
| Qty: 6 | Qty: 2 | Qty: 2 | 1900mm | 11000mm | 4335mm |
| Qty: 2 |
C
D-00
D-01

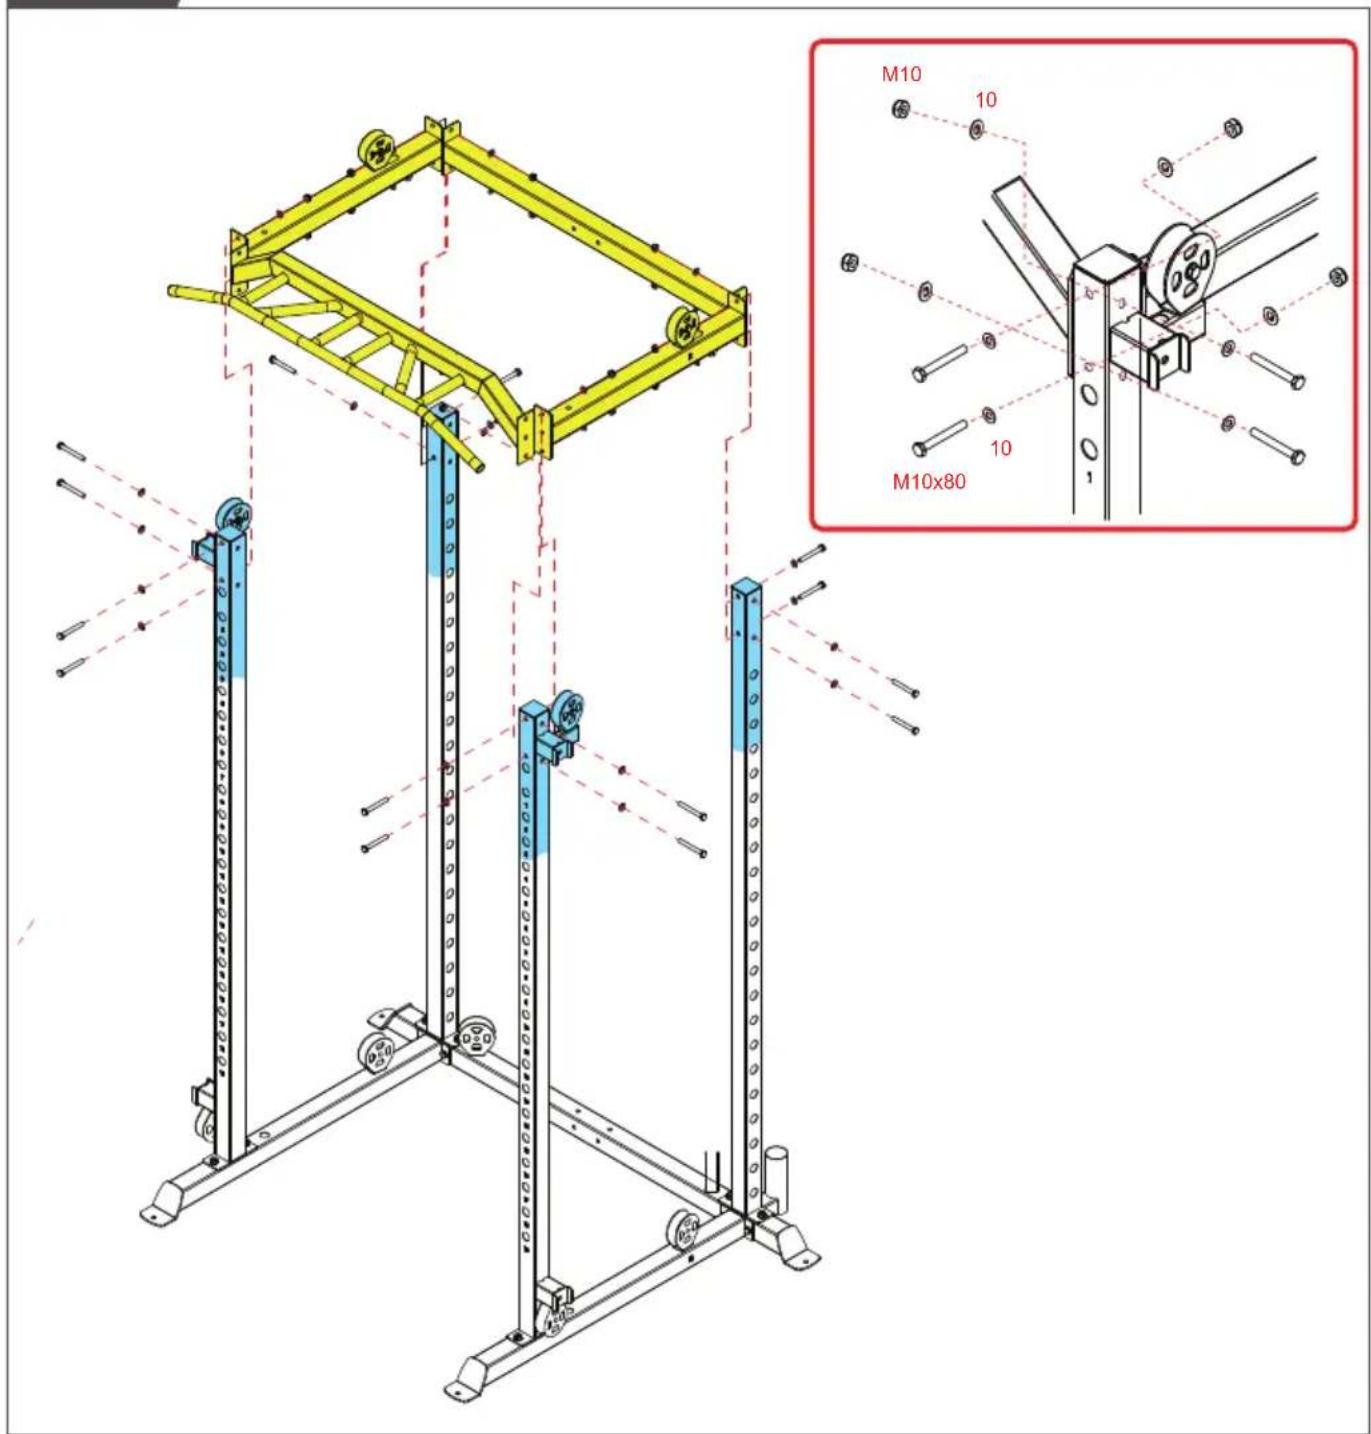
M10*85X 2PCS
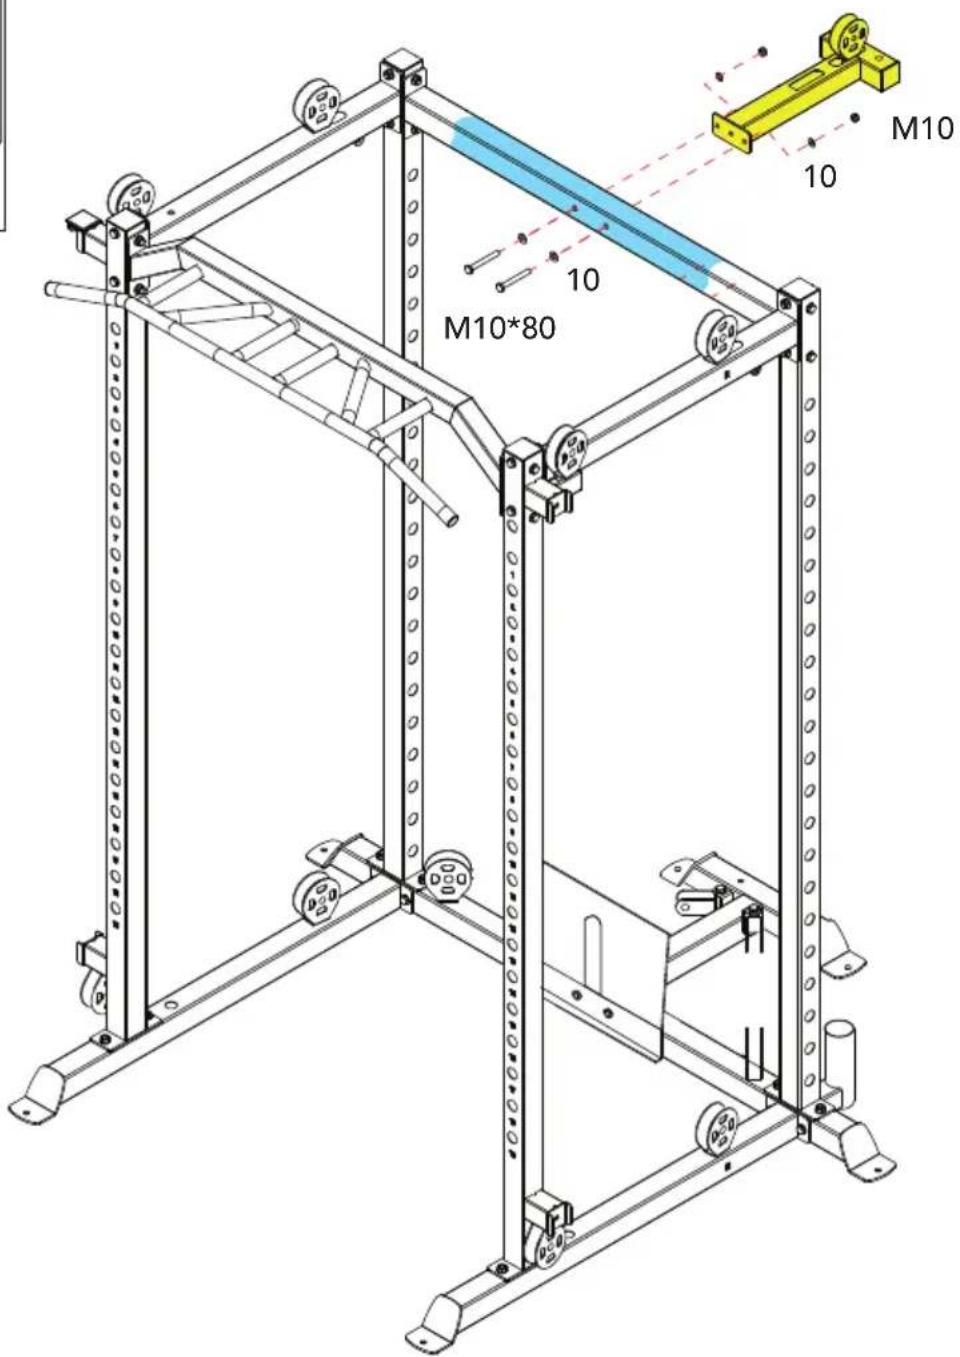
M10*80X 2PCS

M10 4PCS

10 8PCS
D-02
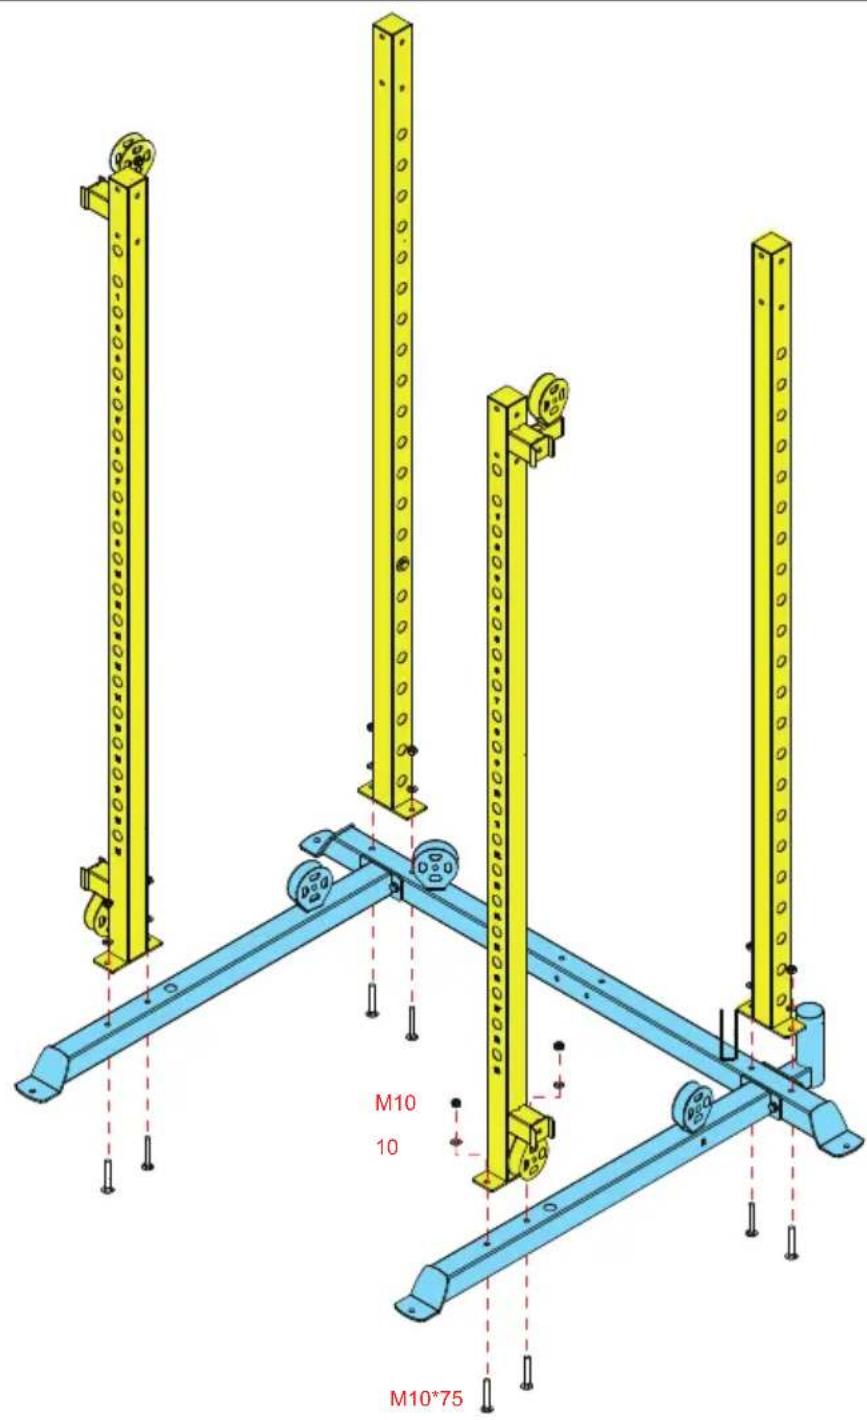
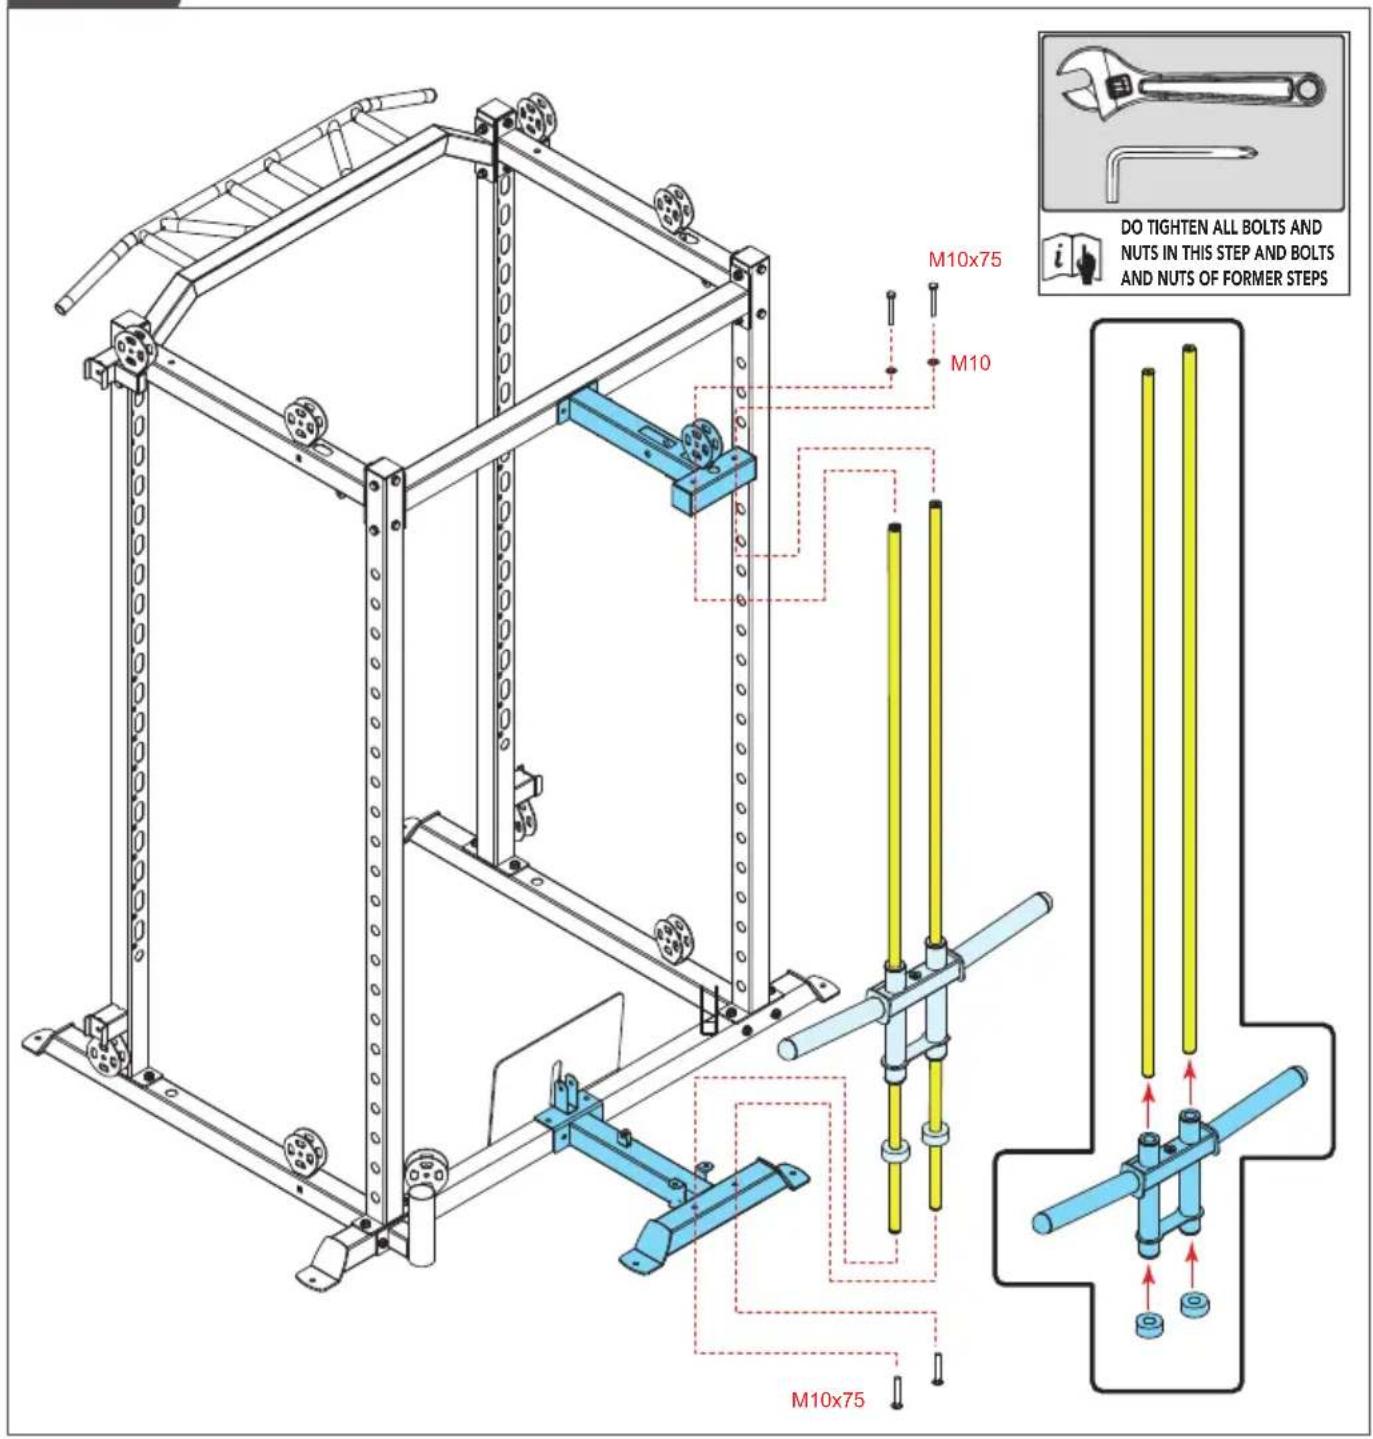
M10*75 8PCS
M10 8PCS
10 8PCS
D-03

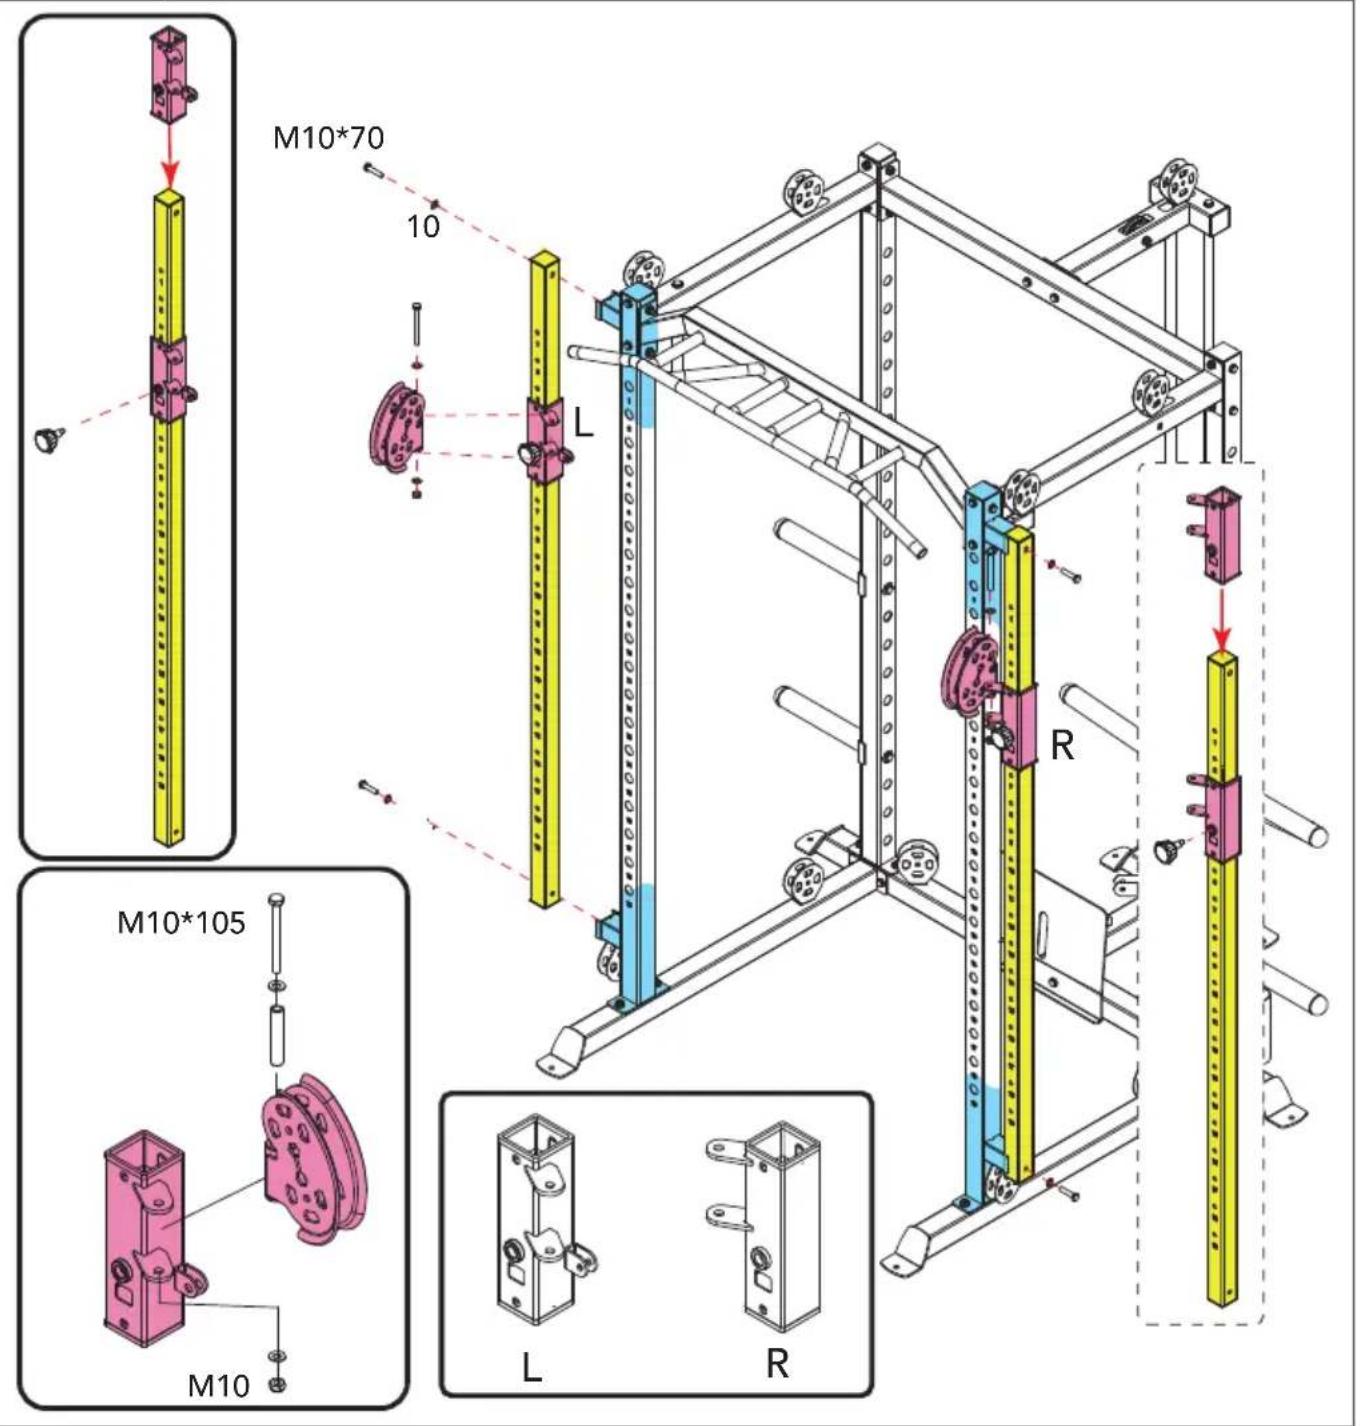
D-04A
D-04B
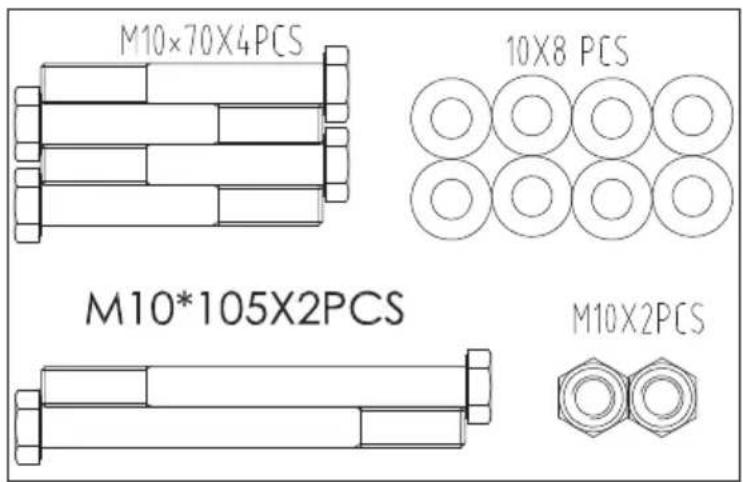
10X4PCS
M10X2PCS

M10×80X2PCS
D-04C

D-05
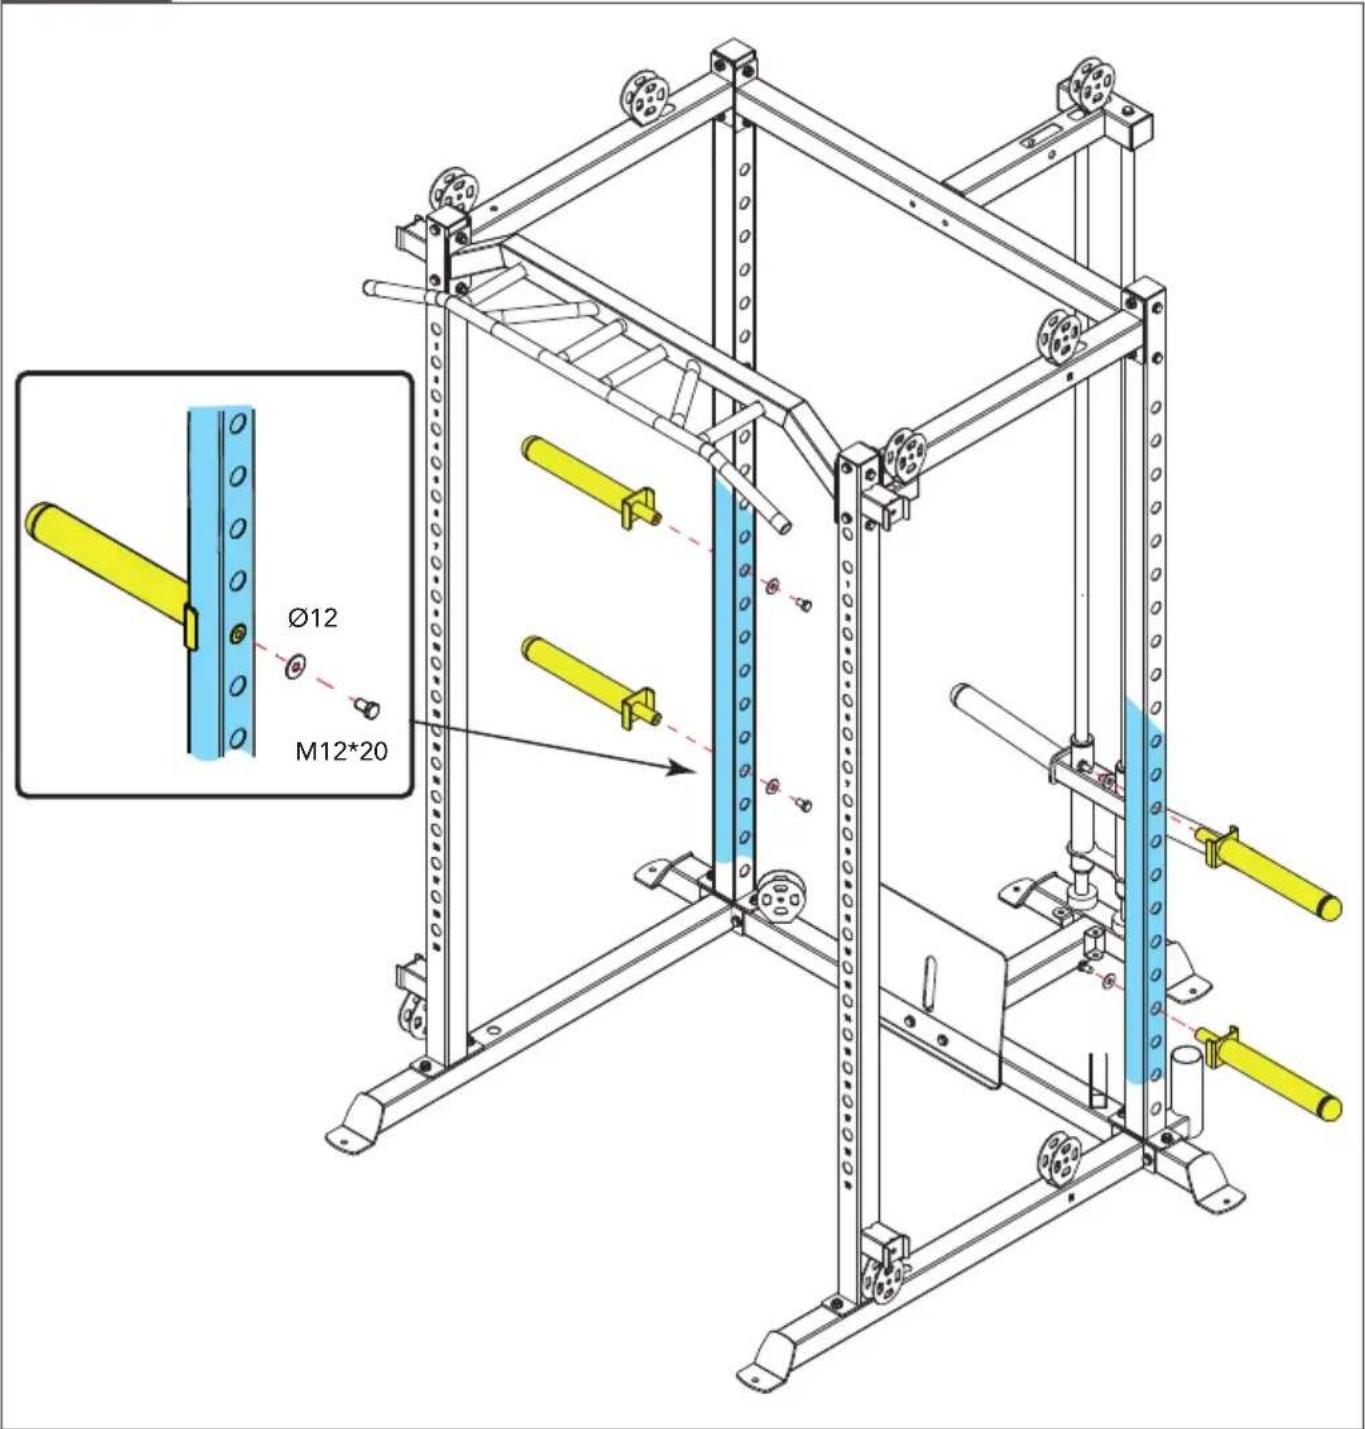
12X4PCS
M12×20X4PCS

D-6

D-07
D-08
D-09
D-10
D-11

D-12
D-13


USER MANUAL ON OUR WEBSITE
To reduce the impact on the environment, you will only find the assembly steps in this manual. To learn how to use and maintain this product, please download the user manual from:
manuals.tunturi.com
Index
Welcome 21
Important safety notice. 21
Additional safety instructions. 22
Important assembly information .... 22
Before you start. 22
Description illustration A. 22
Description illustration B. 22
Description illustration C. 22
Description illustration D. 22
Cable installation. 23
Fixing cable onto Selector Shaft (Fig. D-11) 23
Correct cable tension. 23
Cable Tension Adjustment 23
Free area (Fig. D-0) 23
Additional environmental information. 24
Warranty. 24
Weight capacity and dimension.....24
Disclaimer 24
Welcome
Important Safety Instructions
This manual is an essential part of your training equipment please read all instructions in this manual before you start using this equipment. The following precautions must always be followed:
Important safety notice
This exercise equipment is built for optimum safety. However, certain precautions apply whenever you operate a piece of exercise equipment. Be sure to read the entire manual before you assemble or operate your equipment. In particular, note the following safety precautions:
- Keep children and pets away from the equipment at all times. DO NOT leave children unattended in the same room with the equipment.
- Only one person at a time should use the equipment.
- If the user experiences dizziness, nausea, chest pain, or any other abnormal symptoms, STOP the workout at once. CONSULT A PHYSICIAN IMMEDIATELY.
Position the equipment on a clear, levelled surface. DO NOT use the equipment near water or outdoors.
- Keep hands away from all moving parts.
- Always wear appropriate workout clothing when exercising. DO NOT wear robes or other clothing that could become caught in the equipment. Running or aerobic shoes are also required when using the equipment.
Use the equipment only for its intended use as described in this manual. DO NOT use attachments not recommended by the manufacturer.
- Do not place any sharp object around the equipment.
- Disabled person should not use the equipment.
- Before using the equipment to exercise, always do stretching exercises to properly warm up.
- Never operate the equipment if the equipment is not functioning properly.
- A spotter is recommended during exercise.
English
- This equipment is designed and intended for home and consumer use only, not for commercial use.
Additional safety instructions
- During exercising hands must be kept clear from the guiding bars of the weights.
- Never re-set weights during exercising.
- Avoid the cord grating along sharp parts.
- Children should only use this equipment under the direct supervision of a knowledgeable adult. At no times should children be left unattended near the machine.
- Prior to carrying out any exercise ensure that the body is in the correct position to avoid injury.
Warning:
Before beginning any exercise program, consult your physician. This is especially important for individuals over the age of 35 or persons with pre-existing health problems.
Read all instructions before using any fitness equipment.
Tunturi New fitness bv. assumes no responsibility for personal injury or property damage sustained by or through the use of this product.
Save these instructions!
Important assembly information
Before you start
We recommend to use two adjustable wrenches to assemble your product. If you have metric sized wrenches in correct size this is fine too.
NOTE
- Suitable (adjustable) wrenches are "NOT" provided with the product, neither included in the assembly kit.
It is strongly recommended that this equipment is assembled by two or more people to avoid possible injury.
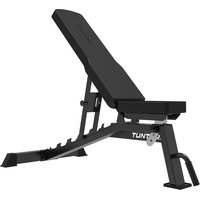
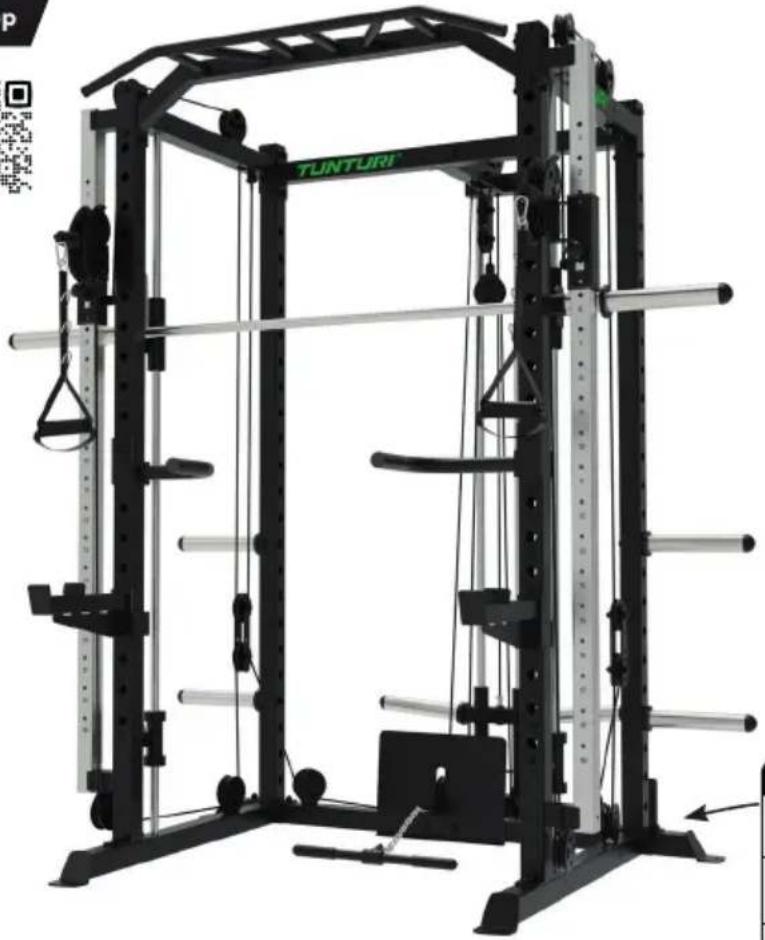
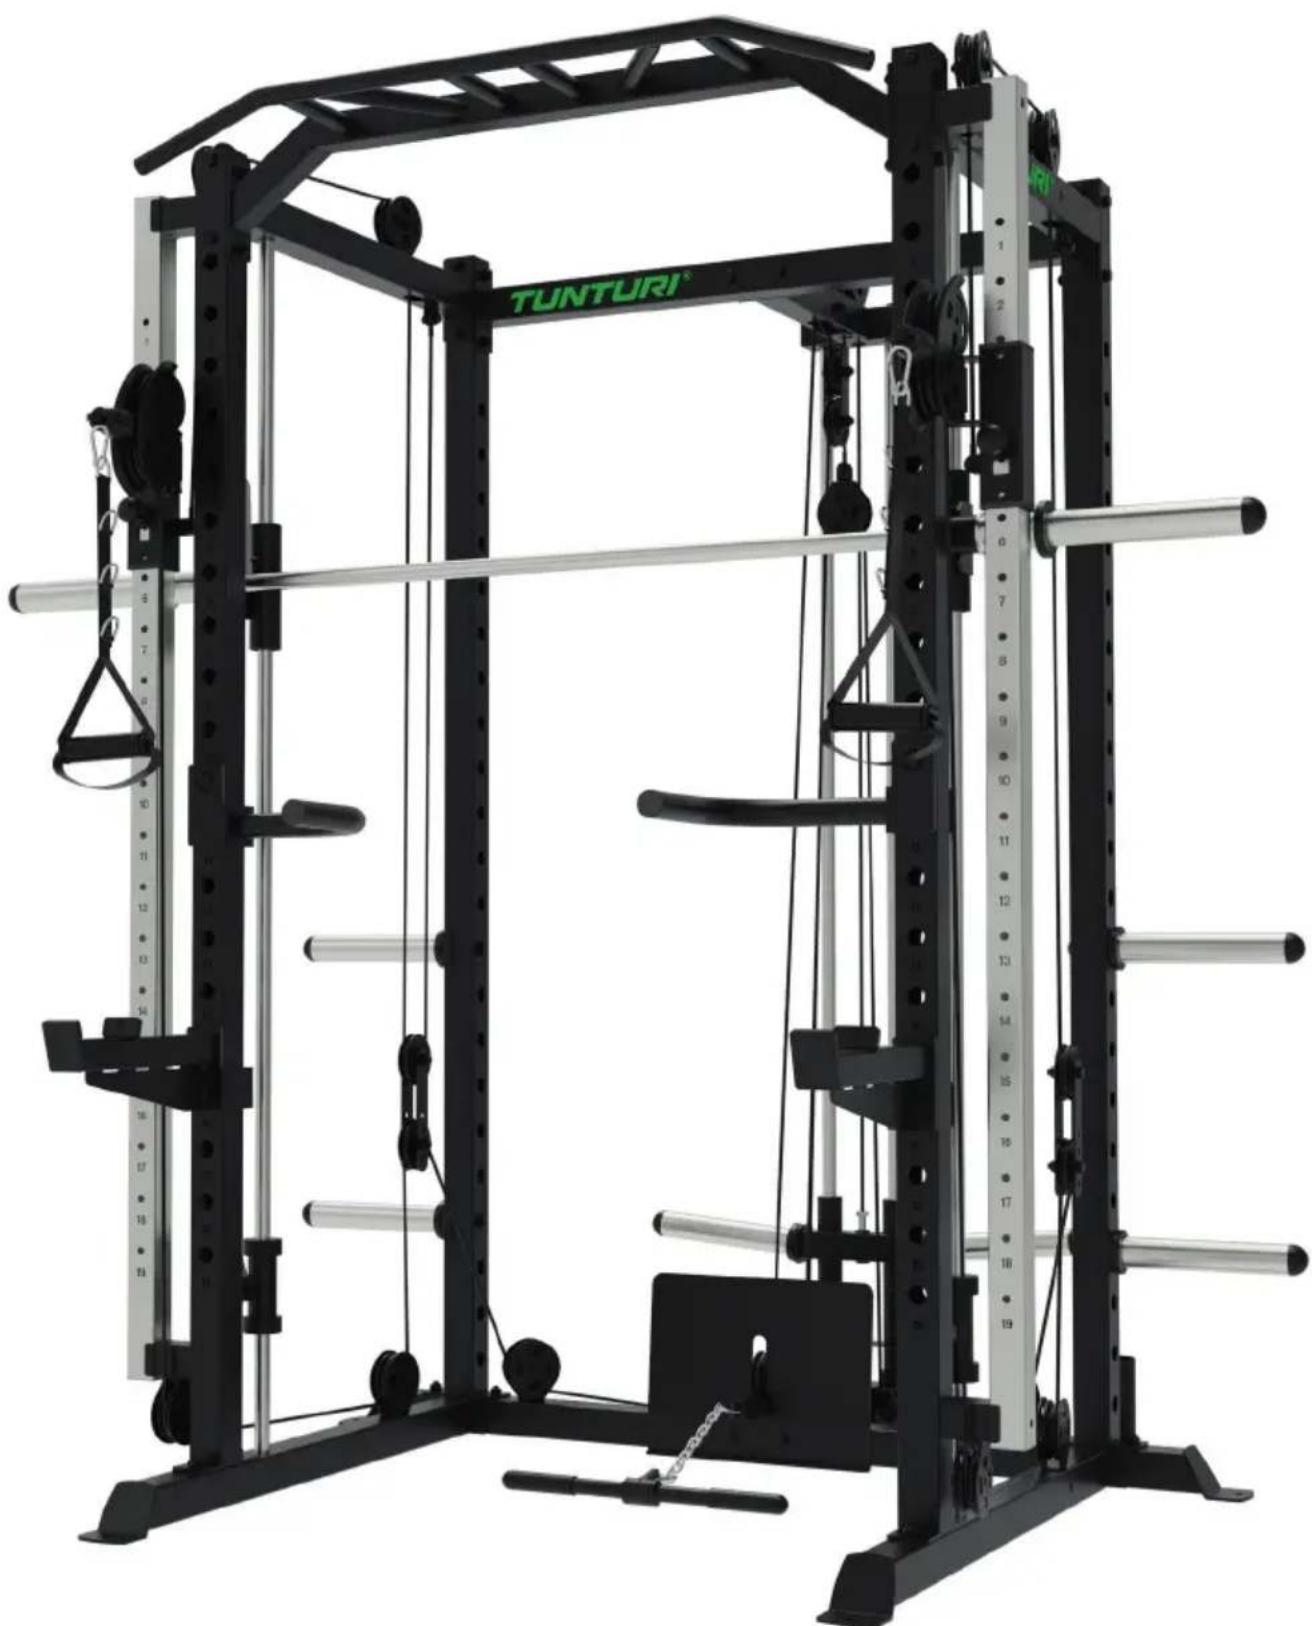
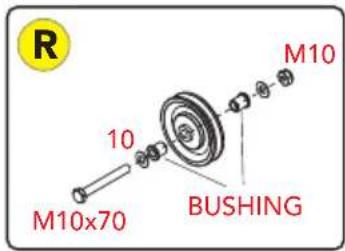
Description illustration A
The illustration shows what the trainer will looks like after the assembly is completed.
You can use this as a reference during your assembly, but do follow the assembly steps always in the correct sequence as showed in the illustrations.
Description illustration B
The illustration shows what components and parts you should find when un-boxing your product.
NOTE
- Small parts can be hidden/ packed in hollow spaces in the Styrofoam product protection
If a part is missing, contact your dealer.
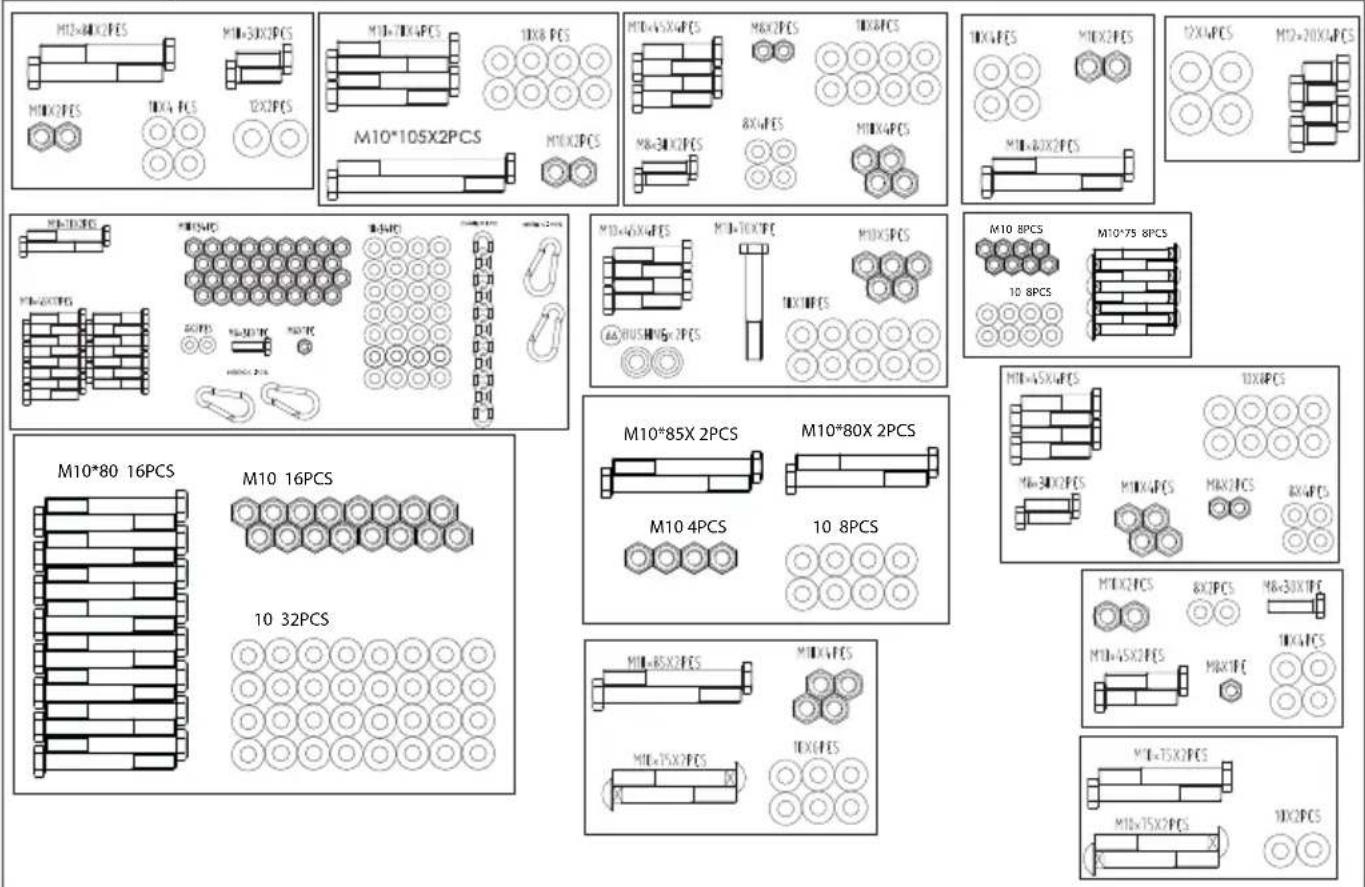
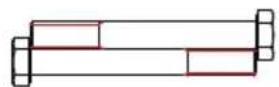
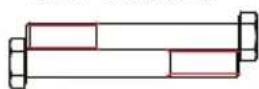
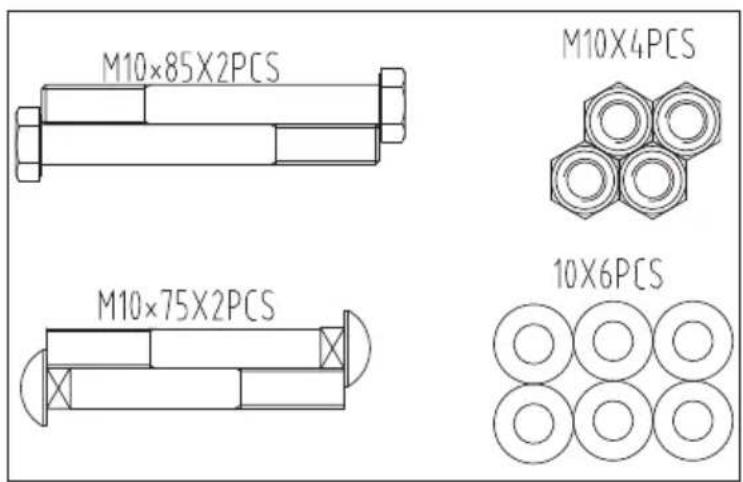
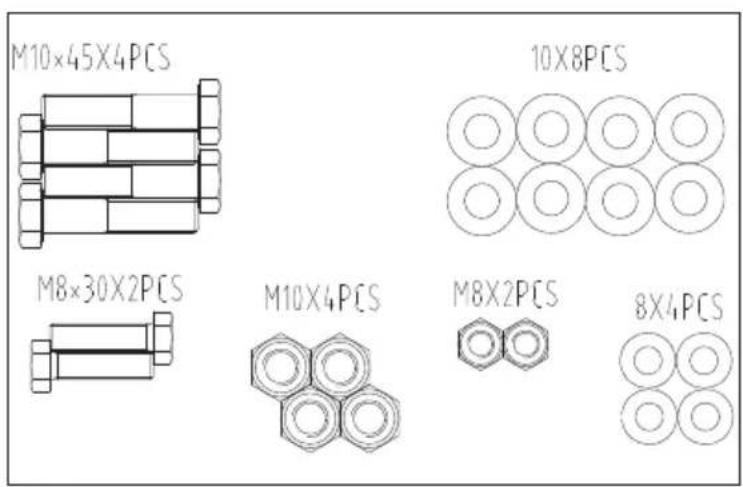
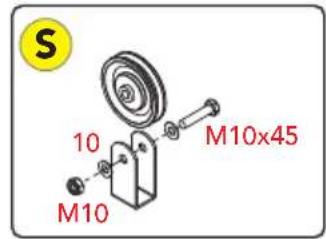
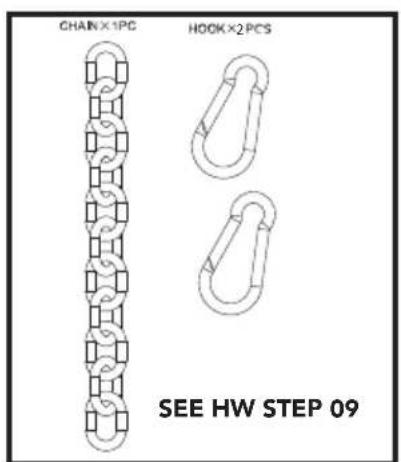
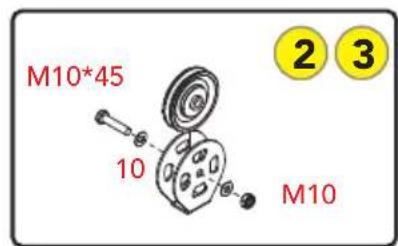
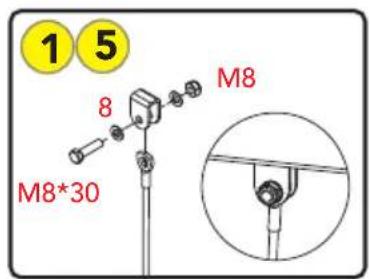
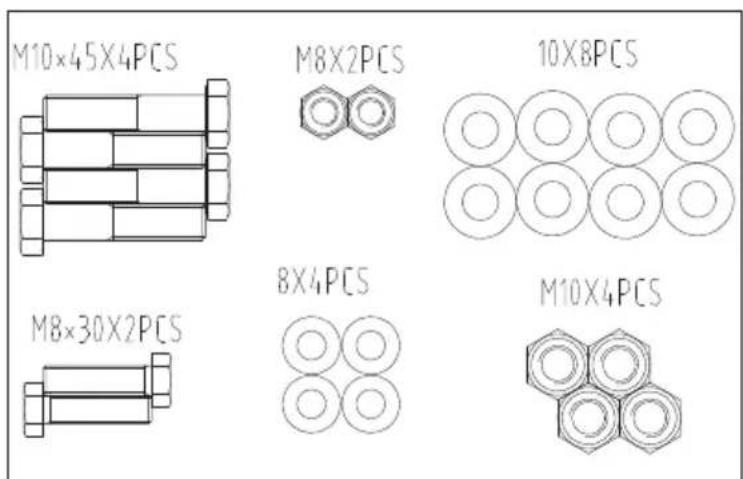
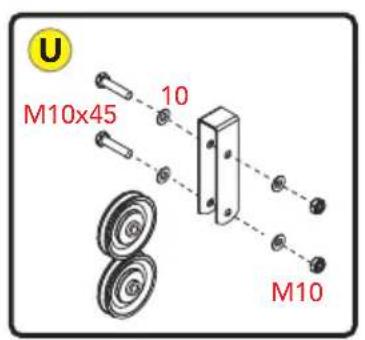
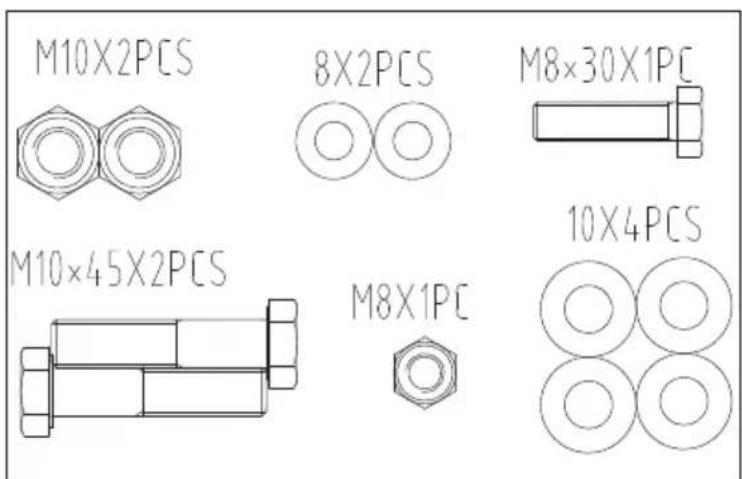
Description illustration C
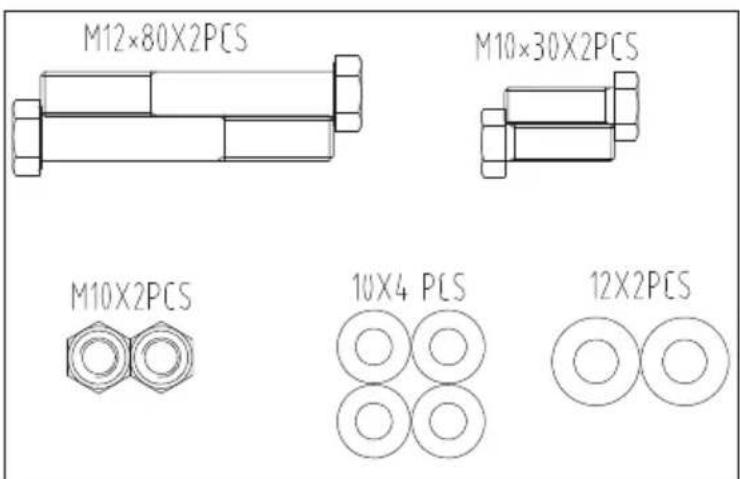
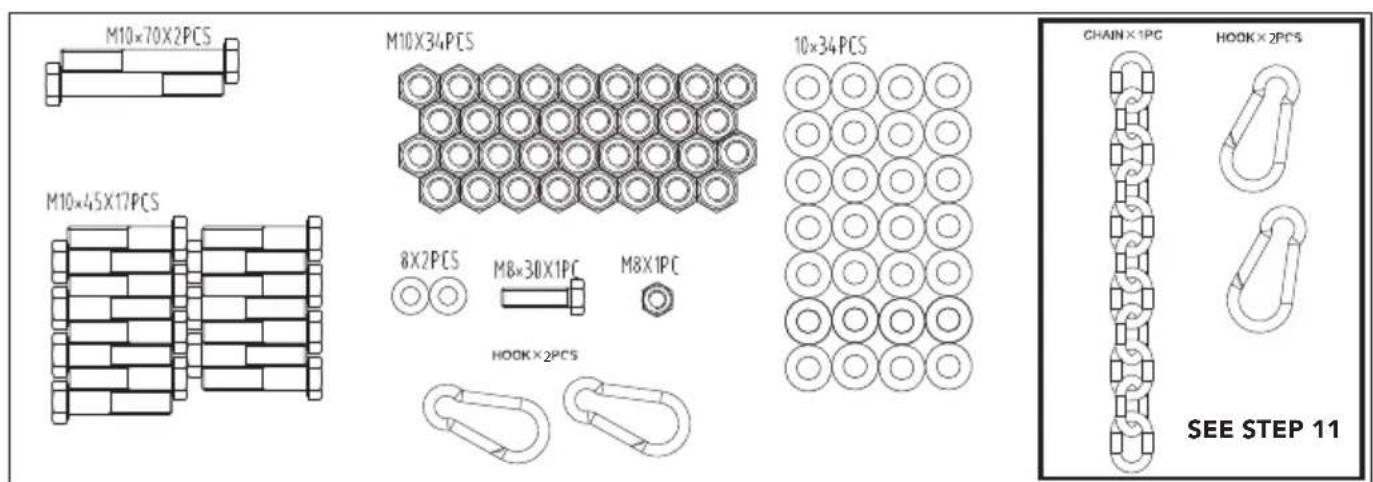
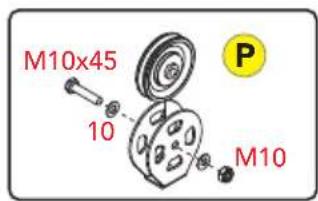
The illustration shows the hardware kit that comes with your product.
The hardware kit contains bolts, washers, screws, nuts etc. and the required tools to properly fit your trainer.
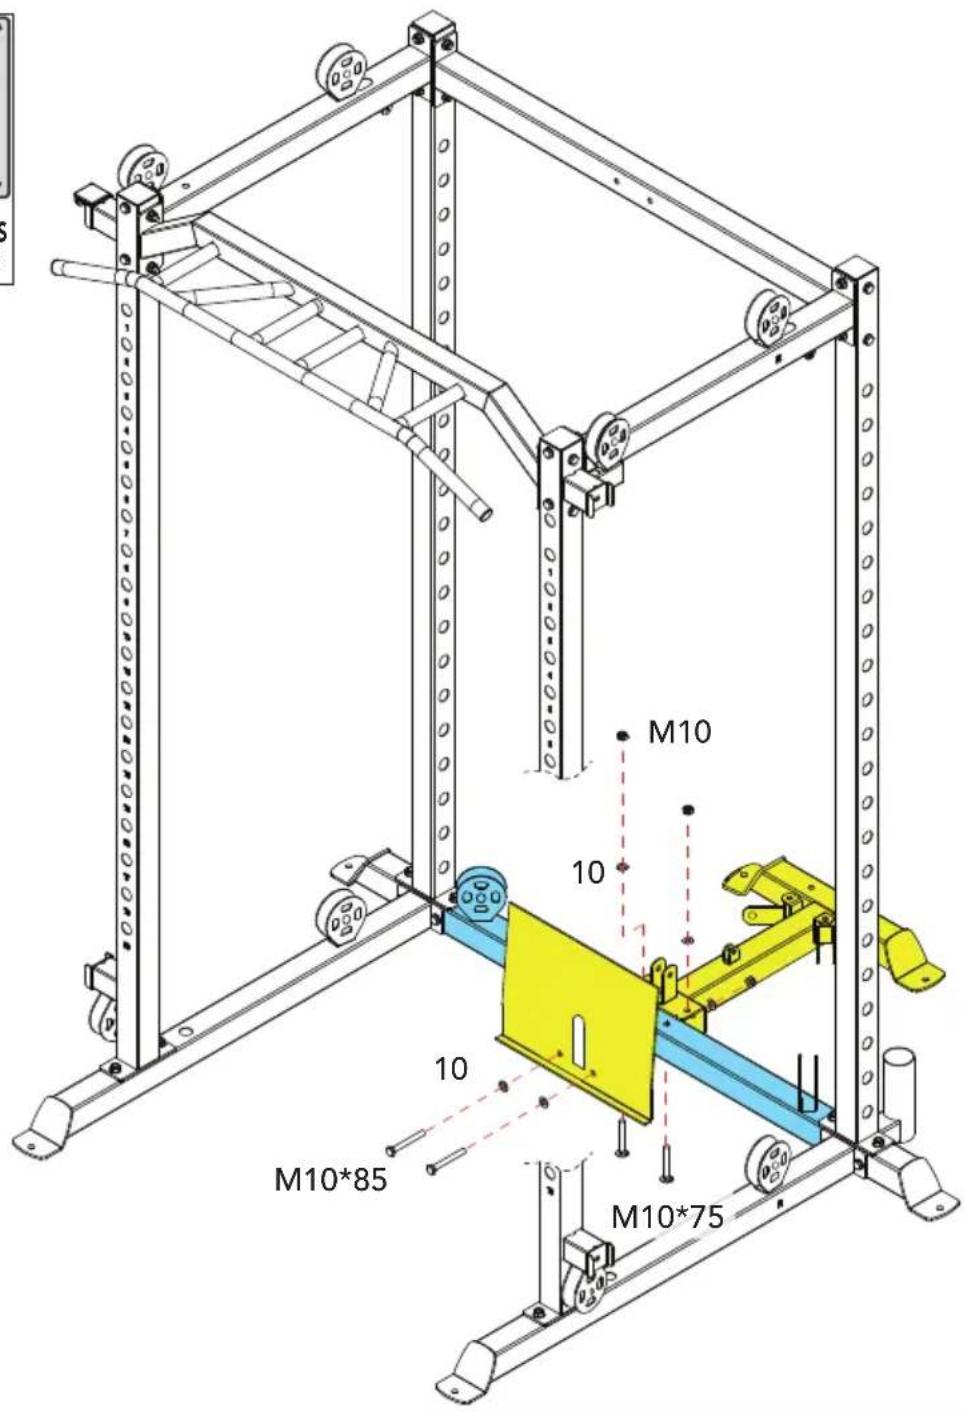
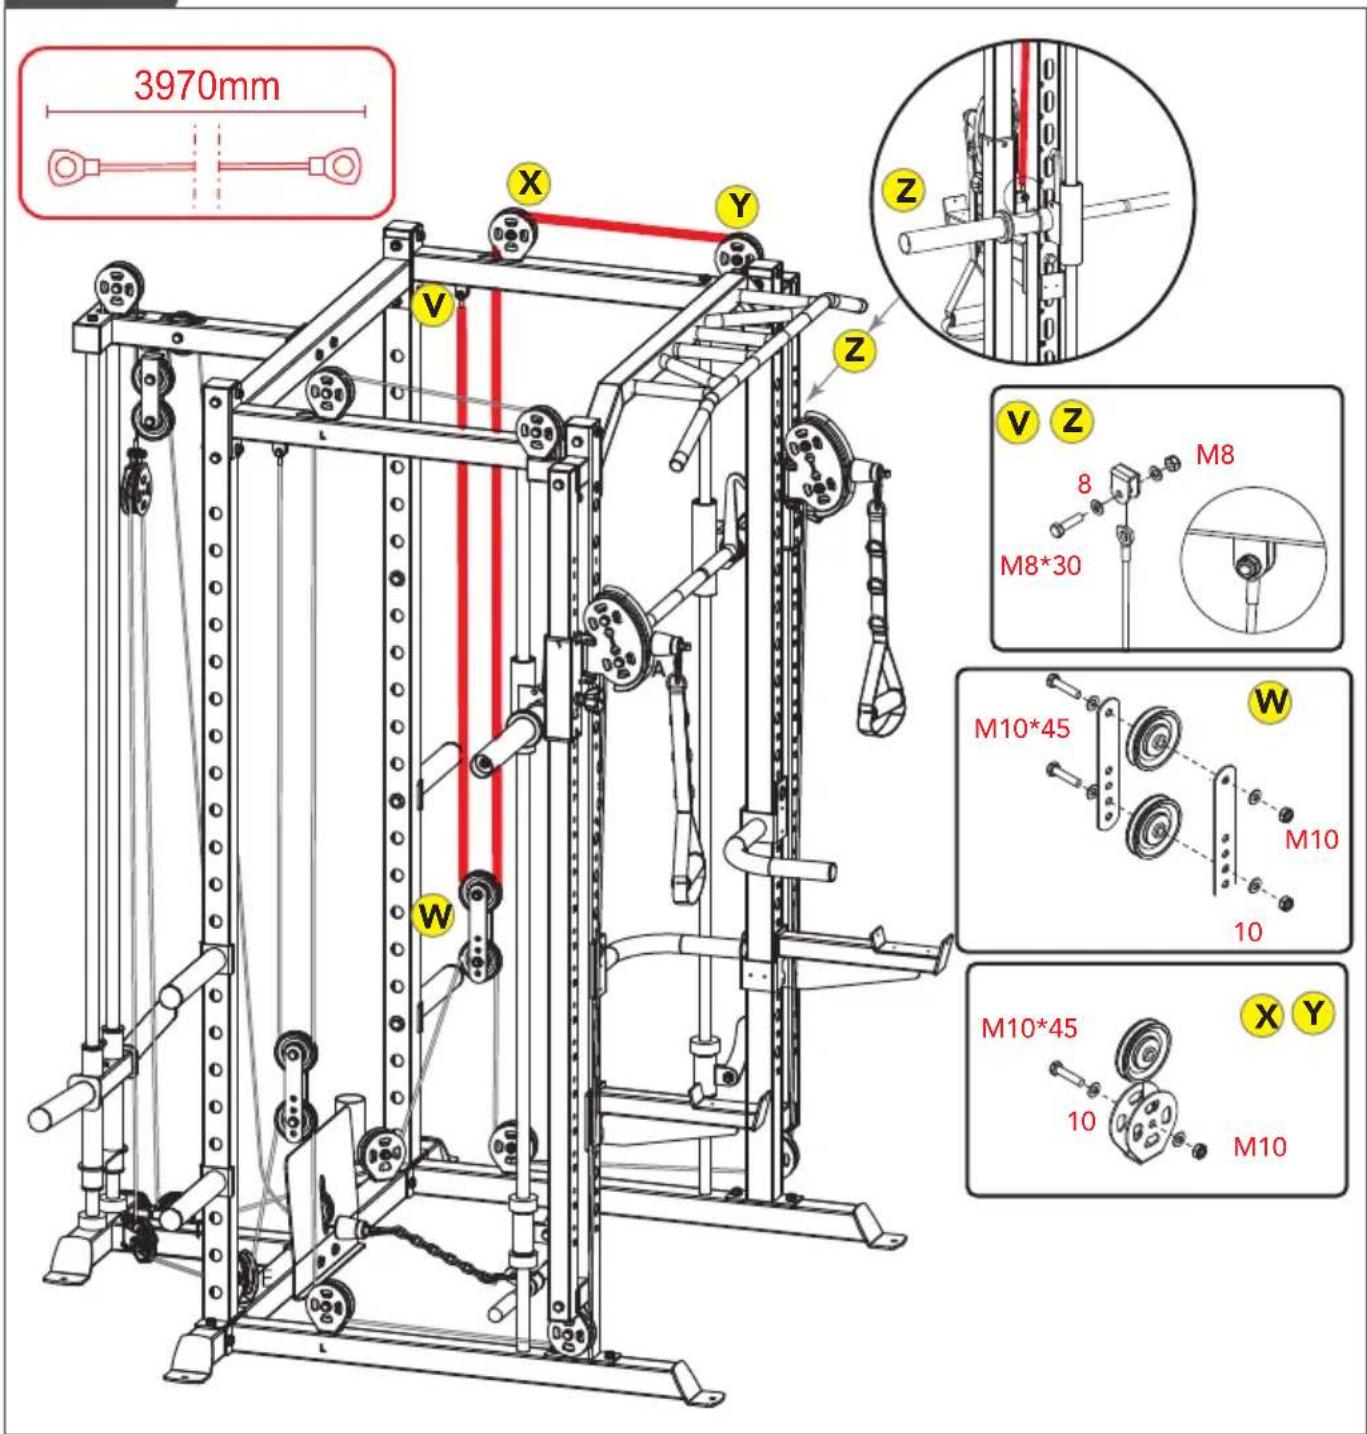
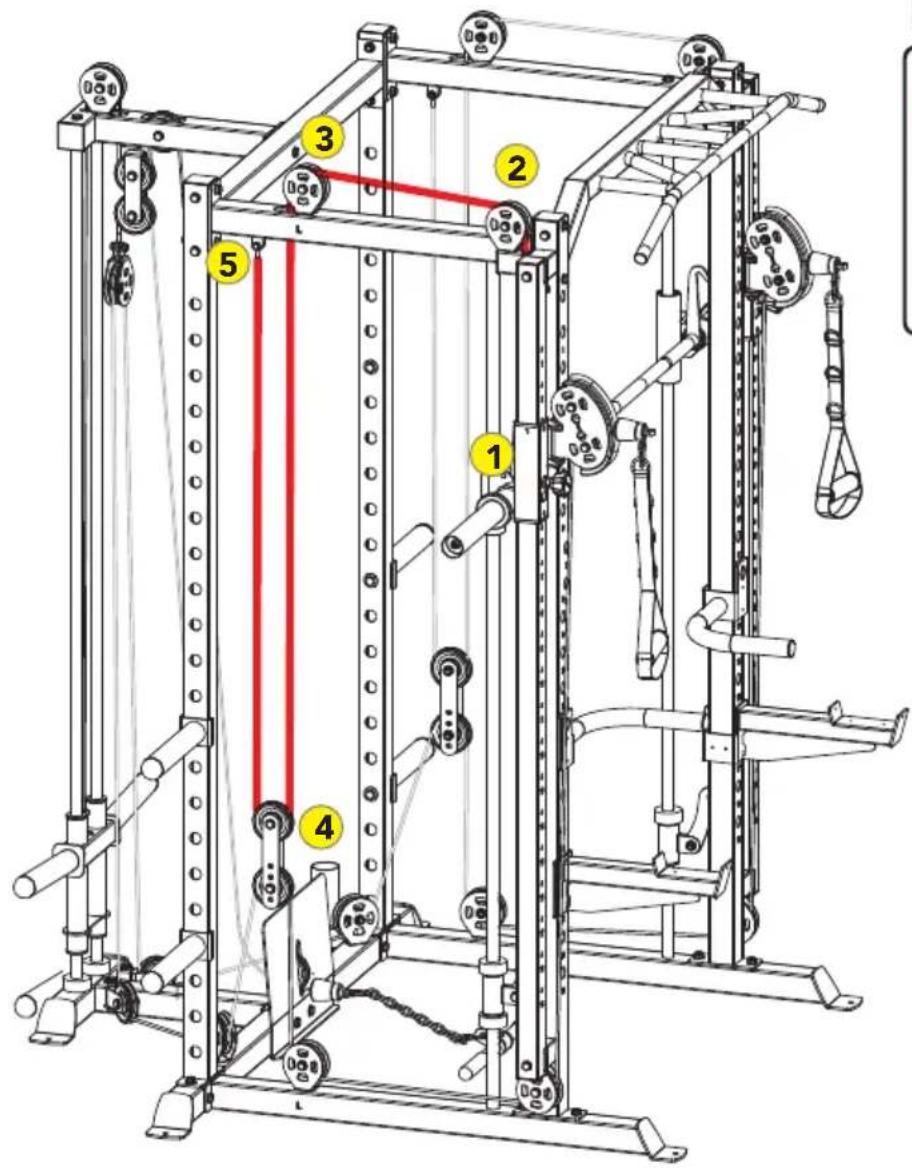
Description illustration D
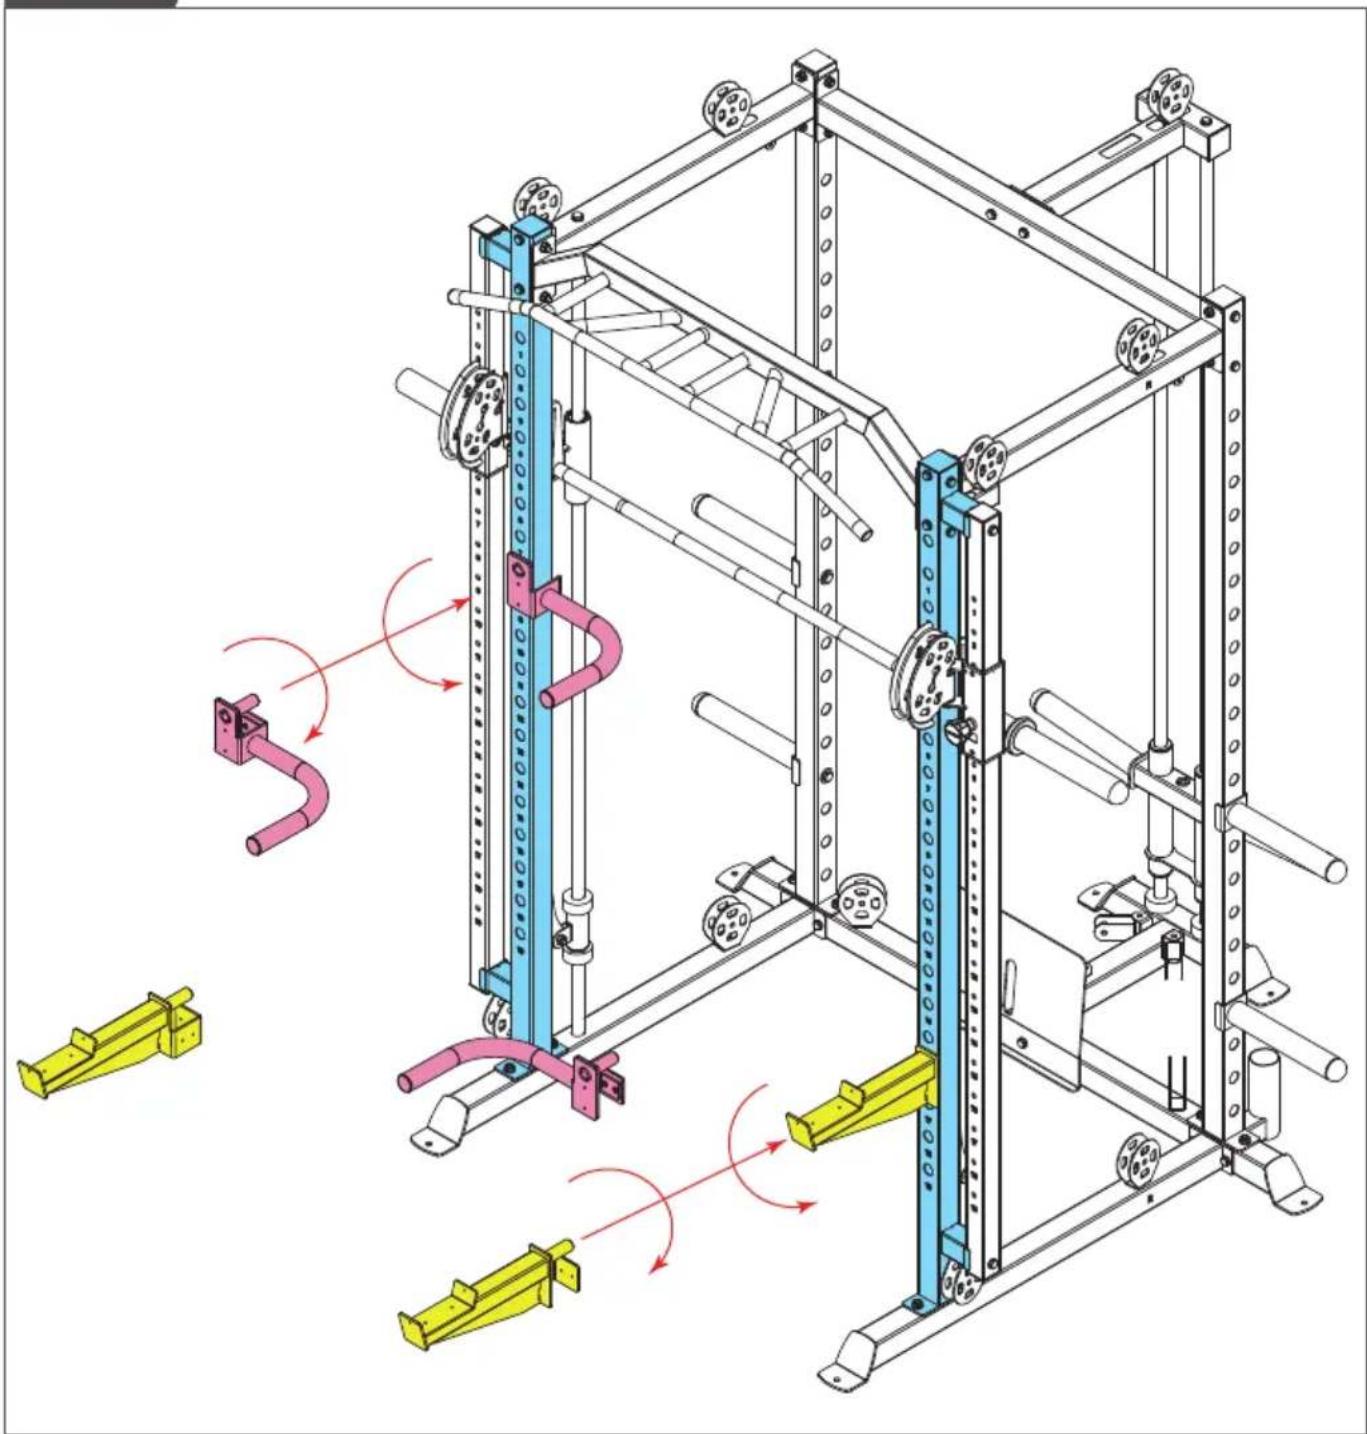
The illustrations show you in the correct following order how to assembly your trainer best.
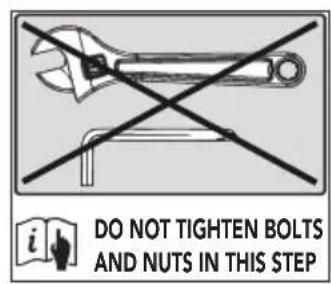
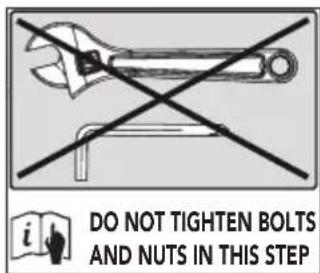
WARNING
- Assemble the equipment in the given order.
- Carry and move the equipment with at least two persons.
CAUTION
- Place the equipment on a firm, level surface.
- Place the equipment on a protective base to prevent damage to the floor surface.
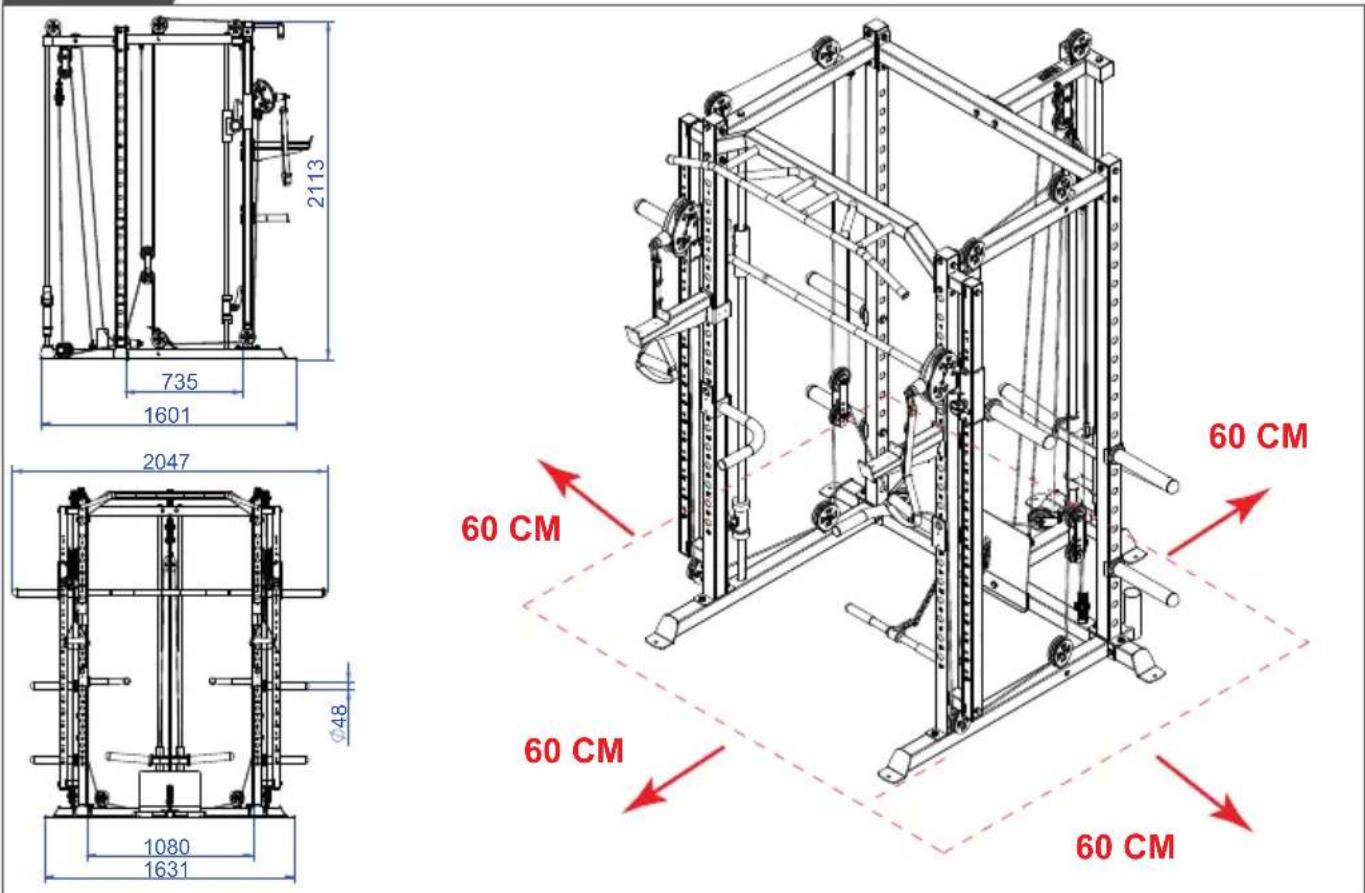
- Allow at least 60~cm of clearance around the equipment.
Refer to the illustrations for the correct assembly of the equipment.
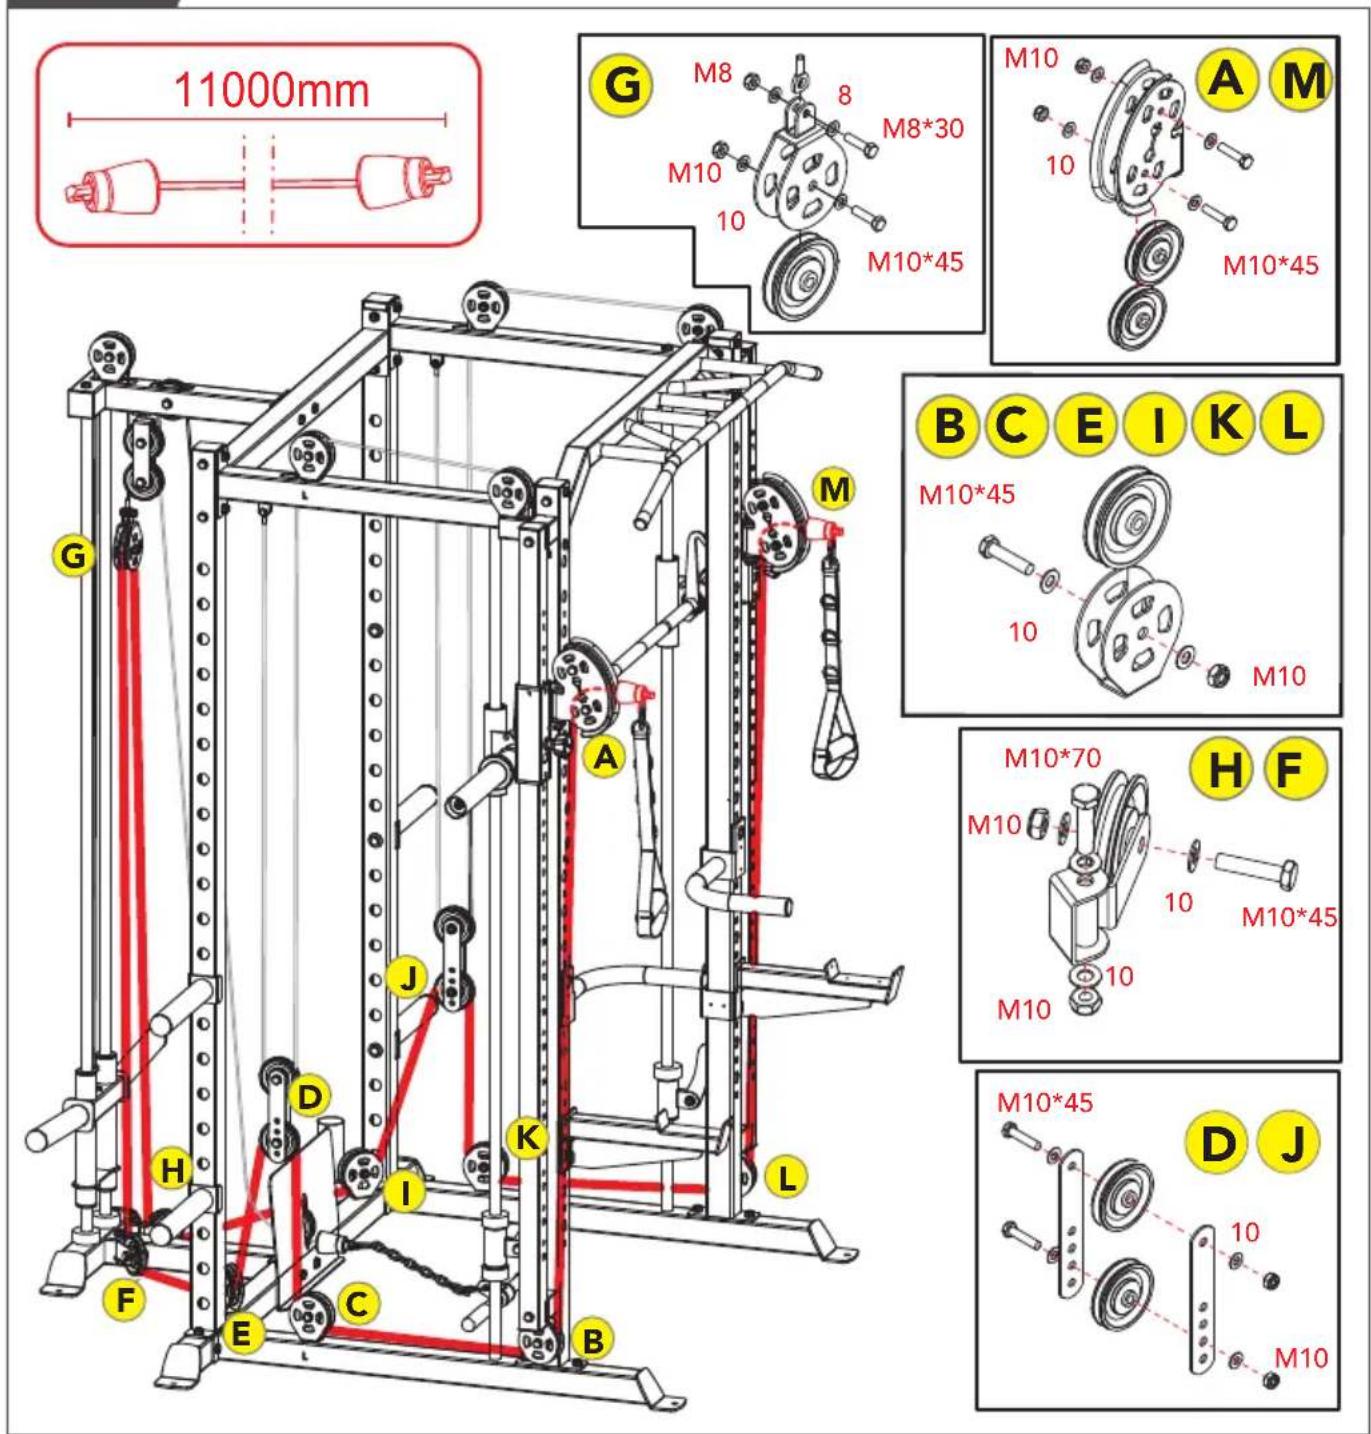
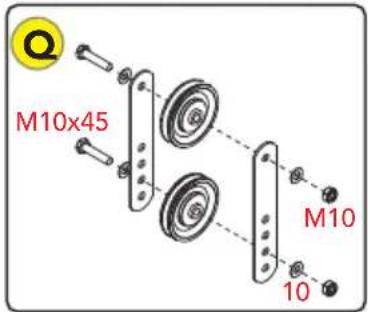
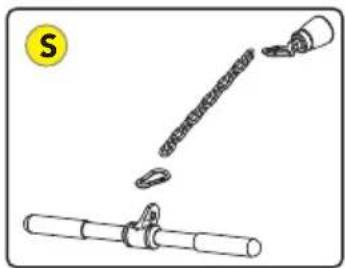
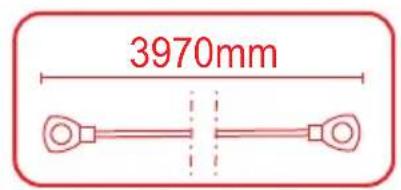
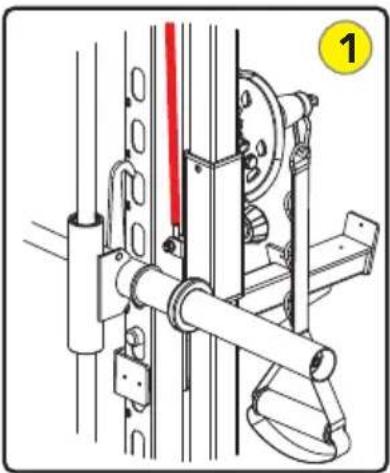
Cable installation
Before installing the cables it is important:
- To de-tangle the cables fully.
- To avoid the cable from twisting during transiting over the pulley wheels.
WARNING
- A twisted cable in the installation can result in separating the outer protective plastic coating from the inner steel cable.
- A twisted cable in the installation can result in the cables to entangle or stall malfunctioning of the weight plates return.
Fixing cable onto Selector Shaft (Fig.
D-11)
Before fixing the cable onto the selector shaft, all cables should be routed throughout the station first.
The locking nut must be turned up fully as well.
- Fit the threaded cable end into the selector shaft by turning it in clockwise direction as far as possible.
- Secure the fixation by turning the locking nut in clockwise direction firmly.
WARNING
- All cables with threaded adjustable ends must have at least 1/2'' of the treads threaded in to its counter part. It is very important that the jam nut be wrenched tightened to the counter part to ensure that the threaded adjustable end of the cable does not back out of its counterpart.
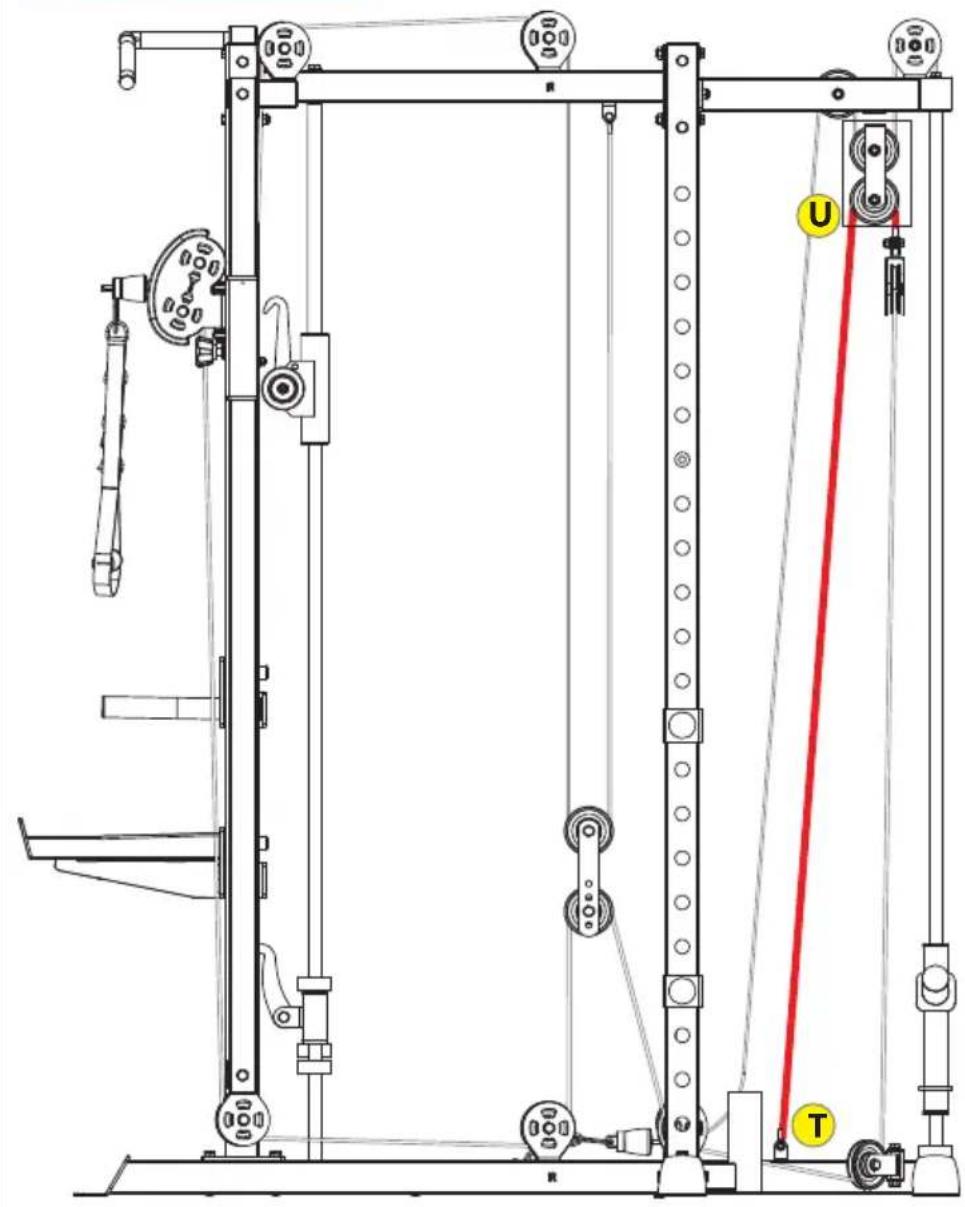
Correct cable tension
The correct cable tension is where the weight stack returns smoothly, keeping a loose cable tension when weight stack is in rest position.
There should be hardly a non tension moment when starting a workout using the weight stack as load.
NOTE
- When weight selector pin can not smoothly fix the required weight load because selector shaft is slightly lifted when selector pin is out, the cable tension should be loosened.
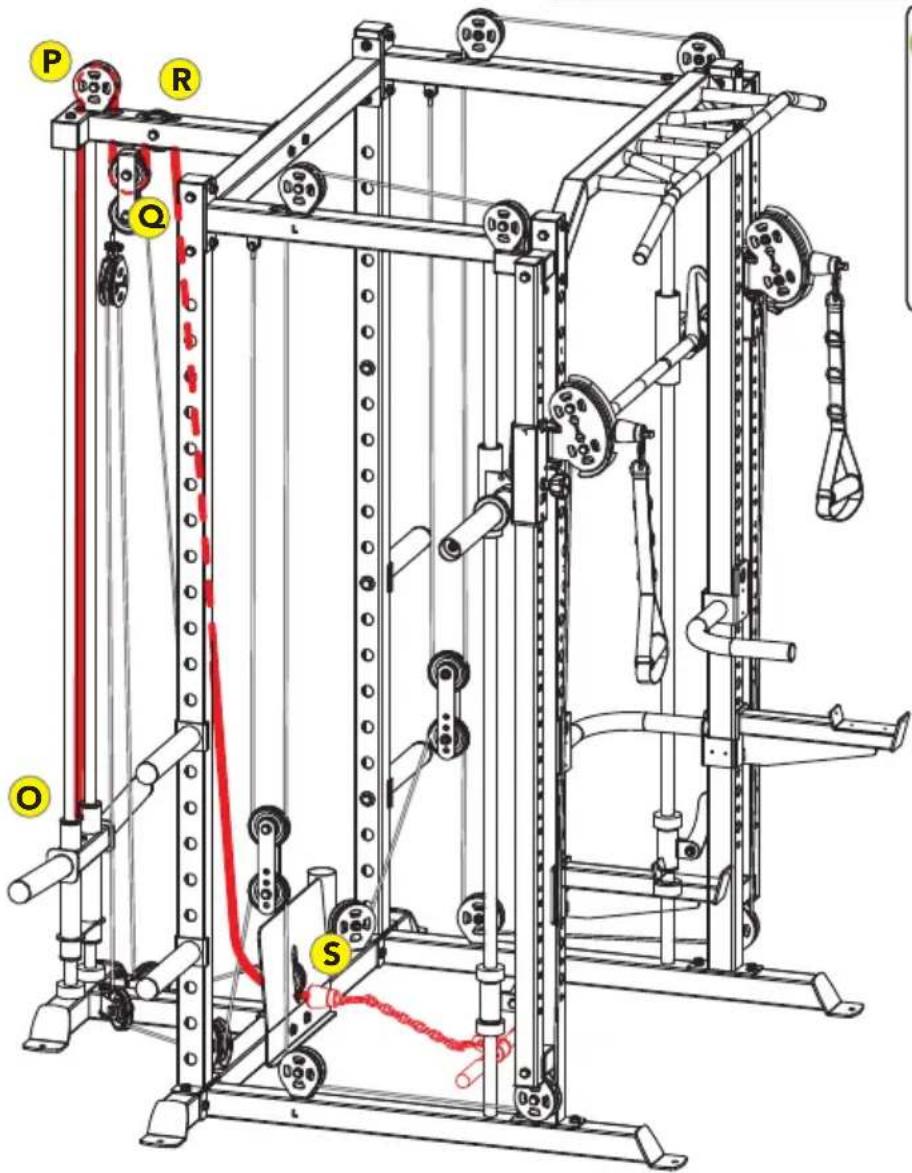
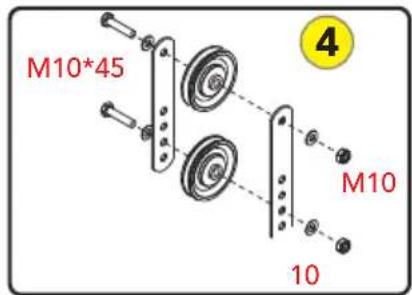
Cable Tension Adjustment
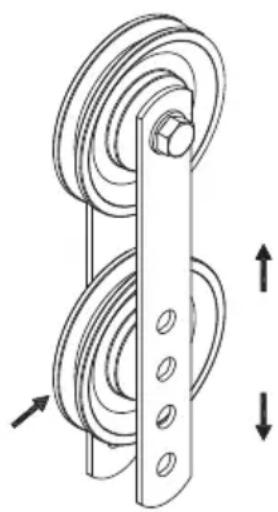
Adjust the tension of the Cable System by moving the position of lower Pulley on the two Double Floating Pulley Brackets.
If the tension is too loose, move the lower pulley up by one hole.
If the tension is too tight, move the lower pulley down by one hole
The correct cable tension is when:
- All weight plates are all correctly stacked on top of each other.
- The weight selector can easily lock and unlock all selectable weights.
- Cable stoppers do not hang too loosely in their starting position.
NOTE
- Due to normal wear of the cable it can stretch out slightly over time. Also the weight plate buffers can be compressed a little. Therefore readjusting the cable might be required after a period of use. This strongly depend on the usage, and total cable length.
Free area (Fig. D-0)
Adequate space is a prerequisite for use.
The free area should be no less than 0.6m greater than the training area in the directions from which the equipment is accessed.
The free area must also include the area for emergency dismount. Where equipment is positioned adjacent to each other, the value of the free area may be shared.
*Training area is the maximum length/width/height of the trainer, including moving parts, been measured to its maximum length/width/height during use.
IMPORTANT
Because your trainer will/ can set in the first using hours, we recommend you do a quick check on the hardware you have fitted during your assembly.
We suggest tightening all bolts and nuts once again after the first few workout sessions (approximate 10 hours).
Just to assure the bolts and nuts are still tightened well for your trainer's best performance.
NOTE
- We recommend checking the hardware regularly, at least once every 3 months.
Additional environmental information
Packaging disposal
Government guidelines ask that we reduce the amount of waste material disposed of in land fill sites. We therefore ask that you dispose of all packaging waste responsibly at public recycling centres.
End of life disposal
We at Tunturi hope you enjoy many years of enjoyable use from your fitness trainer. However, a Time will come when your fitness trainer will come to the end of its useful life. Under 'European WEEE Legislation you are responsible for the appropriate disposal of your fitness trainer to a recognised public collection facility.
Warranty
Tunturi purchaser's warranty
Warranty terms
The consumer is entitled to the applicable legal rights stated in the national legislation concerning the commerce of consumer goods. This warranty does not restrict these rights. The Purchaser's Warranty is only valid if the item is used in an environment approved by Tunturi New Fitness BV, and is maintained as instructed for that particular equipment. The product-specific approved environment and maintenance instructions are stated in the "user manual" of the product. The "user manual" can be downloaded from our website(http://manuals.tunturi.com
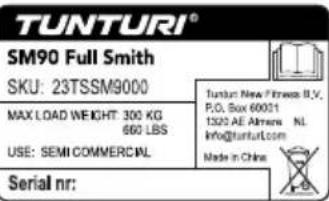
Weight capacity and dimension
(Fig. D-00)
- Maximum load weight: 300 kgs.
Assembled Dimension: 160.1 x 204.7x 211.3 cm.
Disclaimer
© 2023 Tunturi New Fitness BV
All rights reserved.
- The product and the manual are subject to change.
- Specifications can be changed without further notice.
- Check our website for the latest user manual version.

selection (fig. D-11)
© 2023 Tunturi New Fitness BV
Allarattigheterforbehalles.
/TunturiFitness Tunturi Fitness

Tunturi
Tunturi Service