PCS6-20ProS - Saw SCHEPPACH - Free user manual and instructions
Find the device manual for free PCS6-20ProS SCHEPPACH in PDF.


User questions about PCS6-20ProS SCHEPPACH
0 question about this device. Answer the ones you know or ask your own.
Ask a new question about this device
Download the instructions for your Saw in PDF format for free! Find your manual PCS6-20ProS - SCHEPPACH and take your electronic device back in hand. On this page are published all the documents necessary for the use of your device. PCS6-20ProS by SCHEPPACH.
USER MANUAL PCS6-20ProS SCHEPPACH
text_image
scheppachPCS6-20ProS

text_image
https://www.scheppach.com/de/service scheppach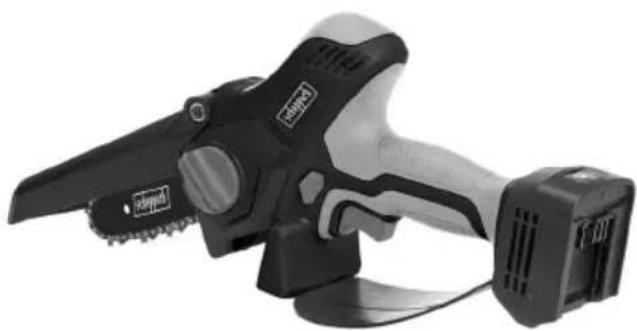
natural_image
Black and white industrial tool with chain cutting and a power adapter (no visible text or symbols)| DE | Akku-GehölzschneiderOriginalbedienungsanleitung | 6 |
| GB | Cordless pruning sawTranslation of original instruction manual | 30 |
| FR | Scie de jardin à batterieTraduction des instructions d'origine | 50 |
1
text_image
Technical diagram of a mechanical device with numbered parts for identification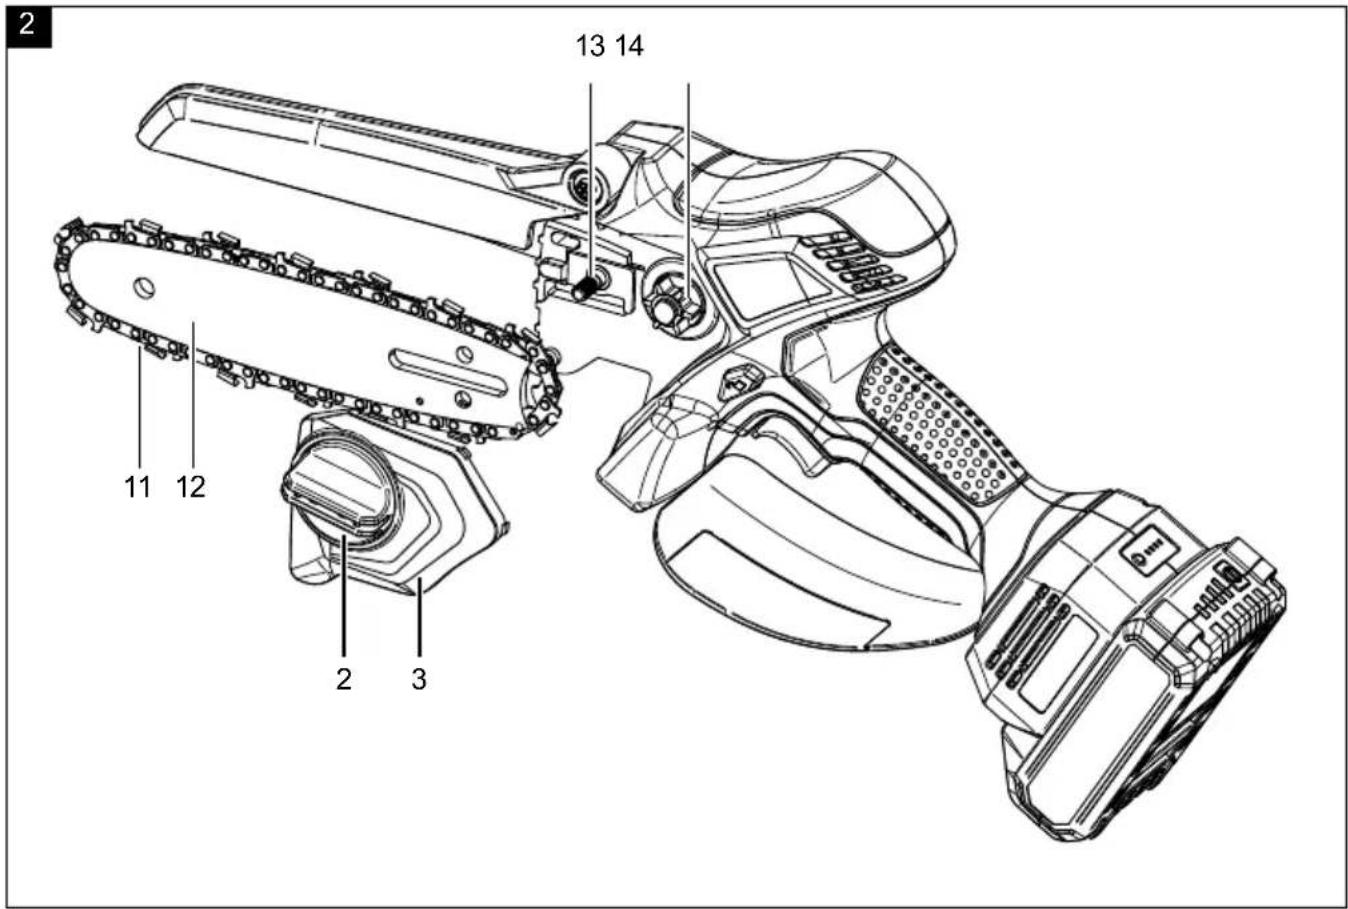
text_image
2 13 14 11 12 2 3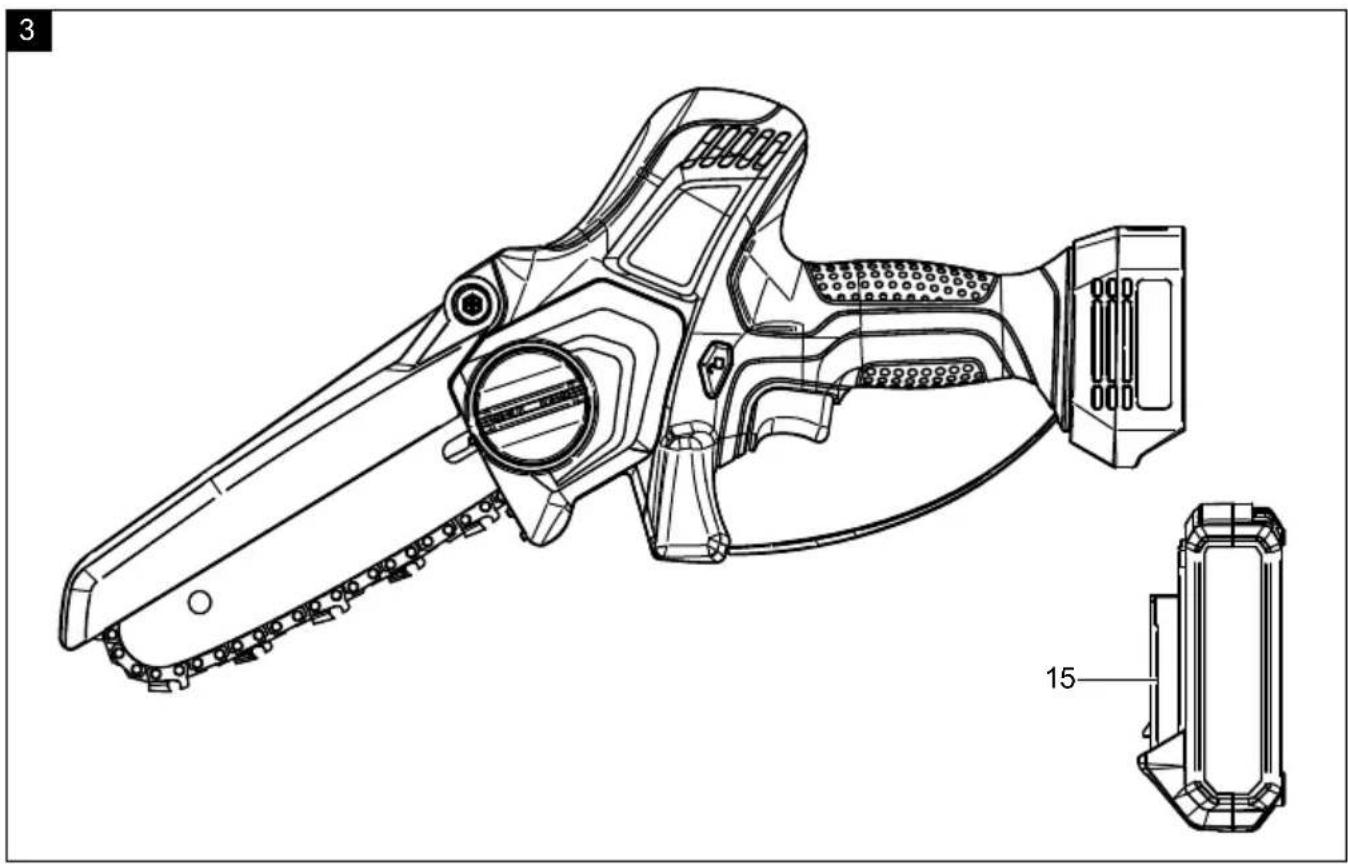
natural_image
Technical line drawing of a mechanical device with a separate 3D view showing internal components (no text or symbols)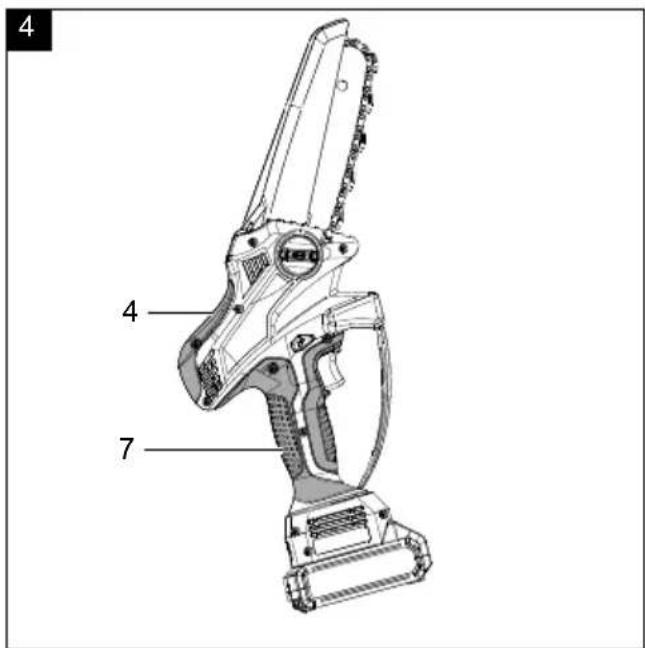
text_image
4 4 7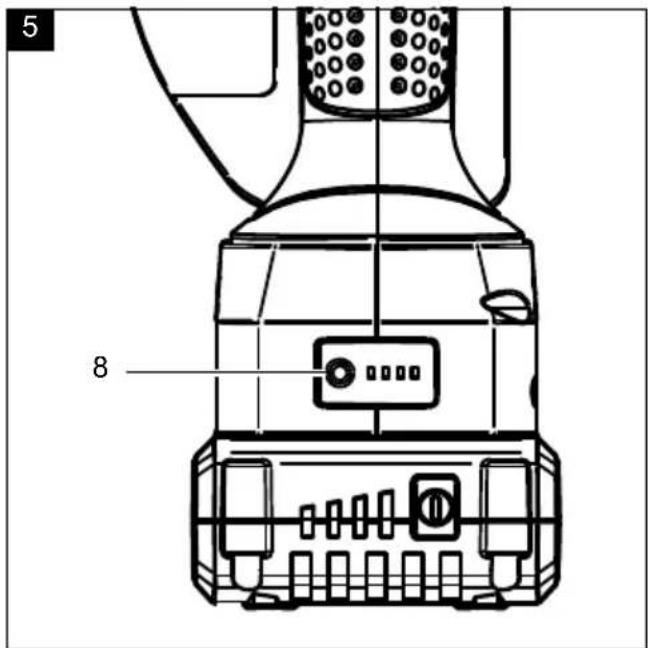
text_image
5 8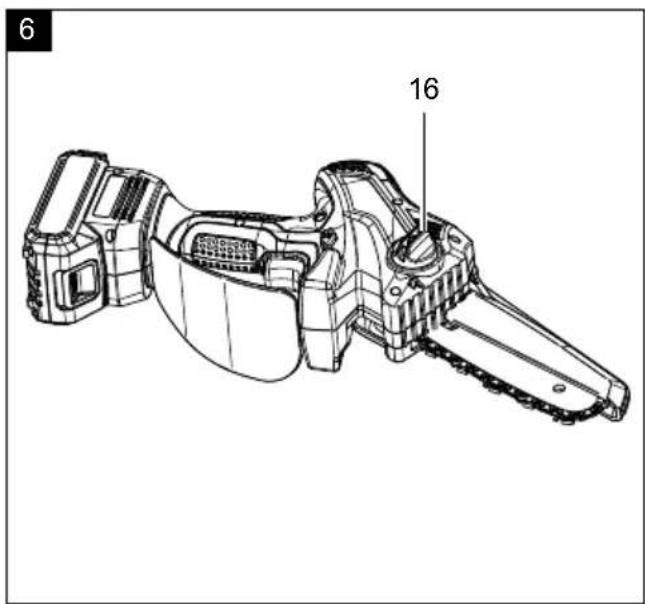
text_image
6 16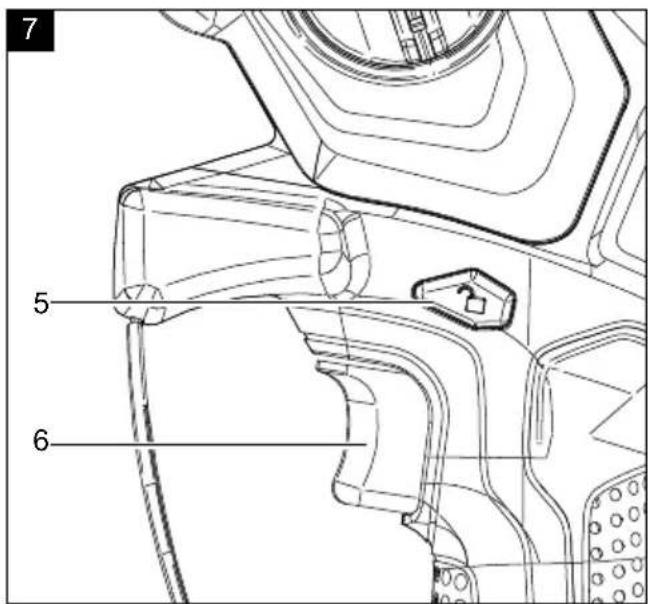
text_image
7 5 6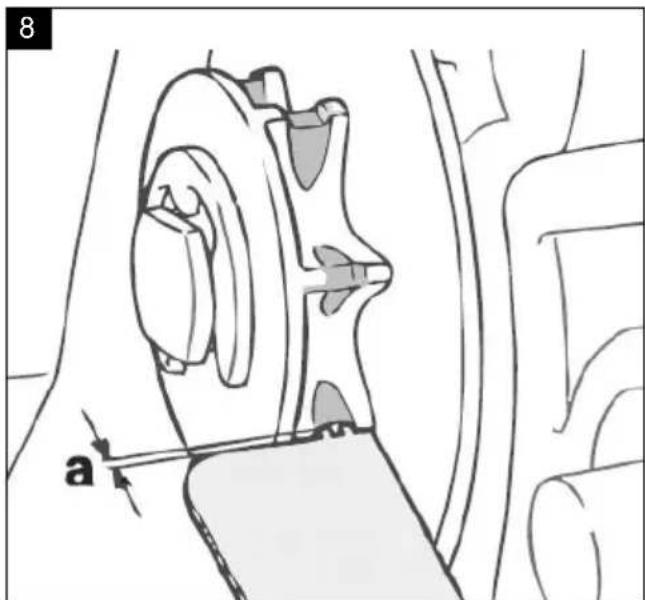
text_image
8 a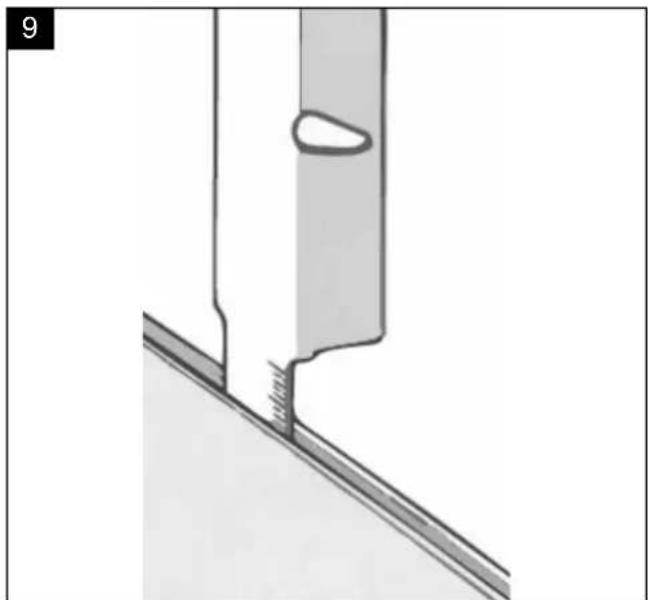
natural_image
Technical diagram showing a mechanical joint or bracket with a highlighted oval feature, no text or symbols present10
text_image
scheppach 17 18Günzburger Straße 69
D-89335 Ichenhausen
Verehrter Kunde
Homepage: https://www.scheppach.com/de/service
text_image
https://www.scheppach.com/de/service scheppachExplanation of the symbols on the product
Symbols are used in this manual to draw your attention to potential hazards. The safety symbols and the accompanying explanations must be fully understood. The warnings themselves will not rectify a hazard and cannot replace proper accident prevention measures.
 | Warning! Disregard of the safety instructions results in a risk of death or injury, or damage to the tool. |
 | Warning - Read the operating manual to reduce the risk of injury. |
 | Always wear safety goggles, hearing protection and a safety helmet. |
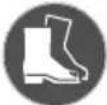 | Wear safety shoes. |
 | Always wear safety and anti-vibration gloves when using the product. |
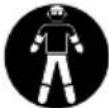 | It is important to wear protective clothing for feet, legs, hands and forearms. |
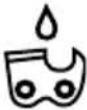 | Filling port for chain oil. |
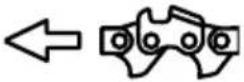 | Installation direction of the saw chain |
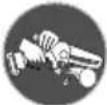 | Always hold the product firmly with both hands. |
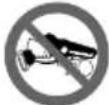 | Do not use the product one-handed. |
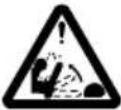 | Warning! Risk of kick-back. Beware of the kick-back of the cordless pruning saw and avoid making contact with the tip of the guide bar. |
 | Do not expose the machine to rain. The product may only be stationed, stored and operated in dry ambient conditions. |
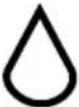 | Chain oil tank contents |
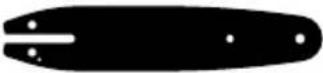 | Blade length |
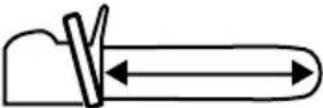 | Cutting length |
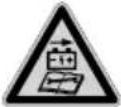 | Always remove the rechargeable battery pack from the electrical tool before performing maintenance and service work! |
 | Switch lock |
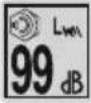 | Guaranteed sound power level of the product. |
 | Weight |
 | The product complies with the applicable European directives. |
| [CBBV] | We have marked points in this operating manual that impact your safety with this symbol. |
Table of contents: Page:
- Introduction....33
- Product description....33
- Scope of delivery 33
- Proper use 34
- General power tool safety warnings.... 34
- Technical data.... 39
- Unpacking....39
- Before start-up / assembly 40
- Operation....42
- Cleaning....44
- Storage & transport 44
- Maintenance 45
- Disposal and recycling....46
- Troubleshooting 48
- Approved cutting gear 49
- Compatible rechargeable batteries and charging units 49
1. Introduction
Manufacturer:
Scheppach GmbH
Günzburger Straße 69
D-89335 Ichenhausen
Dear Customer
We hope your new product brings you much enjoyment and success.
Note:
In accordance with the applicable product liability laws, the manufacturer of this product assumes no liability for damage to the product or caused by the product arising from:
- Improper handling
- Failure to comply with the operating manual,
• Repairs carried out by third parties, unauthorised specialists
• Installing and replacing non-original spare parts, - Improper use
- Failures of the electrical system in the event of the electrical regulations and VDE provisions 0100, DIN 57113 / VDE 0113 not being observed
Note:
Read the whole text of the operating manual before assembly and commissioning.
This operating manual should help you to familiarise yourself with your product and to use it for its intended purpose.
The operating manual includes important instructions for the safe, proper and economic operation of the product, for avoiding danger, for minimising repair costs and downtimes and for increasing the reliability and extending the service life of the product.
In addition to the safety instructions in this operating manual, you must also observe the regulations applicable to the operation of the product in your country.
Keep the operating manual package with the power tool at all times and store it in a plastic cover to protect it from dirt and moisture. They must be read and carefully observed by all operating personnel before starting the work.
The product may only be used by personnel who have been trained to use it and who have been instructed with respect to the associated hazards.
The required minimum age must be observed.
In addition to the safety instructions in this operating manual and the separate regulations of your country, the generally recognised technical rules relating to the operation of such machines must also be observed.
We accept no liability for accidents or damage that occur due to a failure to observe this manual and the safety instructions.
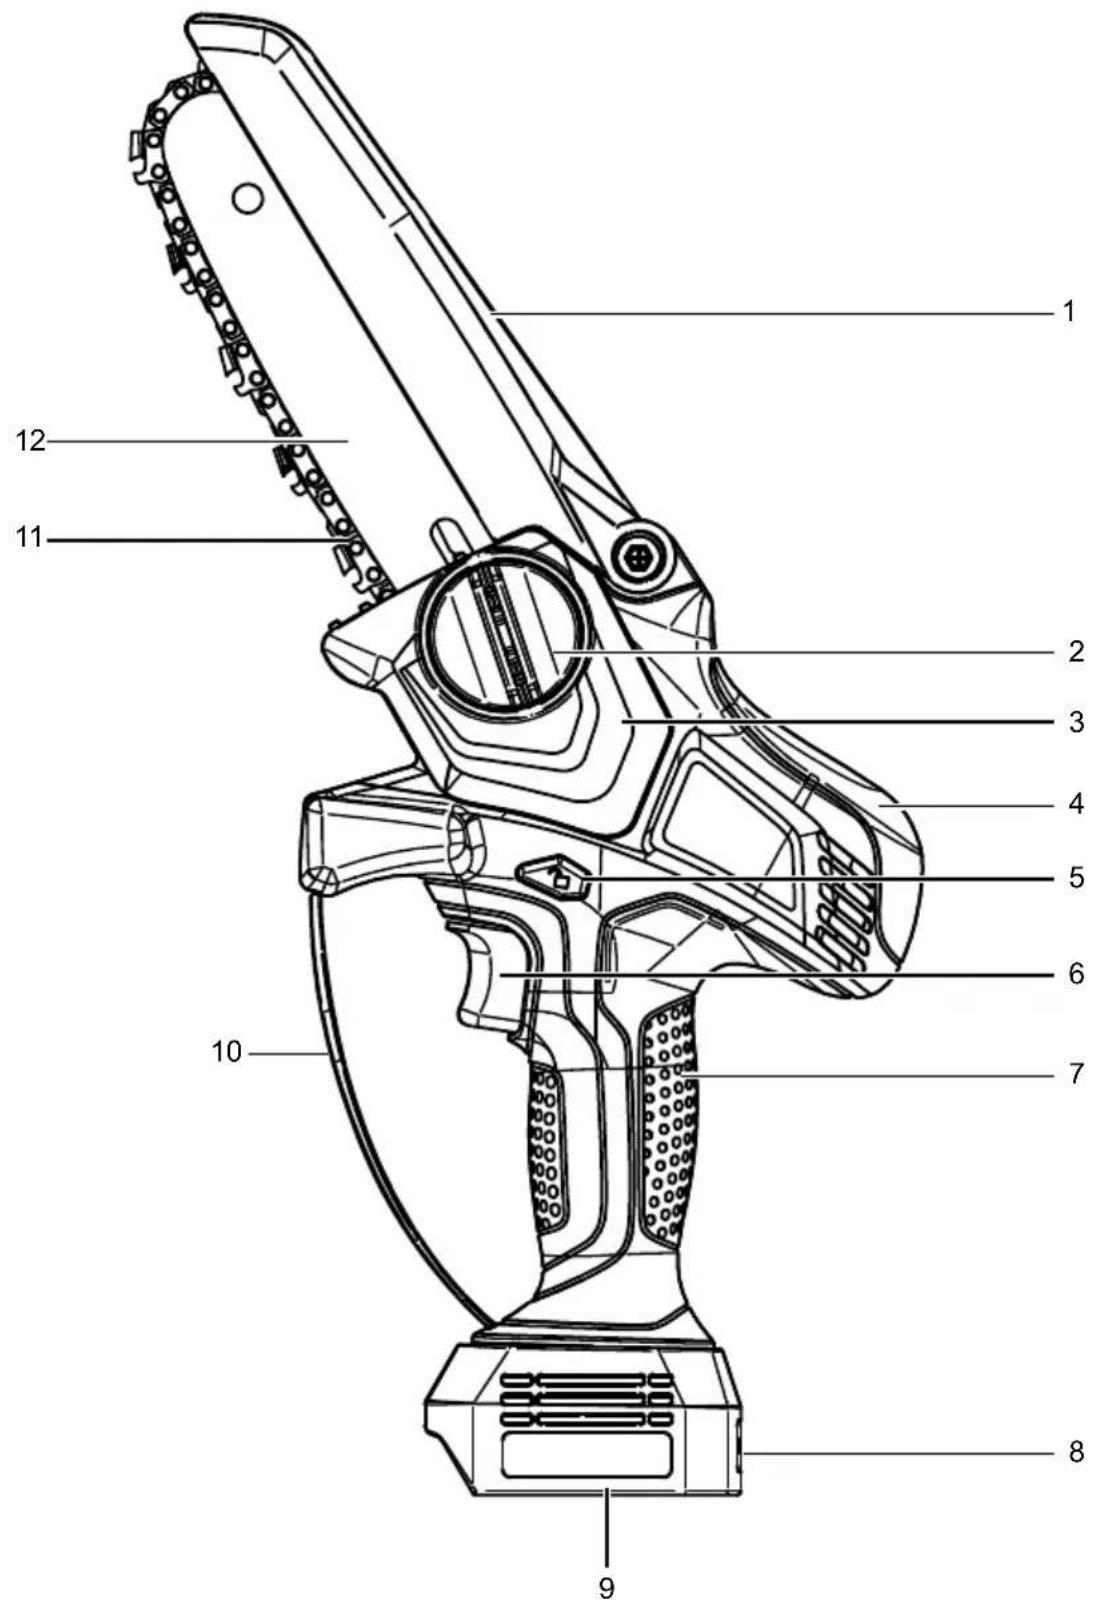
2. Product description (Fig. 1 - 10)
- Front hand guard
- Screw for chain tensioning system
- Chain cover
- Front handle
- Switch lock
- On/off switch
- Rear handle
- Main switch (incl. LEDs)
- Rechargeable battery mount
- Rear hand guard
- Saw chain
- Guide bar
- Spring tensioner
- Chain wheel
- Rechargeable battery
- Oil tank
- Transport case
- Guide bar and chain guard
3. Scope of delivery (Fig. 1 - 10)
- Rechargeable battery-powered cordless pruning saw
- Guide bar (pre-fitted)
- Saw chain (pre-fitted)
• Guide bar and chain guard (pre-fitted) - Transport case
- Rechargeable battery
- Charging unit
- Operating manual
ATTENTION!
Risk of damage to the cordless pruning saw and to the rechargeable battery!
If the cordless pruning saw is operated with an unsuitable rechargeable battery, this can cause damage to the product and the battery.
- Only operate the cordless pruning saw with a suitable rechargeable battery.
4. Proper use
The cordless pruning saw is only intended for sawing wood and branches that do not have a thicker diameter than the chain bar. This pruning saw is not suitable for felling trees. The product is not intended for any other type of application (e.g. cutting masonry, plastic, stone, metal or wood containing foreign objects such as nails or screws).
The machine may only be used in the intended manner. Any use beyond this is improper. The user/operator, not the manufacturer, is responsible for damages or injuries of any type resulting from this. An element of the intended use is also the observance of the safety instructions, as well as the assembly instructions and operating information in the operating manual.
Persons who operate and maintain the machine must be familiar with it and must be informed about potential dangers.
In addition, the applicable accident prevention regulations must be strictly observed.
Other general occupational health and safety-related rules and regulations must be observed. The liability of the manufacturer and resulting damages are excluded in the event of modifications of the machine. The machine may only be operated with original parts and original accessories from the manufacturer.
The safety, operating and maintenance specifications of the manufacturer, as well as the dimensions specified in the technical data, must be observed.
Please note that our products were not designed with the intention of use for commercial or industrial purposes. We assume no guarantee if the product is used in commercial or industrial applications, or for equivalent work.
The product is intended for use by adults. Children under the age of 16 may only use the product when supervised. The manufacturer is not liable for damage caused by improper use or incorrect operation.
Using the pruning saw for work other than that for which it is intended may result in serious injury to the user or other persons.
Any other use not expressly permitted in this operating manual may result in damage to the product and pose a serious danger to the user.
The cordless pruning saw must be held with the right hand on the handle and with the left hand on the gripping surface.
Before using the pruning saw, the user must have read and understood all the information and instructions in the instruction manual. The user must wear appropriate personal protective equipment (PPE).
5. General power tool safety warnings
⚠ WARNING - Read all safety information, instructions, illustrations and technical data for this electric tool. Failure to follow all instructions listed below may result in electric shock, fire and/or serious injury.
Save all warnings and instructions for future reference. The term “electric tool” used in the safety instructions refers to mains-powered electrical tools (with a mains cable) and battery-powered electrical tools (without a mains cable).
ATTENTION! A pruning saw is a dangerous product that can cause serious or even fatal injuries if used incorrectly or carelessly. Therefore, for your safety and the safety of others, always observe the following safety instructions and ask a specialist for advice if you are unsure.
Work area safety
a) Keep your work area clean and well-lit. Cluttered or dark areas invite accidents.
b) Do not operate power tools in explosive atmospheres, such as in the presence of flammable liquids, gases or dust. Power tools create sparks which may ignite the dust or fumes.
c) Keep children and bystanders away while operating a power tool. Distractions can cause you to lose control.
Electrical safety
a) The connection plug of the electric tool must fit into the socket. Never modify the plug in any way. Do not use any adapter plugs with earthed (grounded) power tools. Unmodified plugs and matching outlets will reduce risk of electric shock.
b) Avoid body contact with earthed surfaces, such as pipes, heaters, ovens and refrigerators. There is an increased risk of electric shock if your body is earthed or grounded.
c) Do not expose power tools to rain or wet conditions. Water entering a power tool will increase the risk of electric shock.
d) Do not abuse the cord. Never use the cord for carrying, pulling or unplugging the power tool. Keep cord away from heat, oil, sharp edges or moving parts. Damaged or entangled cords increase the risk of electric shock.
e) When operating a power tool outdoors, use an extension cord suitable for outdoor use. Use of a cord suitable for outdoor use reduces the risk of electric shock.
f) If operating a power tool in a damp location is unavoidable, use a residual current device (RCD) protected supply. Use of an RCD reduces the risk of electric shock.
Personal safety
a) Stay alert, watch what you are doing and use common sense when operating a power tool. Do not use a power tool while you are tired or under the influence of drugs, alcohol or medication. A moment of inattention while operating power tools may result in serious personal injury.
b) Use personal protective equipment. Always wear eye protection. Protective equipment such as a dust mask, non-skid safety shoes, hard hat or hearing protection used for appropriate conditions will reduce personal injuries.
c) Prevent unintentional starting. Ensure the switch is in the off-position before connecting to power source and/or battery pack, picking up or carrying the tool. Carrying power tools with your finger on the switch or energising power tools that have the switch on invites accidents.
d) Remove any adjusting key or wrench before turning the power tool on. A wrench or a key left attached to a rotating part of the power tool may result in personal injury.
e) Do not overreach. Keep proper footing and balance at all times. This enables better control of the power tool in unexpected situations.
f) Dress properly. Do not wear loose clothing or jewellery. Keep your hair and clothing away from moving parts. Loose clothes, jewellery or long hair can be caught in moving parts.
g) If devices are provided for the connection of dust extraction and collection facilities, ensure these are connected and properly used. Use of dust collection can reduce dust-related hazards.
h) Do not let familiarity gained from frequent use of tools allow you to become complacent and ignore tool safety principles. A careless action can cause severe injury within a fraction of a second.
Using and handling the electric tool
a) Do not force the power tool. Use the correct power tool for your application. The correct power tool will do the job better and safer at the rate for which it was designed.
b) Do not use the power tool if the switch does not turn it on and off. Any power tool that cannot be controlled with the switch is dangerous and must be repaired.
c) Disconnect the plug from the power source and/or remove the battery pack, if detachable, from the power tool before making any adjustments, changing accessories, or storing power tools. Such preventive safety measures reduce the risk of starting the power tool accidentally.
d) Store idle power tools out of the reach of children and do not allow persons unfamiliar with the power tool or these instructions to operate the power tool. Electric tools are dangerous if they are used by inexperienced people.
e) Maintain power tools and accessories. Check for misalignment or binding of moving parts, breakage of parts and any other condition that may affect the power tool's operation. If damaged, have the power tool repaired before use. Many accidents are caused by poorly maintained power tools.
f) Keep cutting tools sharp and clean. Properly maintained cutting tools with sharp cutting edges are less likely to bind and are easier to control.
g) Use electric tools, insertion tools, etc. according to these instructions. taking into account the working conditions and the work to be performed. Use of the power tool for operations different from those intended could result in a hazardous situation.
h) Keep handles and grasping surfaces dry, clean and free from oil and grease. Slippery handles and grasping surfaces do not allow for safe handling and control of the tool in unexpected situations.
Using and handling the rechargeable tool
a) Only charge the rechargeable batteries with charging units recommended by the manufacturer. A charging unit that is suitable for a particular type of rechargeable battery poses a fire hazard when used with other rechargeable batteries
b) Only use the rechargeable batteries in power tools that are designed for them. The use of other rechargeable batteries can lead to injuries and a risk of fire.
c) Keep the unused rechargeable battery away from paper clips, coins, keys, nails, screws or other small metal objects that could cause a short-circuit between the contacts. A short-circuit between the contacts of the rechargeable battery could result in burns or fires.
d) Liquid may leak from the rechargeable battery if used incorrectly. Avoid contact with it. In case of accidental contact, rinse with water. If the liquid gets into your eyes, seek additional medical attention. Leaking battery fluid may cause skin irritation or burns.
e) Do not use a damaged or modified rechargeable battery. Damaged or modified rechargeable batteries can behave unpredictably and cause fire, explosion or injury.
f) Do not expose a rechargeable battery to fire or excessive temperatures. Fire or temperatures above 130^ C may cause an explosion.
g) Follow all charging instructions and never charge the rechargeable battery or rechargeable tool outside the temperature range specified in the operating manual. Incorrect charging or charging outside the approved temperature range can destroy the battery and increase the risk of fire.
Service
-
Have your electric tool serviced by a qualified repair person using only identical replacement parts. This will ensure that the safety of the power tool is maintained.
-
Never attempt to service damaged rechargeable batteries. Any type of rechargeable battery maintenance shall be carried out only by the manufacturer or an authorised customer service centre.
Information on the rechargeable battery
- Please observe the operating manual for the rechargeable batteries.
Information on the charging unit and charging process
- Please observe the operating manual for the charging unit.
Warning! This power tool generates an electromagnetic field during operation. This field can impair active or passive medical implants under certain conditions. In order to prevent the risk of serious or deadly injuries, we recommend that persons with medical implants consult with their physician and the manufacturer of the medical implant prior to operating the power tool.
Special safety instructions for working with the pruning saw
General pruning saw safety warnings
a) Keep all body parts away from the saw chain when the saw is running. Before starting the pruning saw, ensure that the saw chain is not touching anything. When working with a pruning saw, a moment of carelessness can result in clothing or body parts being caught by the saw chain.
b) Always hold the pruning saw with your right hand on the rear handle and your left hand on the front handle. Holding the pruning saw using the opposite grip increases the risk of injuries and shall be avoided at all times.
c) Only hold the pruning saw by the insulated gripping surfaces, as the saw chain could hit hidden power lines. Contact between the saw chain and a live power line can also electrify metal device parts and lead to an electric shock.
d) Wear eye protection. Further protective equipment for hearing, head, hands, legs and feet is recommended. Suitable protective clothing reduces the risk of injury from flying chips and accidental contact with the saw chain.
e) Do not work with the pruning saw in a tree, on a ladder, or from a roof or an unstable standing surface. There is a serious risk of injury if operated in such a manner.
f) Always make sure you have a firm footing and only use the pruning saw when standing on firm, safe and level ground. Slippery ground or unstable standing surfaces can cause loss of balance or loss of control of the pruning saw.
g) When cutting a branch that is under tension, expect it to spring back. If the tension in the wood fibres is released, the tensioned branch can hit the operator and/or wrest the pruning saw from control.
h) Be especially careful when cutting under-growth and young trees. The thin material can get caught in the saw chain and hit you or throw you off balance.
i) Carry the pruning saw when switched off, with the saw chain facing away from your body. Always put the protective cover on when transporting or storing the pruning saw.
Careful handling of the chainsaw reduces the likelihood of accidental contact with the running pruning chain.
j) Follow the instructions for lubrication, chain tensioning and replacing the guide bar and chain. An improperly tensioned or lubricated chain can break or increase the risk of kick-back.
k) Only saw wood. Do not use the pruning saw for work for which it is not intended. Example: Do not use the pruning saw to saw metal, plastic, brickwork or building materials other than wood. Using the pruning saw for unintended work can cause dangerous situations.
I) This pruning saw is not suitable for felling trees. Using the pruning saw for work other than that for which it is intended may result in serious injury to the user or other persons.
m) Follow all instructions when clearing debris, storing or servicing the pruning saw. Make sure the switch is off and the battery is removed. Unexpected operation of the pruning saw while clearing a buildup of material or during maintenance can cause serious injury.
Causes and avoidance of kick-back:
- Kick-back can arise if the tip of the guide bar touches an object or if the wood bends and the saw chain jams in the cutting channel.
- Touching with the tip of the guide bar can sometimes lead to an unexpected backward reaction, whereby the guide bar whips up and in the direction of the operator.
- If the saw chain jams on the top edge of the guide bar, the guide bar can jerk back suddenly in the direction of the operator.
• Each of these reactions can lead to you losing control of the cordless pruning saw and possibly suffering a serious injury. Never rely solely on the safety equipment integrated in the cordless pruning saw. As the cordless pruning saw operator, you should implement various measures to work without a risk of accidents and injuries.
Kick-back is the result of incorrect or deficient use of the tool. It can be prevented by suitable precautionary measures, as described in the following:
a) Hold the cordless pruning saw firmly with both hands, with the thumbs and fingers enclosing the pruning saw hand grips. Bring your body and arms into a position in which you can absorb the kickback forces. If suitable measures are implemented, the operator will be able to withstand the kickback forces. Never let go of the cordless pruning saw.
b) Avoid an unusual body stance and never saw above shoulder height. This will help to avoid unintentional contact with the tip of the guide bar, and enable improved control of the cordless pruning saw in unexpected situations.
c) Always use replacement guide rails and chain-saws prescribed by the manufacturer. Incorrect replacement guide bars and saw chains may cause the saw chain to break and/or cause kick-back.
d) Adhere to the instructions of the manufacturer when sharpening and maintaining the saw chain. If the depth limiter is too low, this increases the tendency towards kickback.
Additional safety instructions
Additional safety instructions
a) Carefully follow the maintenance, inspection and service instructions in this operating manual. Damaged protective devices and parts must be repaired properly or replaced by our service centre unless otherwise specified in the operating manual.
b) We recommend that a person using the tool for the first time should at least practice by cutting logs on a sawhorse or stand.
c) Always stand above the tree trunk when sawing on slopes. In order to maintain full control at the moment of cutting all the way through, reduce the pressing force towards the end of the cut, without loosening your firm grip of the handles of the pruning saw. Ensure that the saw chain does not come into contact with the ground. After completing the cut, wait for the pruning saw to stop before removing the pruning saw. Always switch off the motor of the cordless pruning saw and remove the battery before moving from tree to tree.
d) Dirt, stones, loose bark, nails, staples and wire must be removed from the tree.
e) Do not use accessories that are not recommended by the manufacturer. This can lead to electric shock or fire.
Careful handling and use of rechargeable tools
- Only charge the rechargeable batteries in charging units recommended by the manufacturer. A charging unit that is suitable for a particular type of rechargeable battery poses a fire hazard when used with other rechargeable batteries.
- Only use the rechargeable batteries in power tools that are designed for them. The use of other rechargeable batteries can lead to injuries and a risk of fire.
- Keep the unused rechargeable battery away from paper clips, coins, keys, nails, screws or other small metal objects that could cause a short-circuit between the contacts. A short-circuit between the contacts of the rechargeable battery could result in burns or fires.
- Liquid may leak from the rechargeable battery if used incorrectly. Avoid contact with it. In case of accidental contact, rinse with water. If the liquid gets into your eyes, seek additional medical attention. Leaking battery fluid may cause skin irritation or burns.
- Make sure the device is switched off before inserting the rechargeable battery. Inserting a rechargeable battery into an electric tool that is switched on can cause accidents.
-
Only charge your batteries indoors because the charging unit is only intended for this purpose. Danger due to electric shock.
• To reduce the risk of electric shock, unplug the charging unit from the wall socket before cleaning. -
Do not expose the rechargeable battery to strong sunlight for a long time and do not place it on radiators. Heat damages the rechargeable battery and there is a risk of explosion.
- Allow a heated rechargeable battery to cool down before charging.
- Do not open the rechargeable battery and avoid mechanical damage to the rechargeable battery. There is a risk of short-circuiting and vapours may escape that irritate the respiratory tract. Make sure you get fresh air and seek additional medical help if you have any complaints.
- Do not use batteries that are not rechargeable. The device could be damaged.
- Be careful and keep other people and animals out of the work area and at least 2.5 meters away from the object.
Residual risks
The machine has been built according to the state-of-the-art and the recognised technical safety requirements. However, individual residual risks can arise during operation.
• Furthermore, despite all precautions having been met, some non-obvious residual risks may still remain.
- Residual risks can be minimised if the "Safety Instructions" and the "Intended Use" together with the operating manual as a whole are observed.
- Avoid accidental starting of the machine: the operating button may not be pressed when inserting the battery. Use the tool attachment that is recommended in this operating manual. This is how to ensure that your machine provides optimum performance.
- Keep your hands away from the working area when the machine is in operation.
The following hazards may arise in connection with the design and construction of this power tool:
- Cuts
- Hearing damage if suitable hearing protection is not worn.
- Damage to health resulting from hand/arm vibration if the device is used over an extended period of time or if it is not properly operated and maintained.
6. Technical data
Motor voltage 20 V DC
| Engine output 0.4 W | |
| Type of guide bar (pre-fitted) | ROYAL 6" CLQ4336 |
| Type of saw chain (pre-fitted) | ROYAL 6" DG06-36-43P |
| Tank for chain lubricating oil | ca. 30 cm3 (30 ml) |
| Max. cutting speed 6.8 m/s | |
| Max. cutting length 130 mm | |
| Chain pitch 1/4" | |
| Driving link thickness | 0.043"/1.09 mm |
| Chain wheel tooth pitch | 6 / 6.35 (1/4") |
| Weight unfuelled, without cutting gear approx. | 1.1 kg |
| Weight unfuelled, with battery approx. | 1.7 kg |
Technical changes reserved!
Noise and vibration
⚠ Warning: Noise can have serious effects on your health. If the machine noise exceeds 85 dB (A), please wear suitable hearing protection.
Noise data
| Sound power level L_WA | 99 dB(A) |
| Sound pressure level L_pA | 93 dB(A) |
| Uncertainty K_wa/pA | 3 dB(A) |
Vibration parameters
| Vibration a_h | 6 m/s ^2 |
| Uncertainty K_h | 1.5 m/s ^2 |
Information on the specified vibration emission value
Warning: The actual vibration emission value present during use of the machine may differ from the value given in the instruction manual or by the manufacturer.
To be accurate, an estimate of the load level should be made notoriously all work periods during actual use, e.g. the times when the tool is off, idle and not in use. In this way it is possible to significantly reduce the degree of stress throughout the entire working time.
When using this tool regularly, wear anti-vibration gloves and avoid working in ambient temperatures of 10^ C or less. Make a work schedule to spread the use of high vibration tools over several days.
Ensure as little vibration as possible of the tool via regular maintenance and stable parts on the device. Replace worn parts immediately.
The specified vibration emission value has been measured according to a standardised test procedure and can be used for comparison of one power tool with another.
It has been reported that vibration from hand-held power tools can contribute to a condition called Raynauds syndrome (white finger syndrome) in certain individuals. Raynaud's syndrome is a vascular disease that causes the small blood vessels on the fingers and toes to cramp in spasms. The affected areas are no longer supplied with sufficient blood and therefore appear extremely pale.
The frequent use of vibrating tools can cause nerve damage in people whose circulation is impaired (e.g. smokers, diabetics). If you notice unusual adverse effects, stop working immediately and seek medical advice. For long-term and regular users, it is therefore recommended to closely monitor the condition of your hands and fingers. Observe the following information to reduce hazards:
- Keep your body warm, especially your hands, especially in cool weather.
- Take regular breaks and move your hands to promote circulation.
- Limit the use of high vibration tools per day and spread them over several days Make a work schedule that limits vibration exposure.
- Ensure as little vibration as possible of the tool via regular maintenance and stable parts on the device. Replace worn parts immediately.
- Change your working position regularly.
7. Unpacking
- Open the packaging and carefully remove the product.
- Remove the packaging material, as well as the packaging and transport safety devices (if present).
- Check whether the scope of delivery is complete.
- Check the product and accessory parts for transport damage. In the event of complaints the carrier must be informed immediately. Later claims will not be recognised.
- If possible, keep the packaging until the expiry of the warranty period.
-
Familiarise yourself with the product by means of the operating manual before using for the first time.
-
With accessories as well as wearing parts and replacement parts use only original parts. Replacement parts can be obtained from your dealer.
- When ordering please provide our article number as well as type and year of manufacture for the product.
⚠ WARNING!
The device and the packaging material are not children's toys! Do not let children play with plastic bags, films or small parts! There is a danger of choking or suffocating!
8. Before start-up / assembly
⚠️ DANGER!
Danger of injury!
If an incompletely assembled cordless pruning saw is used, serious injuries can be caused.
- Do not use the cordless pruning saw until it has been fully assembled
- Before each use, carry out a visual inspection to check that the cordless pruning saw is complete and does not contain any damaged or worn components. Safety and protective devices must be intact.
CAUTION!
Danger of cuts!
The sharp edges of the saw chain can cause cuts during assembly.
- Remove the rechargeable battery before assembly.
- Always wear protective gloves when assembling.
Notes:
- The guide bar and the chain are already pre-fitted for packaging and transport reasons.
- A new saw chain (11) stretches and needs to be re-tensioned more often. Check and adjust the chain tension regularly after each cut (see 8.2).
- Only use saw chains and guide bars that are designed for this cordless pruning saw (see chapter 15).
8.1 Fitting the guide bar and saw chain (Fig. 2)
The guide bar and the saw chain are already pre-fitted. However, we recommend that you check the guide bar and the saw chain for tightness before using them for the first time and refit them if necessary.
- To do so, set the product down on a level surface.
- Turn the screw (2) for the chain tensioning system and the chain cover (3) anti-clockwise to remove the chain cover (3).
- First remove the pre-fitted guide bar (12) and the saw chain (11).
- Lay out the saw chain (11) in a loop so that the cutting edges are aligned clockwise. To align the saw chain (11), follow the symbols (arrows) on the saw chain or above the chain wheel (14).
- Place the saw chain (11) in the groove of the guide bar.
- For assembly, hold the guide bar (12) swivelled upwards at an angle of approx. 45 degrees to make it easier to feed the saw chain (11) into the groove of the guide bar.
- Insert the guide bar (12) and the saw chain (11) at the spring tensioner (13) and pull the saw chain (11) over the groove of the guide bar. When the saw chain (11) is released, it will be automatically tensioned.
- Fit the chain cover (3) back on.
- Turn the screw for the chain tensioning system (2) clockwise until hand tight.
- Check the seating of the saw chain (11) again and tighten the screw (2) for the chain tensioning system and the chain cover (3).
8.2 Tensioning the saw chain (Fig. 2)
CAUTION!
Risk of injury from the saw chain jumping off!
An insufficiently tensioned saw chain can come off during operation and cause injuries.
- Check the chain tension frequently.
- The chain tension is too low if the drive links come out of the groove on the underside of the guide bar.
- Adjust the tension of the saw chain properly if the chain tension is too low.
The cordless pruning saw is equipped with a quick-tensioning system for the chain. This means that the saw chain is automatically tensioned by the spring tensioner (13) fitted to the product. The saw chain runs around the edge of the (guide bar).
The chain tension and chain lubrication have a considerable influence on the service life of the saw chain.
CAUTION:
- A new saw chain tends to loosen for a certain time after installation. Therefore, check the saw chain tension from time to time before use.
- The tensioning of the saw chain should be carried out in a clean place free from sawdust and the like.
- Correct tensioning of the saw chain is for the safety of the user and reduces or prevents wear and chain damage.
- We recommend that the user check the chain tension before starting work for the first time. The saw chain is correctly tensioned when it does not sag on the underside of the guide bar and can be pulled all the way round with a gloved hand
- If the saw chain (11) sags or the spring tensioner (13) is defective, contact a specialist workshop.
ATTENTION! When working with the saw, the saw chain heats up and expands slightly as a result. This "stretching" is to be expected especially with new saw chains.
8.3 Fill in chain oil (Fig. 6)
ATTENTION!
Product damage!
If the product is operated without oil, with too little oil or with used oil, this can lead to product damage. And the cutting performance and the lifetime of the saw chain will decrease, as the chain becomes blunt more quickly.
- Fill with oil before start-up. The product is delivered without oil.
- Do not use used oil!
- Refill the tank with saw-chain oil at the latest every time you change the rechargeable battery.
- You can also see that there is too little oil by smoke being produced or by the guide bar discolouring.
NOTE!
Environmental damage!
Spilled oil can pollute the environment permanently.
The liquid is highly toxic and can quickly lead to water pollution.
- Fill/empty oil only on level, paved surfaces.
- Use a filling nozzle or funnel.
- Collect drained oil in a suitable container.
- Immediately wipe up any spilled oil carefully and dispose it according to local regulations.
- Dispose of oil as per local regulations.
The chain lubrication has a considerable influence on the service life of the saw chain. The saw chain will be lubricated automatically while the machine is running. To lubricate the saw chain sufficiently, there must always be enough saw chain oil in the tank. Check the amount of oil remaining in the oil tank at regular intervals.
Notes:
- When you fill the cordless pruning saw with oil for the first time or fill the completely empty oil tank, fill oil up to the lower edge of the filler neck. Otherwise, the oil supply may be impaired.
- Use only pruning saw oil or bio chain oil available on the market.
- Never use oil containing dust and foreign bodies or highly volatile oil.
-
Use botanical oil for pruning trees. Mineral oil can damage trees.
• Make sure the oil tank cap is in place before cutting. -
To top up bio chain oil, place the product on a flat surface
- Open the oil tank (16). To do this, unscrew the oil tank cap (16) anti-clockwise.
- Use a suitable funnel or filler pipe for refilling so that no oil can leak onto the housing or floor. Note the max. filling capacity of 30 cm^3 (30 ml).
- Then close the oil tank cap (16) again.
- Wipe up any spilled oil carefully immediately and dispose of the cloth according to local regulations.
- To check the saw chain lubrication, hold the pruning saw with the saw chain over a piece of paper and give a few seconds of full throttle. You can see on the paper whether the chain lubrication is working.
8.4 Inserting/removing the rechargeable battery (Fig. 3)
ATTENTION!
Product damage!
If you do not hold the machine and rechargeable battery securely, they may slip out of your hand, resulting in damage to the machine, battery and personal injury.
- Hold the machine and rechargeable battery securely when attaching or removing the battery.
-
To remove the rechargeable battery (15), pull it off the machine while pressing the release button on the front of the battery.
-
To attach the rechargeable battery (15), align its guide spring with the groove in the housing and slide the battery in. Push it in completely until it clicks into place.
CAUTION:
- Always slide the rechargeable battery in all the way to the stop. Otherwise it may fall out of the machine and injure you or bystanders.
- Do not use force when attaching the rechargeable battery. If the rechargeable battery does not slide in smoothly, it is not aligned correctly.
Lithium-ion batteries are equipped with a protection system. This system automatically disconnects the tool from the power supply to extend the service of life of the battery. The product will automatically stop during operation if the product and/or rechargeable battery are subjected to any of the following conditions:
- Overloaded: The product is operated in such a way that it draws an abnormally high current. In this case, release the ON/OFF switch on the product and stop the work that has overloaded the tool. To restart, press the on/off switch again. If the product does not start, the rechargeable battery has overheated. In this case, let the battery cool down, before trying to start the device again.
- Low battery voltageThe remaining rechargeable battery capacity is too low and the product does not work. In this case, remove the battery and charge it.
8.5 Charge status display on the main switch (Fig. 5)
The charge level of the rechargeable battery is indicated during operation by the corresponding LED lights of the charge level indicator on the main switch (8) lighting up.
4 LEDs illuminate:
Rechargeable battery fully charged
3 LEDs illuminate:
Rechargeable battery partially charged
1 LED illuminates:
Rechargeable battery must be charged
9. Operation
ATTENTION!
Before starting up the product ensure that it is fully assembled and that the rechargeable battery has been inserted!
⚠️ DANGER!
Risk to life and risk of severe injuries.
Ignorance of the safety instructions and operating instructions can lead to serious injuries and even death.
- Read and observe all safety instructions and operating instructions in this operating manual before using the cordless pruning saw.
- Put on the supplied guide bar and chain guard after each instance of working with the cordless pruning saw.
9.1 General
Observe noise protection and local regulations when working with the product. Local regulations may require a suitability test. Check with the forestry administration.
- Dirt, stones, loose bark, nails, staples and wire must be removed from the tree.
• Always stand above the branch when sawing on slopes.
- In order to maintain full control at the moment of cutting all the way through, reduce the pressing force towards the end of the cut, without loosening your firm grip of the handles of the pruning saw. Ensure that the saw chain does not come into contact with the ground. After completing the cut, wait for the pruning saw to stop before removing the pruning saw.
• Always switch off the pruning saw's motor before moving from one work site to the next.
- You have better control when you saw with the underside of the bar (with a pulling chain).
- The saw chain must not touch the ground or any other object during or after sawing.
- Ensure that the saw chain does not become jammed in the saw cut. The branch must not break or splinter.
- Also observe the precautions against kick-back (see safety instructions).
• Always stand above the branch when sawing on slopes. Ensure that the saw chain does not come into contact with the ground. After completing the cut, wait for the saw chain to stop before removing the pruning saw.
⚠ Danger!
Danger of injury
If the saw chain is jammed, do not try to pull the product out by using force.
- Switch off the motor.
- Use a lever arm or wedge to get the product free.
9.2 Hold and guide the device (fig. 4)
CAUTION!
The device may only be guided and operated with both hands!
- Hold the rear handle (7) with your right hand and the front handle (4) with your left hand.
9.3 Switching the motor on and off (Fig. 1 + 5 + 7) △ CAUTION!
Danger of hearing damage!
Operating the cordless pruning saw generates a lot of noise which can cause hearing damage.
- Wear hearing protection when working with the cordless pruning saw.
Switch the motor on:
-
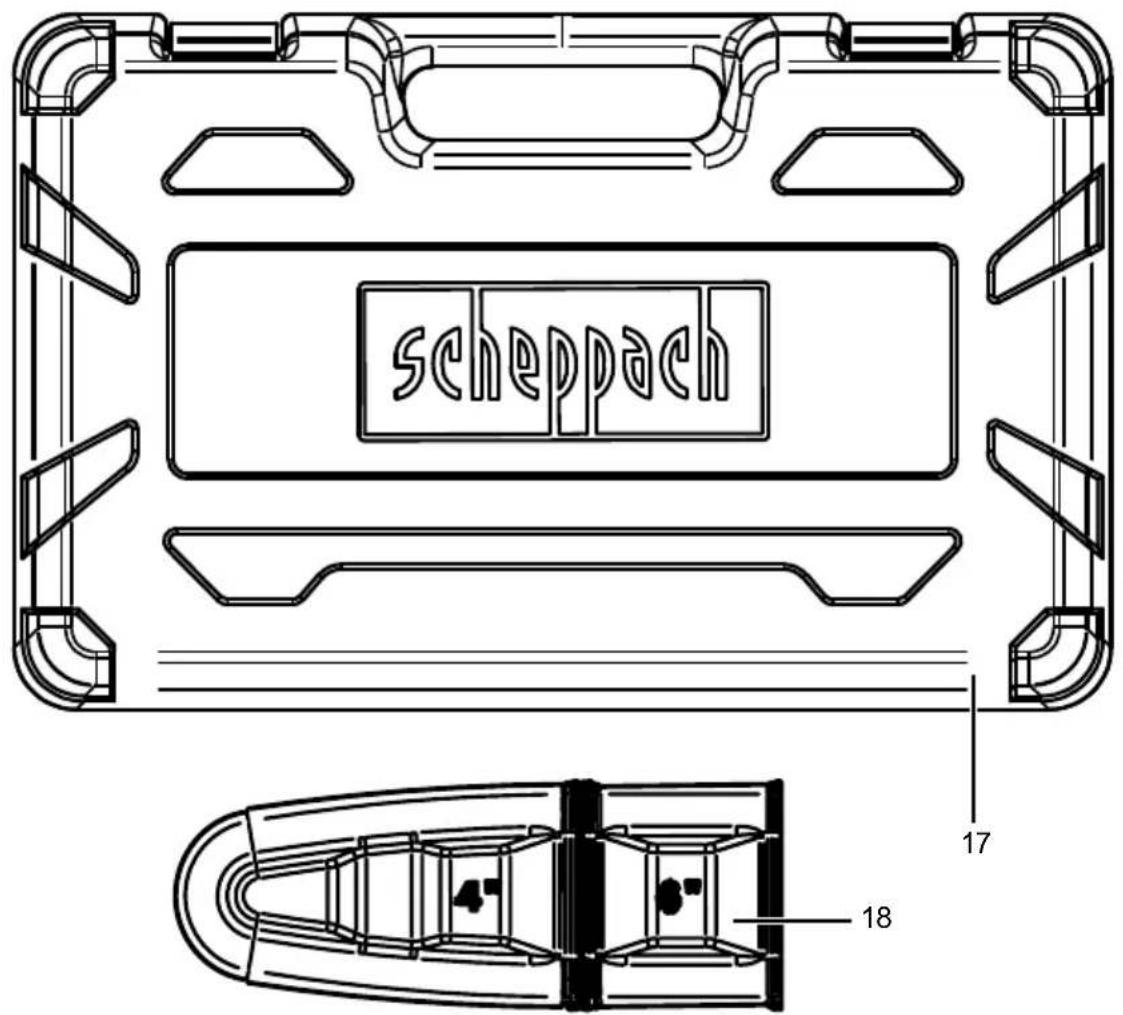
Remove the supplied guide bar and chain guard (18) before each instance of working with the cordless pruning saw.
-
Press the main switch (8) until the LEDs light up.
-
Press the switch lock (5) with your thumb and keep it pressed.
-
Press the ON/OFF switch (6) and keep it depressed.
-
Release the switch lock (5). It is not necessary to keep the switch lock (5) pressed after starting the cordless pruning saw. The switch lock is intended to prevent accidental starting of the cordless pruning saw.
Switch the motor off:
-
Release the on/off switch (6). The product switches off immediately.
-
Put on the supplied guide bar and chain guard (18) after each instance of working with the cordless pruning saw.
9.4 Overload protection
The cordless pruning saw is equipped with an overload protection that switches off in the event of an overload. After a short cooling phase, the cordless pruning saw can be switched on again
9.5 Hand guard
The front hand guard (1) and the rear hand guard (10) protect the fingers from injuries caused by contact with the saw chain if it breaks due to overloading. The rear hand guard (10) also protects the hand from branches and twigs.
Before each start-up, check the functionality of the front handle guard (1). Keep the hand guard clean to ensure proper functioning.
9.6 Sawing techniques
9.6.1 Sawing on a sawhorse:
-
Hold the product firmly with both hands and guide the machine in front of your body while sawing.
-
When cutting the wood, guide the machine past the body on the right. Watch out for the falling wood.
-
Position yourself so that the severed branch does not pose a hazard.
-
Pay attention to your feet. The cut wood could cause injuries if it falls. Keep your balance.
9.6.2 Delimbing
Delimbing is the term for removing branches and twigs from a tree.
⚠ WARNING!
Danger of injury!
Many accidents happen during delimbing. Guide the cordless pruning saw such that no part of your body is within the extended pivot range of the saw chain.
- Whenever working, the cordless pruning saw must be held firmly with both hands, this is the only way to guide it safely at all times.
- Do not lean too far forward during operation.
- Always ensure you have a secure footing when working.
- Never saw off branches when standing on the tree trunk. Keep an eye on the kick-back area if branches are tensioned.
- Remove supporting branches only after cutting to length.
- Tensioned branches must be sawn from the bottom upwards to prevent the product from jamming.
- When sawing off thicker branches, use the same technique as for cutting to length.
- Work to the left of the trunk and as close as possible to the device. If possible, let the weight of the product rest on the trunk.
- Change your position to cut branches on the other side of the trunk.
- Branched boughs are cut to length individually.
- When delimbing, leave larger downward branches that support the tree for the time being. Separate smaller branches with one cut.
10. Cleaning
⚠ WARNING!
Clean the product regularly after each use, depending on the conditions of use. Failure to clean the product regularly may affect the performance of the product and damage it in the long run.
⚠ WARNING!
Danger of injury!
The product can start unexpectedly and cause injuries.
- Switch off the motor before carrying out any cleaning or maintenance work.
- Remove the rechargeable battery.
NOTE!
Risk of damage!
Failure to clean the product regularly may affect the performance of the product and damage it in the long run.
- Clean the product with a cloth or a hand brush, etc.
- Do not immerse the product in water or other liquids and do not spray it with a high-pressure cleaner.
⚠ WARNING!
Danger of injury!
Use cut-resistant gloves when handling the saw chain or guide bar.
- Keep protective devices, air vents and the motor housing as free of dust and dirt as possible. Rub the product clean with a clean cloth or blow it off with compressed air at low pressure.
• We recommend that you clean the product directly after every use. -
Clean the product at regular intervals using a damp cloth and a little soft soap. Do not use any cleaning products or solvents; they could attack the plastic parts of the product. Make sure that no water can penetrate the device interior. Water penetrating the product increases the risk of an electric shock.
-
Keep the handles free of petrol, oil or grease. If necessary, clean the handles with a damp cloth washed in soapy water.
Do not use solvents or petrol for cleaning!
- Clean the saw chain after each use. Use a brush for this. Do not use liquids for cleaning the chain.
- Clean the ventilation slots and the surfaces of the machine with a brush or dry cloth. Do not use any liquids for cleaning.
- Clean the groove of the guide bar using a brush or compressed air.
- Clean the chain wheel (14) and the spring tensioner (13) (Fig. 8).
11. Storage & transport (Fig. 10)
ATTENTION!
The product may only be transported with the battery pulled out and on the handle provided for this purpose.
ATTENTION!
Risk of damage!
If the saw-chain oil dries up or sticks to the chain, it can damage oil-carrying components and the oil pump if stored for a long time.
- Remove the saw-chain oil from the cordless pruning saw before any long-term storage.
NOTE!
Environmental damage!
Spilled oil can pollute the environment permanently. The liquid is highly toxic and can quickly lead to water pollution.
- Fill/empty oil only on level, paved surfaces.
- Use a filling nozzle or funnel.
- Collect drained oil in a suitable container.
- Immediately wipe up any spilled oil carefully and dispose it according to local regulations.
- Dispose of oil as per local regulations.
Clean the cordless pruning saw thoroughly after each use. Keep the surface of the product clean and wipe it only with a dry cloth. Store the product in a dry and lockable location and out of reach of children.
The carrying case (17) supplied in the set is used to transport and store the cordless pruning saw, rechargeable battery and charging unit. The transport case is only included in the scope of delivery of the set (consisting of cordless pruning saw, rechargeable battery and charging unit).
Carry out the following work in the event of breaks in operation lasting longer than 30 days:
- Oil the blades to prevent oxidation of the blades.
- Store the product between 10 °C and 30 °C. Avoid extreme cold or heat during storage to prevent the rechargeable battery from losing power.
- Do not store the product in a damp environment or in places with corrosive gases, but in a dry place out of the reach of children.
- During longer storage periods, check the charge level of the rechargeable battery about every 3 months and recharge if necessary.
• Empty the oil tank for the saw chain oil.
12. Maintenance
Have maintenance and repair tasks that are not described in this operating manual, carried out by our specialist workshop. Use only original spare parts. Before all maintenance and cleaning tasks, let machine cool down. There is a risk of burns!
⚠ WARNING!
Danger of injury!
Use cut-resistant gloves when handling the saw chain or guide bar.
- Switch off the motor before carrying out any cleaning or maintenance work.
- Remove the rechargeable battery.
12.1 Changing the guide bar (Fig. 2)
- Switch the product off and remove the rechargeable battery (15).
- Place the product on a flat surface.
- Turn the screw (2) for the chain tensioning system and the chain cover (3) anti-clockwise to slacken the chain tension and remove the chain cover (3).
- Remove the guide bar (12) and the saw chain (11).
- For dismantling, hold the guide bar (12) swivelled upwards at an angle of approx. 45 degrees to make it easier to remove the saw chain (11) from the groove of the guide bar.
- Replace the guide bar and fit the guide bar and saw chain as described in "Fitting the guide bar and saw chain".
12.2 Turning the guide bar (Fig. 2)
The guide bar (12) must be turned approximately every 10 working hours in order to guarantee even wear.
- Switch the product off and remove the rechargeable battery (15).
- To do so, set the product down on a level surface.
- Turn the screw (2) for the chain tensioning system and the chain cover (3) anti-clockwise to remove the chain cover (3).
- Then remove the guide bar (12) and the saw chain (11).
- Rotate the guide bar (12) around its horizontal axis and mount the guide bar and the saw chain as described in "Fitting the saw chain and guide bar". Observe the running direction of the saw chain!
- To align the saw chain (11), follow the symbols above the chain wheel (14) when turning the guide bar (12). The running direction shown on the guide bar is then no longer correct.
12.3 Changing the saw chain (Fig. 2)
CAUTION:
- Only use saw chains and guide bars with guide bar tips that are designed for this cordless pruning saw (see extract from the spare parts list)!
- Before changing the saw chain, clean the groove of the guide bar, as the saw chain may jump out of the bar if it dirty (Fig. 9). The deposits can also soak up the chain oil. The consequence would be that the chain oil does not reach the underside of the guide bar, or only to a small extent, and lubrication is reduced.
- Switch the product off and remove the rechargeable battery (15).
- To change the saw chain (11), place the product on a flat surface.
- Turn the screw (2) for the chain tensioning system and the chain cover (3) anti-clockwise to remove the chain cover (3).
- First remove the guide bar (12) and the saw chain (11).
- Lay out the new saw chain (11) in a loop so that the cutting edges are aligned clockwise. To align the saw chain (11), follow the symbols (arrows) on the guide bar or above the chain wheel (14).
-
Place the saw chain (11) in the groove of the guide bar.
-
For assembly, hold the guide bar (12) swivelled upwards at an angle of approx. 45 degrees to make it easier to feed the saw chain (11) into the groove of the guide bar.
- Insert the guide bar (12) and the saw chain (11) at the spring tensioner (13) and pull the saw chain (11) over the groove of the guide bar. When the saw chain (11) is released, it will be automatically tensioned.
- Fit the chain cover (3) back on.
- Turn the screw for the chain tensioning system (2) clockwise until hand tight.
- Check the seating of the saw chain (11) again and tighten the screw (2) for the chain tensioning system and the chain cover (3).
12.4 Sharpening the saw chain
Effective work with the cordless pruning saw is only possible if the saw chain is in good condition and sharp. This also reduces the risk of kick-back.
The saw chain can be resharpened at an authorised specialist workshop. Do not attempt to sharpen the saw chain yourself if you do not have a suitable tool and the necessary experience.
12.5 Checking the chain wheel (Fig. 2, 6 and 8)
- Switch the product off and remove the rechargeable battery (15).
- Set the product down on a level surface.
- Turn the screw (2) for the chain tensioning system and the chain cover (3) anti-clockwise to remove the chain cover (3).
- First remove the guide bar (12) and the saw chain (11).
- Check the grooving on the chain wheel (14) with a test gauge (not included in the scope of delivery).
- If the grooves are deeper than a=0.5 mm, do not use the cordless pruning saw and consult a specialist dealer (Fig. 8). The chain wheel (14) must be replaced.
12.6 Checking the guide bar (Fig. 2 + 9)
- Switch the product off and remove the rechargeable battery (15).
- Set the product down on a level surface.
- Turn the screw (2) for the chain tensioning system and the chain cover (3) anti-clockwise to remove the chain cover (3).
-
First remove the guide bar (12) and the saw chain (11).
-
Measure the groove depth of the guide bar with the scale on a file gauge (not included in delivery). (Fig. 9)
- The guide bar (12) must be replaced if any of the following apply:
• The guide bar is damaged
- The measured groove depth is smaller than the minimum groove depth of the guide bar (4 mm).
- The groove of the guide bar has narrowed or spread.
Service information
With this product, it is necessary to note that the following parts are subject to natural or usage-related wear, or that the following parts are required as consumables.
Wearing parts*: Saw chain, guide bar, chain wheel
* may not be included in the scope of supply!
Connections and repairs
Connections and repair work on the electrical equipment may only be carried out by electricians.
Please provide the following information in the event of any queries:
• Type of current for the motor
• Machine data - type plate
• Engine data - type plate
Important note in the case of repairs:
When returning the product for repair, for safety reasons, ensure that it is free of oil when it is sent to the service centre.
Spare parts and accessories can be obtained from our Service Centre. To do this, scan the QR code on the front page.
13. Disposal and recycling
Notes for packaging


The packaging materials are recyclable. Please dispose of packaging in an environmentally friendly manner.
Notes on the electrical and electronic equipment act [ElektroG]
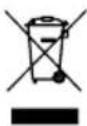
Waste electrical and electronic equipment does not belong in household waste, but must be collected and disposed of separately!
- Old batteries or rechargeable batteries that are not permanently installed in the old unit must be removed before handing them in! Their disposal is regulated by the battery act.
- Owners or users of electrical and electronic devices are legally obliged to return them after use.
- The end user is responsible for deleting their personal data from the old device being disposed of!
- The symbol of the crossed-out dustbin means that waste electrical and electronic equipment must not be disposed of with household waste.
- Waste electrical and electronic equipment can be handed in free of charge at the following places:
- Public disposal or collection points (e.g. municipal works yards)
- Points of sale of electrical appliances (stationary and online), provided that dealers are obliged to take them back or offer to do so voluntarily.
- Up to three waste electrical devices per type of device, with an edge length of no more than 25 centimetres, can be returned free of charge to the manufacturer without prior purchase of a new device from the manufacturer or taken to another authorised collection point in your vicinity.
- Further supplementary take-back conditions of the manufacturers and distributors can be obtained from the respective customer service.
- If the manufacturer delivers a new electrical appliance to a private household, the manufacturer can arrange for the free collection of the old electrical appliance upon request from the end user. Please contact the manufacturer's customer service for this.
• These statements only apply to devices installed and sold in the countries of the European Union and which are subject to the European Directive 2012/19/EU. In countries outside the European Union, different regulations may apply to the disposal of waste electrical and electronic equipment.
Information on the battery act [BattG]

Old batteries and rechargeable batteries do not belong in household waste, but must be collected or disposed of separately!
- For safe removal of primary batteries or rechargeable batteries from the electrical appliance and for information on their type or chemical system, please refer to the additional information in the operating or assembly instructions.
- Owners or users of primary batteries and rechargeable batteries are legally obliged to return them after use. The return is limited to household quantities.
- Old batteries may contain pollutants or heavy metals that can harm the environment or human health. Recycling old batteries and using the resources they contain helps to protect these two important issues.
- The symbol of the crossed-out dustbin means that primary batteries and rechargeable batteries must not be disposed of with household waste.
- If the signs Hg, Cd or Pb are also located below the dustbin symbol, this stands for the following:
- Hg: Battery contains more than 0.0005% mercury
- Cd: Battery contains more than 0.002% cadmium
- Pb: Battery contains more than 0.004% lead
- Rechargeable batteries and primary batteries can be returned free of charge to the following places:
- Public disposal or collection points (e.g. municipal works yards)
- Sales points for primary batteries and rechargeable batteries
- Take-back points of the common take-back system for old device batteries
- Take-back point of the manufacturer (if not a member of the common take-back system)
• These statements are only valid for rechargeable batteries and primary batteries sold in the countries of the European Union and subject to the European Directive 2006/66/EC. In countries outside the European Union, different regulations may apply to the disposal of rechargeable batteries and primary batteries.
Removing the rechargeable battery before disposing of the device
- The integrated rechargeable battery must be removed and disposed of separately in an environmentally friendly manner before disposing of the device.
- Mask off the contacts and package the rechargeable battery such that it cannot move in the packaging. Please also observe any further national regulations.
You can find out how to dispose of the disused device from your local authority or city administration.
Fuels and oils
- Before disposing of the unit, the fuel tank and the engine oil tank must be emptied!
- Fuel and engine oil do not belong in household waste or drains, but must be collected or disposed of separately!
- Empty oil and fuel tanks must be disposed of in an environmentally friendly manner.
14. Troubleshooting
The following table shows fault symptoms and describes remedial measures in the event of your machine failing to work properly. If you cannot localise and rectify the problem with this, please contact your service workshop.
| Fault Possible cause Remedy | ||
| Product does not start | Battery empty Charge battery | |
| Battery defective | Check the rechargeable battery, if necessary, have it repaired by a recognised electrician or replace the rechargeable battery. | |
| Overload protection has tripped. | Wait until the overload protection restores the power supply. | |
| On/off switch defective Repair by an authorised service centre | ||
| Motor defective Repair by an authorised service centre | ||
| Motor stops during operation | Battery empty Charge battery | |
| Battery not inserted correctly | Re-insert battery | |
| Battery defective Clean contacts, replace original rechargeable battery | ||
| Reduced performance (max. speed not reached) | Battery depleted Replace battery | |
| Battery not fully charged Charge battery | ||
| No oil on the chain | The oil tank is empty. Fill oil tank. | |
| The oil guide groove is dirty. | Clean groove | |
| Oil pump malfunction Contact an authorised service centre for repair. | ||
| Unusual vibration | Guide bar or saw chain is loose | Check that the guide bar is firmly in place and that the saw-chain is correctly tensioned |
| Product malfunction | Repair by an authorised service centre | |
15. Approved cutting gear
| Guide bar type | ROYAL 4” DG04-28-43P/ ROYAL 6” DH06-36-43P |
| Type of saw chain | ROYAL 4” CLQ4328/ ROYAL 6” CLQ4336 |
16. Compatible rechargeable batteries and charging units
ATTENTION!
Risk of damage to the cordless pruning saw and to the rechargeable battery!
If the cordless pruning saw is operated with an unsuitable rechargeable battery, this can cause damage to the product and the battery.
- Only operate the cordless pruning saw with a suitable rechargeable battery.
| Rechargeable batteries | |
| Designation Article number | |
| HPSS20-2A 7904201702 | |
| BA2.0-20ProS 7909205701 | |
| BA3.0-20ProS 7909209701 | |
| BA4.0-20ProS 7909205703 | |
| BA5.0-20ProS 7909209702 | |
| Charging units | |
| Designation Article number | |
| RGHP-20 7904201703 | |
| FC.2.4-20ProS 7909205702 | |
Günzburger Straße 69
D-89335 Ichenhausen
Cher client,
text_image
Exploded view diagram of a mechanical device with numbered parts for identificationEC Declaration of Conformity
Standard references:
EN 55014-1:2017+A11:2020, EN 55014-2:2015; EN 62841-1:2015+AC:2015; EN ISO 12100
The object of the declaration described above fulfils the regulations of the directive 2011/65/EU of the European Parliament and Council from 8th June 2011, on the restriction of the use of certain hazardous substances in electrical and electronic equipment.
Apparent defects must be notified within 8 days from the receipt of the goods. Otherwise, the buyer's rights of claim due to such defects are invalidated. We guarantee for our machines in case of proper treatment for the time of the statutory warranty period from delivery in such a way that we replace any machine part free of charge which provably becomes unusable due to faulty material or defects of fabrication within such period of time. With respect to parts not manufactured by us we only warrant insofar as we are entitled to warranty claims against the upstream suppliers. The costs for the installation of the new parts shall be borne by the buyer. The cancellation of sale or the reduction of purchase price as well as any other claims for damages shall be excluded.