HF2019 - Basket ETNA - Free user manual and instructions
Find the device manual for free HF2019 ETNA in PDF.

User questions about HF2019 ETNA
0 question about this device. Answer the ones you know or ask your own.
Ask a new question about this device
Download the instructions for your Basket in PDF format for free! Find your manual HF2019 - ETNA and take your electronic device back in hand. On this page are published all the documents necessary for the use of your device. HF2019 by ETNA.
USER MANUAL HF2019 ETNA
Mounting the cooker hood
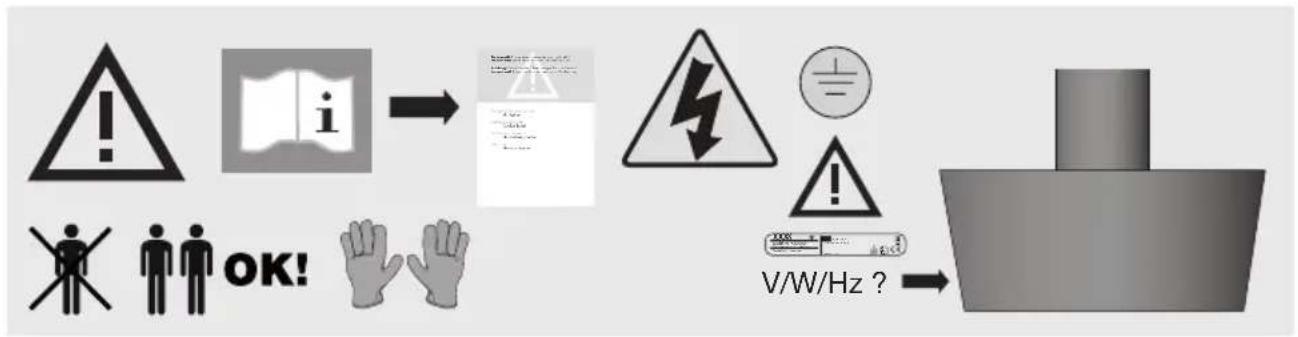
Gebruikte pictogrammen - Pictogrammes utilisés
natural_image
Technical illustration of a cabinet or enclosure with an inset showing a hand holding a mirror (no text or symbols present)
natural_image
Diagram of a mechanical device with a rotating wheel and directional arrow, enclosed in a circular frame (no text or symbols)natural_image
Mechanical assembly diagram showing a rotating component with arrows indicating motion (no text or labels)text_image
Prohibition sign with crossed-out trash bin and no text or symbolsnatural_image
Technical line drawing of a cabinet or enclosure with an inset showing a hand holding a stand (no text or symbols present)
natural_image
Diagram of a mechanical component with labeled parts and an arrow indicating direction (no readable text or symbols)natural_image
Diagram of a mechanical device with a circular frame and directional arrow, no visible text or symbolstext_image
Prohibition sign with crossed-out trash bin and no text, likely indicating no waste or disposal.natural_image
Technical line drawing of a mechanical assembly with an inset showing a hand holding a component (no text or symbols present)Metallfettfilter
natural_image
Diagram of a mechanical device with a circular component and directional arrow, enclosed in a circle (no text or symbols)natural_image
Mechanical assembly diagram showing a rotating component with directional arrows (no text or labels)text_image
Prohibition sign with crossed-out trash bin and no text or symbols| Introduction | 4 | ||
| Description | 4 | ||
| Extraction | systems | 5 | |
| Operation | 6 |
Maintenance
| Cleaning | 7 | |
| Grease | filters | |
| Carbon | filters | |
| Lighting | 8 |
Installation
| General | 9 | |
| Electrical connection | 10 | |
| Mounting the cooker hood 10 |
Environmental aspects
| Disposal of packaging and appliance | 11 |
Installation
Mounting the cooker hood 12
Introduction
Congratulations on choosing this Etna cooker hood. This product is designed with simple operation and optimum comfort in mind.
These instructions for use explain how you can make best use of this appliance. These instructions contain information about the operation of the appliance and background information that may be of help to you during its use.

Read the separate safety instructions before using the device.
Read these instructions thoroughly before you first use the appliance, and keep the instructions for future use.
You can find the most recent version of the instructions for use on our website.
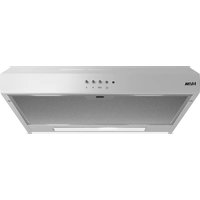
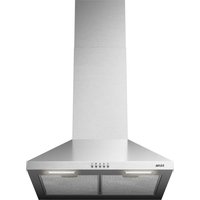
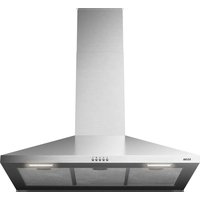
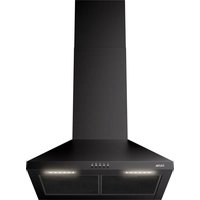
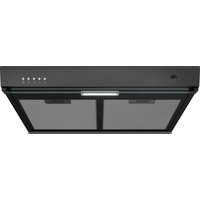
Description
text_image
1 2 3 4- Switching on/off the lighting - Timer function
- Switching on/off speed setting 1
- Switching on/off speed setting 2
- Switching on/off speed setting 3 - Intensive setting
Extraction systems

Depending on the type, the cooker hoods can be connected in one of two ways:
-
To a duct. To a duct, the cooking vapours extracted by suction are carried outside, once the grease particles have been filtered. This is the best method.
-
As a recirculation cooker hood. As a recirculation hood, the grease particles and the smell in the extracted vapours are filtered. The air that has been sucked in is not carried outside but recirculates in the kitchen. In this case you must have a carbon filter fitted.
Note! Carbon filters must be ordered separately.
Operation


Switching the lighting on and off
- Touch and release the lighting key.
The lighting switches on. - To turn off the lighting, touch and release the lighting key again.
Switching the extraction on and off
-
Select the desired extraction setting by touching the corresponding speed setting key.
The cooker hood switches on. -
To switch off the extraction, touch and release the speed setting key again.
Switching the intensive setting on and off
-
Touch and hold speed setting key 3. Speed setting key 3 will start blinking; the intensive setting is switched on. The cooker hood will switch to speed setting 3 automatically after 6 minutes.
-
Touch and hold speed setting key 3 again to switch back to speed 3 prematurely.
-
Briefly press speed setting key 3 to switch off the extraction prematurely.
Switching the timer function on and off
- Select the desired extraction setting by touching the corresponding speed setting key.
The cooker hood switches on.
- Touch and hold the lighting key. The speed setting key will start blinking; the timer function is activated.
The cooker hood will switch off automatically after 5 minutes.
- Switch off the timer function in the meantime by touching the speed setting key that is blinking.
Cleaning

Important!
For all maintenance first switch off the mains power to the cooker hood by pulling the plug out of the socket or by turning off the home's master switch. The hood needs to be cleaned regularly, both inside as well as outside (at least in the same frequency as the grease filter cleaning). Do not use abrasive cleaning products. Do not use alcohol!
Important!
If the instructions regarding cleaning the appliance or replacing the filters are not followed, this can cause a fire. These instructions should be followed! The manufacturer is not liable for damage to the hood or fire damage resulting from incompetent maintenance or from non-adherence to the above safety instructions.
Cooker hood
Clean the cooker hood with soapy water and a soft cloth. Then wash off with clean water. Do not use aggressive cleaning agents such as caustic soda. The cooker hood finish stays in good condition if it is buffed periodically following the application of wax.
Stainless steel cooker hoods
Do not use scouring pads or other abrasive cleaners on stainless steel cooker hoods. Finish with a non-abrasive, non-polishing agent and buff the stainless steel in the direction of the grain.
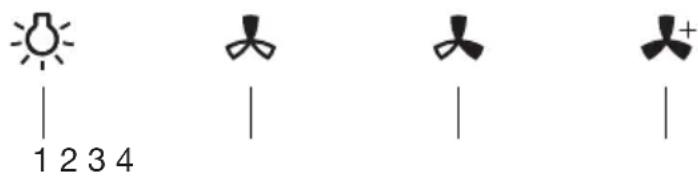
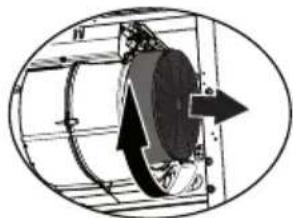
Grease filters
Metal grease filters should be cleaned every month.
- Open the panel.
- Remove the grease filters from the hood by pulling the special handle.

natural_image
Technical illustration of a mechanical assembly with an inset showing a hand holding a component (no text or symbols present)
Metal grease filters should be cleaned, using a neutral cleaning agent, either by hand or in the dishwasher on a short, low-temperature program. Place the grease filters with the openings facing downwards in the dishwasher so the water can drain out of the filter. Aluminium grease filters become dull as a result of dishwasher cleaning agents. This is normal and does not effect the working.
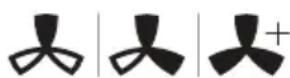
Carbon filters
natural_image
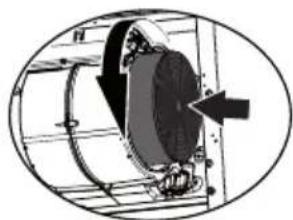
Diagram of a mechanical device with a circular housing and directional arrow, no visible text or symbolsUse carbon filters when the cooker hood is not connected to an exhaust duct.
- Open the front panel and remove the grease filter.
- Centre the carbon filter on the motor frame and turn it to mount it to the motor frame.
natural_image
Mechanical assembly diagram showing a rotating component with arrows indicating motion (no text or labels)It is necessary to replace the carbon filter every 6 months.
Note
- More noise is produced when carbon filters are used than when the cooker hood is used with an exhaust vent.
- Carbon filters function optimally at a lower motor speed. For this reason, avoid the intensive setting.
- Saturation of the carbon filter will eventually occur after more or less prolonged use, depending on the type of cooking and how frequently the grease filter is cleaned.
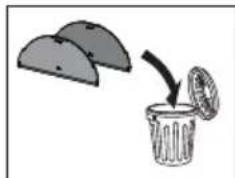
- Do not wash or reuse the carbon filter. Saturated carbon is not environmentally friendly, change the filter regularly.
- Dispose of the old carbon filter properly, with non-recyclable waste.
Lighting

This hood is fitted with a light system. This light system has to be replaced by an authorized technician. Do not attempt to replace it by yourself.

The lamp in this household appliance is only suitable for illumination of this appliance. The lamp is not suitable for household room illumination.
General
This appliance should be connected to the power supply by a recognized fitter who is familiar with, and works according to the correct safety regulations. This appliance meets the European requirements.
Important that you know:
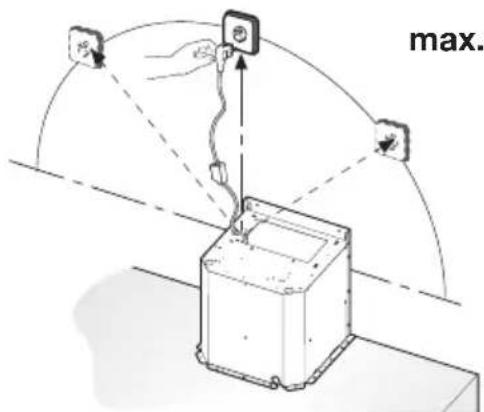
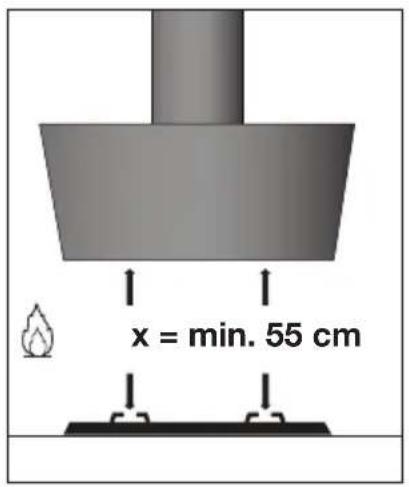
- The minimum distance between the supporting surface for the cooking vessels on the gashob and the lowest part of the range hood must be not less than 65 cm. For use with an electric, ceramic or induction hob, this distance must be at least 45 cm.
- If the cooker hood is to be fitted to an existing duct no other appliances, such as a geyser or heater, may be connected to that same duct.
- Consider local regulations with respect to the ventilation of gas appliances.
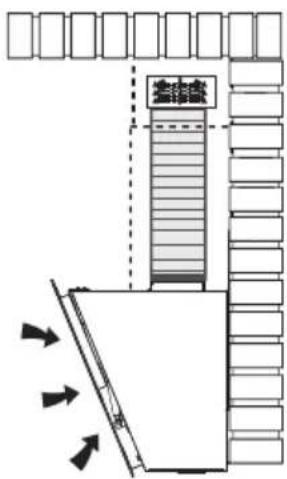
- The shorter the duct, and the fewer the bends in it, the better the cooker hood will work.
- Before you start drilling check that there are no installation cables present.
- The connecting pipe for the cooker hood has a diameter of 120, 125 or 150 mm. It is best also to use a flue pipe of the same diameter.
- The installation material supplied with this range hood is designed for fixing to reinforced concrete or masonry walls. For some types of walls you may need special plugs and screws.
Electrical connection
This appliance is a Class I appliance and must be earthed.
Make sure the supply voltage ratings correspond with those stated on the appliance data plate. The connection to the mains is carried out as follows:
BROWN = phase L
BLUE = phase N
GREEN/YELLOW = Earth
This canopy hood has been provided with a power plug. When installing the hood, make sure that this plug remains accessible. We recommend installing the wall socket out of view, behind the chimney cover.
Attention:
If you want to make a fixed connection, ensure that a multi-pole switch with a distance between contacts of 3 mm is installed in the supply cable.
Warning! Before re-connecting the hood circuit to the mains supply and checking the efficient function, always check that the mains cable is correctly assembled.
The hood is provided with a special power cable; if the cable is damaged, request a new one from Technical Service.
text_image
max.Mounting the cooker hood
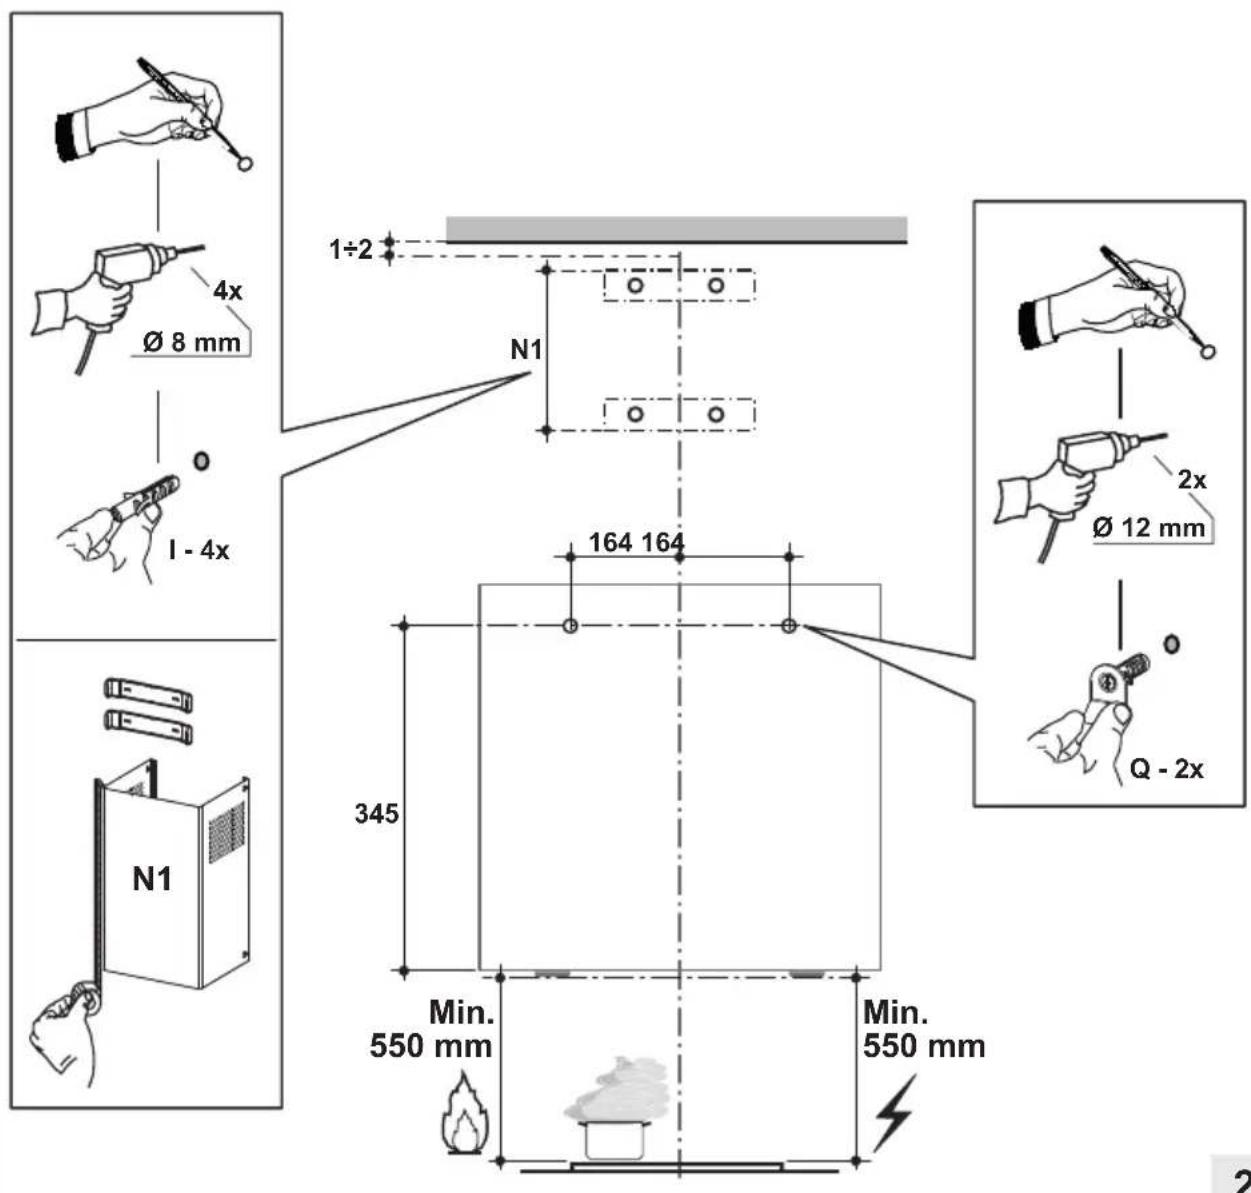
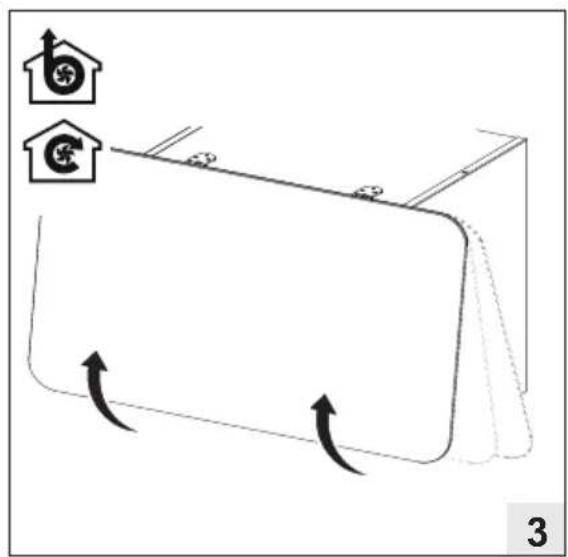
The last pages of this manual show the steps for mounting the cooker hood.
Disposal of packaging and appliance
This appliance is made from sustainable materials. This appliance must be disposed of in a responsible manner at the end of its service life. Contact the local authorities for information about the method.
The packaging of the appliance is recyclable. The following materials may have been used:
- cardboard;
- polythene foil (PE);
- CFK-free polystyrene (PS-hard foam).
These materials must be disposed of in a responsible manner and in accordance with government regulations.
text_image
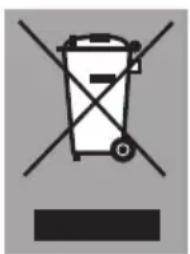
Prohibition sign with crossed-out trash bin and no text or symbolsThe appliance is marked with a crossed out wheeled bin symbol to draw your attention to the requirement for the separate disposal of domestic electrical appliances. This means that the appliance may not be disposed of in unsorted household waste at the end of its service life. The appliance must be taken to a special municipal waste processing location for separated waste or to a dealer who provides this service.
Collecting and disposing of domestic appliances separately avoids detrimental consequences for humans and the environment. This ensures that the materials used to make the appliance can be recovered and that substantial savings in the use of energy and raw materials can be achieved.
CE
Declaration of conformity
We hereby declare that our products conform to the applicable European Directives, Regulations and requirements, as well as all requirements in the standards to which reference is made.
INSTALLATIE - INSTALLATION
flowchart
graph LR
    A["Warning"] --> B["Warning Sign"]
    B --> C["Warning Hazard"]
    C --> D["Warning Level"]
    D --> E["V/W/Hz ?"]
text_image
x = min. 55 cm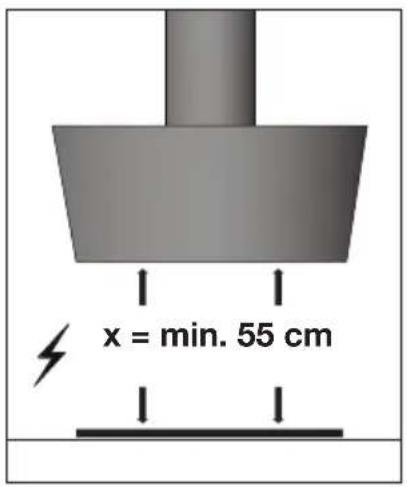
text_image
x = min. 55 cm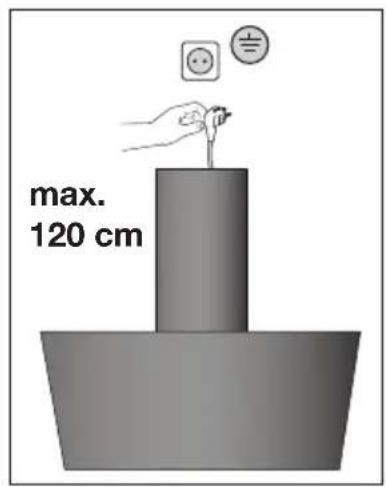
text_image
max. 120 cm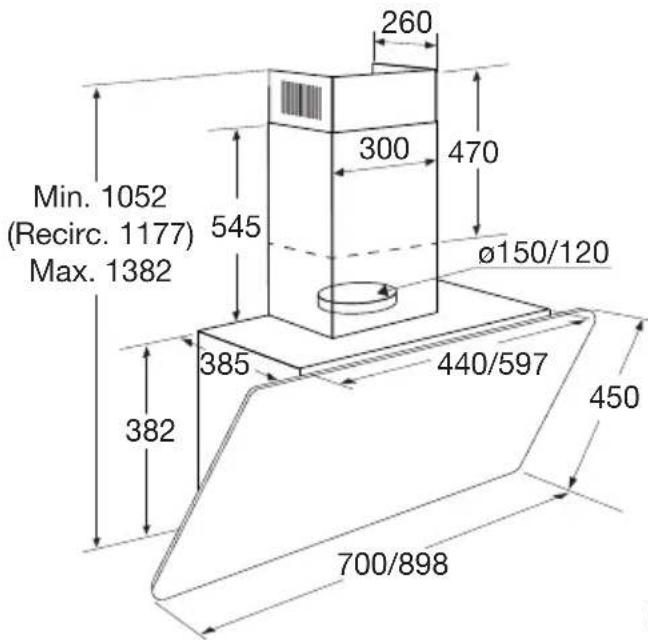
text_image
Min. 1052 (Recirc. 1177) Max. 1382 545 385 382 260 300 470 Ø150/120 440/597 450 700/898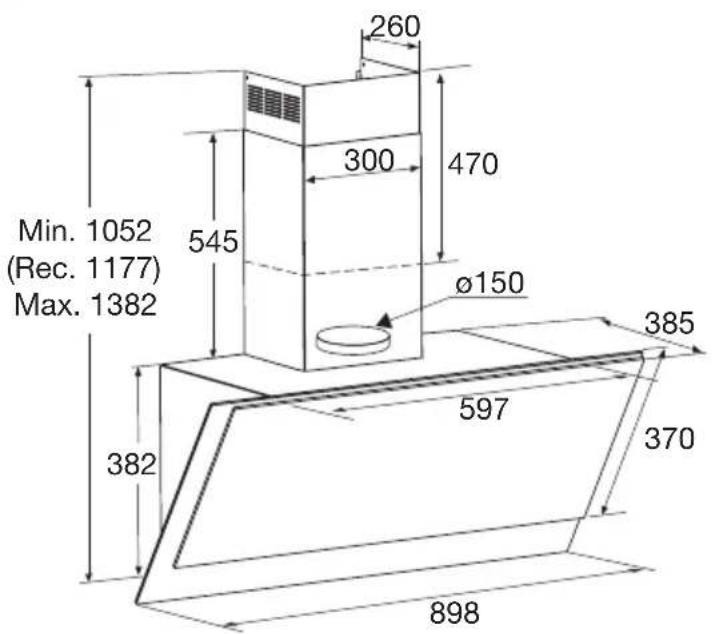
text_image
Min. 1052 (Rec. 1177) Max. 1382 545 260 300 470 Ø150 385 382 597 370 898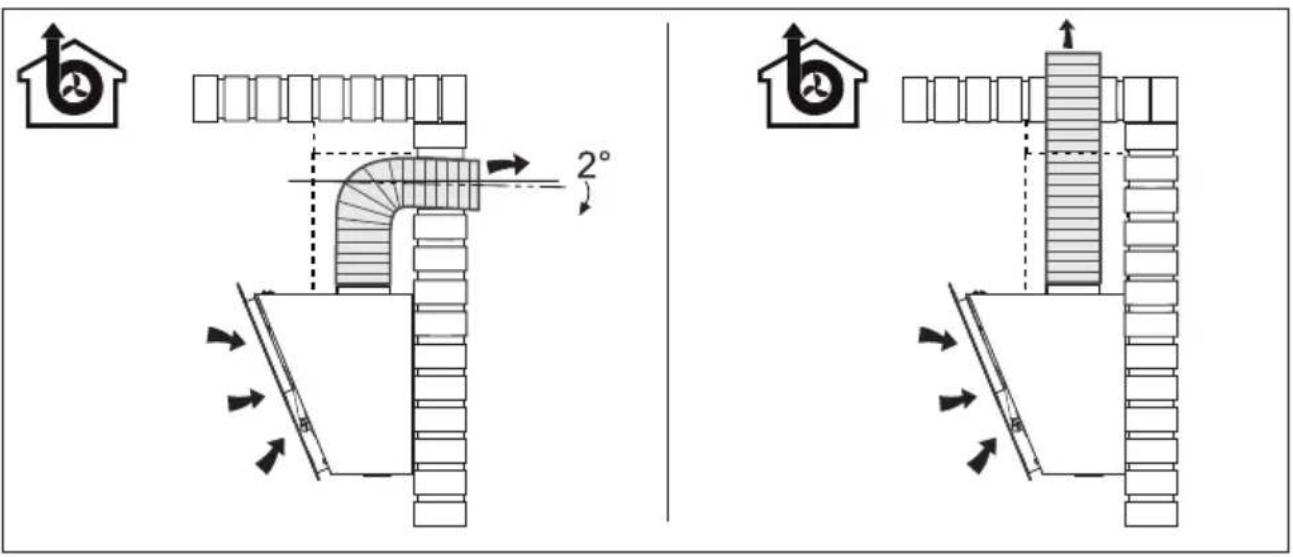

natural_image
Architectural diagram showing a building with stairs and directional arrows indicating flow or movement (no text or symbols)

natural_image
Diagram of a coiled spring with two coiled loops (no text or symbols)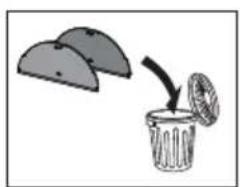
natural_image
Simple line drawing of a trash bin with a broken lid and an open coin, no text or symbols present.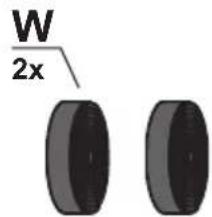
text_image
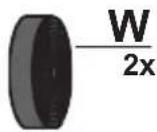
W 2x


natural_image
Illustration of a waste sorting machine with a leaf and a bag (no text or symbols)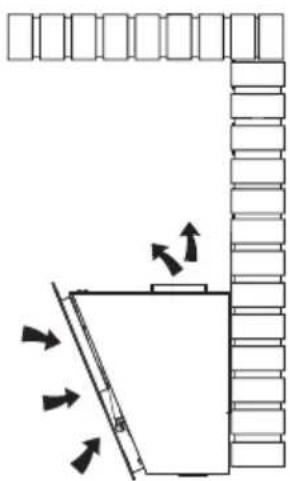
natural_image
Diagram showing airflow or movement between a building and a staircase (no text or symbols)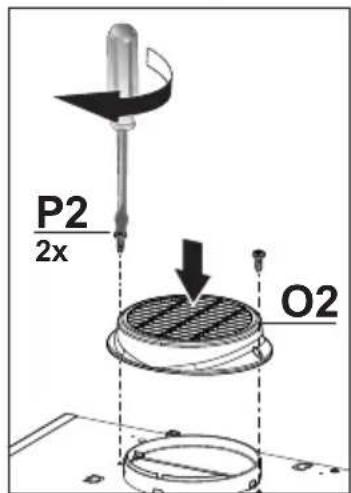
text_image
P2 2x O2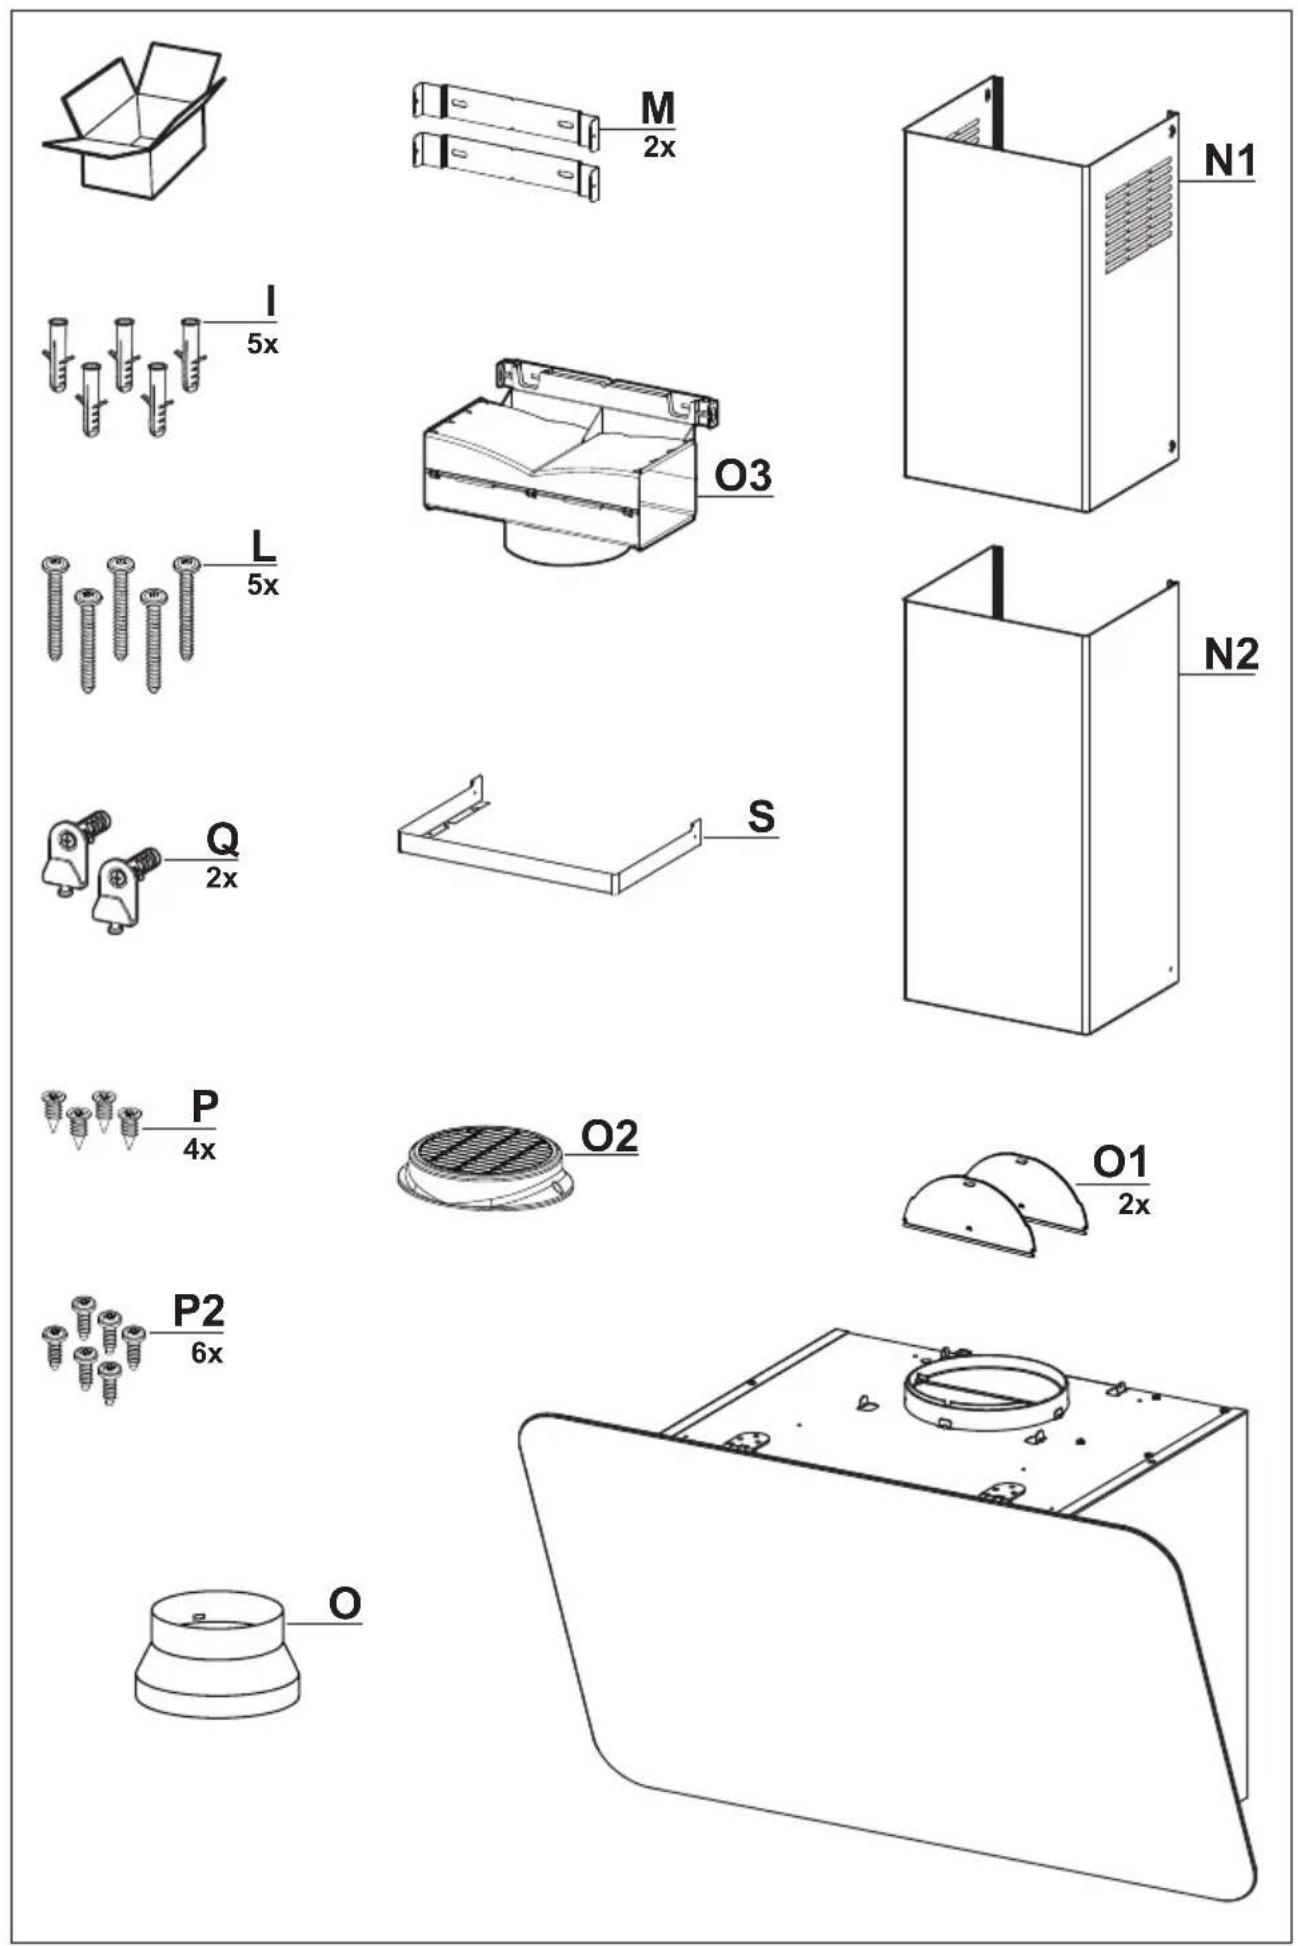
text_image
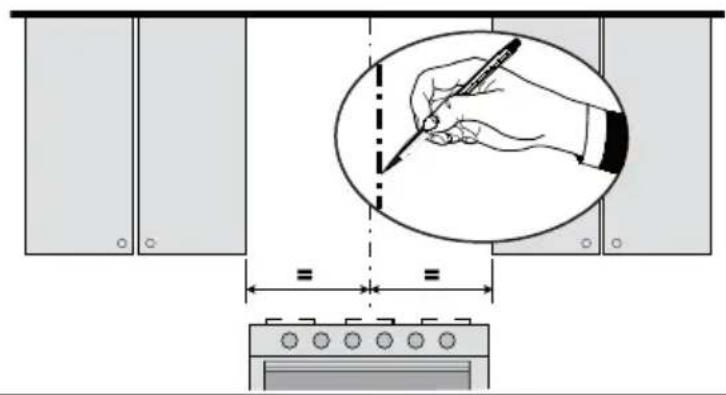
Diagram showing a hand holding a pen inside an oval, with dimension lines and a kitchen appliance below.1

text_image
1÷2 Ø 8 mm 4x 1 - 4x N1 164 164 345 Min. 550 mm Q - 2x Min. 550 mm 22
INSTALLATIE - INSTALLATION
text_image
Diagram illustrating a document or paper folding process with arrows indicating rotation and transformation, accompanied by icons of a house and a currency symbol.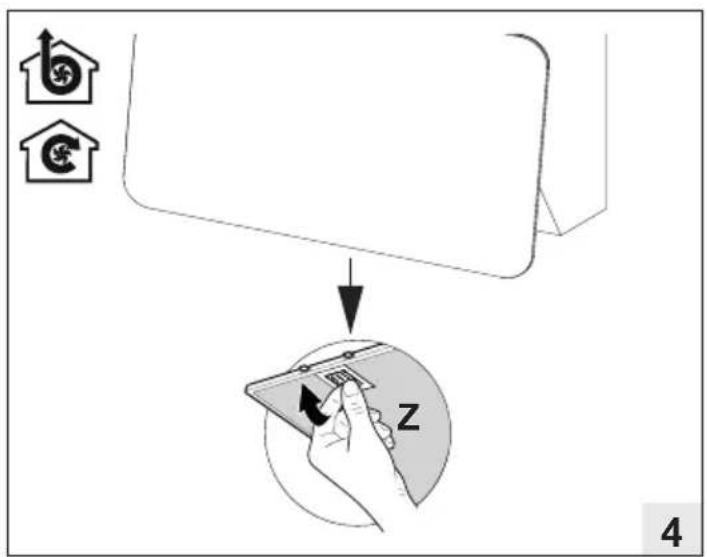
text_image
Diagram illustrating a mobile phone app interface with icons and a hand interacting with the screen, labeled 'Z' and numbered '4'.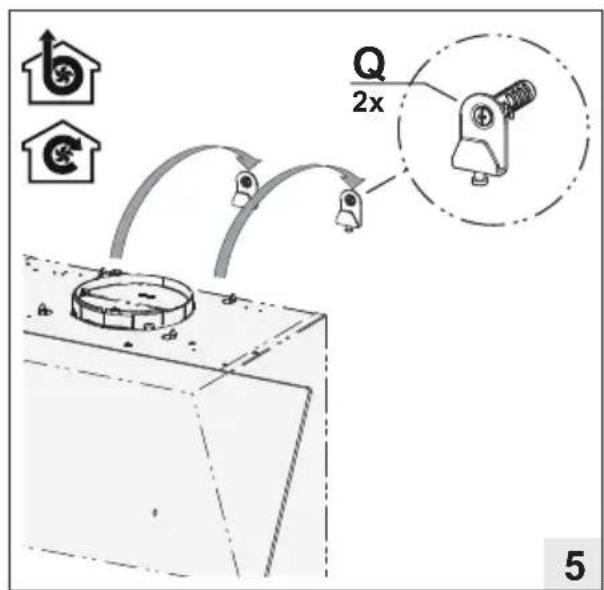
text_image
Q 2x 5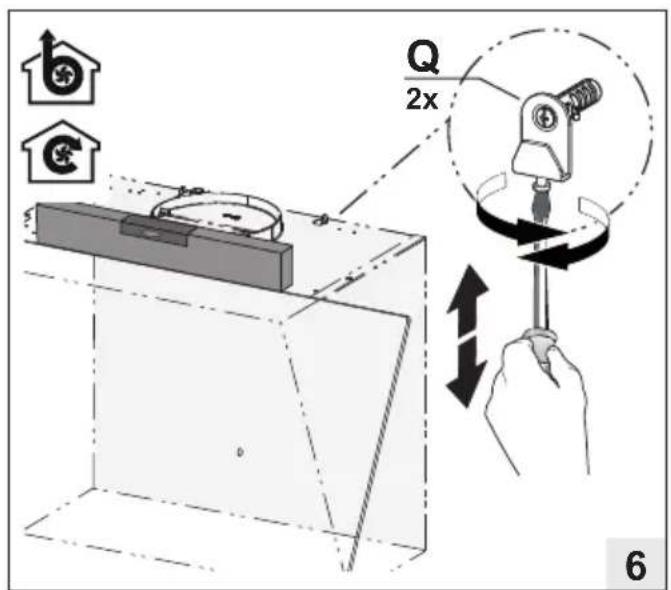
text_image
Q 2x 6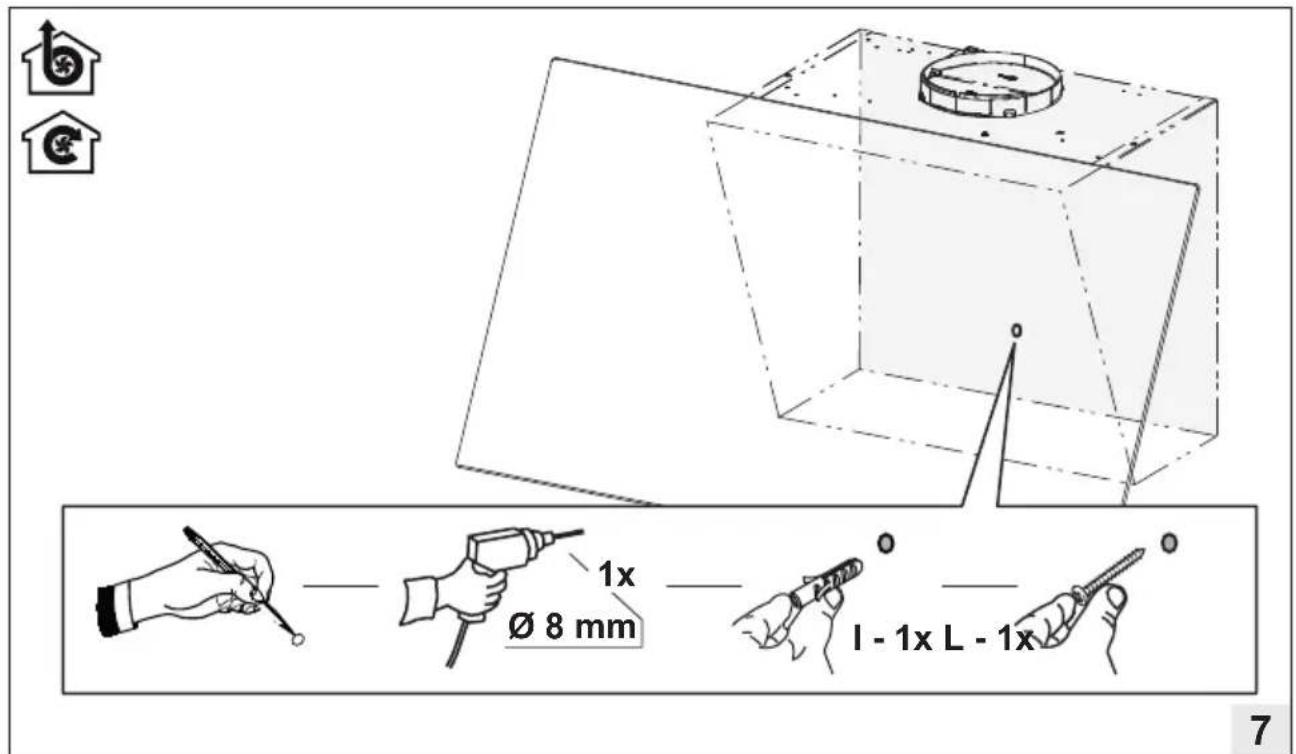
text_image
7 Ø 8 mm 1x I - 1x L - 1x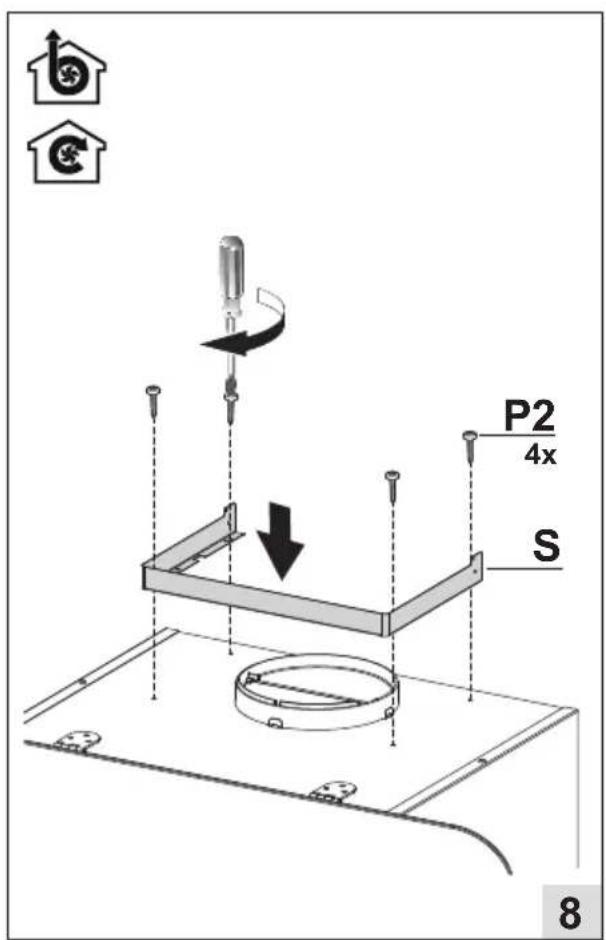
text_image
P2 4x S 8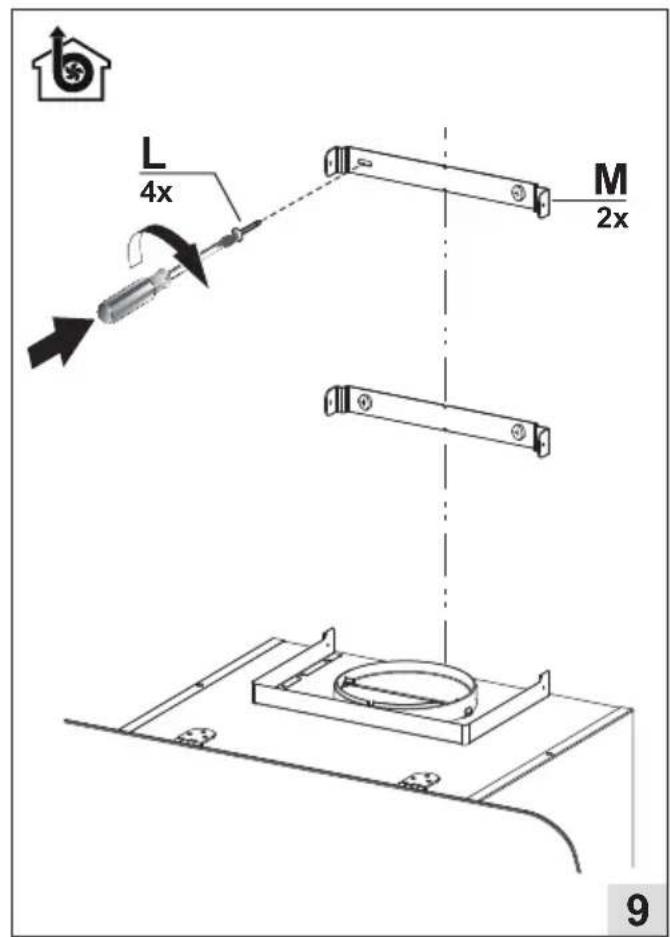
text_image
L 4x M 2x 9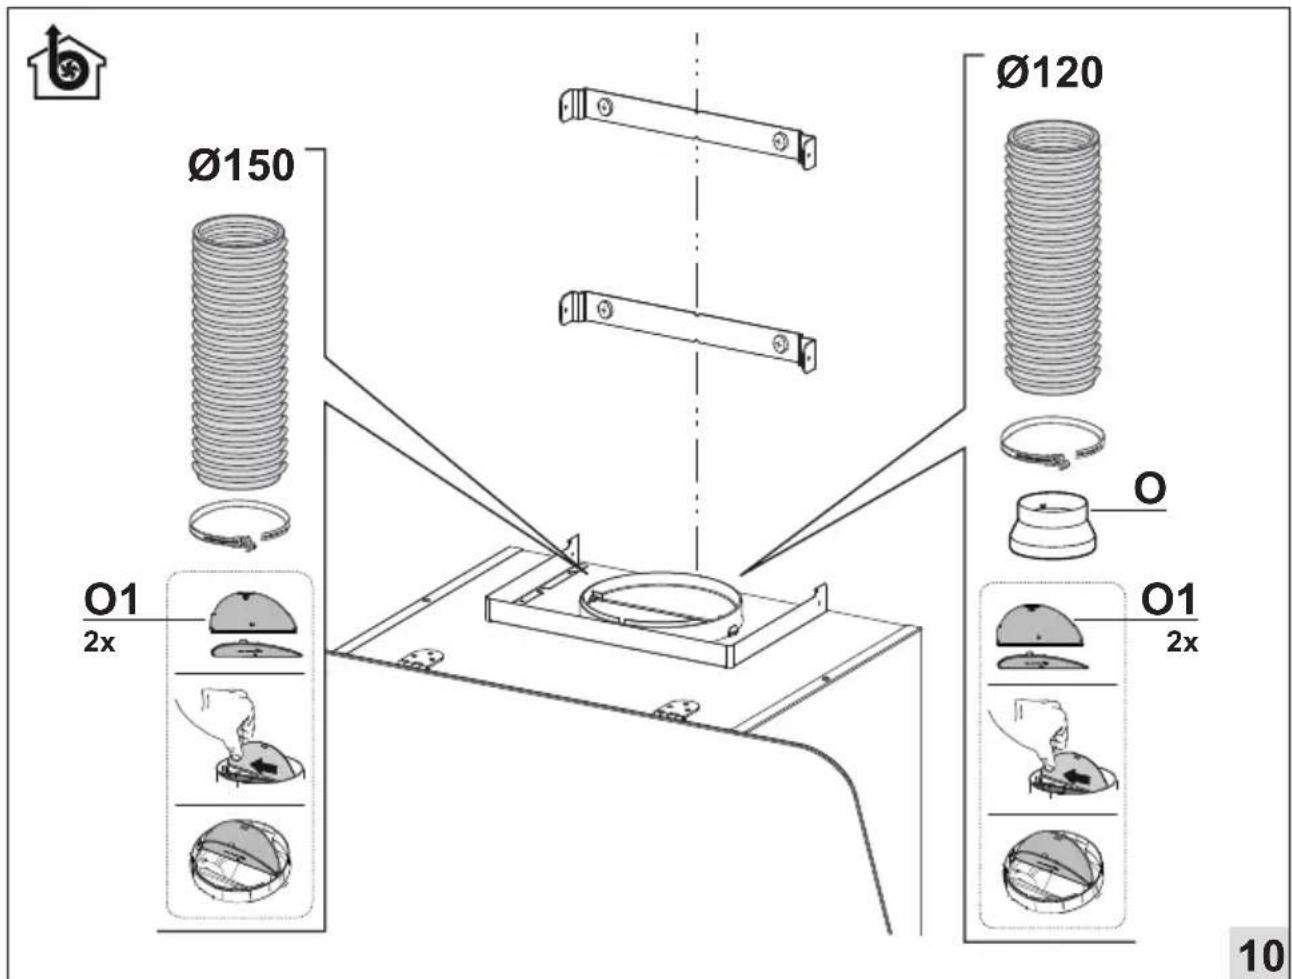
text_image
Ø150 Ø120 O O1 2x O1 2x 10INSTALLATIE - INSTALLATION
text_image
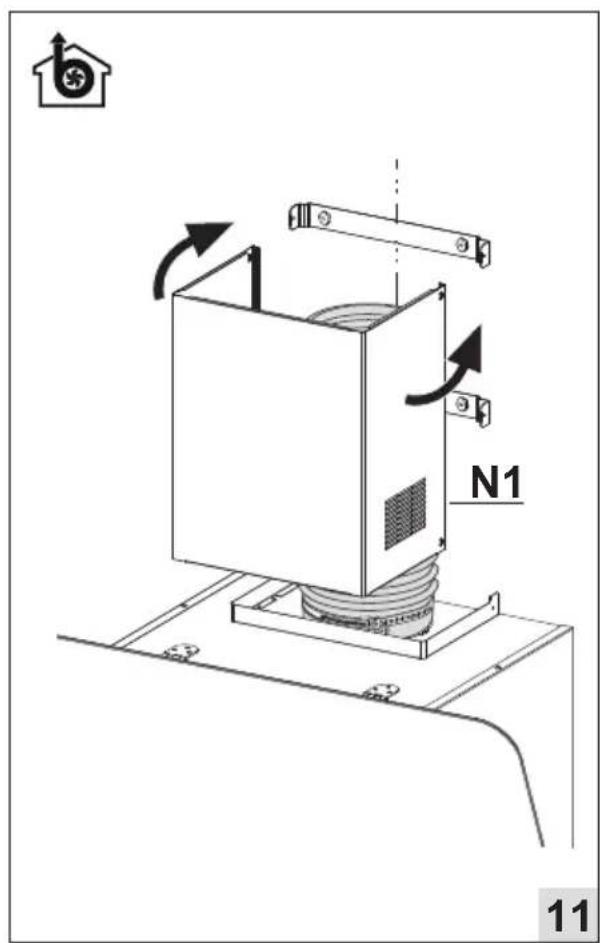
N1 11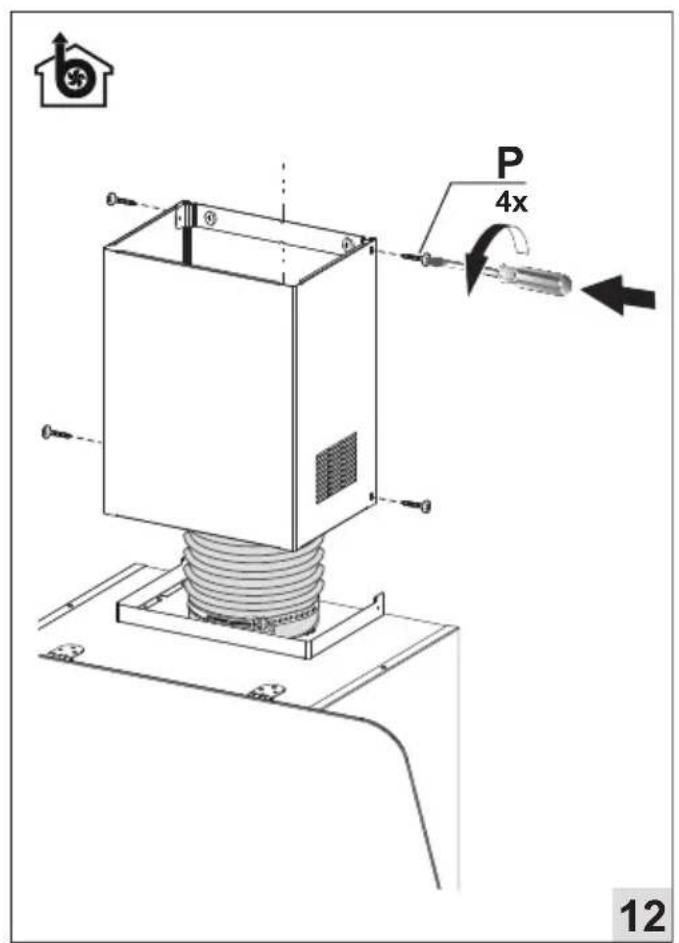
text_image
P 4x 12
text_image
N2 13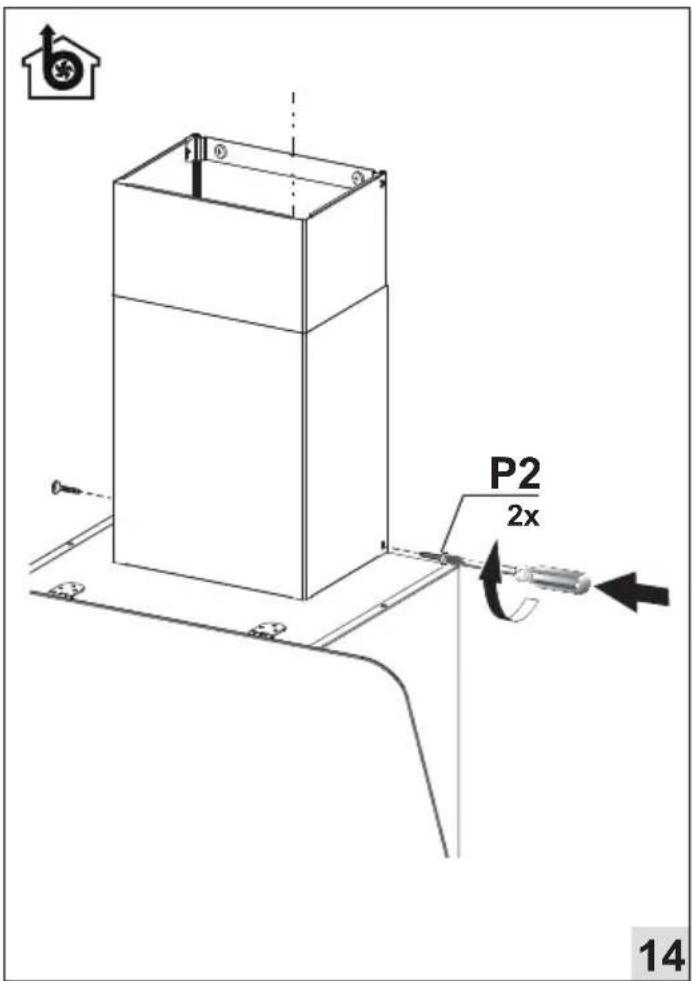
text_image
P2 2x 14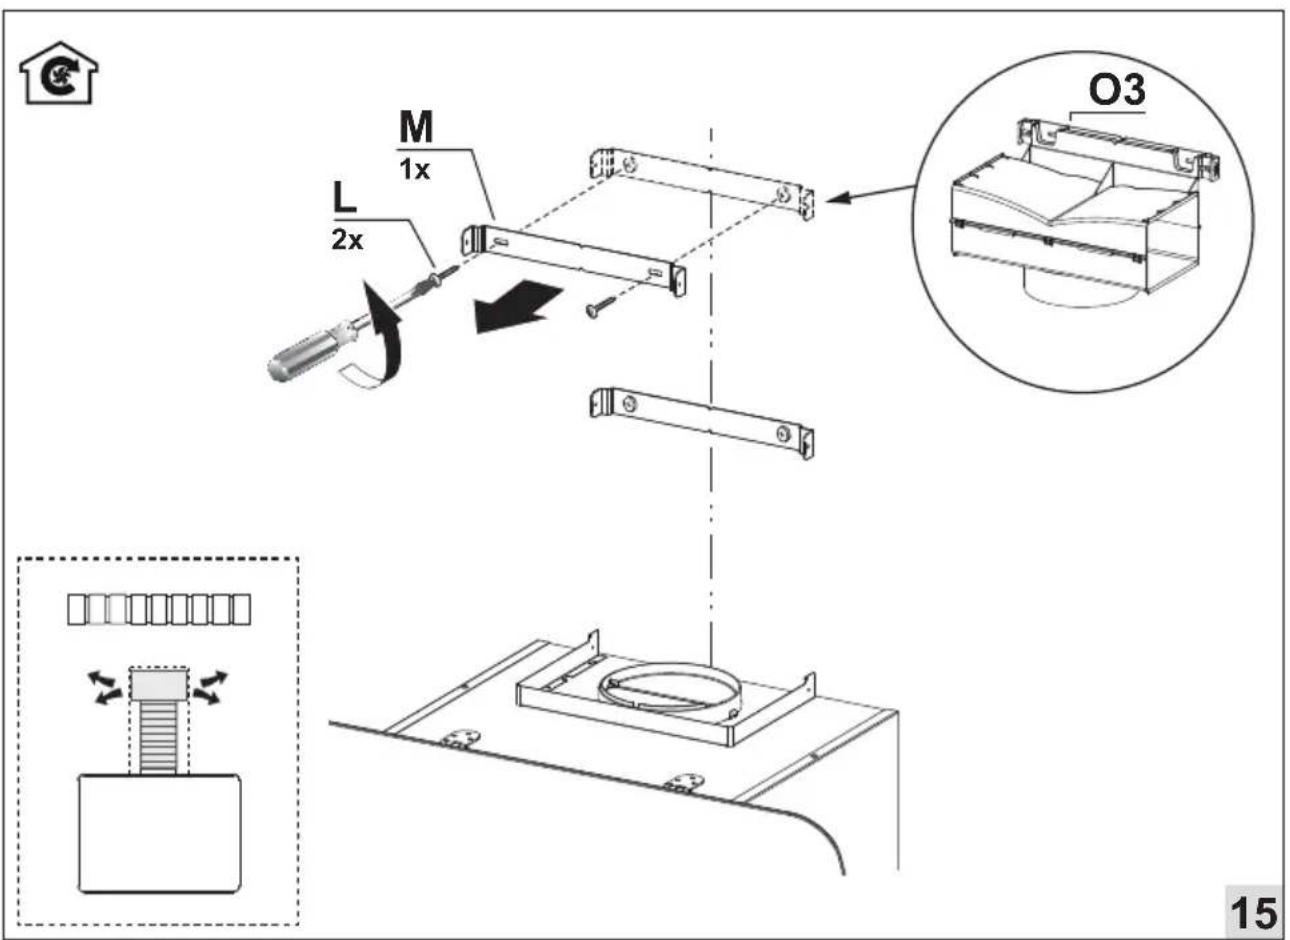
text_image
M 1x L 2x O3 15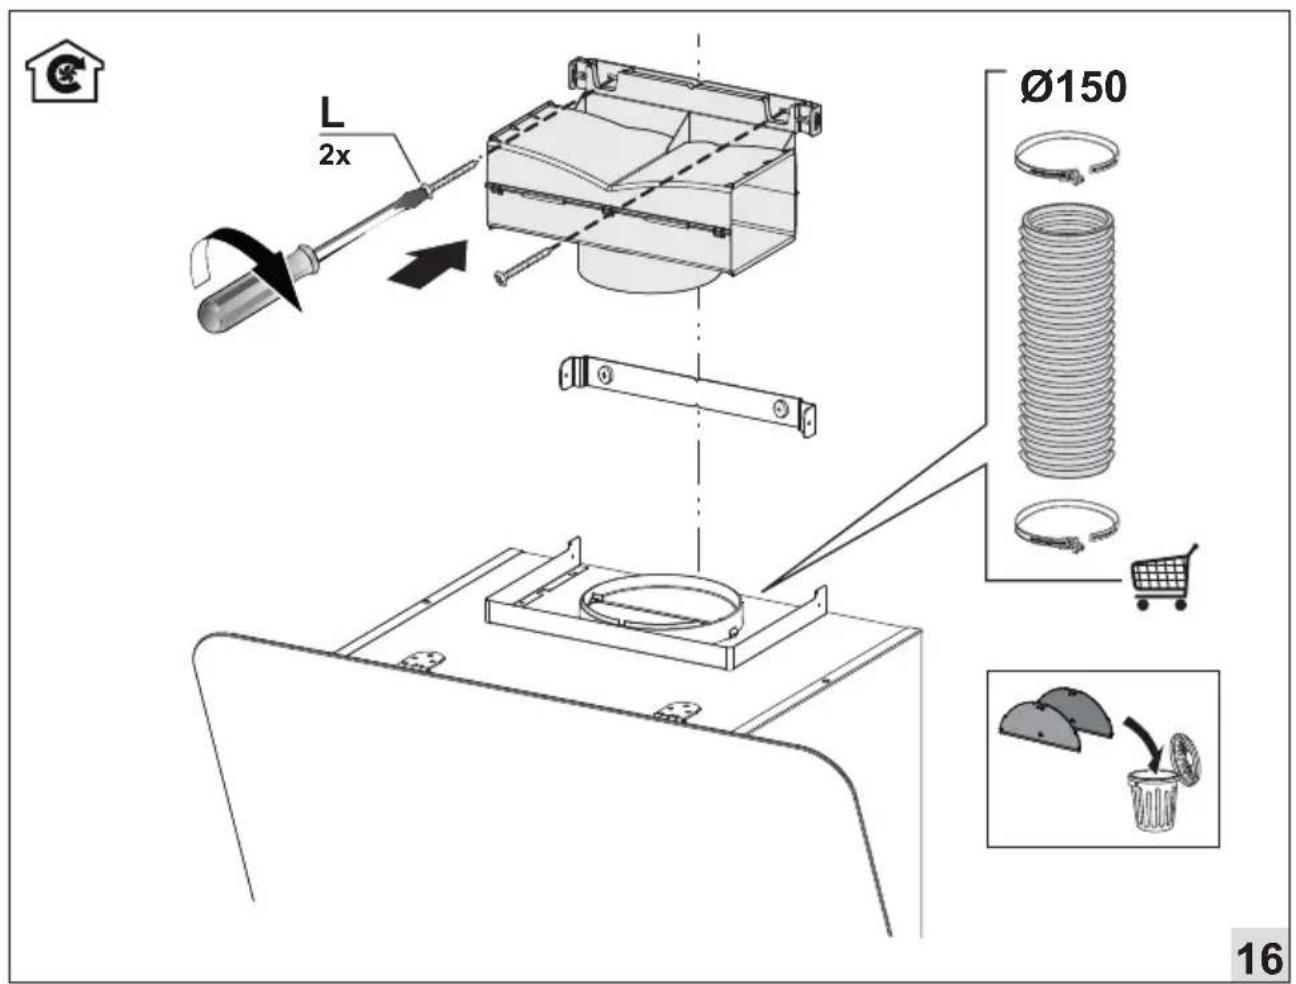
text_image
L 2x Ø150 16INSTALLATIE - INSTALLATION
text_image
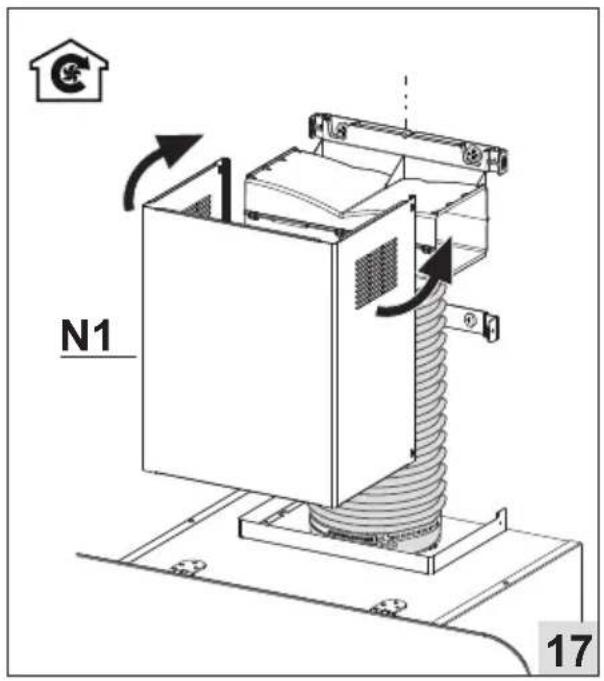
N1 17
text_image
P 4x 18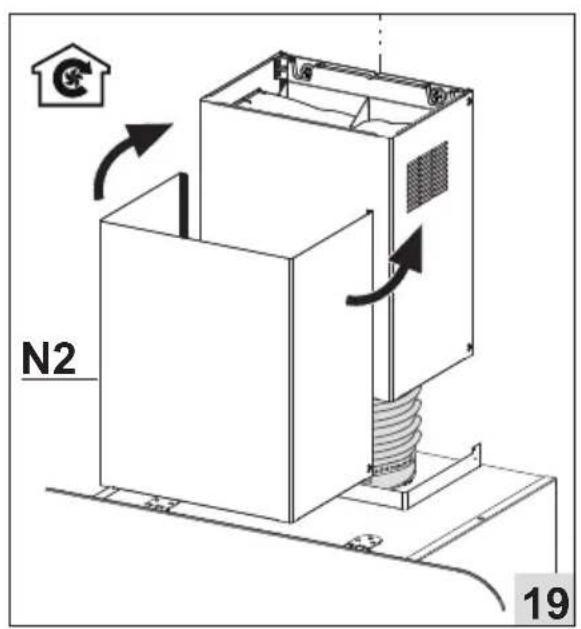
text_image
N2 19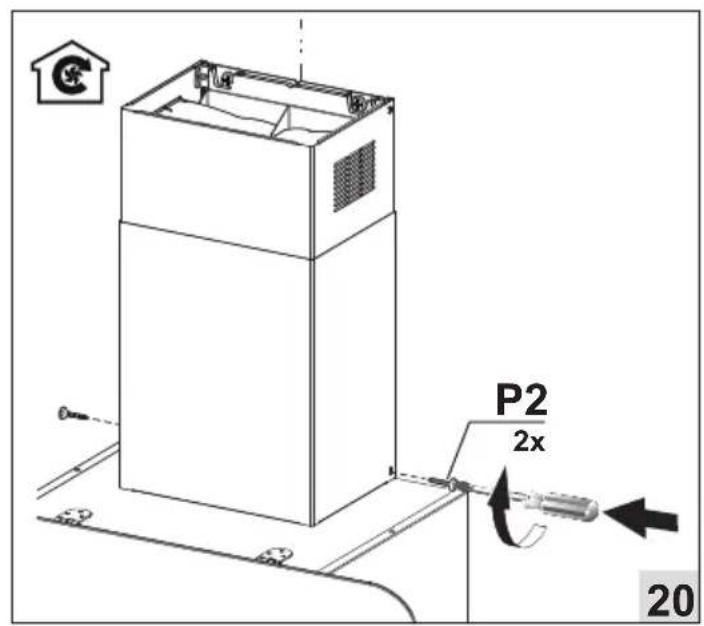
text_image
P2 2x 20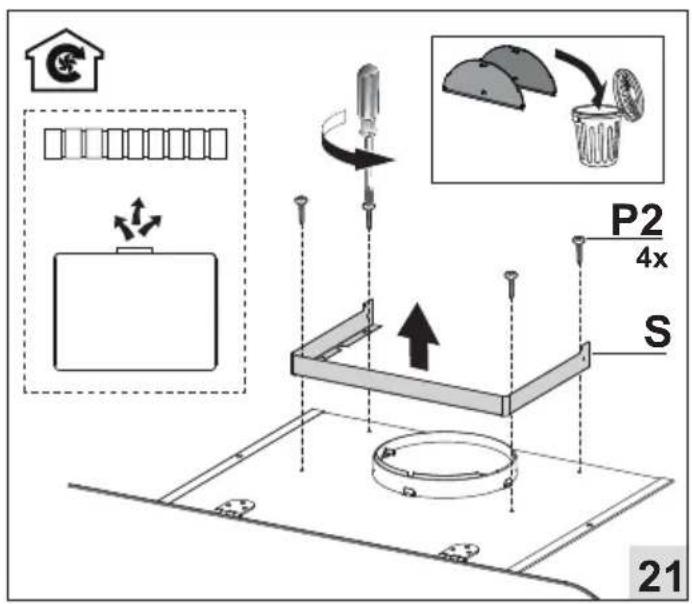
text_image
P2 4x S 21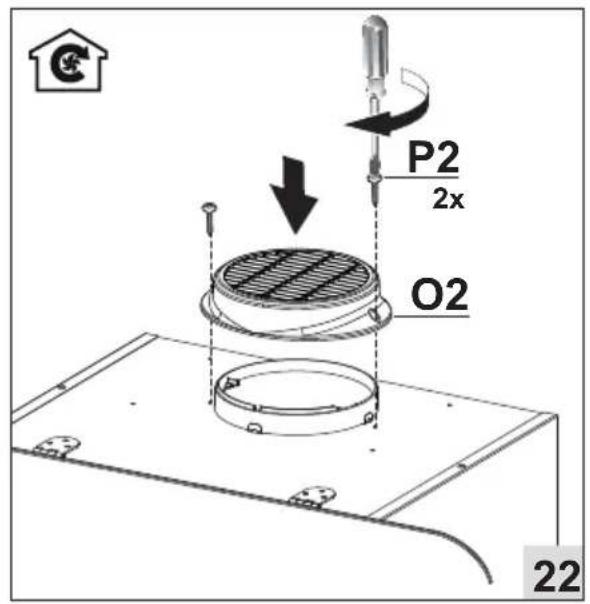
text_image
P2 2x O2 22INSTALLATIE - INSTALLATION
text_image
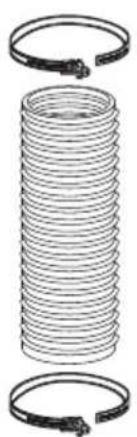
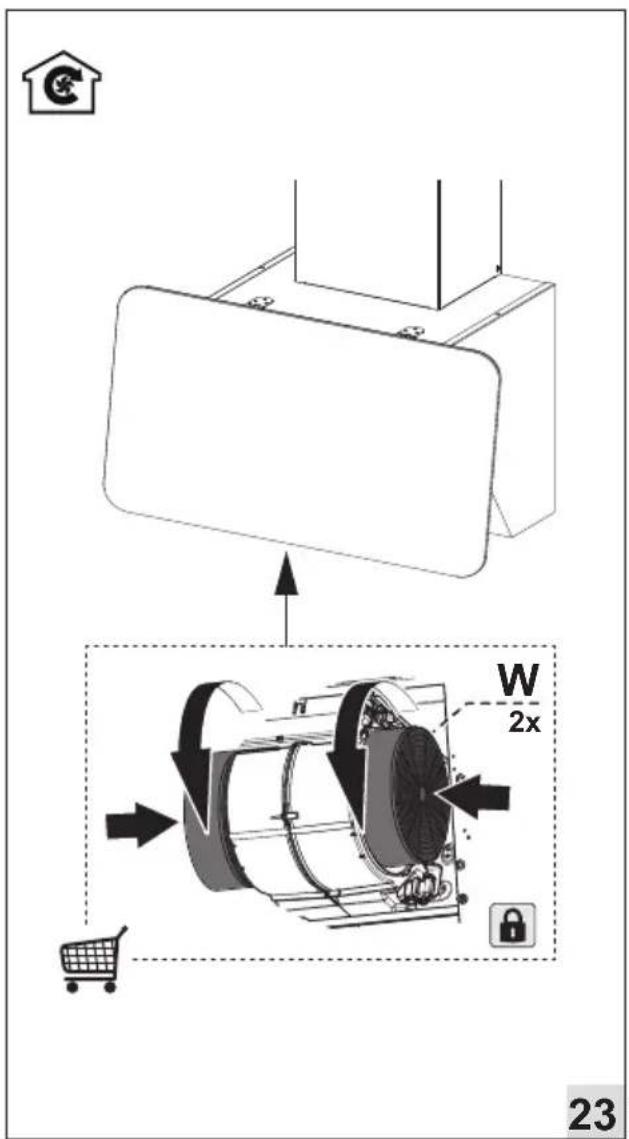
W 2x 23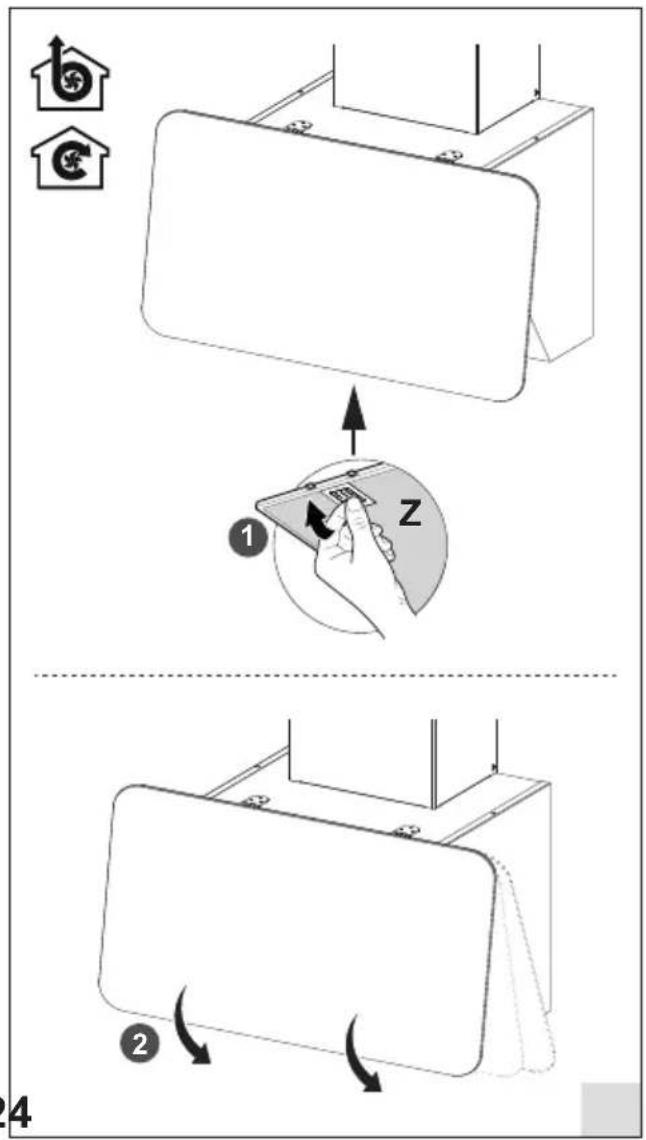
text_image
Diagram illustrating a device's step-by-step installation, showing transformation from front panel to screen with labeled steps 1 and 2.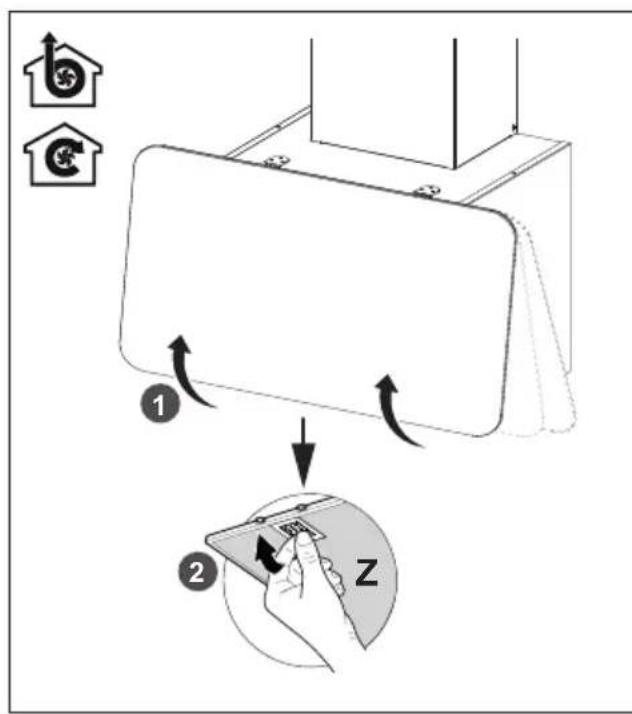
text_image
Diagram illustrating a device's rotation and usage process, showing step 1 with directional arrows and step 2 with a hand interacting with a device labeled 'Z'.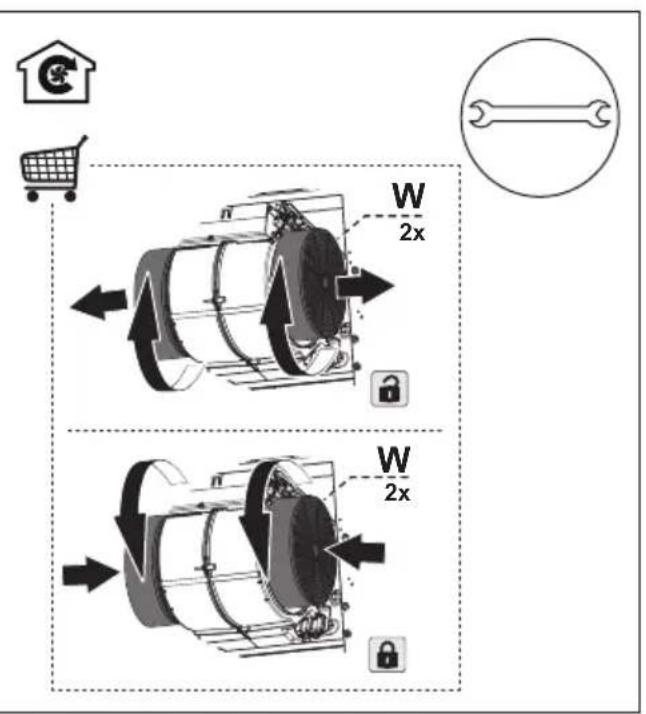
text_image
W 2x W 2xwww.etna.nl
www.etna.be
864507