Abisko - Exercise bike Skandika - Free user manual and instructions
Find the device manual for free Abisko Skandika in PDF.

| Product Type | Exercise Bike |
| Brand | Skandika |
| Model | Abisko |
| Use | Home |
| Maximum User Weight | 135 kg |
| Resistance System | Electromagnetic Braking (EMS) with thumbwheel |
| Automatic Adjustments | Motorized seat and handlebars via Bluetooth app |
| Connectivity | Bluetooth (compatible with Skandika Fitness and Kinomap apps) |
| Display | Built-in screen: resistance level, time, calories, heart rate, distance |
| Heart Rate | Bluetooth chest strap included (CR2032 battery) |
| Power Supply | Mains power adapter (cable included) |
| Pedals | With adjustable pedal straps |
| Transport Wheels | Yes, at the rear |
| Adjustable Feet | Yes, for leveling |
| Maintenance | Clean with damp cloth, periodic lubrication of moving parts |
| Warranty | 24 months on manufacturing defects |
| Service and Spare Parts | Contact: service@skandika.de |
Frequently Asked Questions - Abisko Skandika
User questions about Abisko Skandika
0 question about this device. Answer the ones you know or ask your own.
Ask a new question about this device
Download the instructions for your Exercise bike in PDF format for free! Find your manual Abisko - Skandika and take your electronic device back in hand. On this page are published all the documents necessary for the use of your device. Abisko by Skandika.
USER MANUAL Abisko Skandika
natural_image
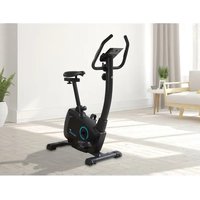
Exterior view of three Ablotá stationary bikes (black, pink, white) with visible branding and side arm mechanism (no text or symbols on the bikes themselves)Abisko
Art.Nr. SF-3100 / SF-3101 / SF-3102
Inhalt
SF-3100/3101/3102 Abisko

Klasse: HA
Standard: EN ISO 20957
skandika.com/service
natural_image
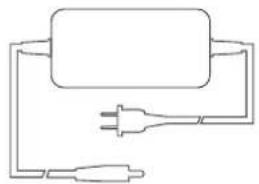
Simple line drawing of a plug and plug with a rectangular component above it (no text or symbols)Netzteil

natural_image
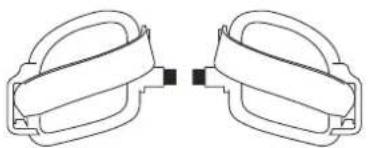
Pure diagram of two identical mechanical clamps with no text or symbolsL
natural_image
Simple line drawing of a symmetrical mechanical or architectural component with no text or symbolsR
Vorderer Standfuß
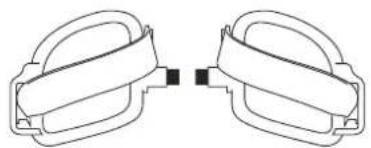
Links / Rechtes Pedal

natural_image
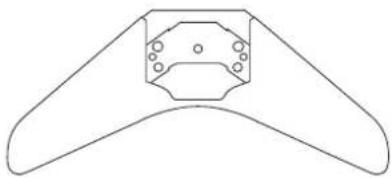
Simple line drawing of a mechanical component with no text or symbolsHinterer Standfuß
natural_image
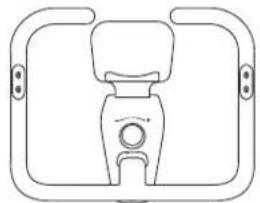
Simple line drawing of a mechanical component with no text or symbolsGriffset

natural_image
Simple geometric diagram with two horizontal lines inside a rectangle (no text or symbols)Gebrauchsanleitung

natural_image
Technical line drawing of a mechanical device with internal components and directional arrows (no text or symbols)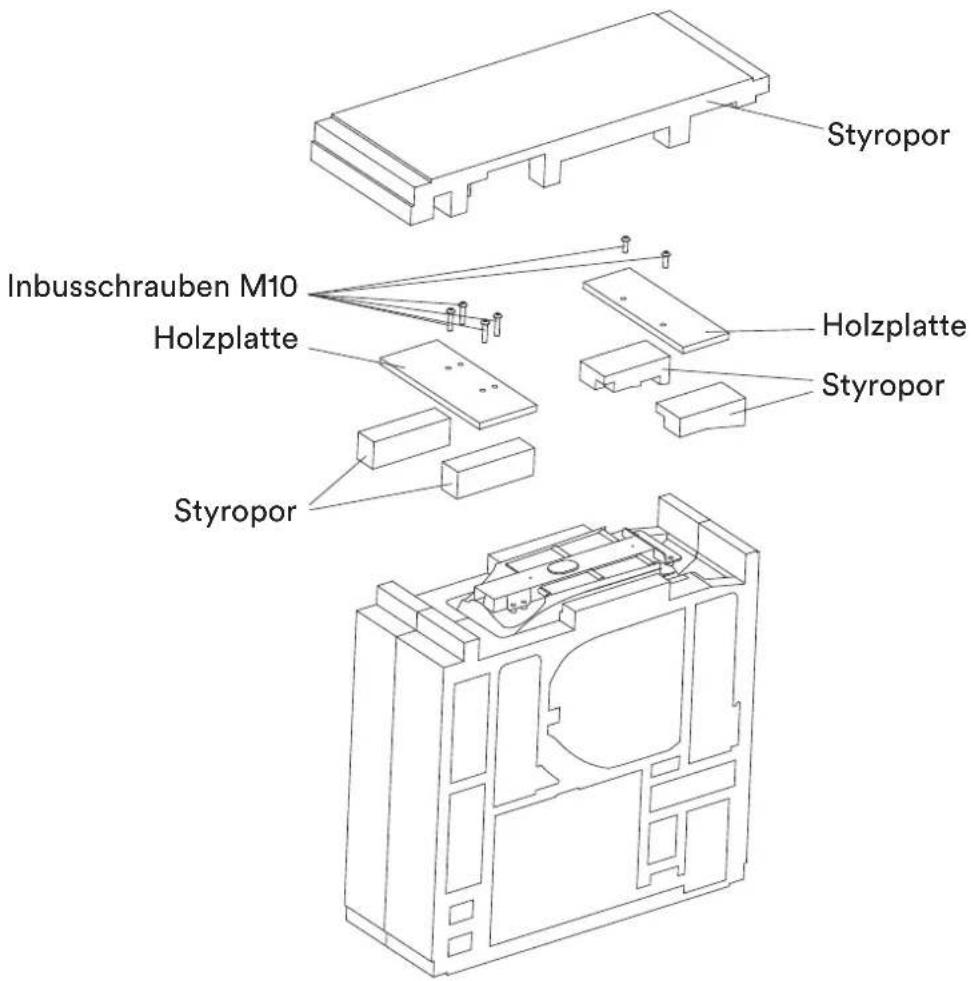
text_image
Inbusschrauben M10 Holzplatte Styropor Styropor Styropor Holzplatte StyroporSCHRITT 2
text_image
47 50 R R R Maulschlüsseltext_image
88888 RTC FD 80080natural_image
Line drawing of a person using an exercise bike with a magnified inset showing the seat detail (no text or symbols)FEHLERBEHEBUNG
23 Safety precautions
24 Parts identification / Serial number
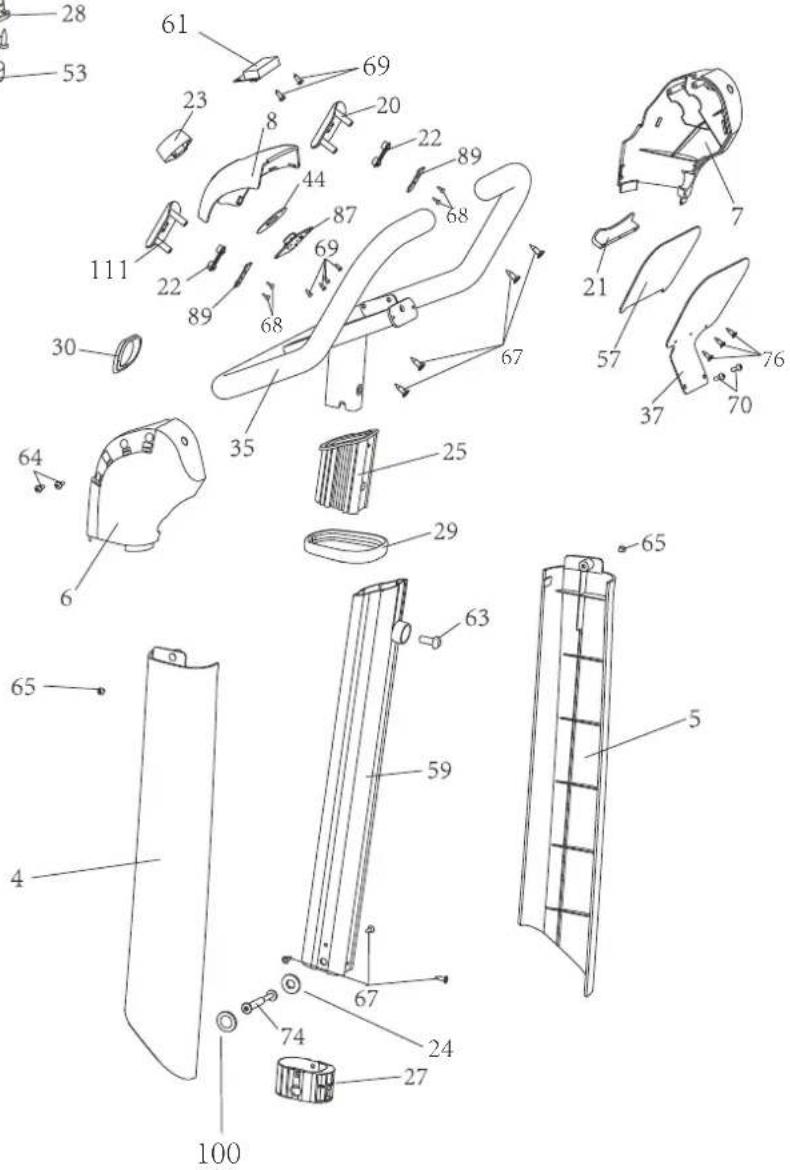
25 Explosion drawings / Parts list
28 Set-up instructions
33 Operating instructions
35 Chest-belt connection
36 Connecting to KinoMap app
37 Aligning / transporting the unit
38 Troubleshooting / Care
39 Regular maintenance
40 Warm-up and cool-down
41 Guarantee conditions

skandika.com/service
SF-3100/3101/3102 Abisko

Class: HA
Standard: EN ISO 20957
Max. user weight: 135 kg

Please read the instructions before use.
Not suitable for therapeutic purposes.

Please visit the Skandika Service portal on our website for setup & help videos, FAQs and downloadable instructions. For more information about Skandika, simply visit our main page www.skandika.com

WARNING
To reduce risk of injury, read and understand this instruction manual before using the device! This machine is intended for home use only in accordance with the instructions provided in this manual. Read the instruction manual carefully before using this device and keep the instruction manual for future use.
SAFETY PRECAUTIONS
-
Keep children and pets away from the machine at all times. DO NOT leave children unattended in the same room with the machine.
-
Only one person at a time should use the machine.
-
If the user experiences dizziness, nausea, chest pain, or any other abnormal symptoms, STOP the workout immediately. CONSULT A PHYSICIAN IMMEDIATELY.
-
Position the machine on a plain, leveled surface. DO NOT use the machine near liquids or outdoors.
-
Keep hands away from all moving parts.
-
Always wear appropriate workout clothing when exercising. DO NOT wear robes or other clothing that could become caught in the machine. Running or aerobic shoes are also required when using the machine.
-
Use the machine only for its intended use as described in this manual. DO NOT use attachments not recommended by the manufacturer.
-
Do not place any sharp objects around the machine.
-
Disabled persons should not use the machine without a qualified person or physician, who can provide qualified surveillance / assistance.
-
Before using the device, always do stretching exercises to properly warm up.
-
Never operate the device if it is not functioning properly. Before each use, check that the unit is undamaged and that all connections are tight.
-
The max. user capacity of this class HA device is 135 kgs.
-
Do not use this device directly after meals or drinks.
-
This device is not suitable for therapeutically use. Only use this unit according to the intended purpose and as directed in the instruction manual.
-
Please do not attempt to repair the unit yourself in the event of malfunctions, since this will void all warranty claims. Only have repairs carried out by authorised service centres. It is recommended to lightly lubricate all moving parts from time to time to maintain functionality.
-
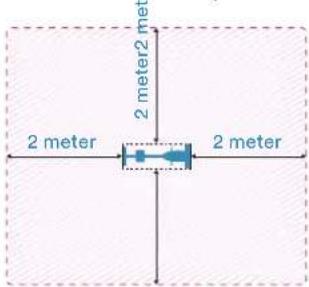
Please only exercise with a minimum clearance area of 2 meters around the device.
-
When mounting and dismounting, make sure that the pedals and flywheel are completely at rest. Risk of injury!
text_image
2 meter 2 meter2 meter 2 meter 2 meterBe sure to consult a physician before you start any device program. He may give you proper hints and advice with respect to the individual intensity of stress for you, your workout and sensible eating habits. This is especially important for individuals over the age of 35 or persons with pre-existing health problems.
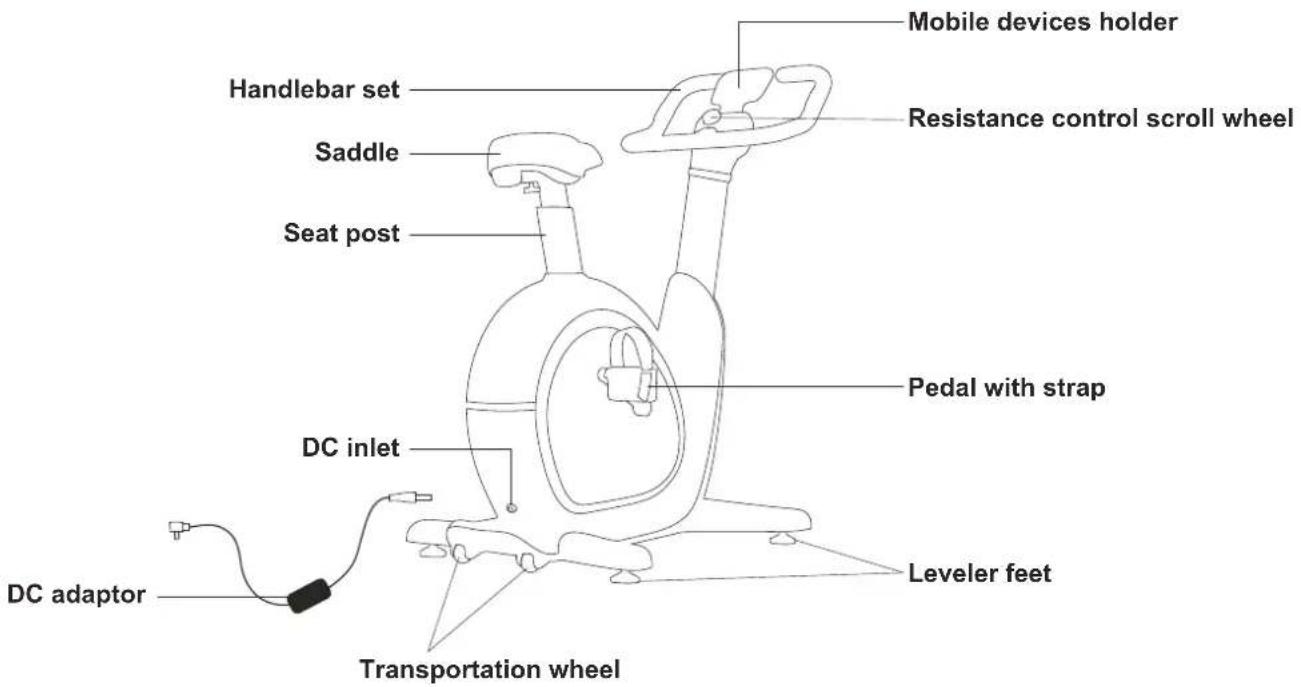
text_image
Mobile devices holder Handlebar set Saddle Resistance control scroll wheel Seat post Pedal with strap DC inlet Leveler feet DC adaptor Transportation wheelHERE YOU WILL FIND THE SERIAL NUMBER OF THE UNIT:
Enter them in the fields below this text to have them ready at any time.
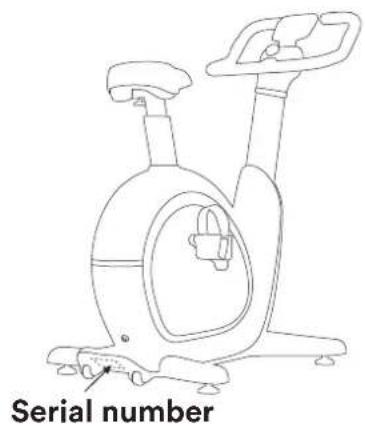
text_image
Serial number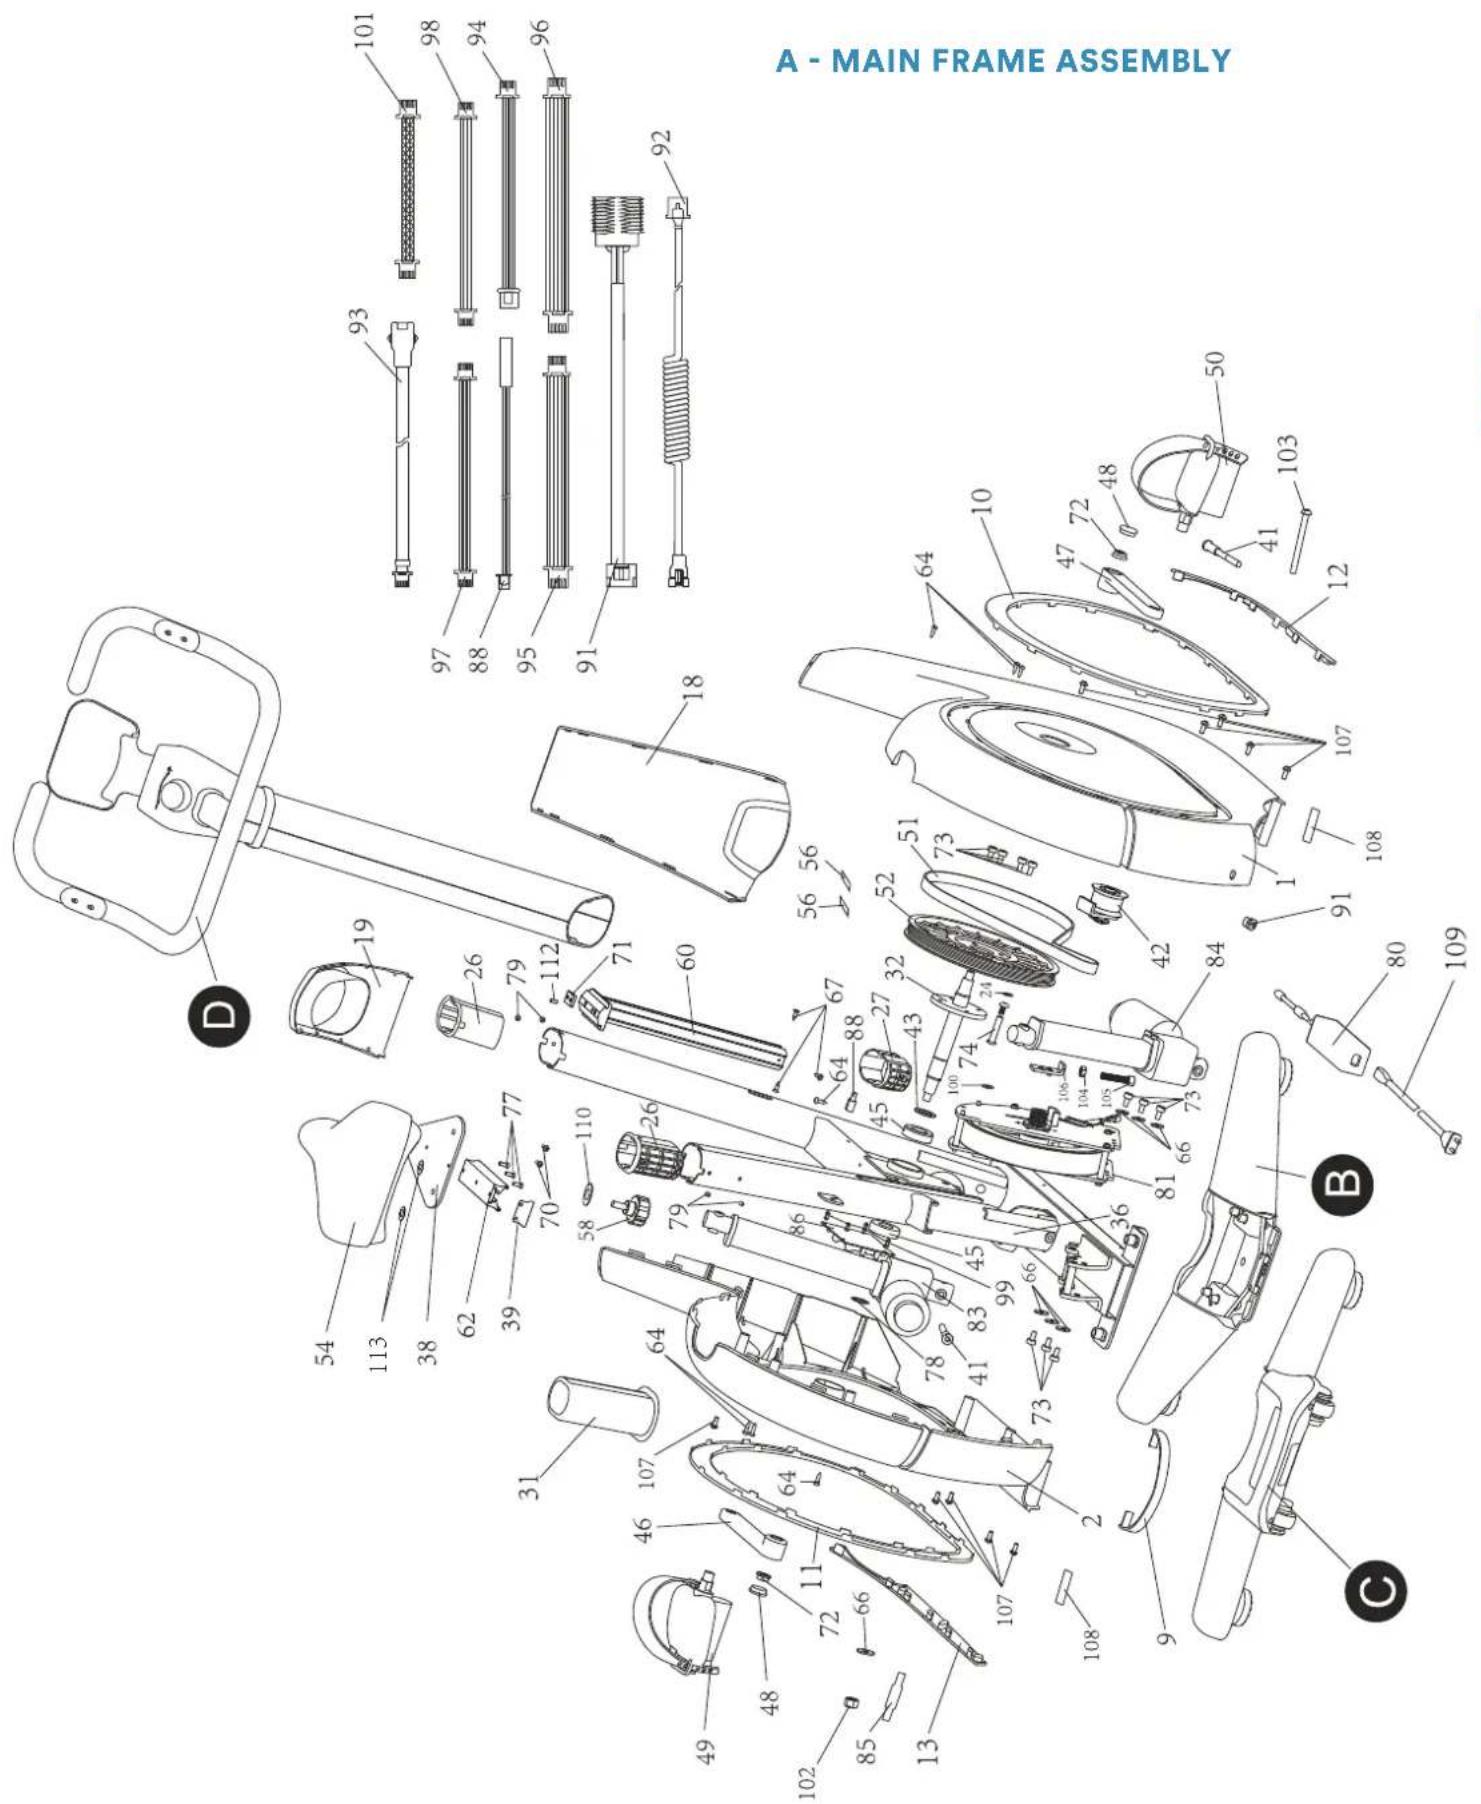
text_image
A - MAIN FRAME ASSEMBLY 101 98 94 96 92 93 97 88 95 91 18 10 47 72 48 103 12 50 64 41 107 108 1 91 80 109 B D 19 26 79 -112 71 60 56 56 52 51 42 84 64 88 67 32 43 45 43 24 100 74 108 104 109 73 66 36 81 66 73 78 45 41 83 79 66 73 70 58 110 26 31 46 107 64 64 48 11 72 -66 49 48 102 85 13B - FRONT STAND
C - REAR STAND
61
69
68
111
68
67
76
D - HANDLE BAR SET
24
100
| Part nr. | Description Q'ty | |
| 1 | Right cover 1 | |
| 2 | Left cover 1 | |
| 3 | Top cover, rear stand 1 | |
| 4 | Right support cover 1 | |
| 5 | Left support cover 1 | |
| 6 | Control panel cover (R) 1 | |
| 7 | Control panel cover (L) 1 | |
| 8 | Control panel top 1 | |
| 9 | Light strip cover | 1 |
| 10 | Right bezel | 1 |
| 11 | Left bezel | 1 |
| 12 | Right bezel | 1 |
| 13 | Left bezel | 1 |
| 14 | Rear stand cover (R) | 1 |
| 15 | Rear stand cover (L) | 1 |
| 16 | Bottom part rear stand | 1 |
| 17 | Front stand cover | 1 |
| 18 | Front cover 1 | |
| 19 | Support base | 1 |
| 20 | Key cover, left | 1 |
| 21 | Bracket | 1 |
| 22 | Keys | 2 |
| 23 | Scroll wheel | 1 |
| 24 | POM spacer (ø 6mm) | 2 |
| 25 | Handle guide | 1 |
| 26 | Top guide 2 | |
| 27 | Guide lower part | 2 |
| 28 | Sensor housing | 4 |
| 29 | Bezel | 1 |
| 30 | Spacer for control panel | 1 |
| 31 | Guide for seat post | 1 |
| 32 | Pedal arm base set | 1 |
| 33 | Front stand 1 | |
| 34 | Rear stand | 1 |
| 35 | Handle set | 1 |
| 36 | Main frame | 1 |
| 37 | Bracket | 1 |
| 38 | Saddle bracket | 1 |
| 39 | Stopper | 1 |
| 40 | Spacer | 4 |
| 41 | M8 bolt | 2 |
| 42 | Tensioning pulley set | 1 |
| 43 | POM spacer | 1 |
| 44 | Teflon stopper | 1 |
| 45 | Ball bearing | 2 |
| 46 | Left pedal arm | 1 |
| 47 | Right pedal arm | 1 |
| 48 | Pedal arm cap | 2 |
| 49 | Left pedal 1 | |
| 50 | Right pedal | 1 |
| 51 | V-belt | 1 |
| 52 | Tensioning pulley | 1 |
| 53 | Adjustable feet | 4 |
| 54 | Saddle unit 1 | |
| 55 | Transport wheels 2 | 2 |
| 56 | Graphite piece | 2 |
| 57 | Anti-slip pad | 1 |
| 58 | Adjuster with screw | 1 |
| Part nr. | Description Q'ty | |
| 59 | Front post | 1 |
| 60 | Seatpost | 1 |
| 61 | Display panel | 1 |
| 62 | Slider | 1 |
| 63 | Screw M8×20 | 1 |
| 64 | Screw ST4.2×16 | 45 |
| 65 | Screw ST4.2×12 | 4 |
| 66 | Flywheel spacer | 7 |
| 67 | Screw ST4.2×15 | 10 |
| 68 | Screw ST2.2×8 | 4 |
| 69 | Screw ST2.9×8 | 10 |
| 70 | M4×10 bolt | 4 |
| 71 | Saddle adjustment plate | 1 |
| 72 | Nut M10 | 2 |
| 73 | Screw M6×12 | 10 |
| 74 | Screw set | 2 |
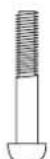
| 75 | Screw M10×45 | 6 |
| 76 | Screw ST2.9×10 | 3 |
| 77 | Screw M5×15 | 3 |
| 78 | Shaft ring | 1 |
| 79 | Screw M4×8 | 2 |
| 80 | Power supply unit (DC adaptor) | 1 |
| 81 | Flywheel | 1 |
| 82 | Pressure sensor | 4 |
| 83 | Motor front part | 1 |
| 84 | Motor rear section | 1 |
| 85 | PCB lamp board (optional) | 1 |
| 86 | MCU control board | 1 |
| 87 | PCB scroll wheel | 1 |
| 88 | Speed sensor | 1 |
| 89 | Key block 2 | |
| 90 | Adapter board for pressure sensor | 2 |
| 91 | Inner power cable | 1 |
| 92 | Control cable, lower part | 1 |
| 93 | Control cable, upper part | 1 |
| 94 | Cable for lamp board (optional) | 1 |
| 95 | External sensor cable 1 | 1 |
| 96 | External sensor cable 2 1 | |
| 97 | Key connection cable 1 1 | |
| 98 | Key connection cable 2 | 1 |
| 99 | Spacer for control board | 4 |
| 100 | Spacer ø8mm | 2 |
| 101 | Display cable | 1 |
| 102 | Nut M6 | 1 |
| 103 | Screw M6×68 | 1 |
| 104 | Hexagon nut M8 | 1 |
| 105 | Screw M8×45 | 1 |
| 106 | Pressure roller board 1 | |
| 107 | Screw M4×12 | 10 |
| 108 | EVA pad | 2 |
| 109 | Power cable | 1 |
| 110 | Distance knob | 1 |
| 111 | Key cover, right | 1 |
| 112 | Fixation pin | 1 |
| 113 | Saddle spacer | 2 |
| 114 | Wave shape washer | 1 |
| 115 | POM Slice (inner ø 4mm) | 2 |
natural_image
Simple line drawing of a plug connected to a power outlet (no text or symbols)DC adaptor
natural_image
Pure diagram of two identical mechanical clamps with no text or symbolsL

natural_image
Simple line drawing of a symmetrical mechanical or architectural component with no text or symbolsR
Front stand
Left / right pedal

natural_image
Simple line drawing of a mechanical component with no text or symbolsRear stand

natural_image
Simple line drawing of a mechanical device with no text or symbolsHandlebars
natural_image
Simple geometric diagram with two horizontal lines inside a rectangle (no text or symbols)Instruction manual
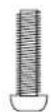
1x Screw M8×20
6x Screw M10×45
Allen key

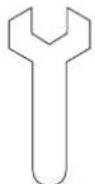
Open-end spanner
SET-UP INSTRUCTIONS
We recommend that you assemble the unit with 2 people.
Find a free, bright place for assembly and remove all packaging materials. Do not dispose of the packing materials until assembly is complete.
NOTE: At each assembly step, make sure ALL nuts and bolts are in place and partially screwed in before fully tightening a single bolt.
NOTE: A light application of grease may help with hardware installation.
Any grease, such as lithium bicycle grease, is recommended.
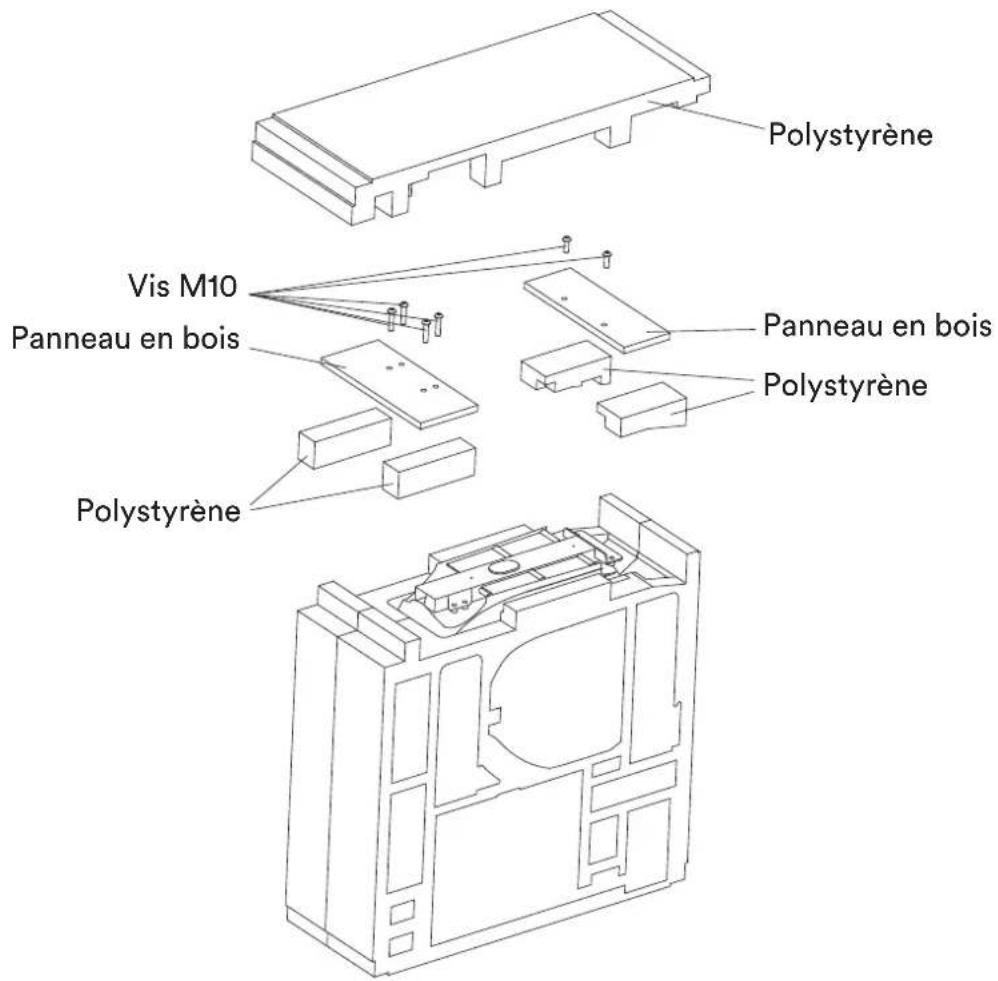
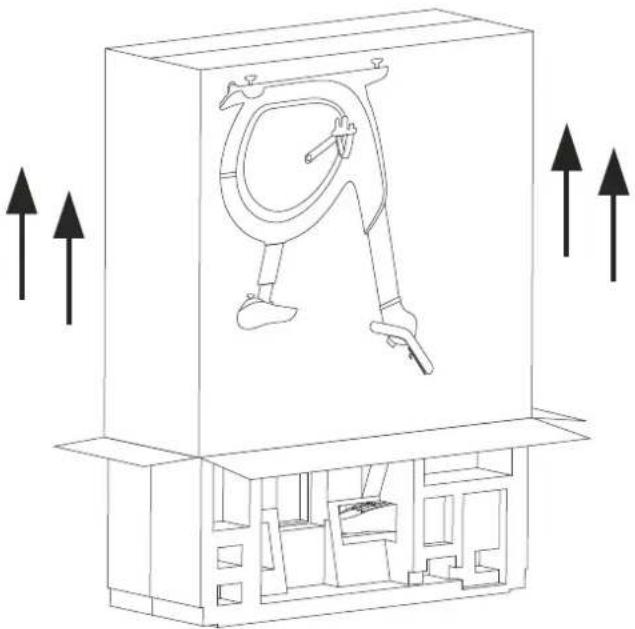
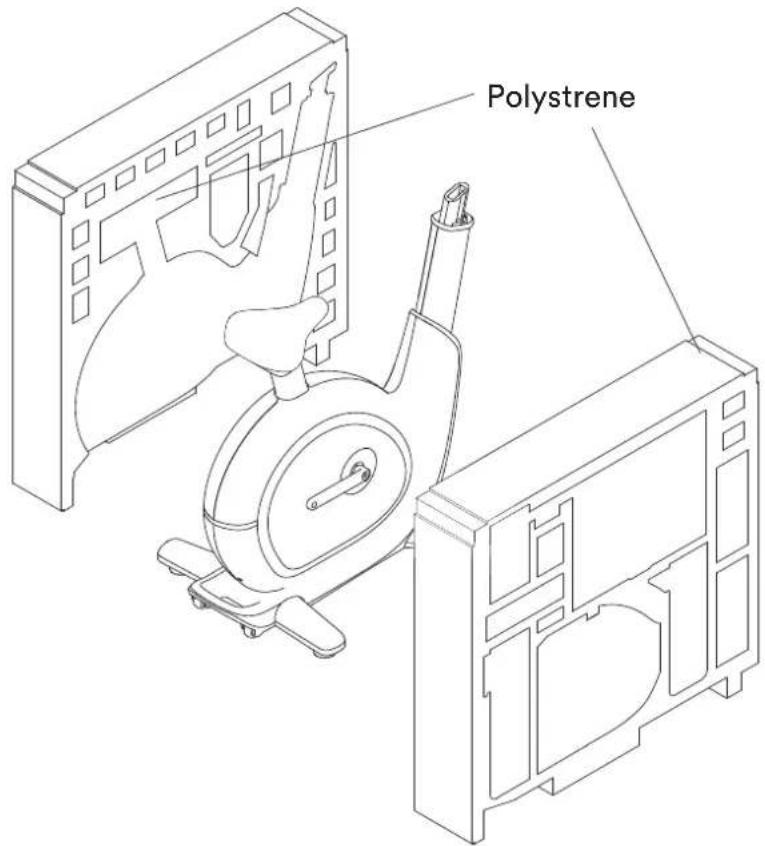
STEP 1
Open the box on the top and take out the assembly and operating instructions. Turn the box over and pull the outer box upwards. Remove the contents carefully and do not drop any parts.
Remove the upper polystyrene plate.
Now remove the 6 x M10 Allen screws with the Allen key (included in the scope of delivery). The screws removed in this step will not be used in the further assembly.
Remove the wooden boards and the polystyrene from the packaging and prepare for the next assembly step.
natural_image
Technical line drawing of a mechanical device with internal components and directional arrows (no text or symbols)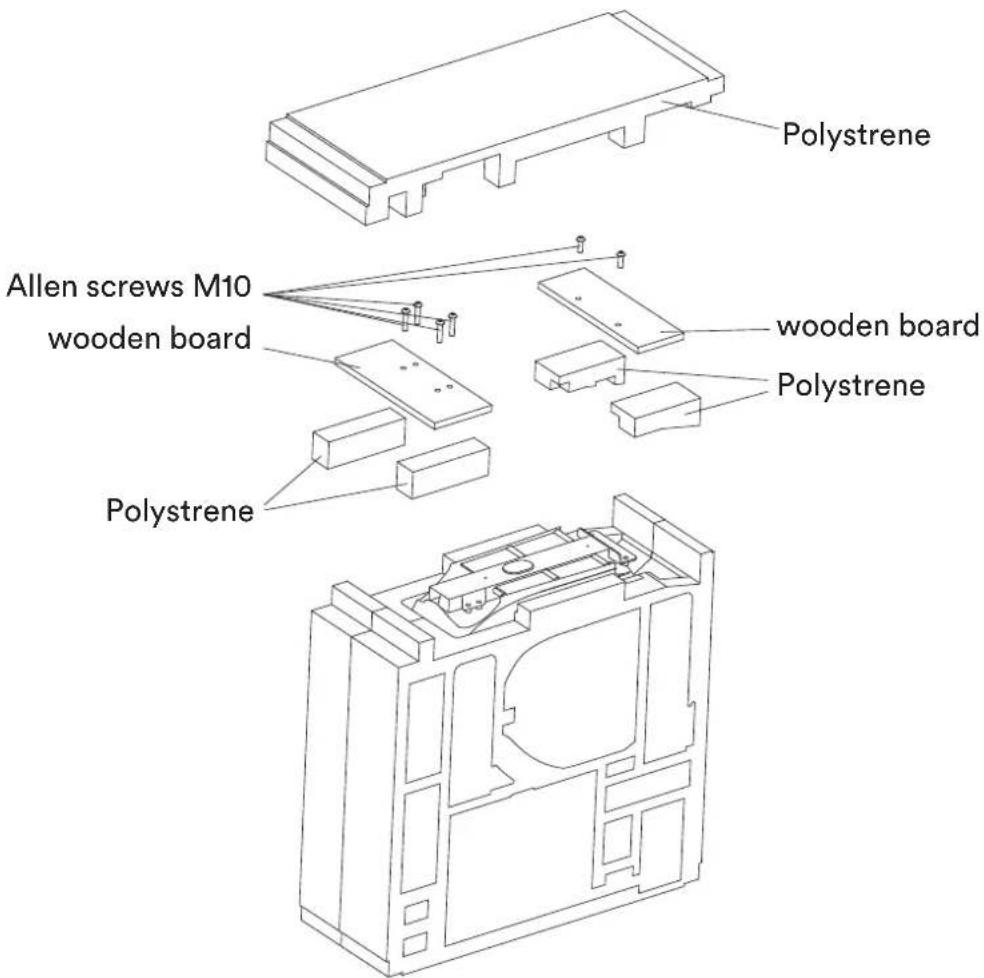
text_image
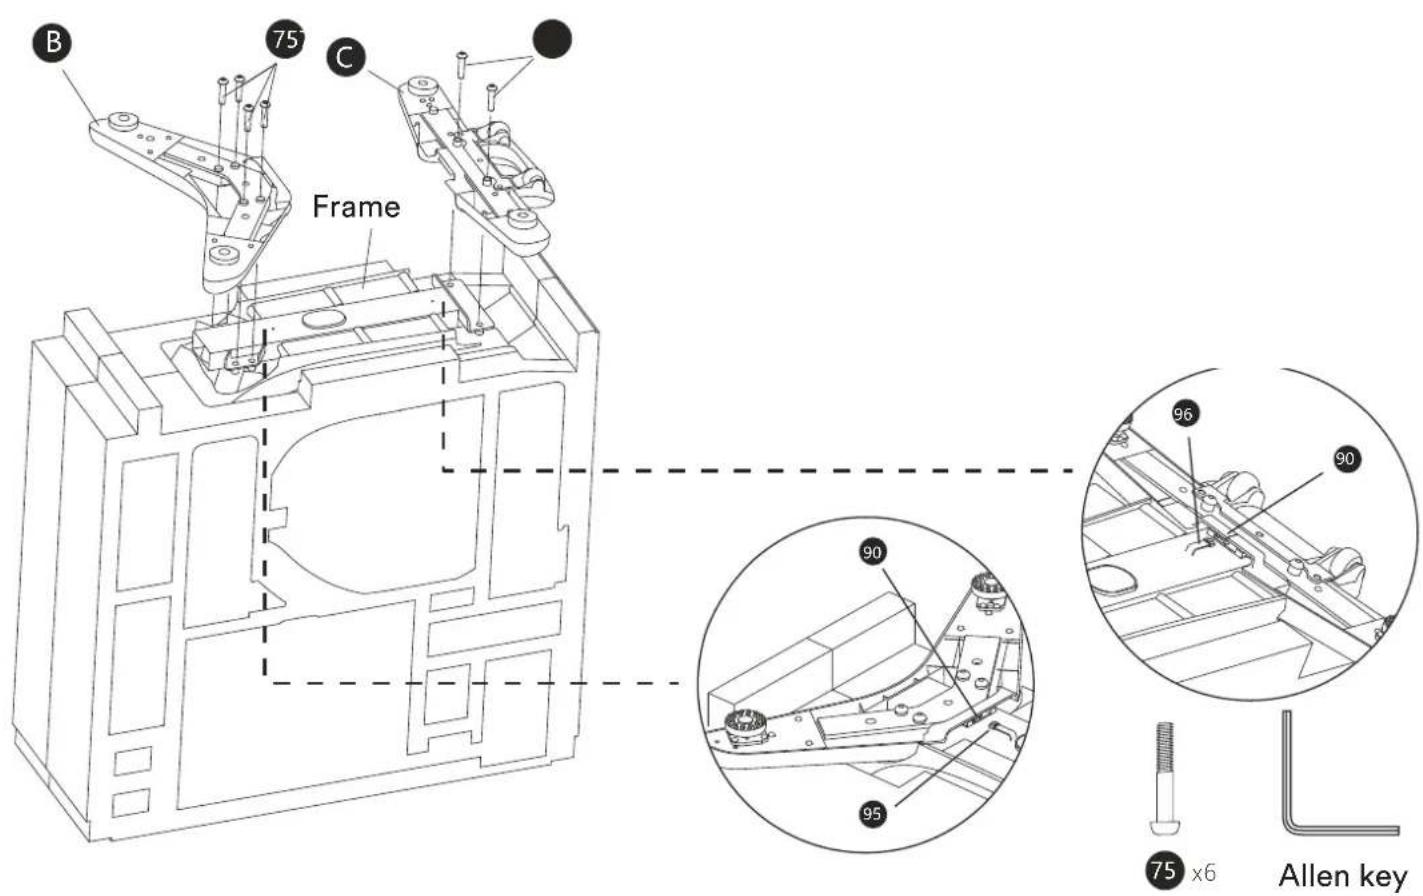
Polystrene Allen screws M10 wooden board polystrene wooden board PolystreneSTEP 2
Mount the front stand (B) with 4 screws (75) and the rear stand (C) with 2 screws (75) to the frame as shown.
Then connect the sensor cables (95 and 96) respectively to the provided connectors (90) on the front and rear stand as shown.
text_image
B 75 C Frame 90 95 96 90 75 x6 Allen keySTEP 3
From this step, turn the assembly over and place the unit with its feet on the floor.
Remove the polystyrene plate from the main frame assembly.
text_image
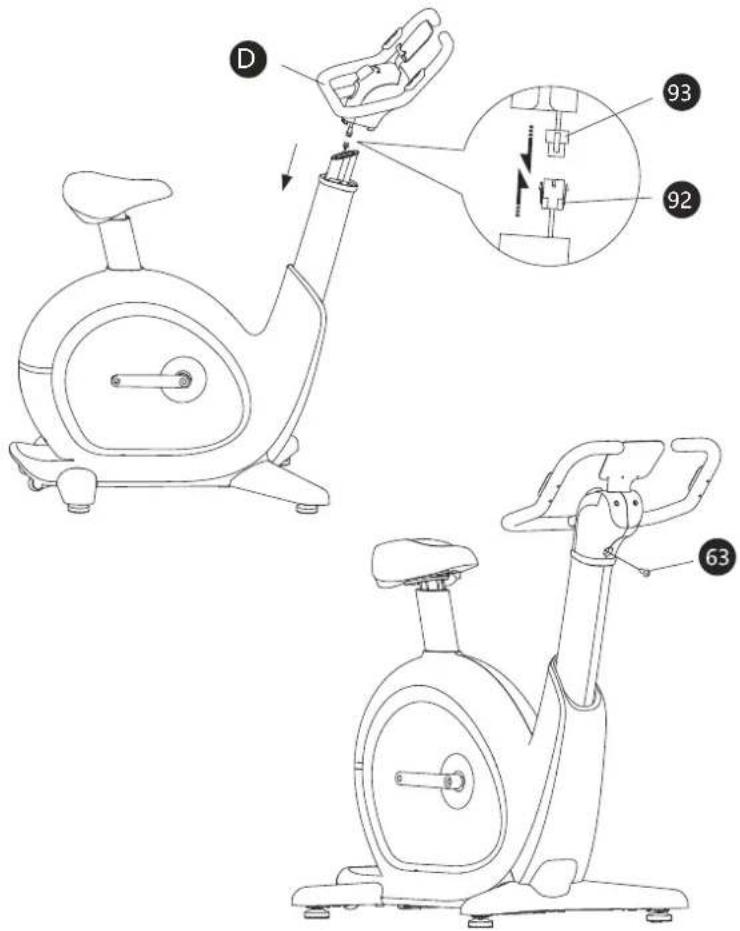
PolystreneSTEP 4
Carefully connect the control cable lower part (92) to the cable upper part (93).
Fix the handle set (D) on the upper end of the front support with the screw (63).
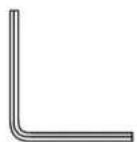
Allen key

63 x1
text_image
Technical diagram of a stationary exercise bike with labeled components and internal mechanism diagramSTEP 5
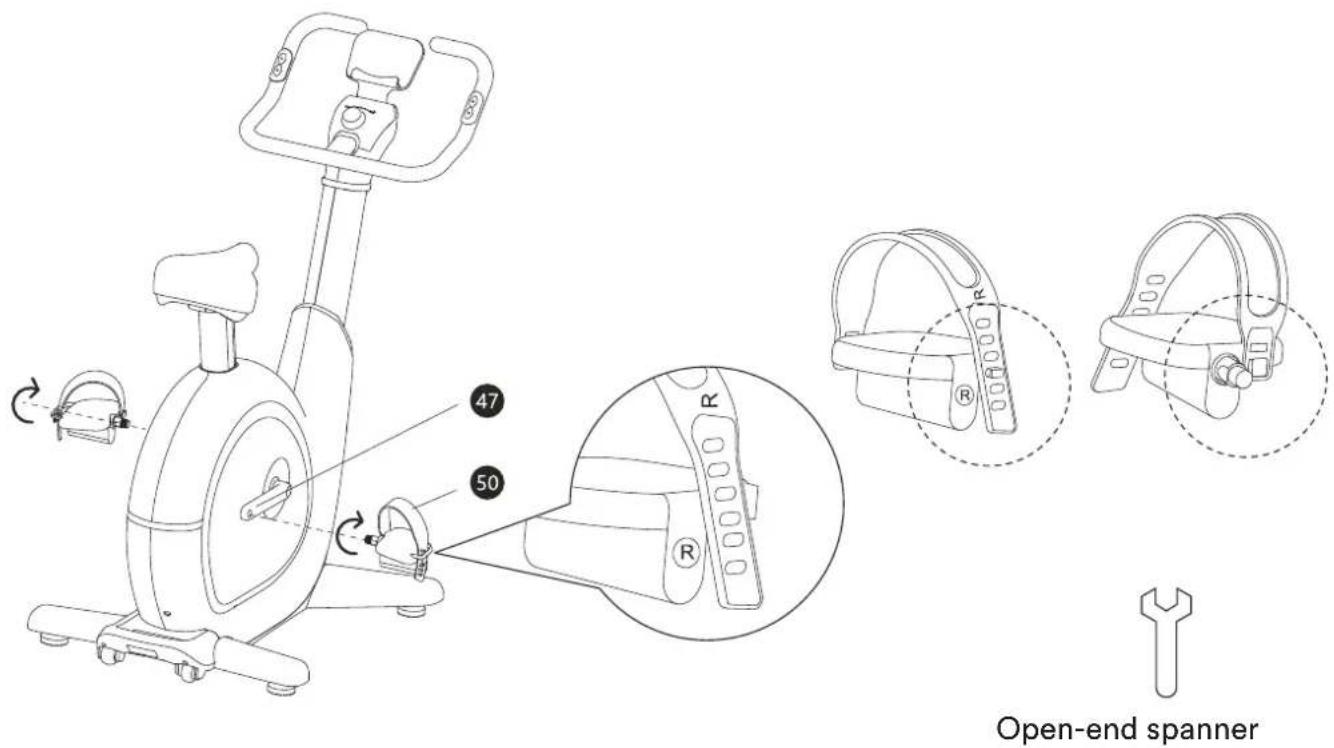
Mount the two pedals (left = 49 and right = 50) on the pedal arms (46/47) as shown. Then attach the two pedal straps.
text_image
Open-end spannerTHIS COMPLETES THE SET-UP!
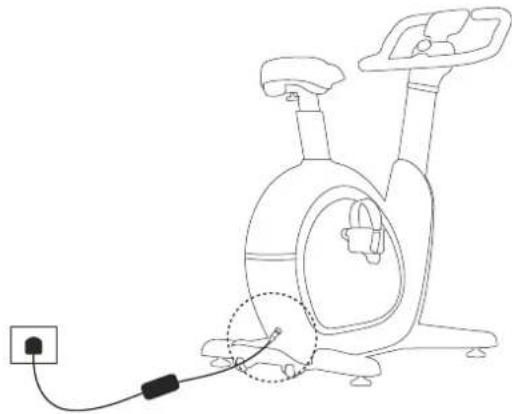
ESTABLISH POWER SUPPLY
Connect the power supply to the unit with the aid of the connection cable as shown opposite.
After connecting to the power supply, please wait a few seconds, then the unit is ready for further use.
natural_image
Line drawing of a stationary exercise machine with attached cable and power outlet (no text or symbols)INSTALL APP
For proper training operation of your SKANDIKA ABISKO, you need to download the Skandika Fitness App and connect it to the ABSIKO ergociser via Bluetooth. You can find them in your Apple Store (iOS) or on Google Play (Android).
After installation, start the app - you can register here accordingly and enter your personal data. Various user profiles can be created. Alternatively, you can also connect the device with the KinoMap app (see the corresponding chapter in this manual).


Note: If you have set the operating language of your tablet or smartphone to German, the menu navigation of the app is also set to German when you open it. The same applies if you have set the operating language of your tablet or smartphone to English.
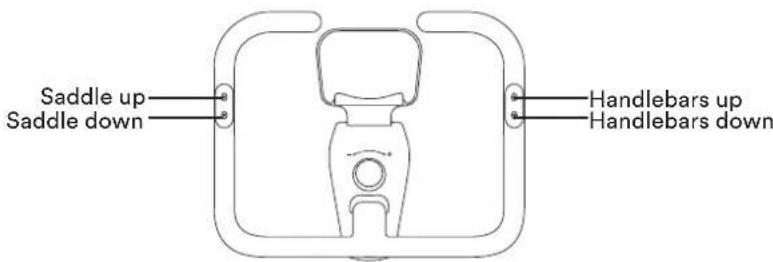
BEFORE TRAINING: SET SADDLE AND HANDLEBAR HEIGHT
The device initially sets the saddle and handlebar height to the lowest position so that you can easily mount.
Once the Bluetooth connection has been established, please click on the connected device. A field with the Sizeez function will appear in the next window. Here you will be redirected to an advanced, intuitive body measurement func-
text_image
Saddle up Saddle down Handlebars up Handlebars downtion to determine the ergonomically correct saddle and handlebar position for you. Back in the Skandika Fitness app, the saddle, and handlebars are then automatically adjusted to the height measured for you.
You can then still manually change the height for the saddle and the handle by pressing the corresponding button on the handle.
The set position can then be saved in the app under the respective user profile so that it can be called up again when the user changes.
Note: The app will be updated and revised from time to time, which may result in the operating steps changing slightly.
CHANGING THE DISPLAY UNIT
Press and hold the two saddle adjustment buttons on the left side of the handle for approx. 3 seconds to set the display to „metric“ (km). To change to „imperial“ (miles), press and hold the handle adjustment buttons on the right side accordingly.
SLEEP MODE
If the unit is not operated for 15 minutes, it is put into sleep mode. Connecting via Bluetooth, moving the pedal or using the scroll wheel will reawaken the system.
START OR END WORKOUT
To start, sit on the saddle, secure your feet on the pedals using the pedal straps and start pedalling. If there is an existing Bluetooth connection and no pedal movement for 3 minutes, the resistance is automatically set to zero. After resuming the training, all original data records will be resumed. To end a workout, click „Exit“. If the device is NOT connected to the app via Bluetooth and there is no movement for 3 minutes, the training is automatically ended and all values are reset to zero.
text_image
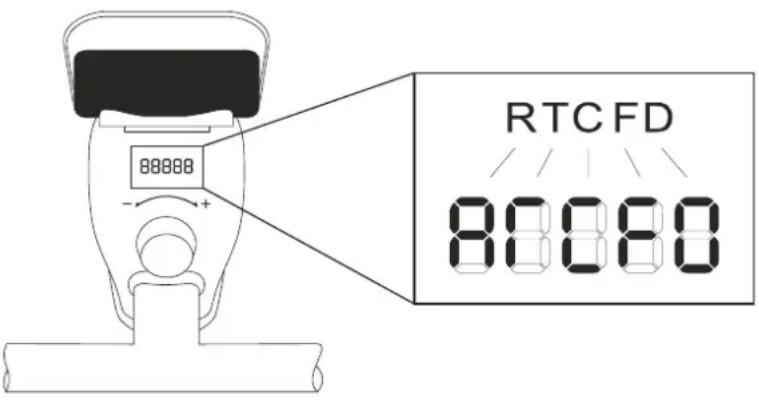
88888 RTC FD 80080THE DEVICE DISPLAY
The display on the device itself distinguishes whether the device is connected to the training app or not. If there is no connection, the values for resistance level (R), time (T), calories (C), frequency (F) and distance (D) appear alternately on the display every 3 seconds. By moving the scroll wheel (under the associated resistance adjustment), the display of the resistance level (R) is forced for a short time.
When connected to the app, the display constantly shows the resistance level.
For a better training experience, we recommend connecting to the app every time you train.
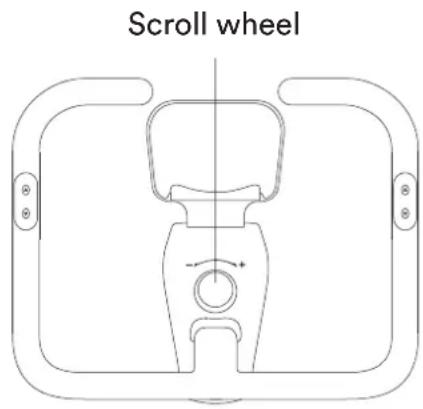
ADJUST RESISTANCE MANUALLY
If you want to adjust the pedalling resistance manually, you can do this using the scroll wheel:
- To increase the resistance, turn the scroll wheel clockwise.
- To decrease the resistance, turn the scroll wheel counterclockwise.
text_image
Scroll wheelUSING THE CHEST BELT
ABISKO is equipped with a built-in receiver for wireless heart rate transmission using the SKANDIKA Bluetooth chest strap (included). The heart rate can be called up during training both in the SKANDIKA Fitness app and in Kinomap.
If you want to transmit your pulse frequency via chest-belt, follow these instructions:
- Make sure, the correct battery is inserted into the chest belt (button cell of type CR-2032, 3 volts). Battery replacement: Open the battery case cover on the back side of your transmitter (you may use a coin for easier handling) and replace the old battery by a fitting new one. The „+“ symbol should point upwards. Make sure, the sealing ring ist correctly placed. Close the case cover properly.
- The transmitter needs to be attached to the belt with the 2 buttons. Moisten the electrodes slightly before wearing the belt. This increases the contact sensibility and enables a better wireless signal transmitting.
- Put on the chest belt and make sure the electrodes are touching your breast directly. You may adjust the belt to a comfortable length. However, the electrodes must have contact with your skin in order to measure your heart rate correctly.
- The Bluetooth chest belt communicates directly with the app. It may last up to one minute before a correct display can be seen.
Safety notice:
If wearing a pacemaker, do not use the chest strap until you have consulted the manufacturer of the pacemaker and/or your doctor.
Battery disposal:
Batteries do not belong in household waste. As a consumer, you are legally obliged to return used batteries. You can hand in your old batteries at the public collection points in your community or wherever batteries of the relevant type are sold.
KINOMAP
The Skandika ABISKO can be connected to the „KinoMap“ app via Bluetooth. The free KinoMap app turns your device into a powerful and fun fitness product! Choose from the geotagged video on Kinomap and go! Your position is shown in the video and as icon on the map. Download the Kinomap Fitness app in the app or play store by searching for ‘Kinomap Fitness’ or follow one of the links below.
Install and open the app and register resp. log in. Activate Bluetooth. Now add the training device as follows:

text_image
Download on the App Store GET IT ON Google Play
text_image
Buchen Kinomap Kinomap SAS ACTUALISEREN 4,3 ★★★★☆ *53 4+ New Funktionen Thanks for training on Kinomap. Our daily concern is offering you the best experience there is. Vorschau Versionsverlauf Vol 1 W Version 0.4.10
text_image
Kinomap FOLGT SIE Kinomap Gesponsert STAVANGER, LIMBURG & HONG KONG RACES JOIN THE CHALLENGE HAMMER SERIES ON Kinomap IN ASSOCIATION WITH wahoo Mehr erfahren >
text_image
1. Zurück Kinomap Meine Rudermaschine KETTLER MARATHON PAFERS PEAK FITNESS PAFERS PEAK FITNESS POWERLAND FTMS POWERLAND FTMS sportplus SPORTSTECH SPORTPLUS SPORTSTECH- SELECT „FTMS“ →
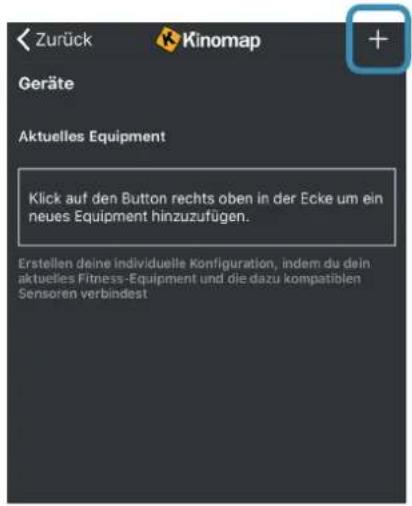
- Home Exercise Bike →
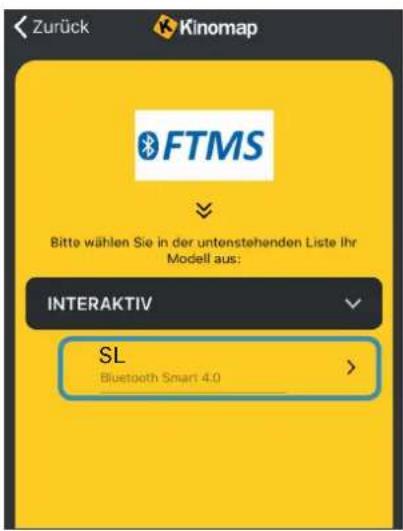
Now tap on OK and return to main menu. You can now choose a course for your exercise (depending on your type of KinoMap account maybe only some free courses). Press Start and begin to exercise!

text_image
Kinomap Free videos Suzhen 47.3 10.8 Suzhen Options HKS# #1- Hong Kong Harbour HKS# #1- Hong Kong Harbour HKS# #1- Hong Kong Harbour HKS# #1- Hong Kong Harbour HKS# #1- Hong Kong Harbour HKS# #1- Hong Kong Harbour HKS# #1- Hong Kong Harbour HKS# #1- Hong Kong Harbour HKS# #1- Hong Kong Harbour HKS## #1- Hong Kong Harbour HKS## #1- Hong Kong Harbour HKS## #1- Hong Kong Harbour HKS## #1- Hong Kong Harbour HKS## #1- Hong Kong Harbour HKS## #1- Hong Kong Harbour HKS## #1- Hong Kong HarbourALIGNING THE UNIT
Your unit should always stand upright.
For the most level stand possible, there are height-adjustable feet under the front and rear stands. Adjust these levelling feet so that the appliance stands straight and cannot rock during use.
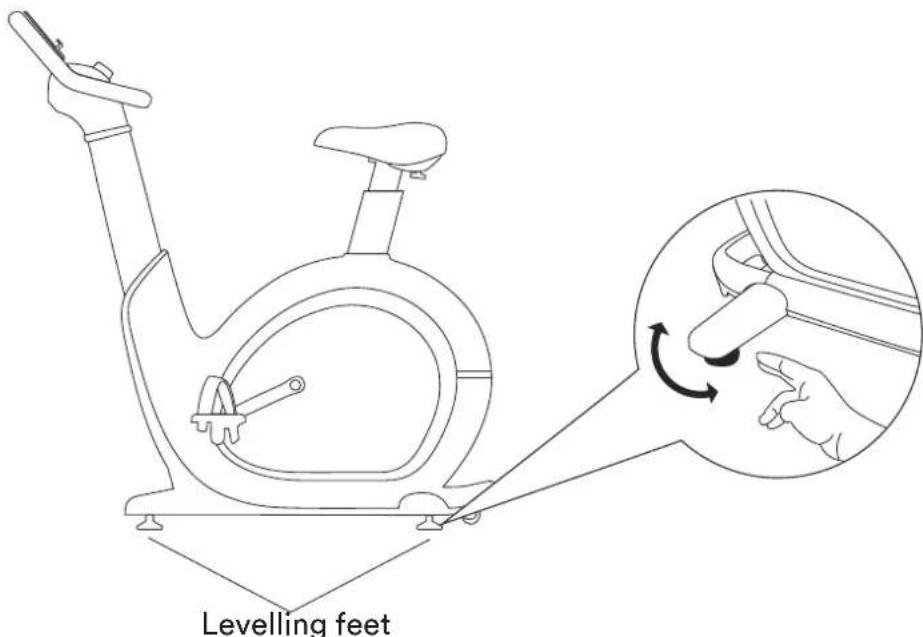
text_image
Levelling feetTRANSPORTATION
For easy transport of the unit, there are transport wheels at the rear end. Before transporting, please set the handle to the lowest position.
Then lift the handle from the front and roll the unit over the transport wheels to the desired location.
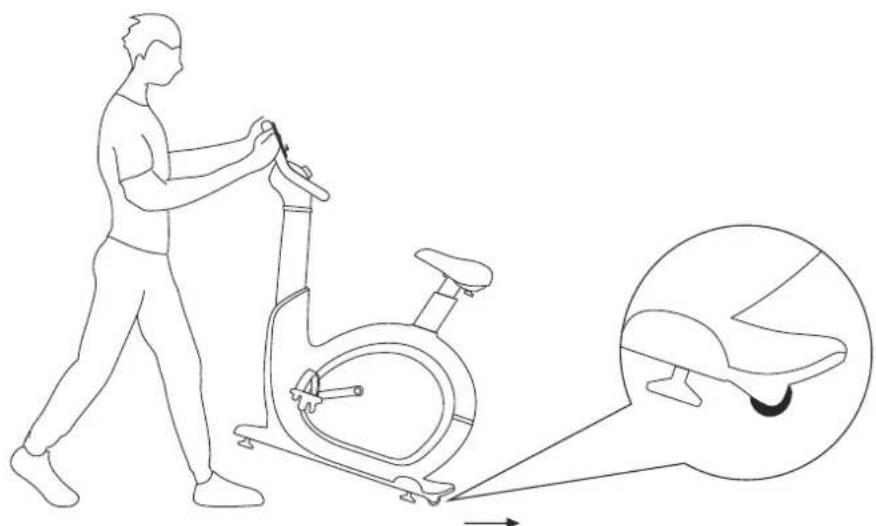
natural_image
Line drawing of a person using an exercise bike with a magnified inset showing the seat detail (no text or symbols)TROUBLESHOOTING
Problem: Unusual noises.
Explanation / Solution: This unit is equipped with belt drive, high quality bearings and EMS braking resistor to minimise noise. However, slight mechanical noise is normal and is caused by the transfer of large amounts of energy to a rapidly rotating flywheel. All bearings, belts and other rotating parts produce some noise that is transmitted through the housing and frame. It is also normal for this noise to change slightly during a workout and over time due to thermal expansion of the parts. If you still find the noise unusual, please check that the unit is level and lightly grease the screw connections.
If the problem cannot be solved or other problems occur with the unit, please contact the customer service.
CARE
- Before cleaning the appliance, make sure that the appliance is switched off and the power supply is disconnected from the socket. Allow the unit to cool down.
- Clean the appliance only with a slightly damp cloth. Never use brushes, strong detergents, petrol, thinner or alcohol. Wipe the unit dry with a clean, soft cloth.
- Never immerse the unit in water for cleaning and make sure that no water or other liquid enters the unit.
- Do not use the unit again until it is completely dry.
REGULAR MAINTENANCE
The safety level of the unit can only be maintained if it is regularly inspected for damage and wear. Worn or defective components should be replaced and the unit should not be used until it is fully repaired. We recommend that the following maintenance routines be carried out accordingly:
Daily or before and after each use:
- Clean the unit according to the points under „Care“ to remove sweat and dirt.
- Checking the unit for loose components (e.g. screws, pedals etc.) and fixing them.
Weekly:
- Check seat post and handle for correct mobility. If necessary, lightly lubricate the moving parts.
- Make sure that the crank arms are firmly attached to the bottom bracket.
- Check all connections as well as bolts and nuts for correct fit and tighten or replace them.
Monthly:
- Inspect the frame and main components for rust or corrosion. Use a small wire brush to remove rust build-up in small crevices, e.g. on levelling feet, quick release levers and other bolt assemblies.
- Check all wear parts for adjustment or replacement. Pay particular attention to the following:
a) Grip of foam grips: Excessive wear or dryness means replacement is required.
b) Seat pads: Rips, tears or excessive movement indicate that replacement is required.
c) Pedals: Excessive play in the pedals means replacement is required. - Check the tension of the belt by turning the crank to move the flywheel forward. Make this movement in 1/4 turns to see if there is play between the crank and the flywheel. If in doubt, contact customer service.
- Please lubricate the seat post regularly with a little grease, especially if noises occur.
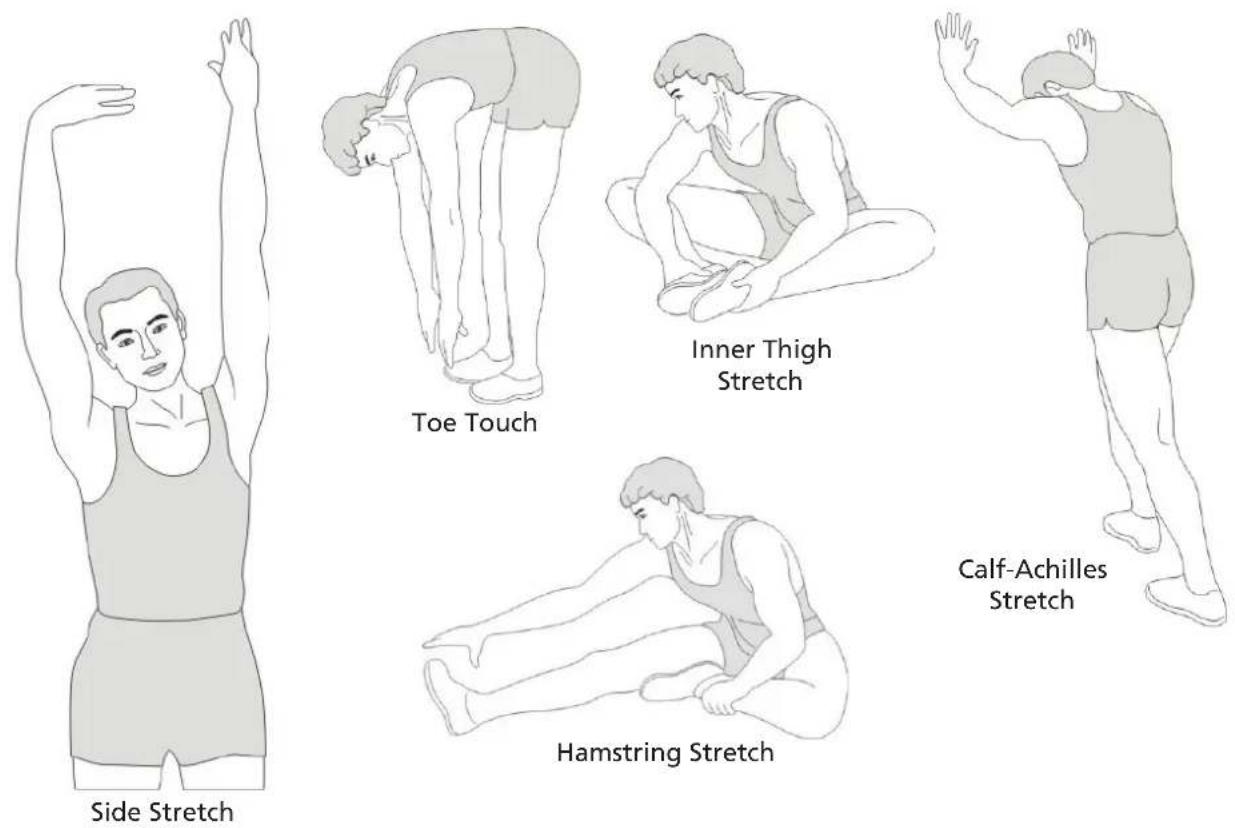
WARM-UP and COOL-DOWN
A successful exercise program consists of a warm-up, aerobic exercise and a cool-down. Exercise for at least two or preferably three times a week, resting for a day between workouts. After several months, you may increase the frequency to four or five times per week.
WARM-UP
This stage helps to improve the blood circulation and prepares the muscles for your workout. It additionally helps to reduce the risk of injury or cramps. It is recommended to do some stretching exercises as shown here below. Hold each stretching position for approximately 30 seconds. Never force or jerk yourself into a stretching position – if you feel pain, STOP immediately. Warm-up exercises may also include brisk walking, jogging, jumping jacks, jump rope exercises or running in place.
STRETCHING
Muscles can be stretched more easily when these are warm. This reduces the risk of injury. DO NOT BOUNCE.
COOL-DOWN
This stage helps to soothe your muscles and your cardiovascular system after your workout. At the end of your workout, reduce the speed and exercise for approximately 5 minutes at this lower speed level. Afterwards, repeat the warm-up exercises as described above.
GUARANTEE CONDITIONS
For our devices we provide a warranty as defined below.
- In accordance with the following conditions (numbers 2-5) we repair defect or damage to the device free of charge, if the cause is a manufacturing defect. Therefore, these defects / damages need to be reported to us without delay after appearance and within the warranty period of 24 months after delivery to the end user. The warranty does not cover parts, which easily break (e.g. glass or plastic). The warranty does not cover slight deviations of the product, which are insignificant for usability and value of the device and damage caused by chemical or electrochemical effects and damages caused by penetration of water or generally force majeure damage.
- The warranty achievement is the replacement or repair of defective parts, depending on our decision. The cost of material and labor will be borne by us. Repairs at customer site cannot be demanded. The proof of purchase along with the date of purchase and / or delivery is required. Replaced parts become our property.
- The warranty is void if repairs or adjustments are made,
which are not authorized by us or if our devices are equipped with additional parts or accessories that are not adapted to our devices. Furthermore, the warranty is void if the device is damaged or destroyed by force majeure or due to environmental influences and in case of improper handling / maintenance (e.g. due to non-observance of the instruction manual) or mechanical damages. The customer service may authorize you to replace or repair defective parts after telephone consultation. In this case, the warranty is not void.
- Warranty services do not extend the warranty period nor do they initiate a new warranty period.
- Further demands, especially claims for damages which occurred outside the device, are excluded as long as a liability is not obligatory legal.
- Our warranty terms - which cover the requirements and scope of our warranty conditions - do not affect the contractual warranty obligations of the seller.
- Parts of wear and tear are not included in the warranty.
- The warranty is void if not used properly or if used in gyms, rehabilitation centers and hotels. Even if most of our units are suitable for a professional use, this requires a separate agreement.
ENVIRONMENTAL PROTECTION

At the end of its life cycle, this product must not be disposed of with household waste but must be taken to a collection unit for the recycling of electric and electronic equipment. The symbol on the product, the instructions for use or the packaging express mention of this. The basic materials can be recycled as specified on the labelling.
When recycling the materials and finding other utilisation for used equipment, you are making a significant contribution towards protecting our environment. Ask at your council about the respective local disposal sites.
In accordance with our policy of continual product improvement, we reserve the right to make technical and visual changes without notice.
For spare parts please contact: service@skandika.de
Service centre:
SF-3100/3101/3102 Abisko

Classe: HA
Standard: EN ISO 20957

skandika.com/service
text_image
Exploded view diagram of a device with numbered parts for identificationC - PIED ARRIÈRE
text_image
Technical diagram of a device with numbered parts, likely an exploded view of internal components or parts.D - UNITÉ DE POIGNÉE
natural_image
Simple line drawing of a plug connected to a power outlet (no text or symbols)Alimentation
natural_image
Pure diagram of two identical mechanical clamps with no text or symbolsL
R

natural_image
Simple line drawing of a symmetrical mechanical or architectural component with no text or symbolsPied avant

natural_image
Simple line drawing of a mechanical component with no text or symbolsPied arrière

natural_image
Simple line drawing of a mechanical component with no text or symbolsSet de poignées

natural_image
Simple geometric diagram with two horizontal lines inside a rectangle (no text or symbols)Mode d'emploi

1x Vis M8×20

6x Vis M10×45
Clé Allen
Clé à fourche
INSTRUCTIONS DE MONTAGE
natural_image
Technical line drawing of a mechanical device with internal components and directional arrows (no text or symbols)